Wooden Doll on Paper
This is a project we worked on four years ago, when my daughter F was five years old, for the joy of observing and expressing.
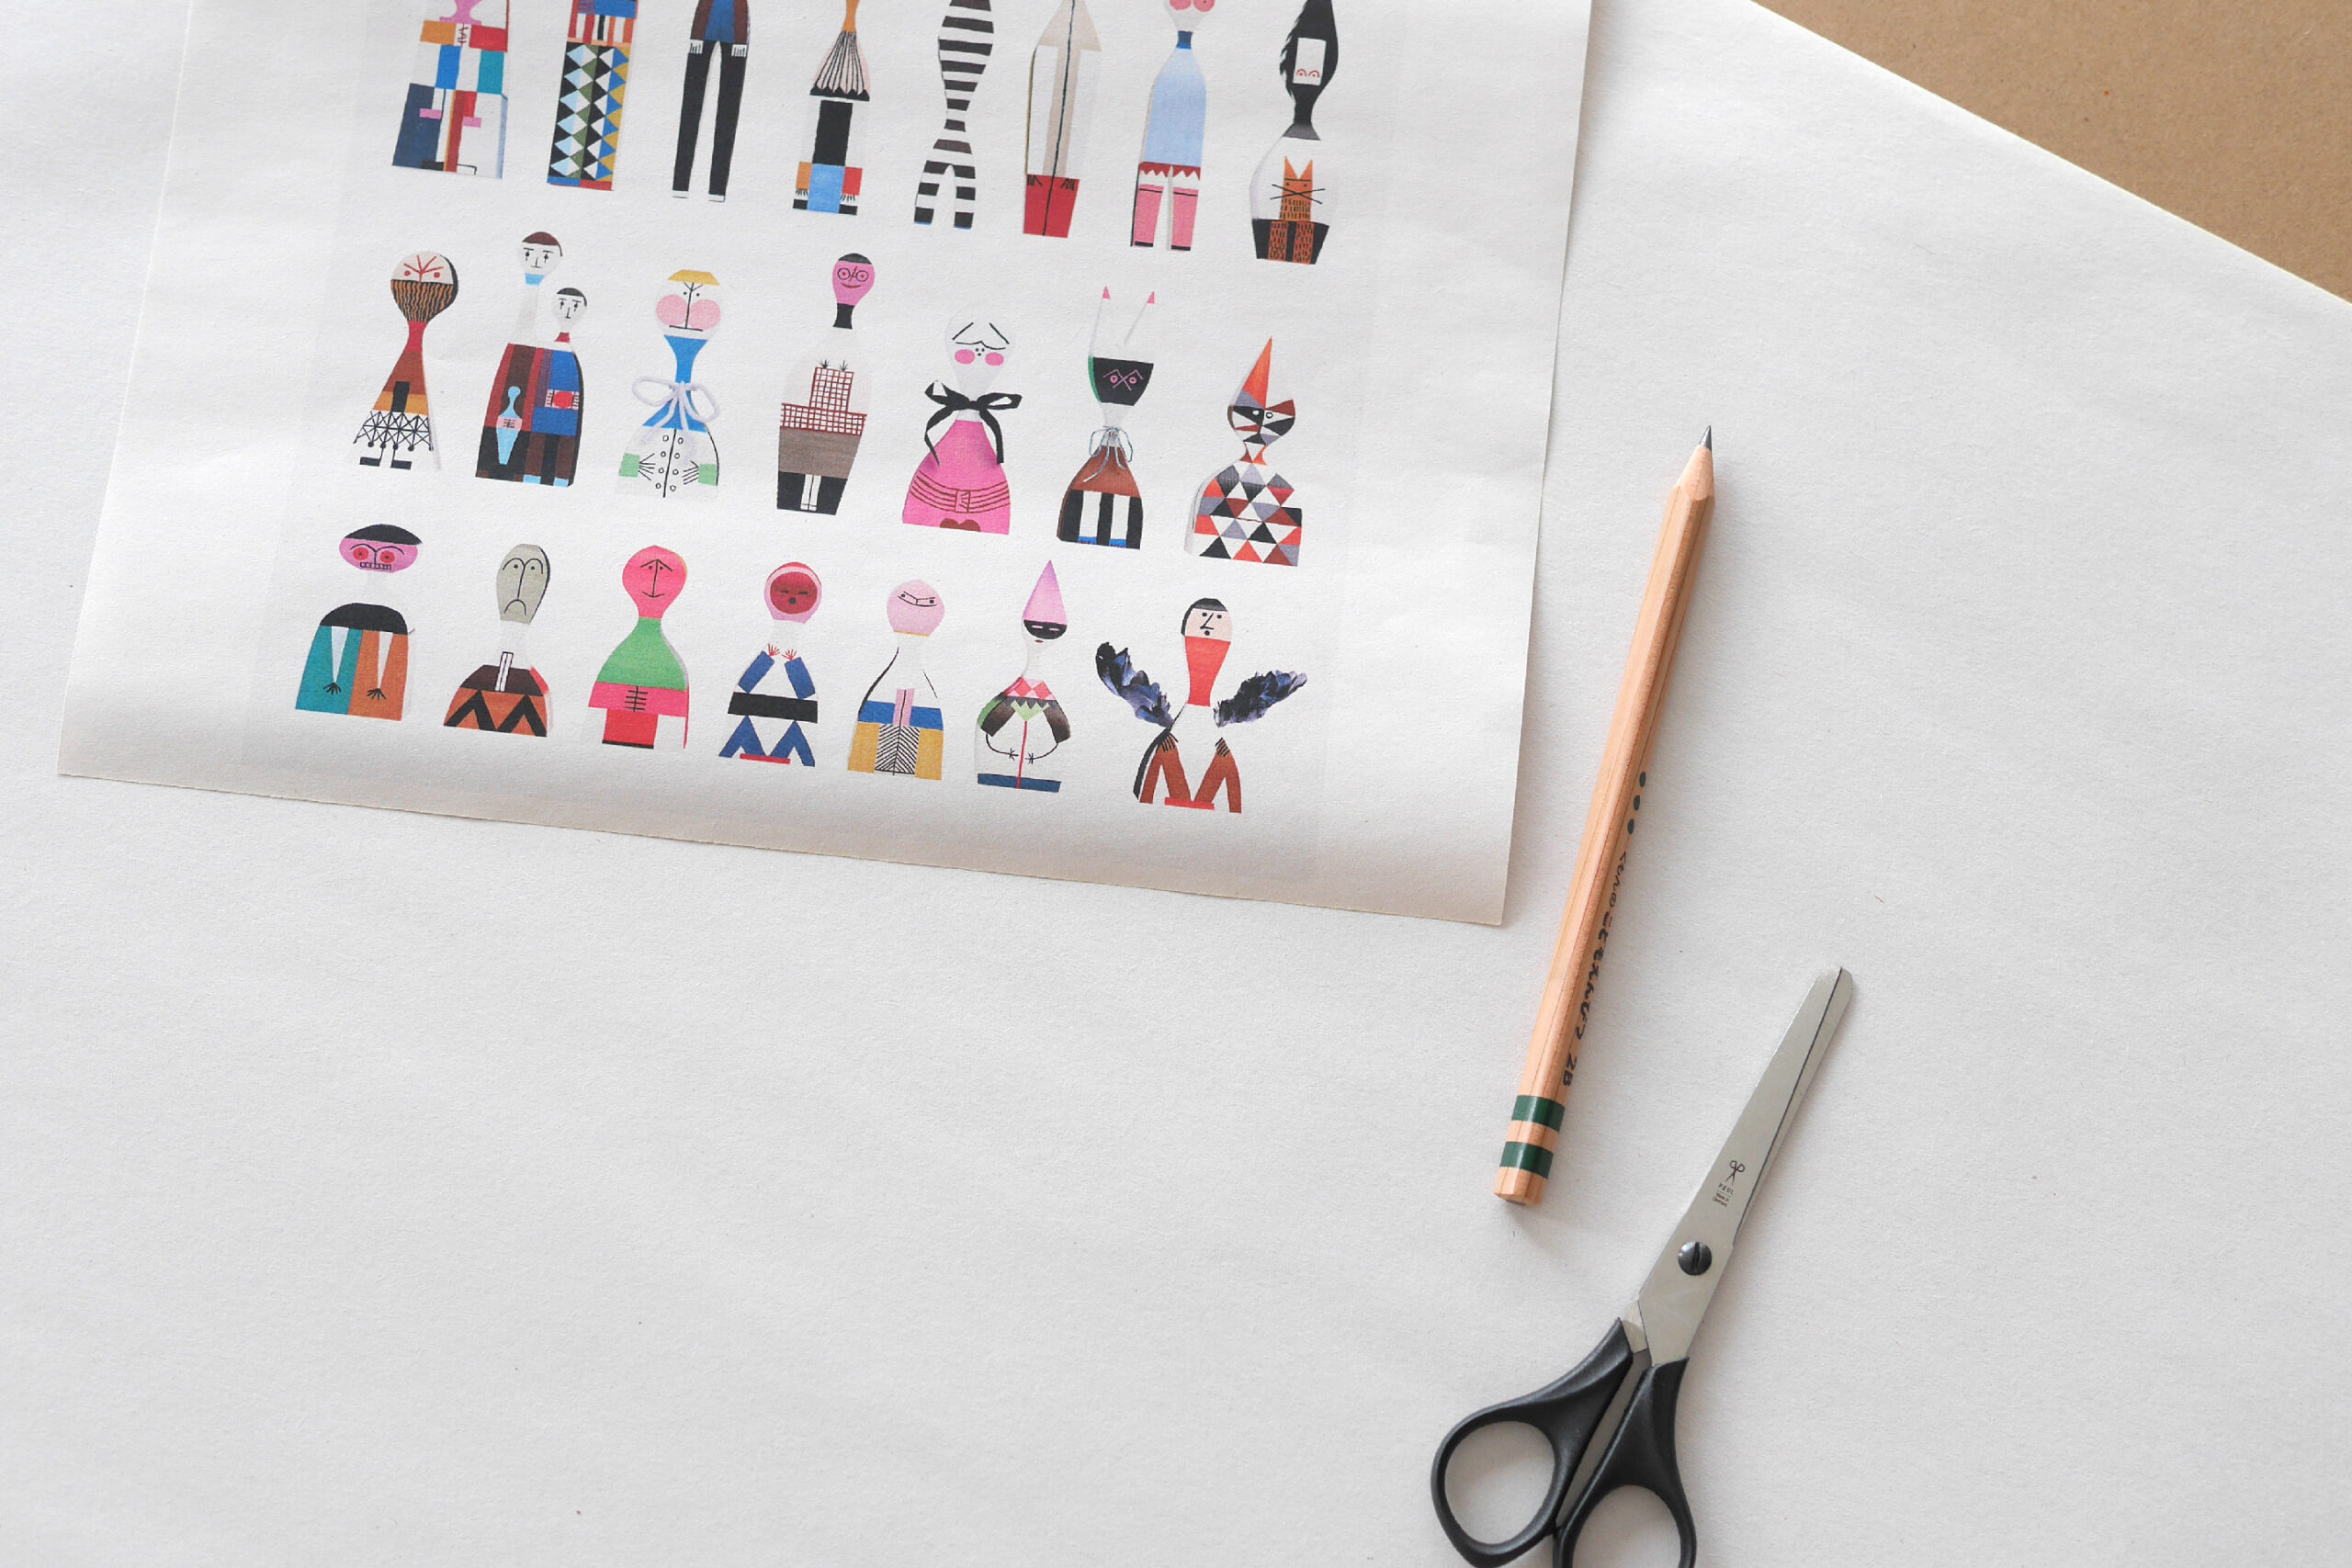
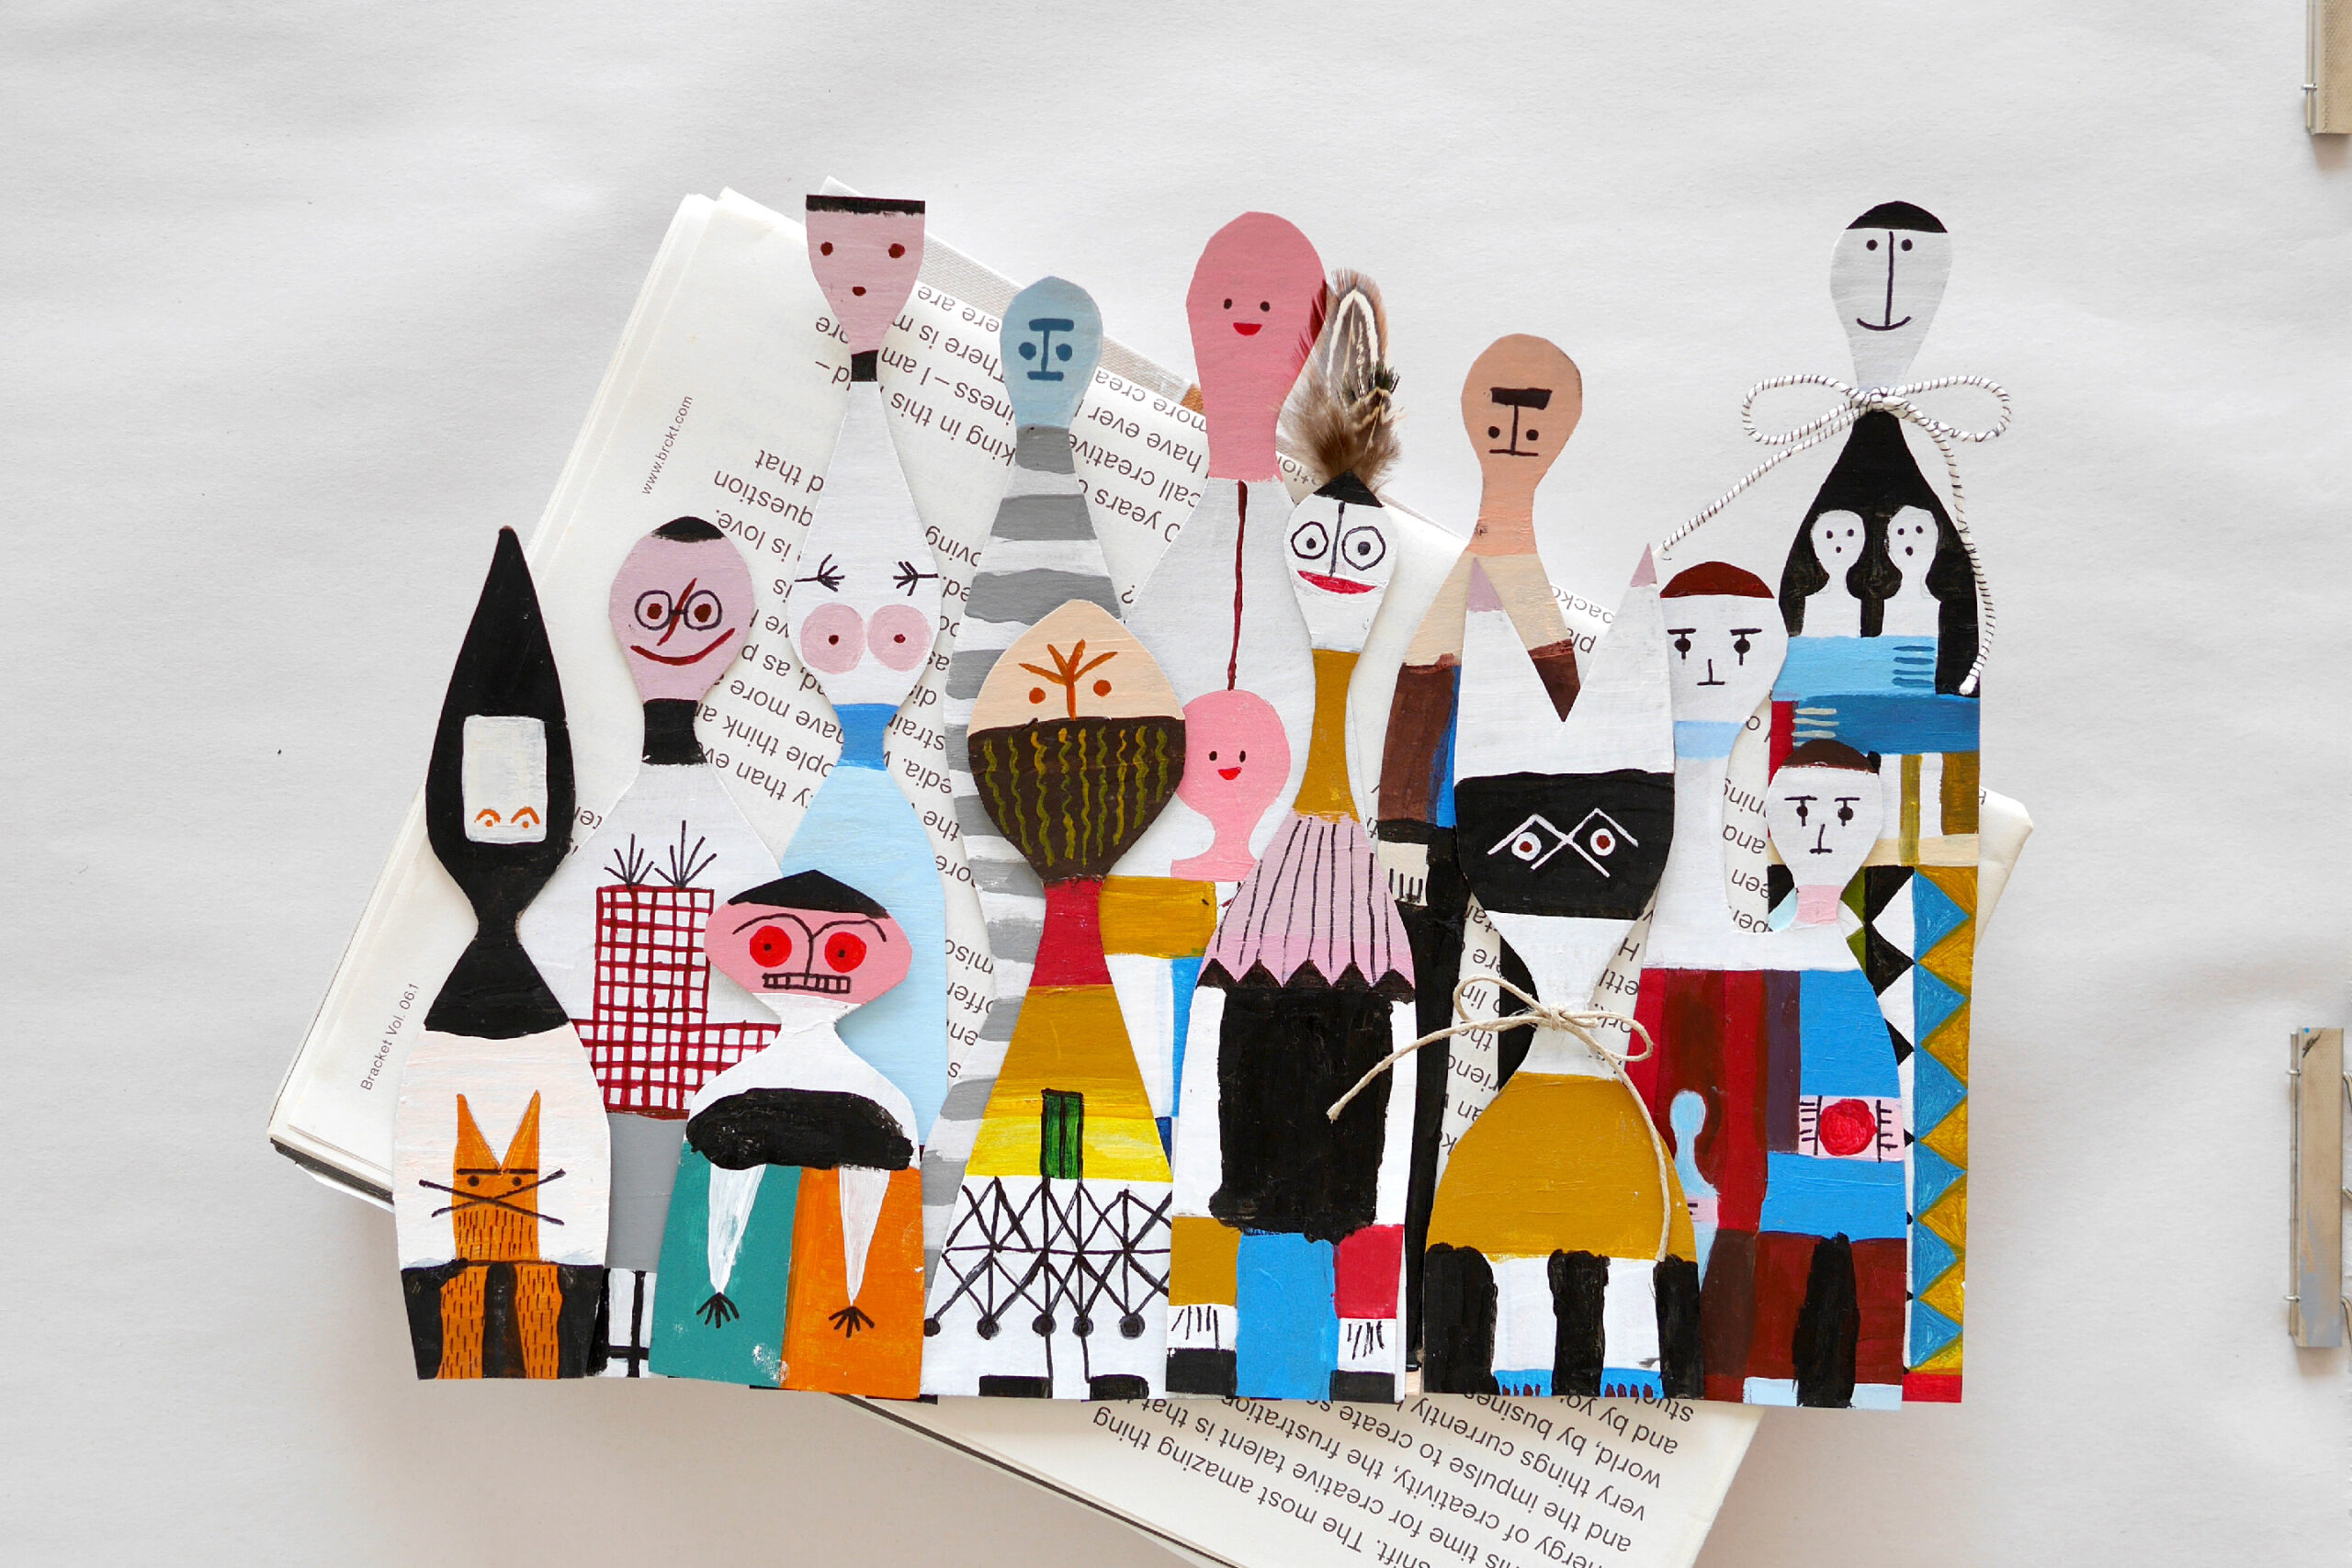
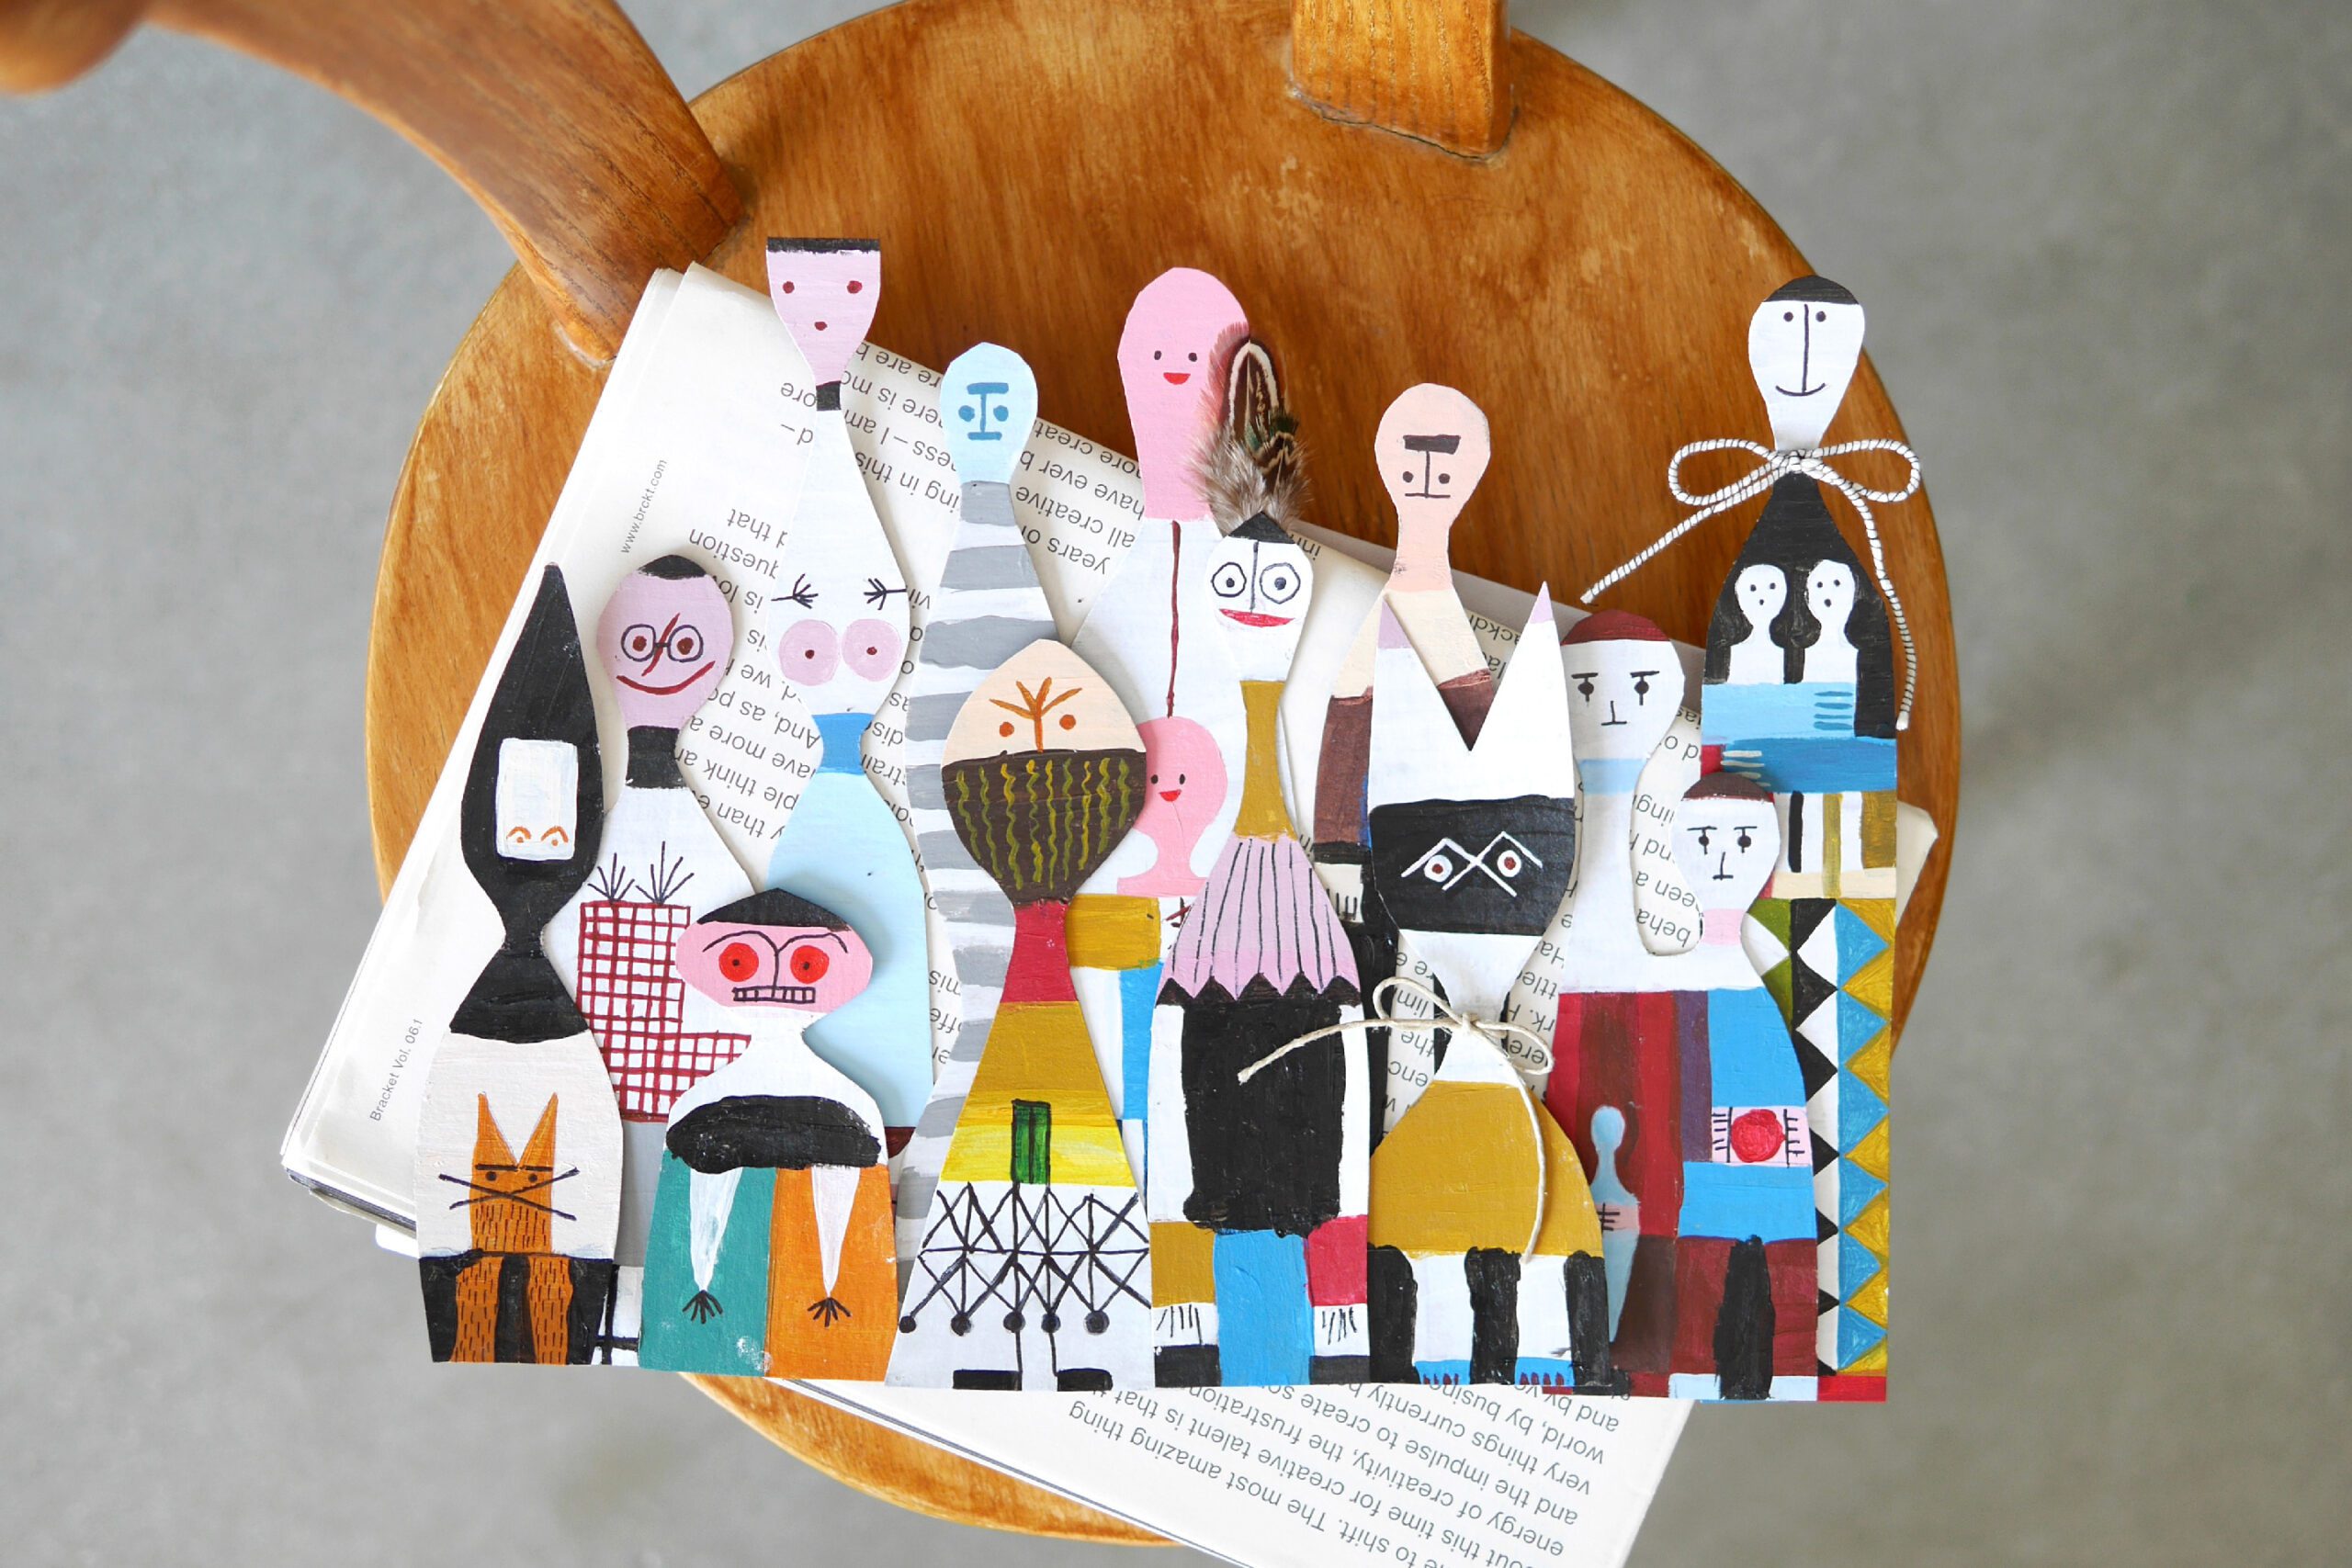
Alexander Girard is one of the most famous American mid-century designers. Among his works, “wooden doll” is one of our favorites. The playful design of the dolls fascinates with each doll’s unique expression, colorful and beautiful.
This dolls are actually three-dimensional handcrafted pieces of solid wood that are carved and colored. We decided to recreate this unique and beautiful three-dimensional woodwork in two dimensions on paper.
It means looking at things carefully. Then to express what we see with our hands. Not only visually seeing, but also creating colors, reproducing shapes, and constructing. By drawing the same thing using our physical senses, we relive the process by which the artist created the work. We were so absorbed in the work that we were pulled in by the uniqueness of the motifs. The result is these 12 paper dolls.
Materials
– Wooden doll images for sample*
– Card board *About 0.5 mm thick
– Pencil
– Scissors
– Acrylic paint
– Paintbrush
– Black marker for drawing details
– Feathers or strings for decoration
*A search for “Alexander Girard wooden doll” will bring up several images. You may want to use a picture taken from the front as a sample.
Instructions for making
Step 1. Reproduce a Figure
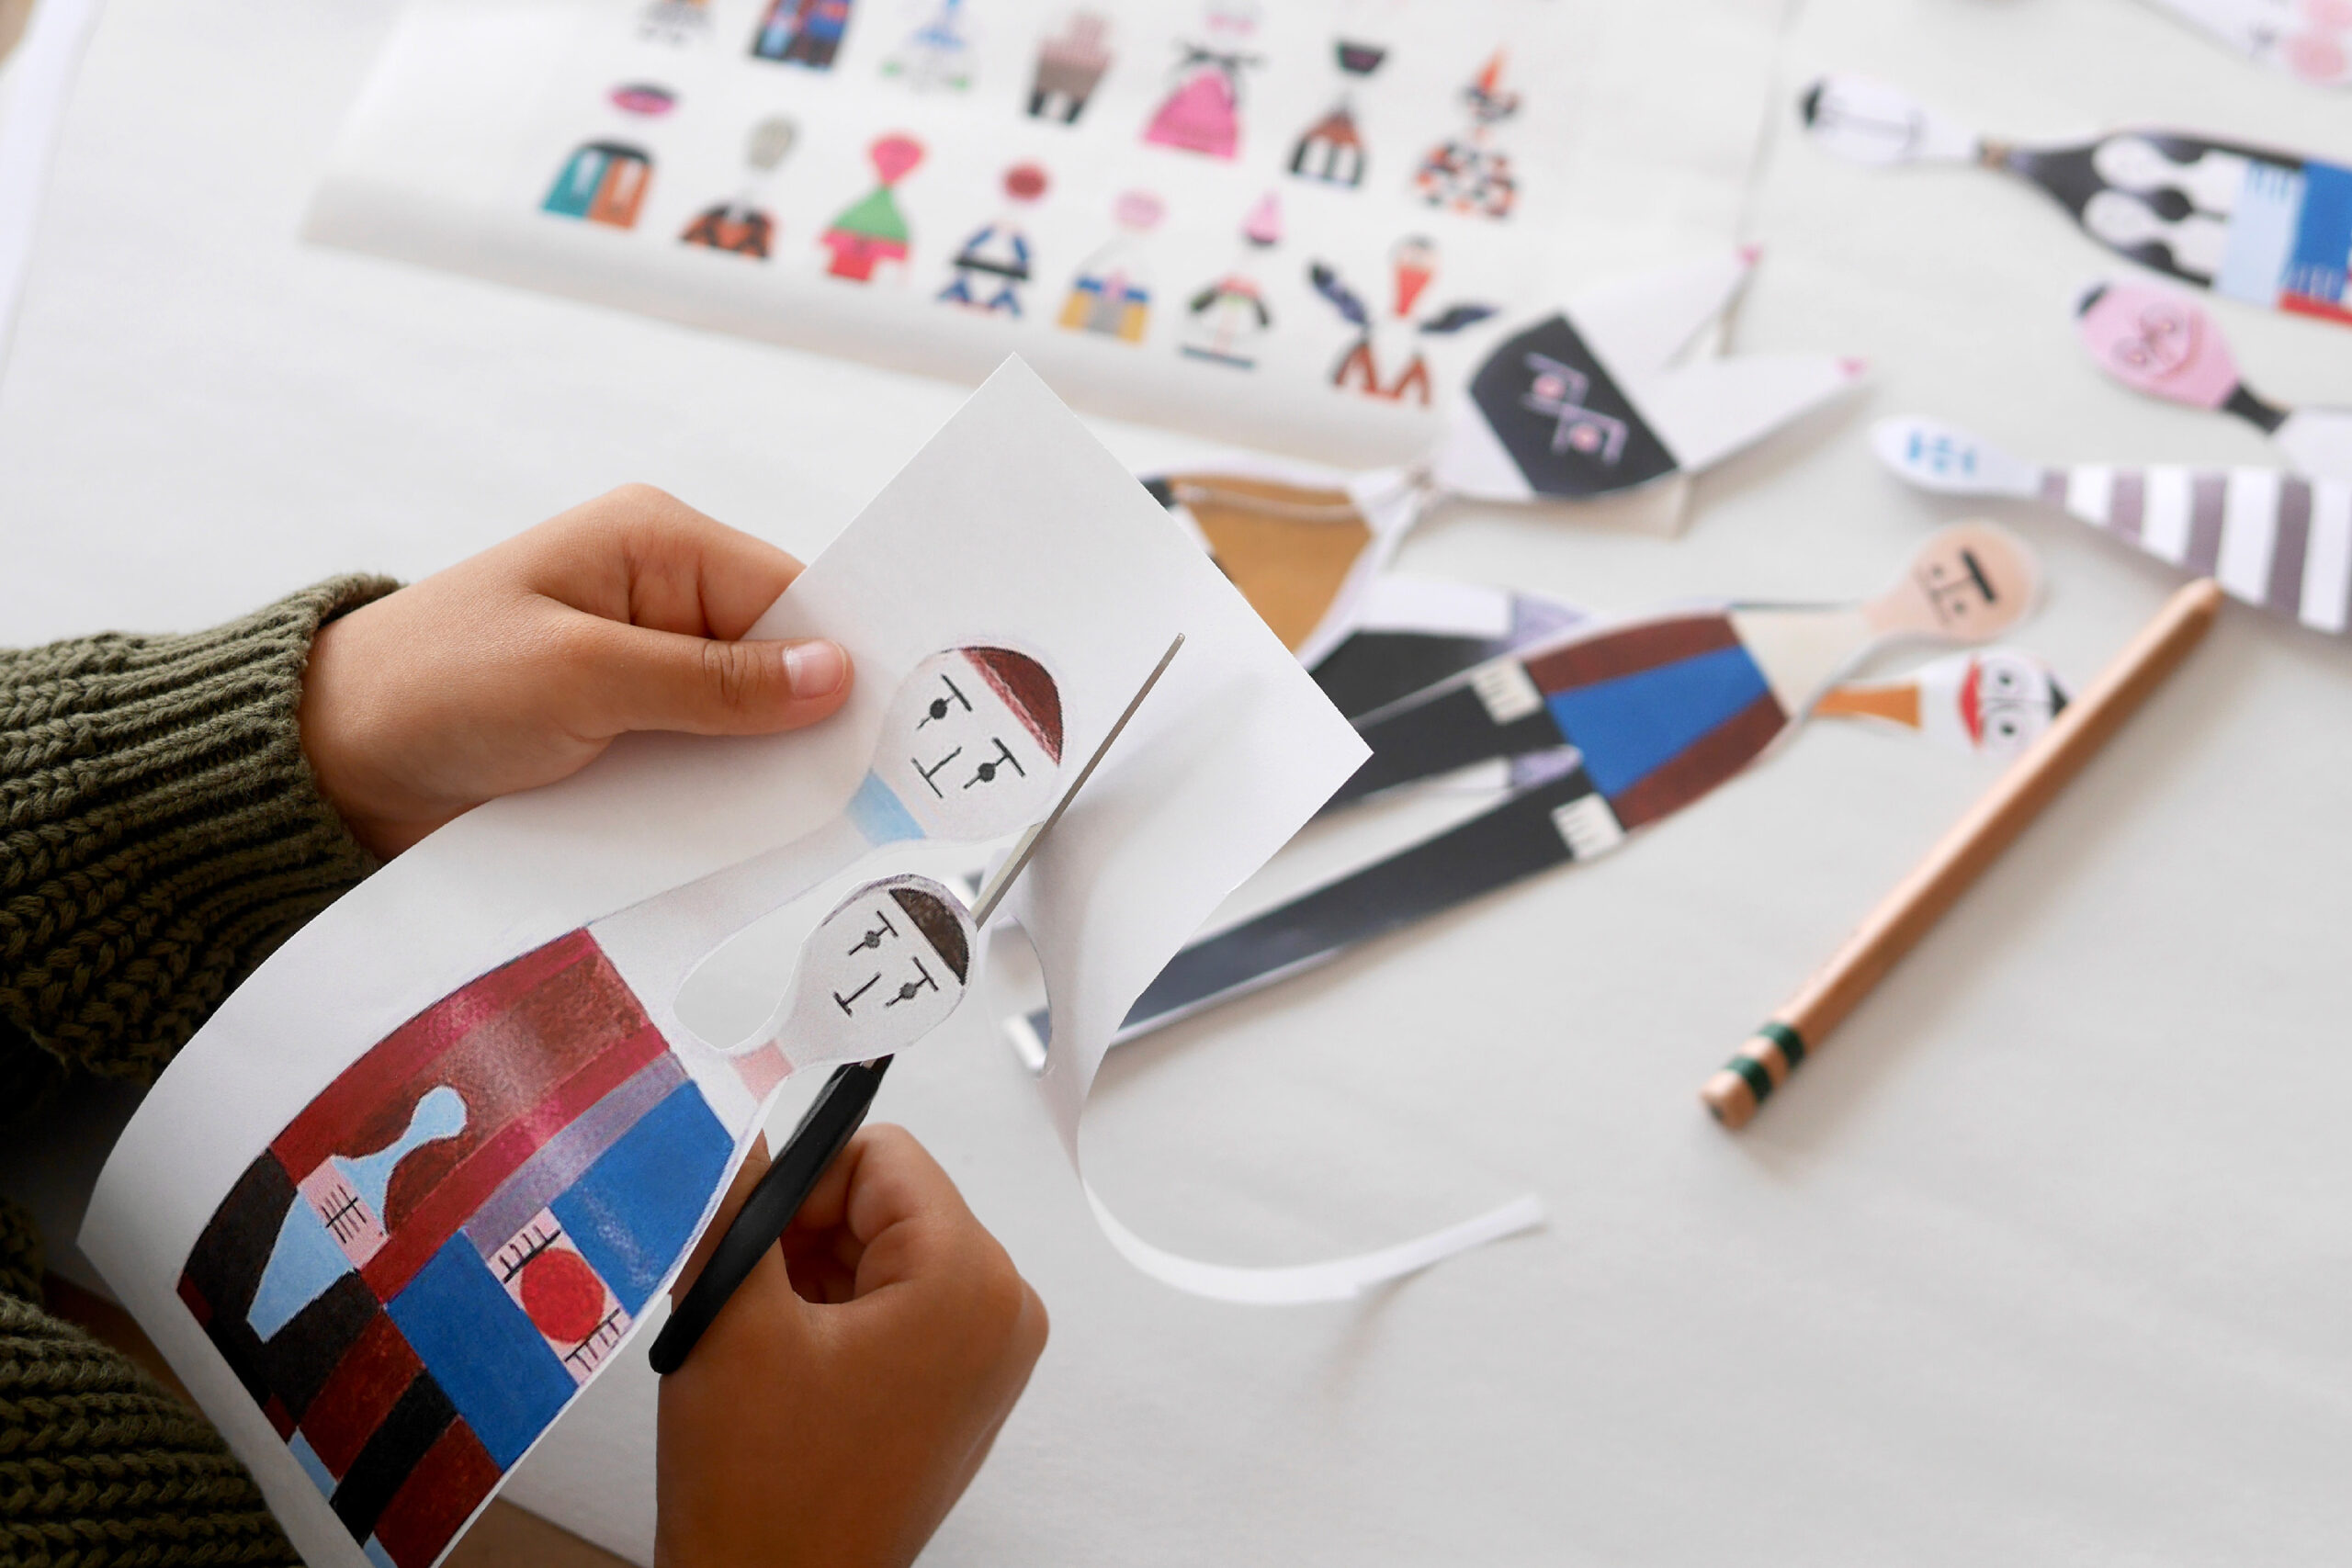
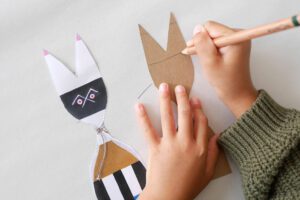
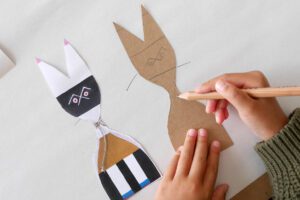
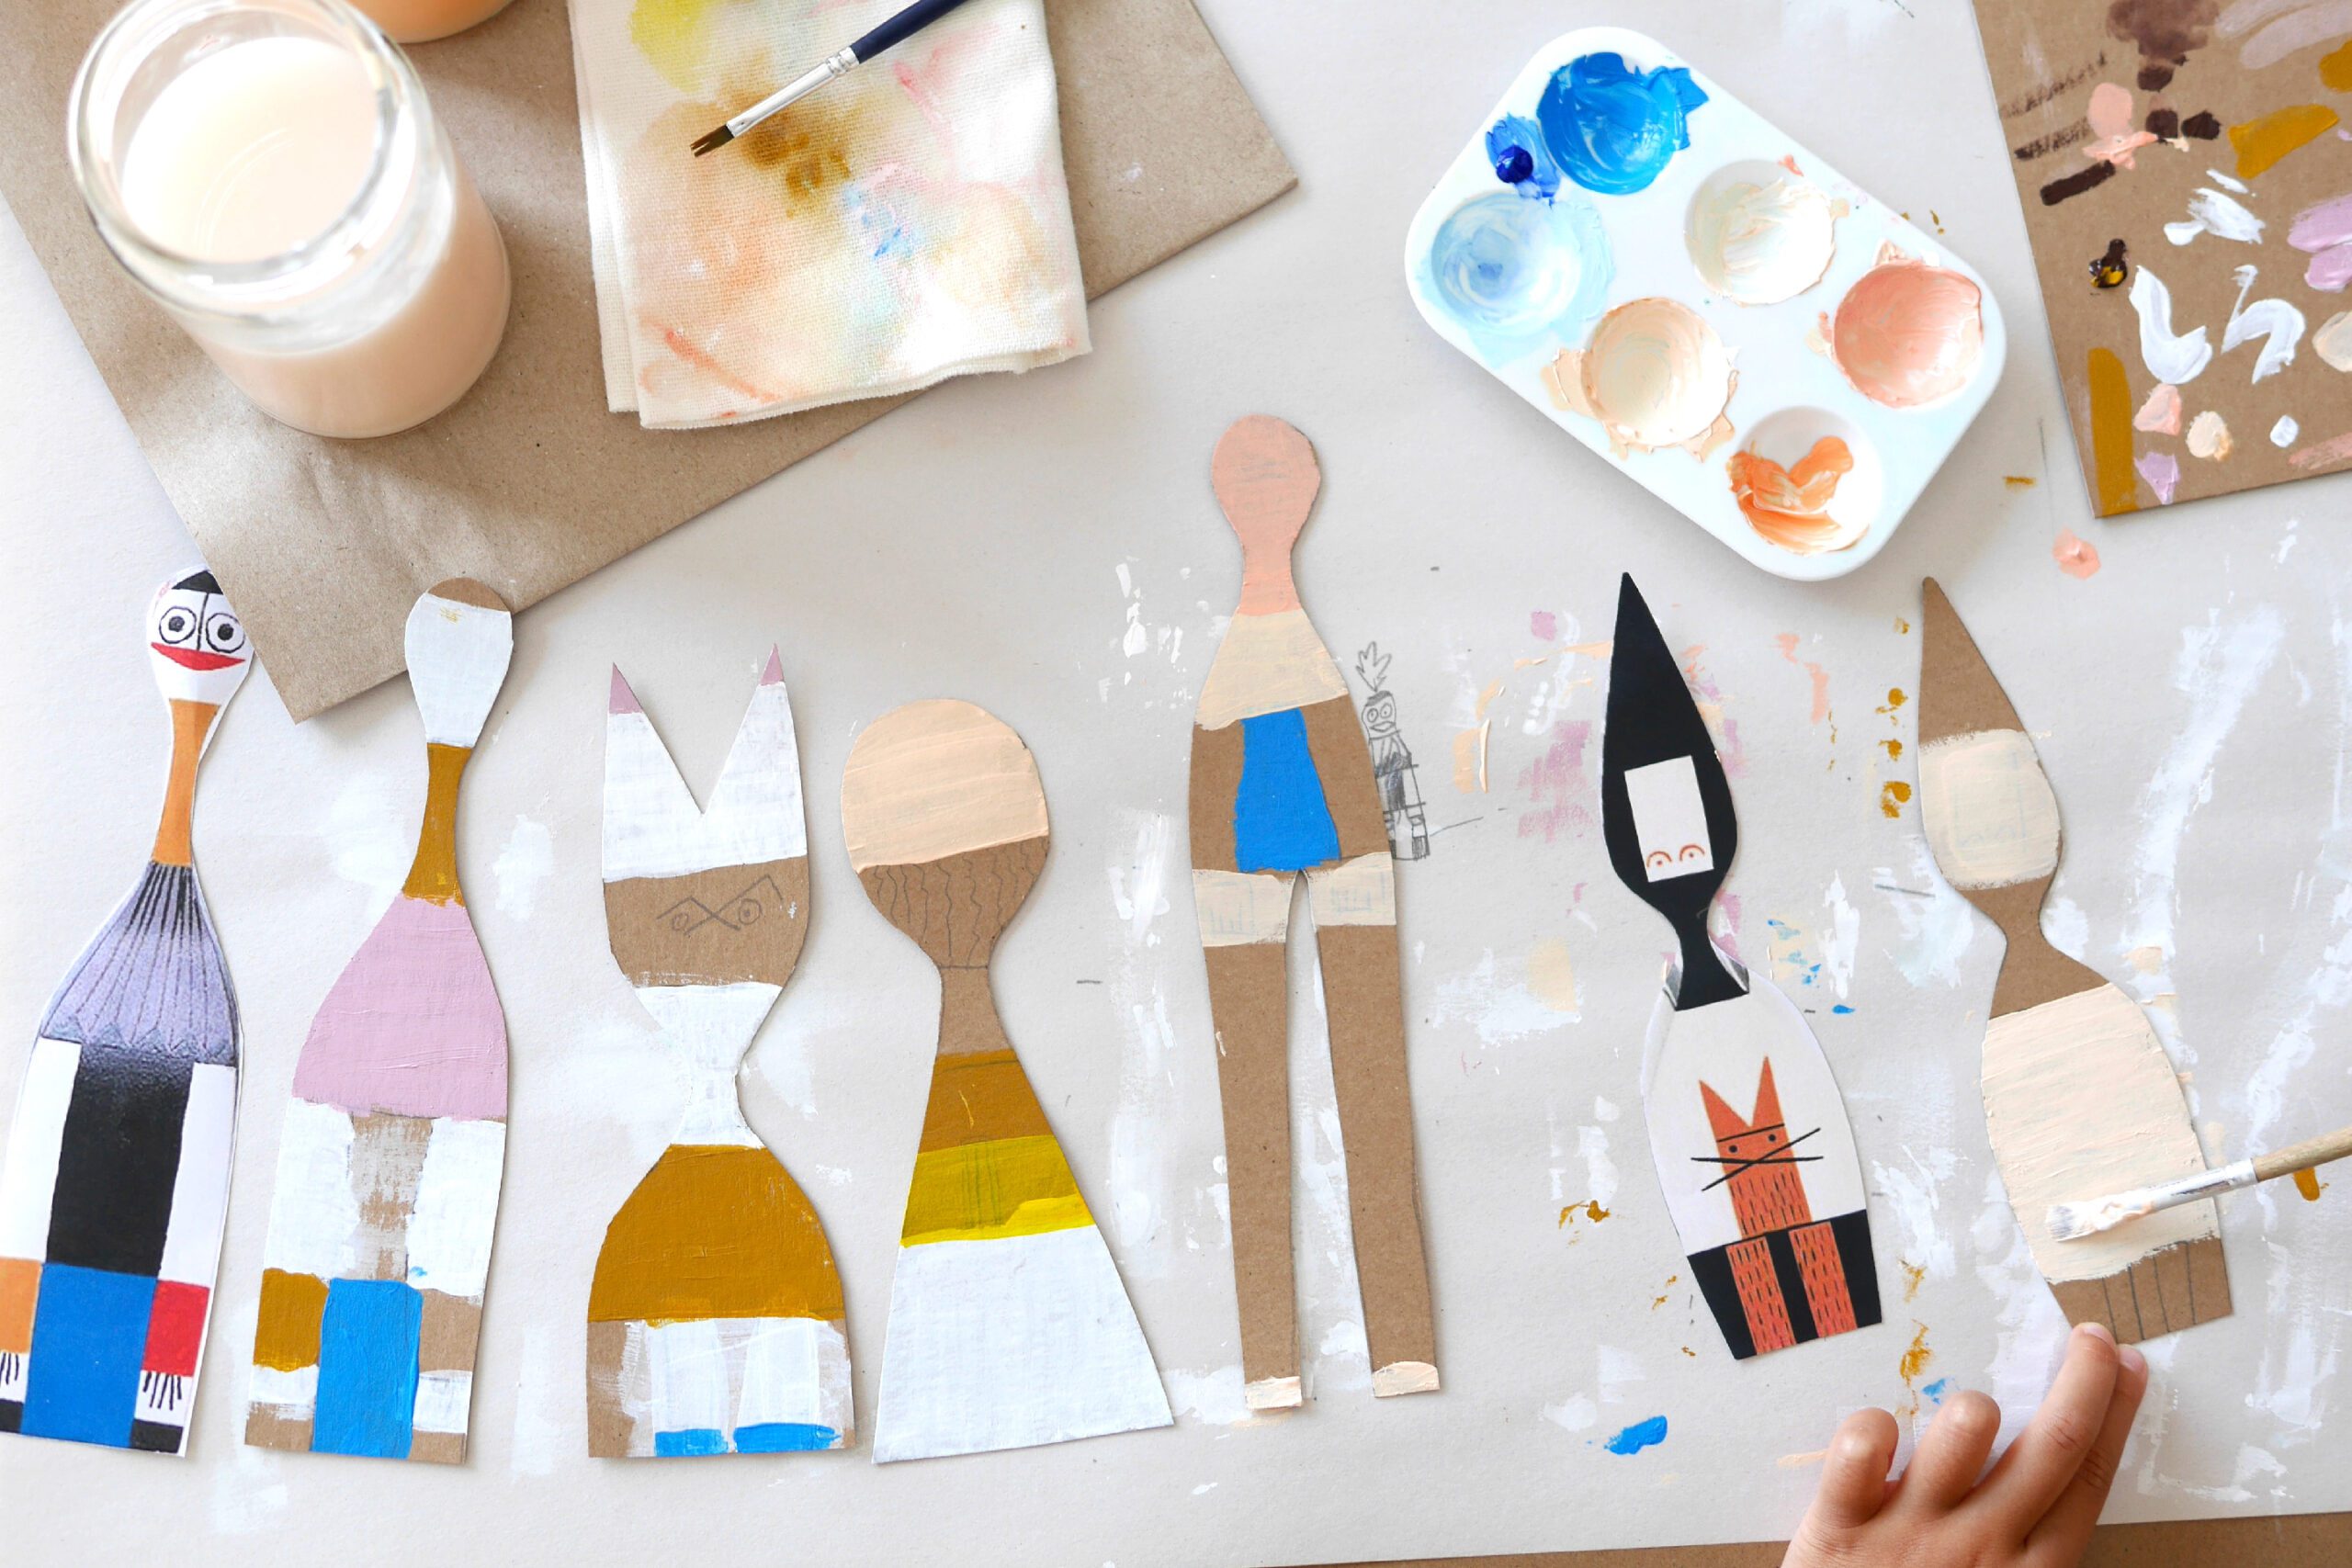
Pick the one you want to draw from the 22 adorable wooden dolls. Print out the selected sample image on a printer and cut it out according to the figure. The size of the output is arbitrary. In our case, we made the output about 4 to 10 inches tall so that it would be life-size.
Copy the figure of the wooden doll onto card board and cut out along the line.
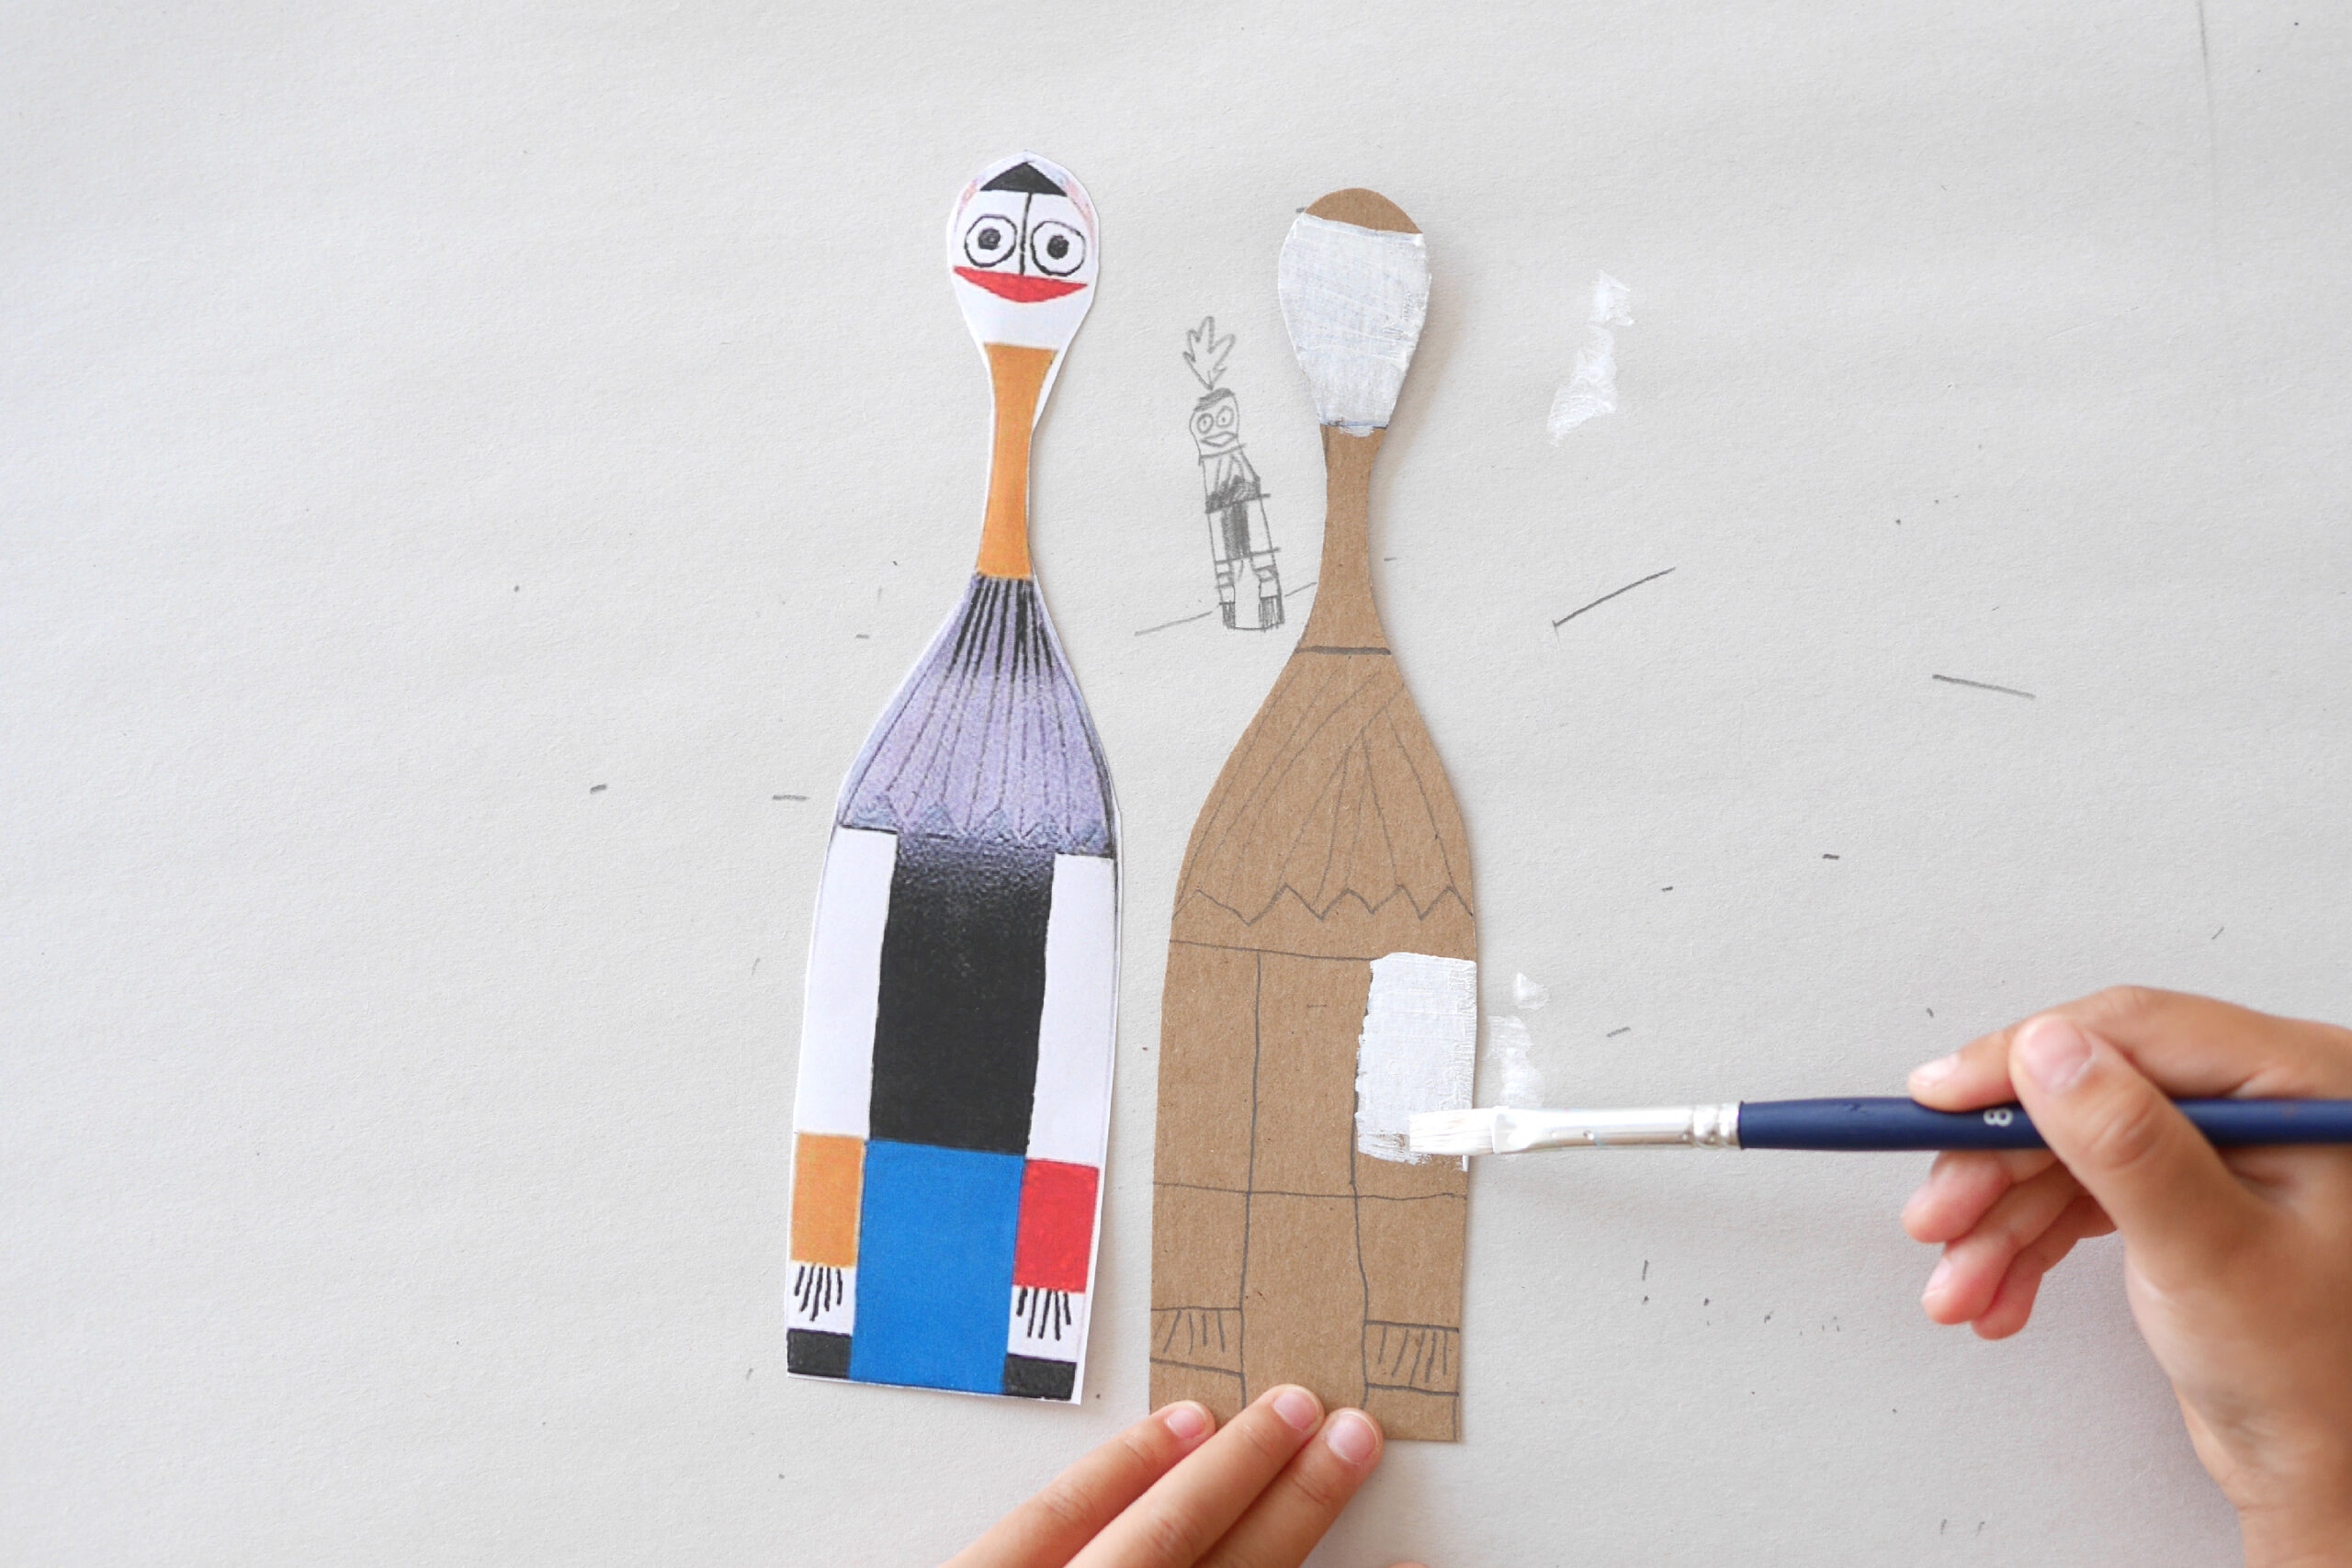
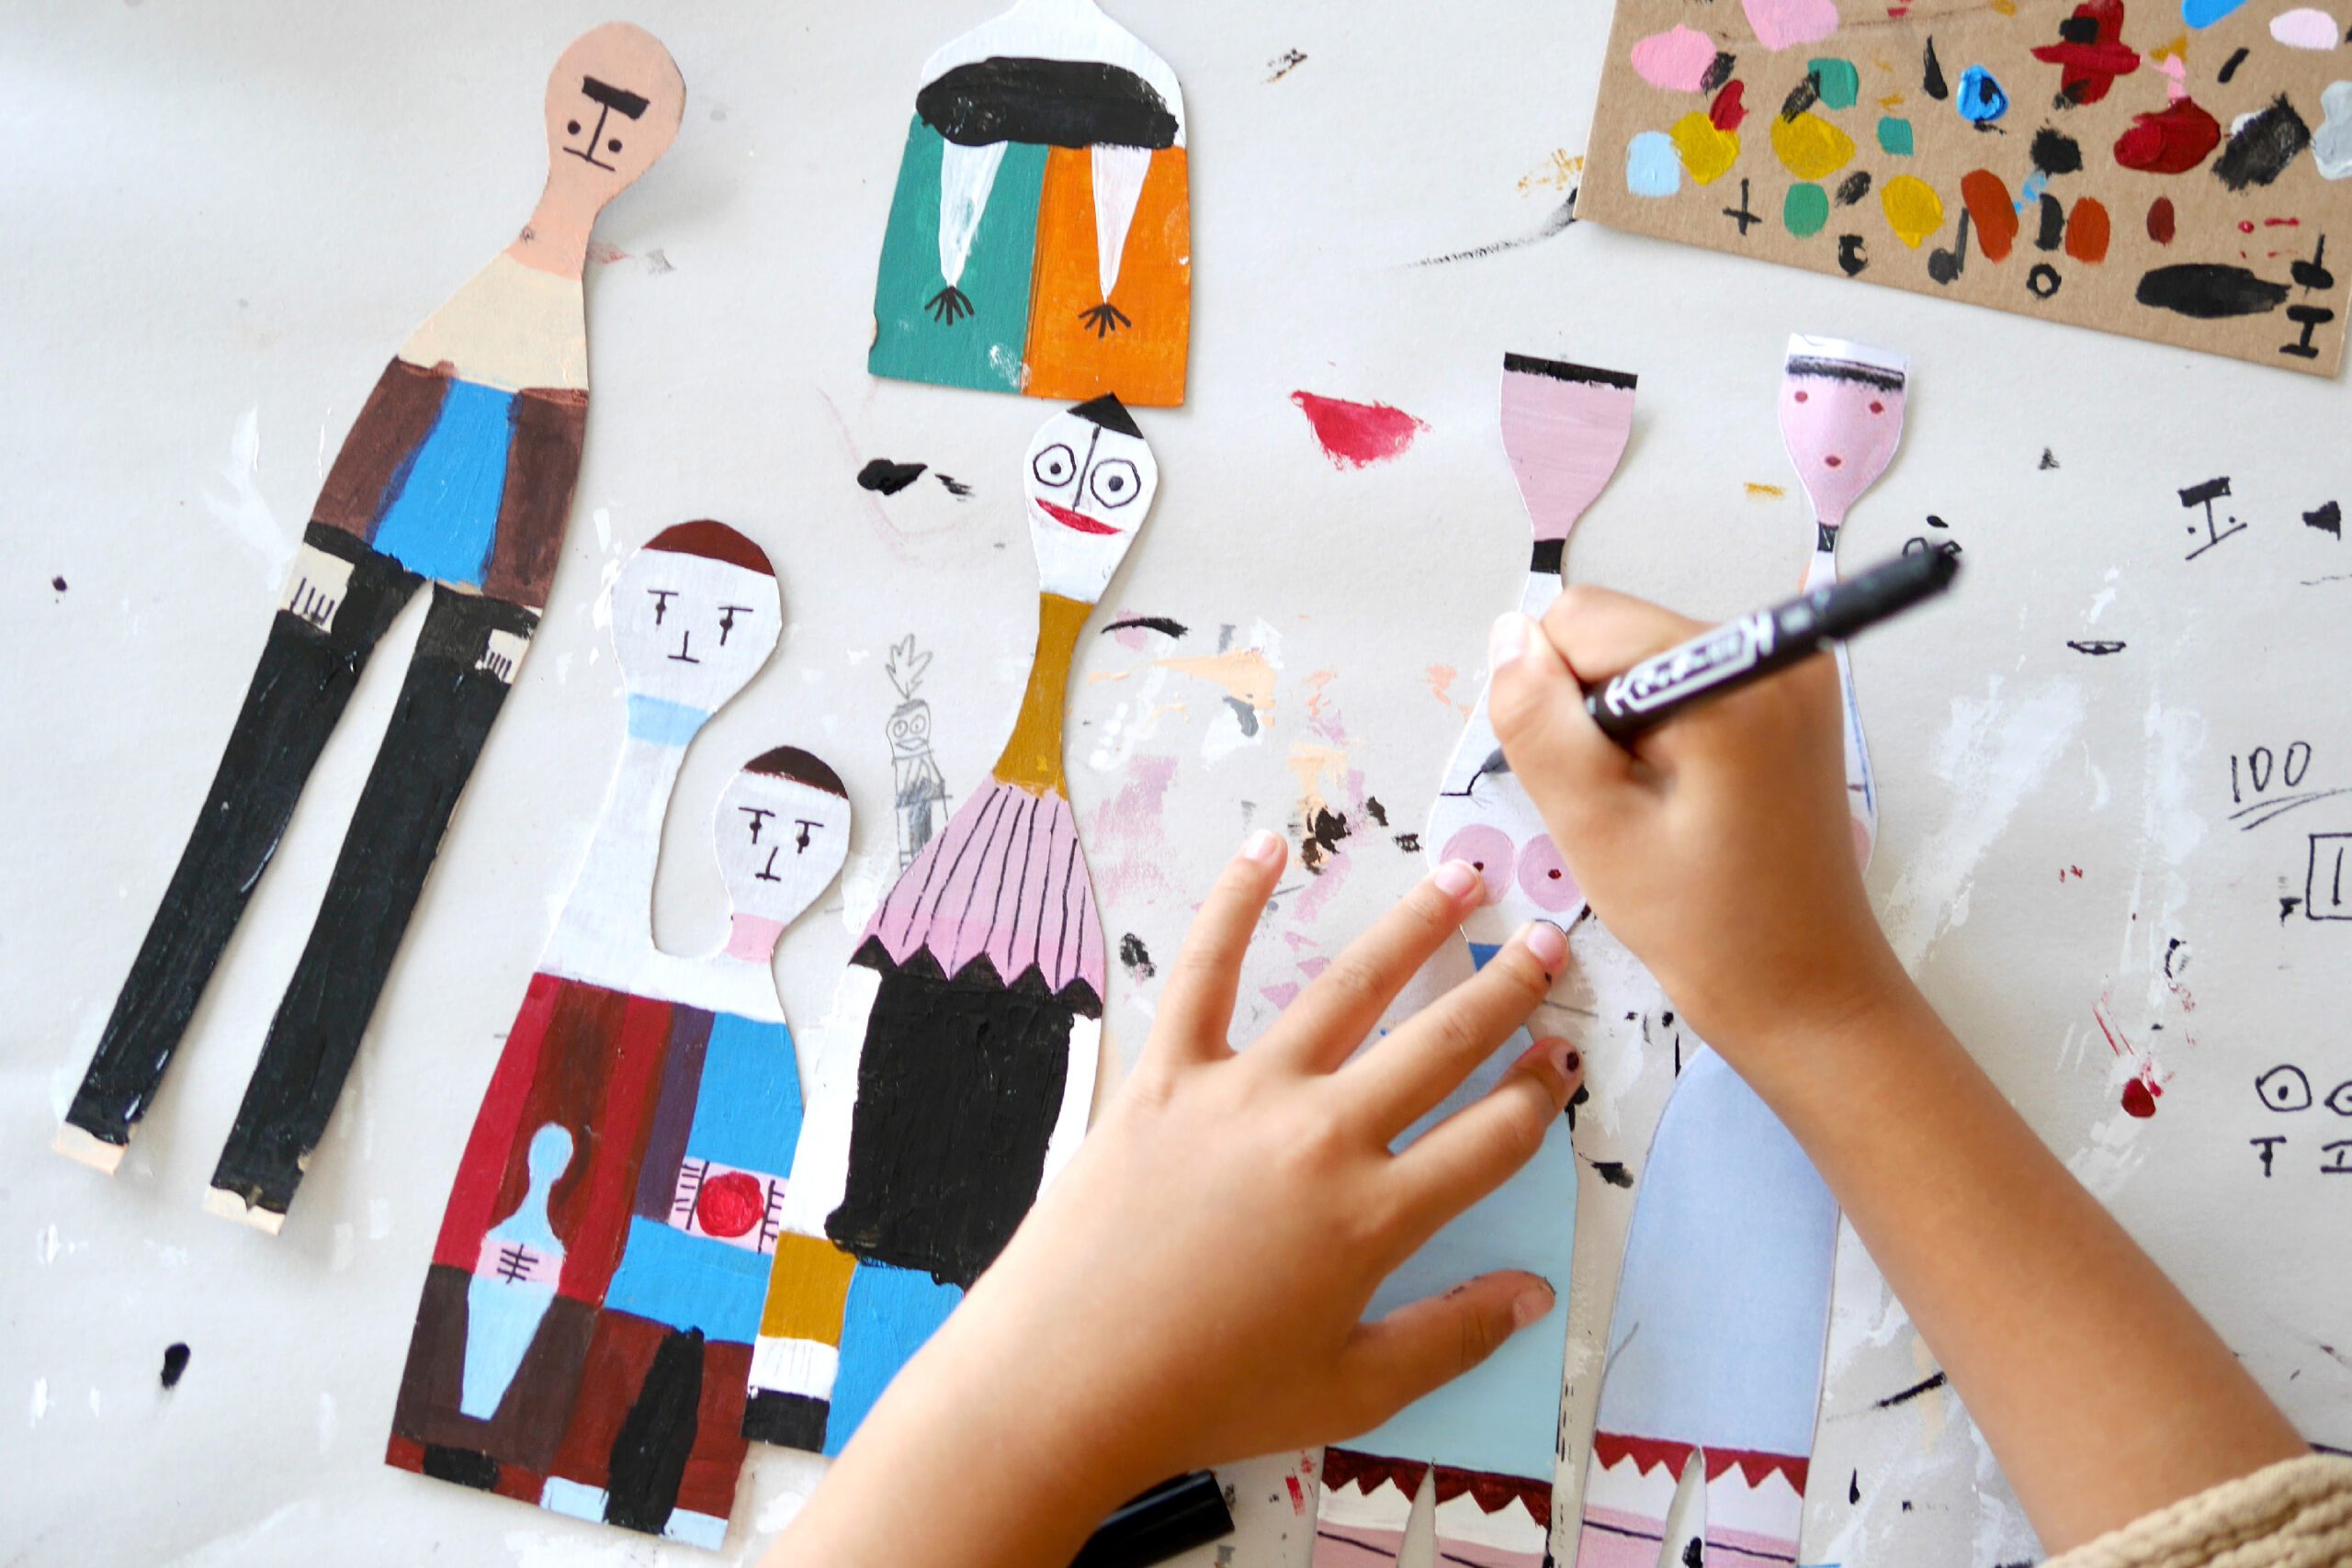
Step 2. Sketch the Details
Write the details in pencil on the cut-out card board.
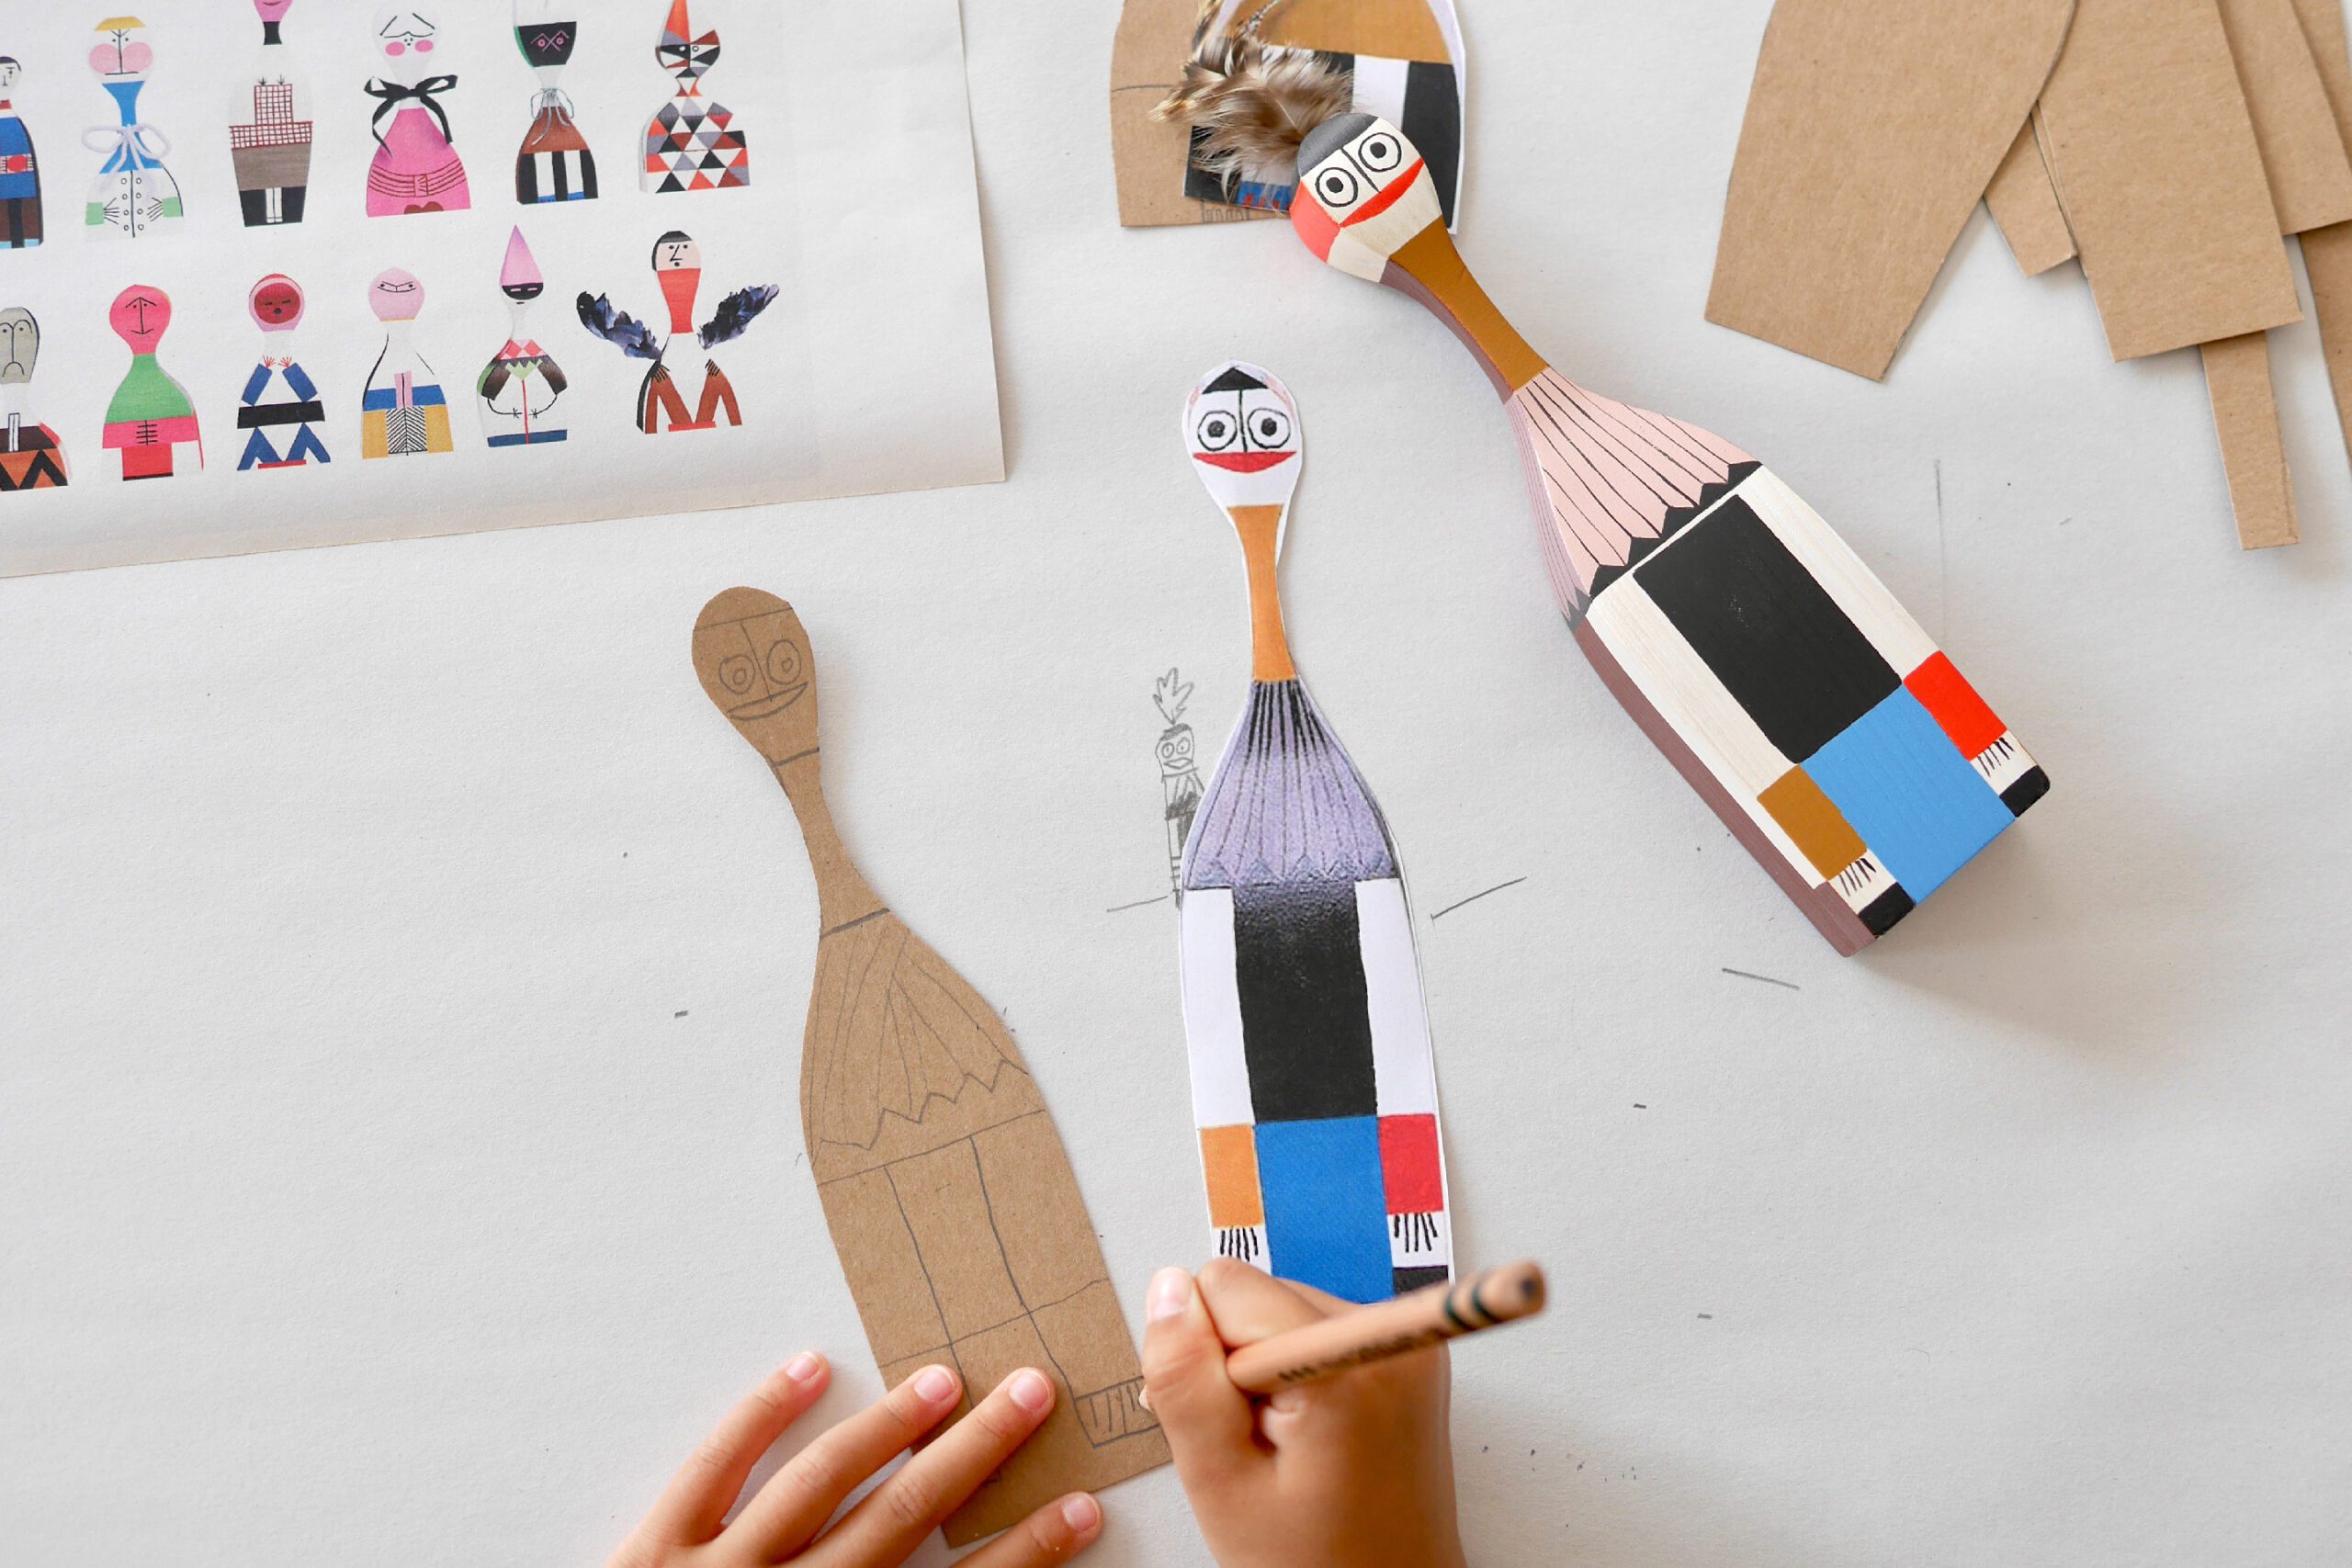
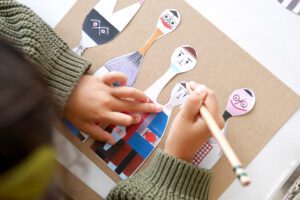
Step 3. Paint with Colors
Color the work according to the sketch. Look carefully at the sample colors and mix the paints to create colors. It is best to start with light colors such as white and pale tones. Gradually add darker colors, such as blue and black, to finish the painting.
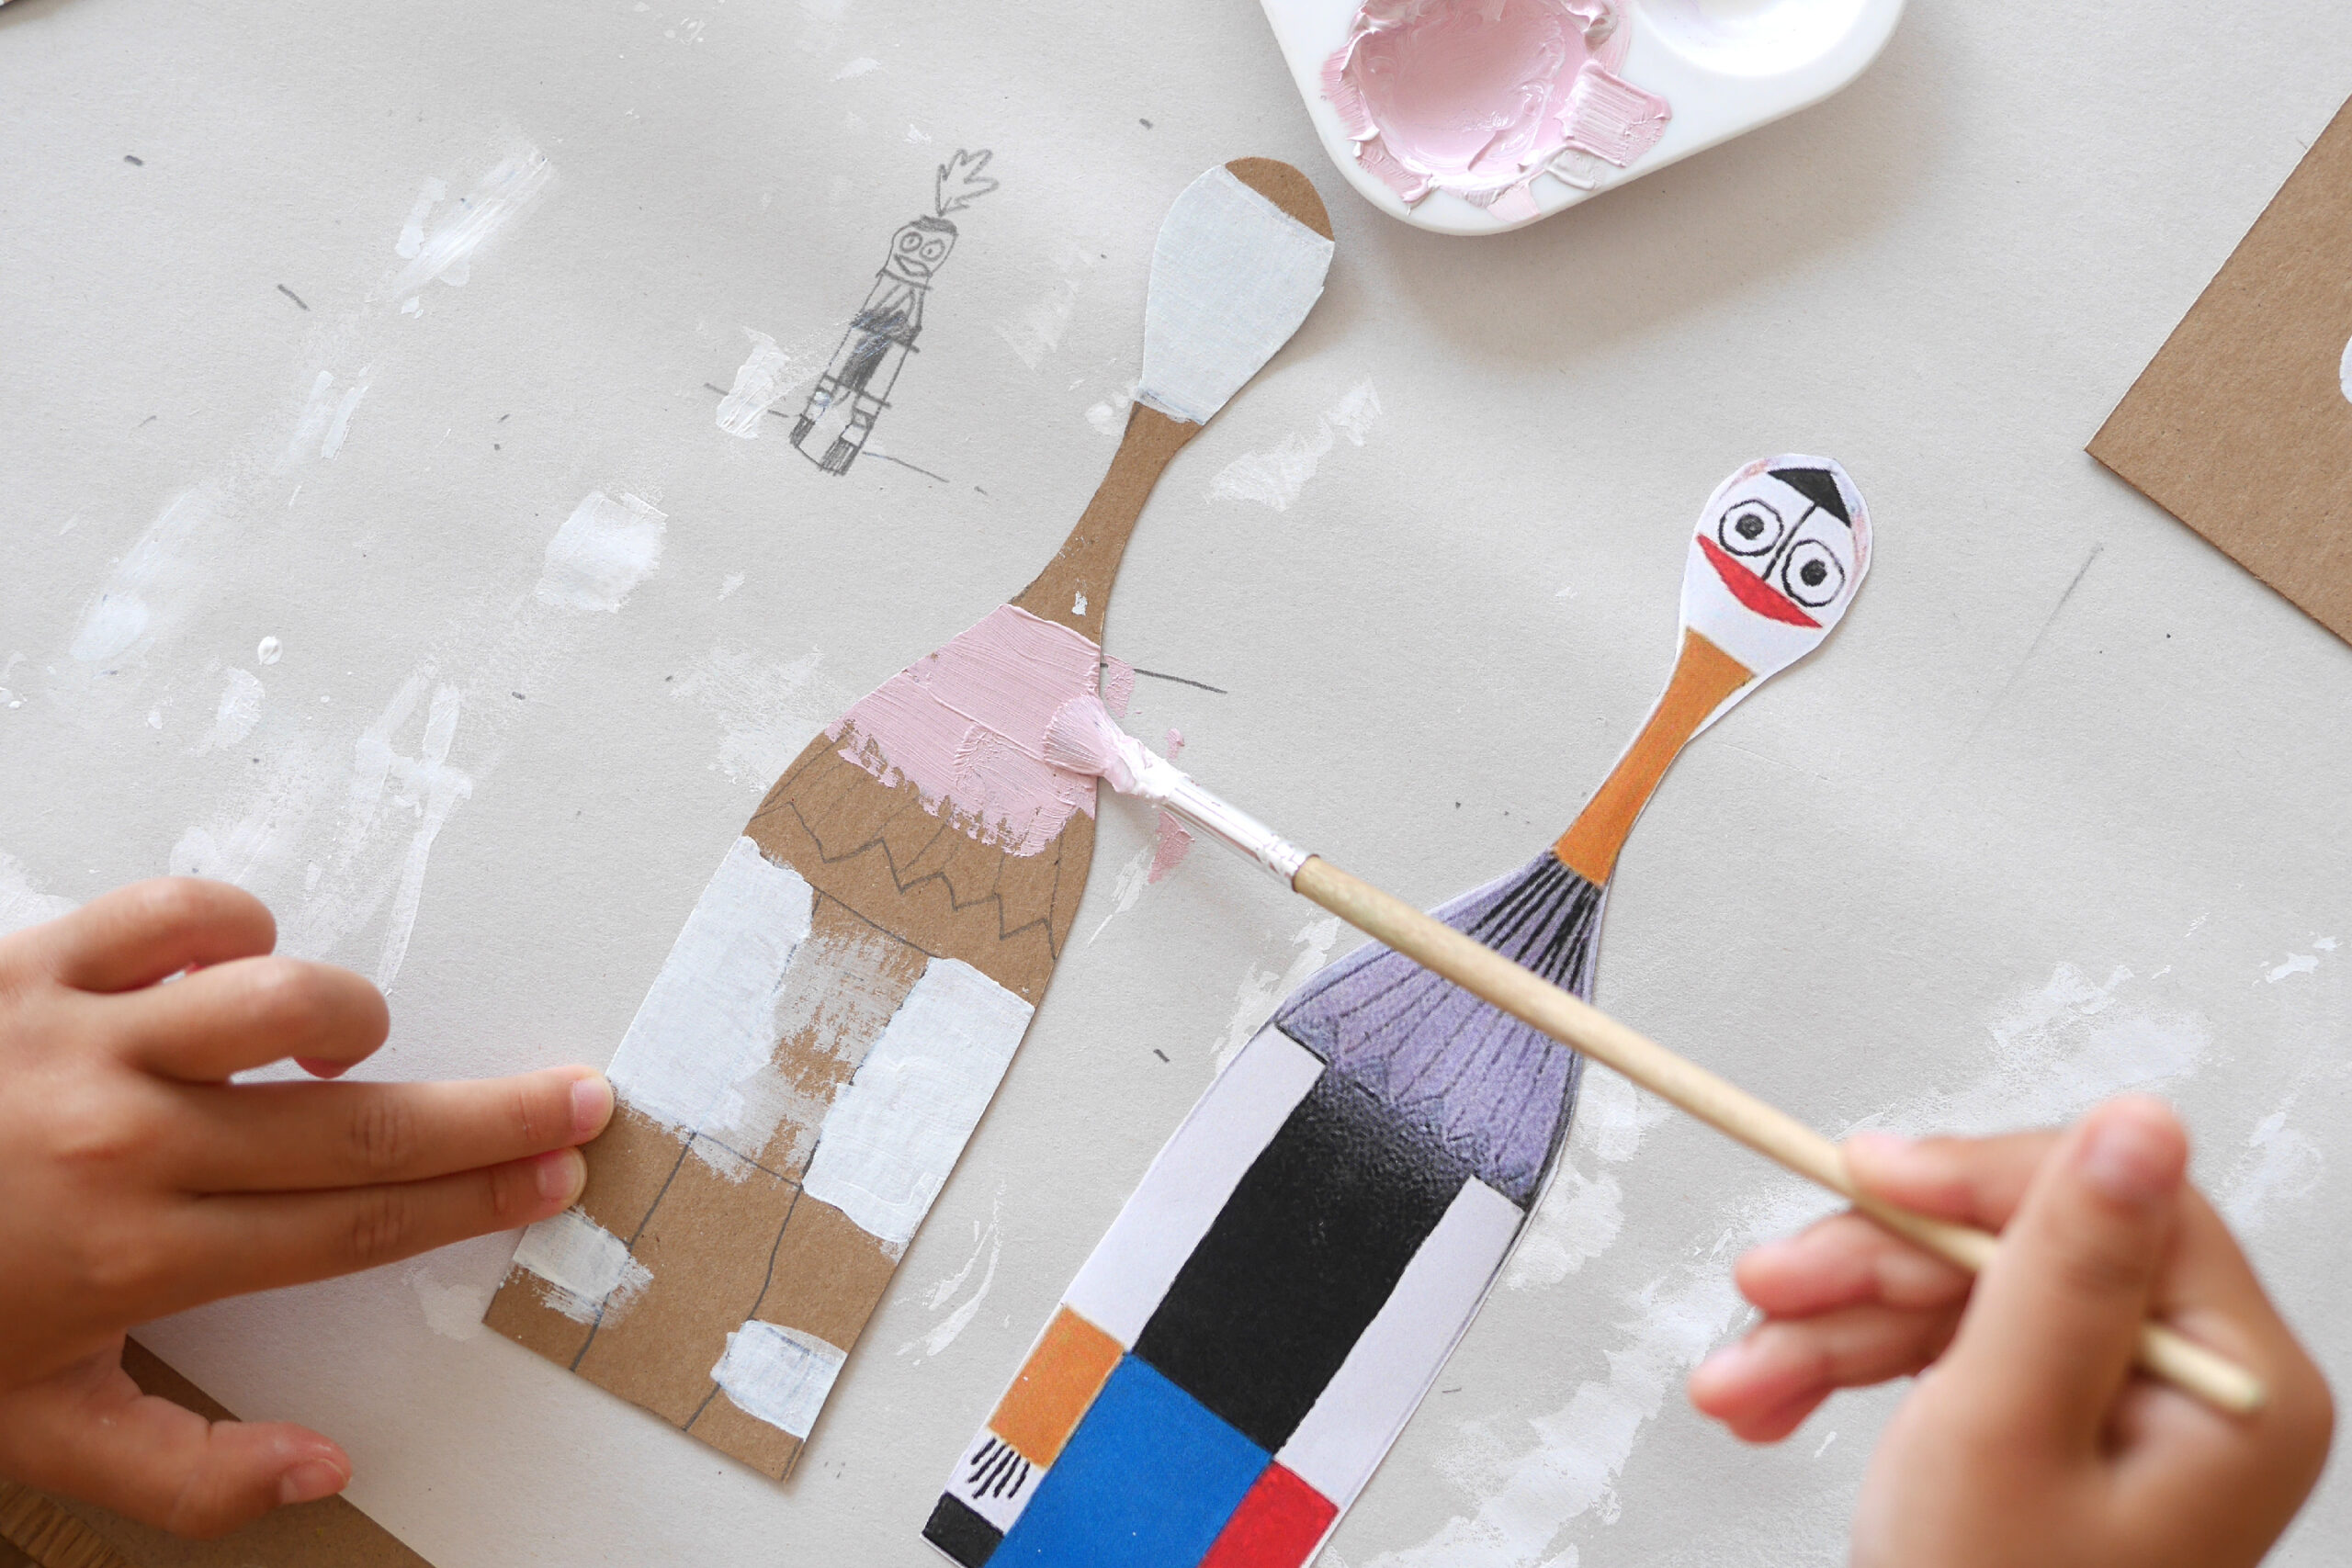

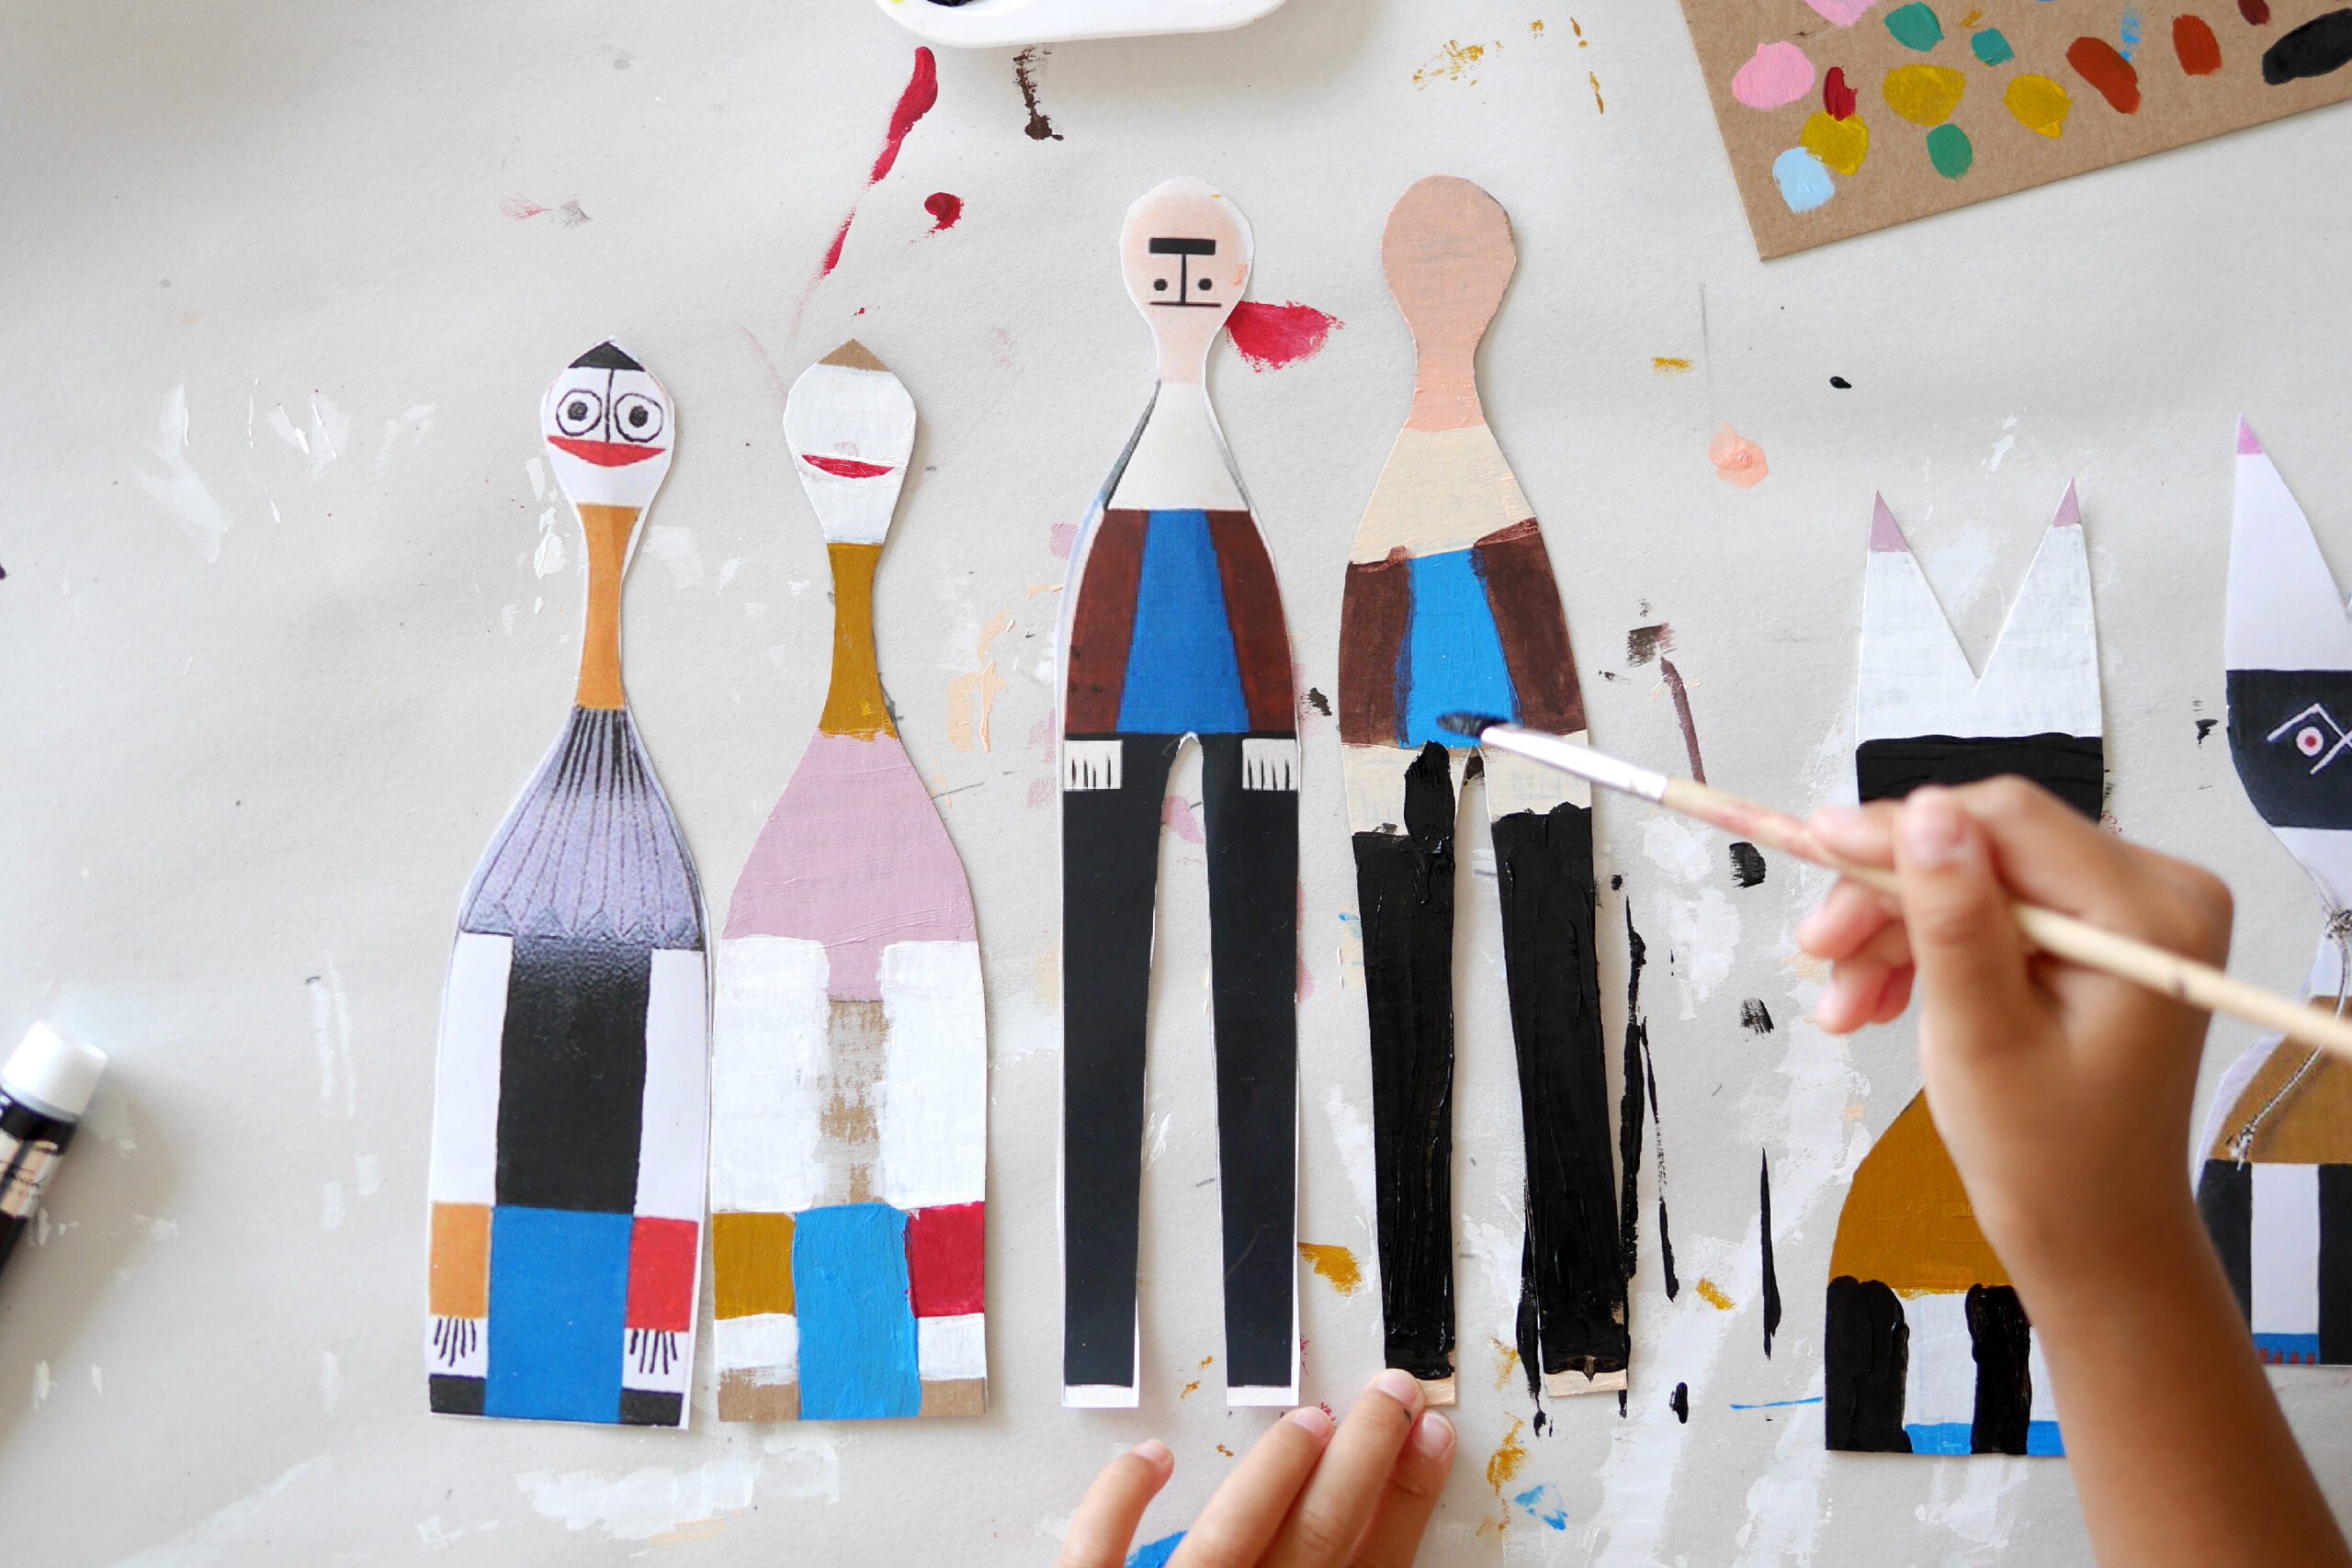
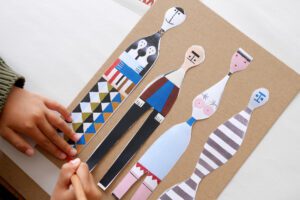
Step 4. Draw the Details
Use a black marker to finish details such as the face and clothing patterns. Look carefully at the sample. Some dolls are decorated with feathers and strings.
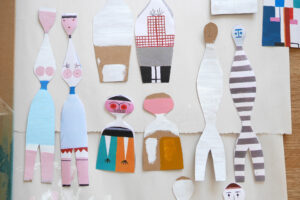
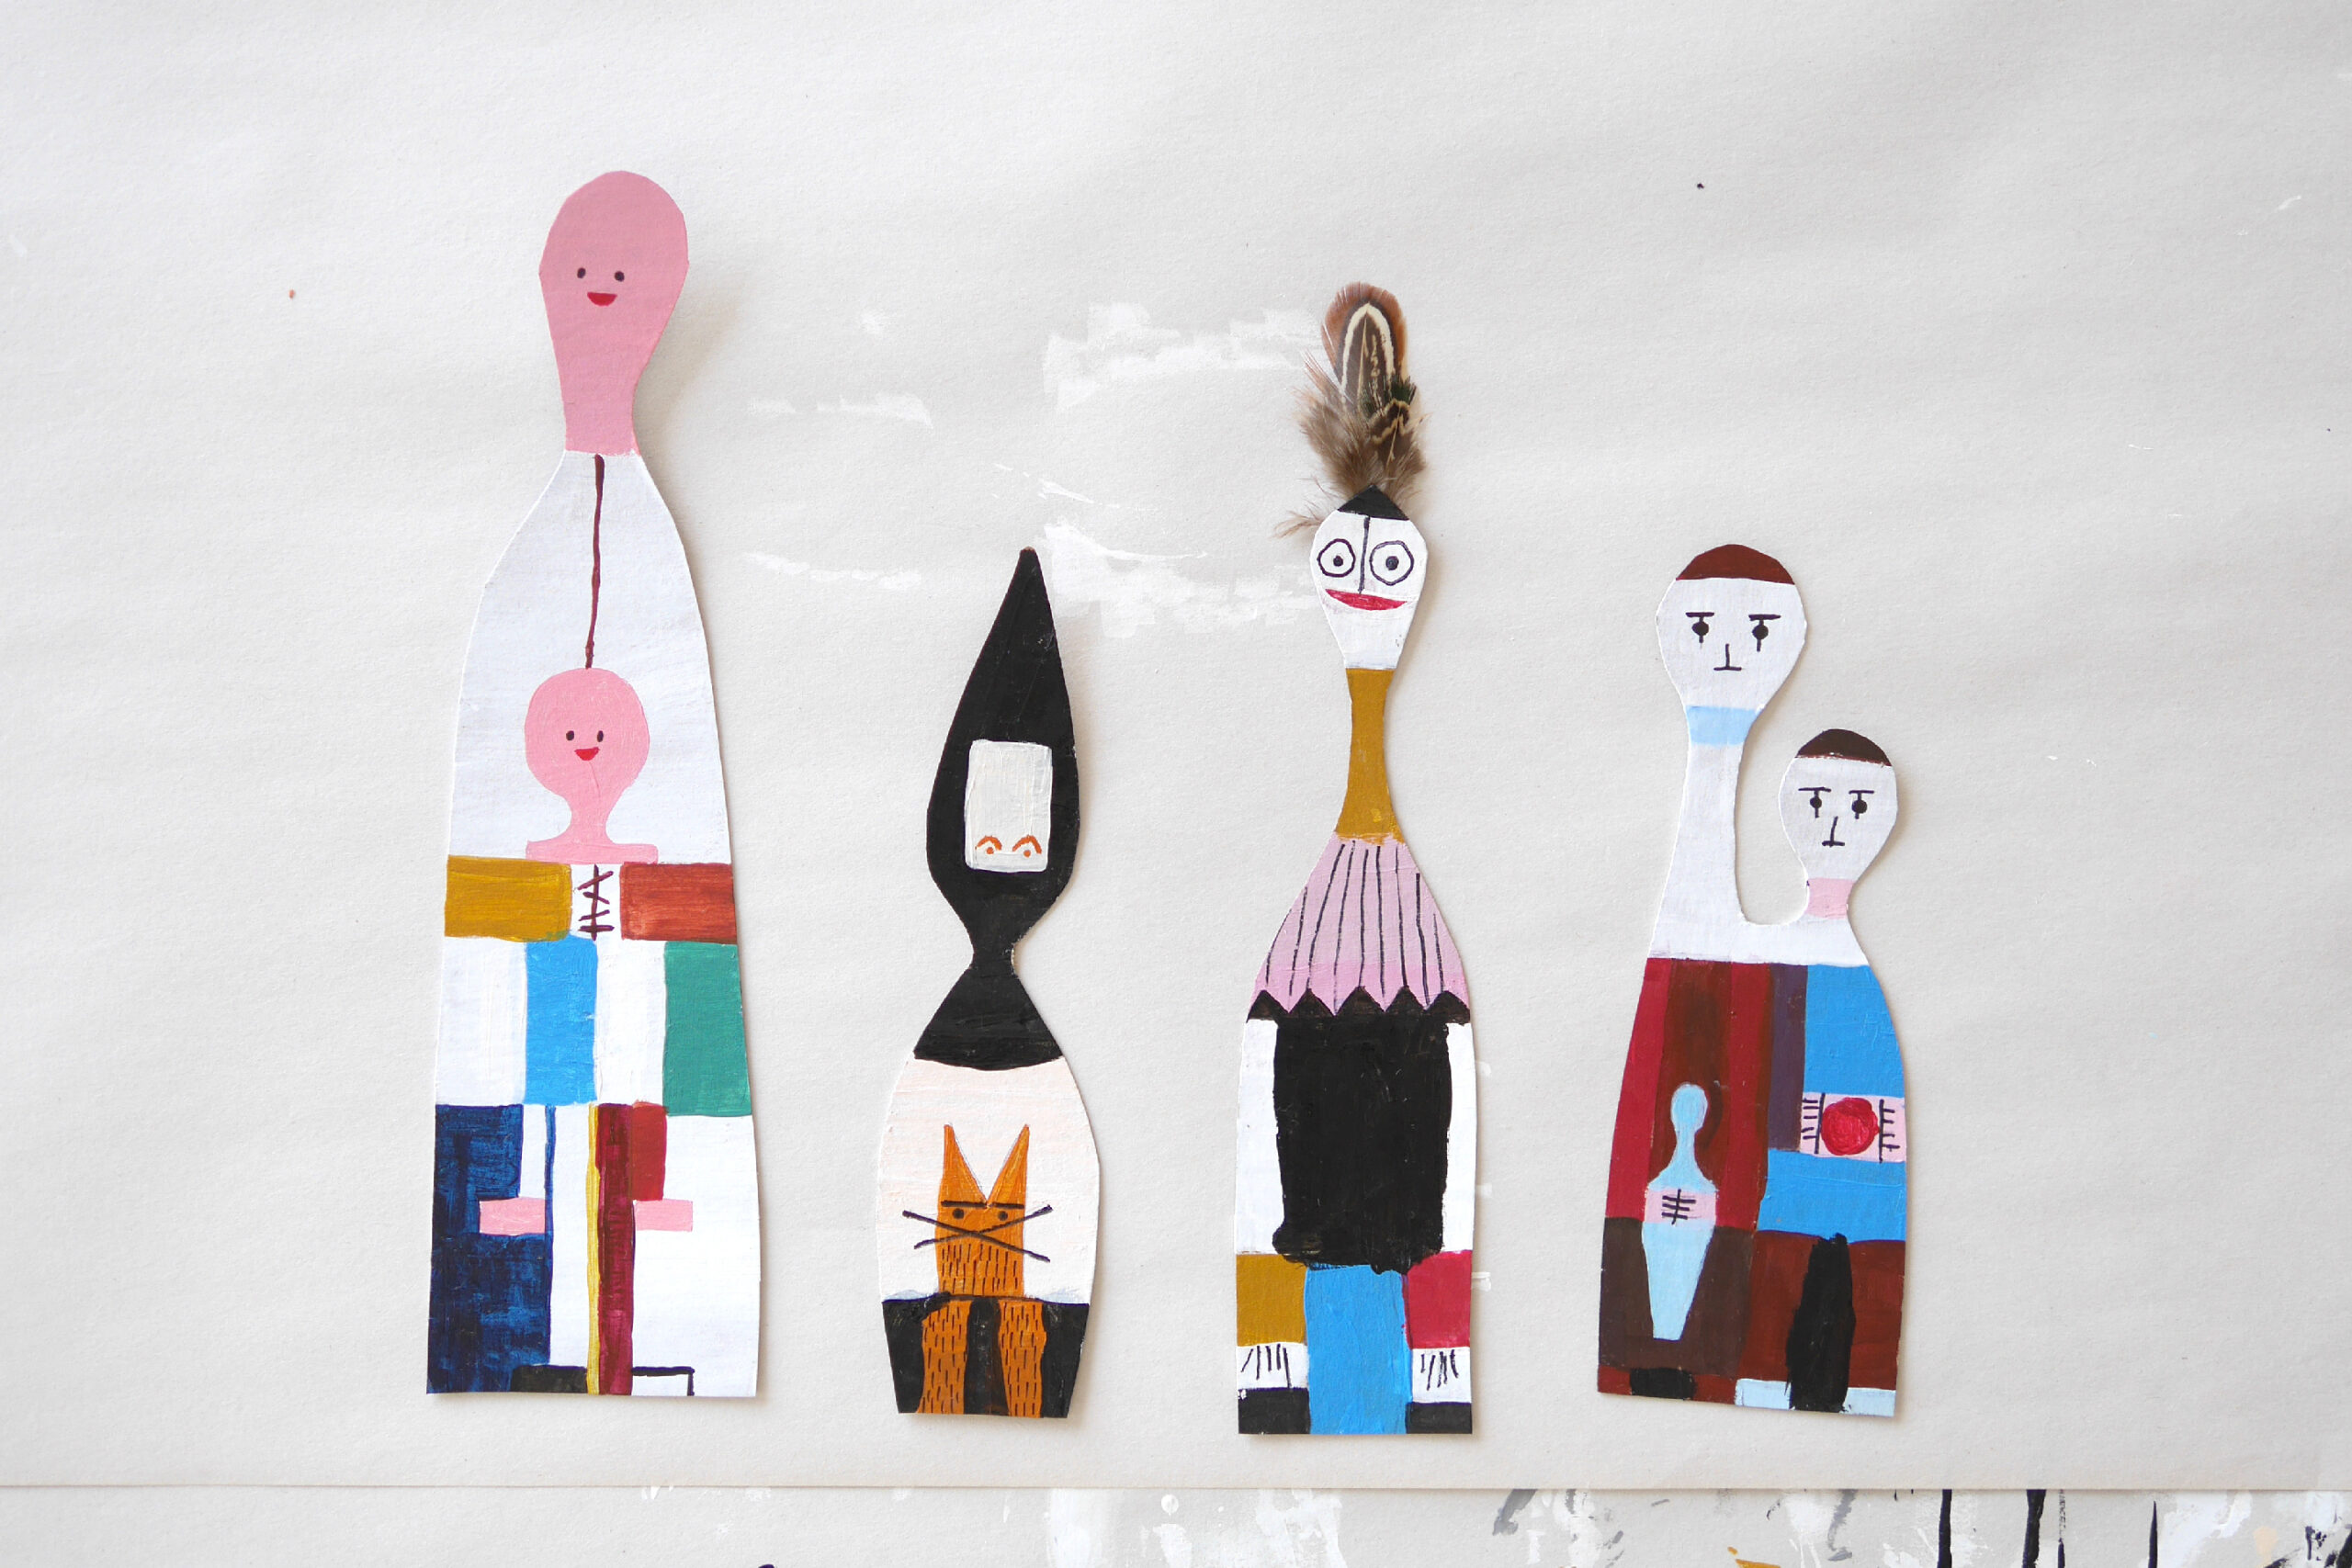
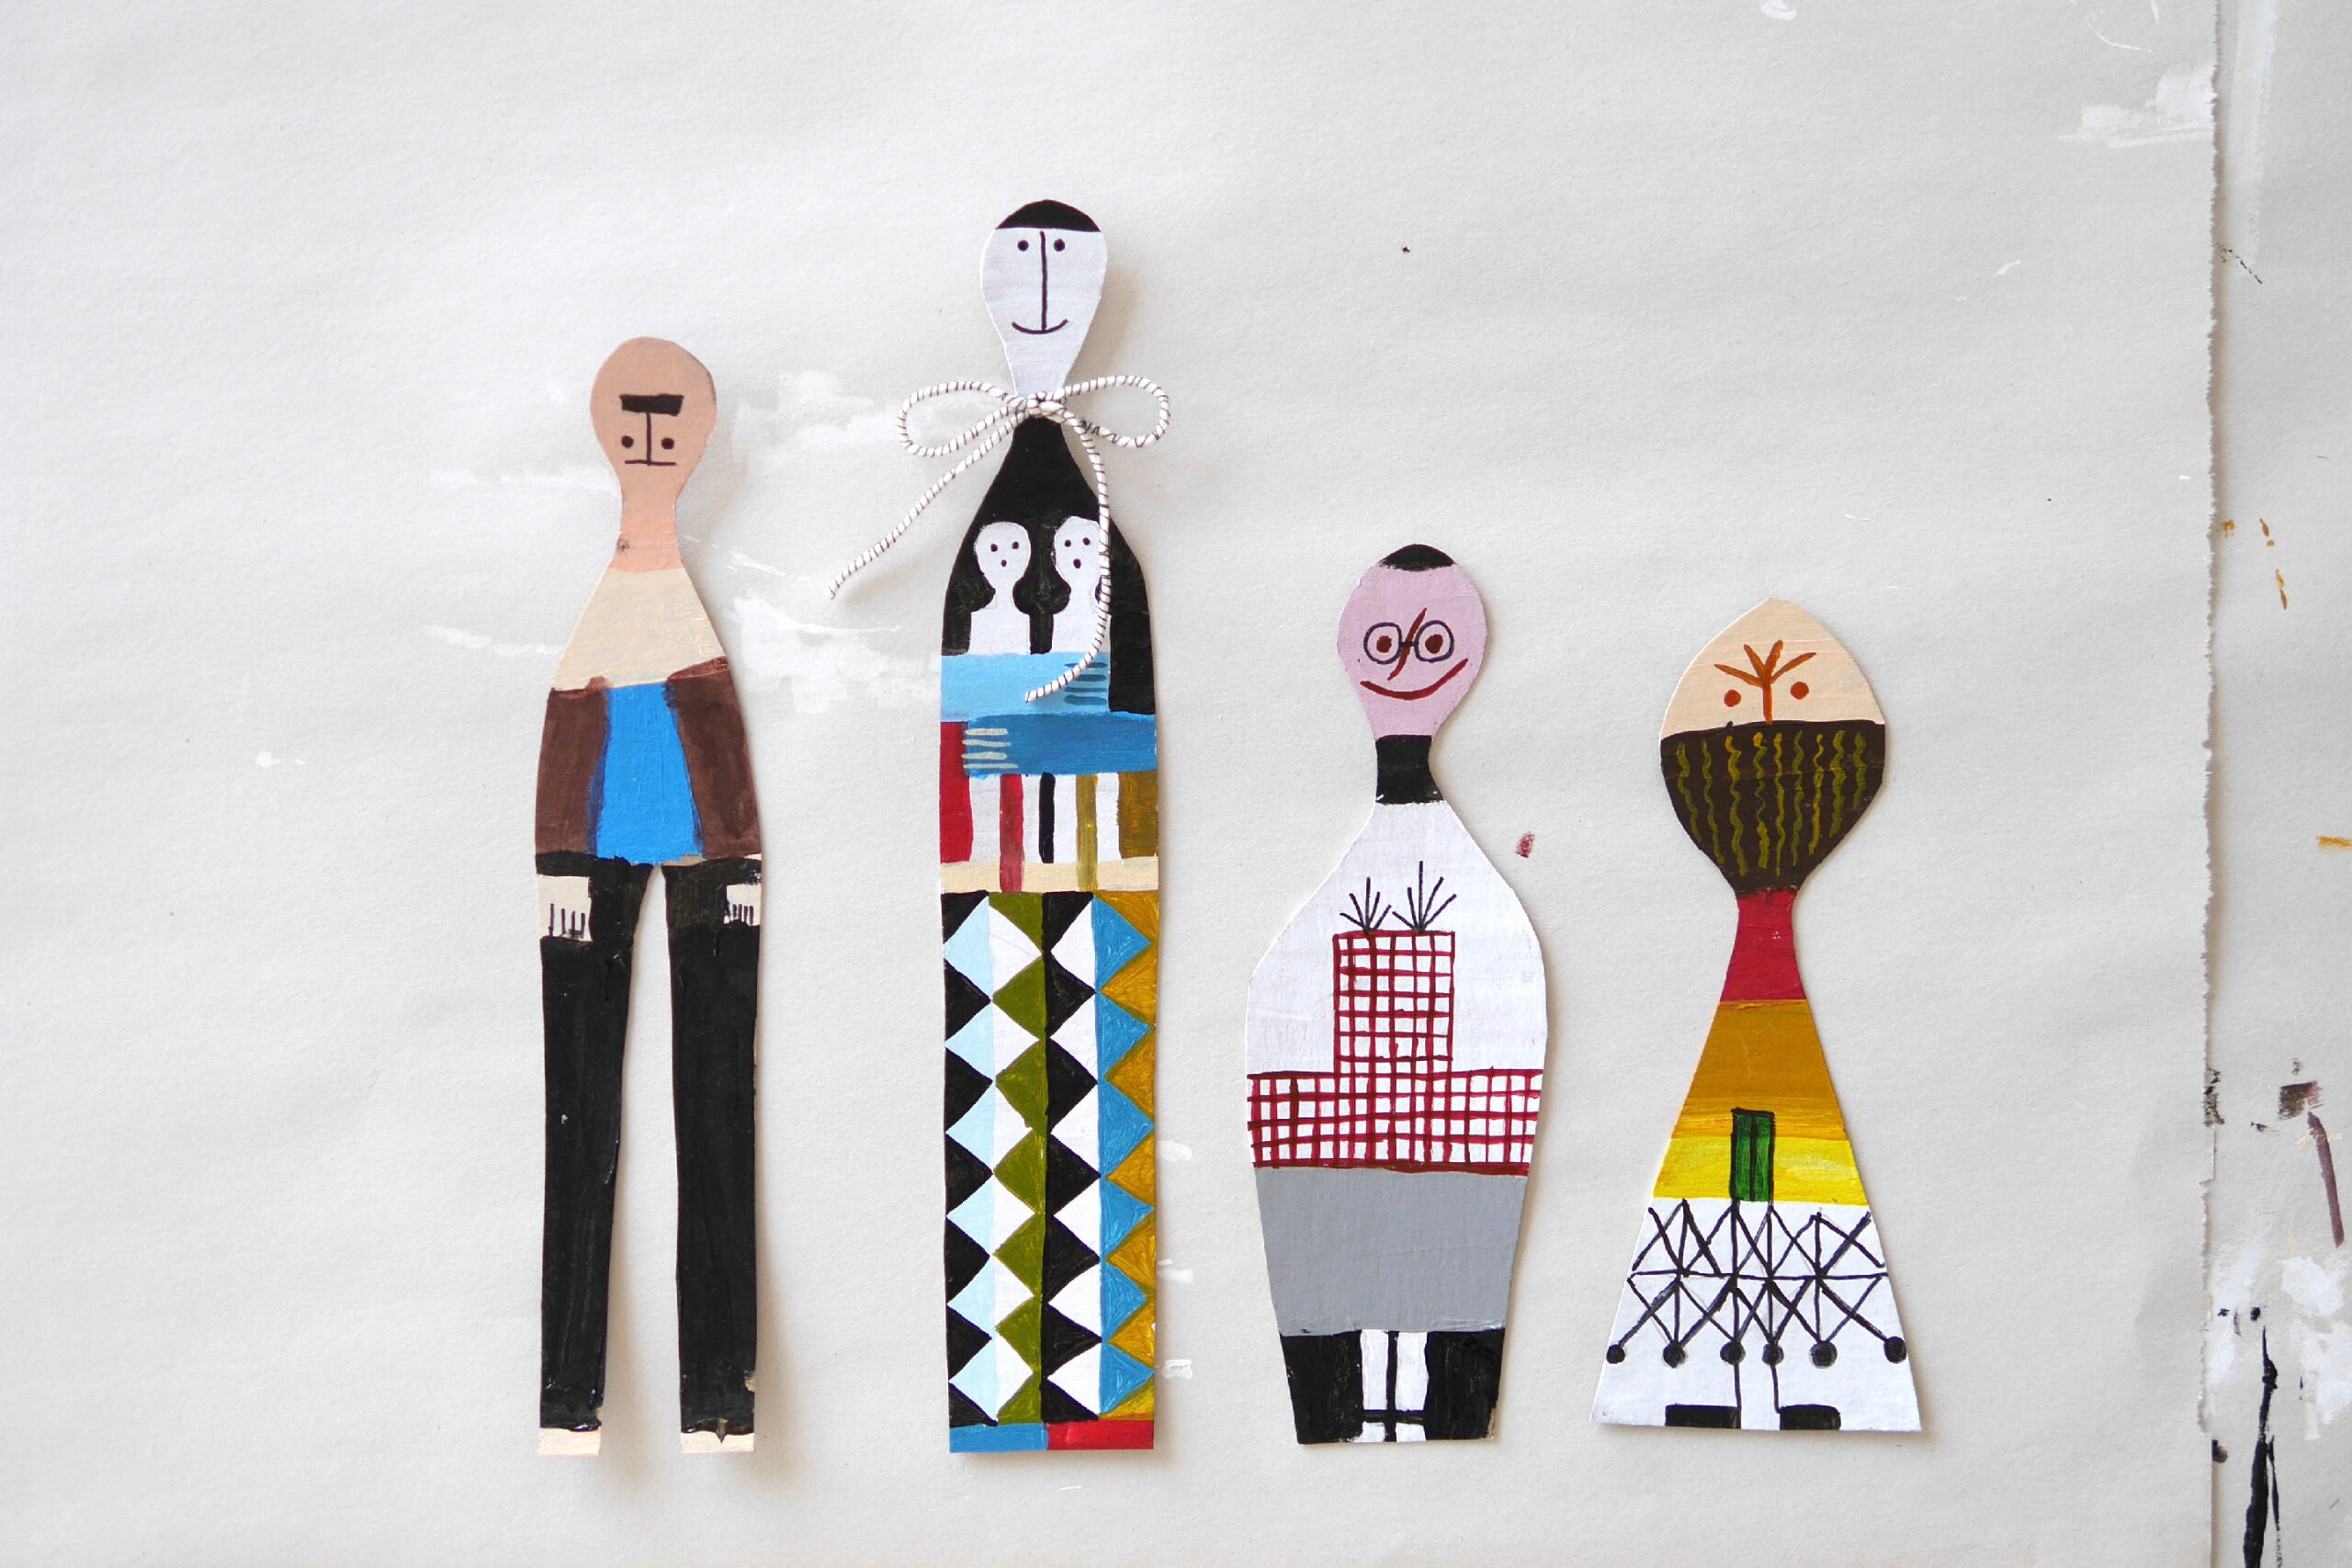
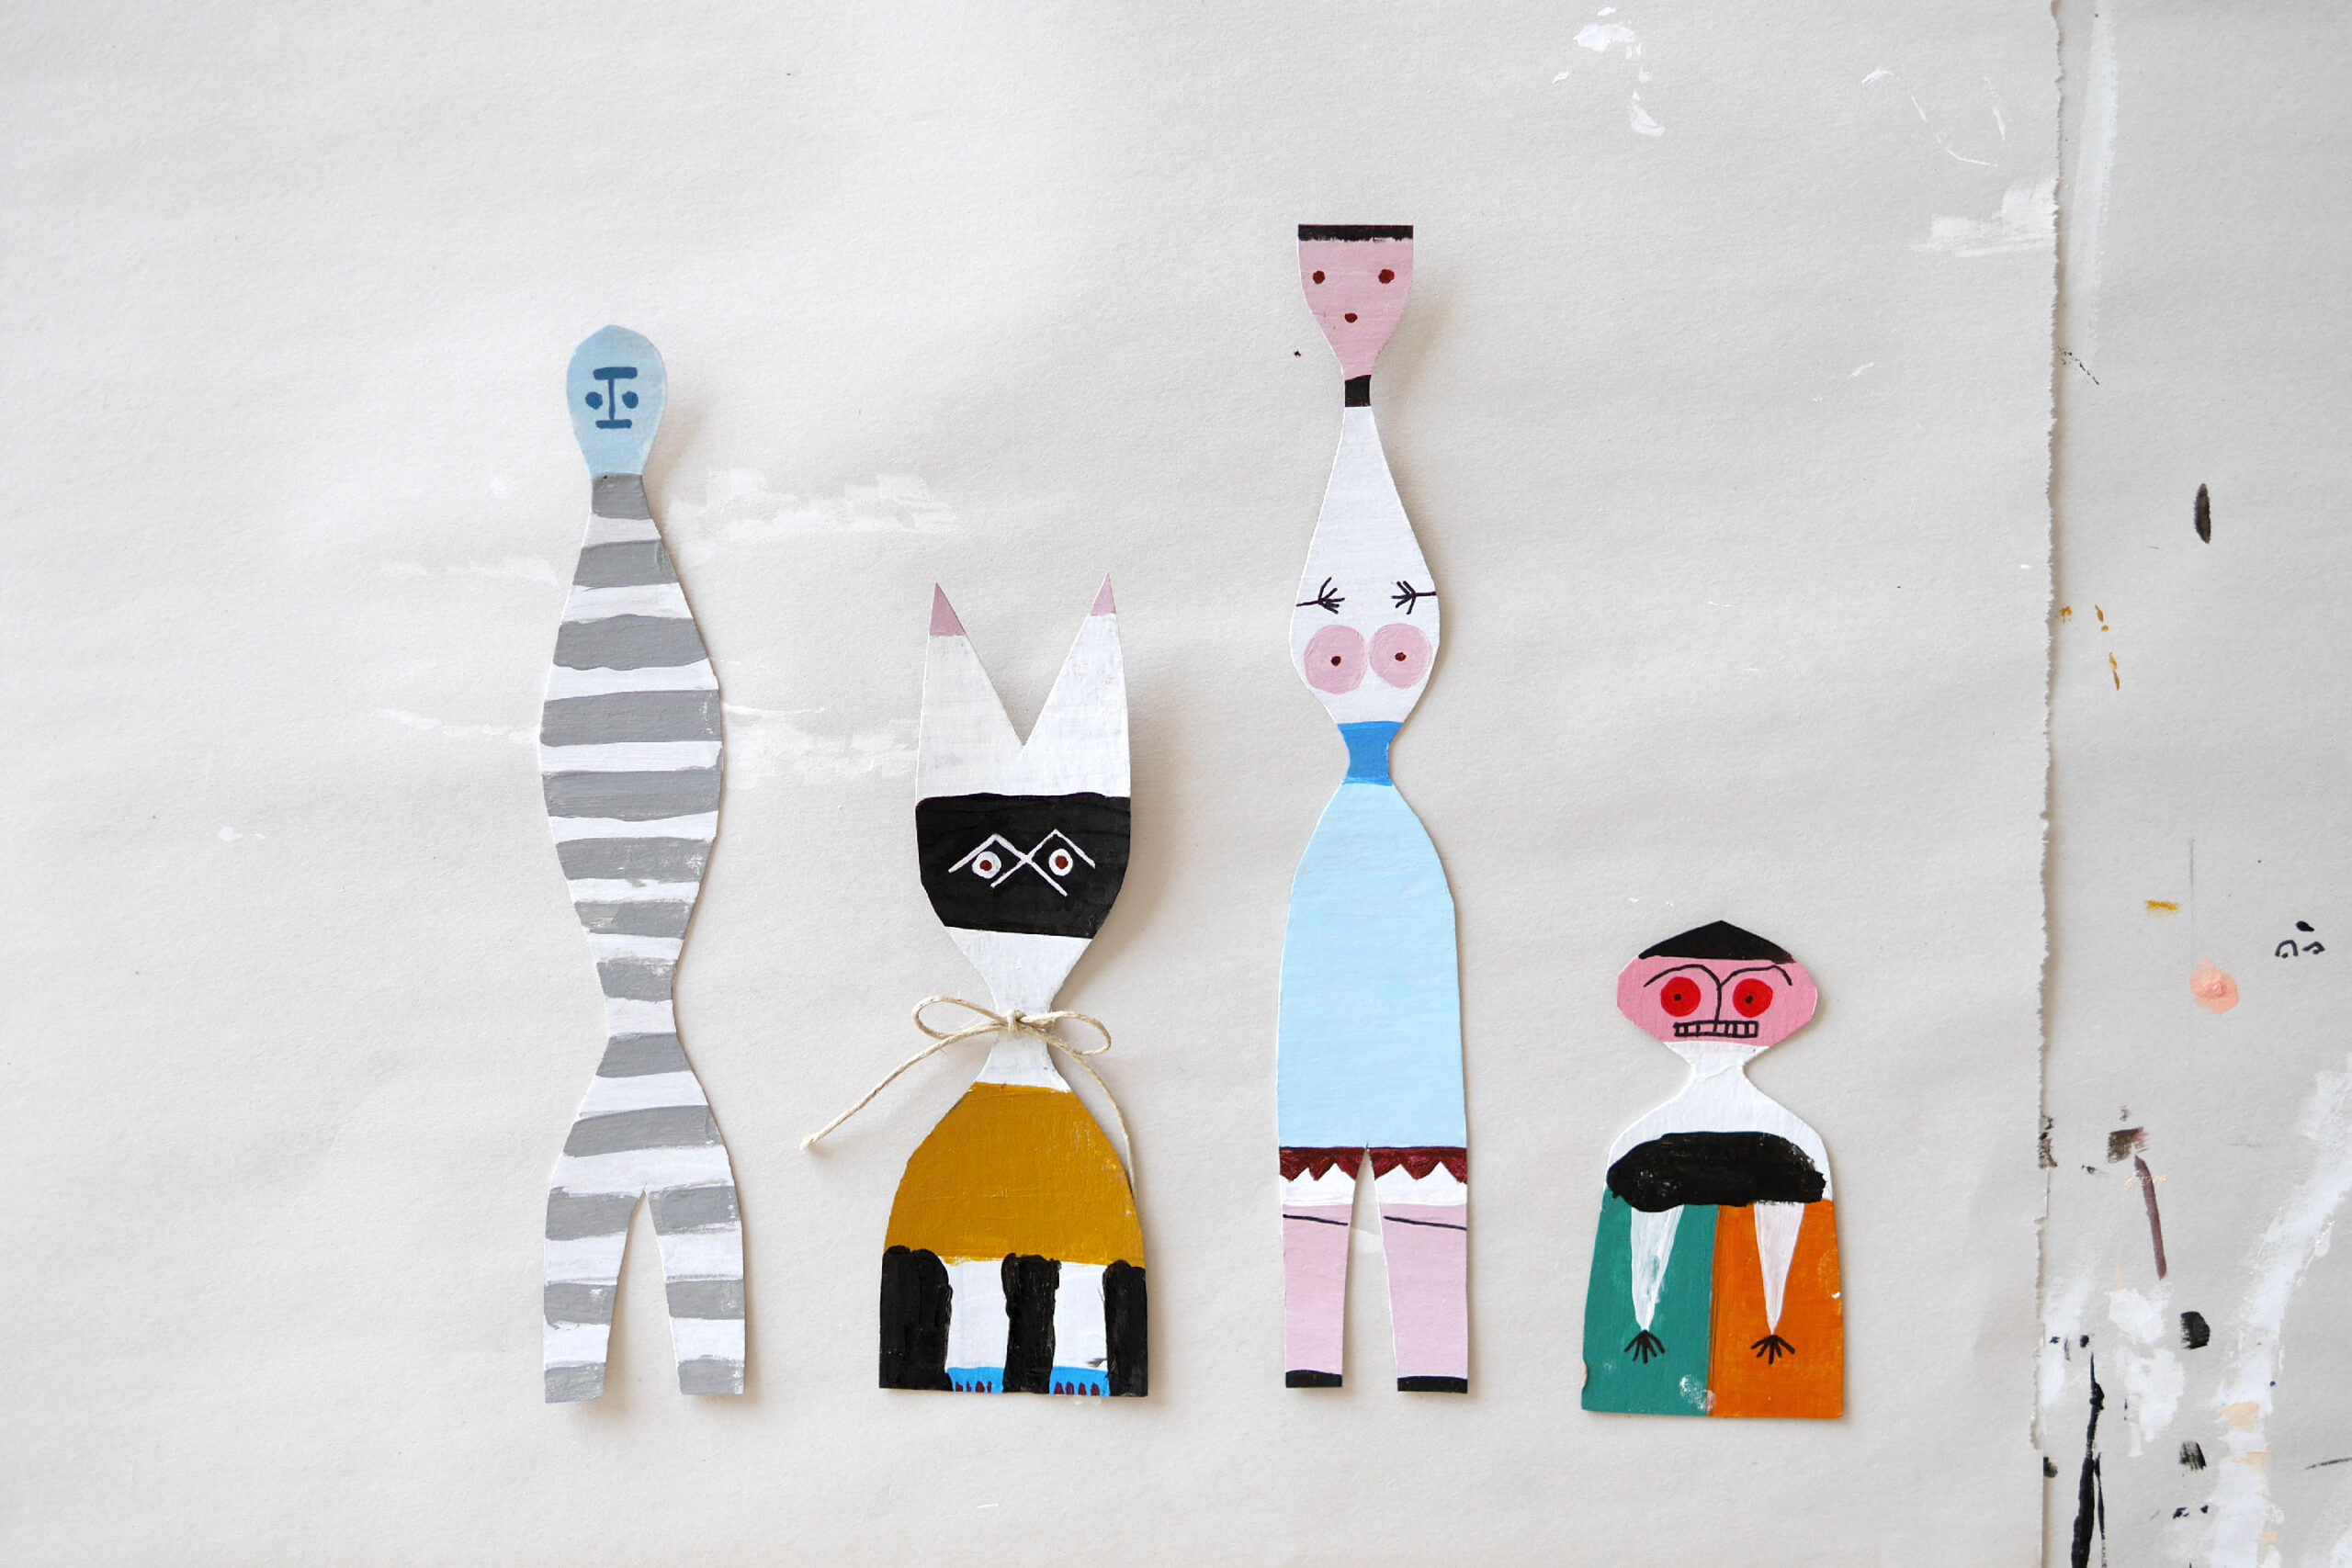
12 Paper Dolls
Here are the 12 paper dolls we made. As a result, this was the perfect craft for parents and children to enjoy together. Mixing the paints, painting the colors, and writing in the details with pens were all enjoyable processes. Converting a wooden three-dimensional piece into a two-dimensional piece using familiar paper also gave it a new fascinate. The colors and lines drawn by the child’s hand perfectly matched this work, and I believe that the generosity of this work gently encompassed everything. Through the reproduction, I was able to experience anew the magnificence of Girard’s work.
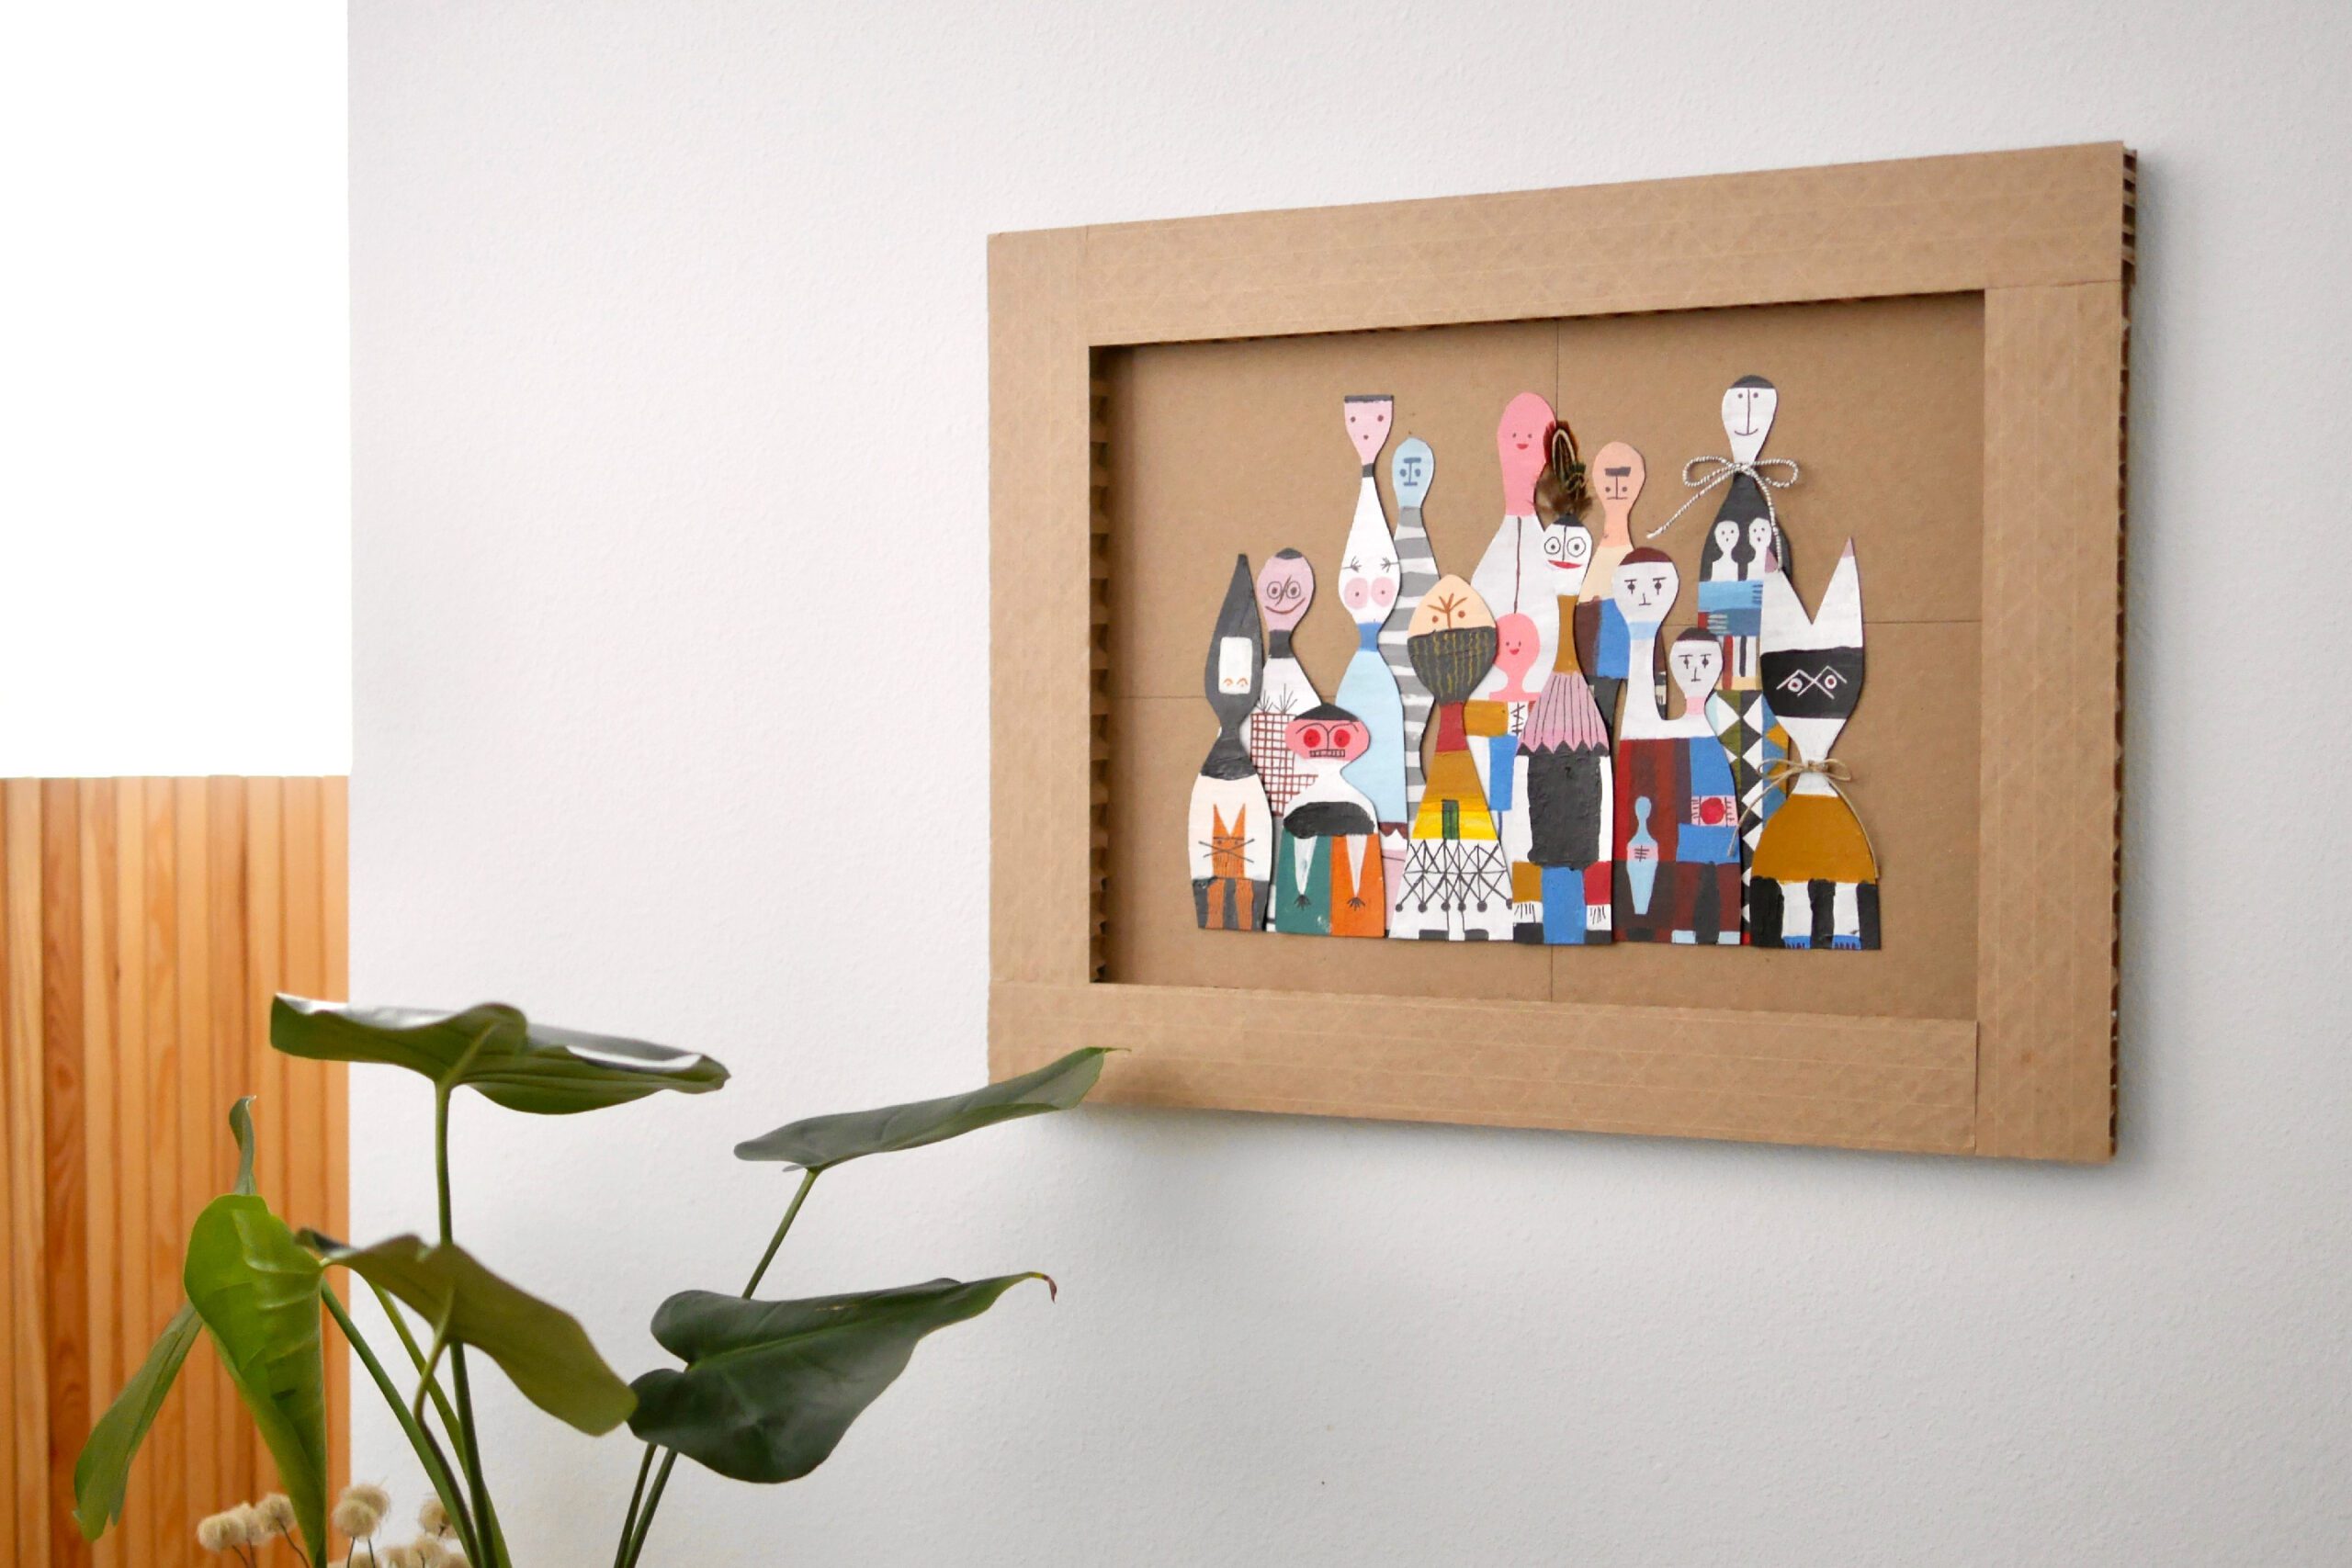
Cardboard Picture Frame
A frame was made from scrap cardboard to display this artwork. The thicker frame is perfect for preserving three-dimensional artwork as well. I will introduce it in the next post.
Wooden Doll on Paper
これは観察し表現することを楽しむために、いまから4年前、娘が5歳の時に取り組んだプロジェクトです。
アメリカを中心としたミッドセンチュリーを代表するデザイナー、アレキサンダー・ジラード。彼の作品の中でも私たちが大好きな”wooden doll”。そのデザインは遊び心満載で、ひとつひとつの人形のユニークな表情や色鮮やかな色彩に魅了されています。
この作品は、実際には無垢の木材を削り出して色付けされた立体のハンドクラフトです。私はこのユニークで美しい立体作品を、娘と一緒に紙に描き、平面で再現しようと思ったのです。ものごとをじっくり見るということ。そして見たものをそのまま、この手で表現するということ。単に視覚的に見る作業だけでなく、色をつくり、形を再現し、構築する。身体感覚を使い同じものを描くことで,作者がその作品を生み出したプロセスを追体験する。モチーフのユニークさに引っ張られる様に、私たちは夢中でつくりました。そして出来上がったのがこの12体のpaper dollです。
用意するもの
– 見本となるwooden dollの画像*
– カードボード *0.5mmほどの厚さ
– 鉛筆
– ハサミ
– アクリル絵の具
– 絵筆
– ディテールを描くための黒いペン
– 飾りとなる羽や紐
*Alexander Girard wooden dollと検索するといくつかの画像が出て来ます。真正面から撮られた写真を見本として使うといいでしょう。
つくりかた
Step 1. 形を写す
22種類もの愛らしいwooden dollから、描きたいものをピックアップします。選んだ見本となる画像をプリンターで出力して、形に沿って切り取ります。出力の大きさは任意です。今回私たちは実物大となるように、4~10インチほど高さになるように出力しました。
カードボードに見本の形を書き写し、線に沿って切り抜きます。
Step 2. ディテールを描く
形を切り抜いたカードボードに、鉛筆でディテールを書き込みます。
Step 3. 色を塗る
下絵に沿って、着彩します。見本の色をよく見て、絵の具を混ぜて色をつくります。白や、ペールトーンなどの明るい色から塗るといいでしょう。徐々に青や黒などの濃い色を塗って仕上げていきます。
Step 3. ディテールを描く
顔や服の模様などの細かい部分はペンを使って仕上げていきます。見本をよく見て、慎重に。いくつかの人形には羽や紐の飾りがついています。
12体のpaper doll
こちらが私たちがつくった12体のpaper dollです。結果的にこれは親子で楽しめる完璧なクラフトでした。絵の具を混ぜるのも、色を塗るのも、ペンでディテールを書き込むのも、全てが楽しい工程でした。木製の立体作品を、身近な紙を用いて平面作品に変換することで、新たな魅力を感じることもできました。子どもの手で描かれる色や線がこの作品に完全にマッチしていて、この作品の持つ大らかさで全てをやさしく包み込んでくれたのだと思います。模写を通して改めてジラードの作品の素晴らしさを体感できました。
廃材のフレーム
この作品を飾るために廃材を使ってフレームをつくりました。厚めのフレームは、立体的な作品の保存にも最適です。次回のポストでご紹介します。