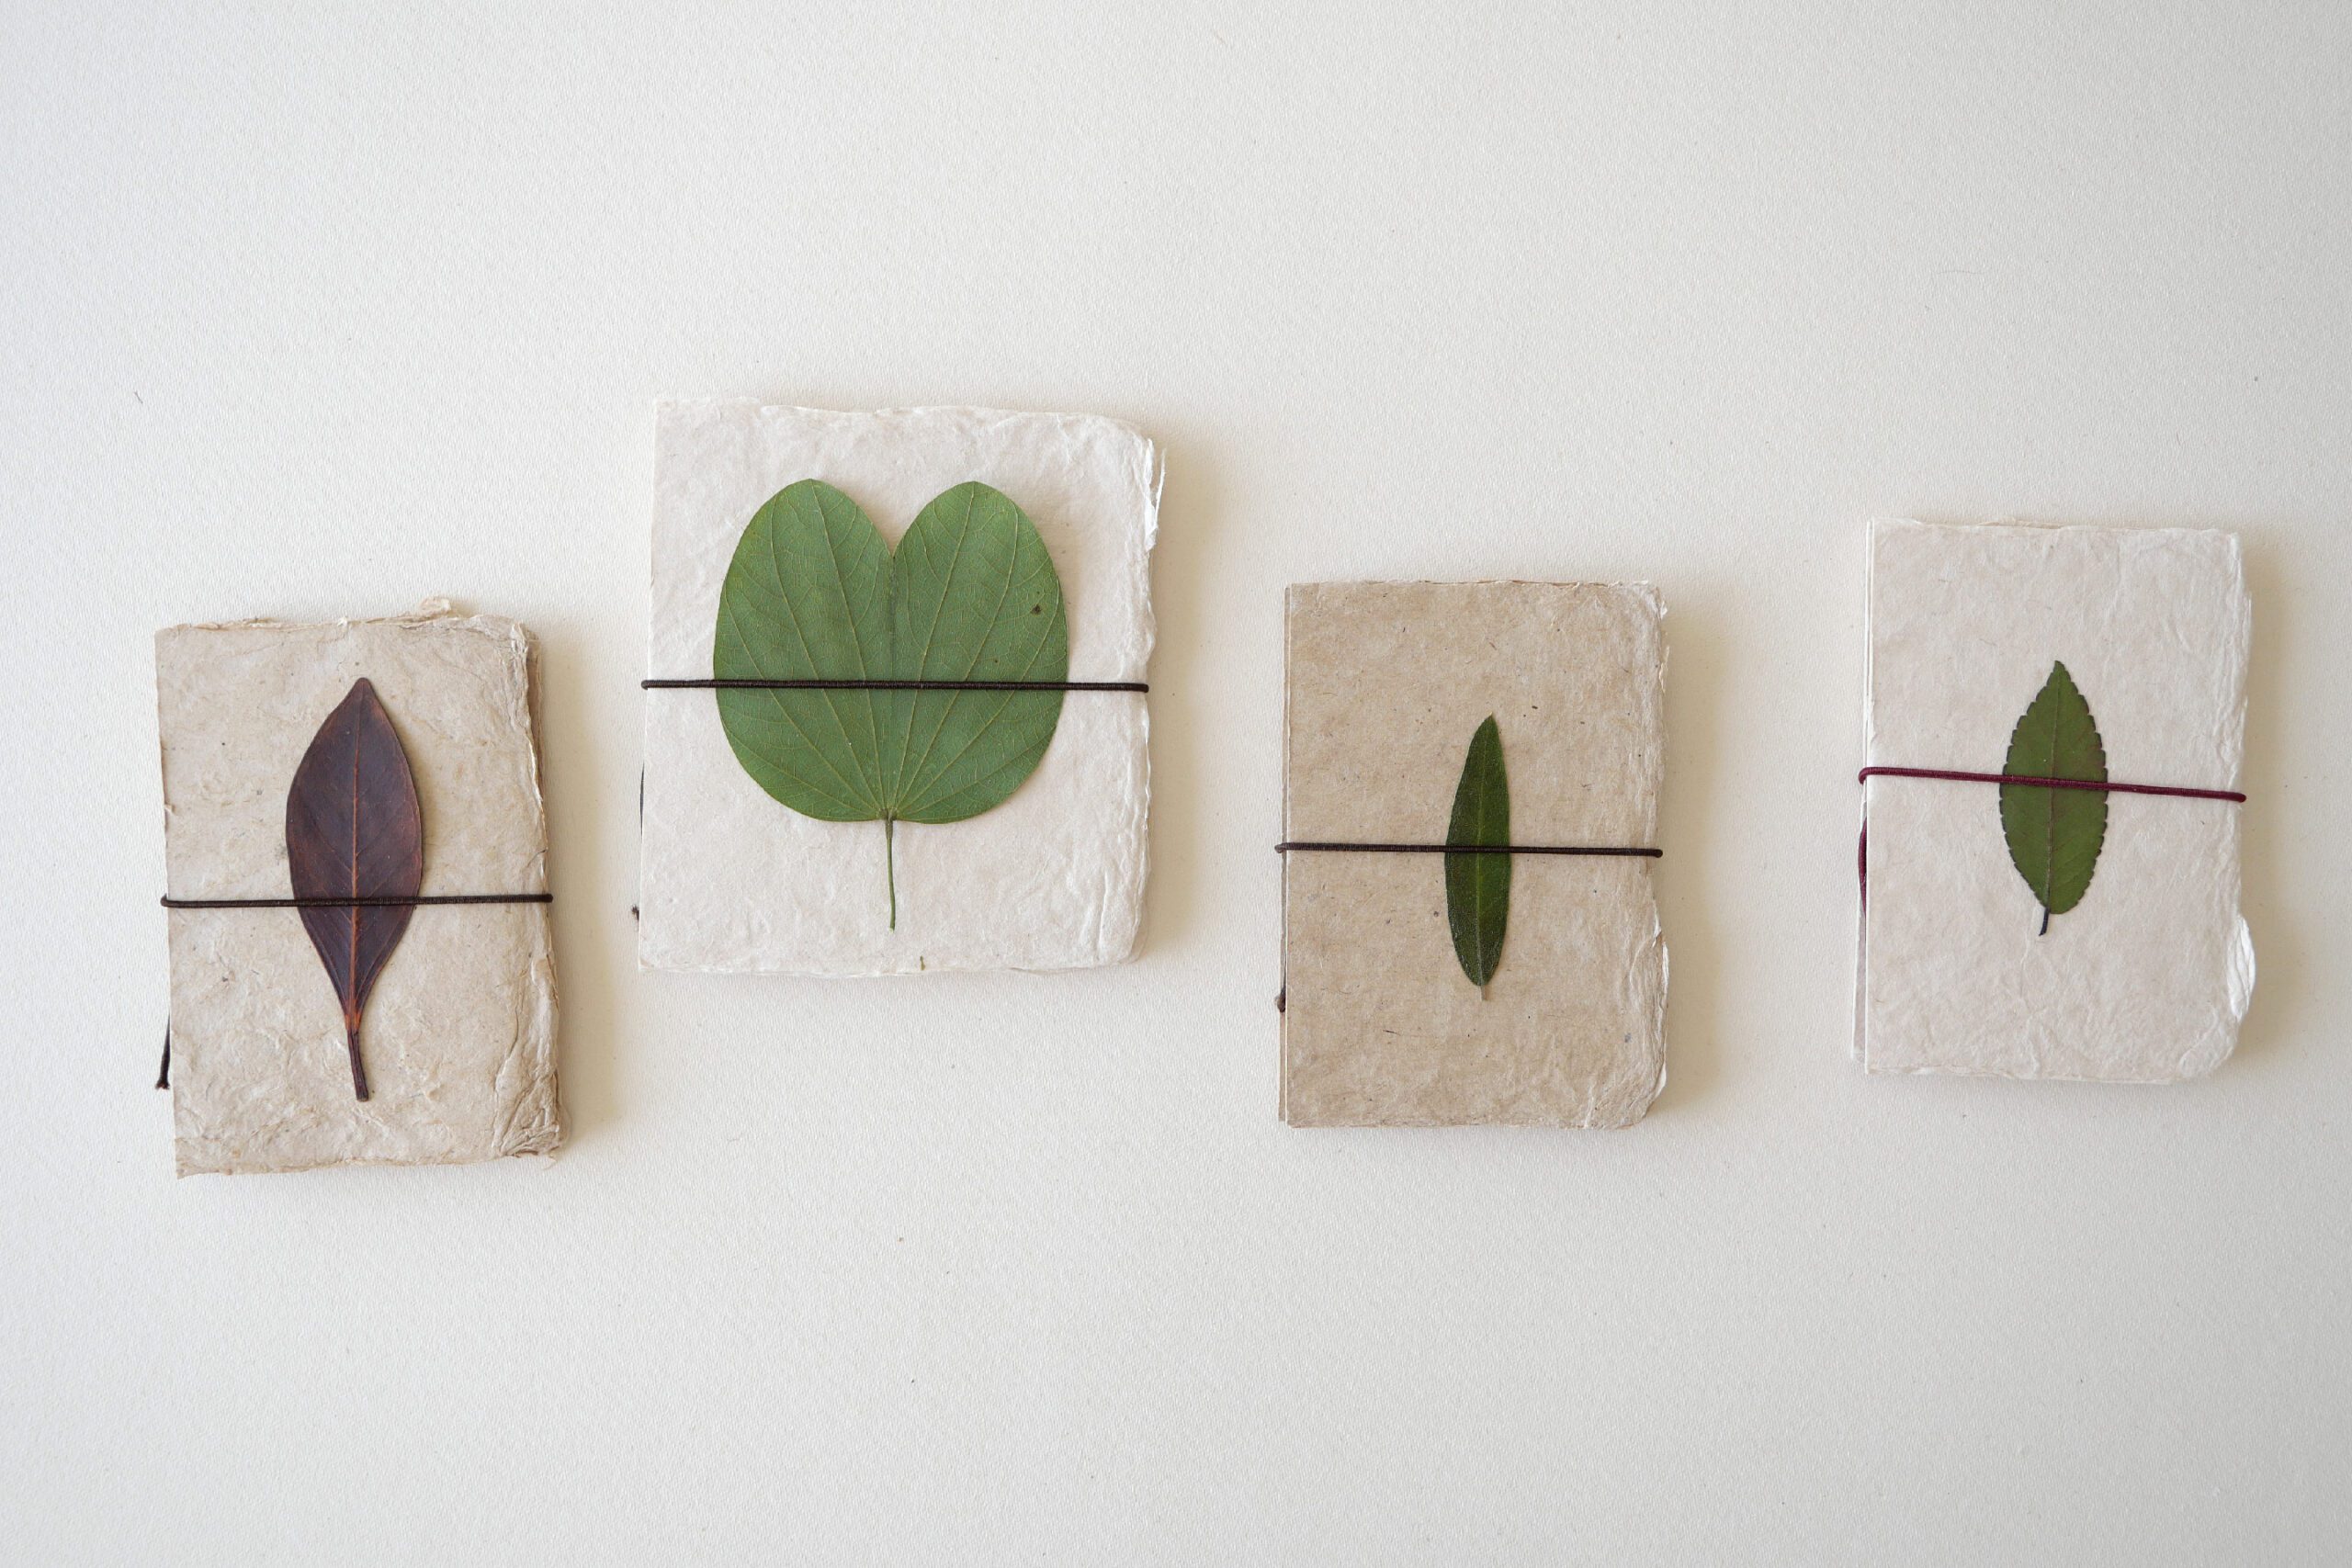
Fallen Leaves Pocket Journal
There is a Japanese children’s song that I have been familiar with since I was a small child, “Chiisai aki mitsutte” (“I found a small autumn”). It was a beautiful melody, and even now I remember this song in the fall.
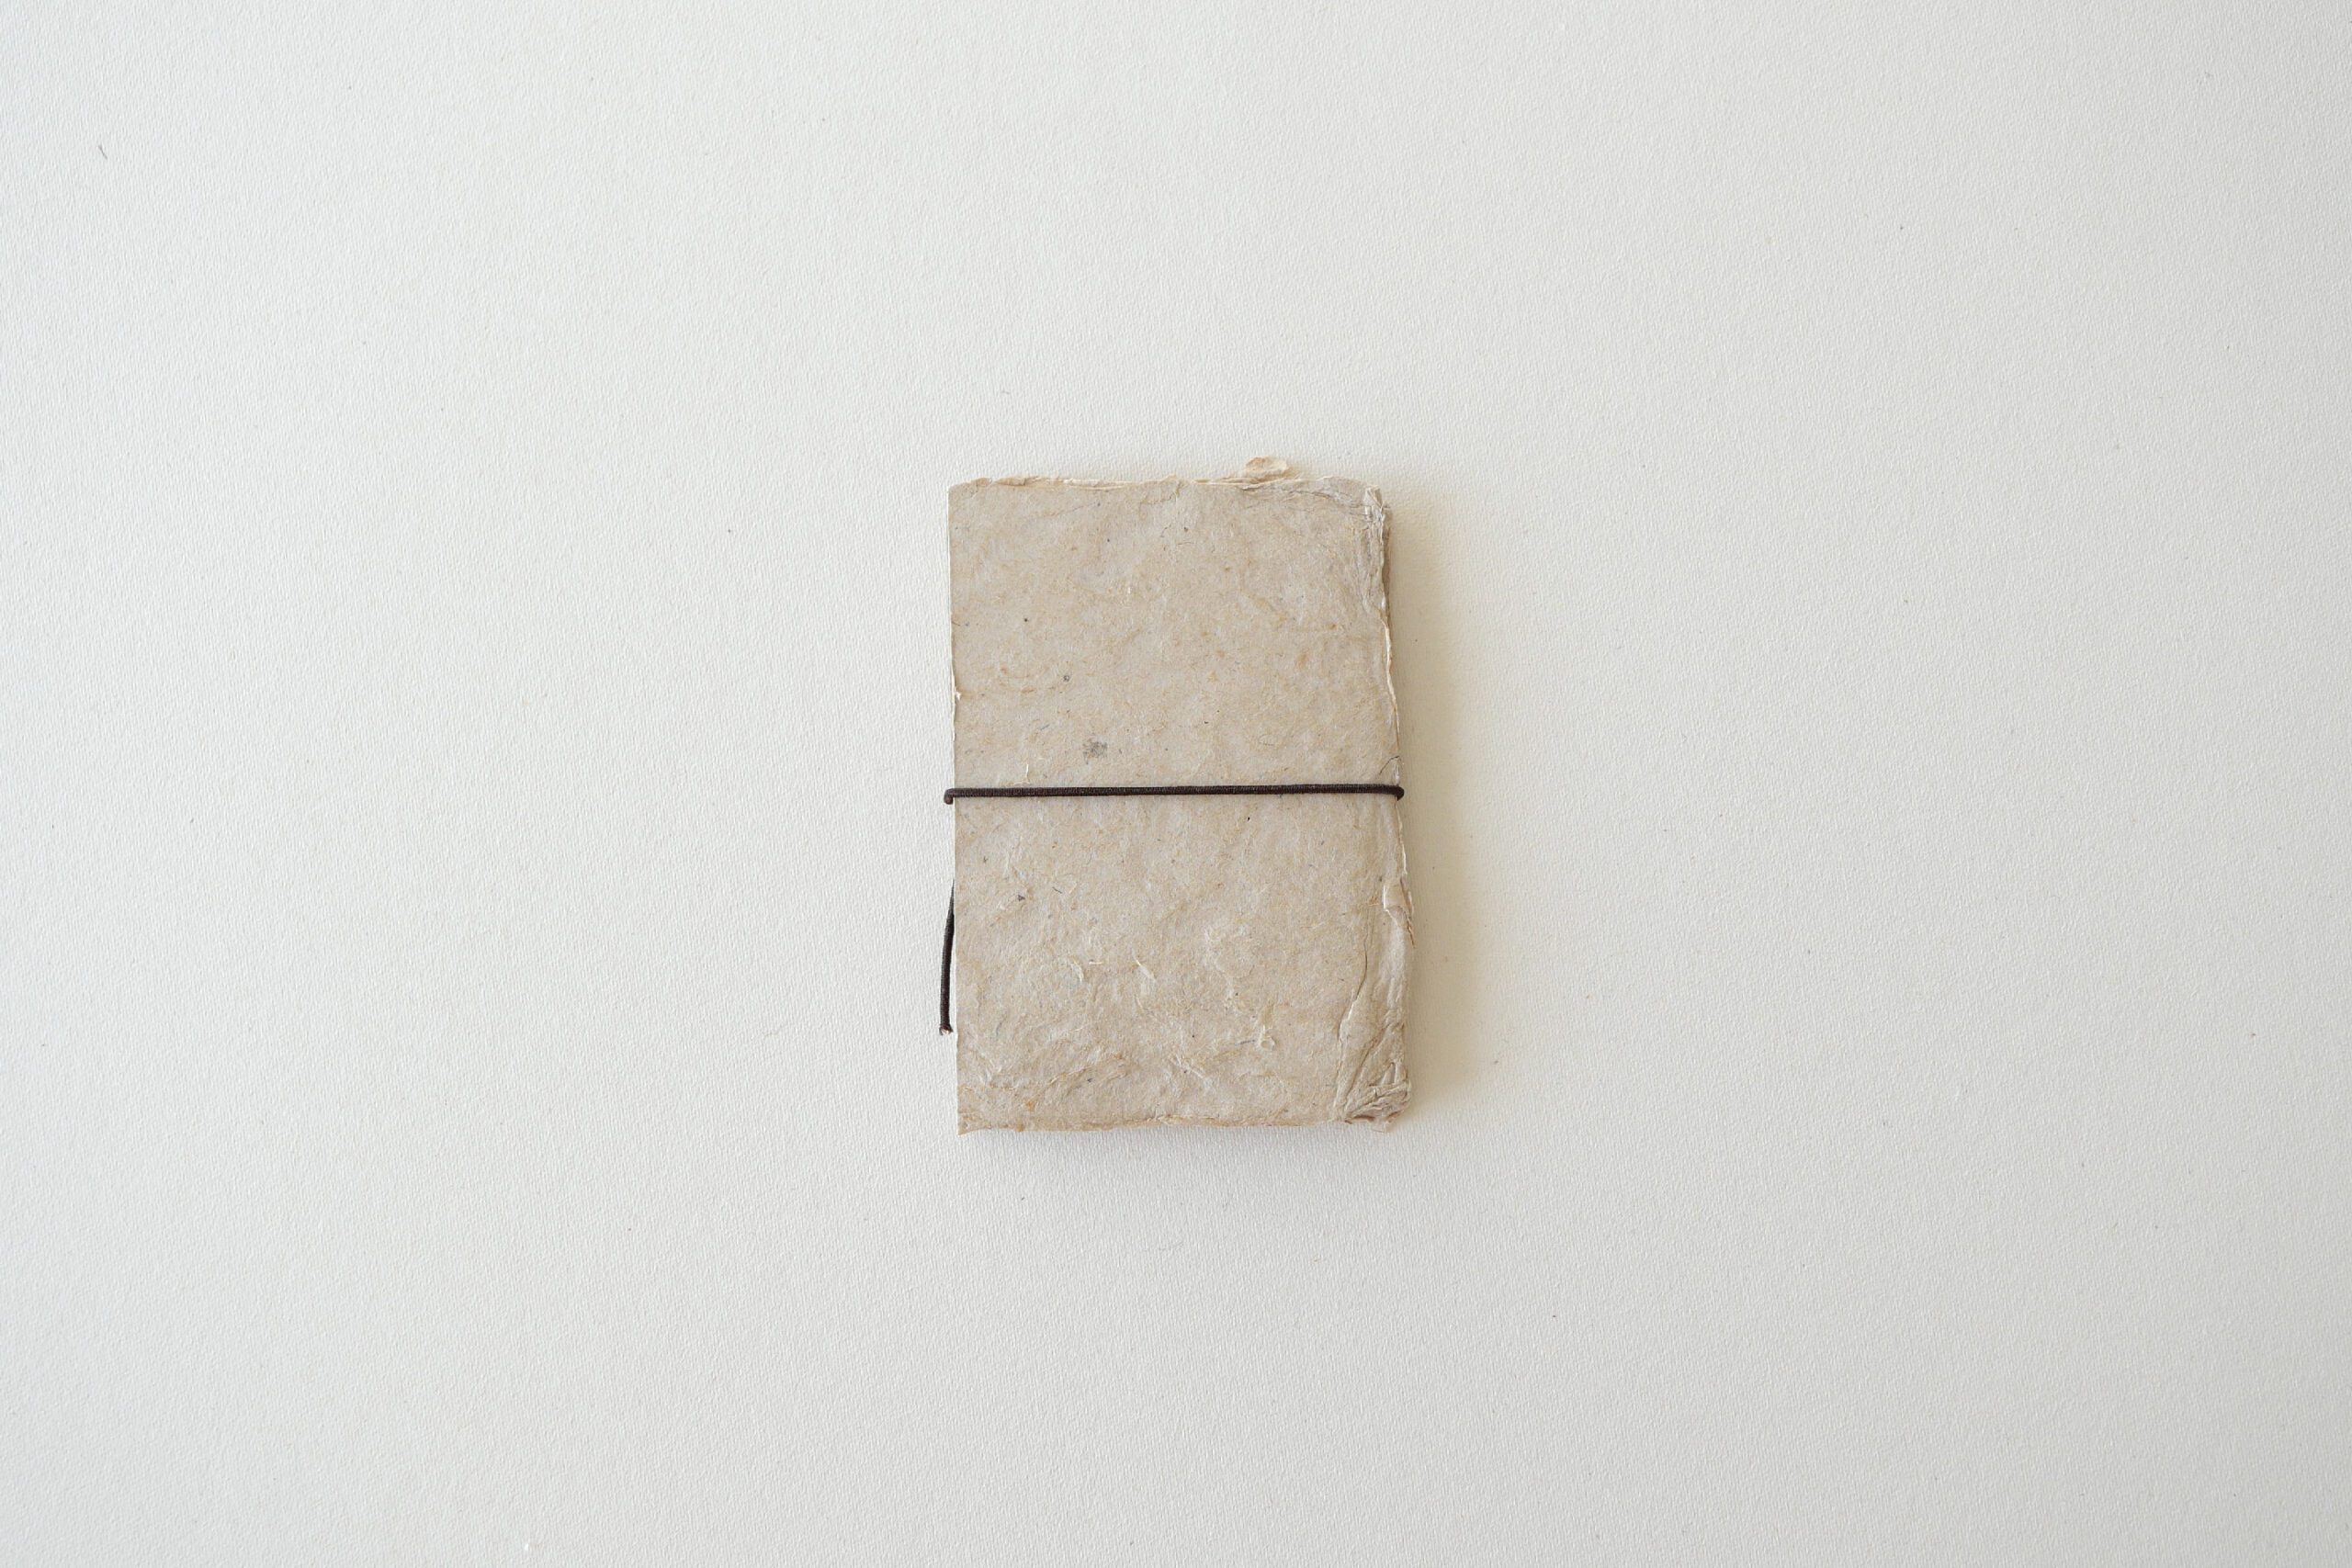
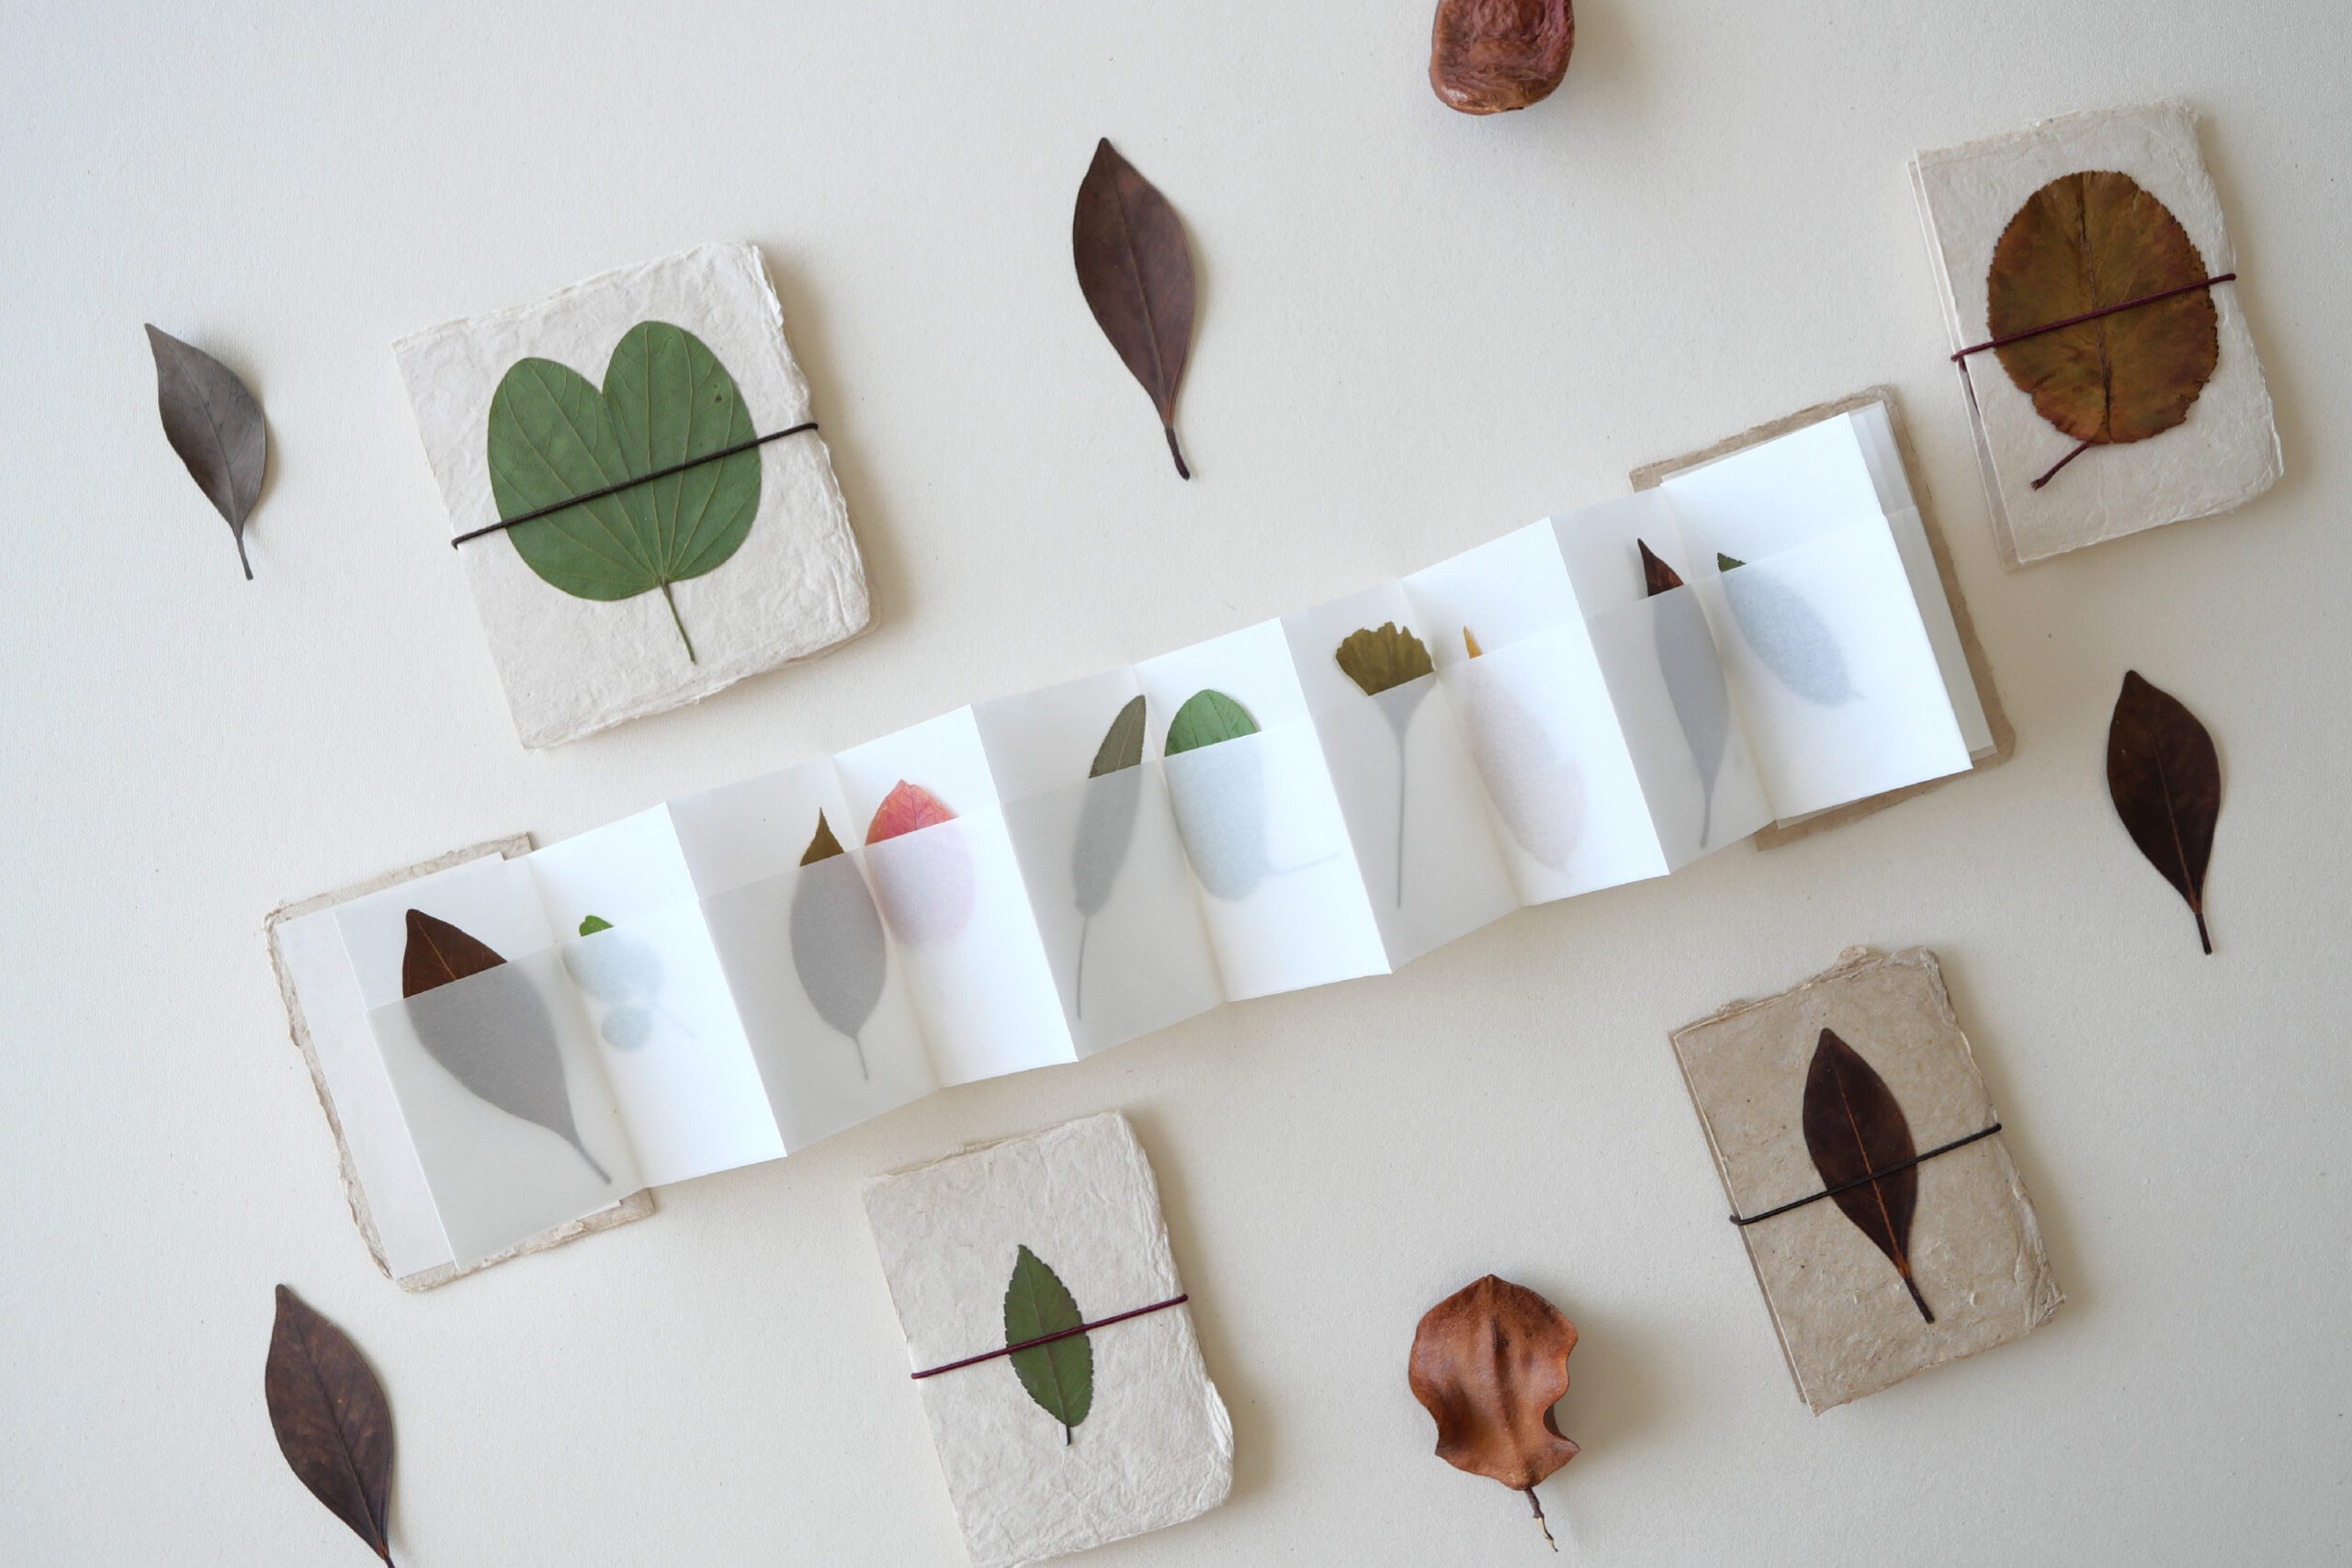
This pocket journal is for collecting a tiny autumn. Pick up some fallen leaves on your walk and put them in this pocket. Leaves of various colors, shapes, and sizes are stored as a collection of pressed leaves.
Fold tracing paper into a bellows, attach a cover and secure it with an elastic band. If you don’t have tracing paper on hand, wax paper or parchment paper would be a great alternative. You can change the size and the number of pockets as you wish. I look forward to taking this with me on our autumn walks.
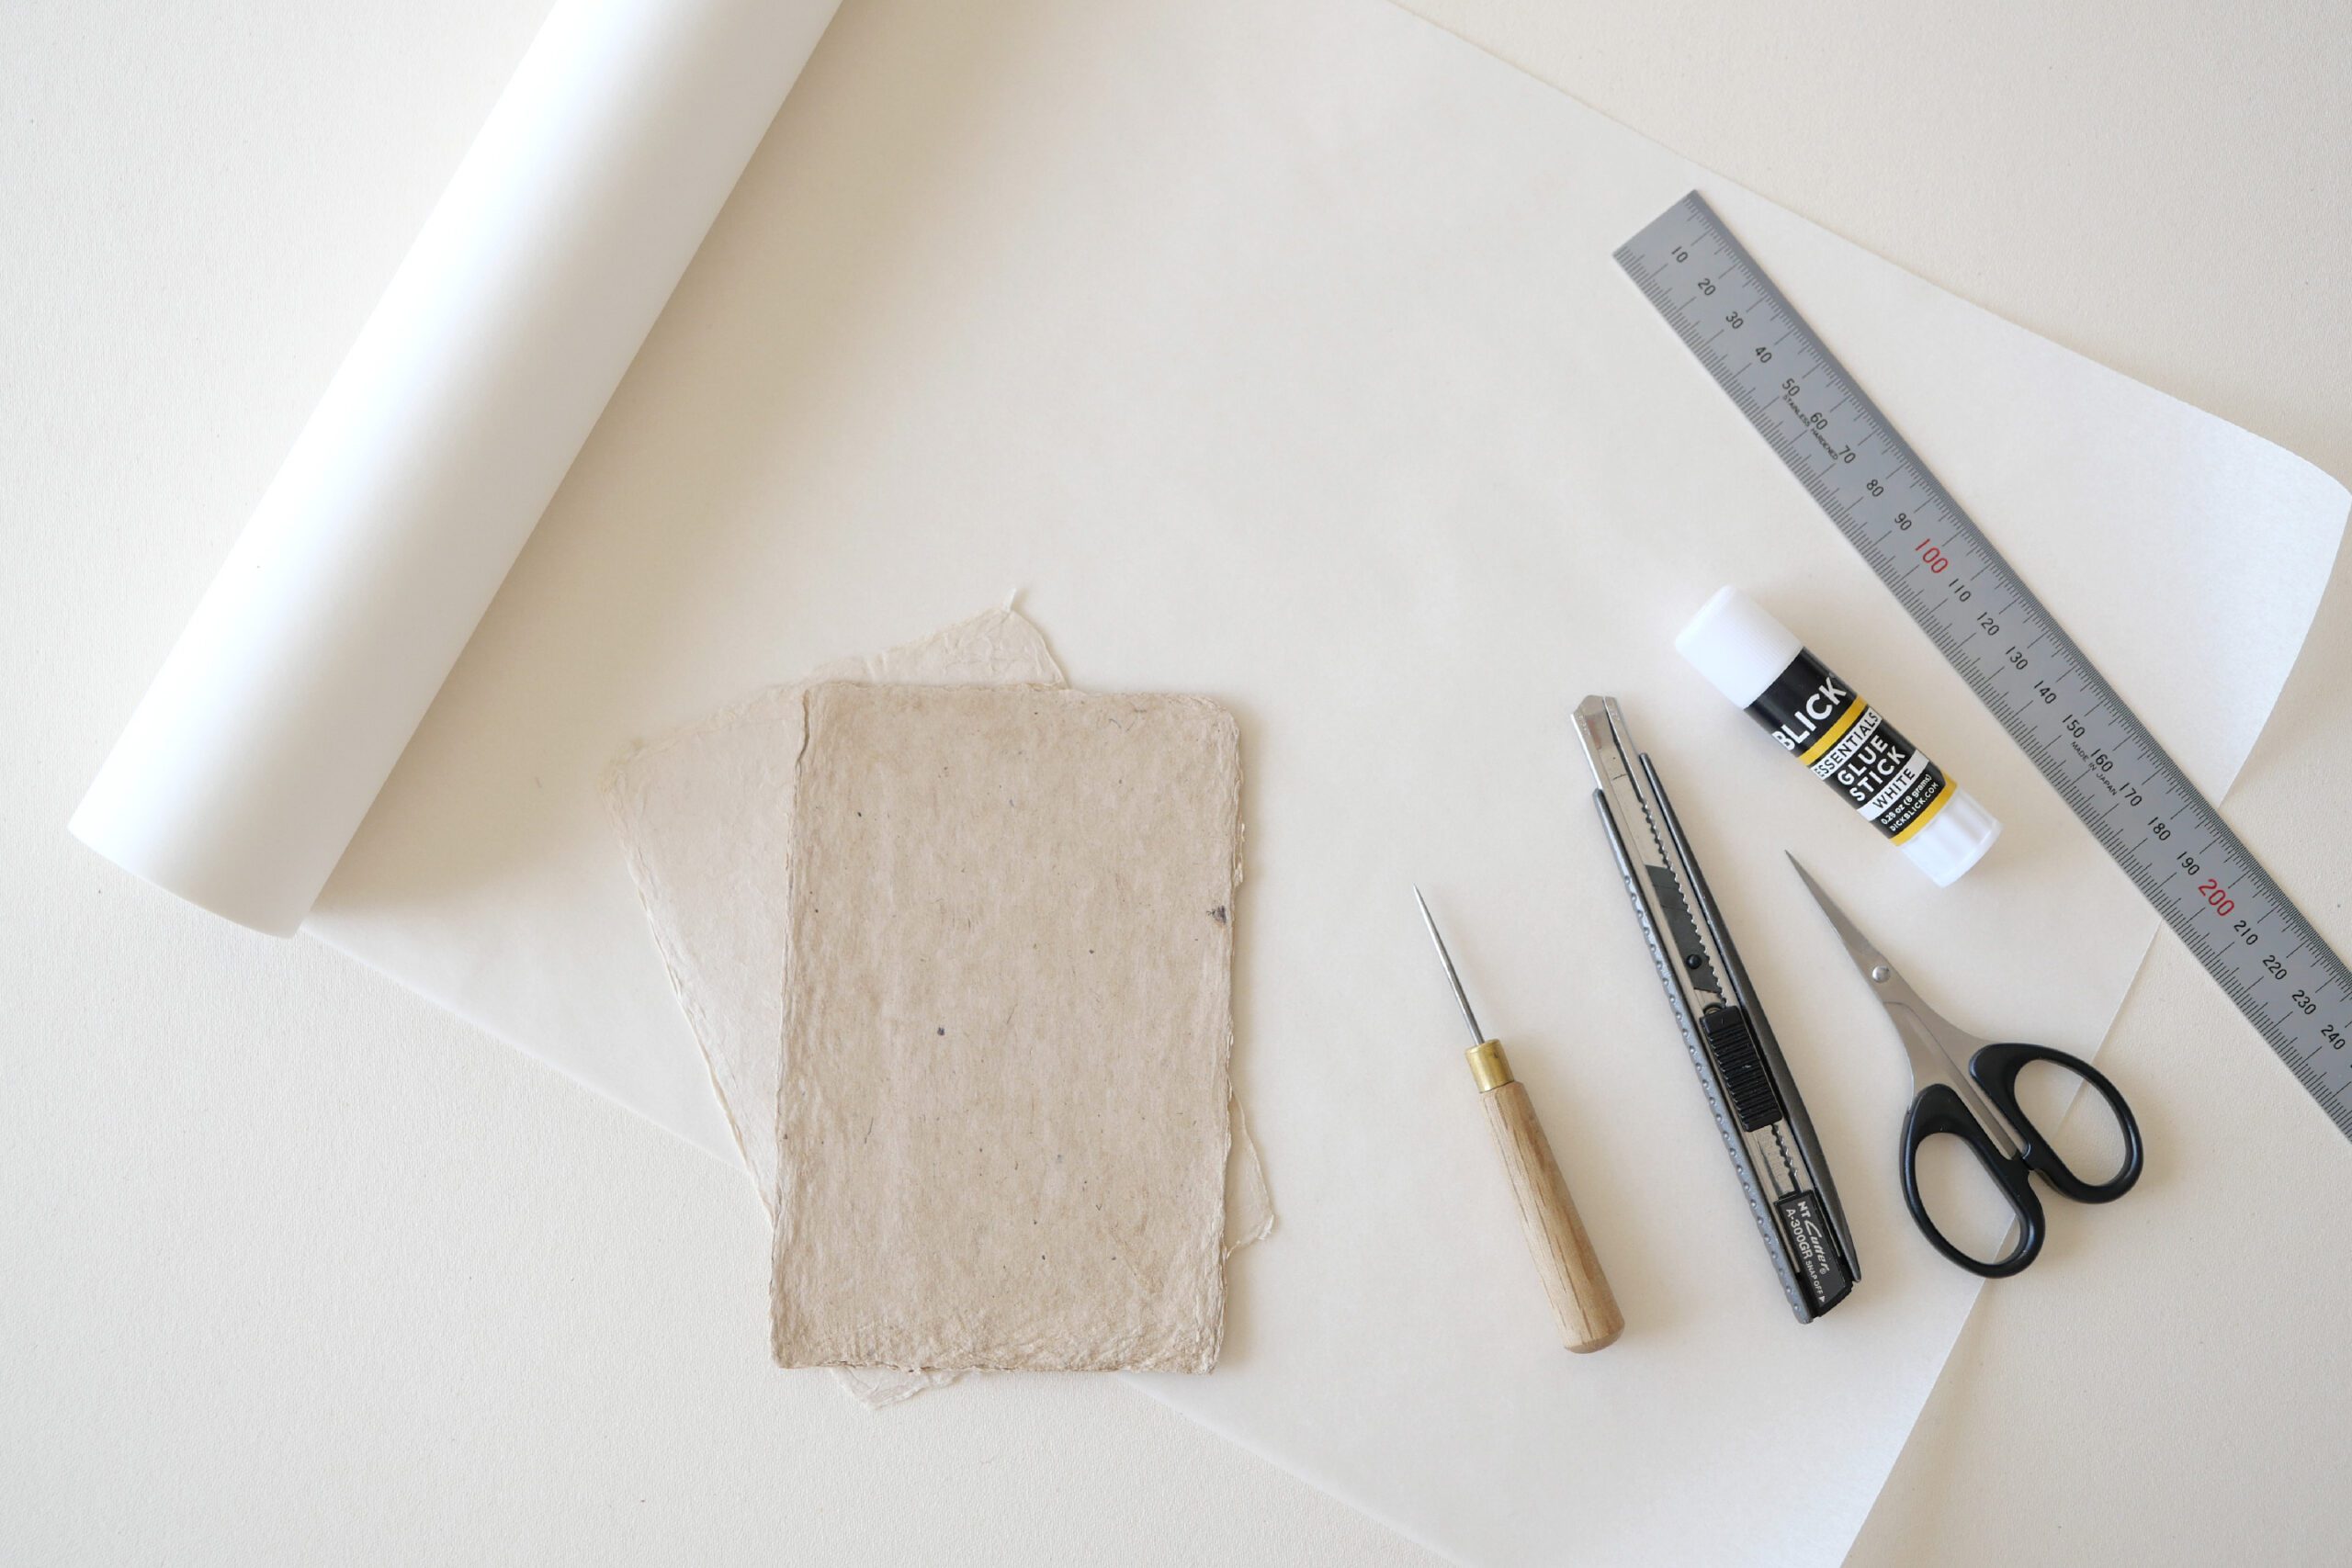
Materials
– Tracing paper*.
– Card board to serve as cover
– Elastic band
– Glue
– Scissors
– Cutter
– Hole punch or awl
*In this case, I used 3 ft.(about 90 mm) x 12-inch roll of tracing paper to make 14 pockets. You can change the size and number of pockets as you wish.
Instructions for making
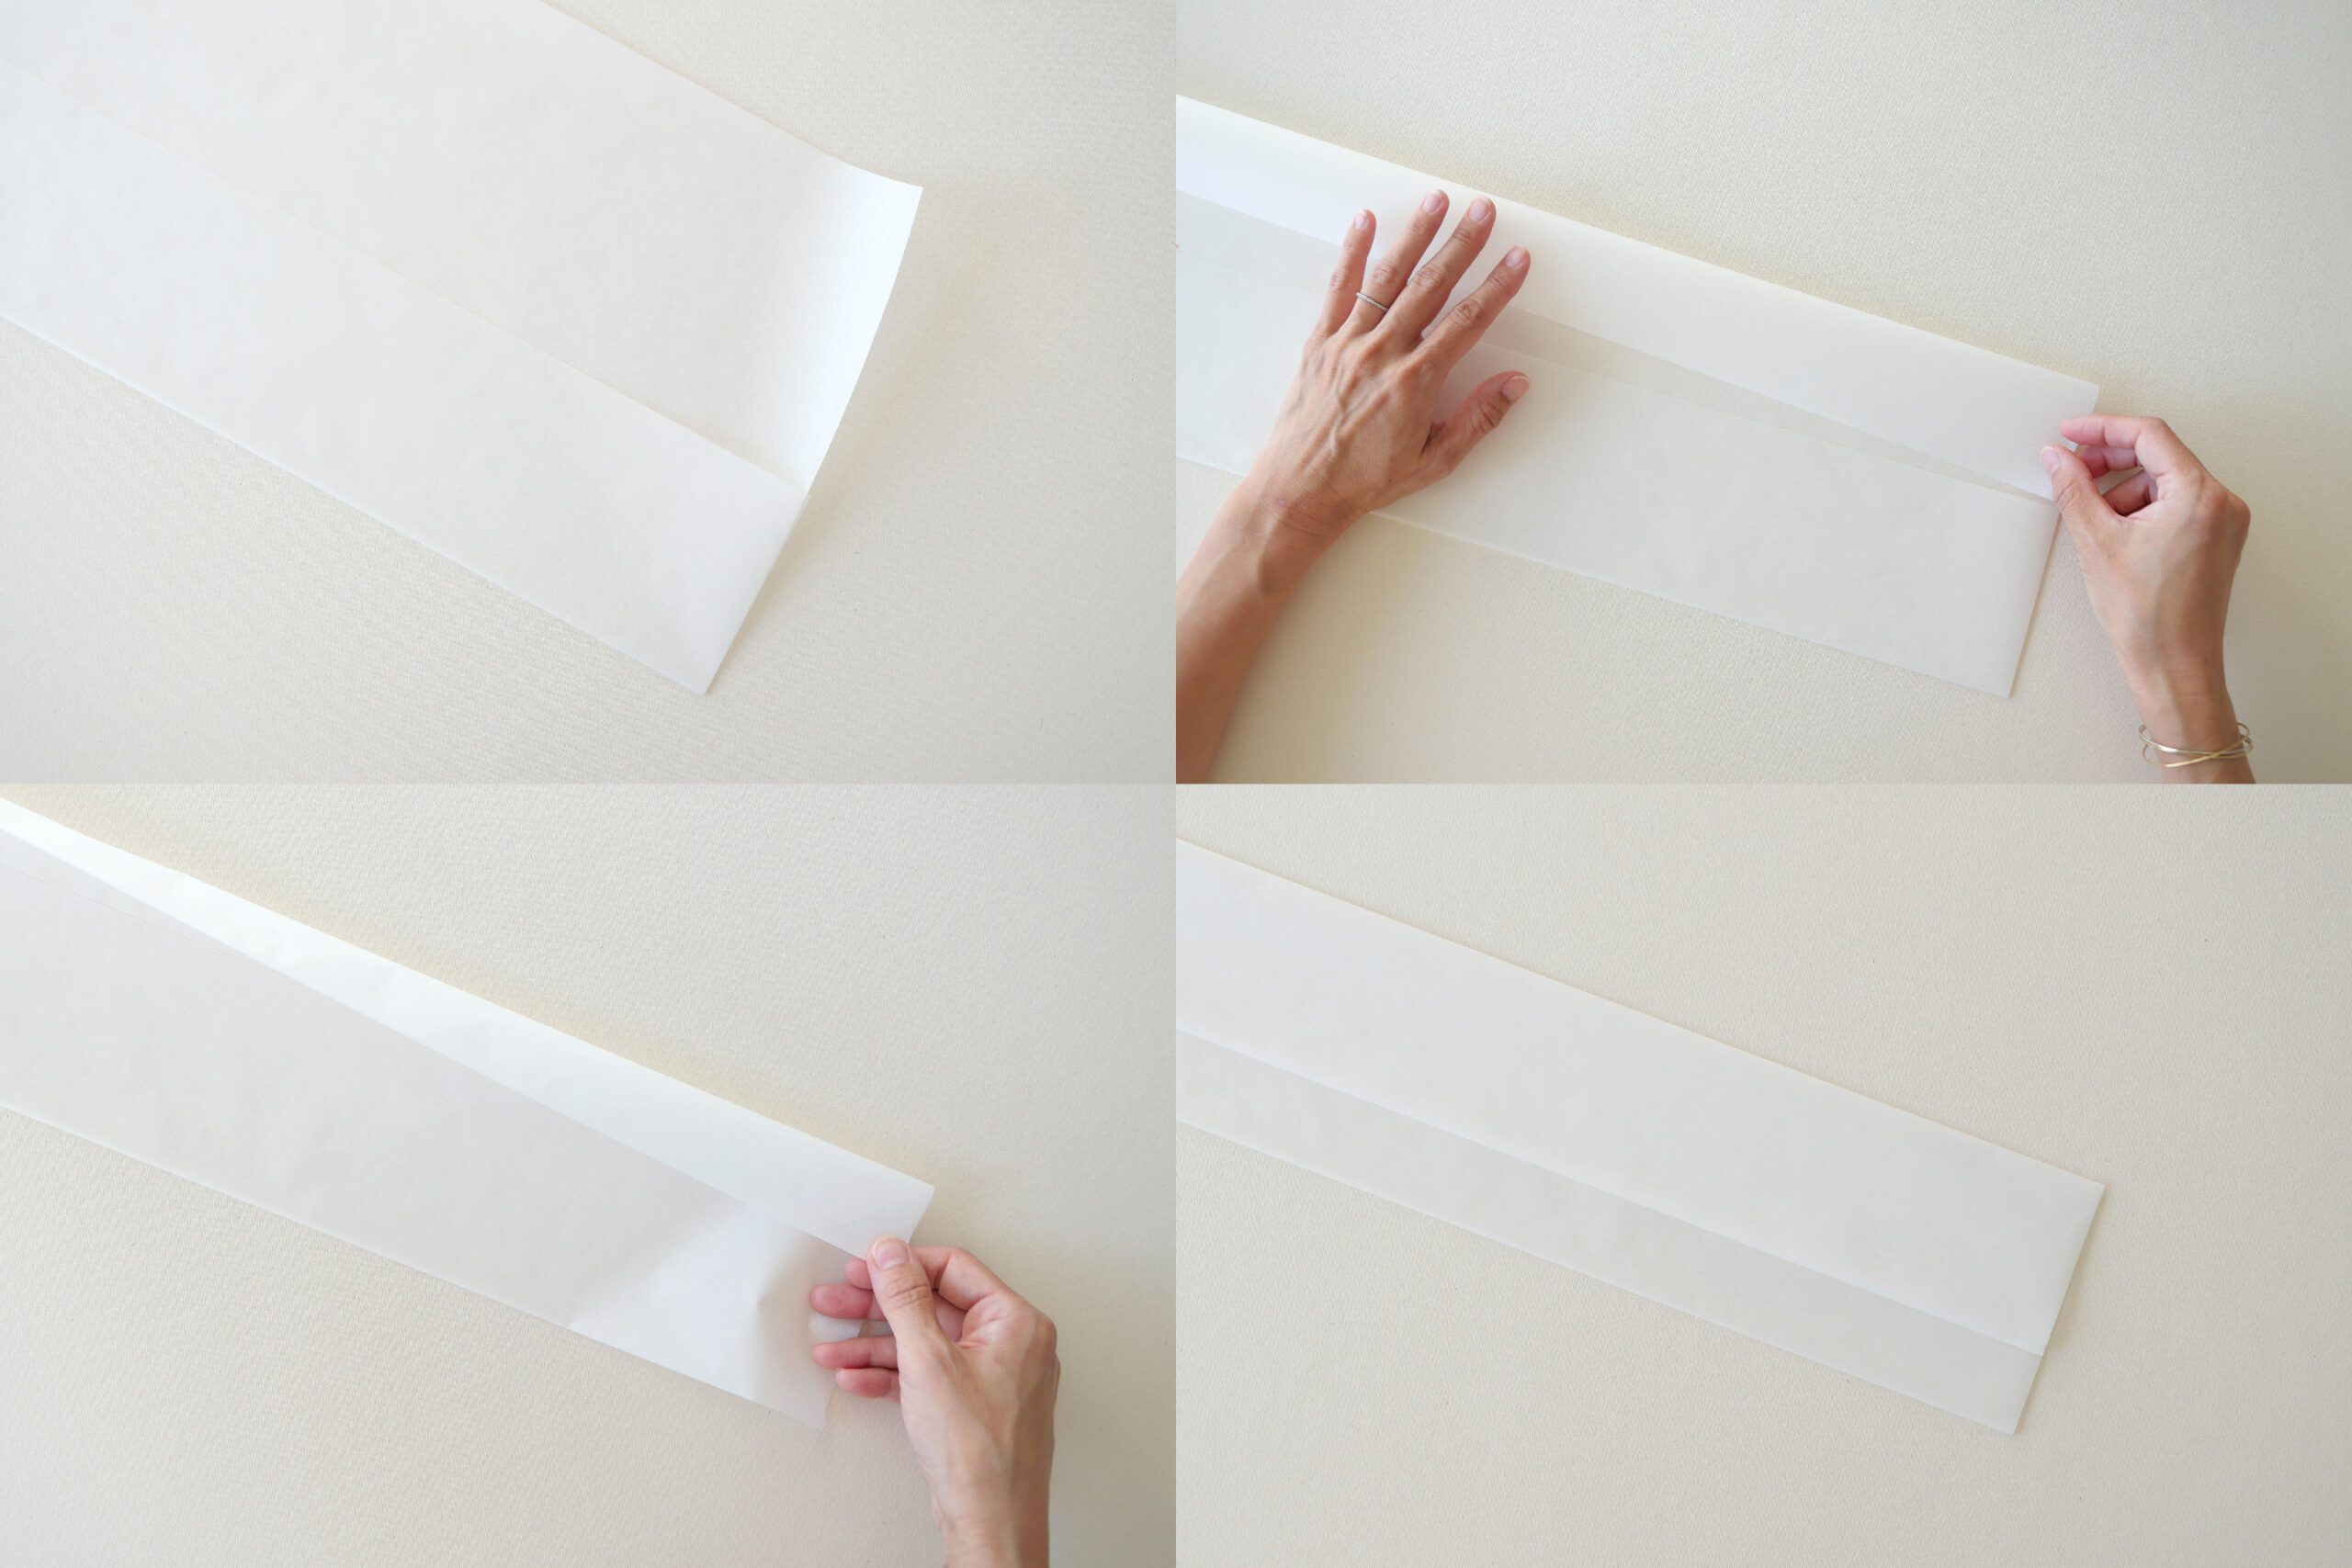
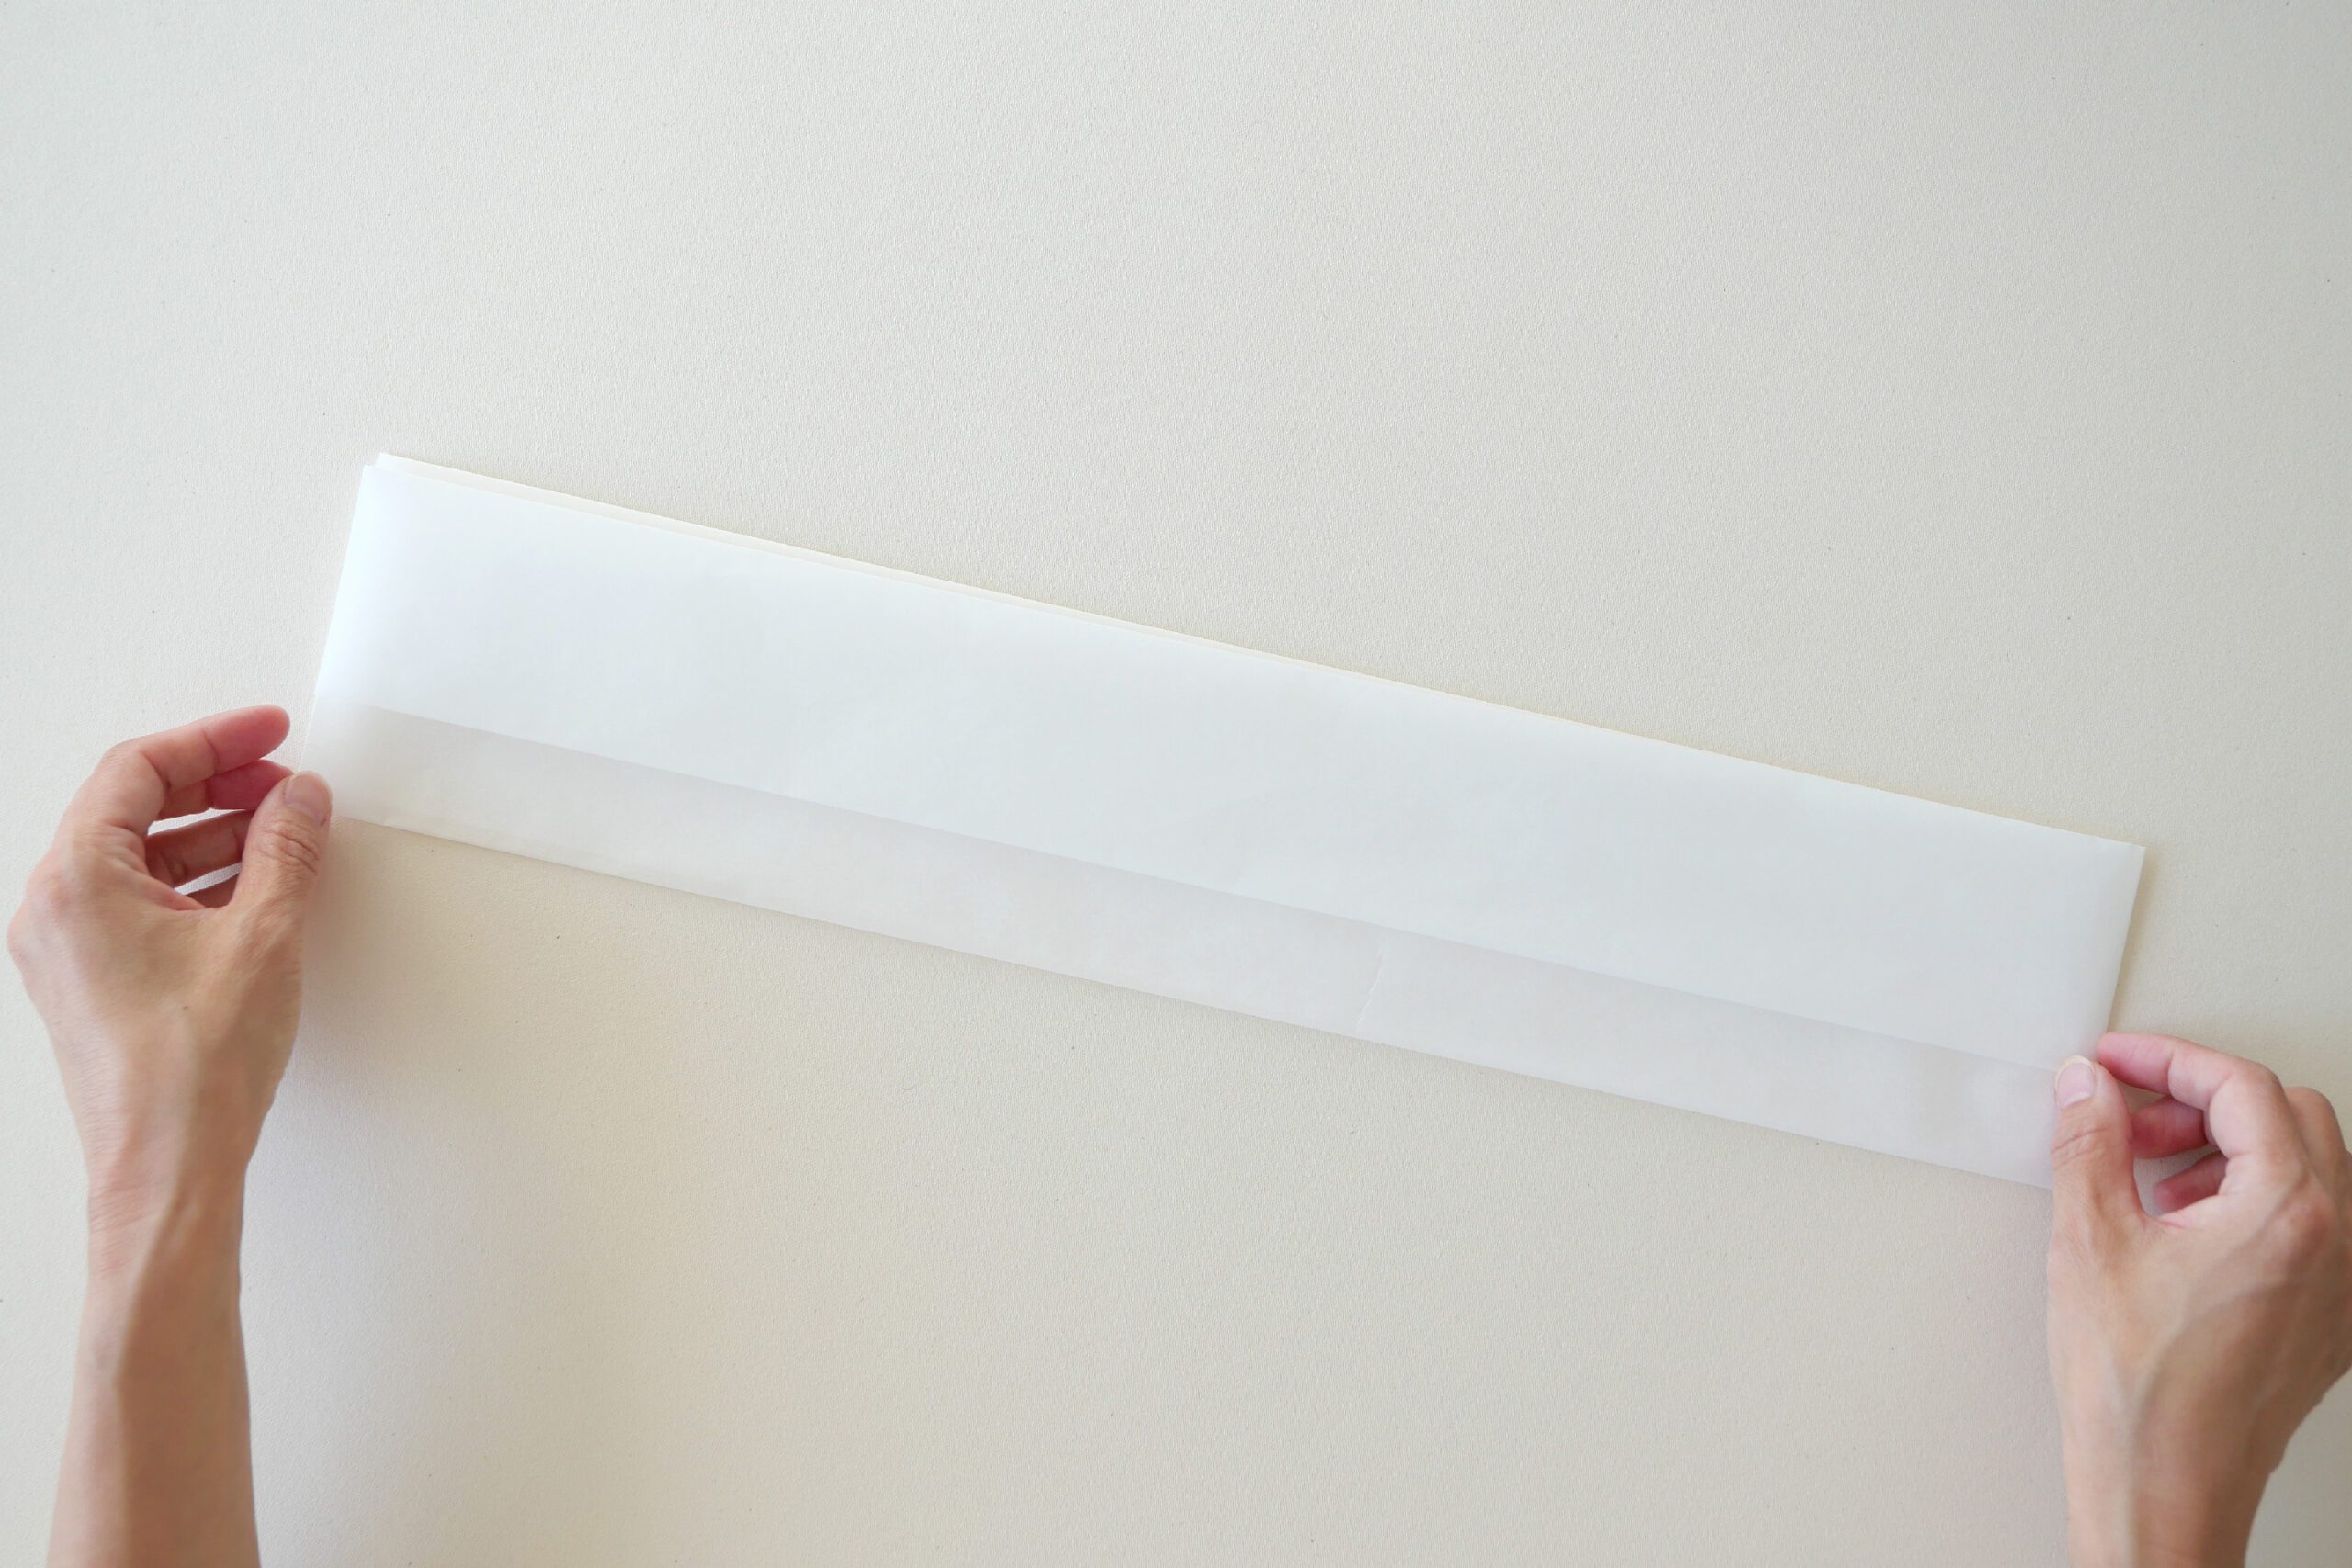
Step 1. Fold the Pocket
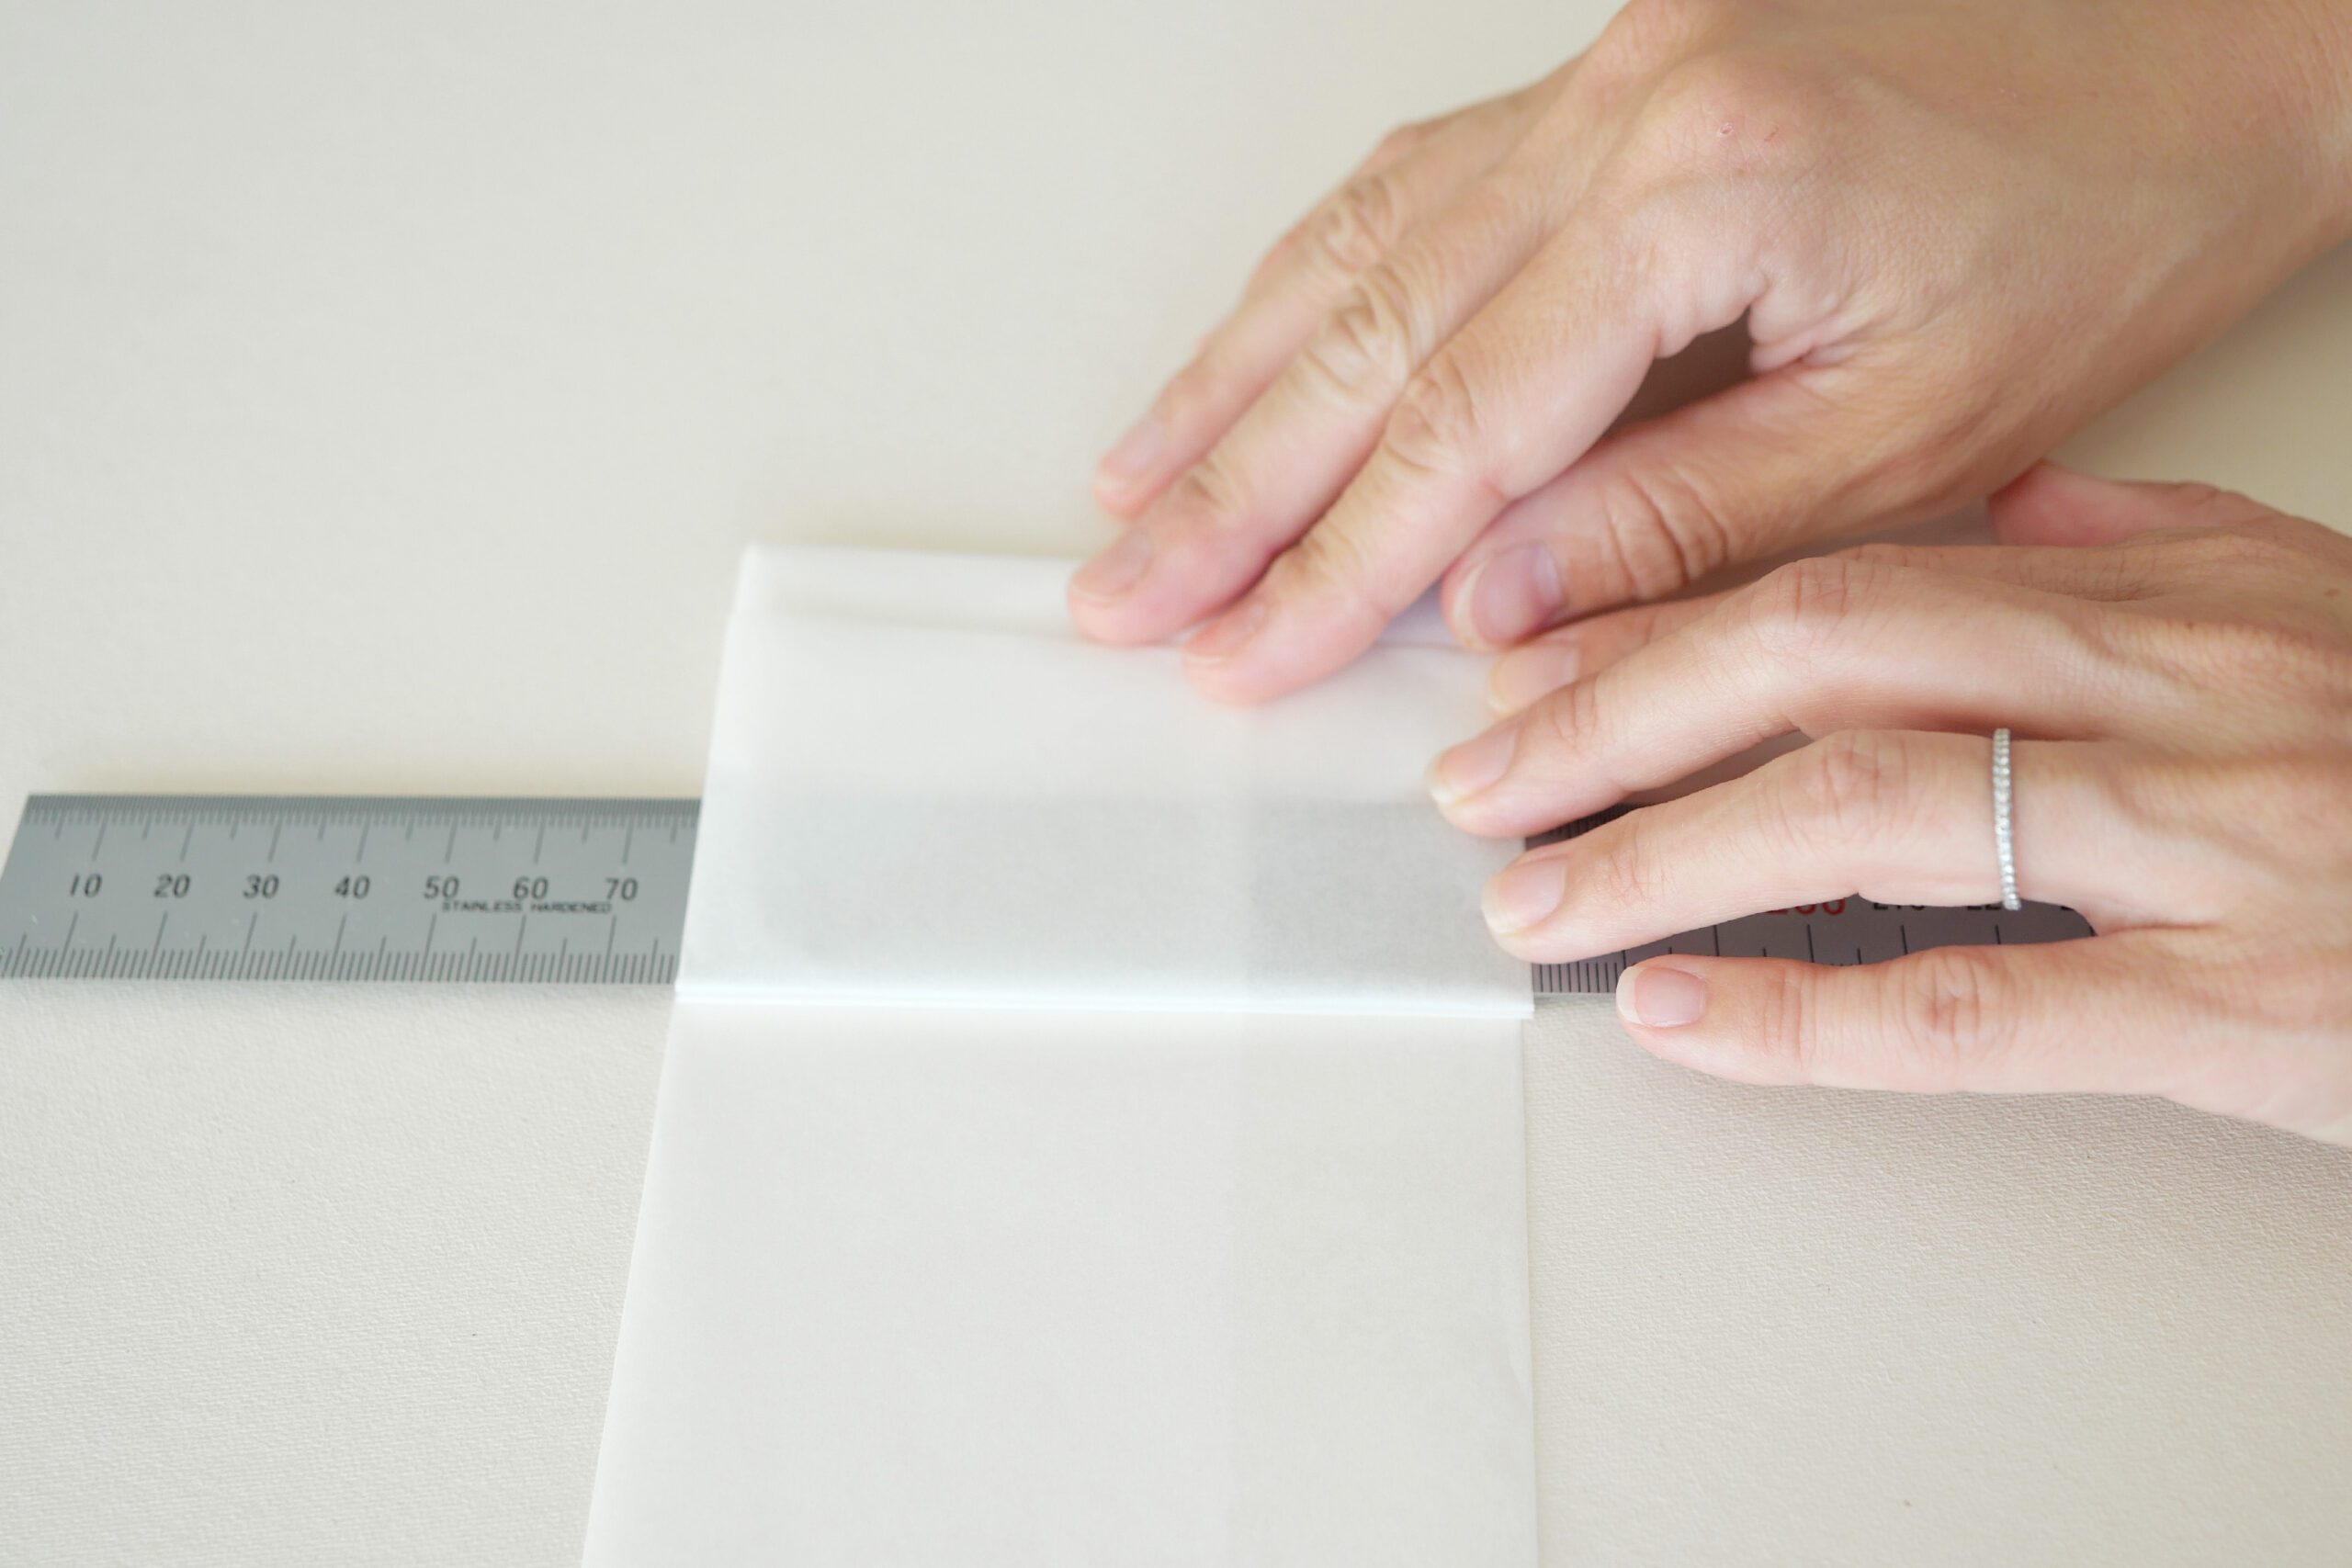
To accommodate small leaves, I made each page 90 x 60 mm. The depth of the slit for the pockets is 65 mm. Against the 12” tracing paper, fold at 90 mm from the top and 65 mm from the bottom. Then fold where the top and bottom papers overlap to complete the slit. Folding in this way makes all edges baggy and makes for a more durable pocket.
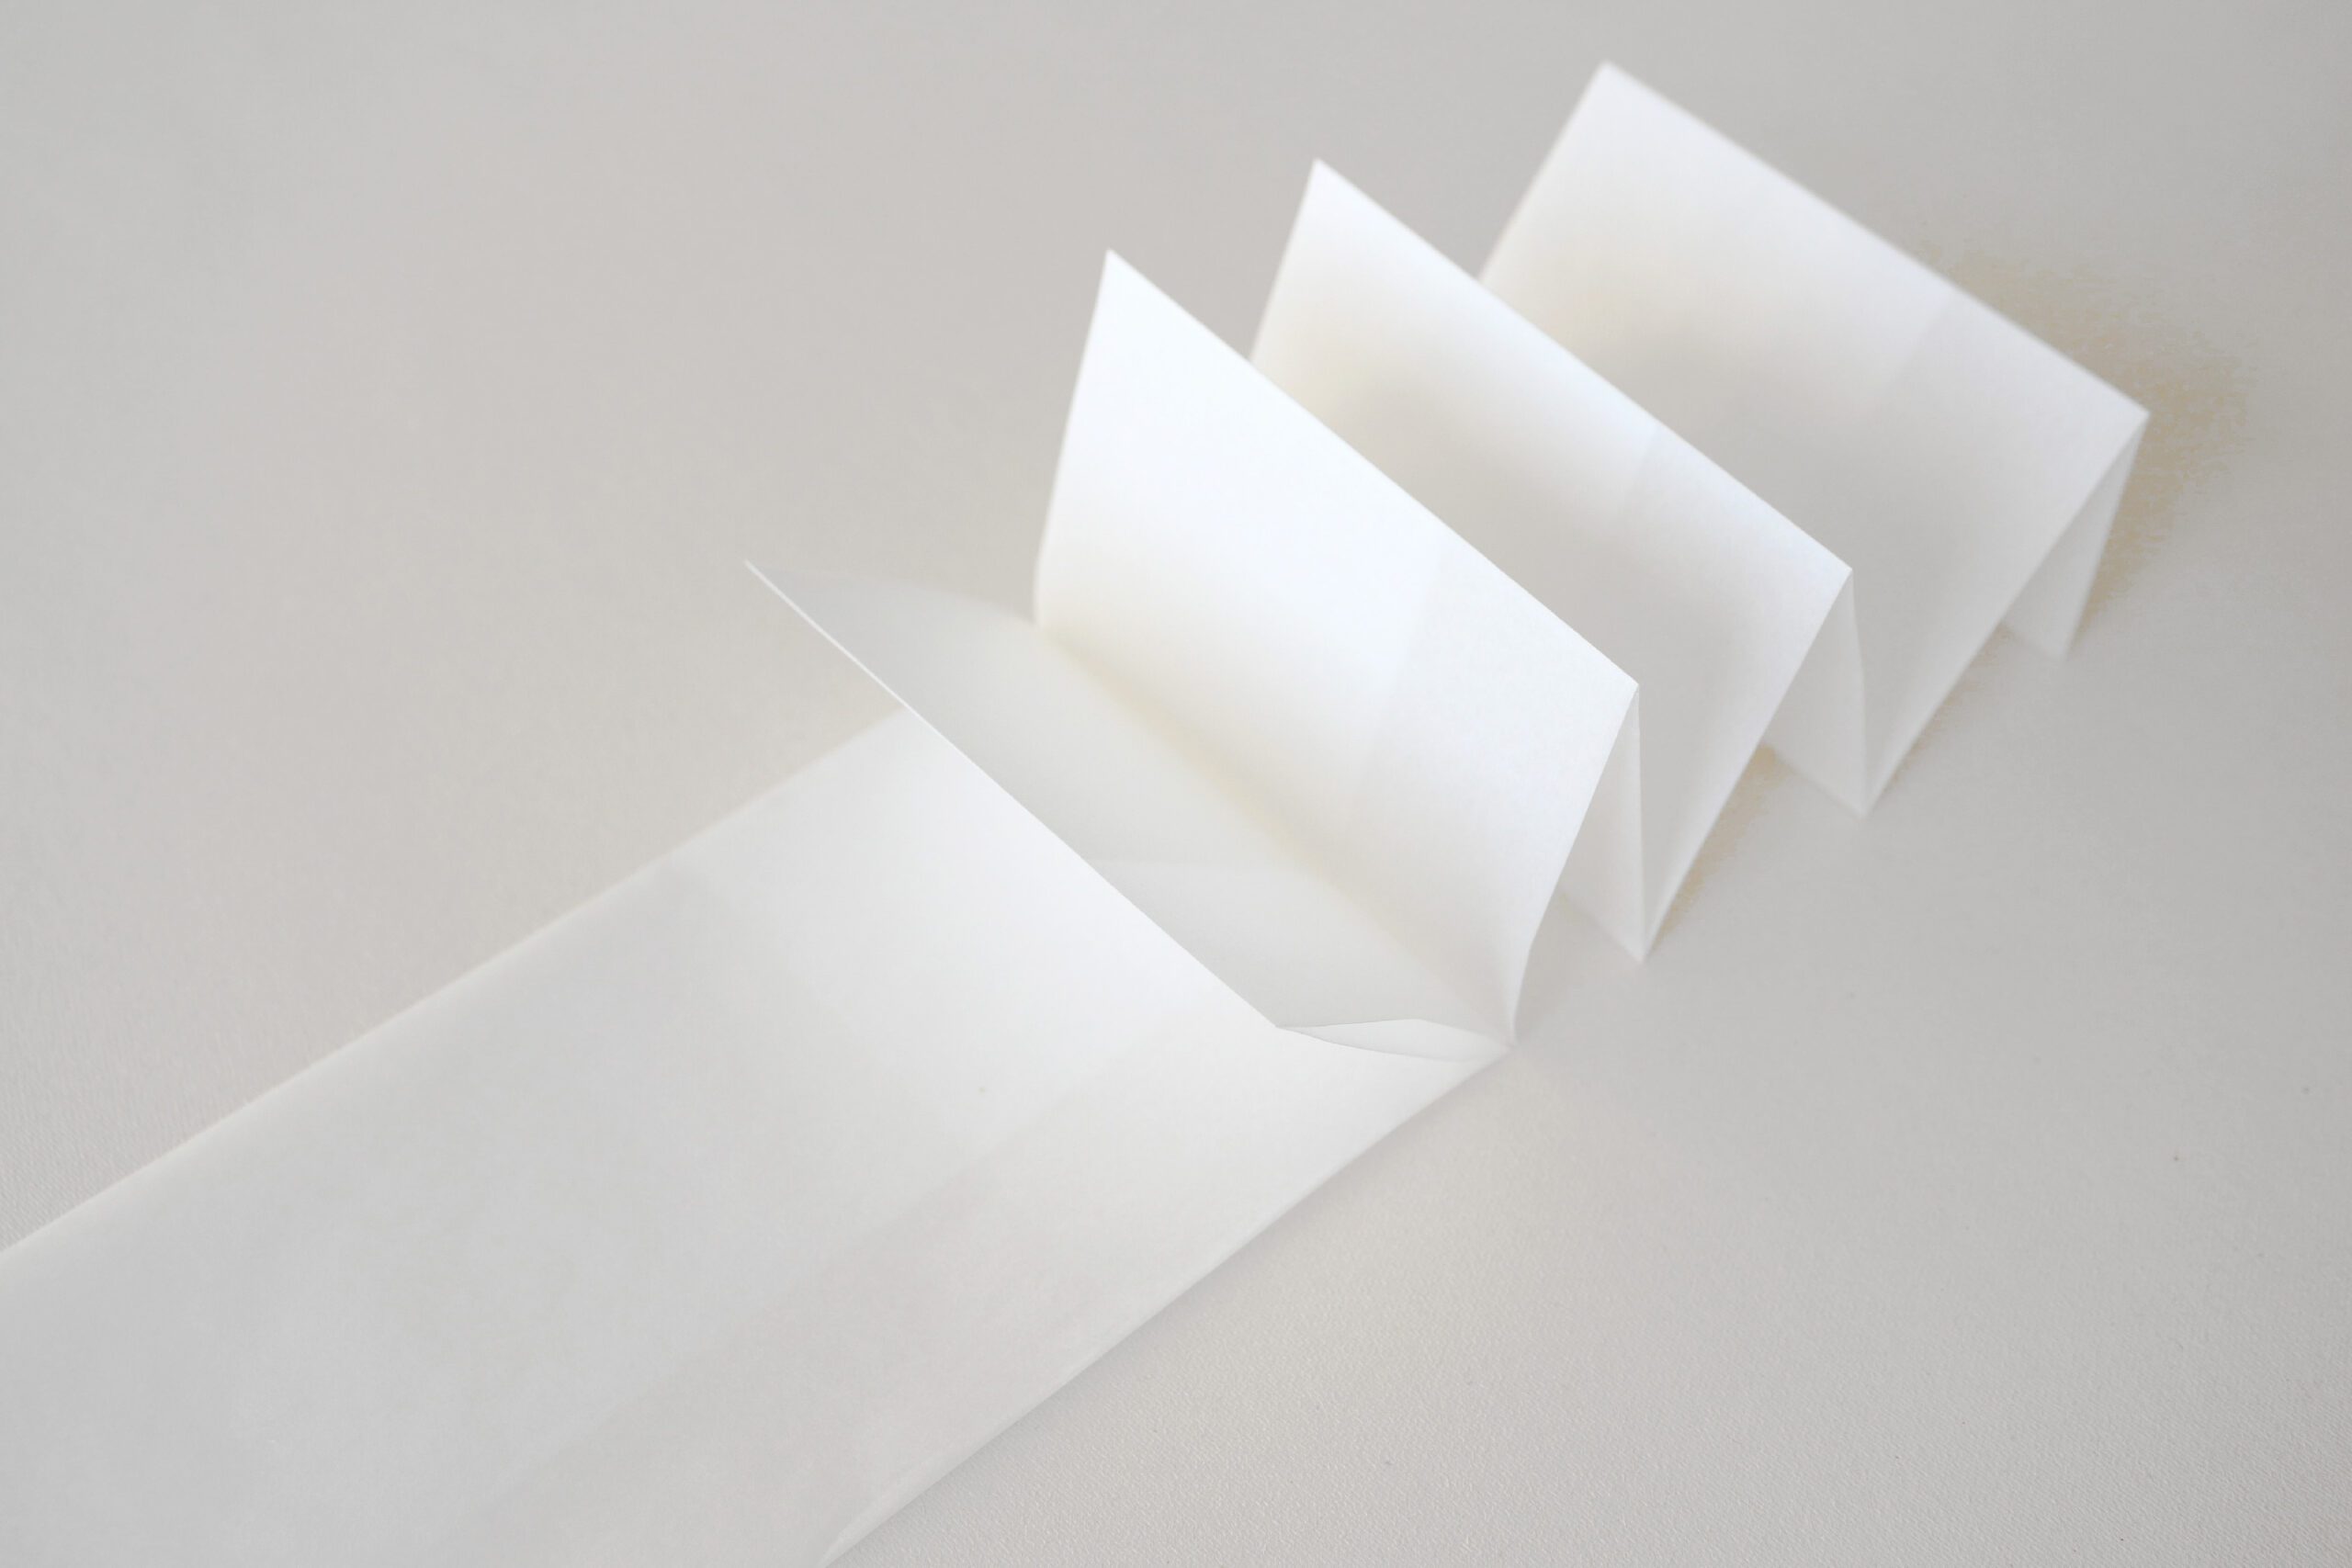
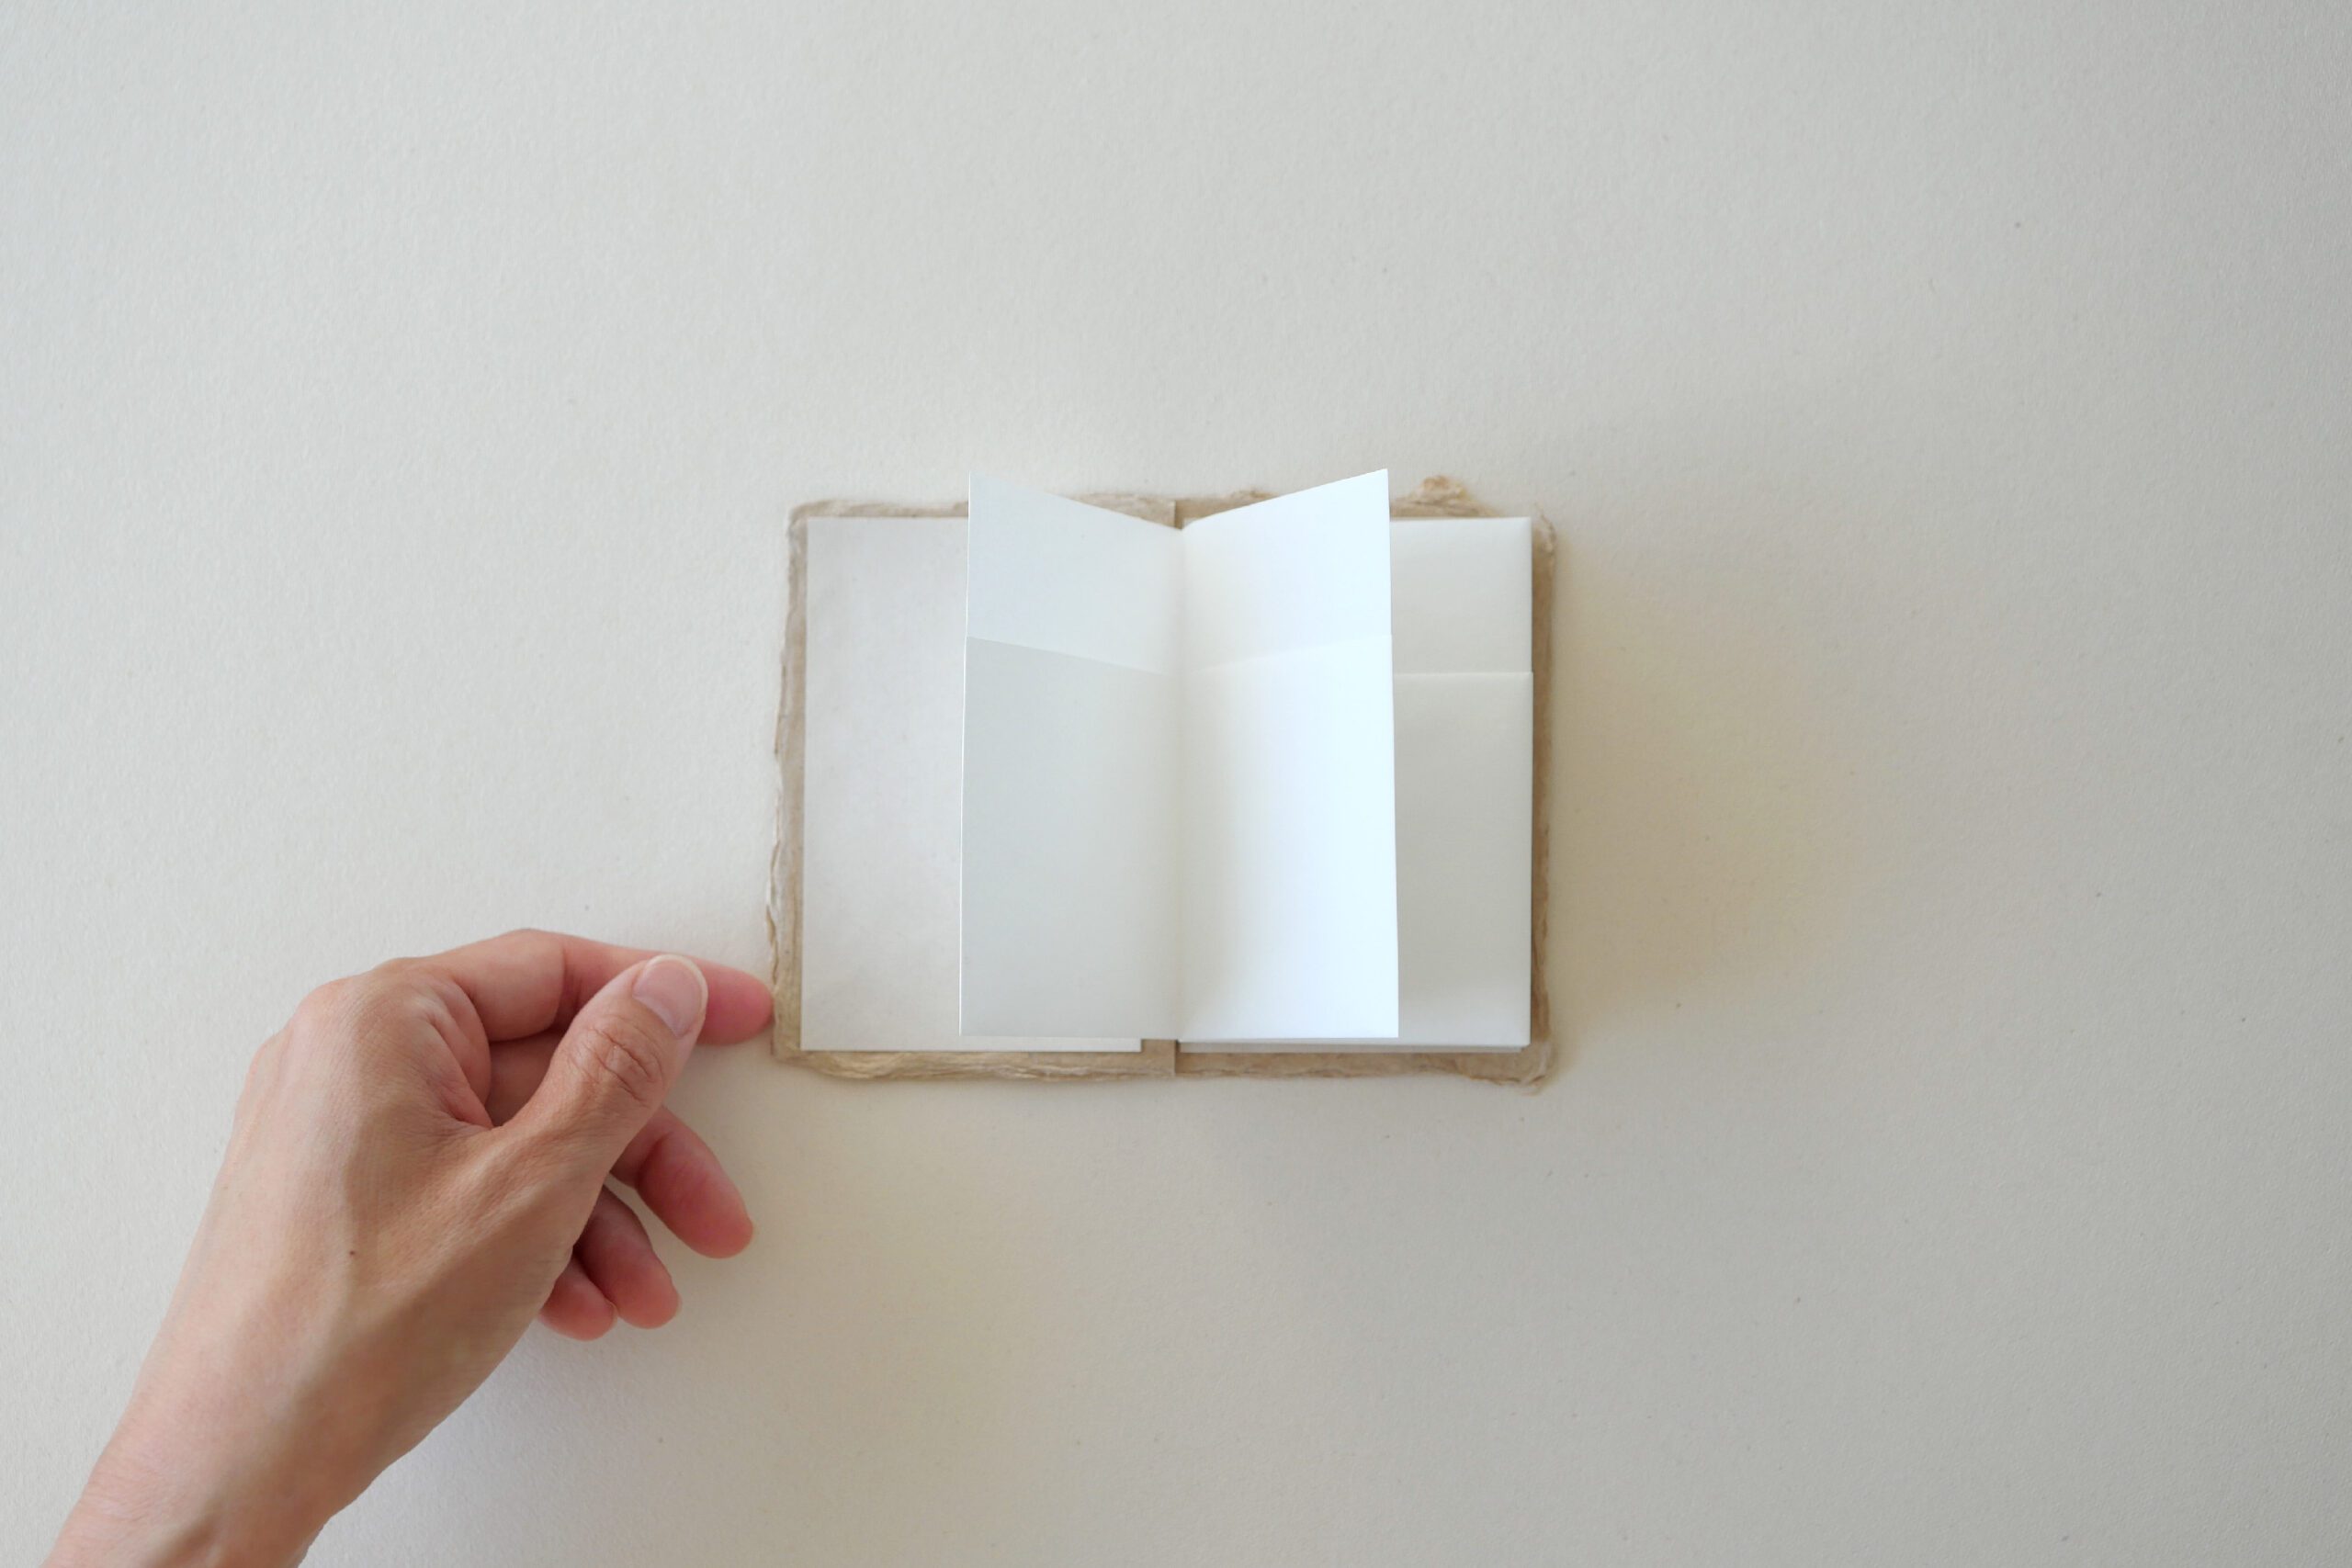
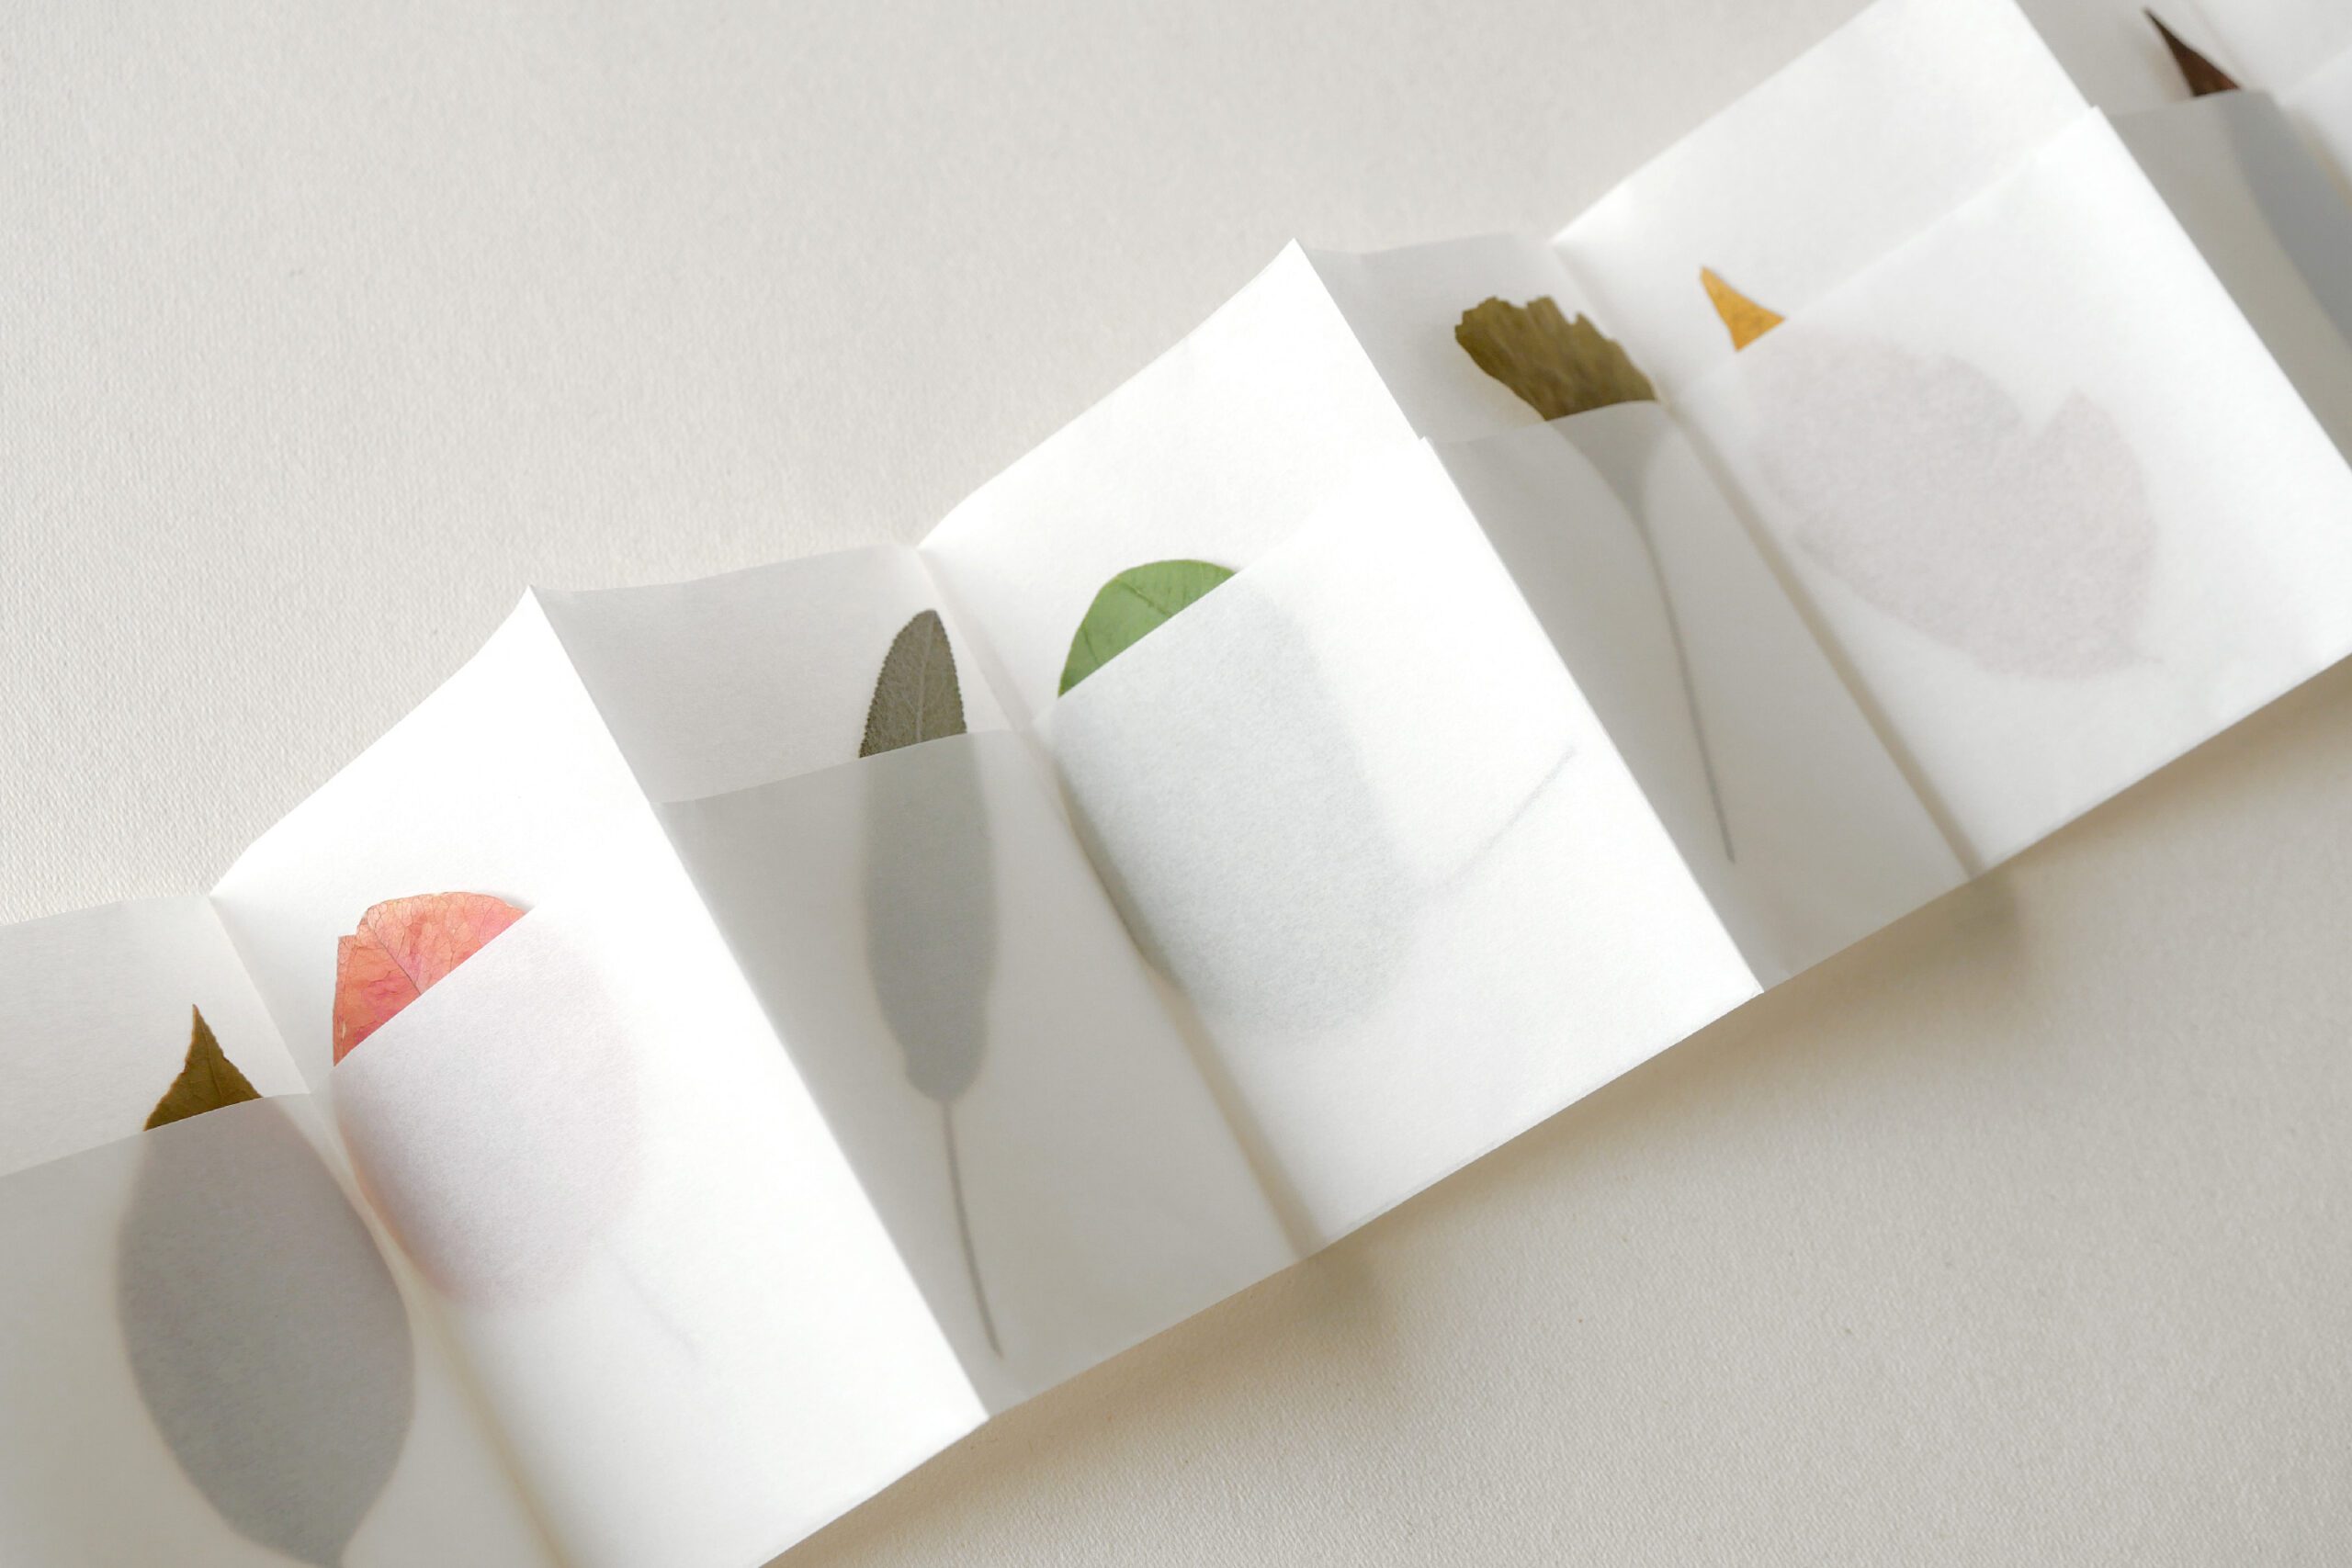
Step 2. Fold to Accordion Style
Initially fold it in half. Then fold an accordion style each side alternately into a 60 mm. This method is only recommended; folding alternately from the center will reduce the final misalignment, rather than folding from the edges.
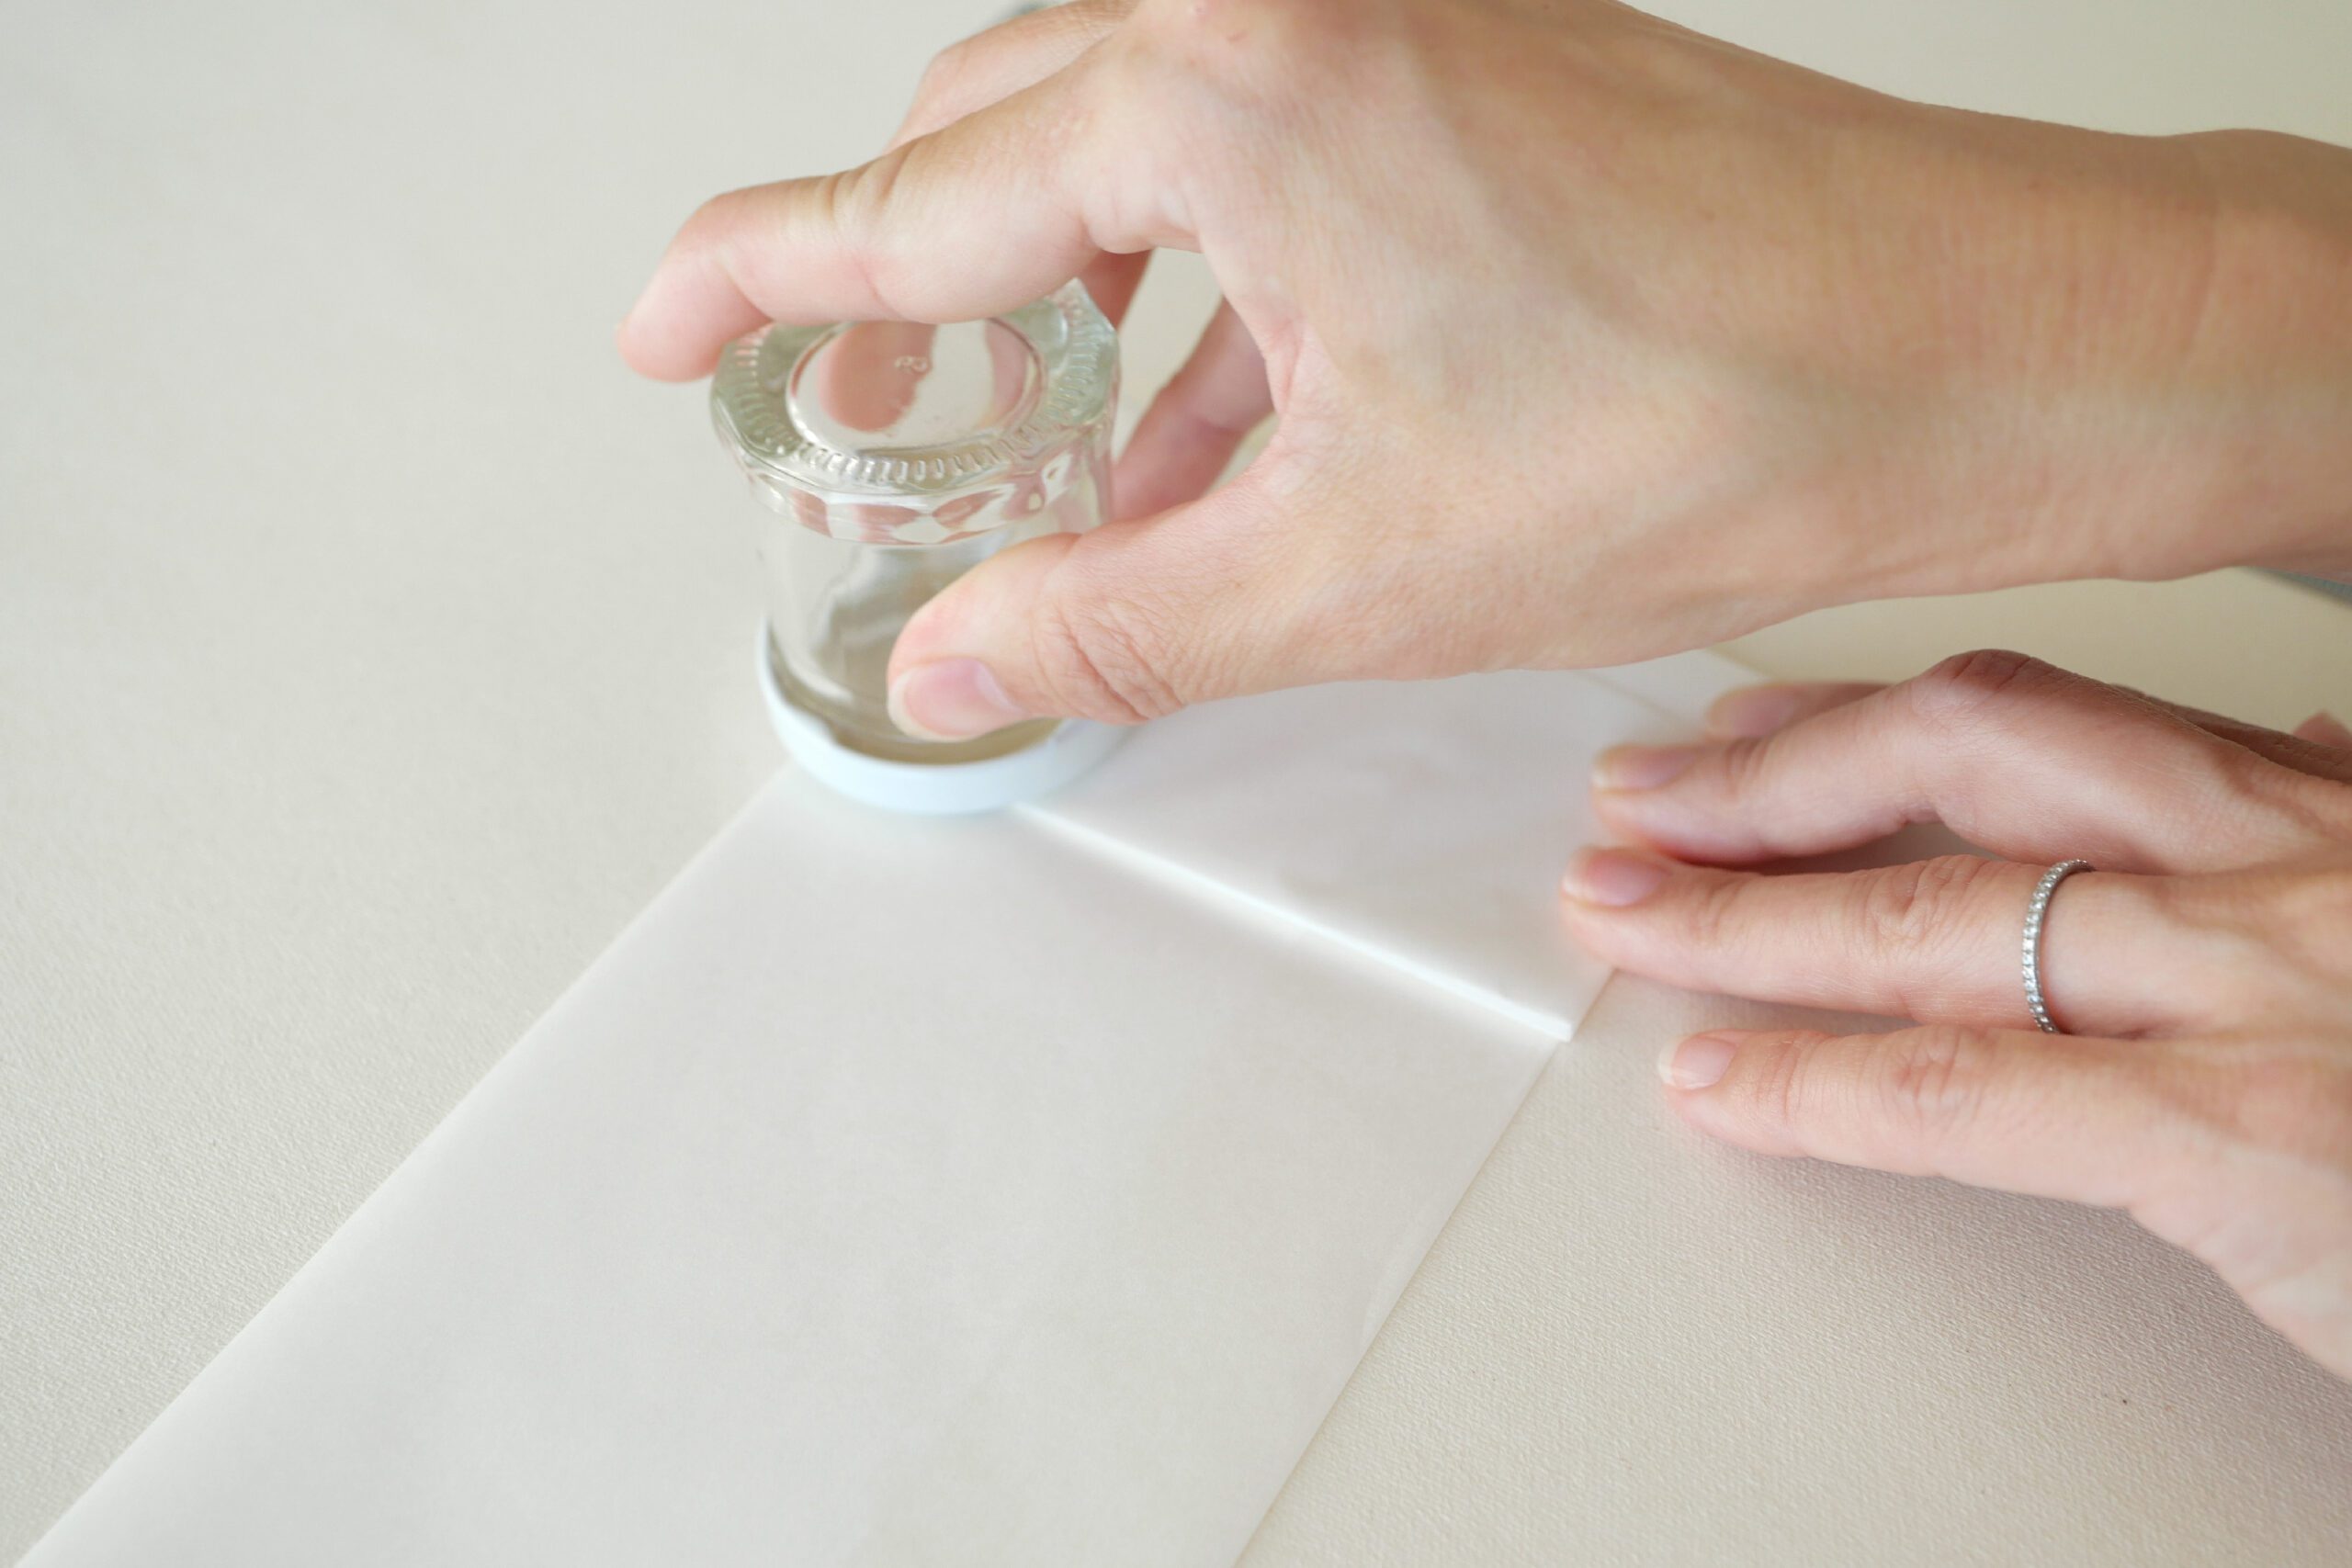
The important part of this pocket is to fold the creases tightly. The first tip for a tight fold is to fold it while holding a steel ruler against it. The ruler will serve as a guide and make it easier to fold. The second tip is to use a small jar bottle. Instead of pressing down on the folded part with your hand, you can slide it down with the jar to make a tighter fold.
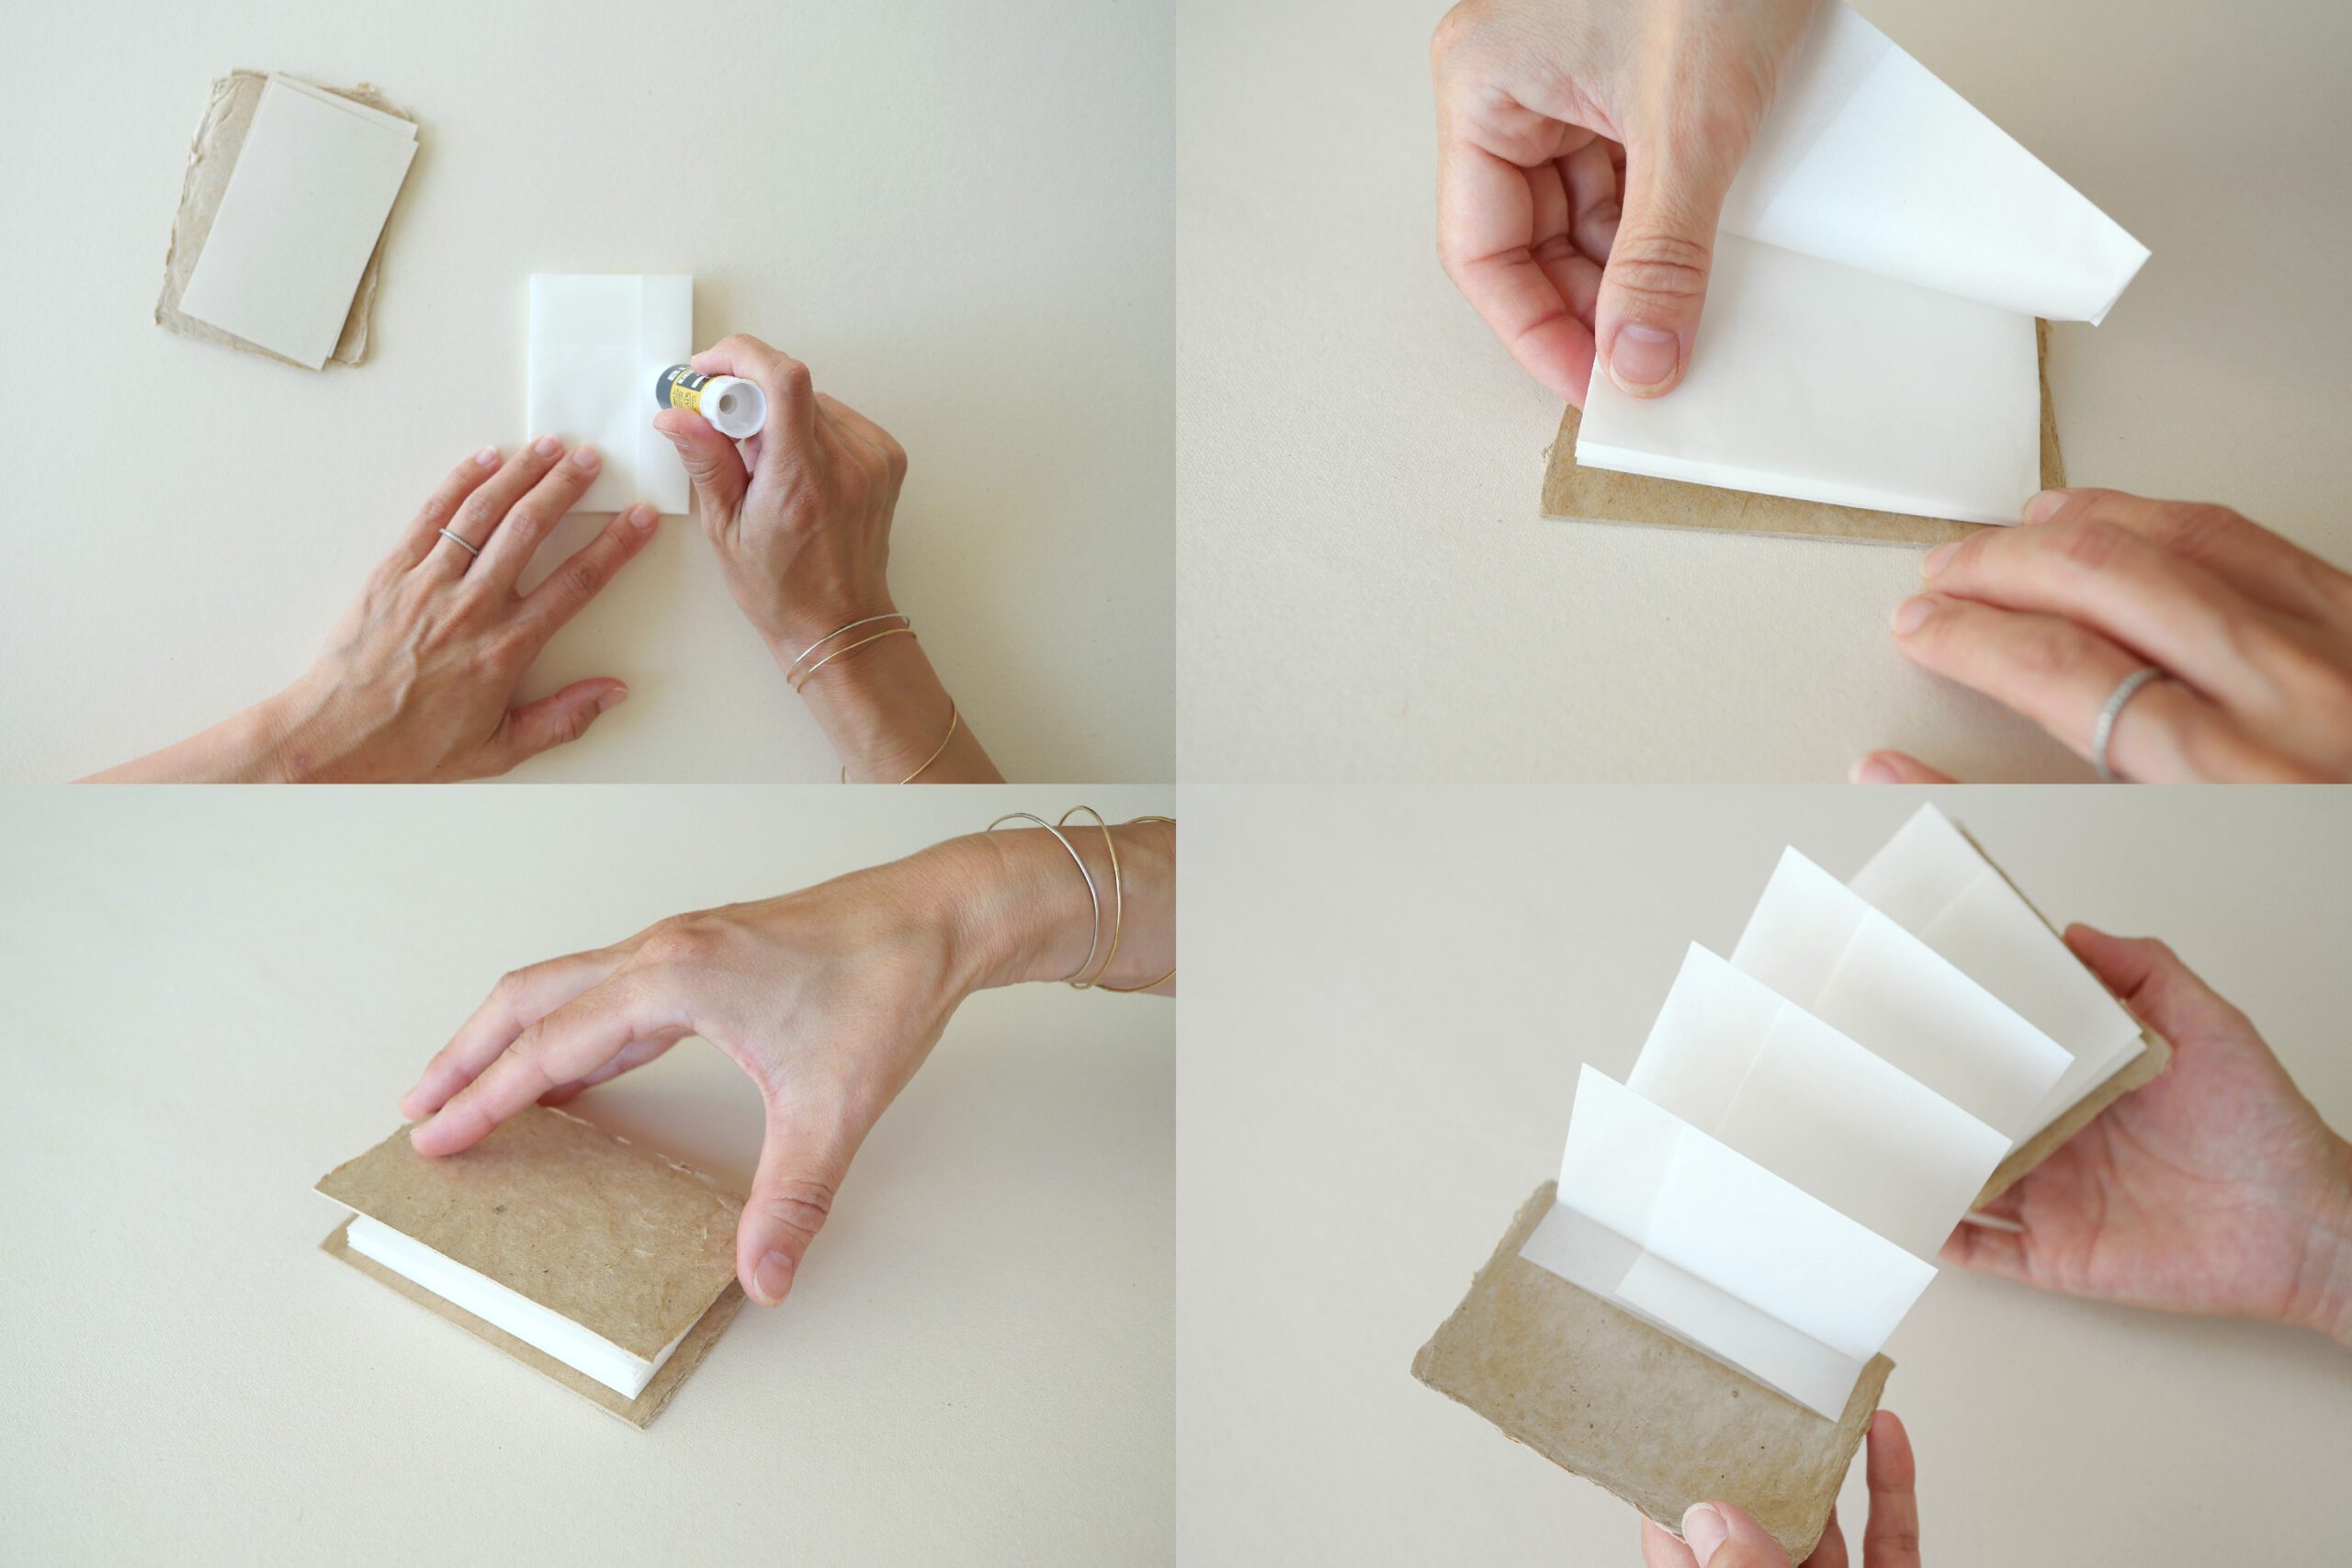
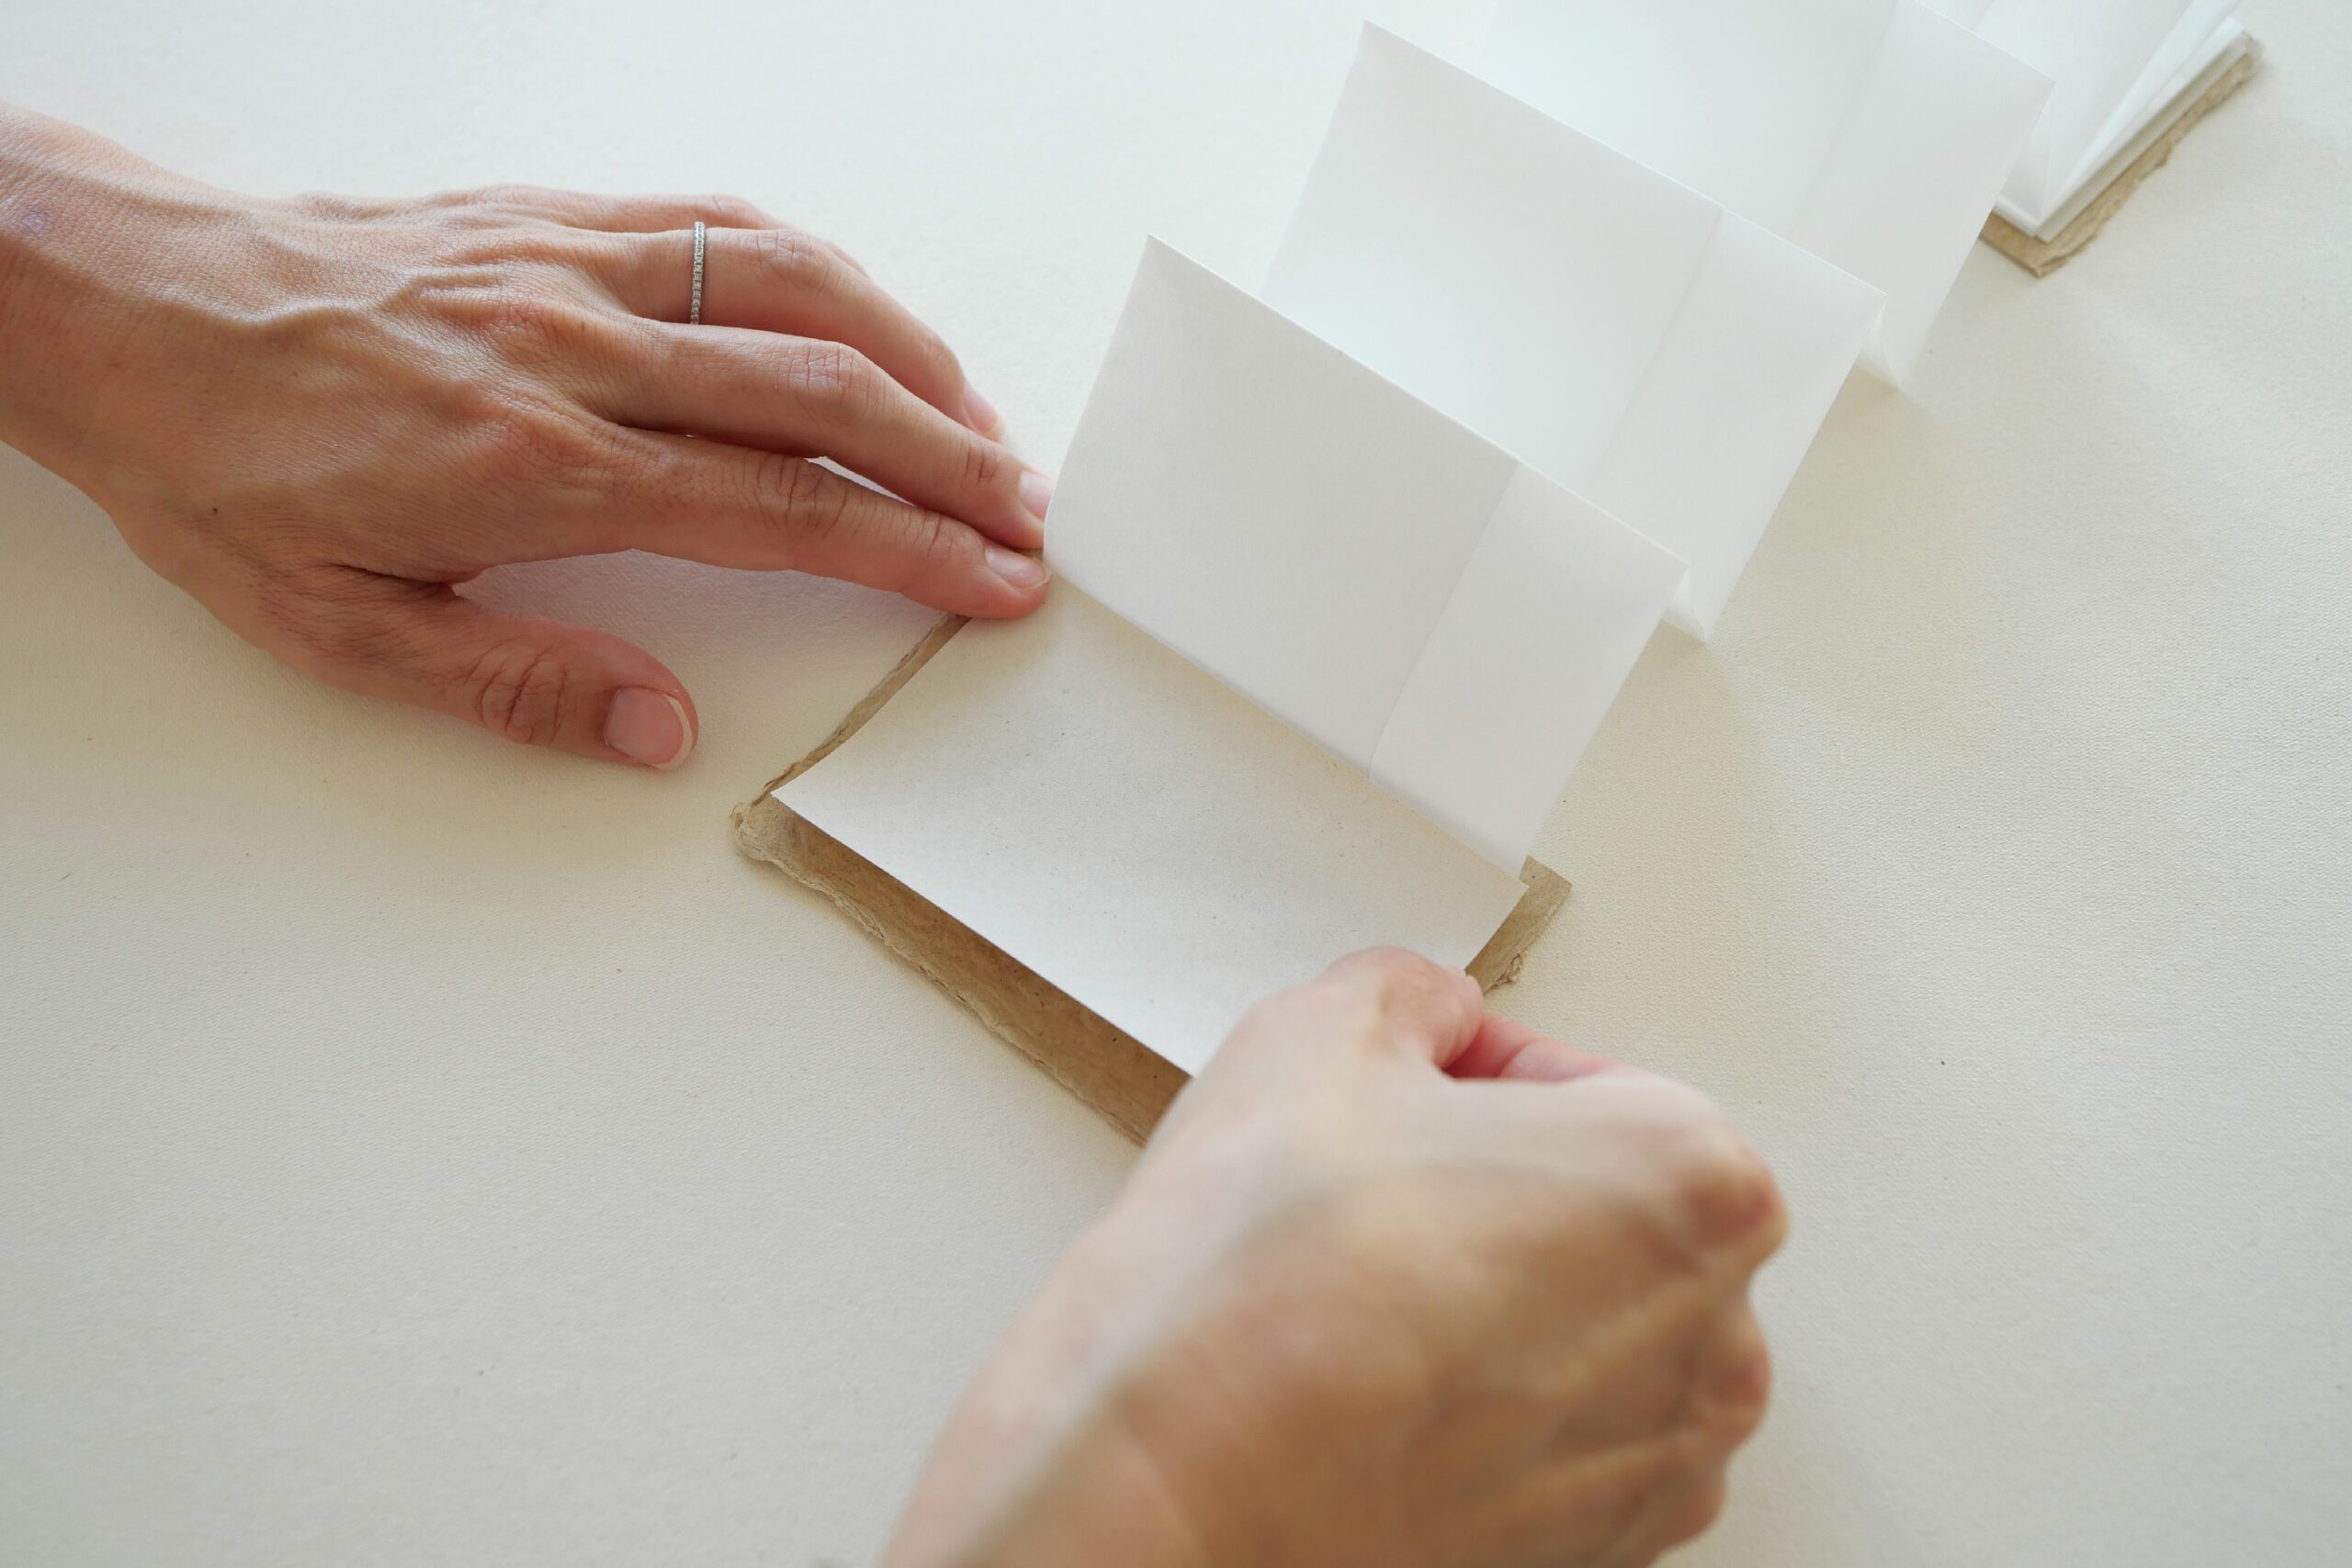
Step 3. Attach the Cover
Cut a piece of thick paper for the cover in the size of 100 x 70 mm and affix the cover to the body of the pocket. The back side of the cover is also covered with thin paper for a beautiful finish.
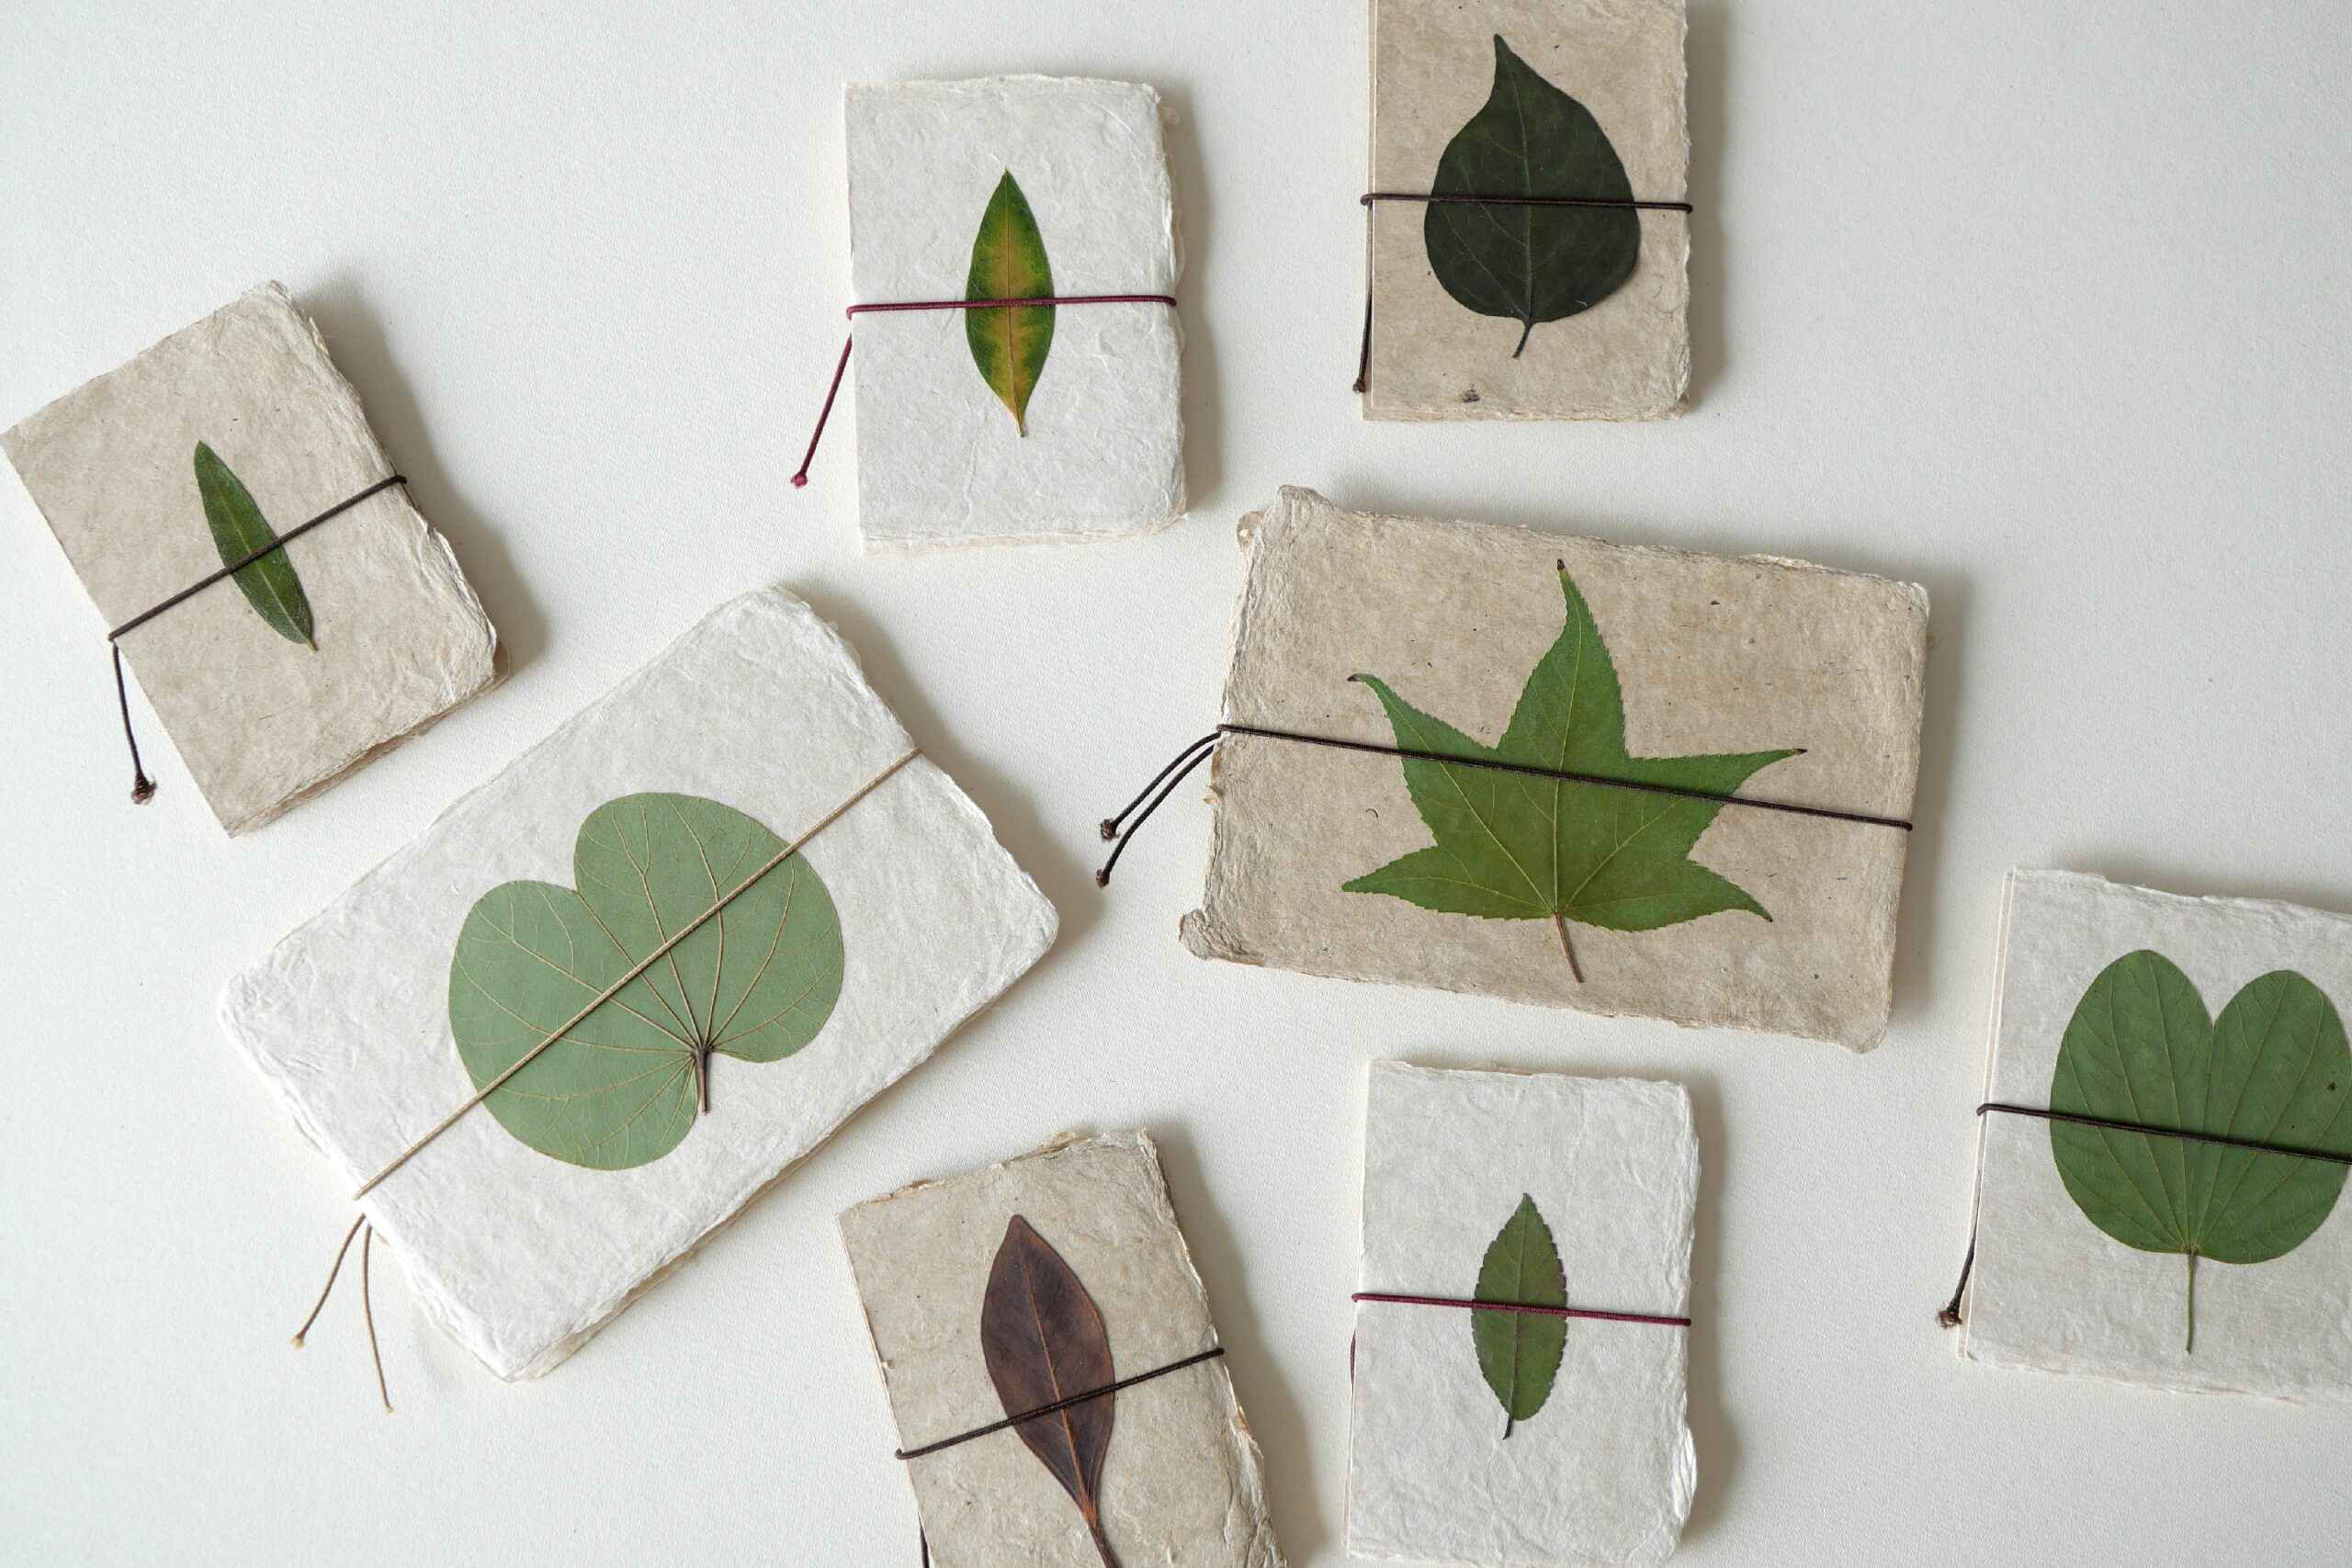
The cover arrangement is free. You can draw pictures or messages on it, or paste pressed leaves, etc. to arrange it beautifully.
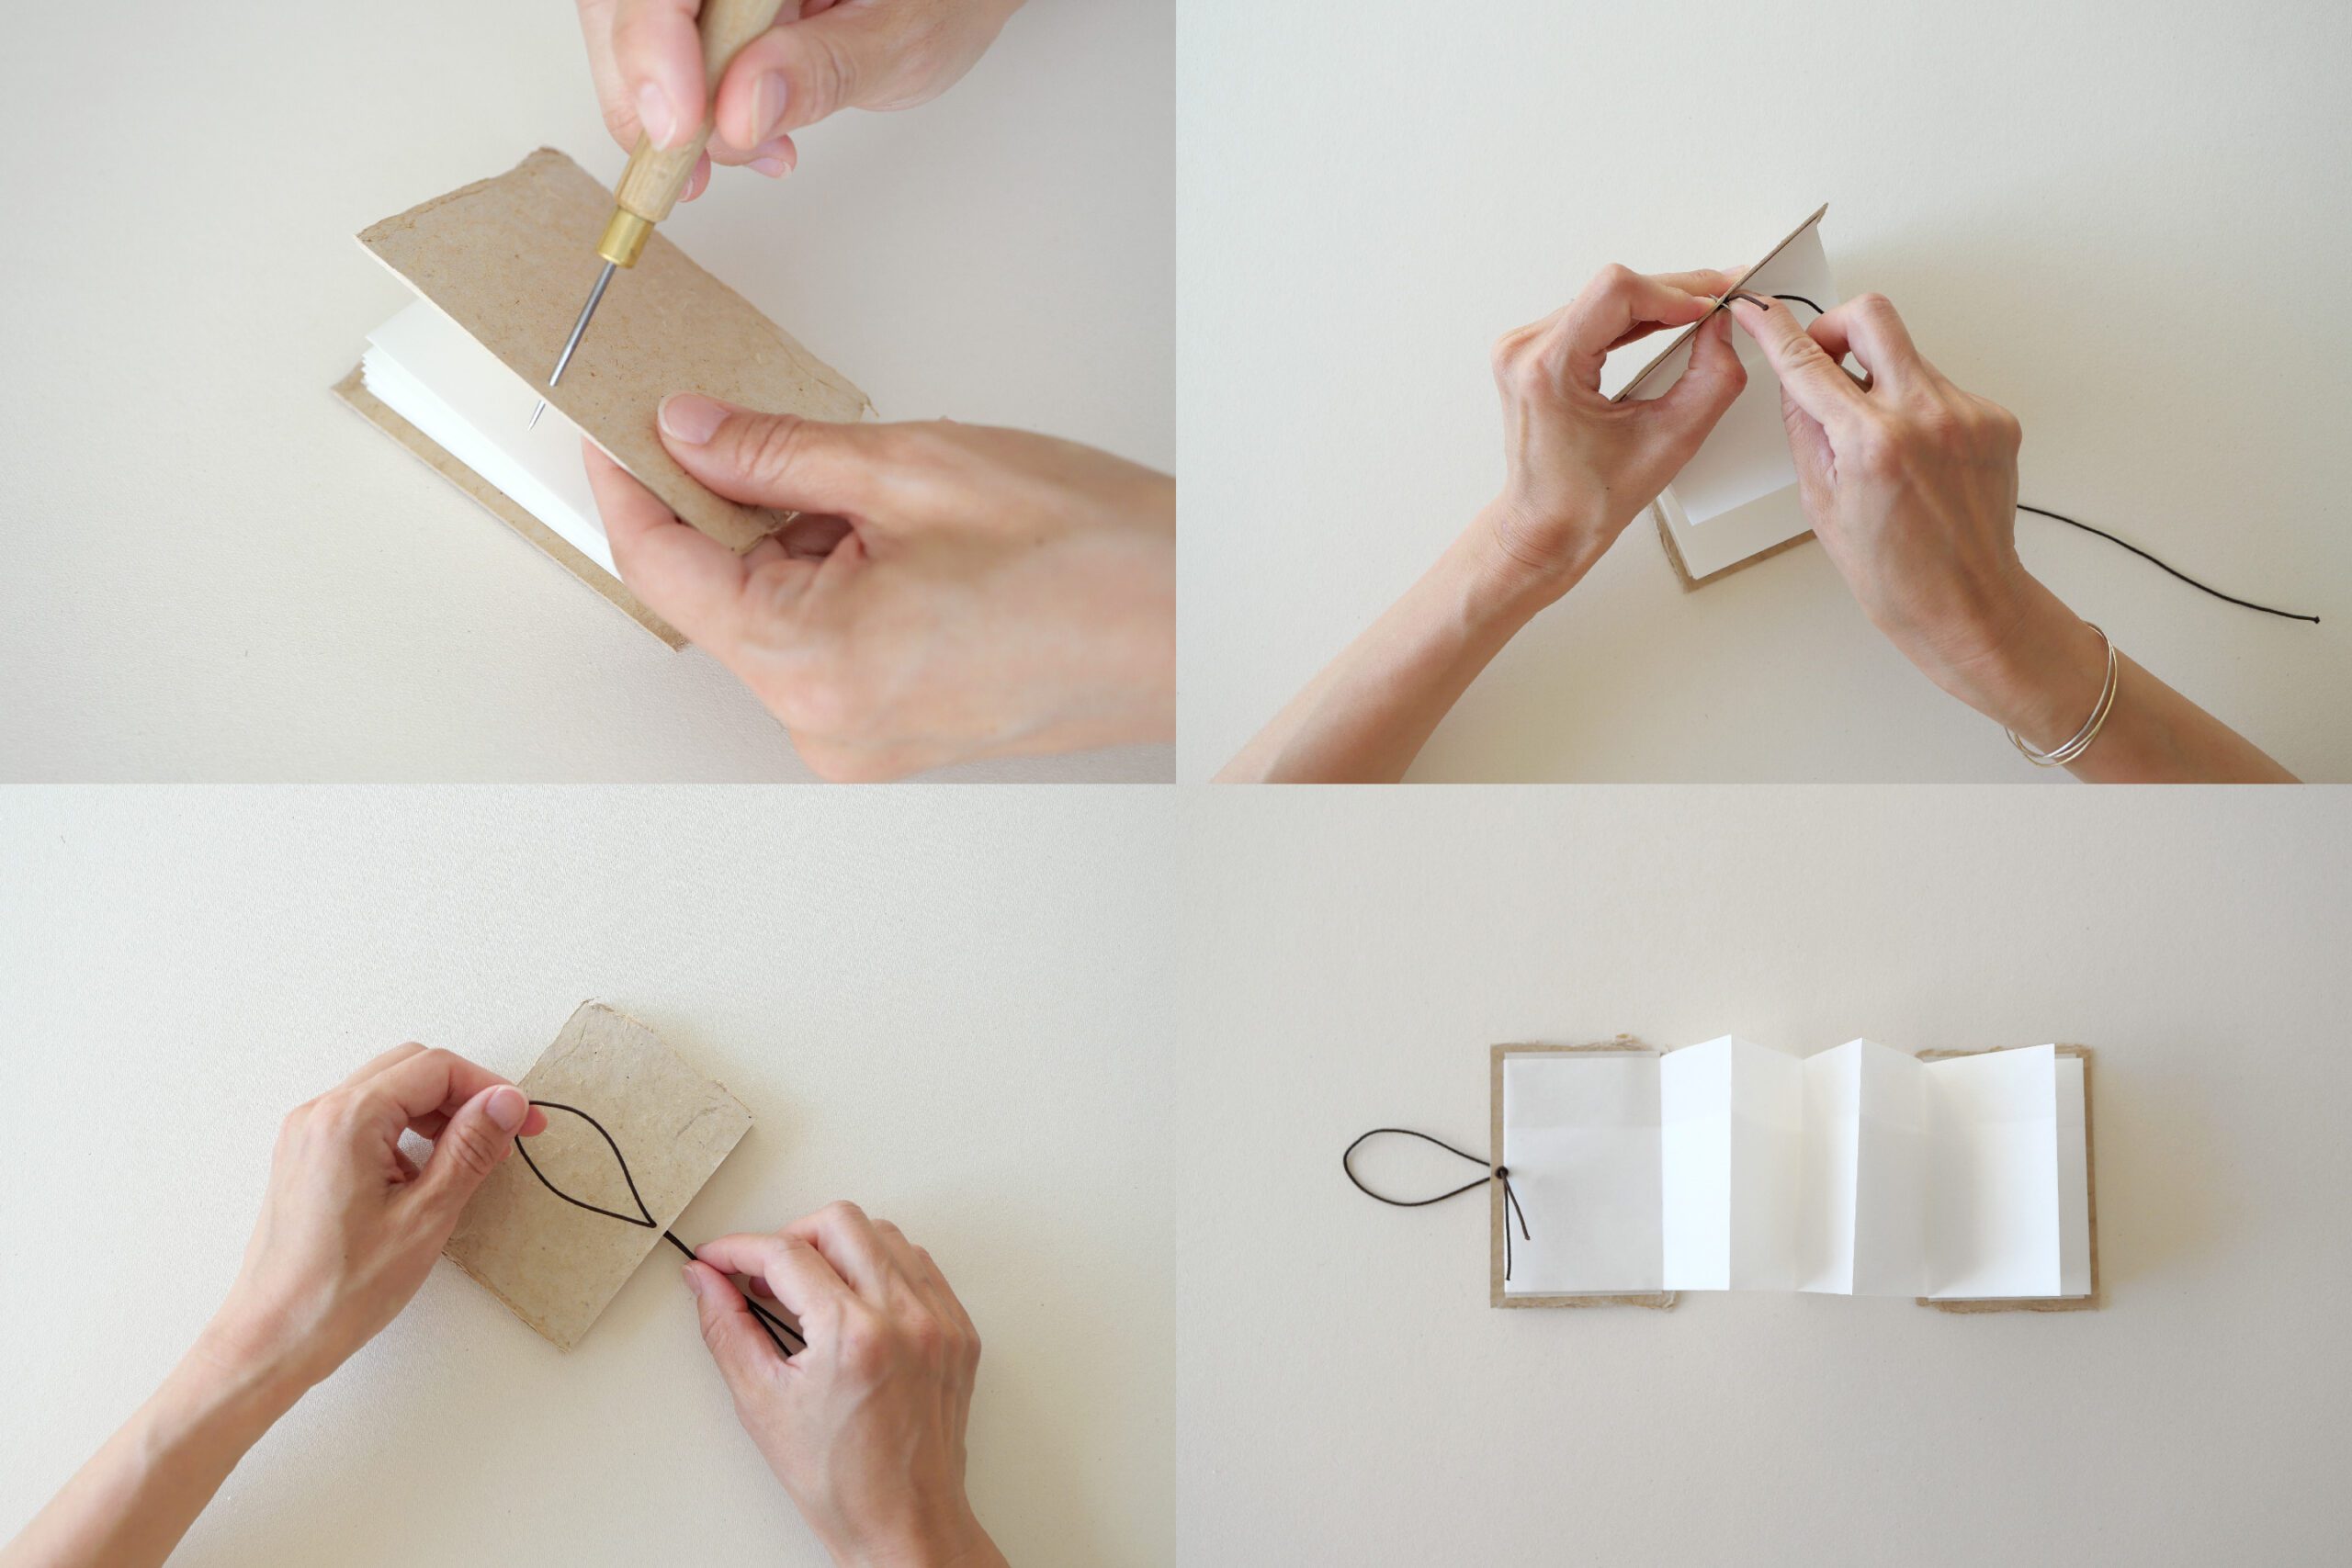
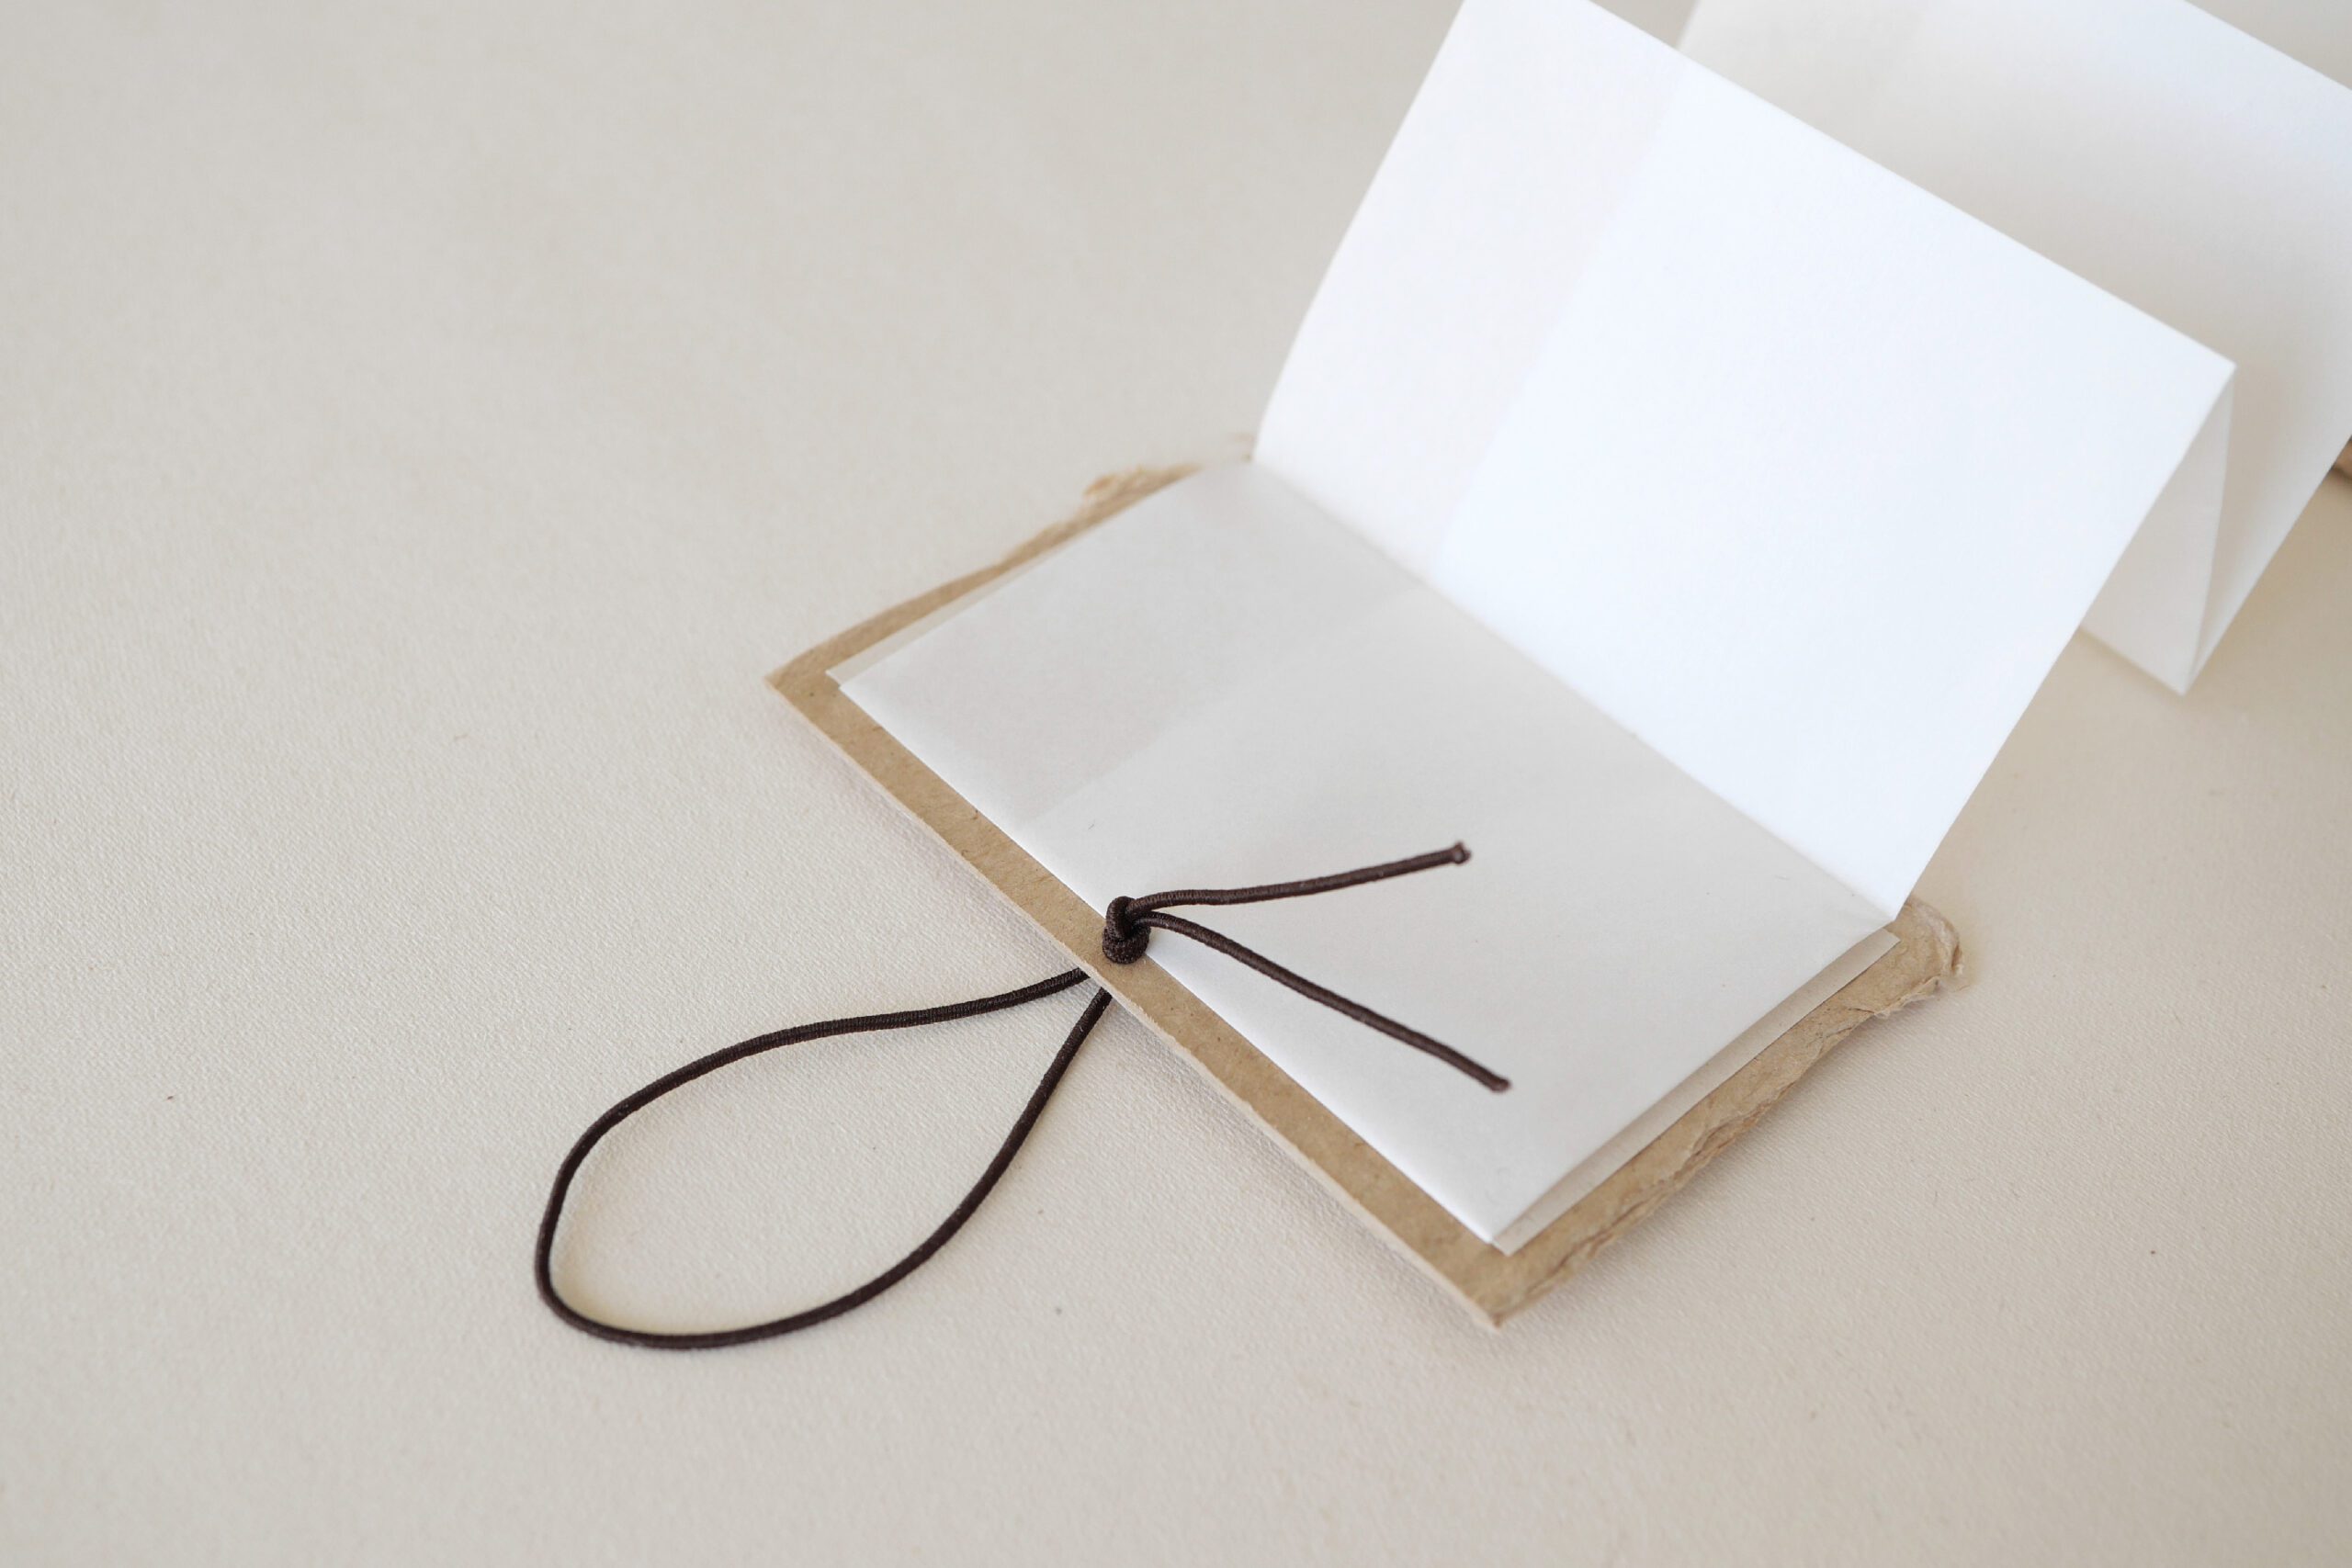
Step 4. Put on Elastic Band
On the left side of the back cover, drill a small hole for the elastic band. Be careful about the size of the hole, because if it is too large, the elastic band will slip through. Thread the elastic band through the hole and tie the end into a single knot to complete!
Step 5. Put in a Leaves
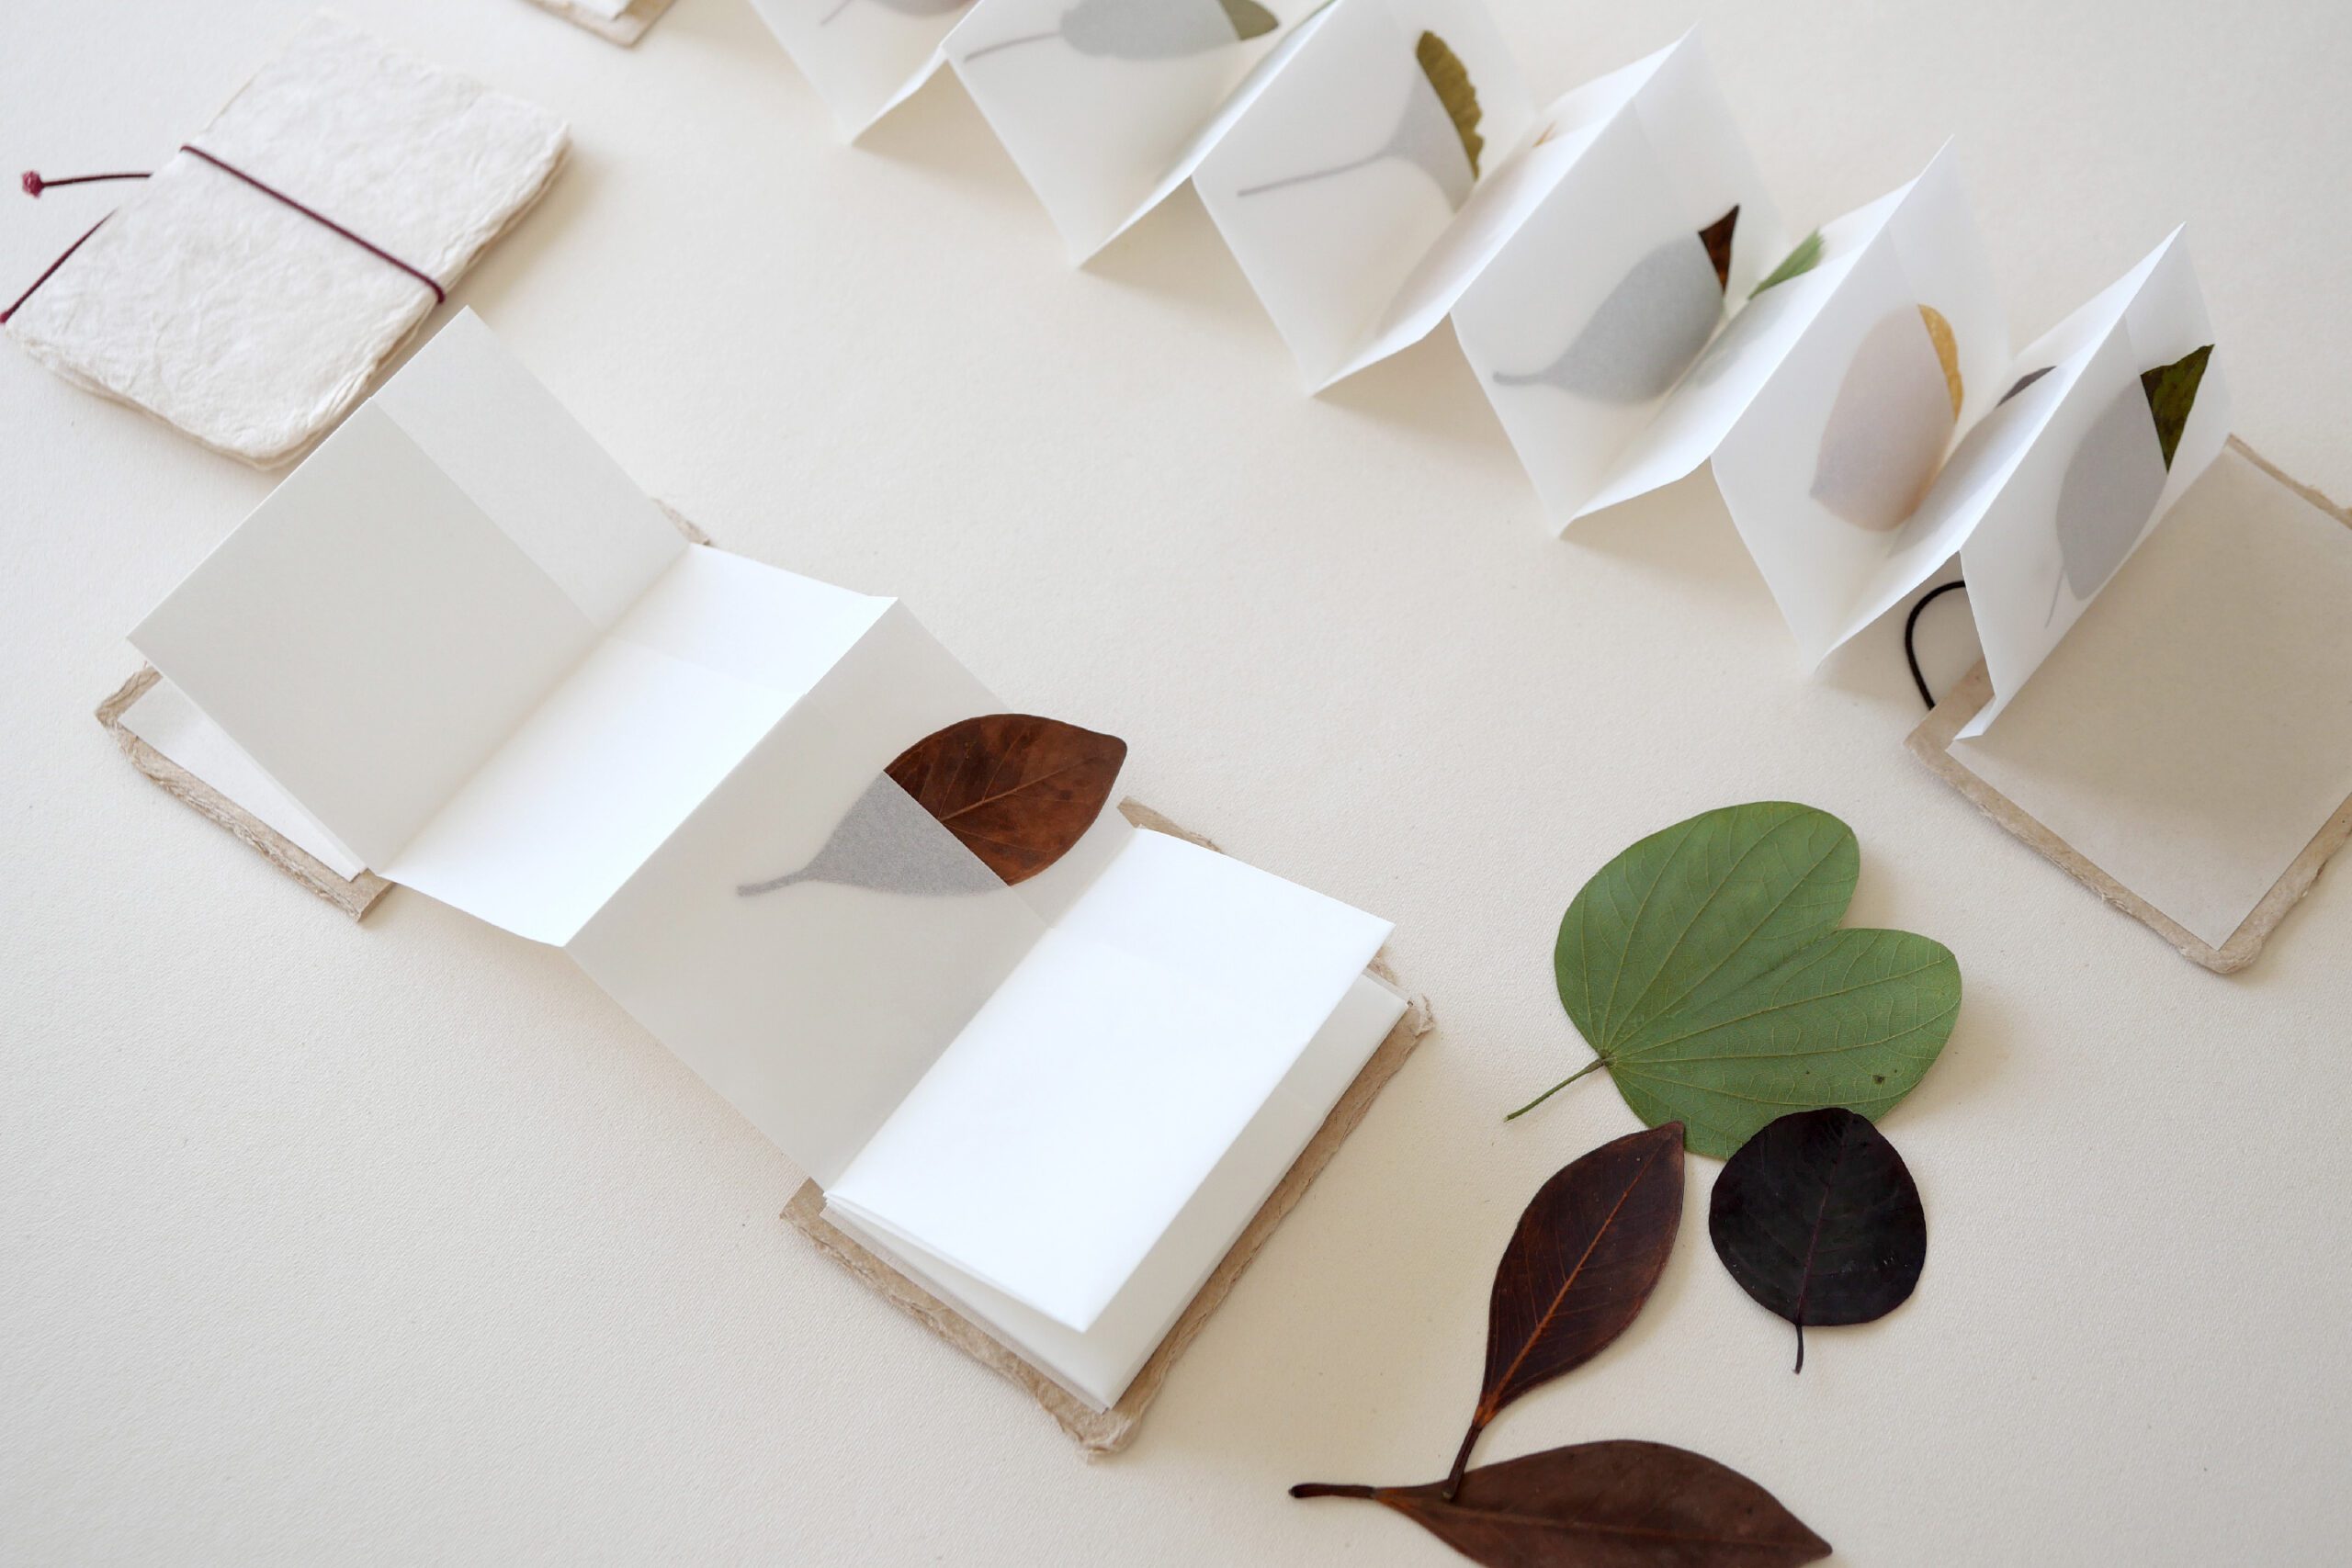
I put pressed leaves in pocket. To pick up fresh leaves and make pressed leaves as they are, you can place a weight on top of the pocket journal.
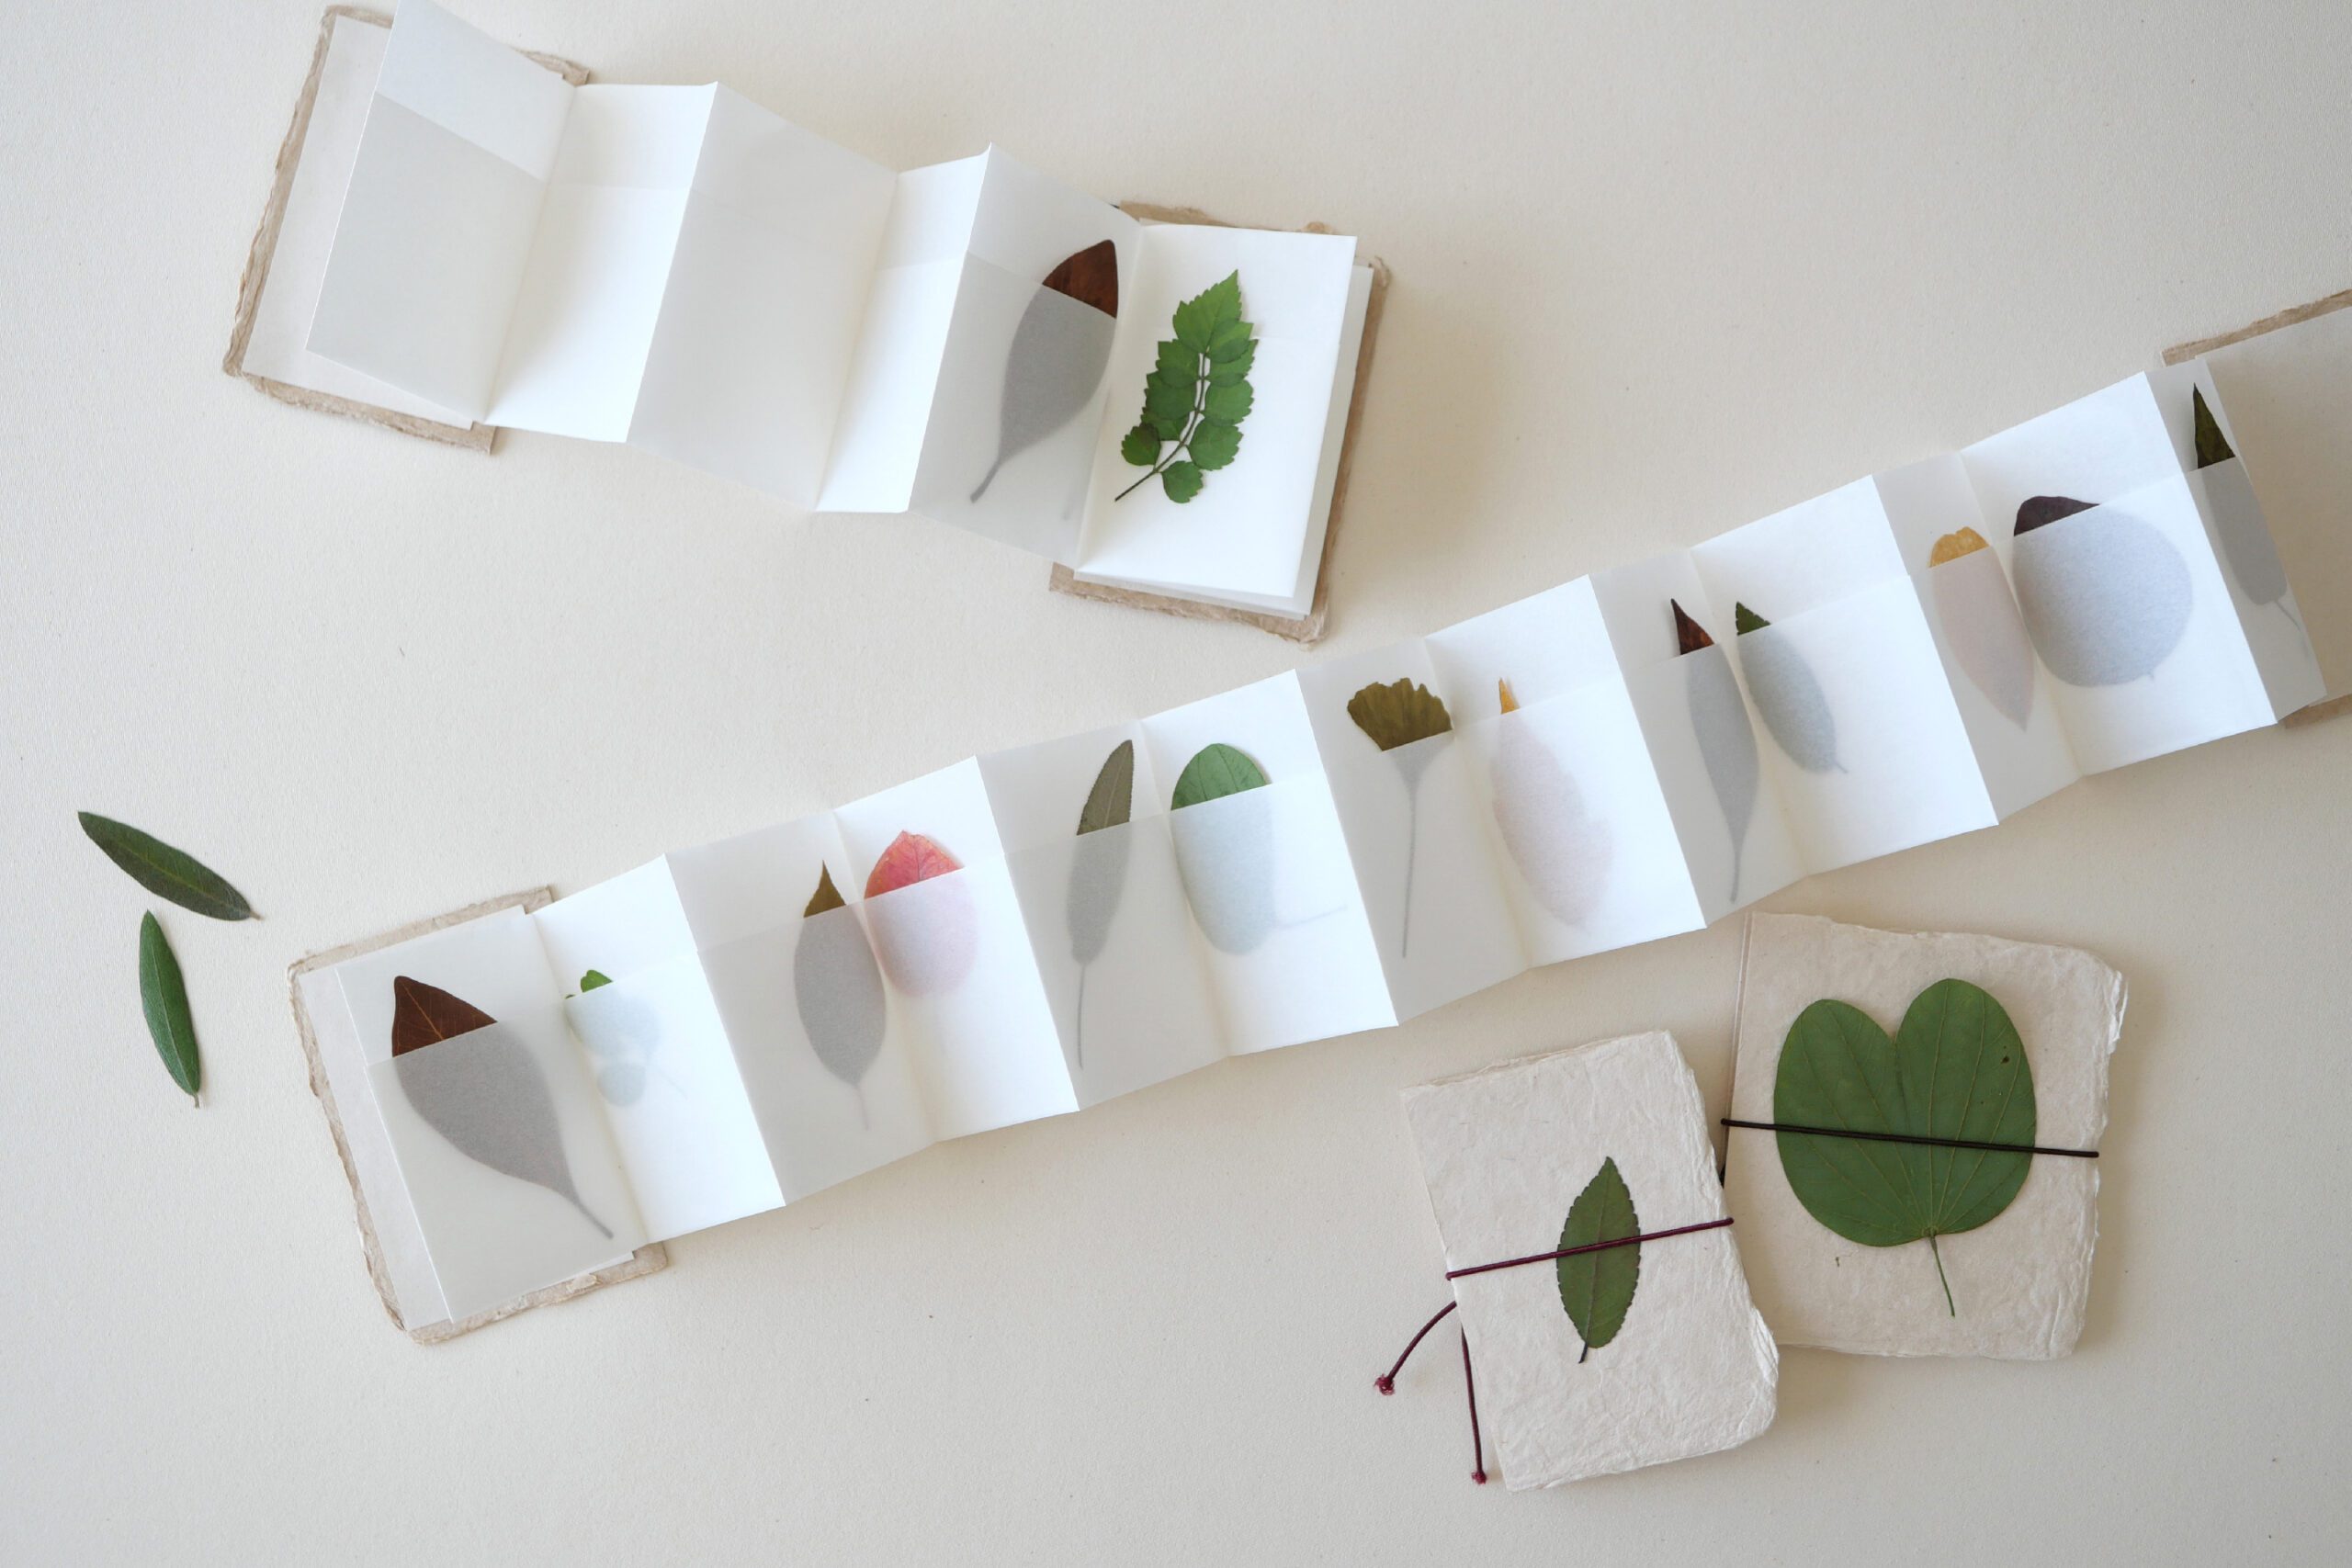
Let's Make Various Pocket Journals
You can arrange the size and number of pages however you like. I made a horizontal pocket journal to hold larger leaves. All of them in the same way, finished by folding them into accordion style of the desired size. When I pasted the pressed leaves inside onto the cover as well, my favorite collection book of pressed leaves was complete.
Fallen Leaves Pocket Journal
「ちいさい秋みつけた」という、小さな頃から親しんだ日本の童謡があります。それは美しいメロディでいまでも秋になるとこの歌を思い出します。
このポケットジャーナルは、ちいさな秋を見つけるためのもの。散歩の途中に葉っぱを拾って、このポケットに入れてみよう。いろいろな色、形、大きさの葉っぱたちが、押し葉のコレクションとなって収納されます。
トレーシングペーパーを蛇腹に折って、表紙をつけてゴムで止める。トレーシングペーパーが手元になければ、ワックスペーパーやパーチメントペーパーが最適な代替品となるでしょう。大きさや、ポケットの数は自由に変更できます。これを持って秋の散策に出かけるのが楽しみです。
用意するもの
– トレーシングペーパー*
– 表紙となるカードボード
– ゴム紐
– 糊
– ハサミ
– カッター
– 穴あけパンチ または 千枚通し
*今回は12インチのロール状のトレーシングペーパーを3フィート(90mmほど)使い、14個のポケットをつくりました。大きさや、ポケットの数は自由に変更できます。
つくりかた
Step 1. ポケットを折る
小さな落ち葉を入れるために、各ページのサイズは90×60mmにしました。ポケットのスリットの深さは65mmです。12インチのトレーシングペーパーに対して、上から90mm、下から65mmの位置で折ります。次に上下の紙が重なった部分を折ればスリットの完成です。この方法で折ることで、すべての辺が袋状になって、より耐久性のあるポケットになります。
Step 2. 蛇腹に折る
初めに半分に折ります。そして、片方ずつ交互に60mmの蛇腹に折っていきます。この方法はあくまで推奨で、端から蛇腹に折っていくよりも、中心から交互に折っていくことで最終的なズレが軽減されます。
このポケットの大切なところは、折り目をしっかりと折ることです。しっかり折るためのひとつめのヒントは、鉄製の定規を当てながら折ること。定規がガイドとして役立ちより折りやすくなります。そしてふたつめのヒントは、小さな空き瓶。折った部分を手で押さえる代わりに、瓶でスライドさせるように押さえるとよりしっかりとした折り目がつきます。
Step 3. 表紙を付ける
表紙用の厚紙を100×70mmの大きさに切り、ポケットの本体に表紙を貼ります。表紙の裏側も美しく仕上げるために薄い紙を貼りました。
表紙は自由です。絵やメッセージを描いたり、押し葉などを貼って素敵にアレンジ可能です。
Step 4. ゴムを付ける
裏表紙の左側に、ゴム紐を通す小さな穴を開けます。あまり大きな穴にしてしまうと、ゴムが滑り落ちてしまうので、大きさには注意してください。穴にゴム紐を通して、端を片結びしたら完成です。
Step 5. 葉っぱを入れる
ポケットには事前に押し葉にしたものを入れました。フレッシュな葉っぱを拾ってそのまま押し葉にするためには、ポケットジャーナルの上に重しを乗せるといいでしょう。
いろいろなポケットジャーナルをつくろう
大きさもページ数もあなたの好きなようにアレンジできます。私はより大きな葉っぱを収納できる、横長のポケットジャーナルをつくりました。すべて同じように、好みの大きさに蛇腹に折って仕上げています。中に入っている押し葉を表紙にも貼ったら、お気に入りの押し葉コレクションブックが完成しました。