Paper Sushi Rolls
I think pretend cooking is wonderful. Setting aside the benefits like boosting imagination, language development, and expressiveness, I find it truly amazing that children get exposed to essential daily activities like cooking and eating from a young age, and naturally learn them through play.
My daughter loved pretend cooking from a very young age. The moment I headed to the kitchen, she’d spread out all her materials and busily cook meals for her stuffed animals. She’d use dried beans as rice, leaves as vegetables, and sticks as pasta. Combining natural materials, she’d create wonderfully imaginative dishes. And when I looked at what she’d made, I’d see my way of plating food and the whole meal scene perfectly recreated in her play. It always impressed me how closely she observed what we did.
The paper sushi rolls I made for my daughter’s school Winter Faire were created specifically for the pretend play repertoire of children living here in LA. Japanese foods like rice balls and sushi rolls are very popular among the children around us. Cucumber rolls, in particular, are perfect for accommodating options like vegan and gluten-free, and we often bring them to events like potlucks. I wanted to bring Japan’s beloved cucumber roll into their everyday pretend play. That’s the thought behind the paper sushi rolls I made with love. It’s very easy to make and you can enjoy creating it with your little ones. It turned out great, so I’d like to share the instructions here.

Materials
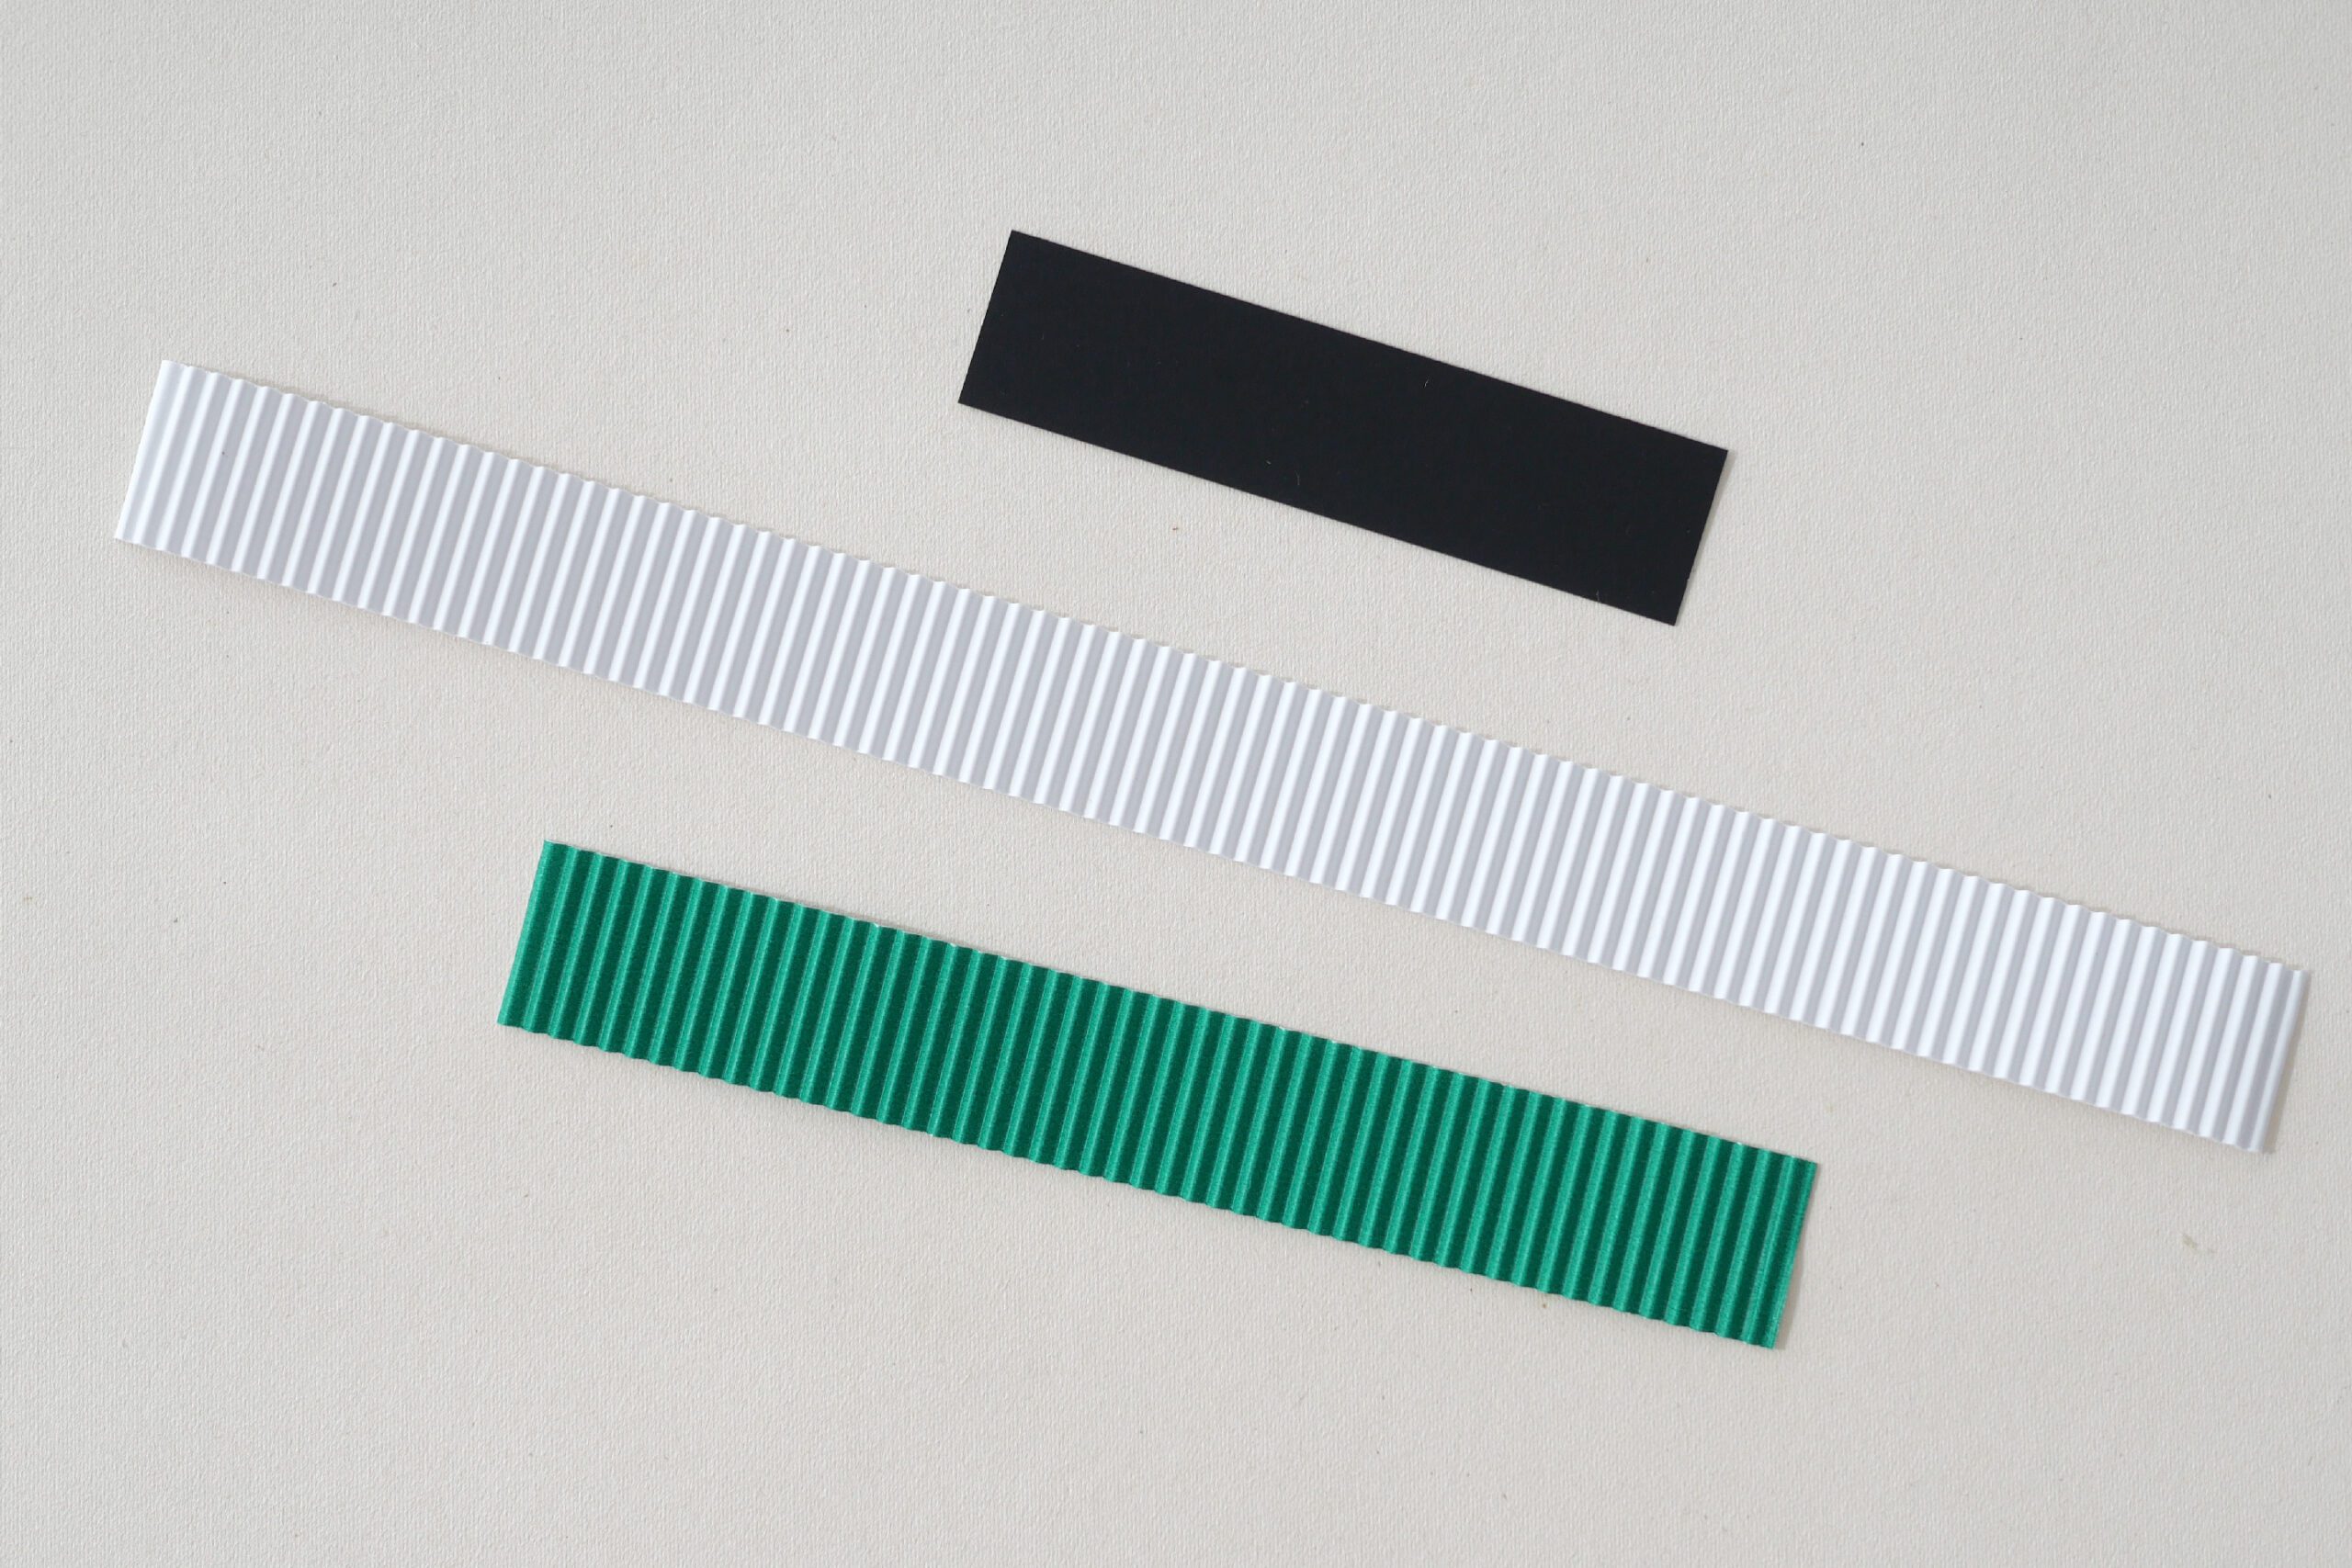
– Single-sided cardboard white and green *I got this at US Amazon
– Black paper
– Glue gun or double-sided tape
– Scissors, craft knife, etc.
*Here I will make sushi roll pieces measuring 2.5 x 2.5 cm each.
Instructions for making
Step 1. Cut the Materials
Cut the white single-sided cardboard for the rice into 25mm x 300mm pieces, the green single-sided cardboard for the cucumber into 25mm x 170–180mm pieces, and the black paper for the seaweed into 25mm x 100mm pieces.
Step 2. Roll the Cucumber
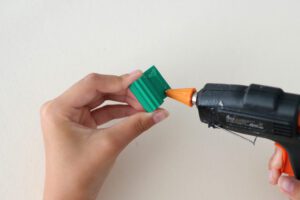
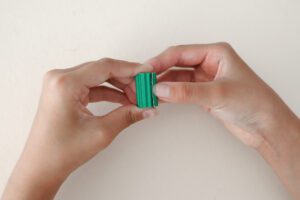
Roll the green paper into a cucumber shape. Start from one end and roll it as tightly and firmly as possible. Finally, secure it with a glue gun. You don’t need a thick layer of glue; just a small amount is enough to hold the paper in place.
*Glue sticks or something similar take too long to set, so we recommend using a glue gun or double-sided tape.

Step 3. Roll the Rice
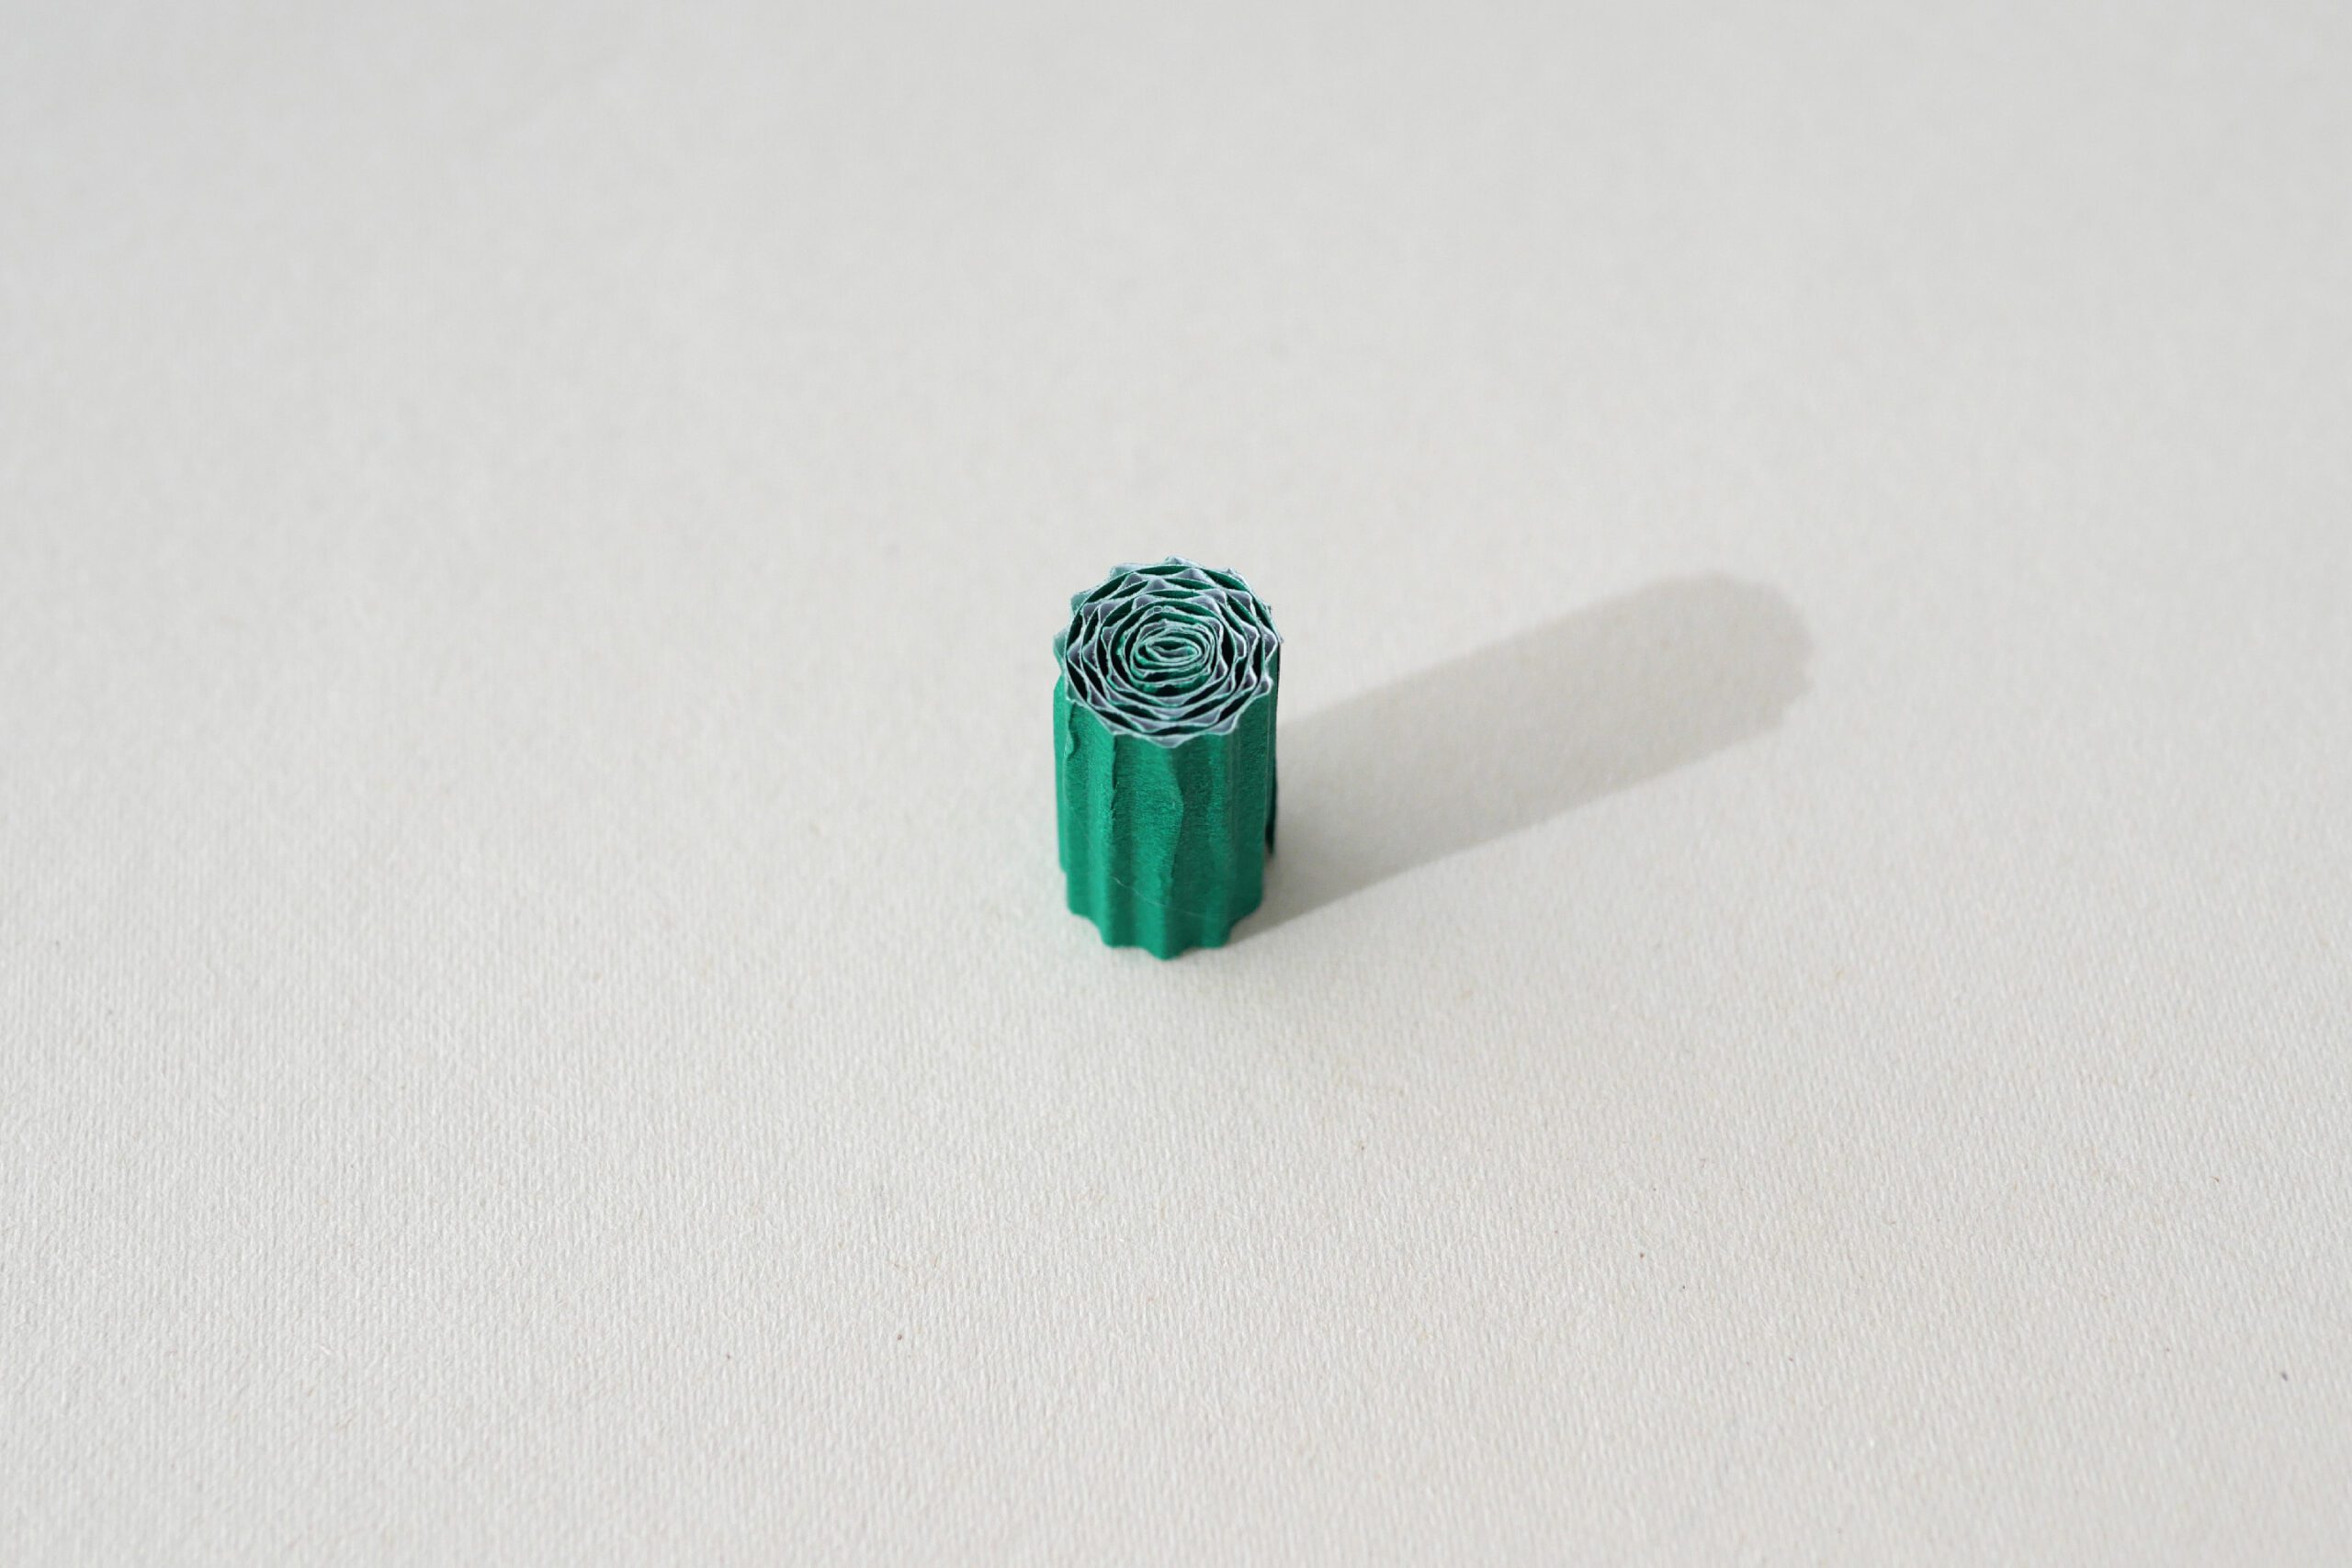
Next, roll the rice. Attach the white paper to the green cucumber using a glue gun, then roll it up tightly. Secure the end with a glue gun.
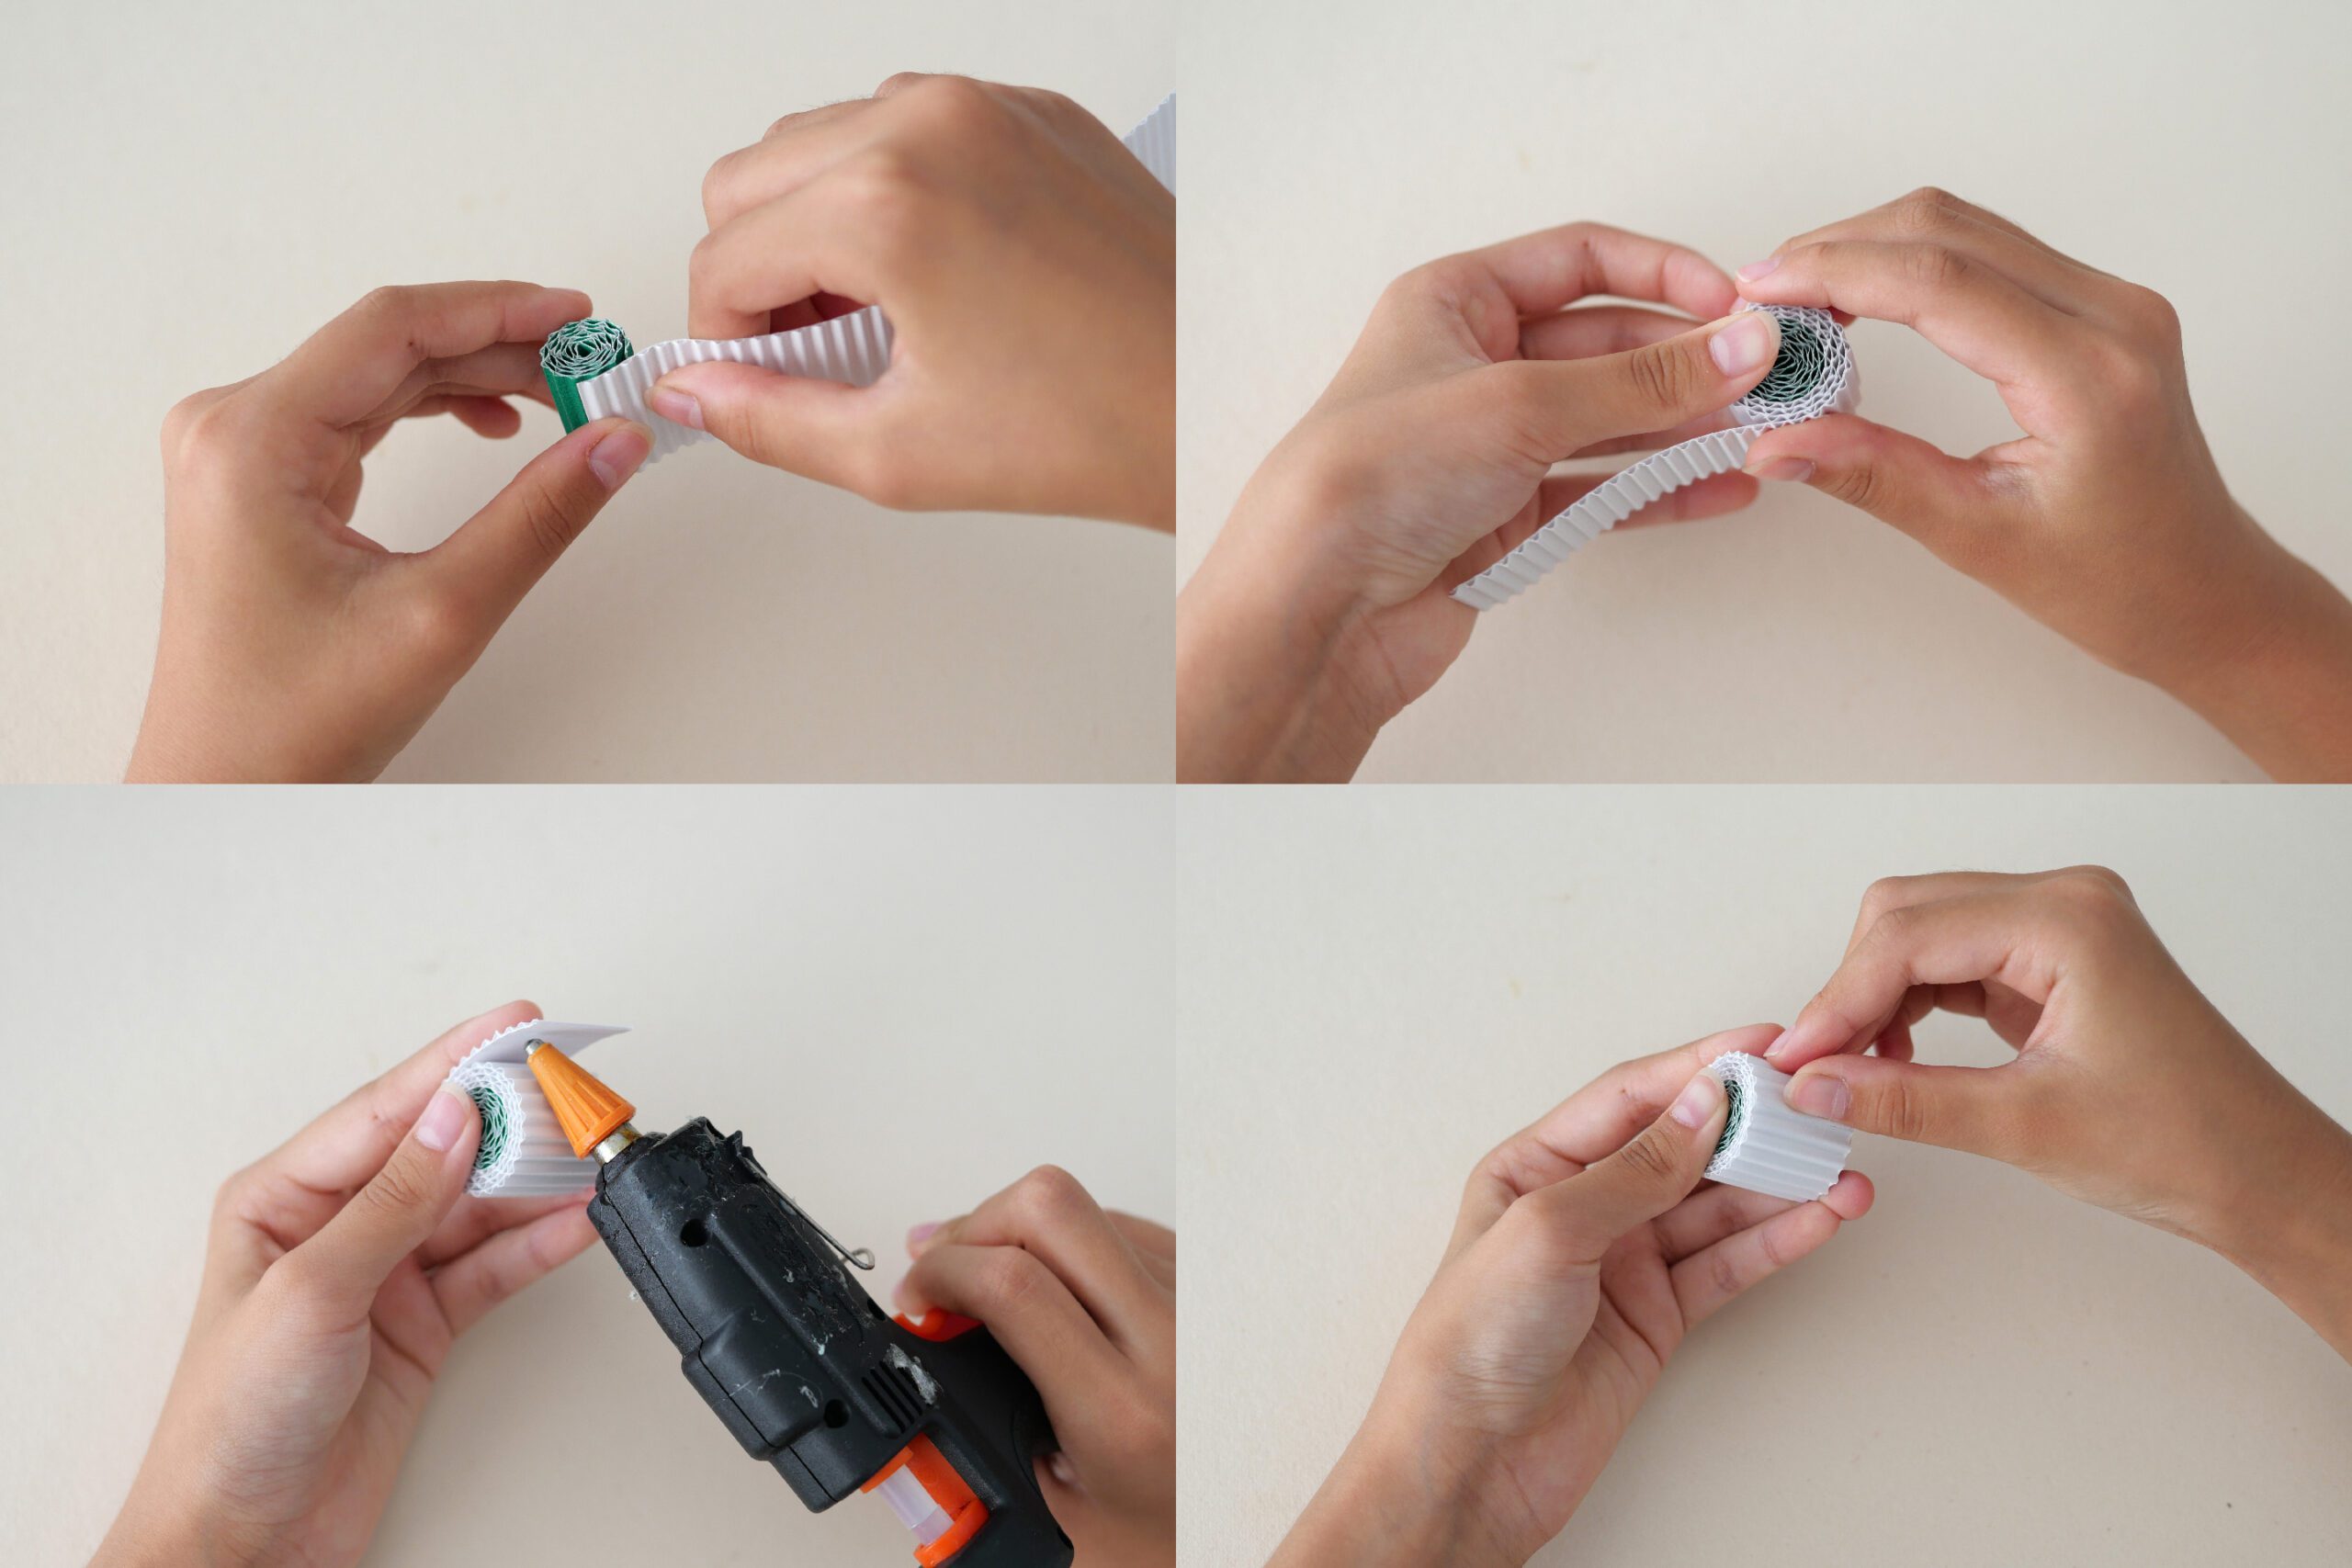
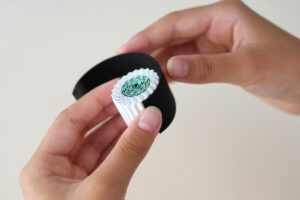
Step 4. Rolling the Seaweed
Finally, the seaweed. Roll the black paper in the same manner, then adhere it at the end.
*For a beautiful finish, I used double-sided tape to adhere it at the end.


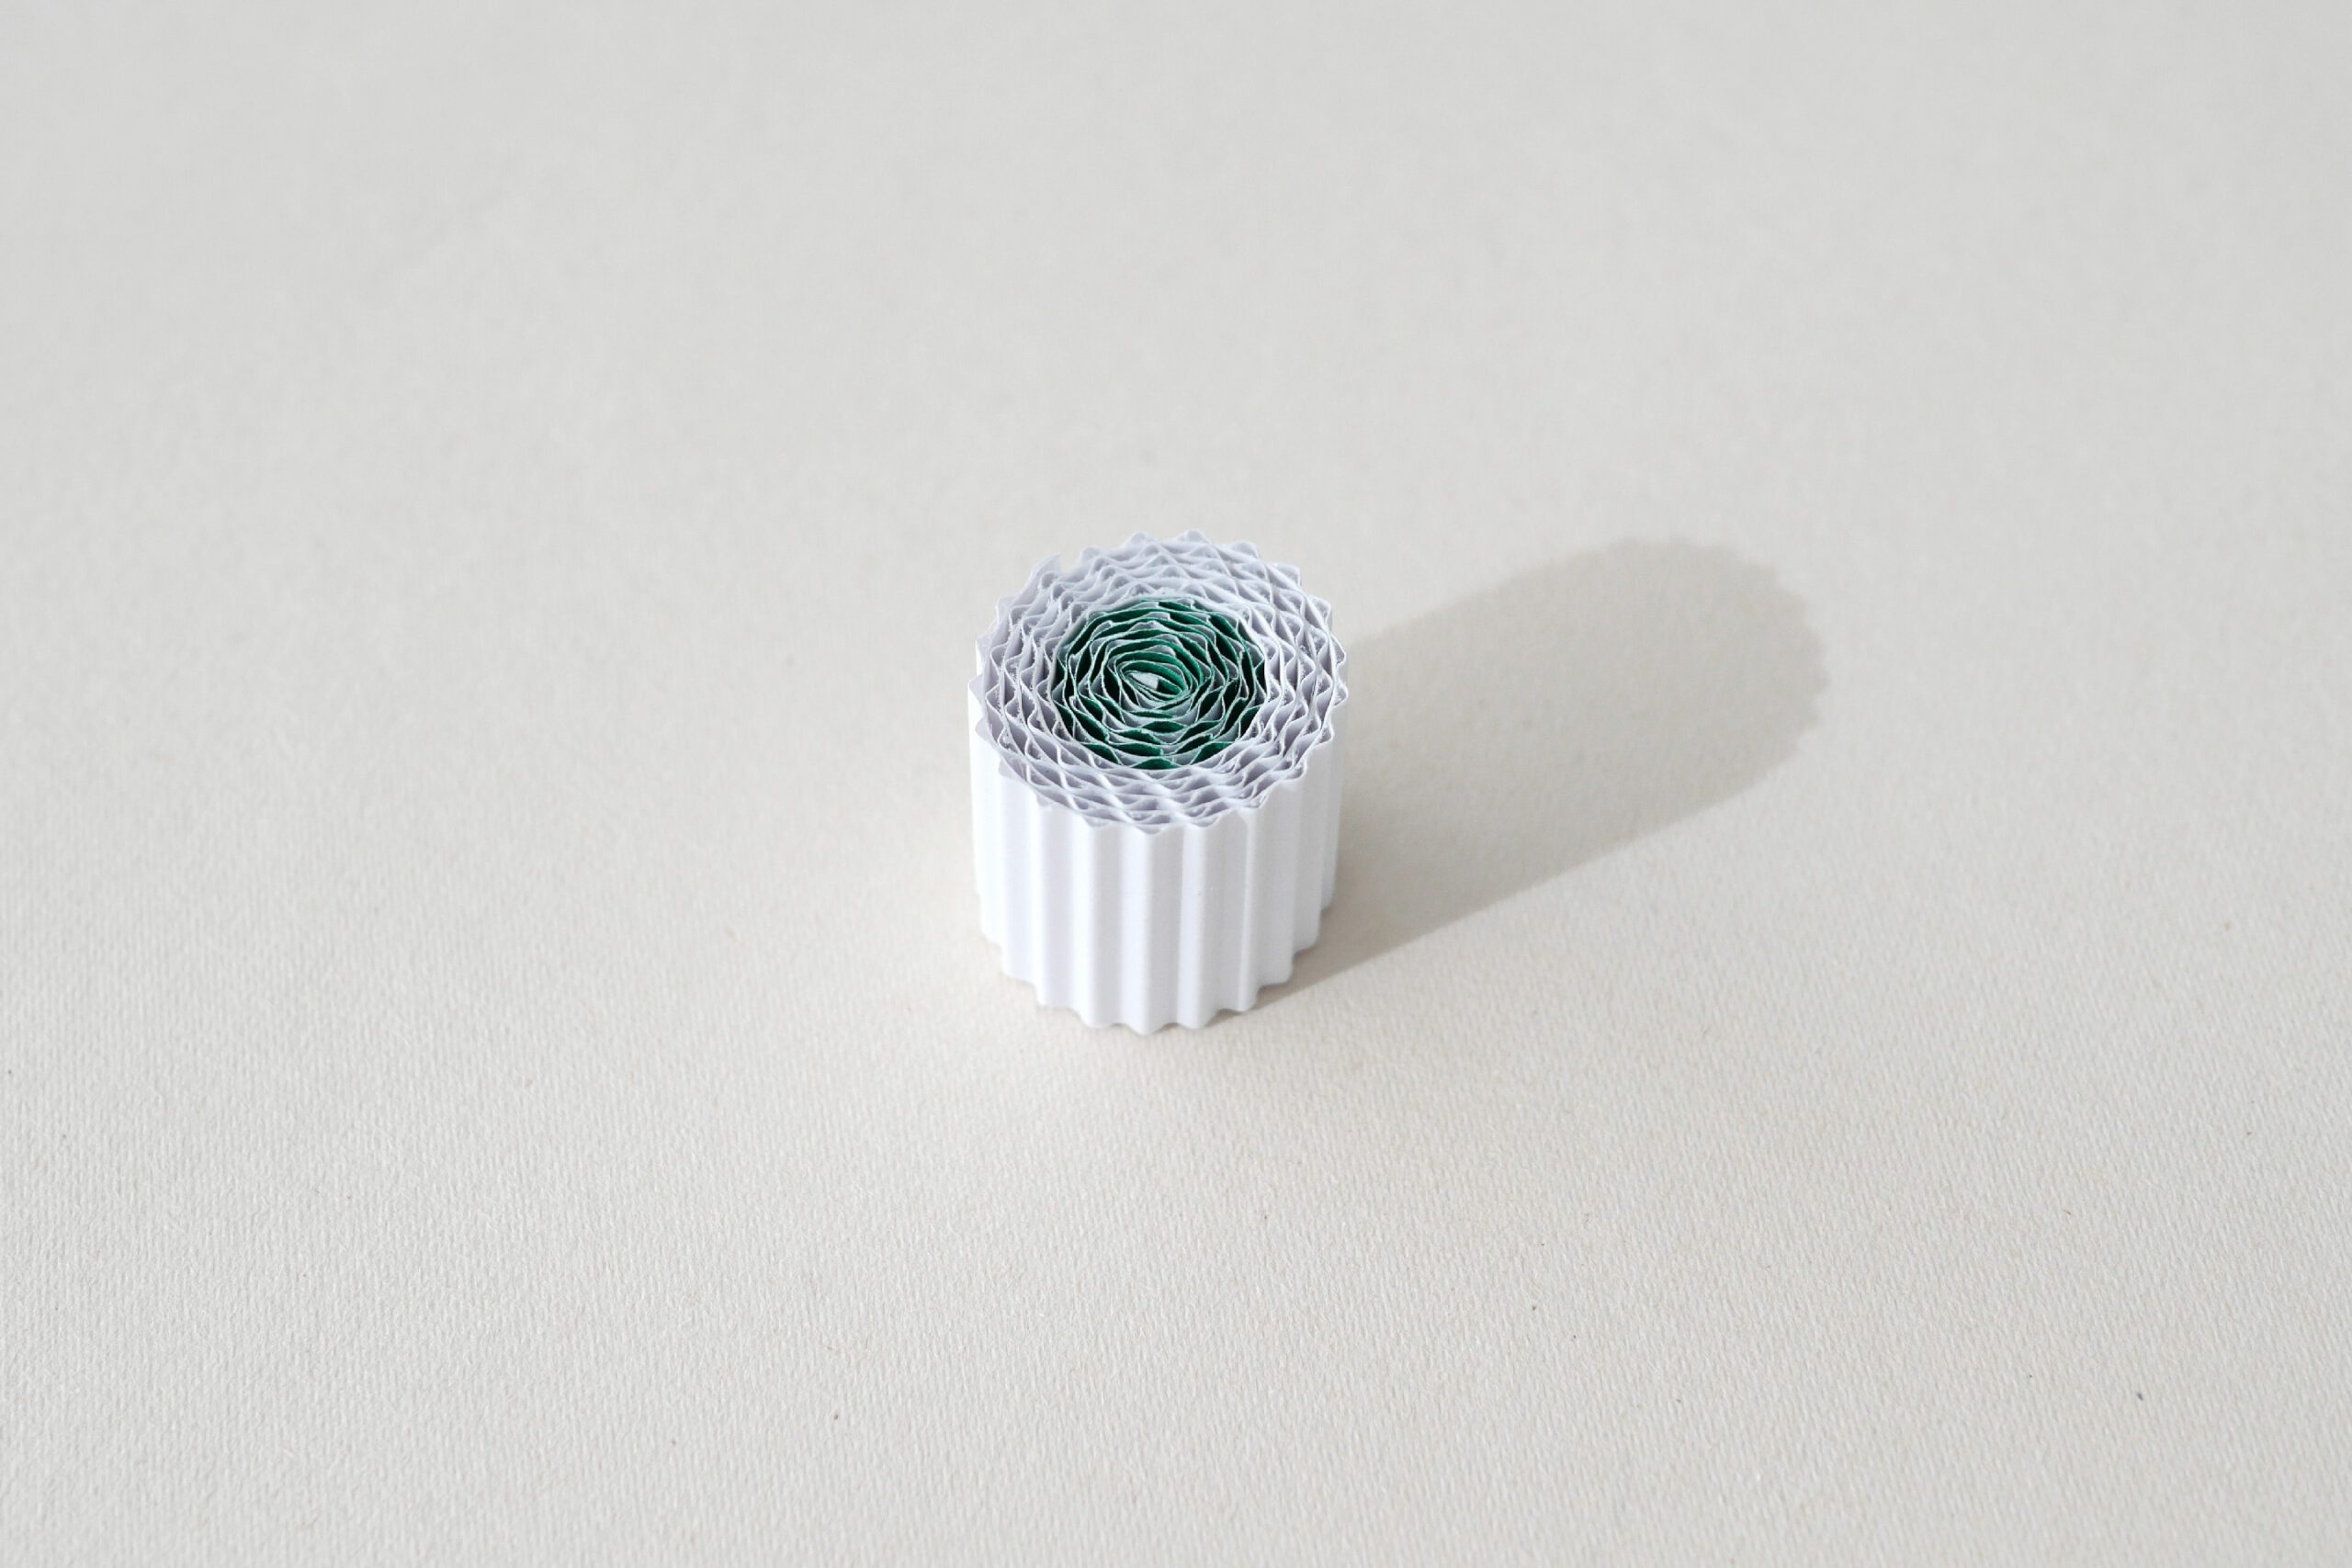
Step 5. Let’s Play
Place it on a plate, and your luxurious cucumber roll dish is complete.
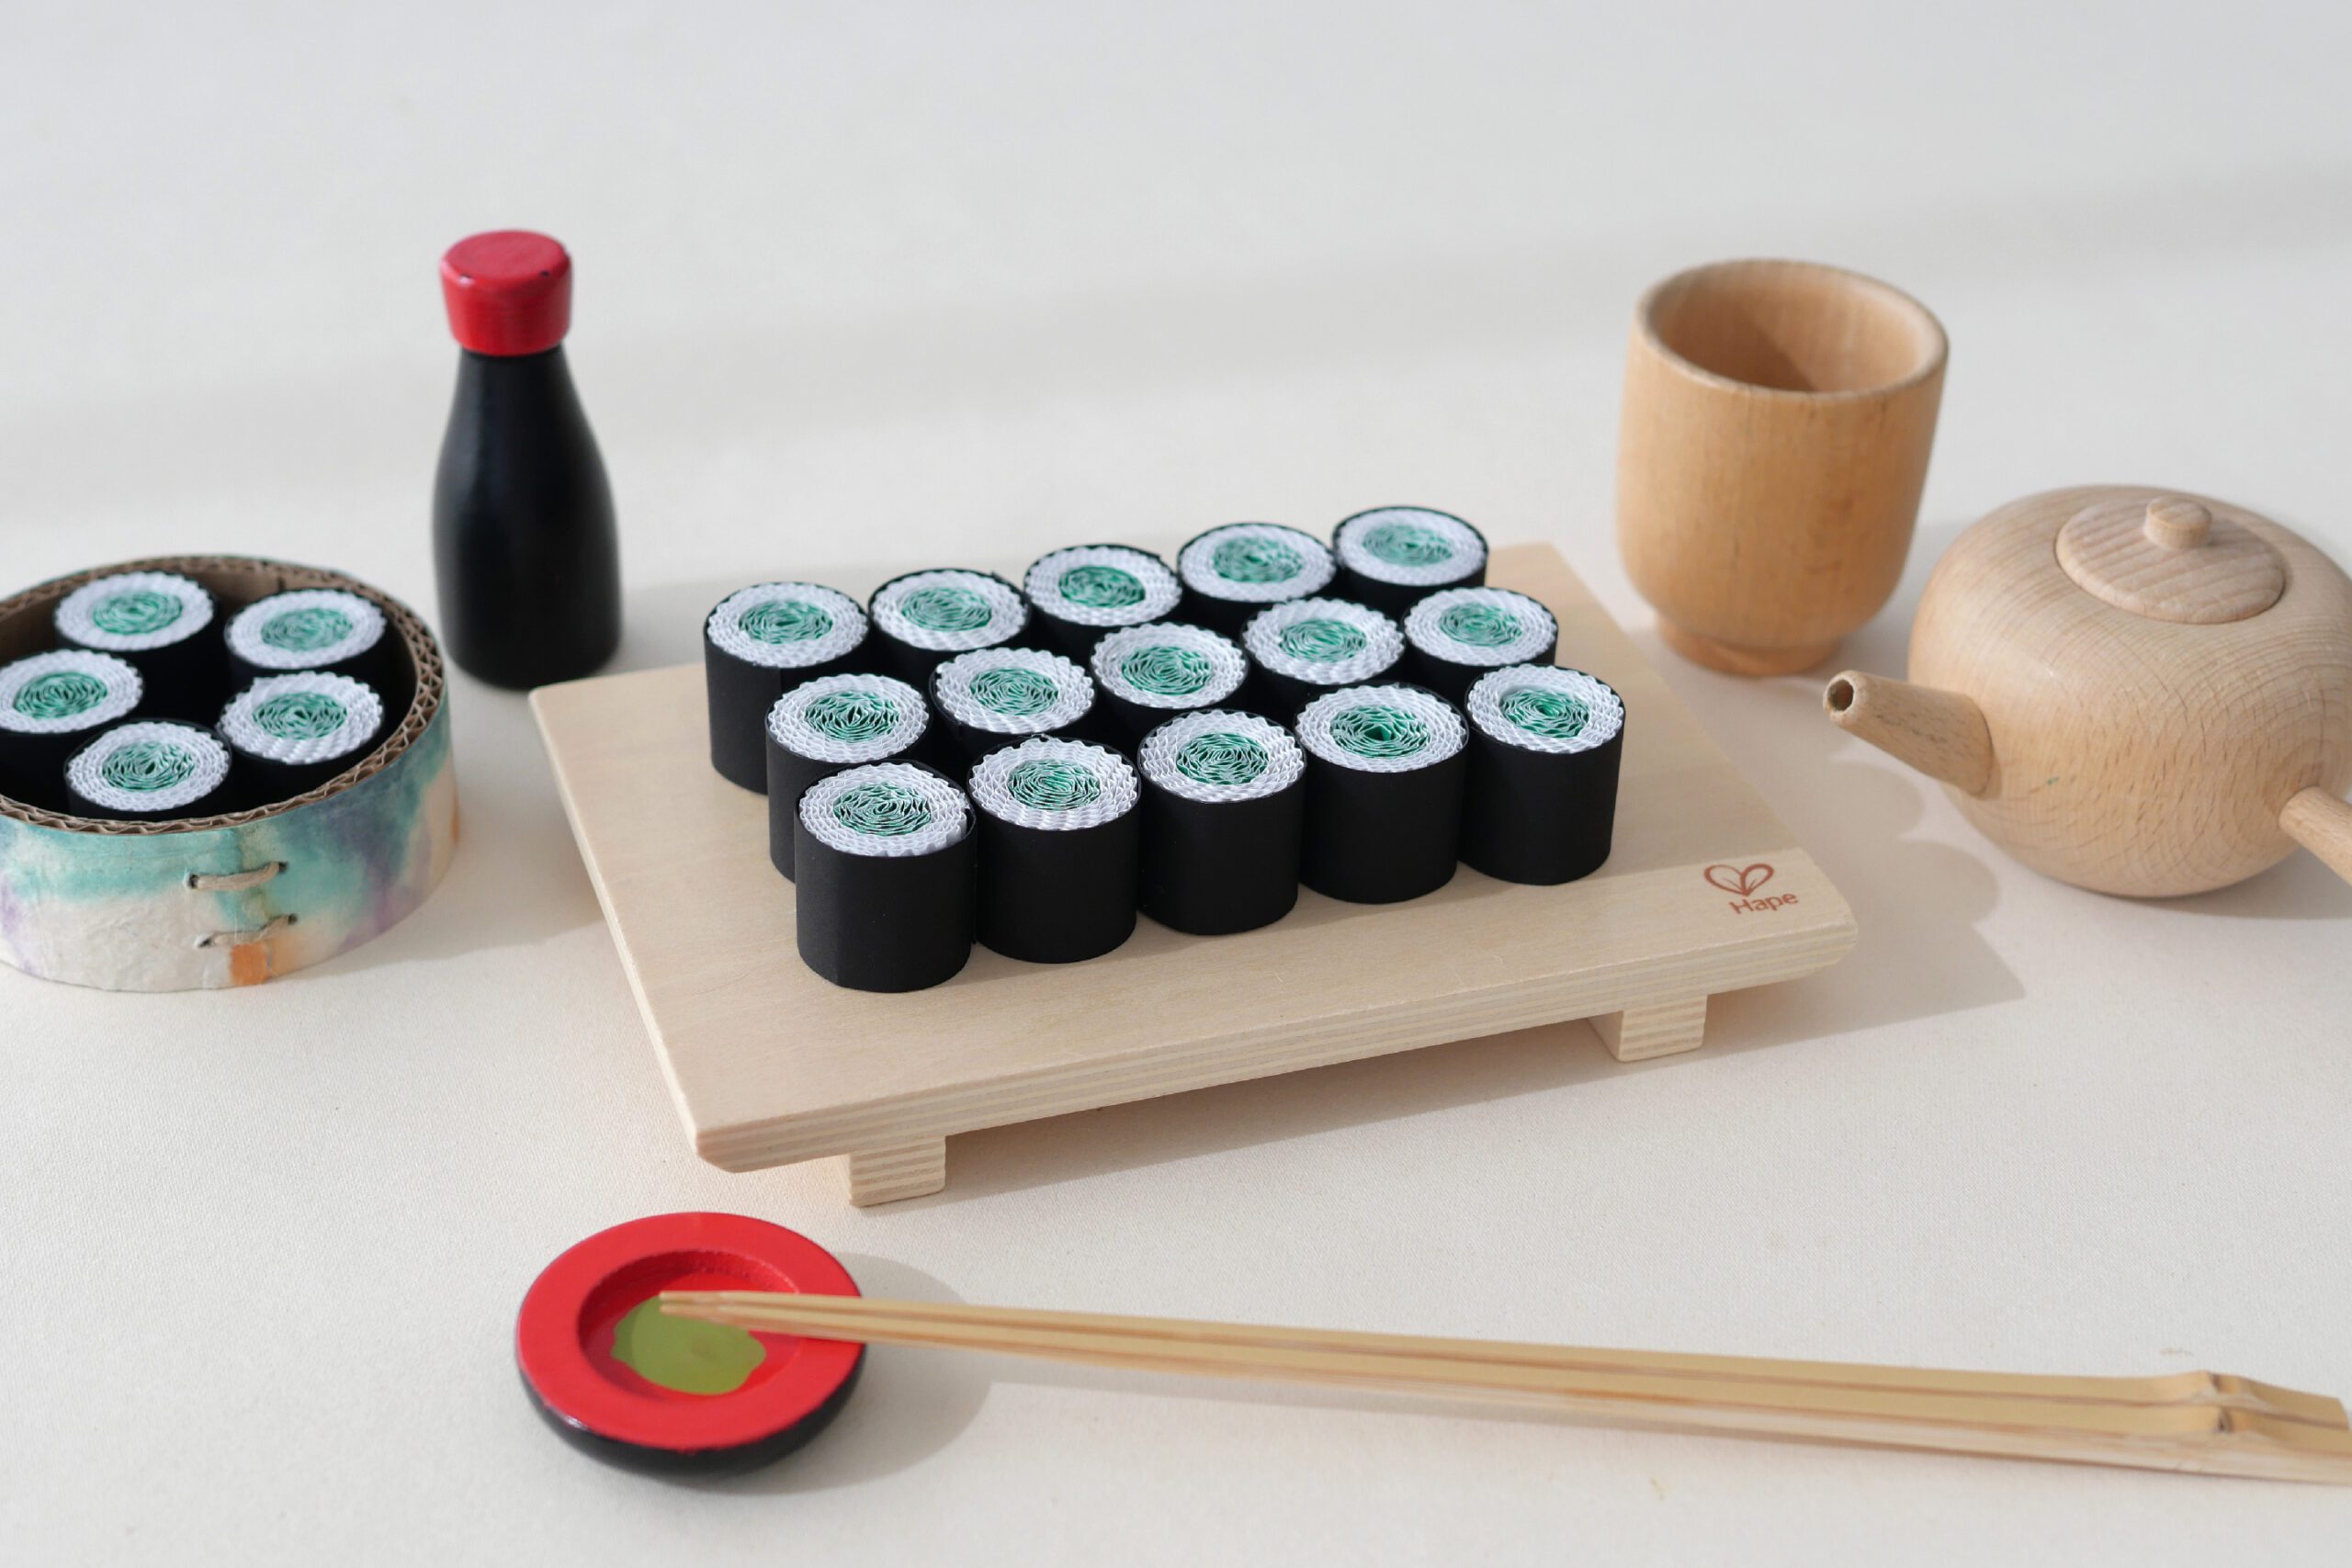
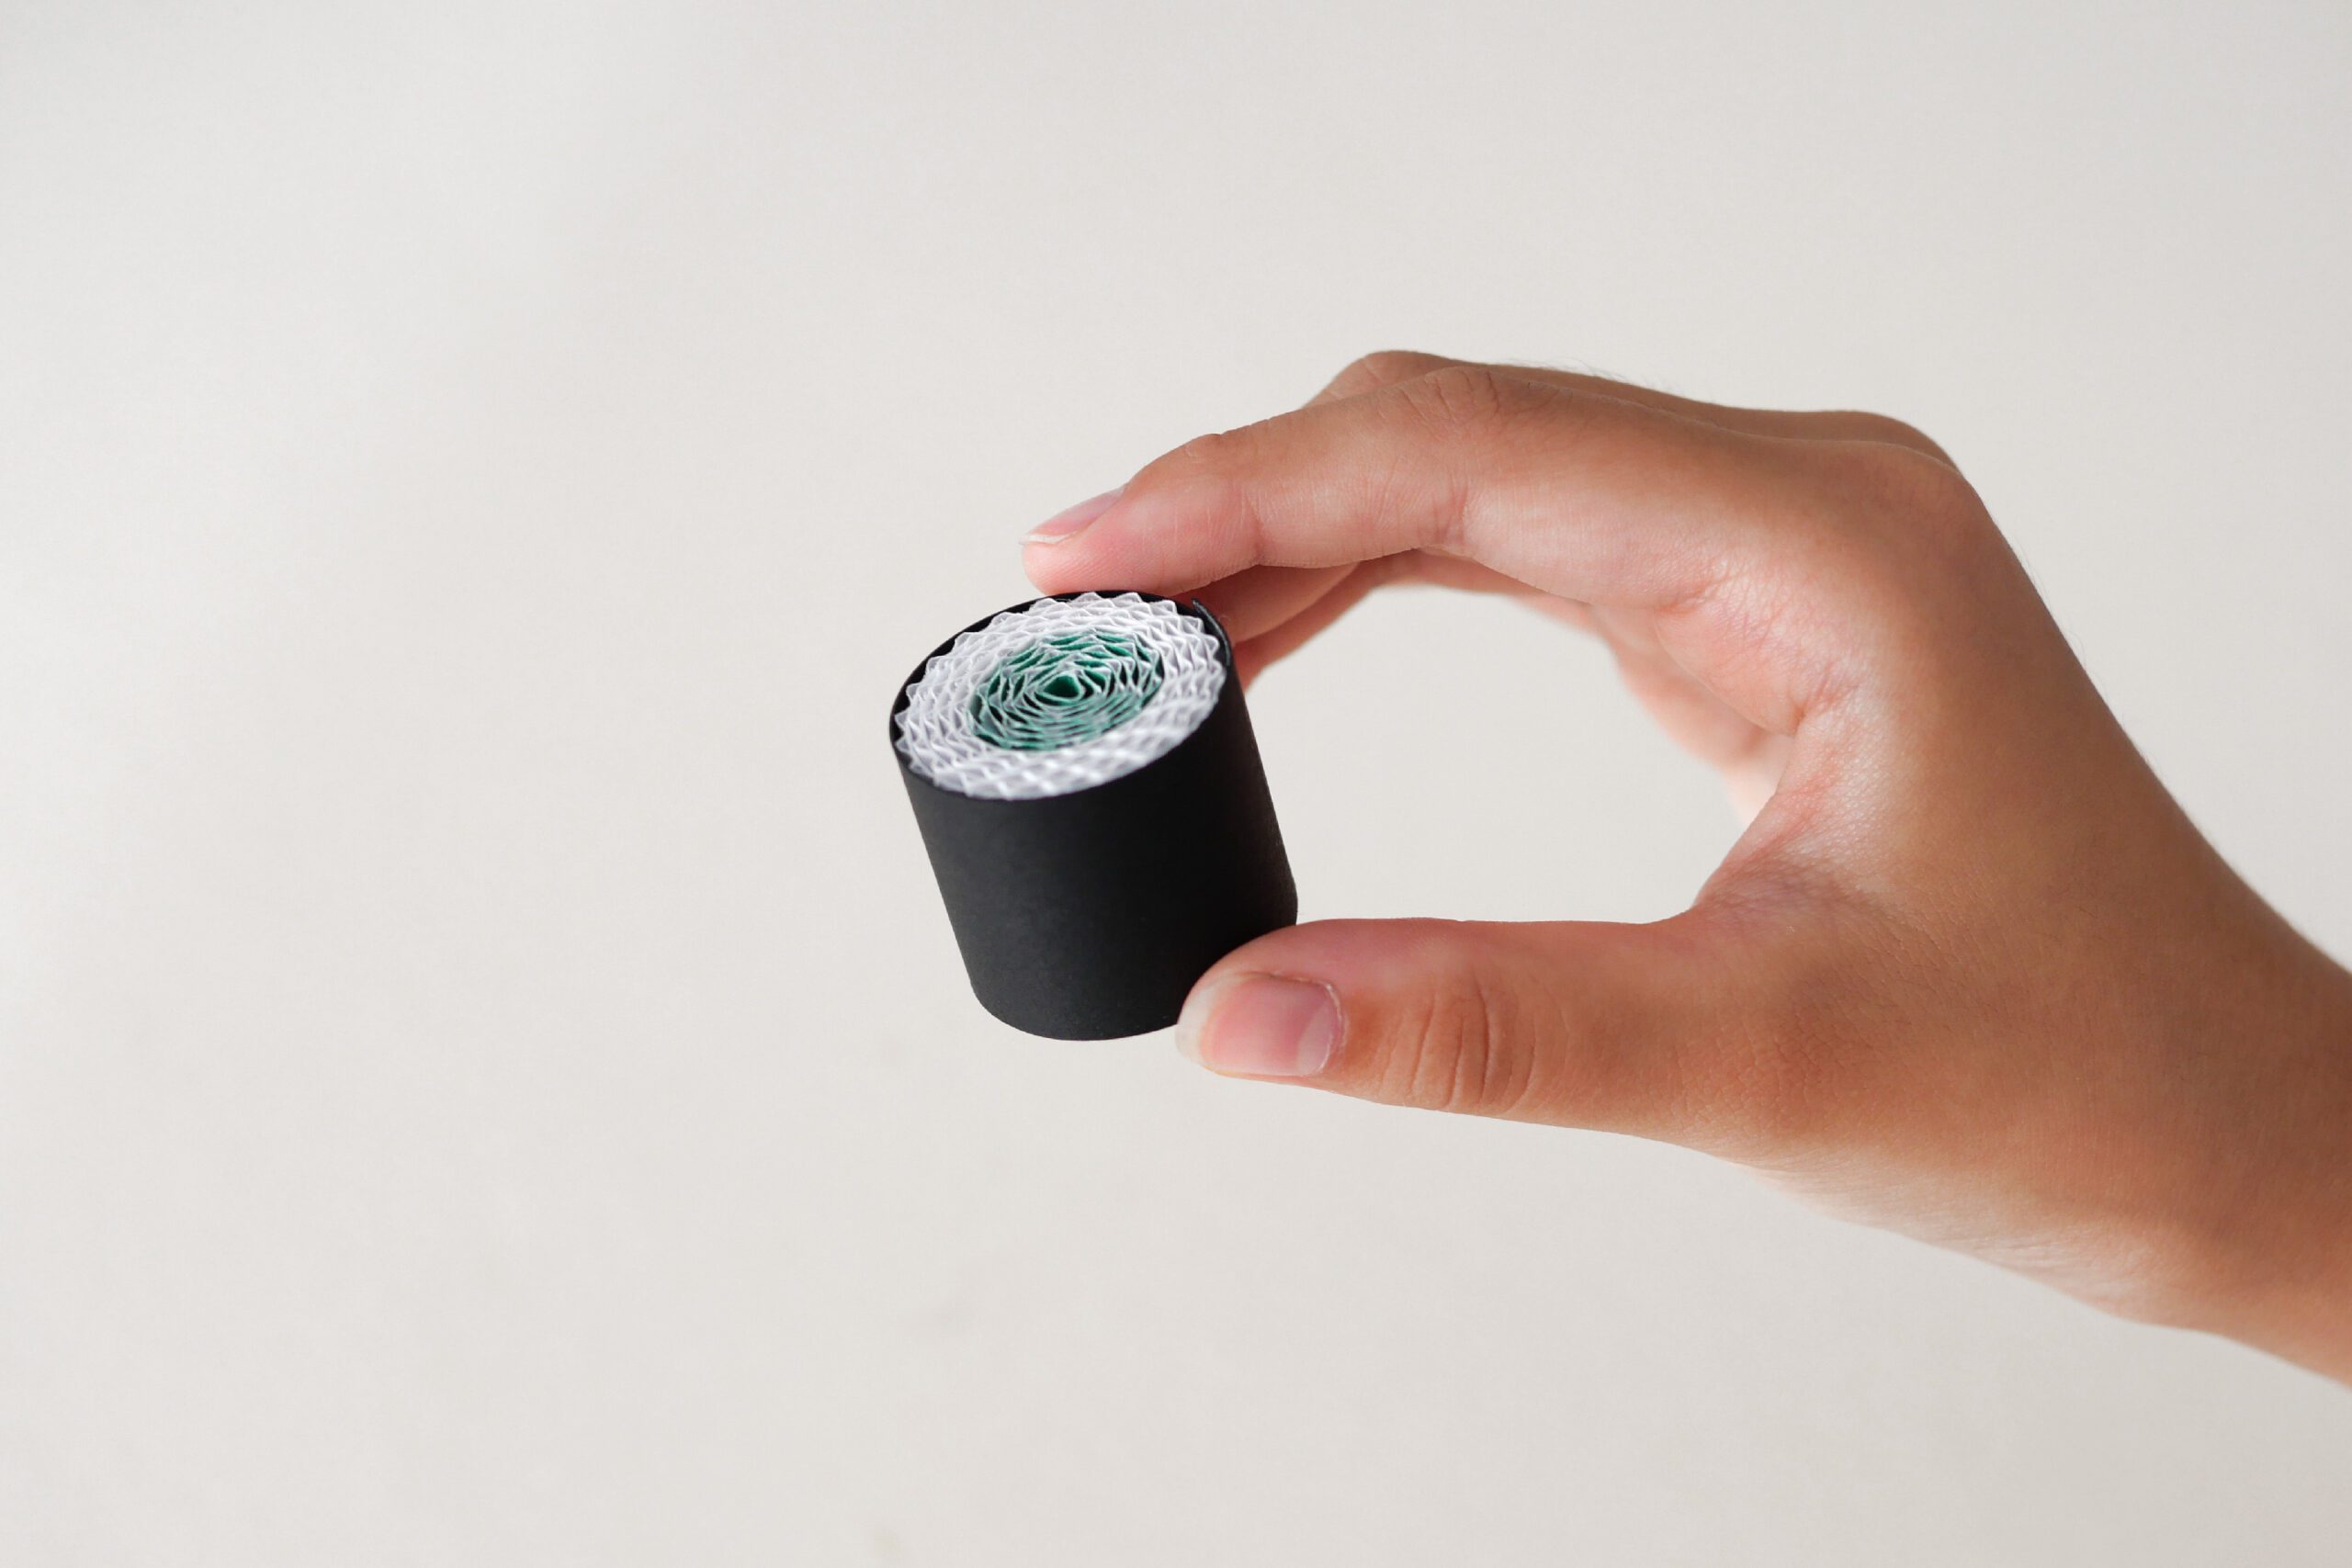
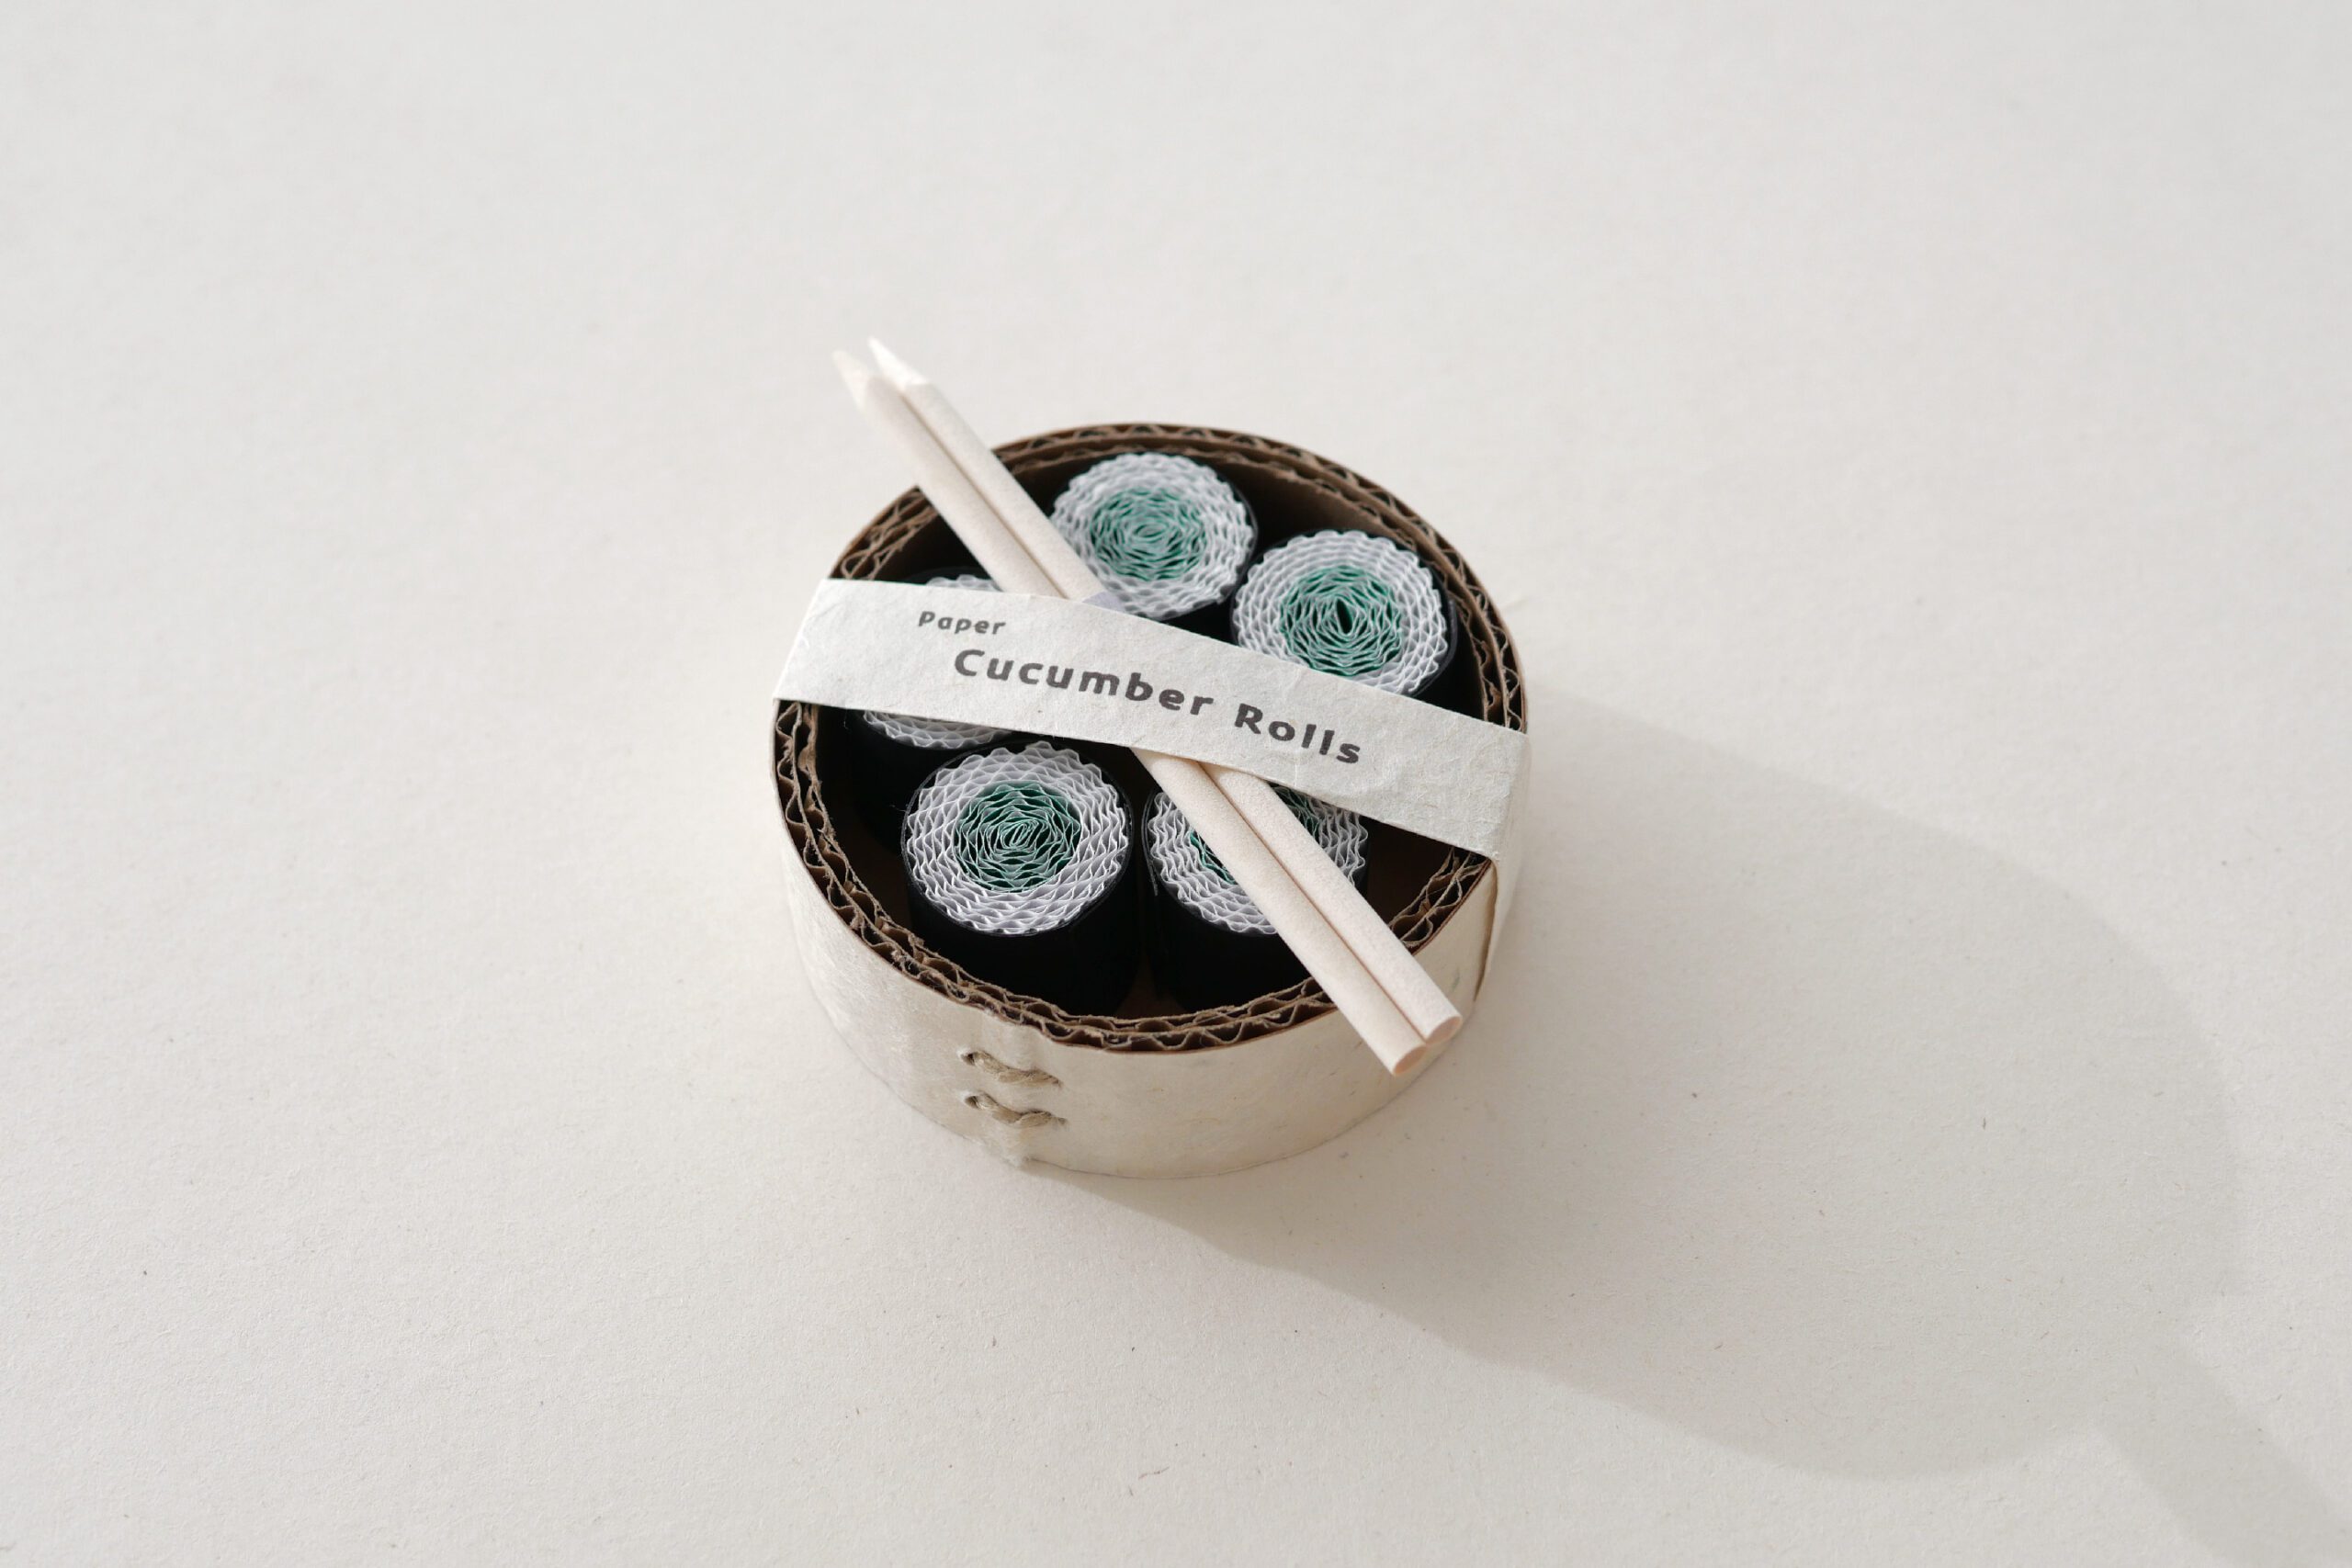
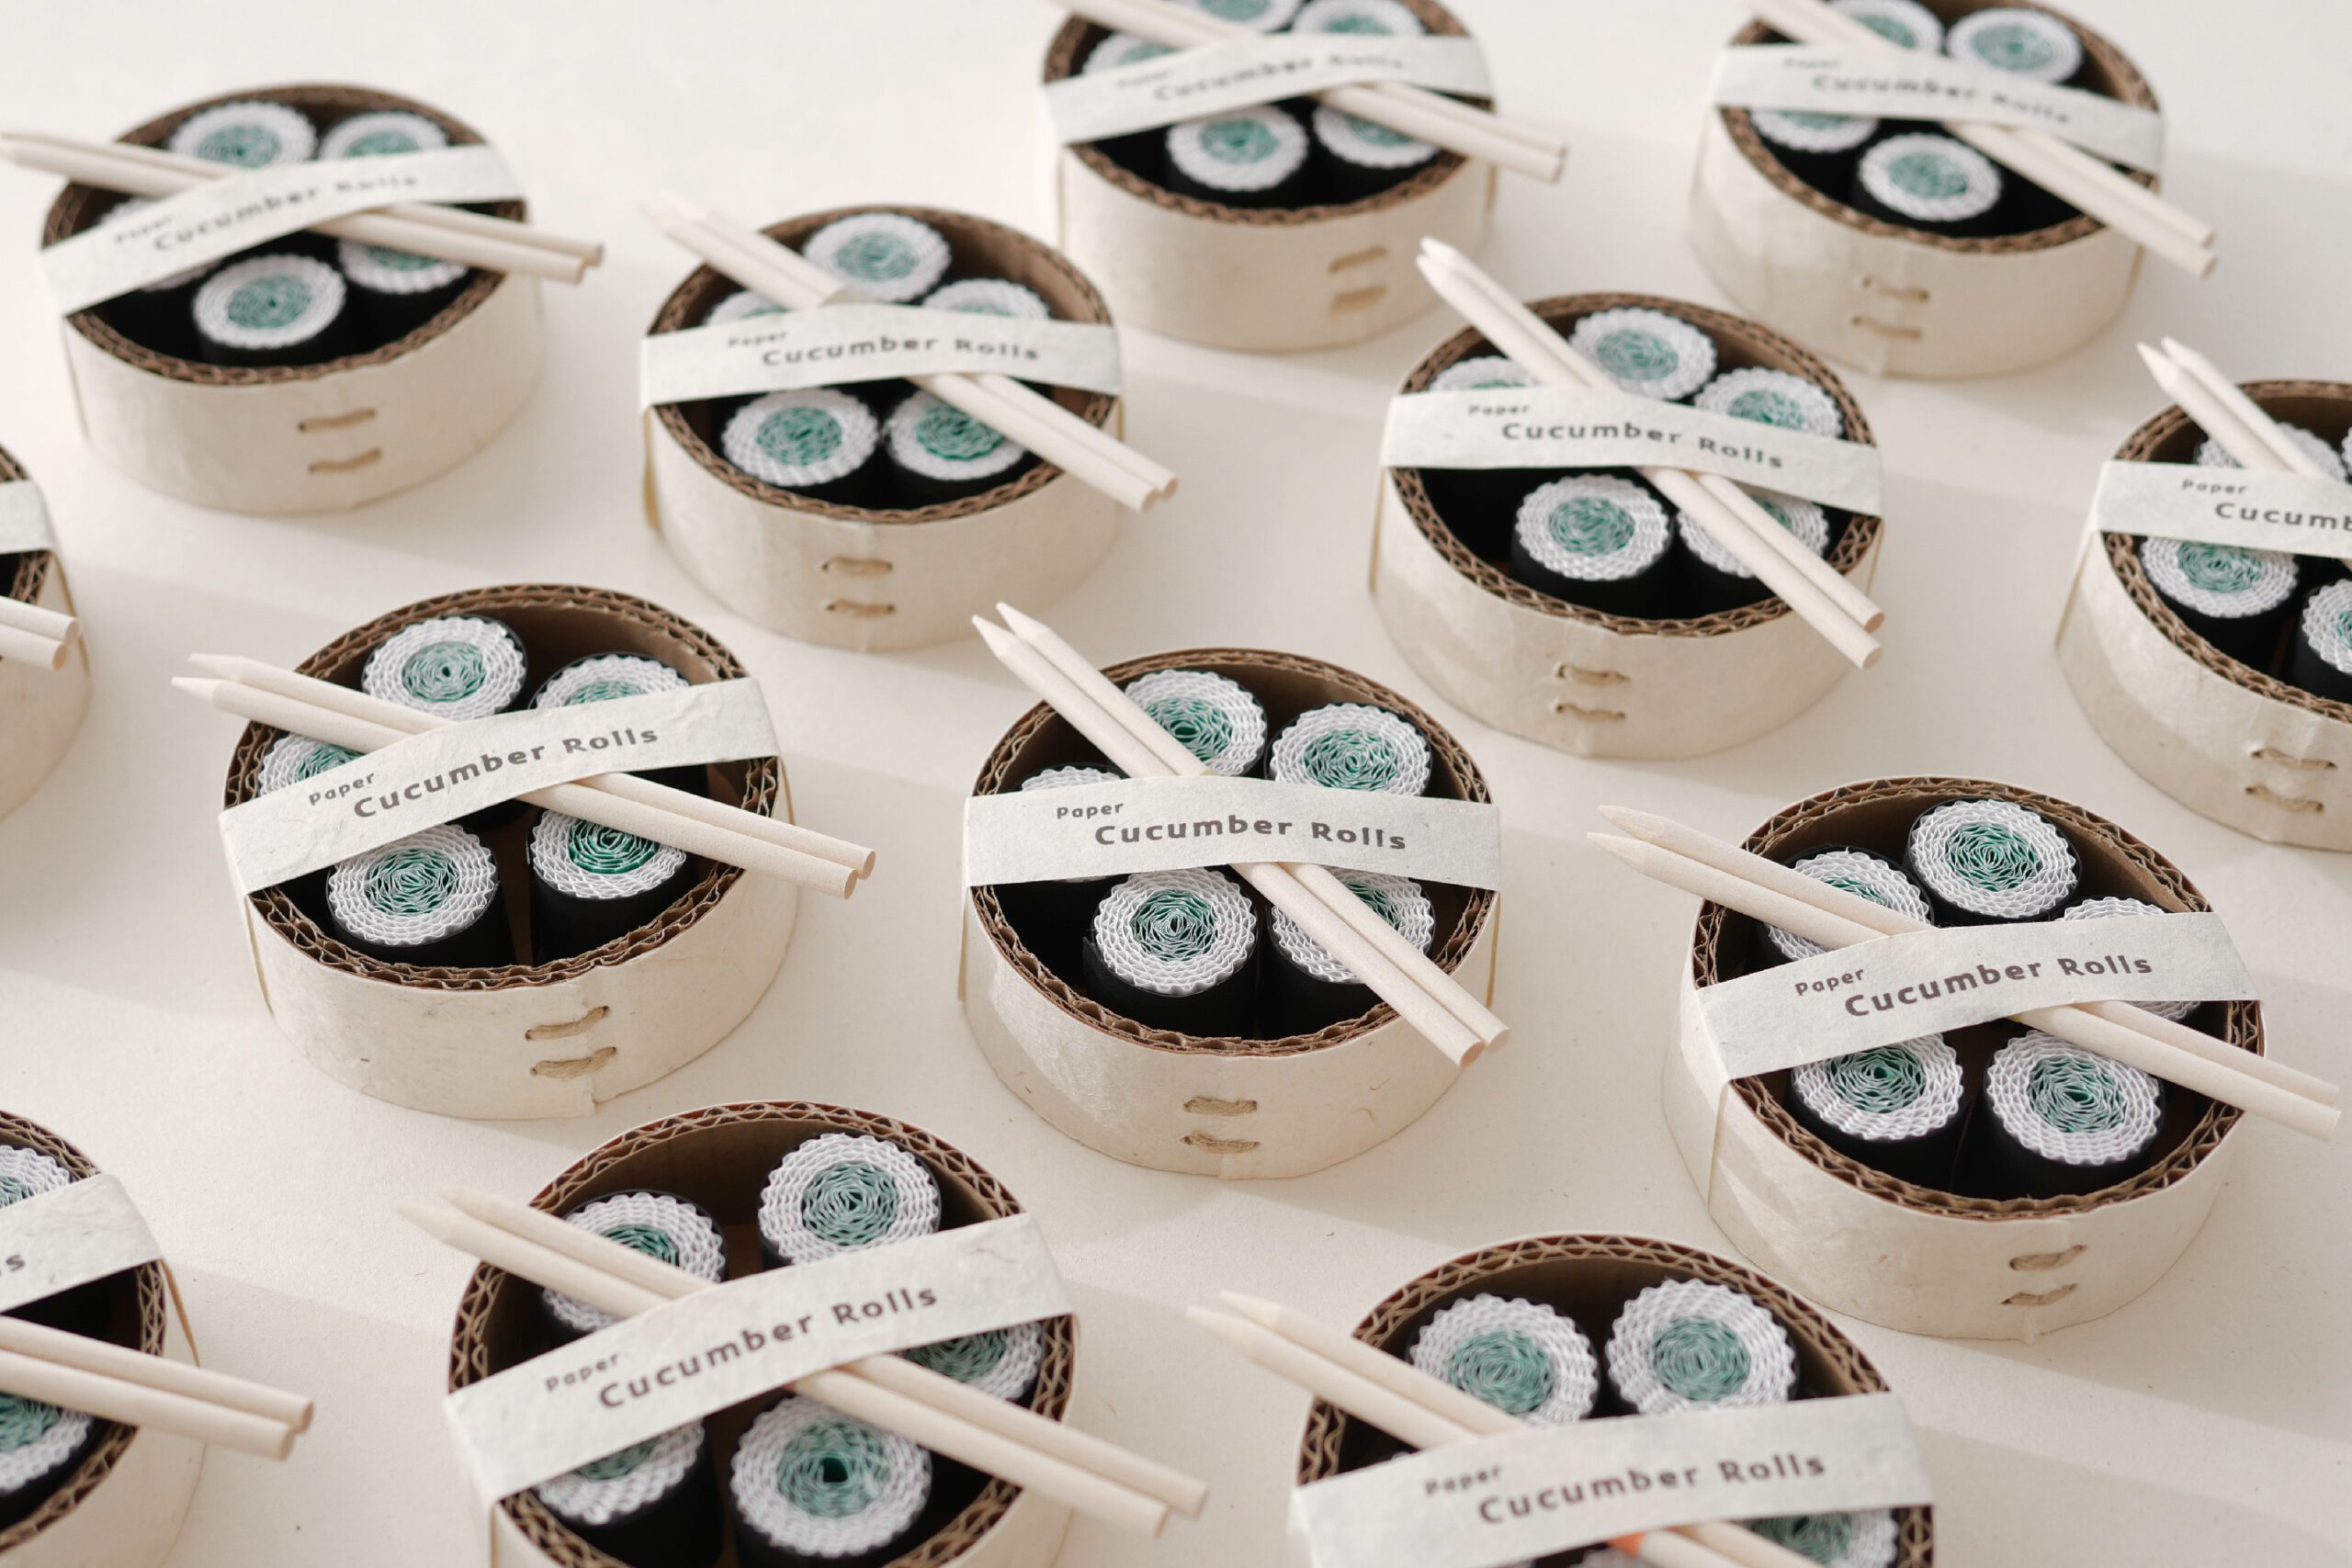
The Cucumber rolls made for the school festival come in sets of five in a special sushi box. The sushi box itself was made by rolled cardboard. Wooden chopsticks, sharpened at the tips with a pencil sharpener, are included. Made with love, hoping everyone will have fun playing.
Paper Sushi Rolls
おままごとっていいなって思うんです。想像力が豊かになったり、言語の発達や表現力が高くなるなどの効果はさておき、食事をつくる、食べる、という生活に必要不可欠なことに小さな頃から触れ、遊びを通じて自然と身につくって素晴らしいなと思います。
娘は小さな頃からおままごとが好きで、私がキッチンへ向かうと同時に、娘も自分の道具をめいっぱい広げてせっせとぬいぐるみたちへ料理をつくっていました。乾燥豆をご飯に見立てたり、葉っぱを野菜に見立てたり、木の枝はパスタ。自然の素材を組み合わせて、想像力豊かに素晴らしい料理の数々をつくっていました。そして出来上がったものをみると、我が家の盛り付け方や、食事の有り様がおままごとの中に見事に再現されているのです。私たちのすることを本当によく見ているなと関心したものです。
娘の学校のWinter Faireのためにつくった紙のお寿司は、ここLAに住む子どもたちのおままごとのレパートリーにと考えたものです。私たちの周りの子どもたちにはおにぎりや巻き寿司など日本食がとても人気です。特にかっぱ巻きは、Vegan、グルテンフリーなどのオプション対応にもピッタリで、よくポットラックなどイベントごとに持参します。日本が誇るかっぱ巻きを身近なおままごとにも。そんな思いでつくったの紙のお寿司、とても簡単でお子さんと一緒につくるところから楽しめます。よくできたのでここでもつくり方をシェアします。
用意するもの
– 片面ダンボール 白と緑 *私はこちらを使いました (US Amazon)
– 黒い紙
– グルーガン もしくは 両面テープ
– ハサミ、カッターなど
*ここではひとつ2.5 x 2.5cmのサイズの巻き寿司をつくります
つくりかた
Step 1. 材料を切る
ごはんとなる白い片面ダンボールを25 x 300mmに、きゅうりとなる緑の片面ダンボールを25 x 170-180mmに、海苔となる黒い紙を25 x 100mmに切ります。
Step 2. きゅうりを巻く
きゅうりとなる緑の紙を巻きます。端からなるべくキツくしっかりと巻いていきます。最後にグルーガンで接着します。ベッタリとつける必要はありません。紙が止まればいいのでほんの少しのグルーをつけてください。
*通常の糊だと接着するのに時間がかかるので、グルーガンもしくは両面テープを使うことをおすすめします。
Step 3. ごはんを巻く
次に巻くのはご飯です。緑のきゅうりに白い紙を接着して、それからくるくると巻いていきます。巻き終わりをグルーガンで接着します。
Step 4. 海苔を巻く
最後は海苔です。同じ要領で黒い紙を巻き、最後に接着します。
*最後は仕上がりが美しくなるように両面テープを使い接着しました。
Step 5. 遊ぶ
お皿に乗せたら豪華なかっぱまきランチの完成です。
学校のフェアのためにつくったかっぱ巻きは専用の寿司桶に入った5つ入り。寿司桶も段ボールを巻いてつくりました。木の棒の先端を鉛筆削りで削ったお箸を添えて。みんなが楽しく遊べますようにと心を込めて。