Kumihimo Friendship Bracelet
Have you ever seen of Kumihimo? Kumihimo is a traditional Japanese handcraft in which several strands of threads are interlaced and braid into a cord. It has a very long history and has been used as a piece of armor, a cord to hold handscroll offered to the gods, and as an Obi-jime (obi sash belt) for kimonos. These beautiful, seemingly intricately braided cords are durable and can be made in a variety of colors and patterns, depending on the color, number of threads, and the way they are combined. The literature shows that the people of those days were very fashionable, because they used such beautiful strings as ornaments to adorn their surroundings.
I would like to introduce a very simple Kumihimo braided using 7 threads and a cardboard disk. This was taught in the handwork class at my daughter’s school. Here in the U.S., it is recognized and all the children love this Kumihimo braid. The finished strings look intricately braided, but in reality they are very simple and can be enjoyed by everyone, adults and children alike.
This perfect handcraft can be done anytime, anywhere, and is perfect for when you are traveling, camping, or just waiting around.
In this article, we will show you how to make a Friendship Bracelet using embroidery thread.
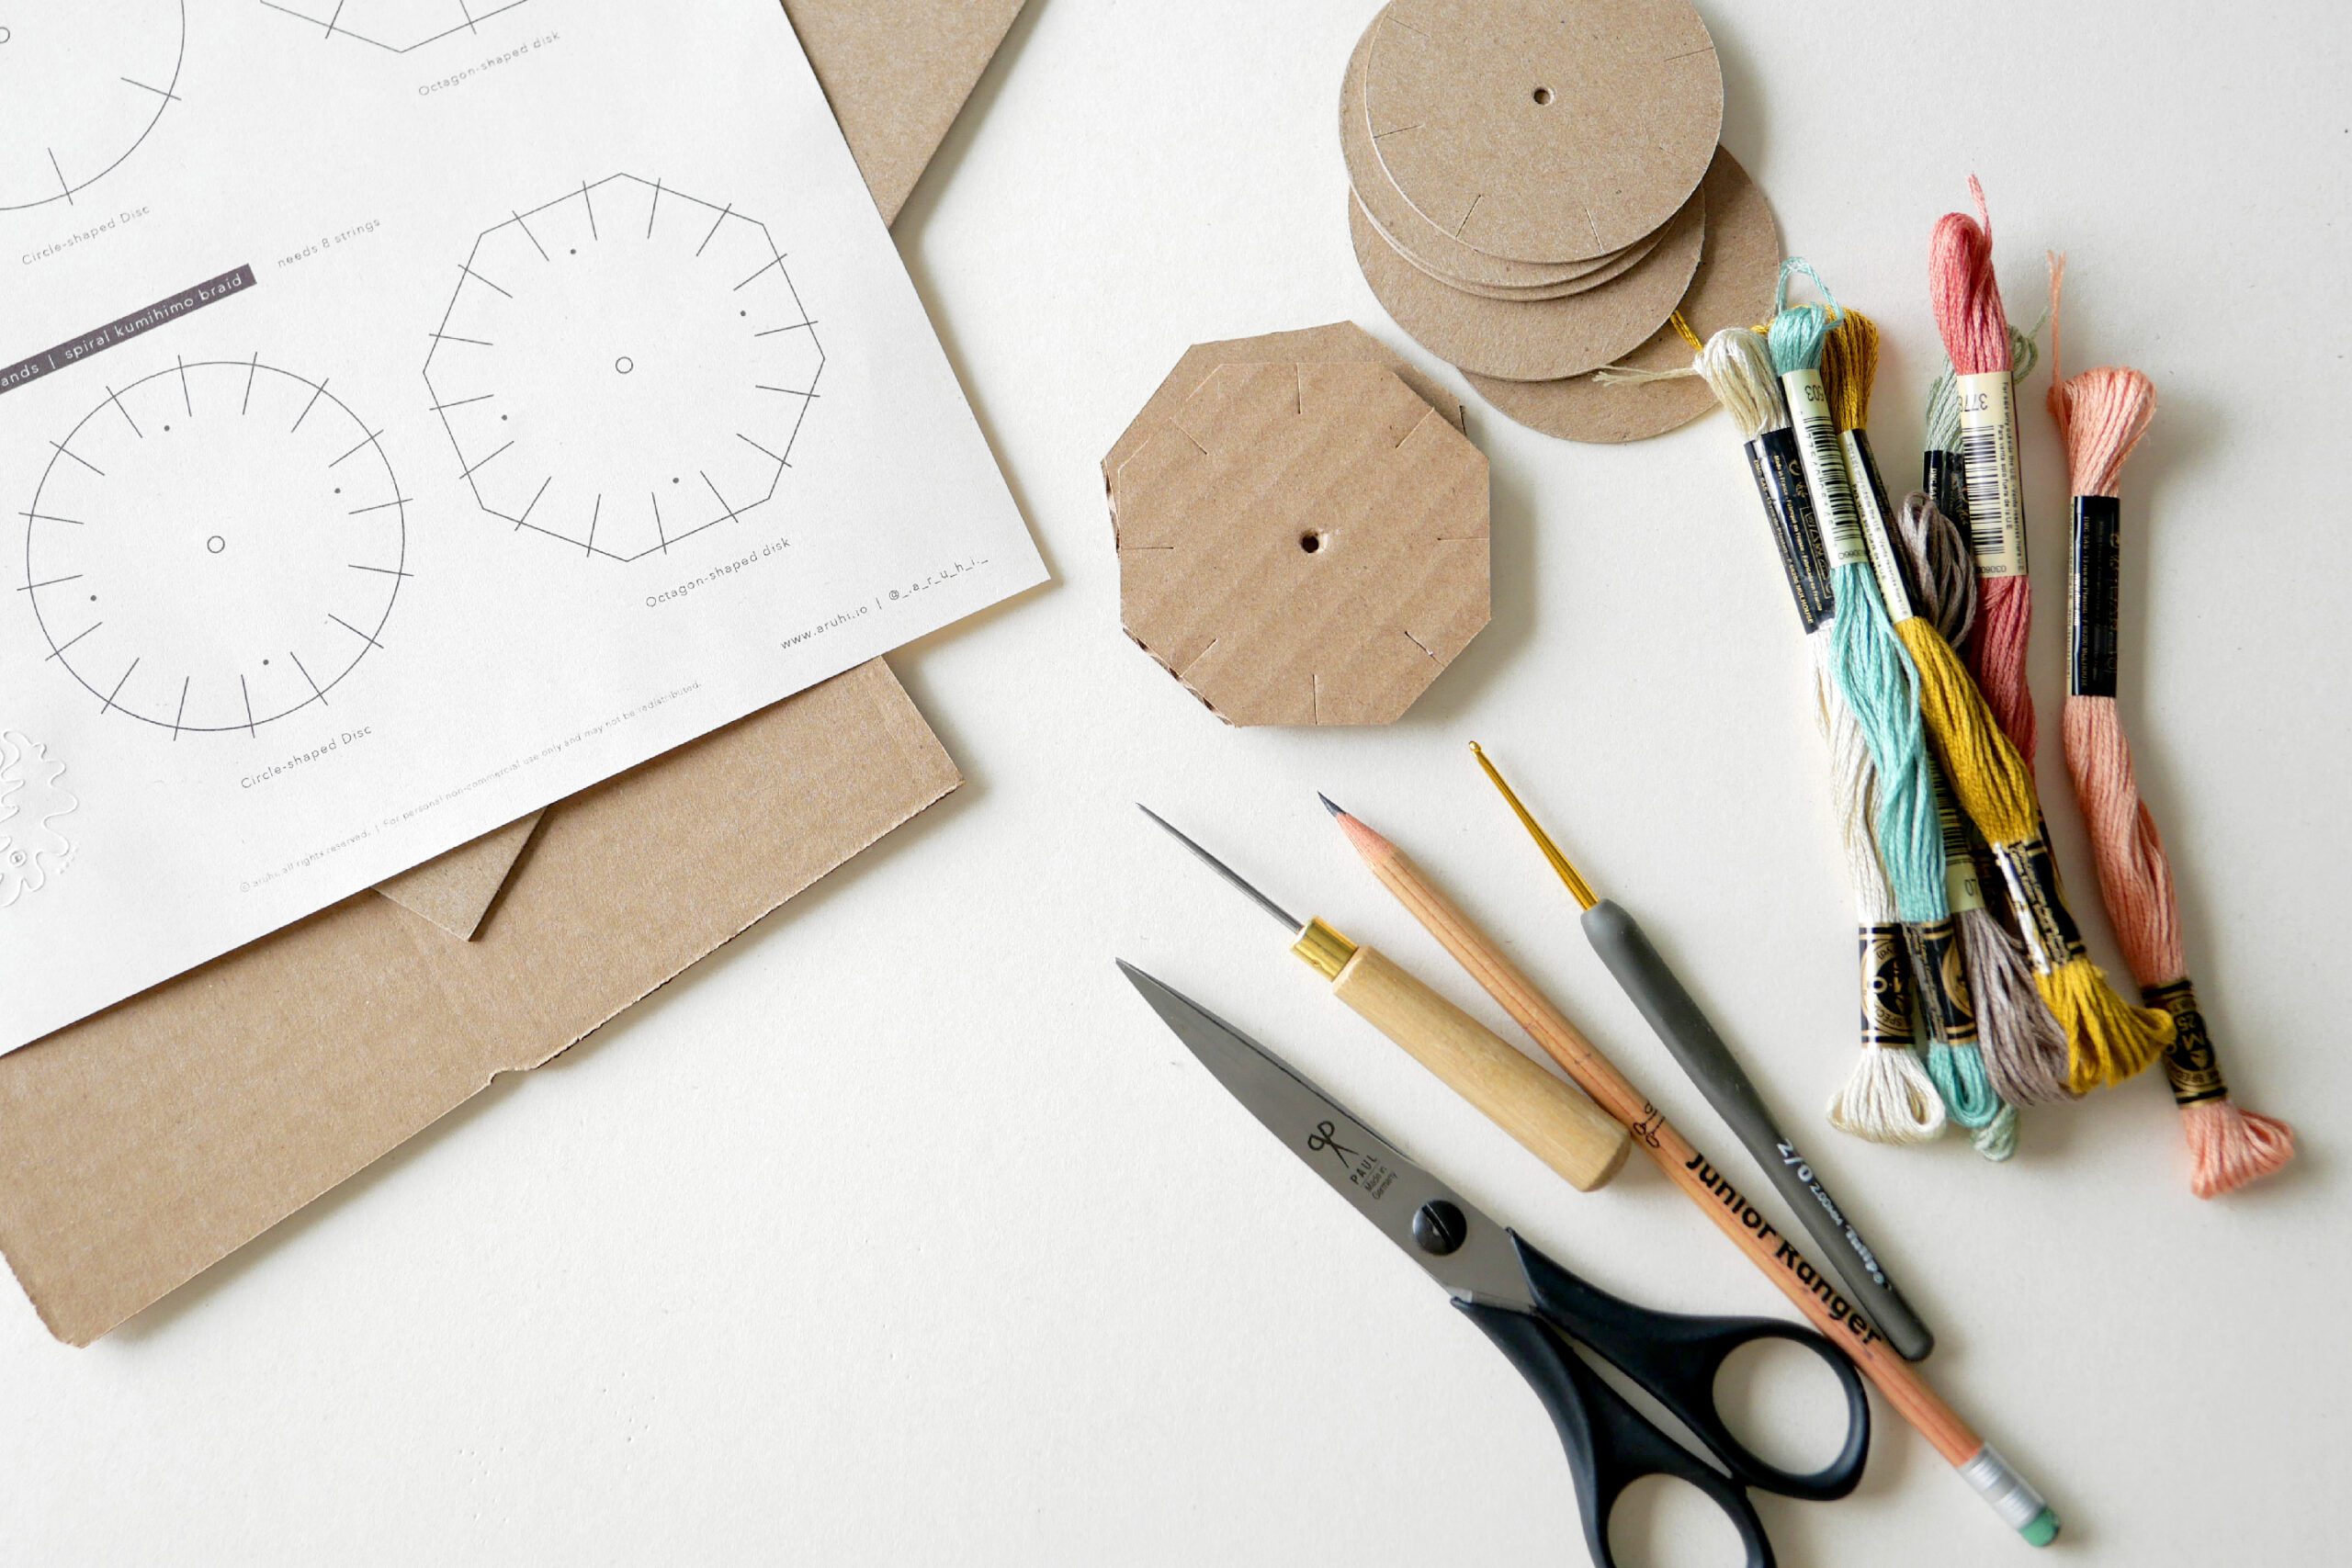
Materials
– About 10 pieces scraps of paper
– Thick paper for as the cover
– Stapler
– Cutter or scissors
– Perforation cutter *Optional
Here is the template for the Kumihimo disc. Please feel free to download and use it.
download the template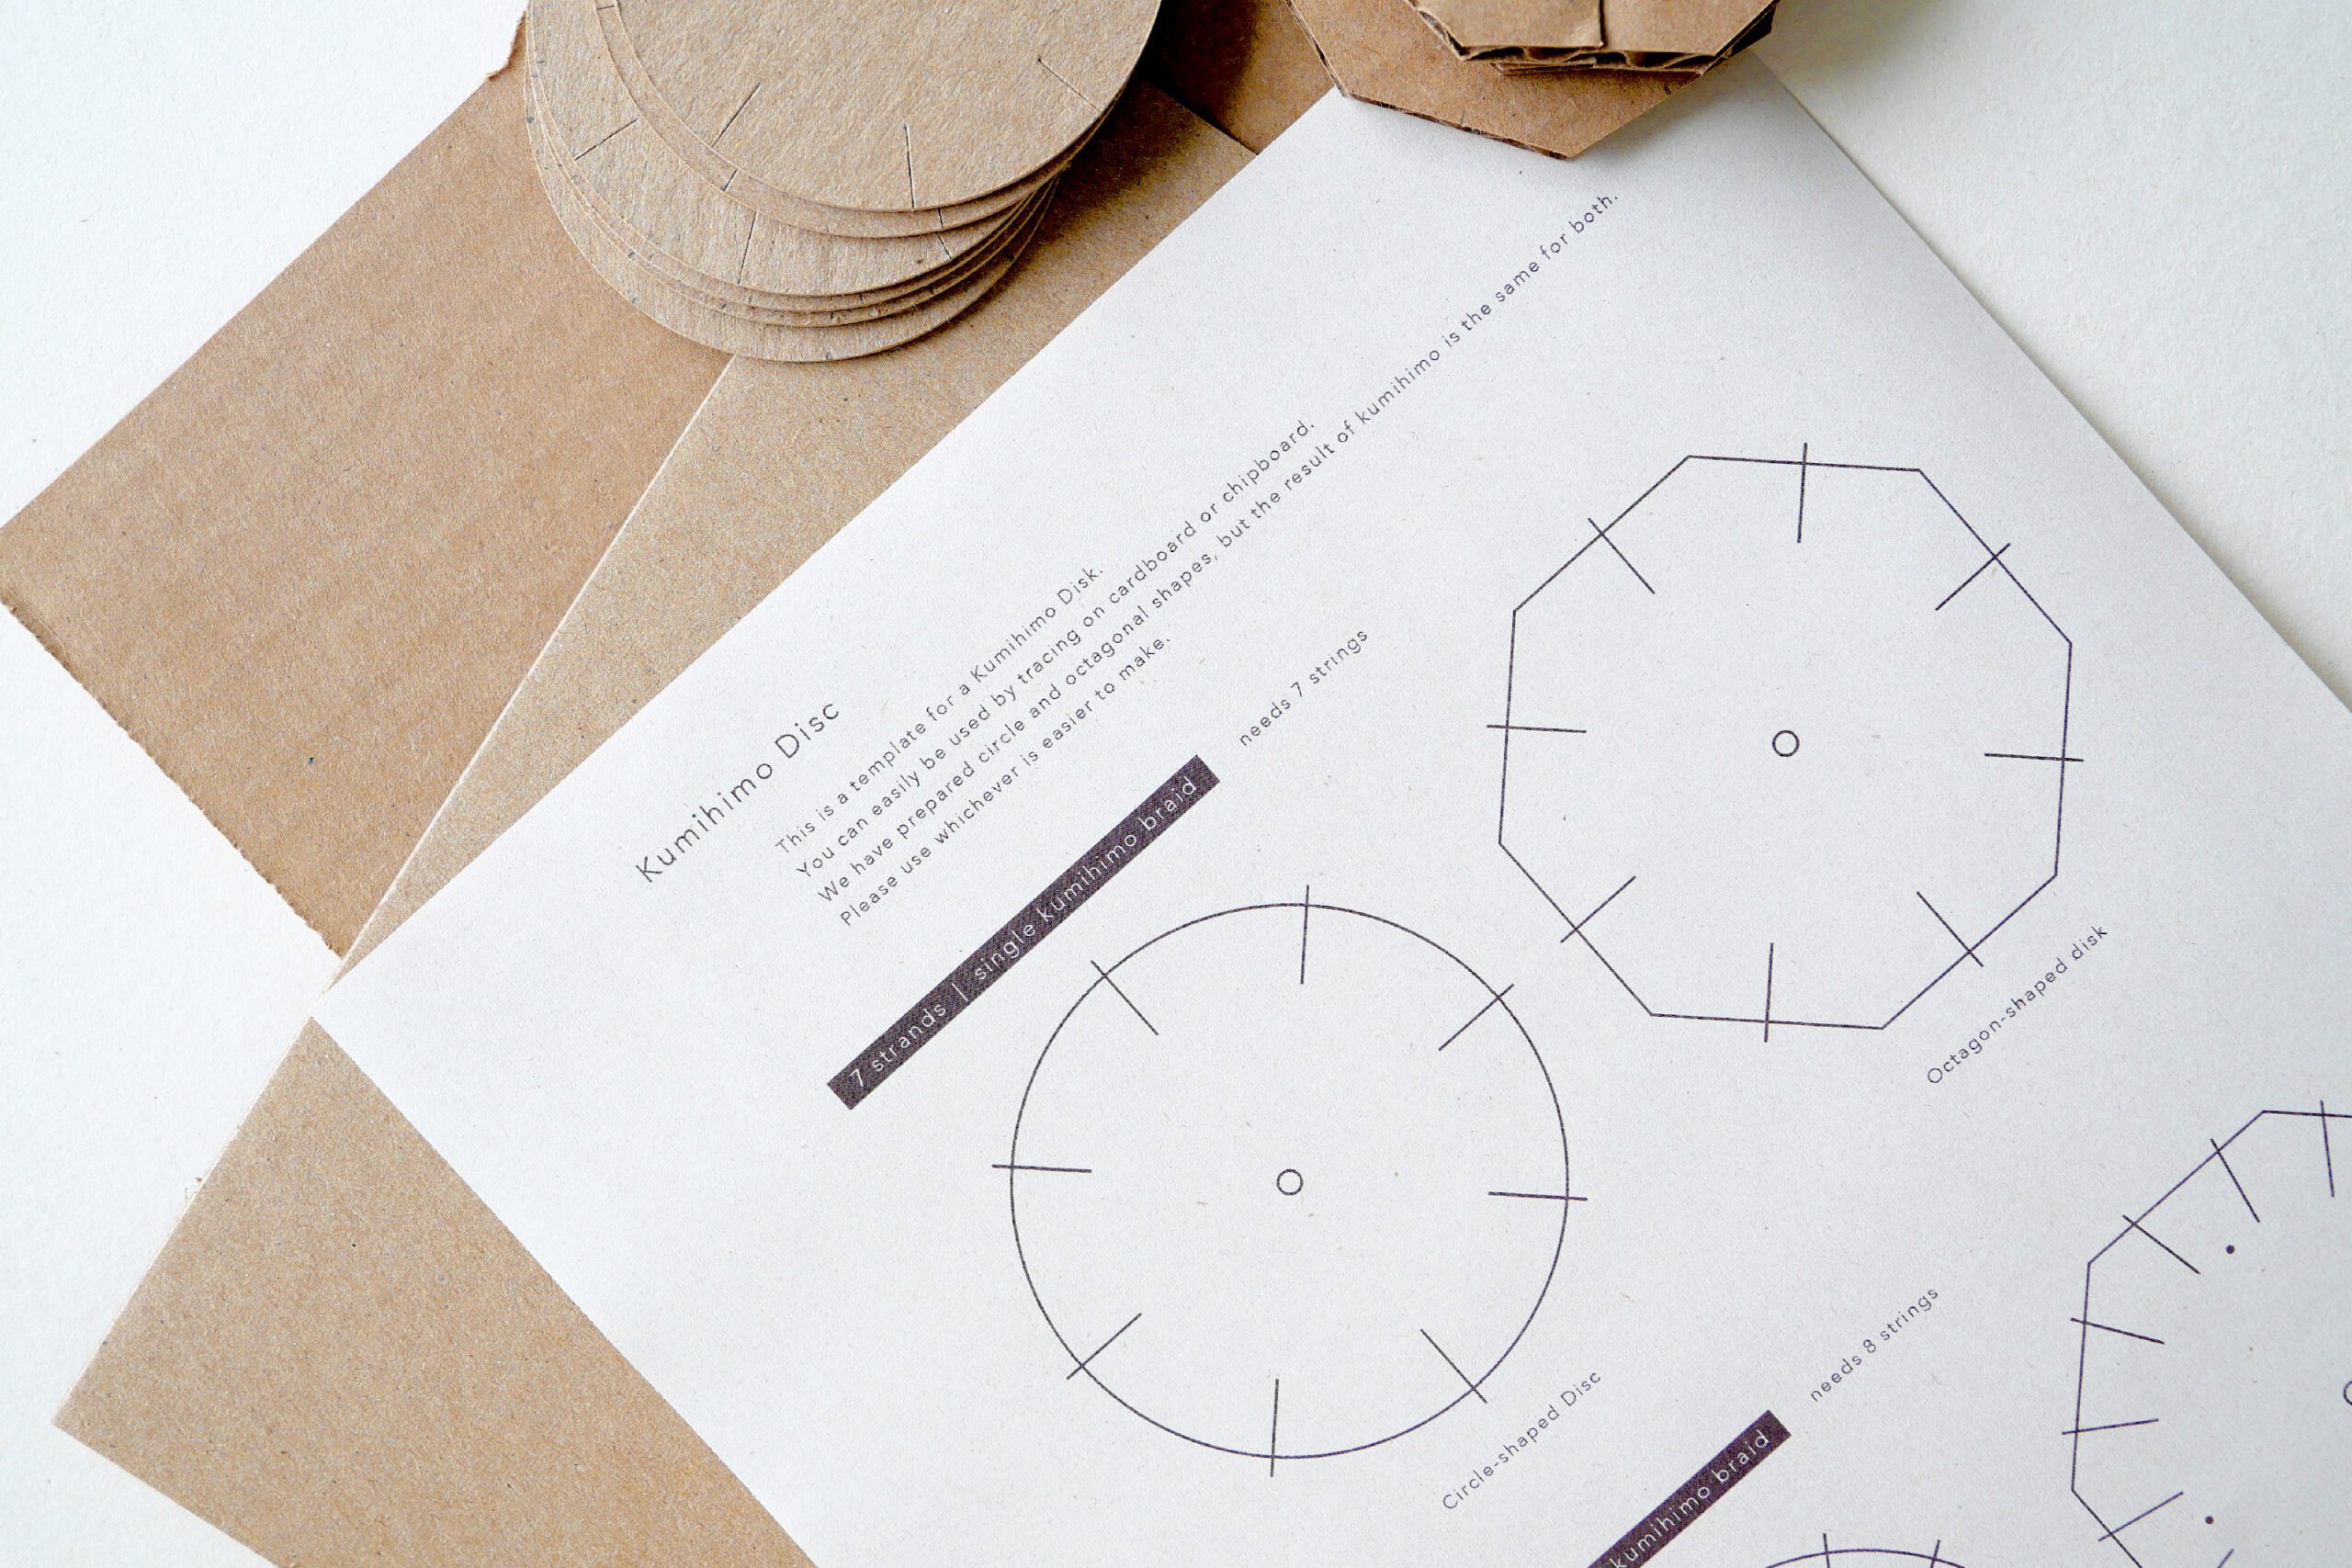
Instructions for making
Step 1. Makting a Kumihimo Disk
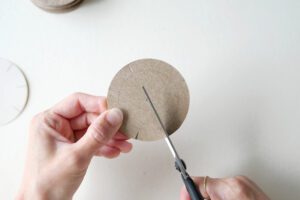
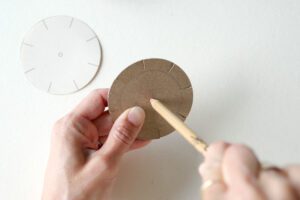
Cut a round piece of cardboard and make a 3mm hole in the center. After drilling a small hole, it is easy to insert a pencil and expand the hole.
Make 8 equal incisions around the circle.
*I have prepared a template for the disk. If you need it, download and use it.

Step 2. Prepare the Thread
Choose 7 favorite threads. You can use a single color or all different colors in any combination you like. Cut the yarn to a length 2 to 2.5 times the desired finished size. For a bracelet, 60cm is sufficient.
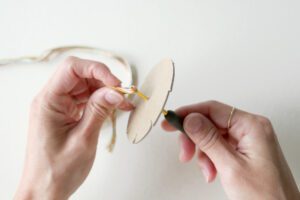
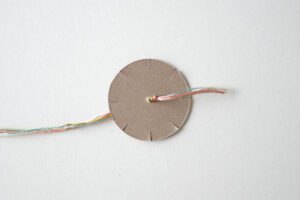
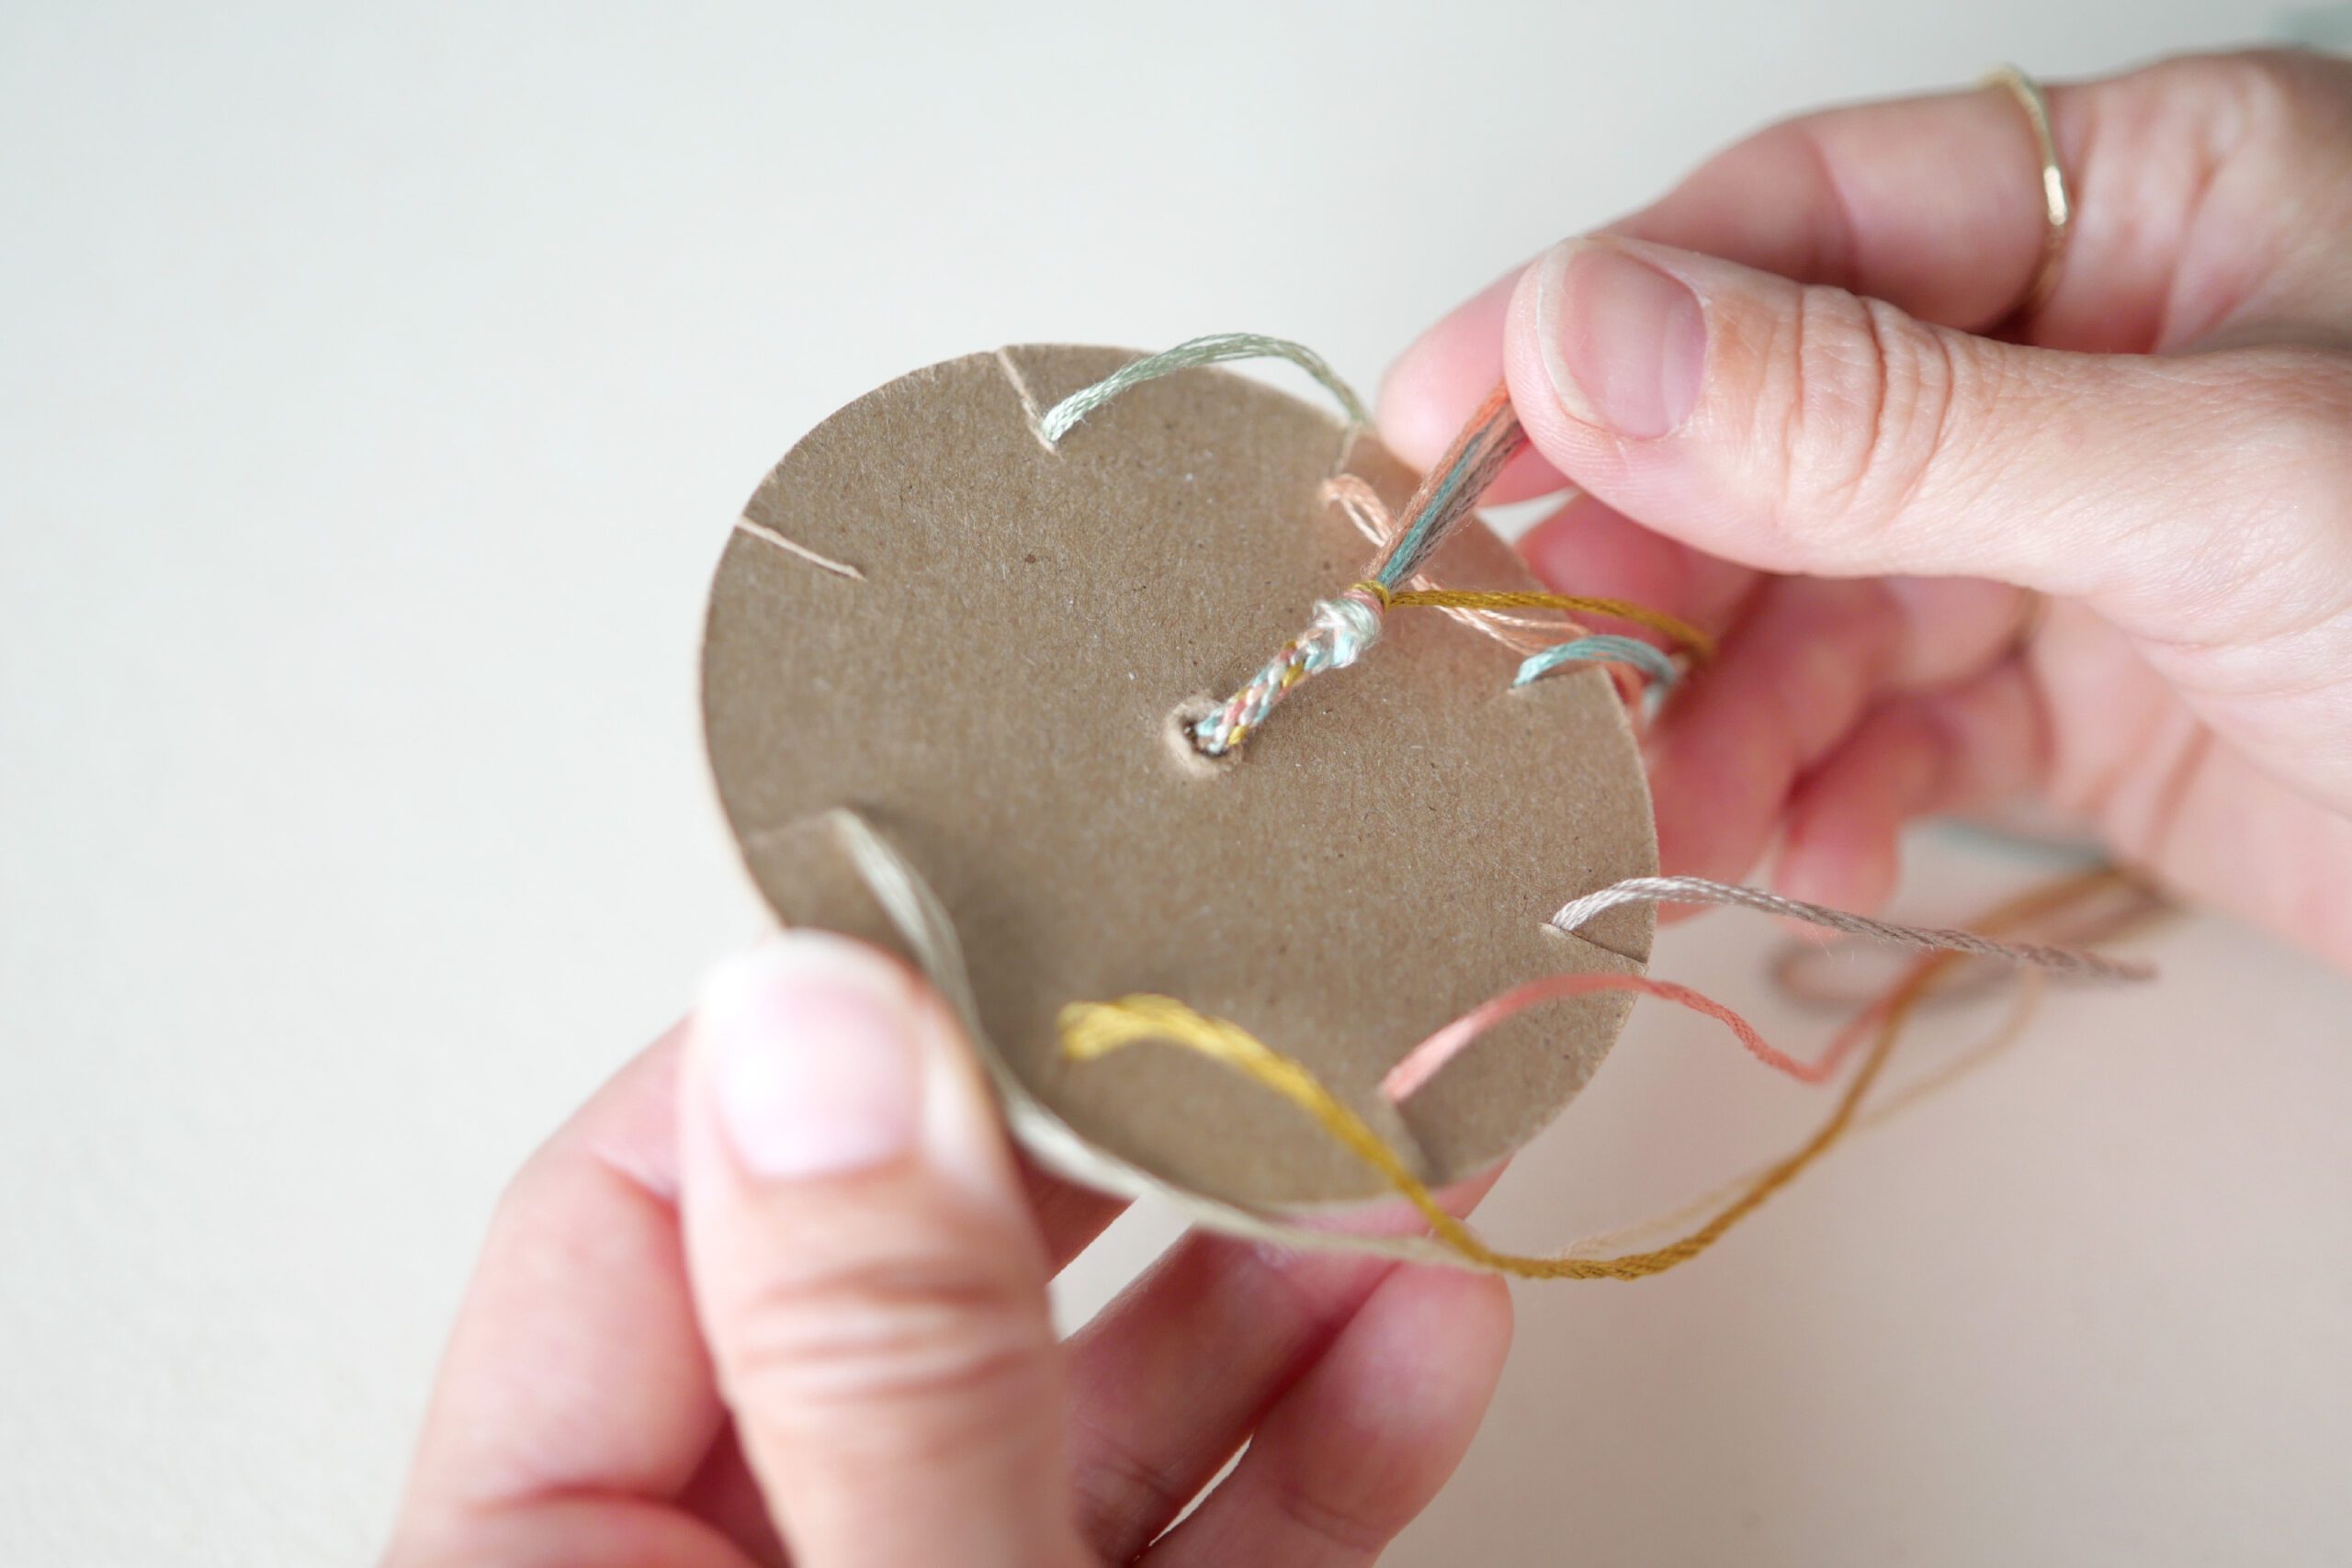
Insert 7 threads into the hole in the center of the disk and tie a knot, leaving 5 cm at the end.
Step 3. Place the Threads in the Slit
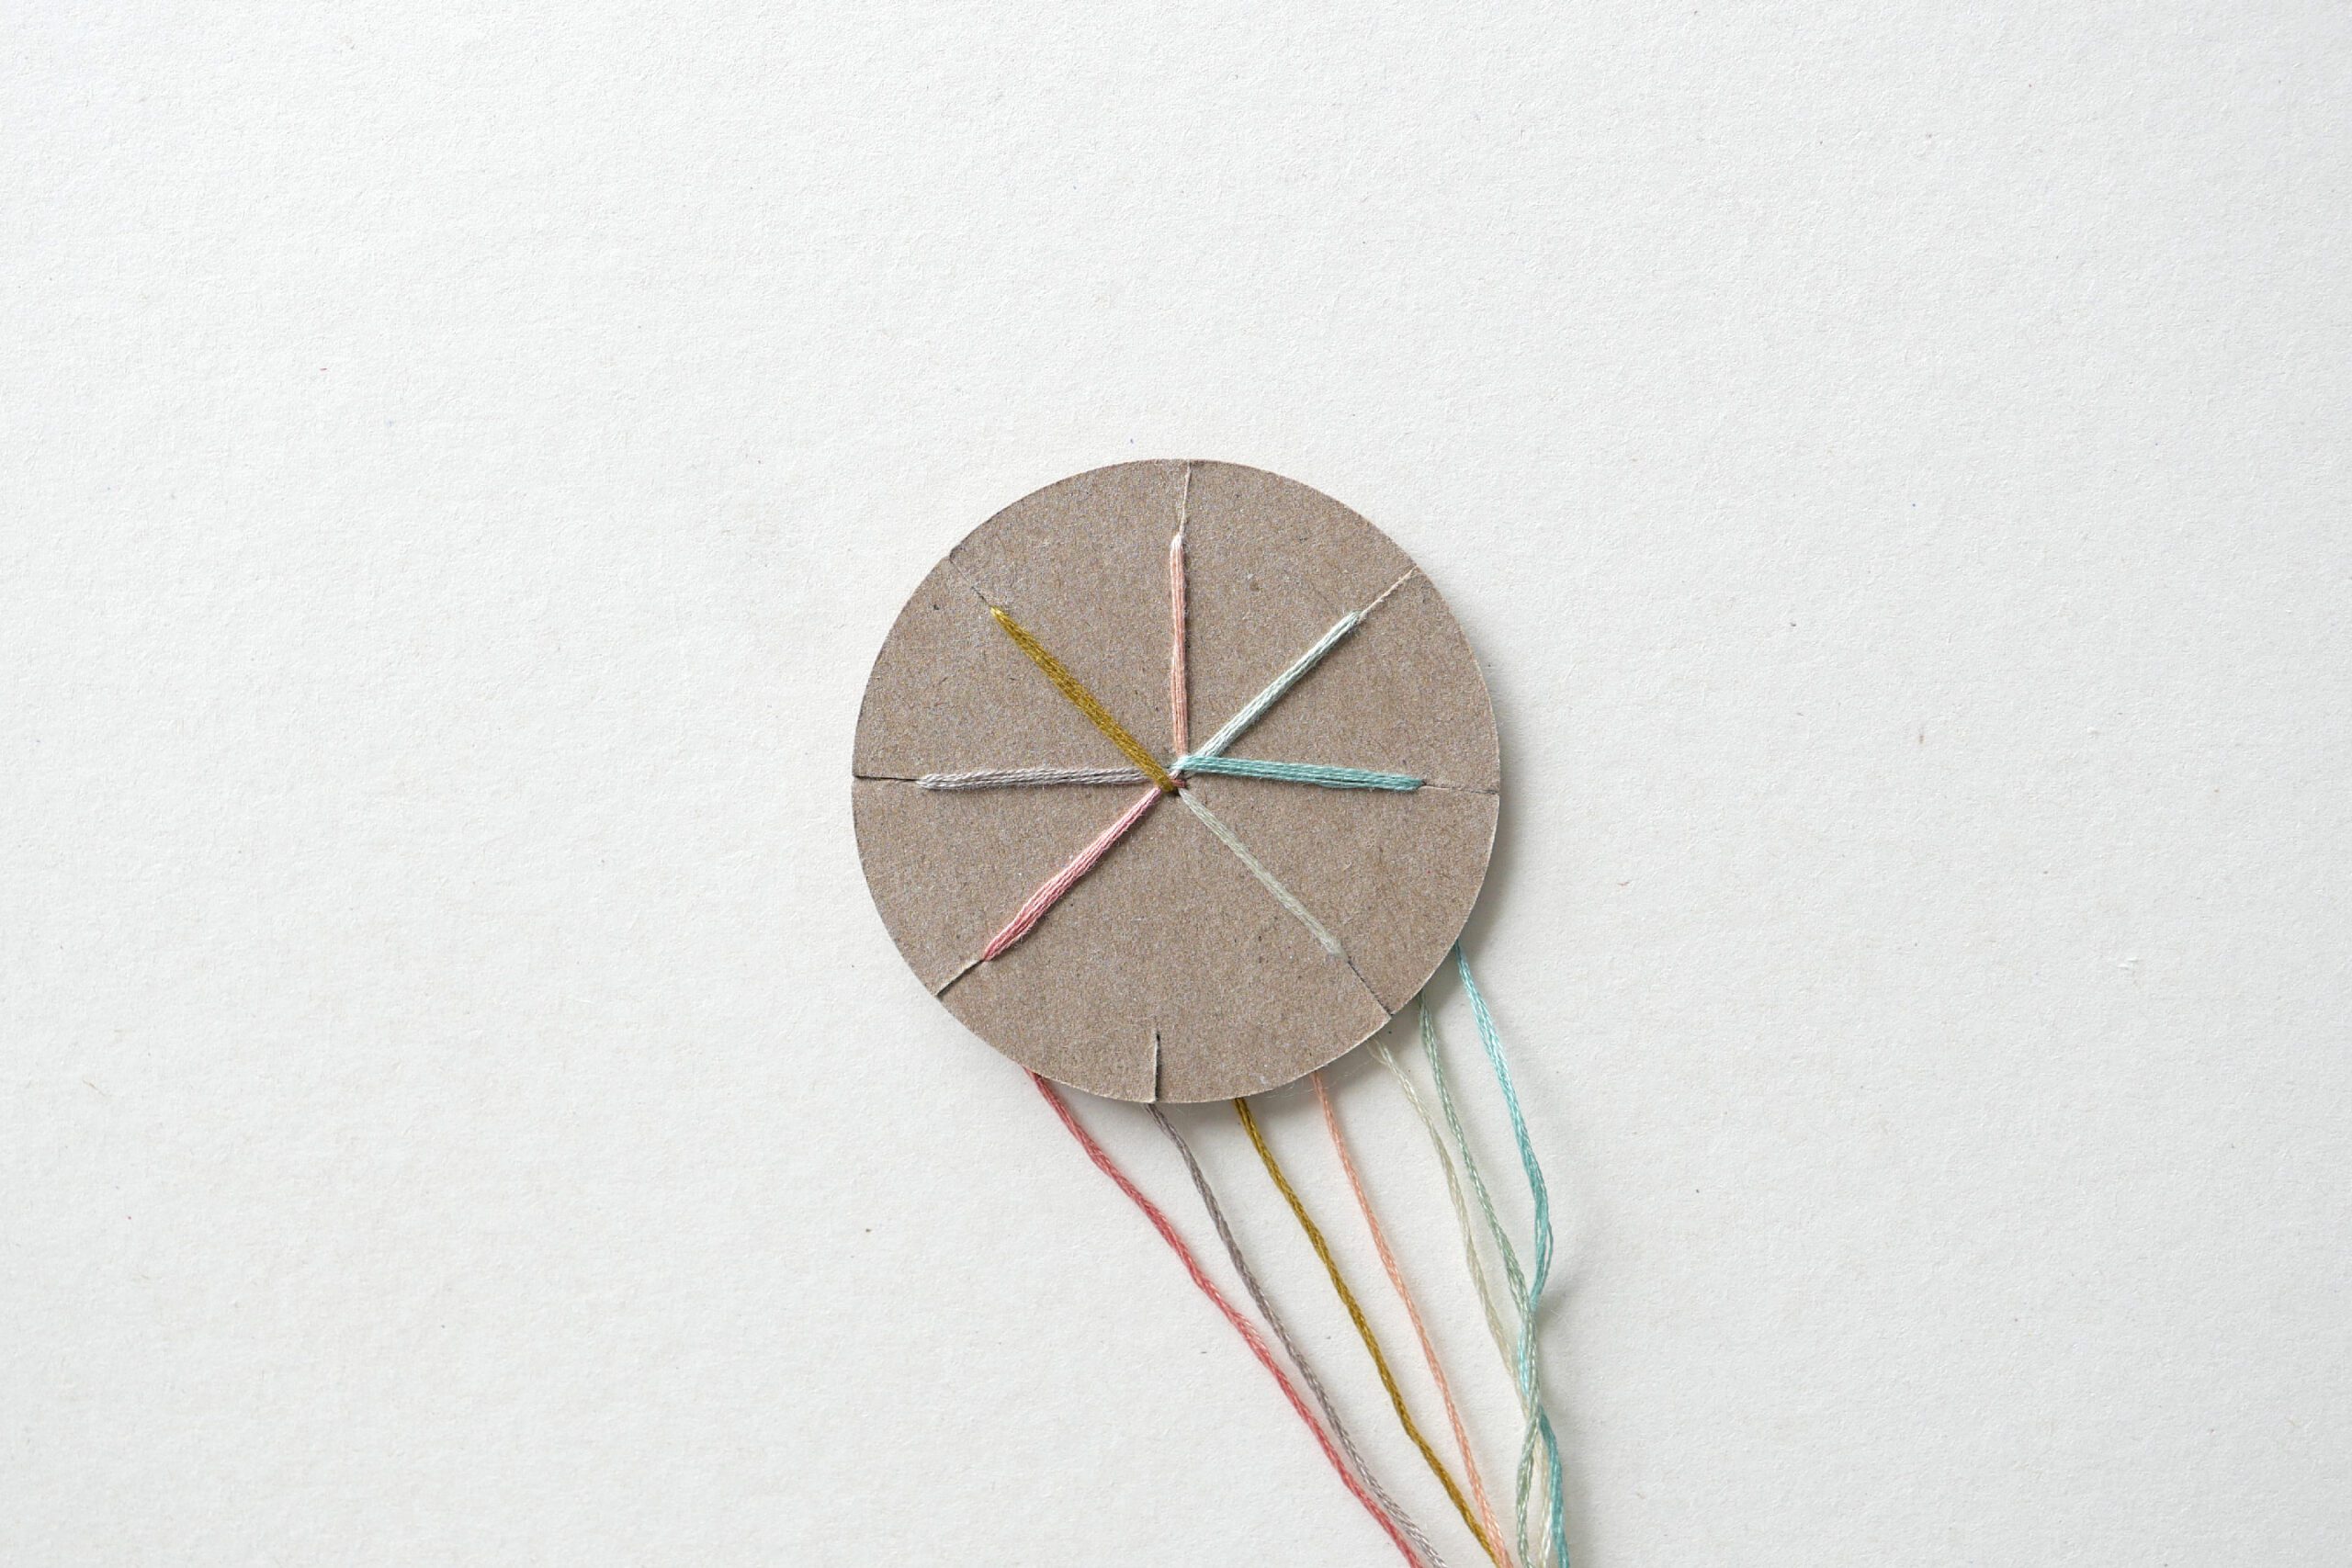
Insert one thread into each of the eight slits; one slit will be left over. Start with that slit facing your belly.
Step 4. Braid the Thread
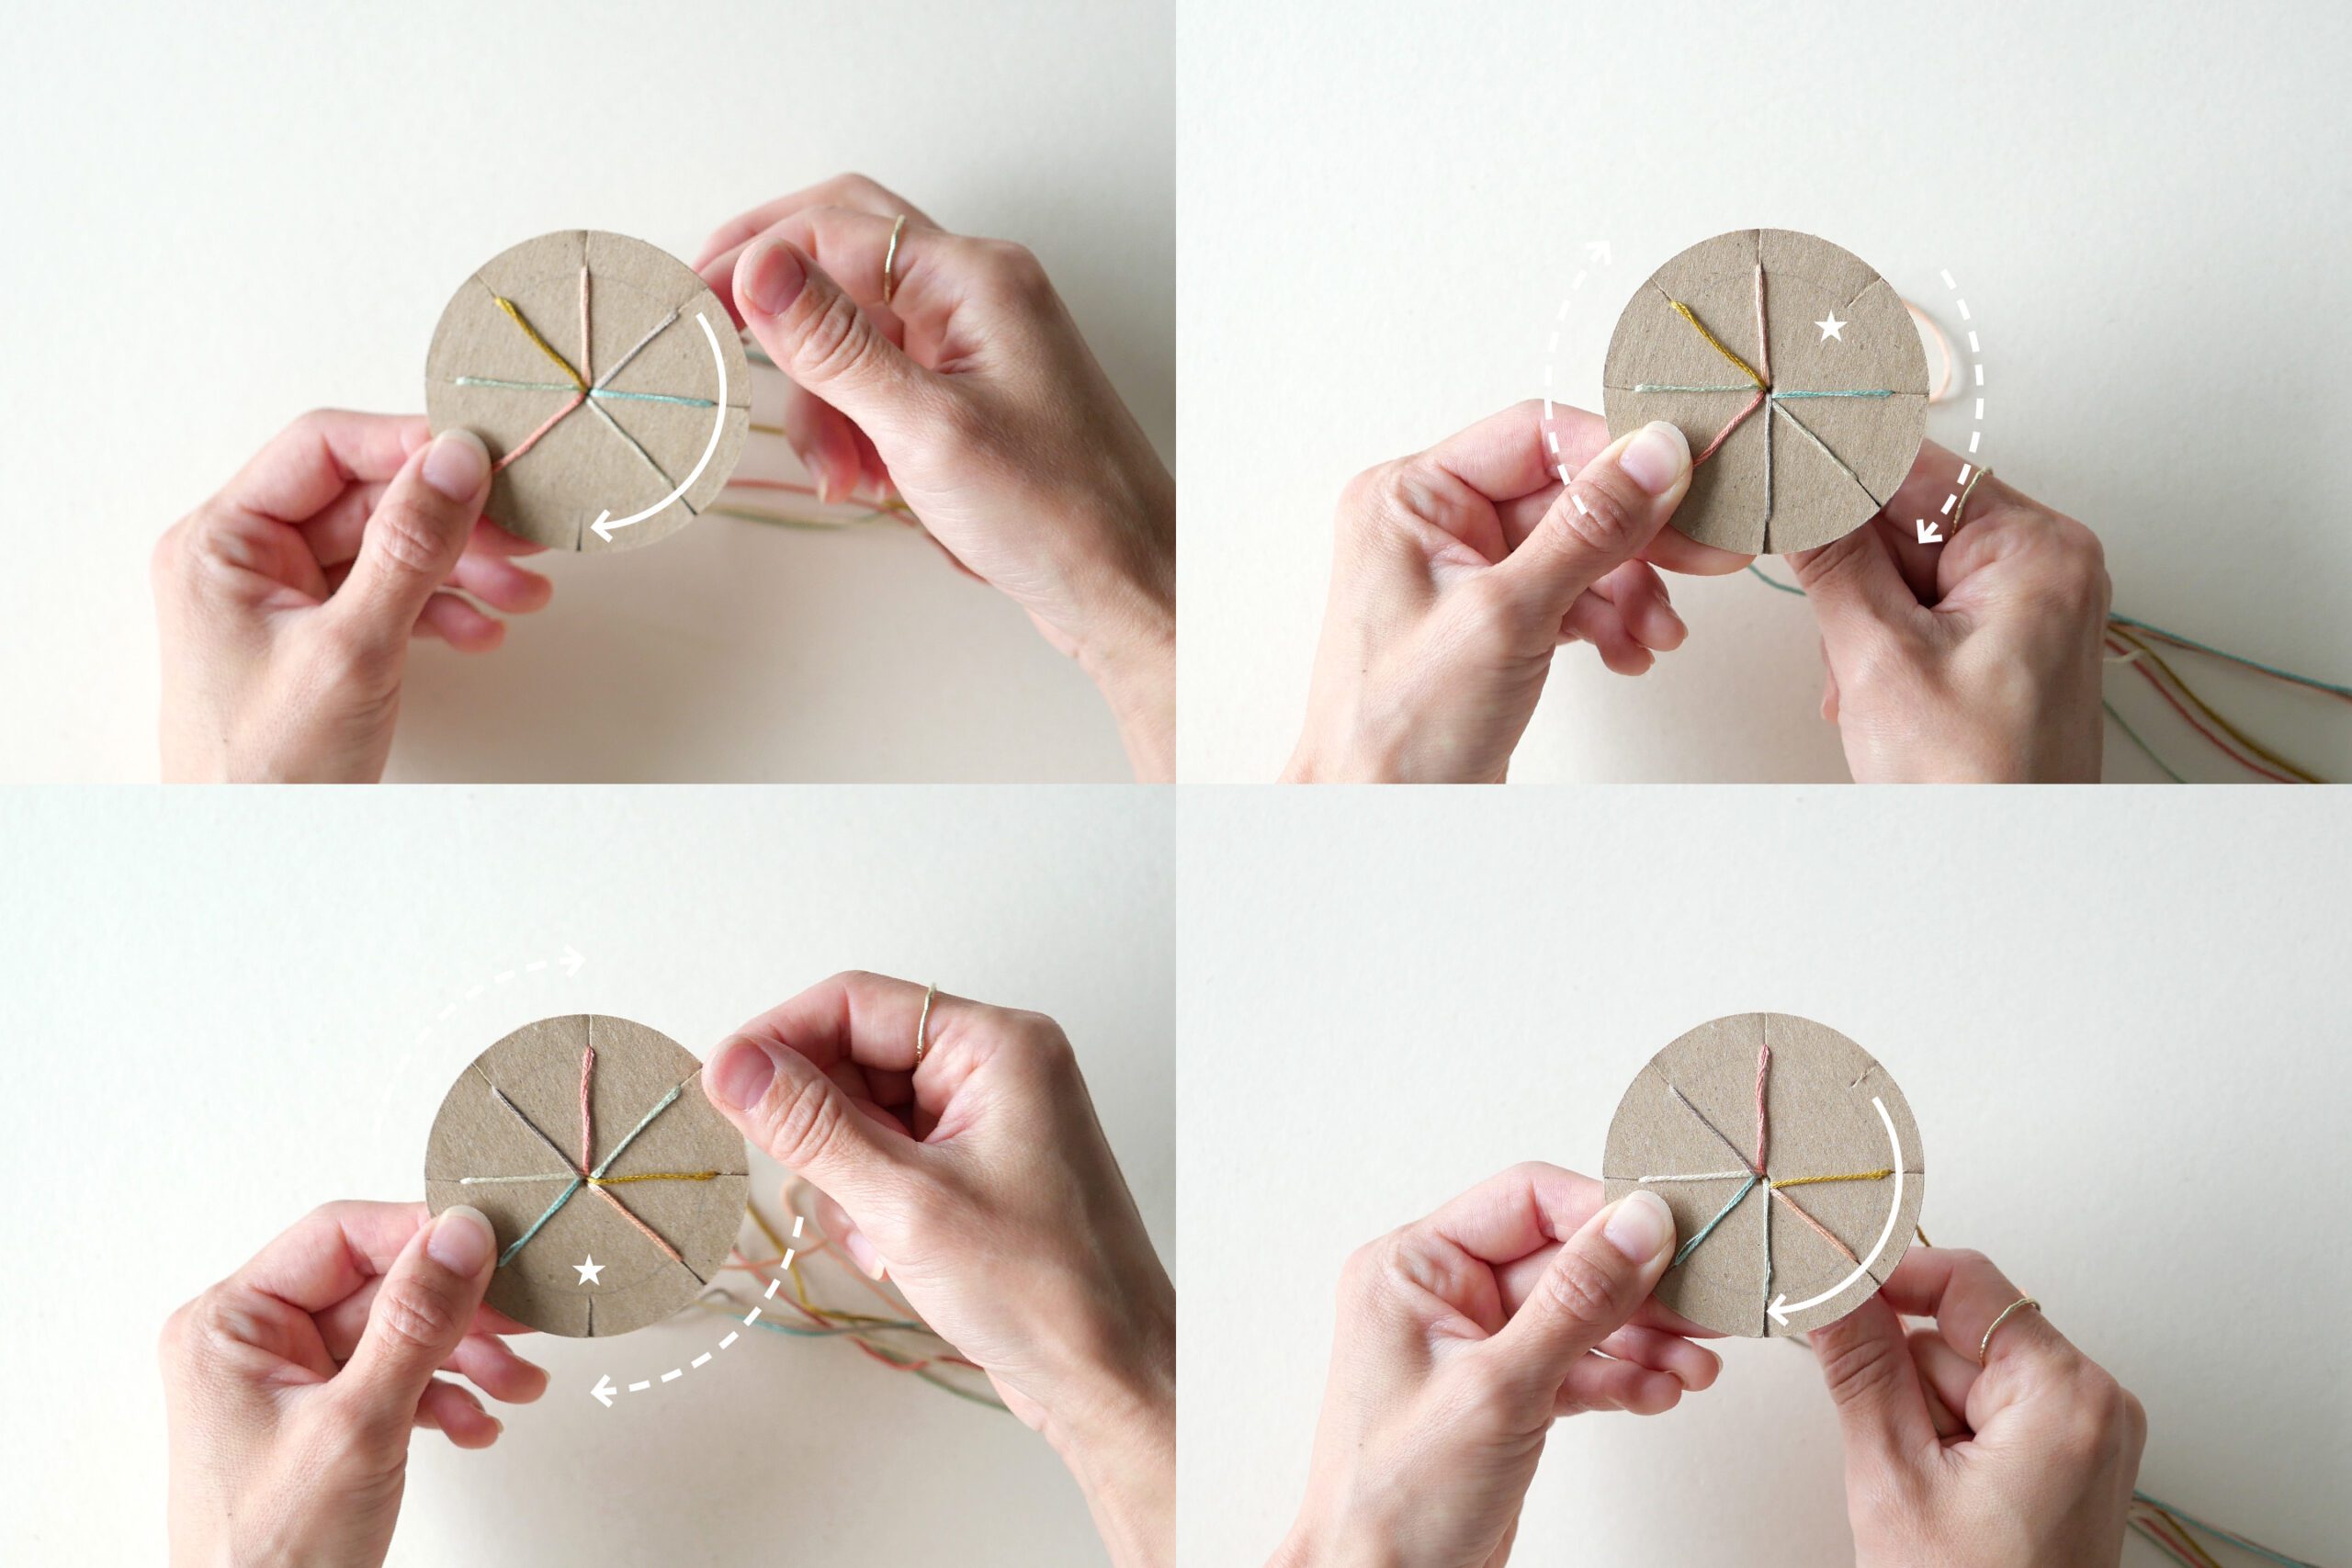
With the empty slit at your belly position, move the thread from the third position on the right side to the empty slit. Then turn the disk clockwise so that the slit with the missing thread is facing your belly position again. Then move the third thread again to the vacant slit, and repeat the process.
There are only two points. The slit that is always open is at the position of one’s belly. From there, move the three previous threads into the open slit.
Step 5. Braided and Comb
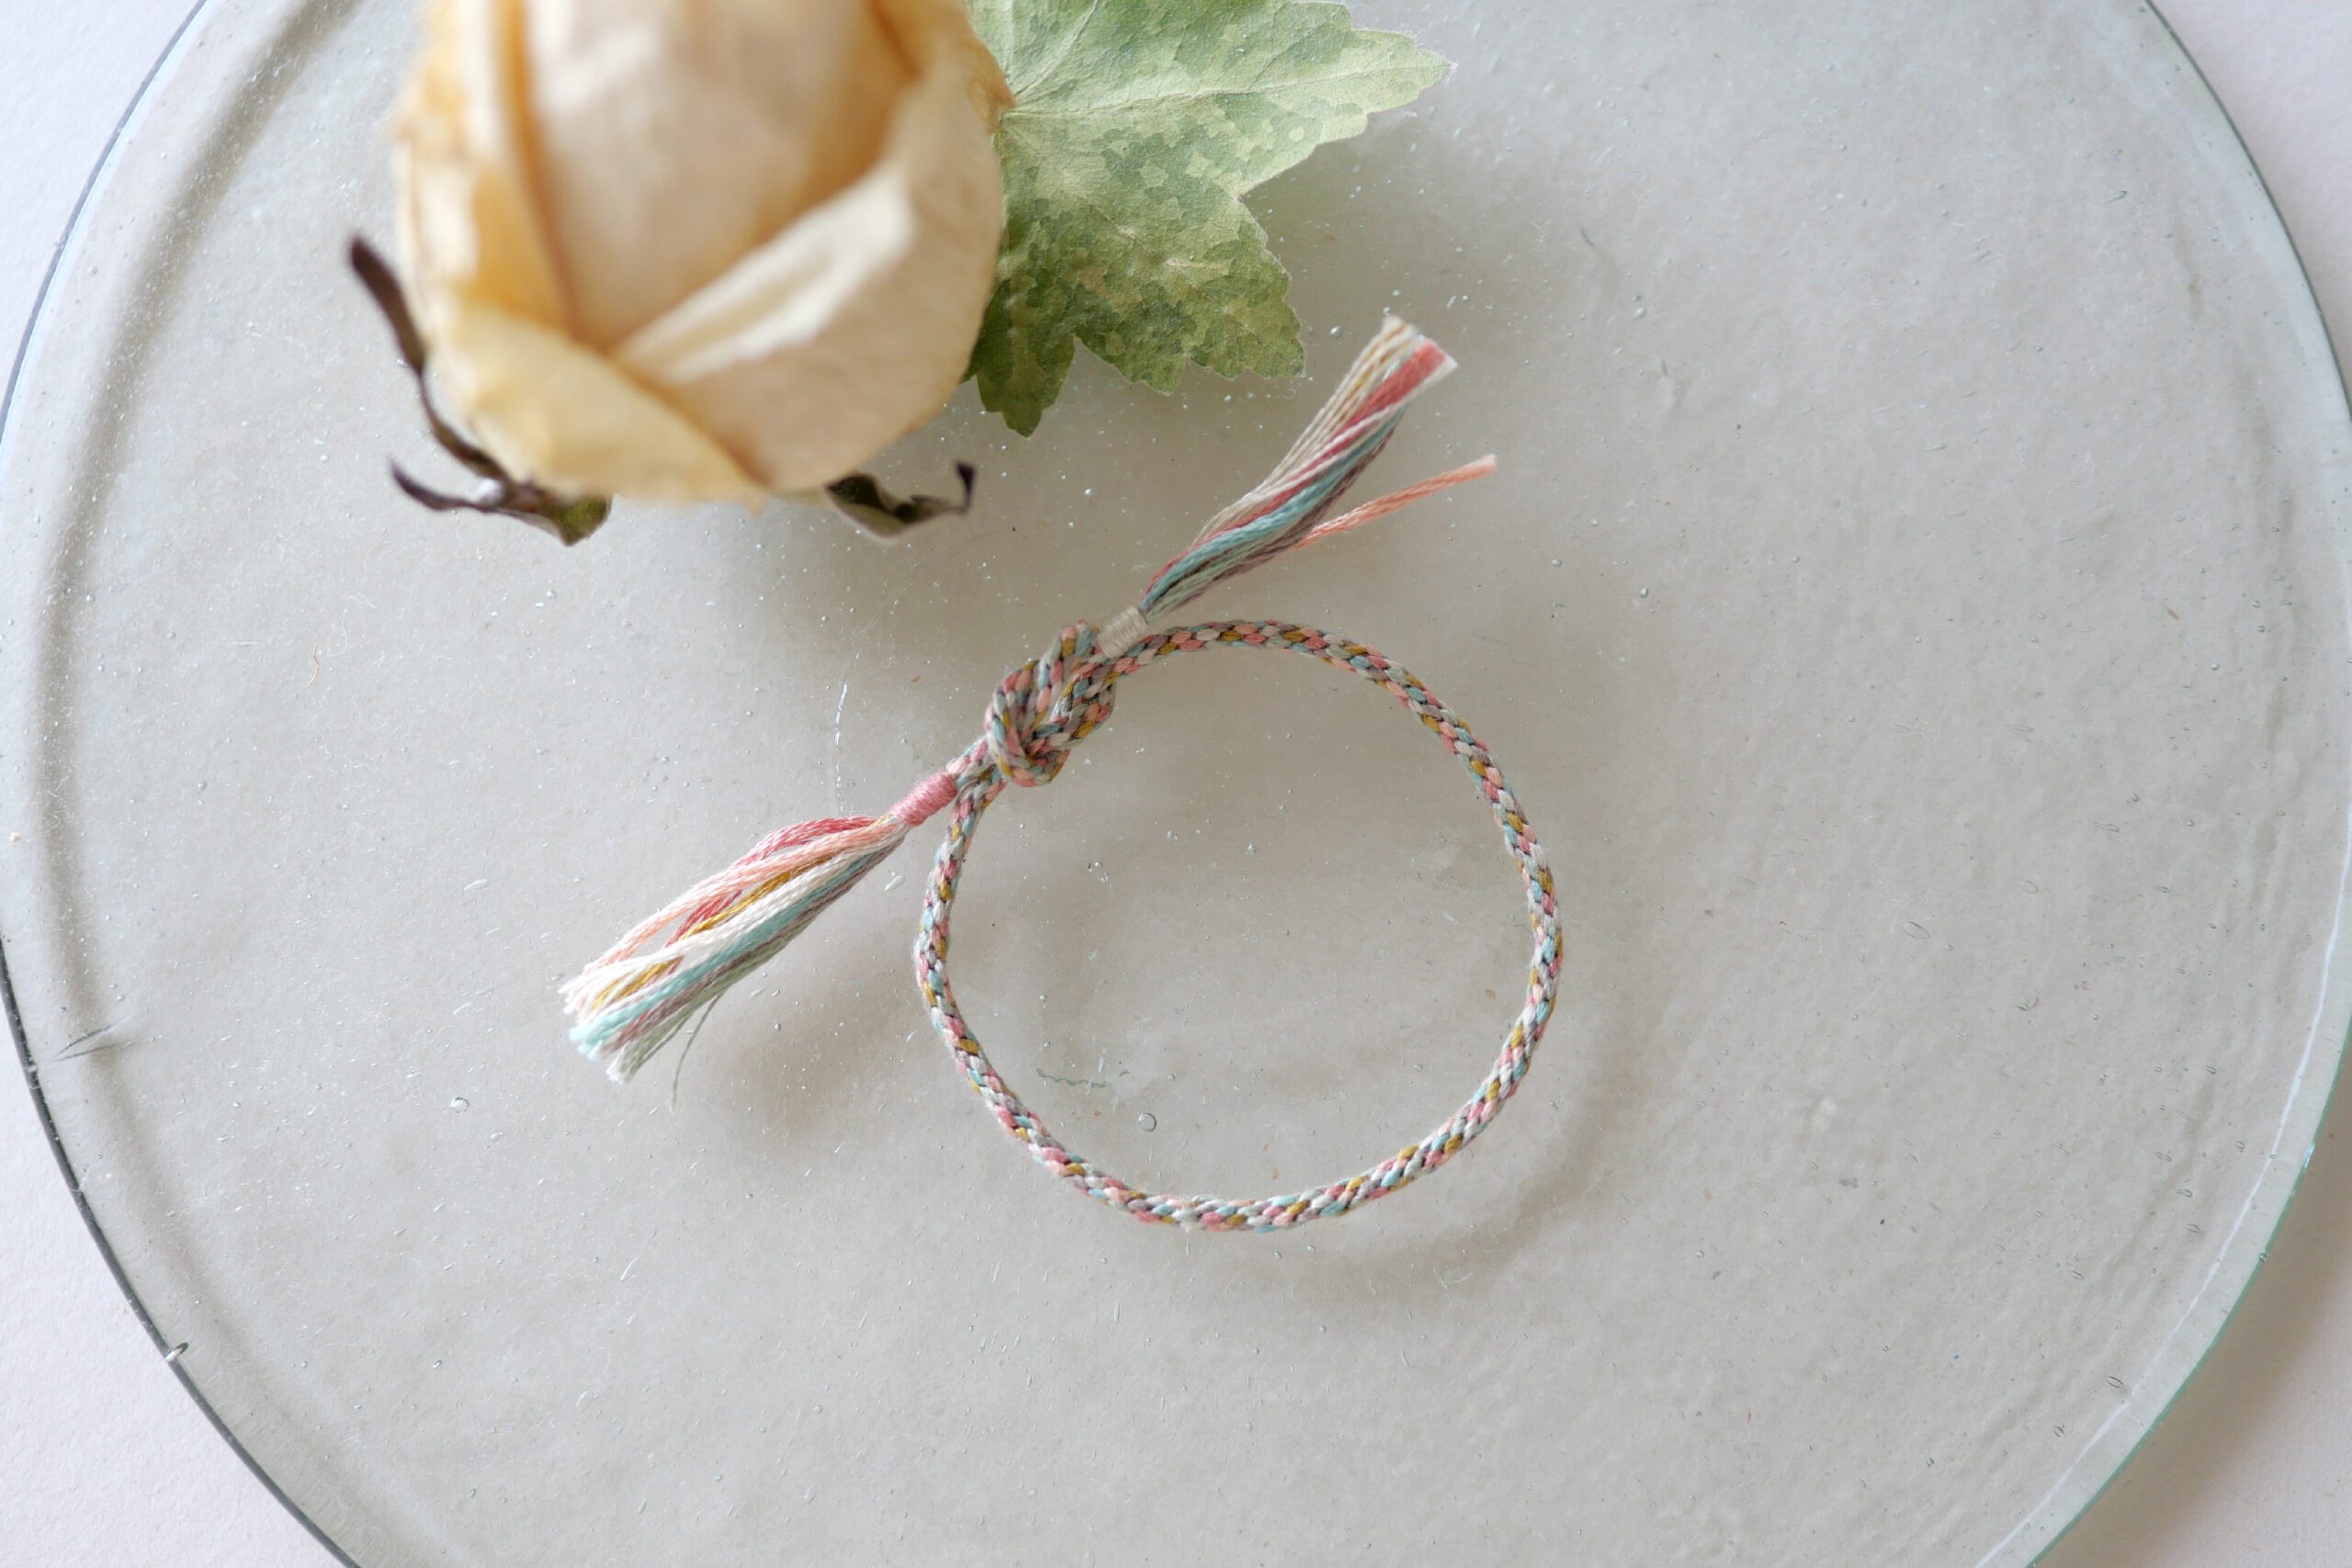
After repeating several times, a braided thread will come out of the hole in the center. The thread that comes out should be pulled gently to let it hang down through the hole.
Also, the ends of the thread tend to get tangled, so remember to comb them so that they hang neatly after a few knits.
Step 6. Completed
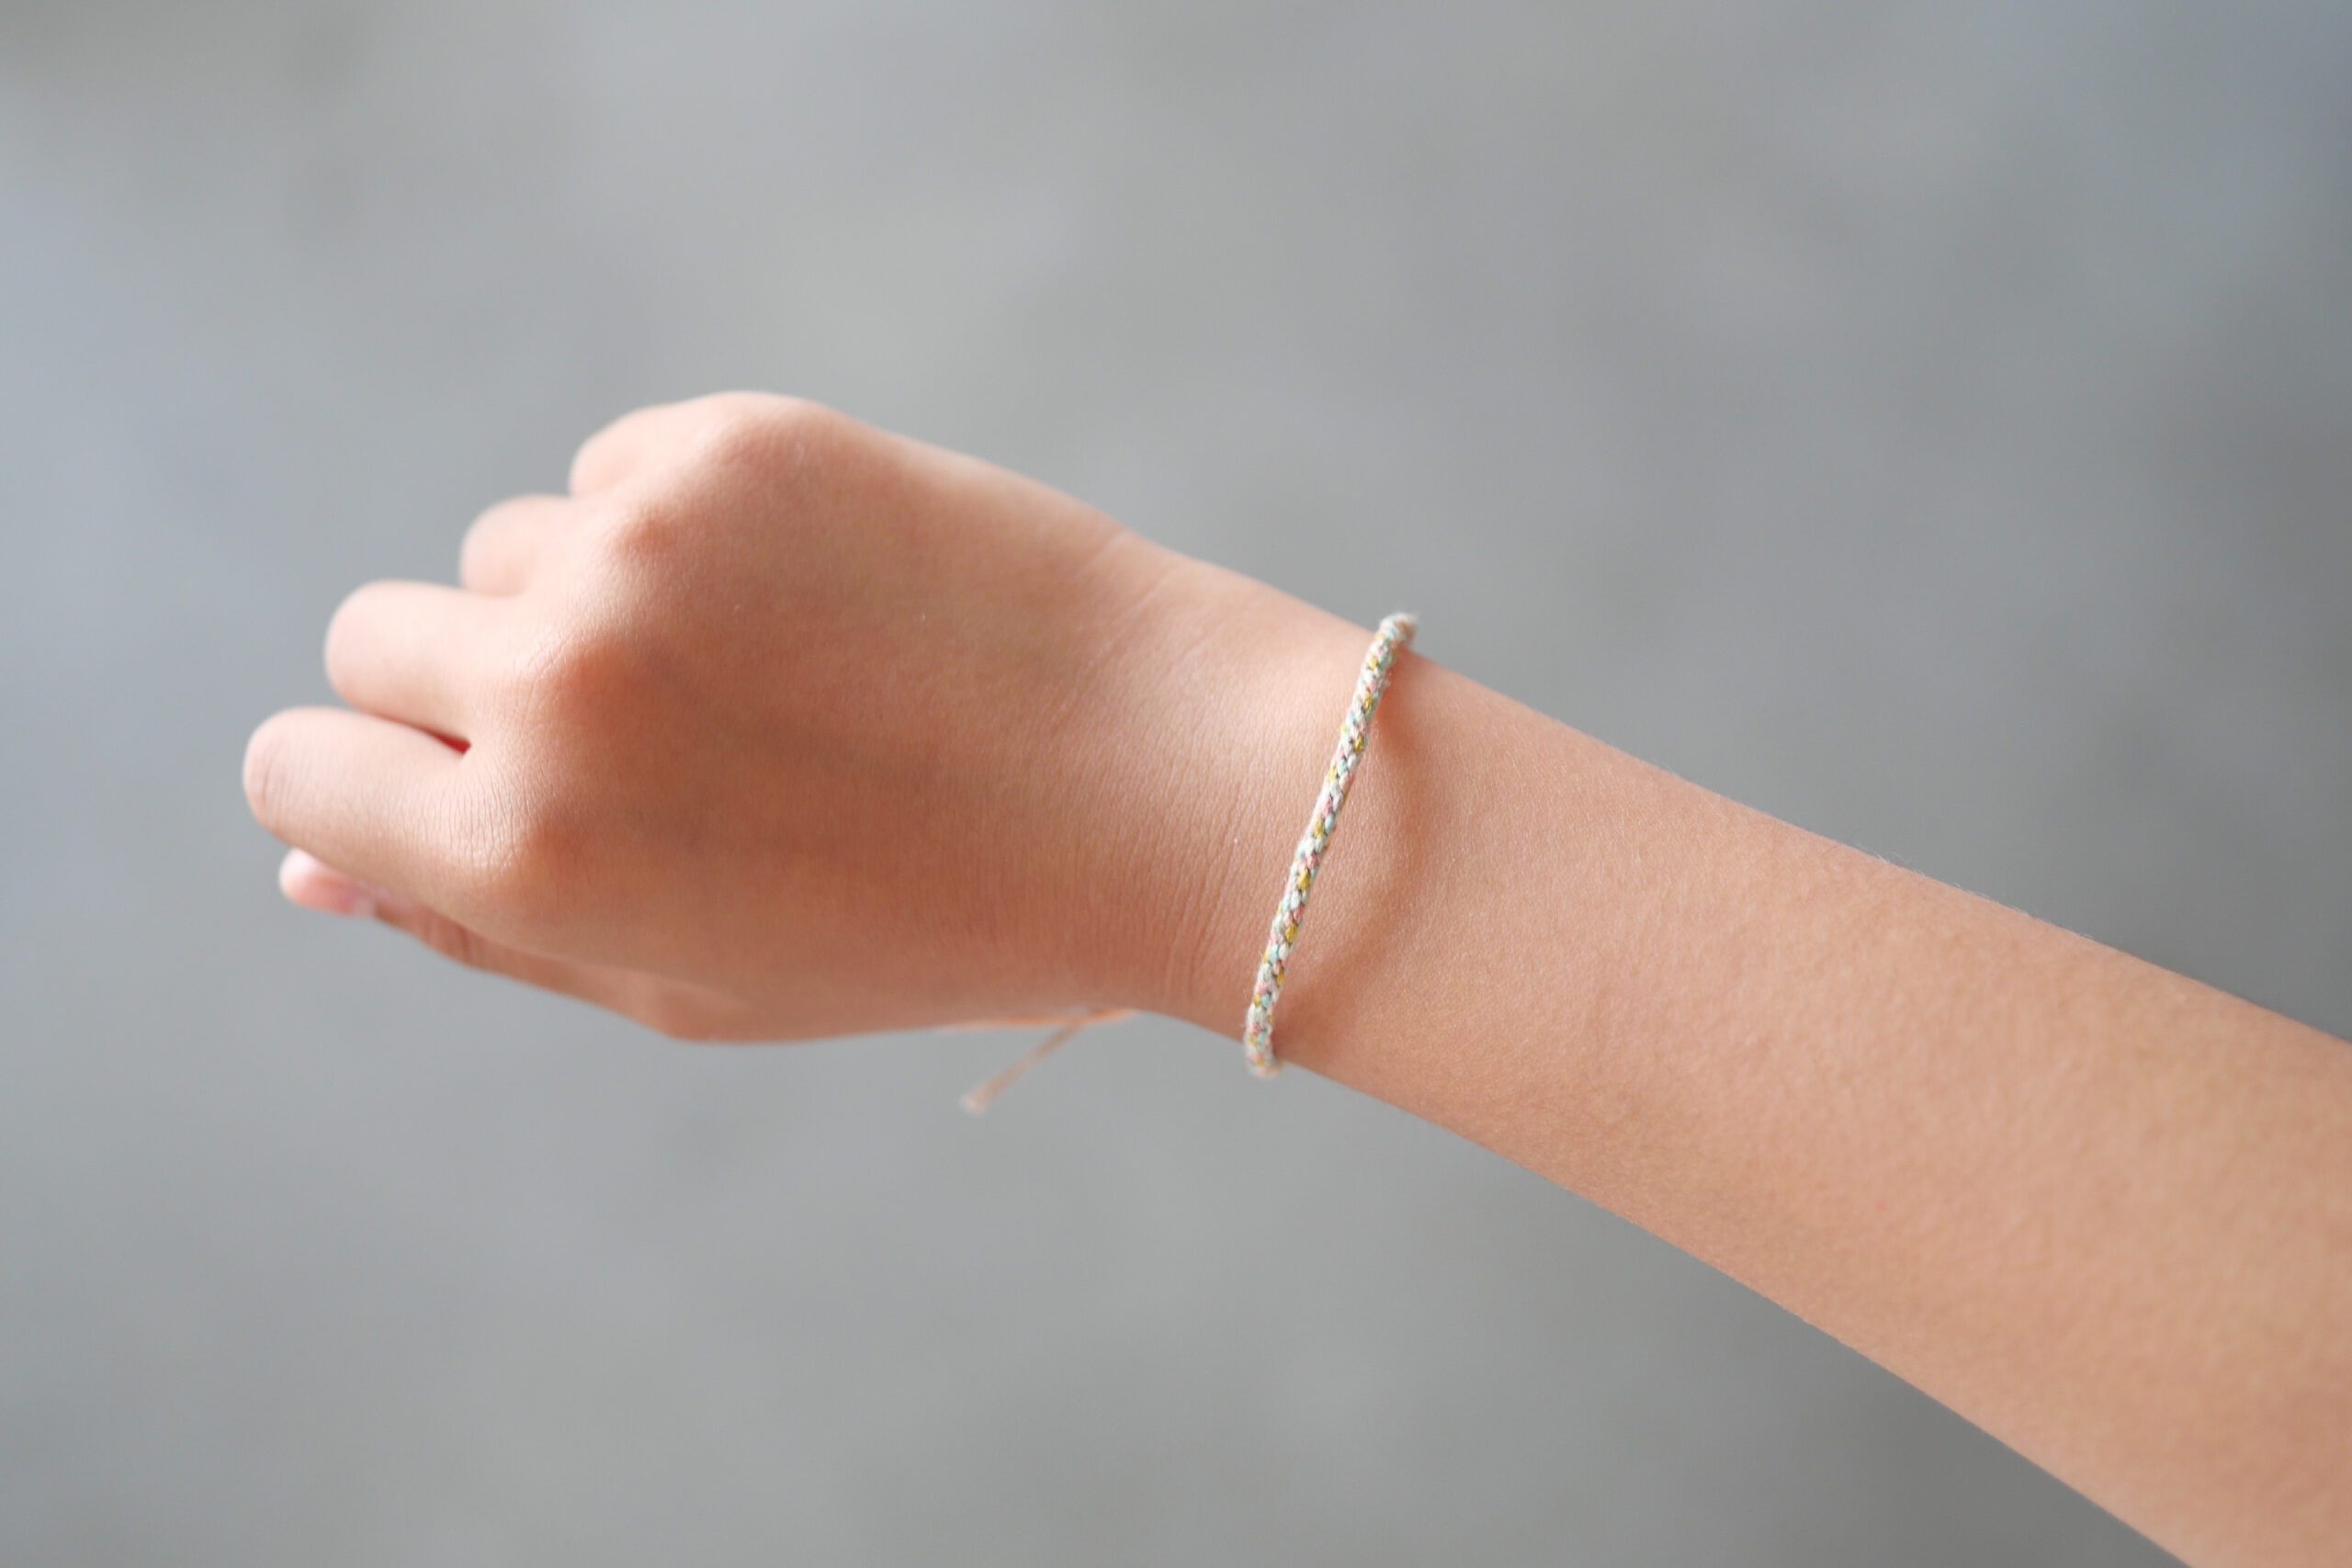
Once you’ve reached the desired length of braided cord, remove the thread from the disk and tie the ends together. The braid is completed when the fringes at both ends are the same length.
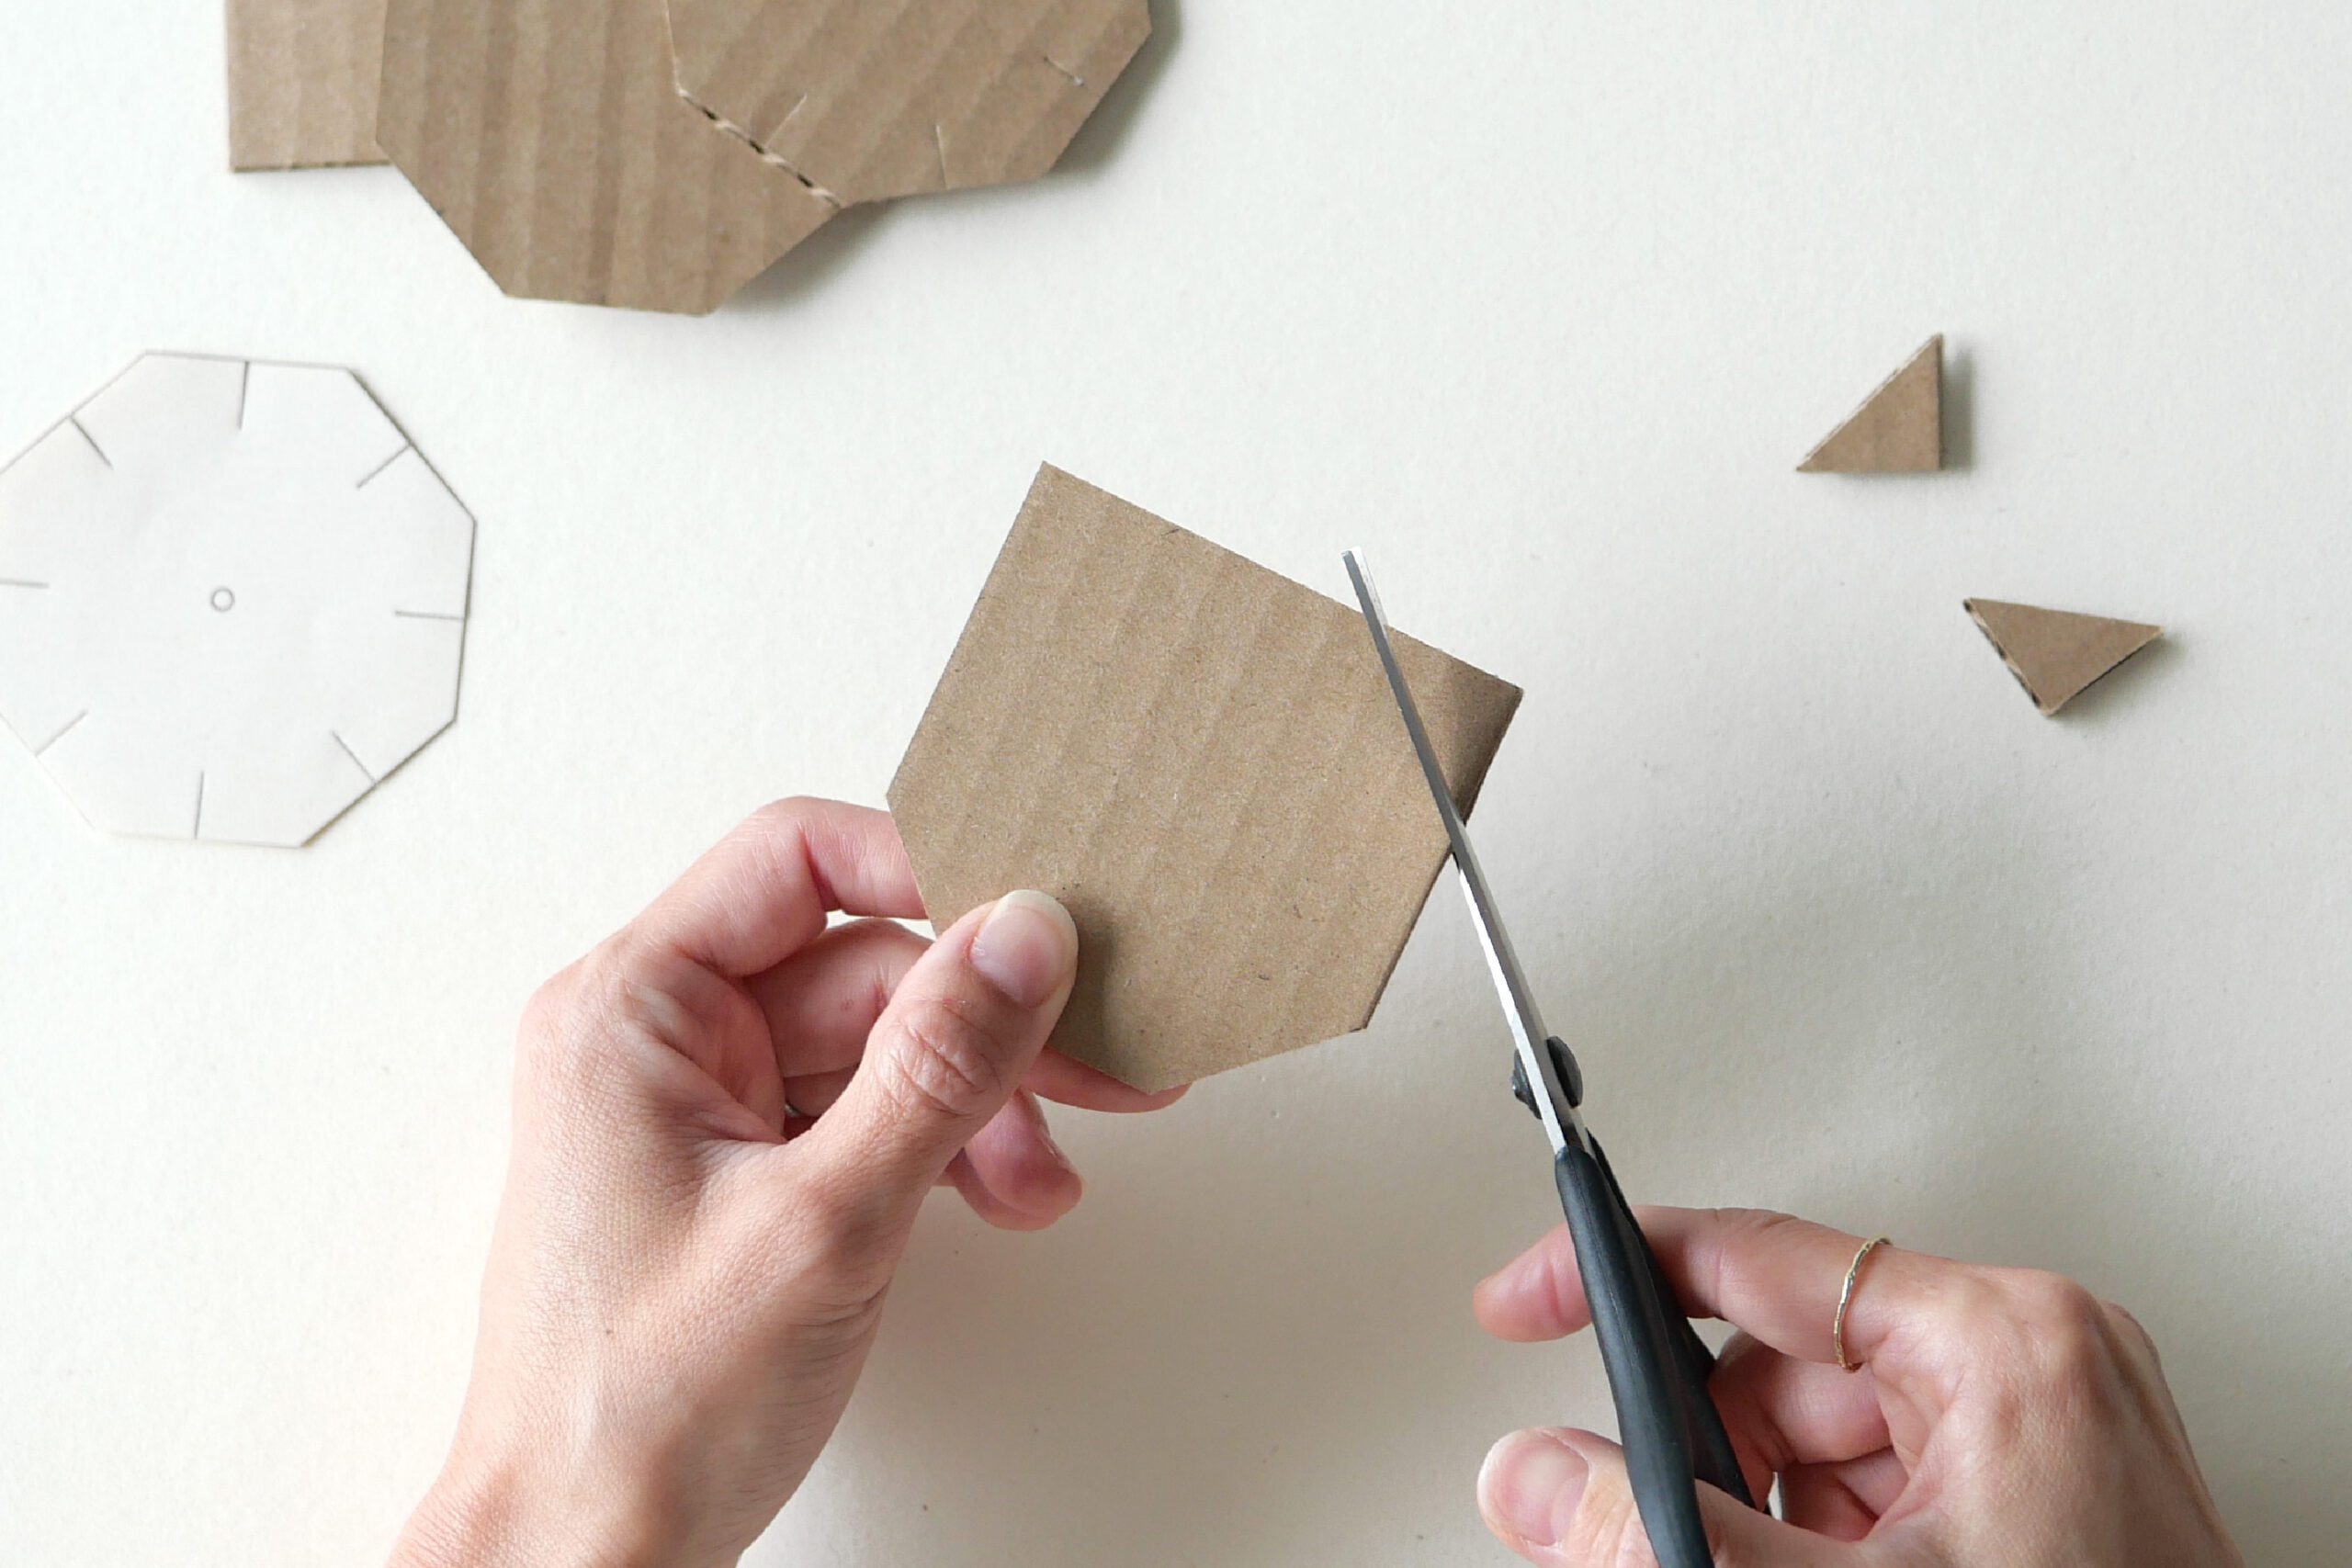
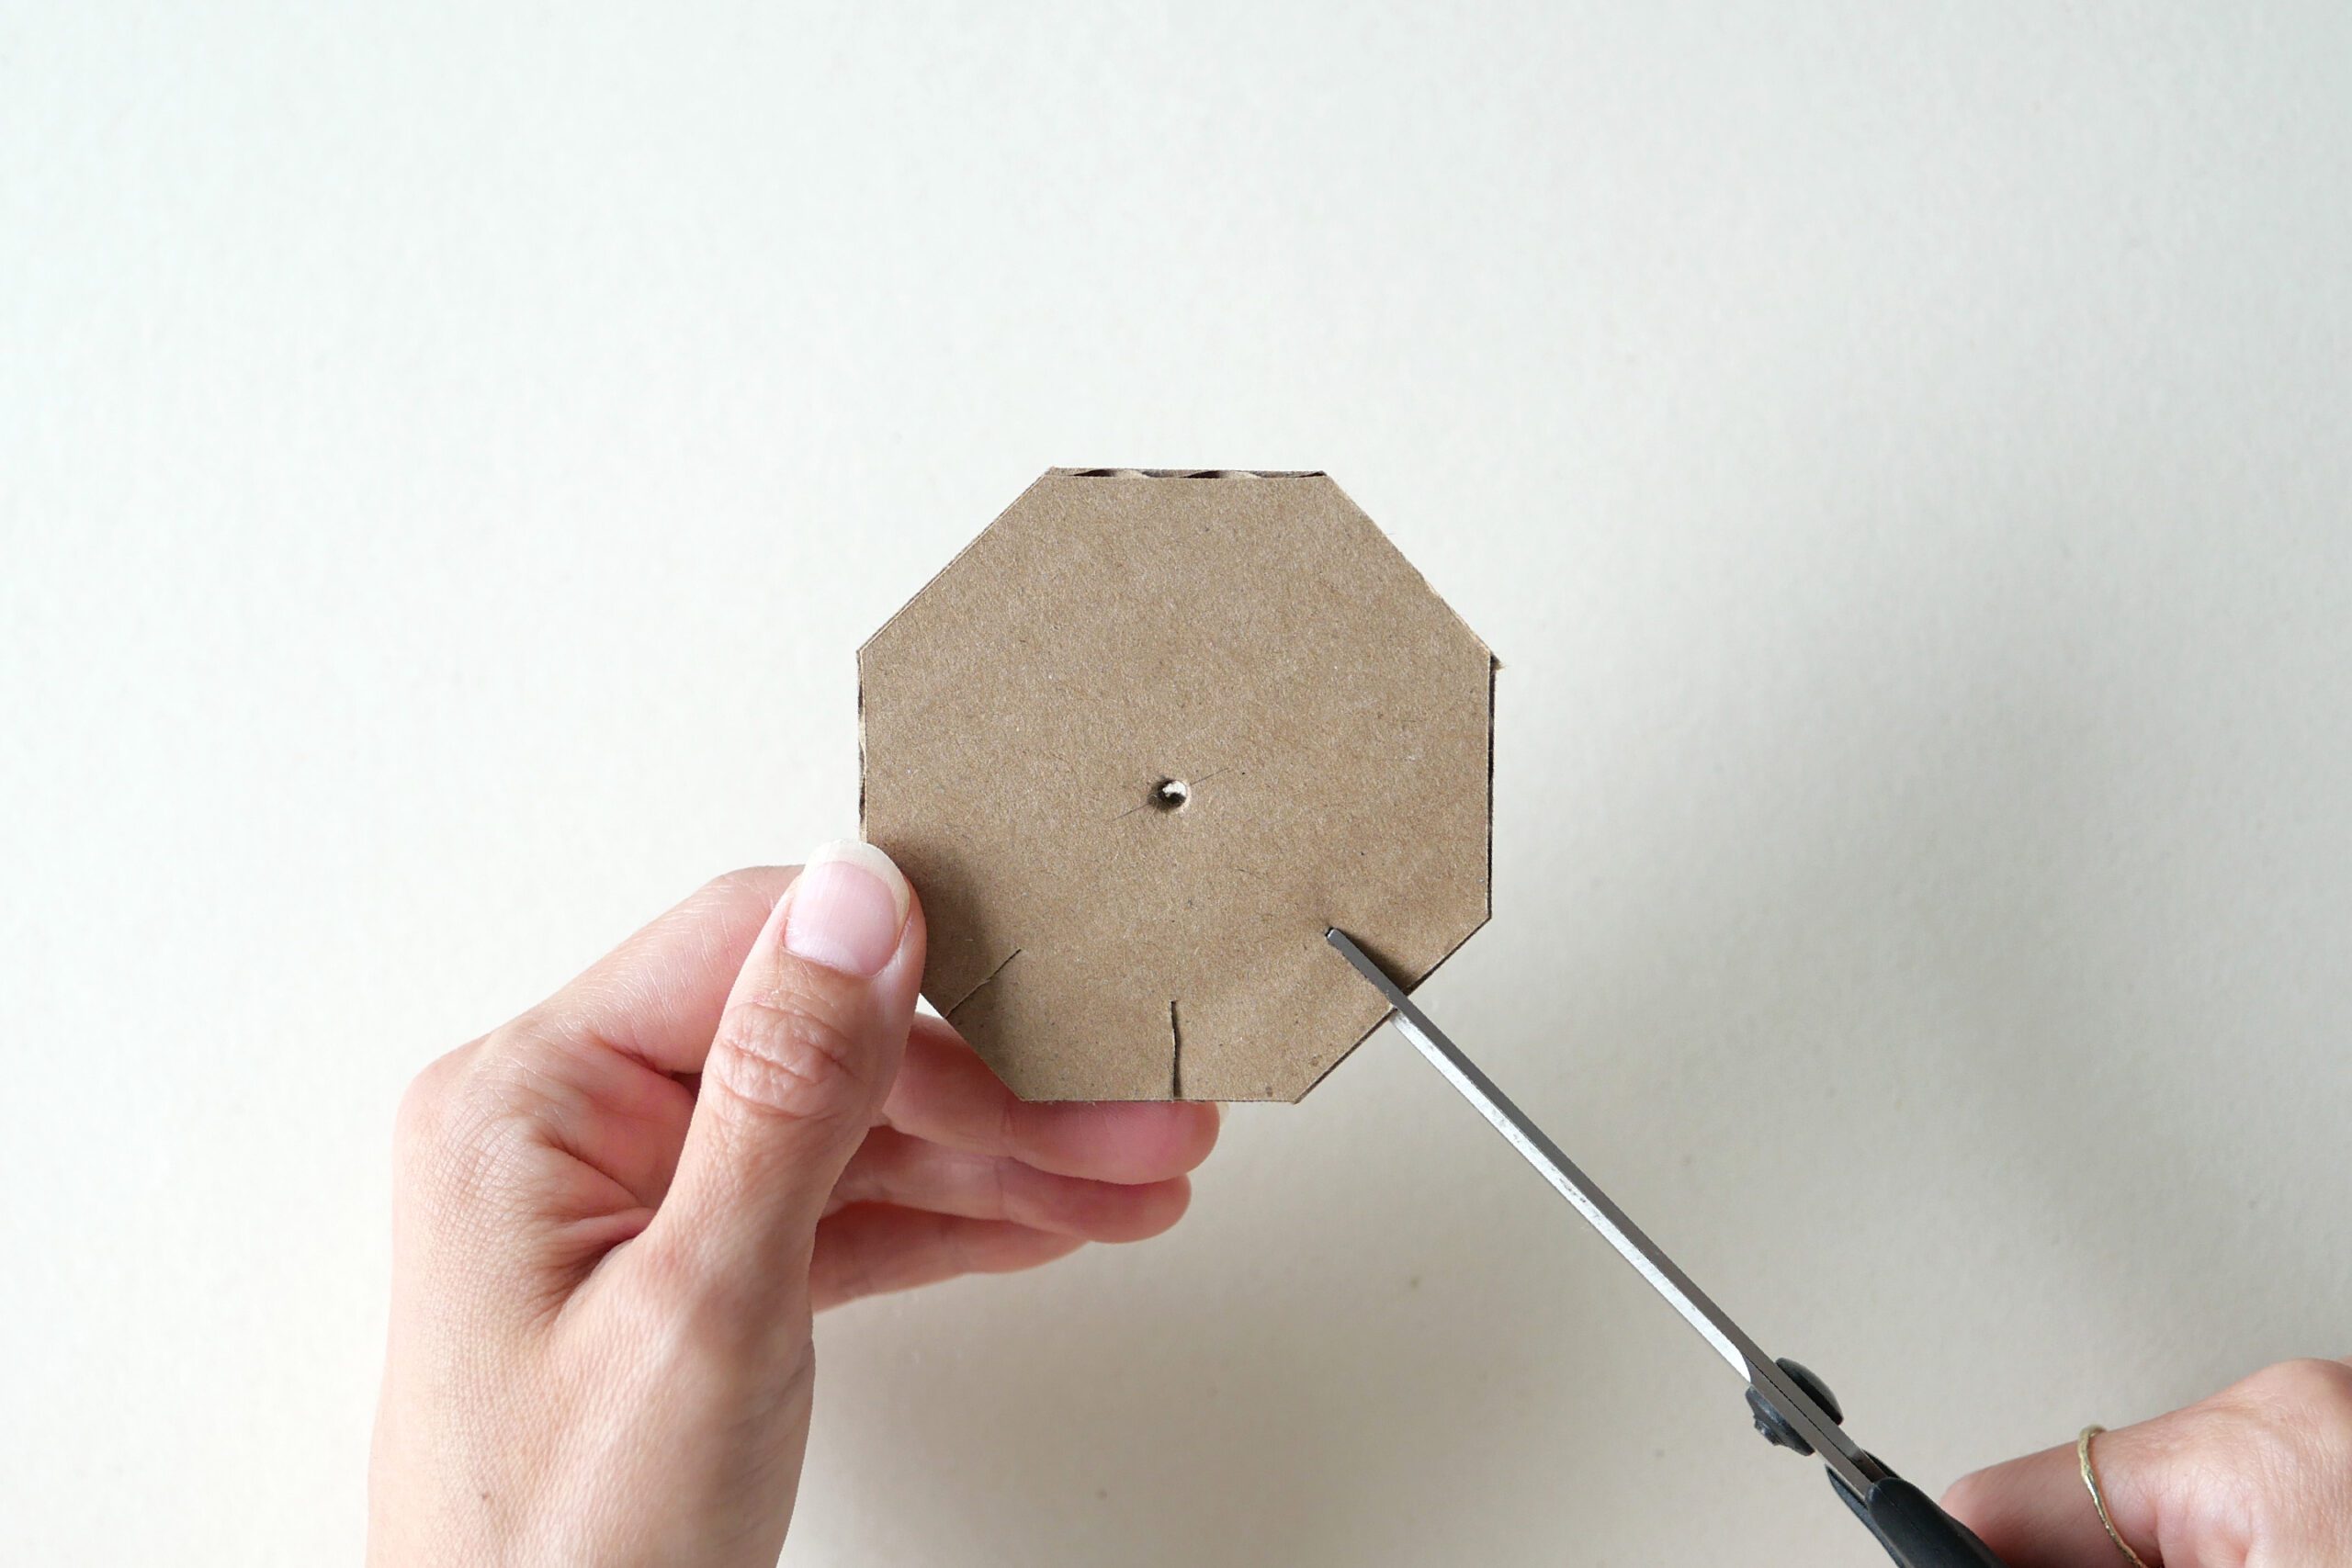
Octagonal Kumihimo Disk
If cutting out a circle is difficult, an octagonal disk is easy. Simply cut off the four corners of a board cut into squares. Once you have made a cut in the center of each side, you will have eight slits.
There is no need to be nervous about the shape of the disc or the position of the cutouts; you can cut them out roughly and it will still work.
*We have templates for both circular and octagonal discs. If you need them, download and use them.
Various Thicknesses and Braided Methods
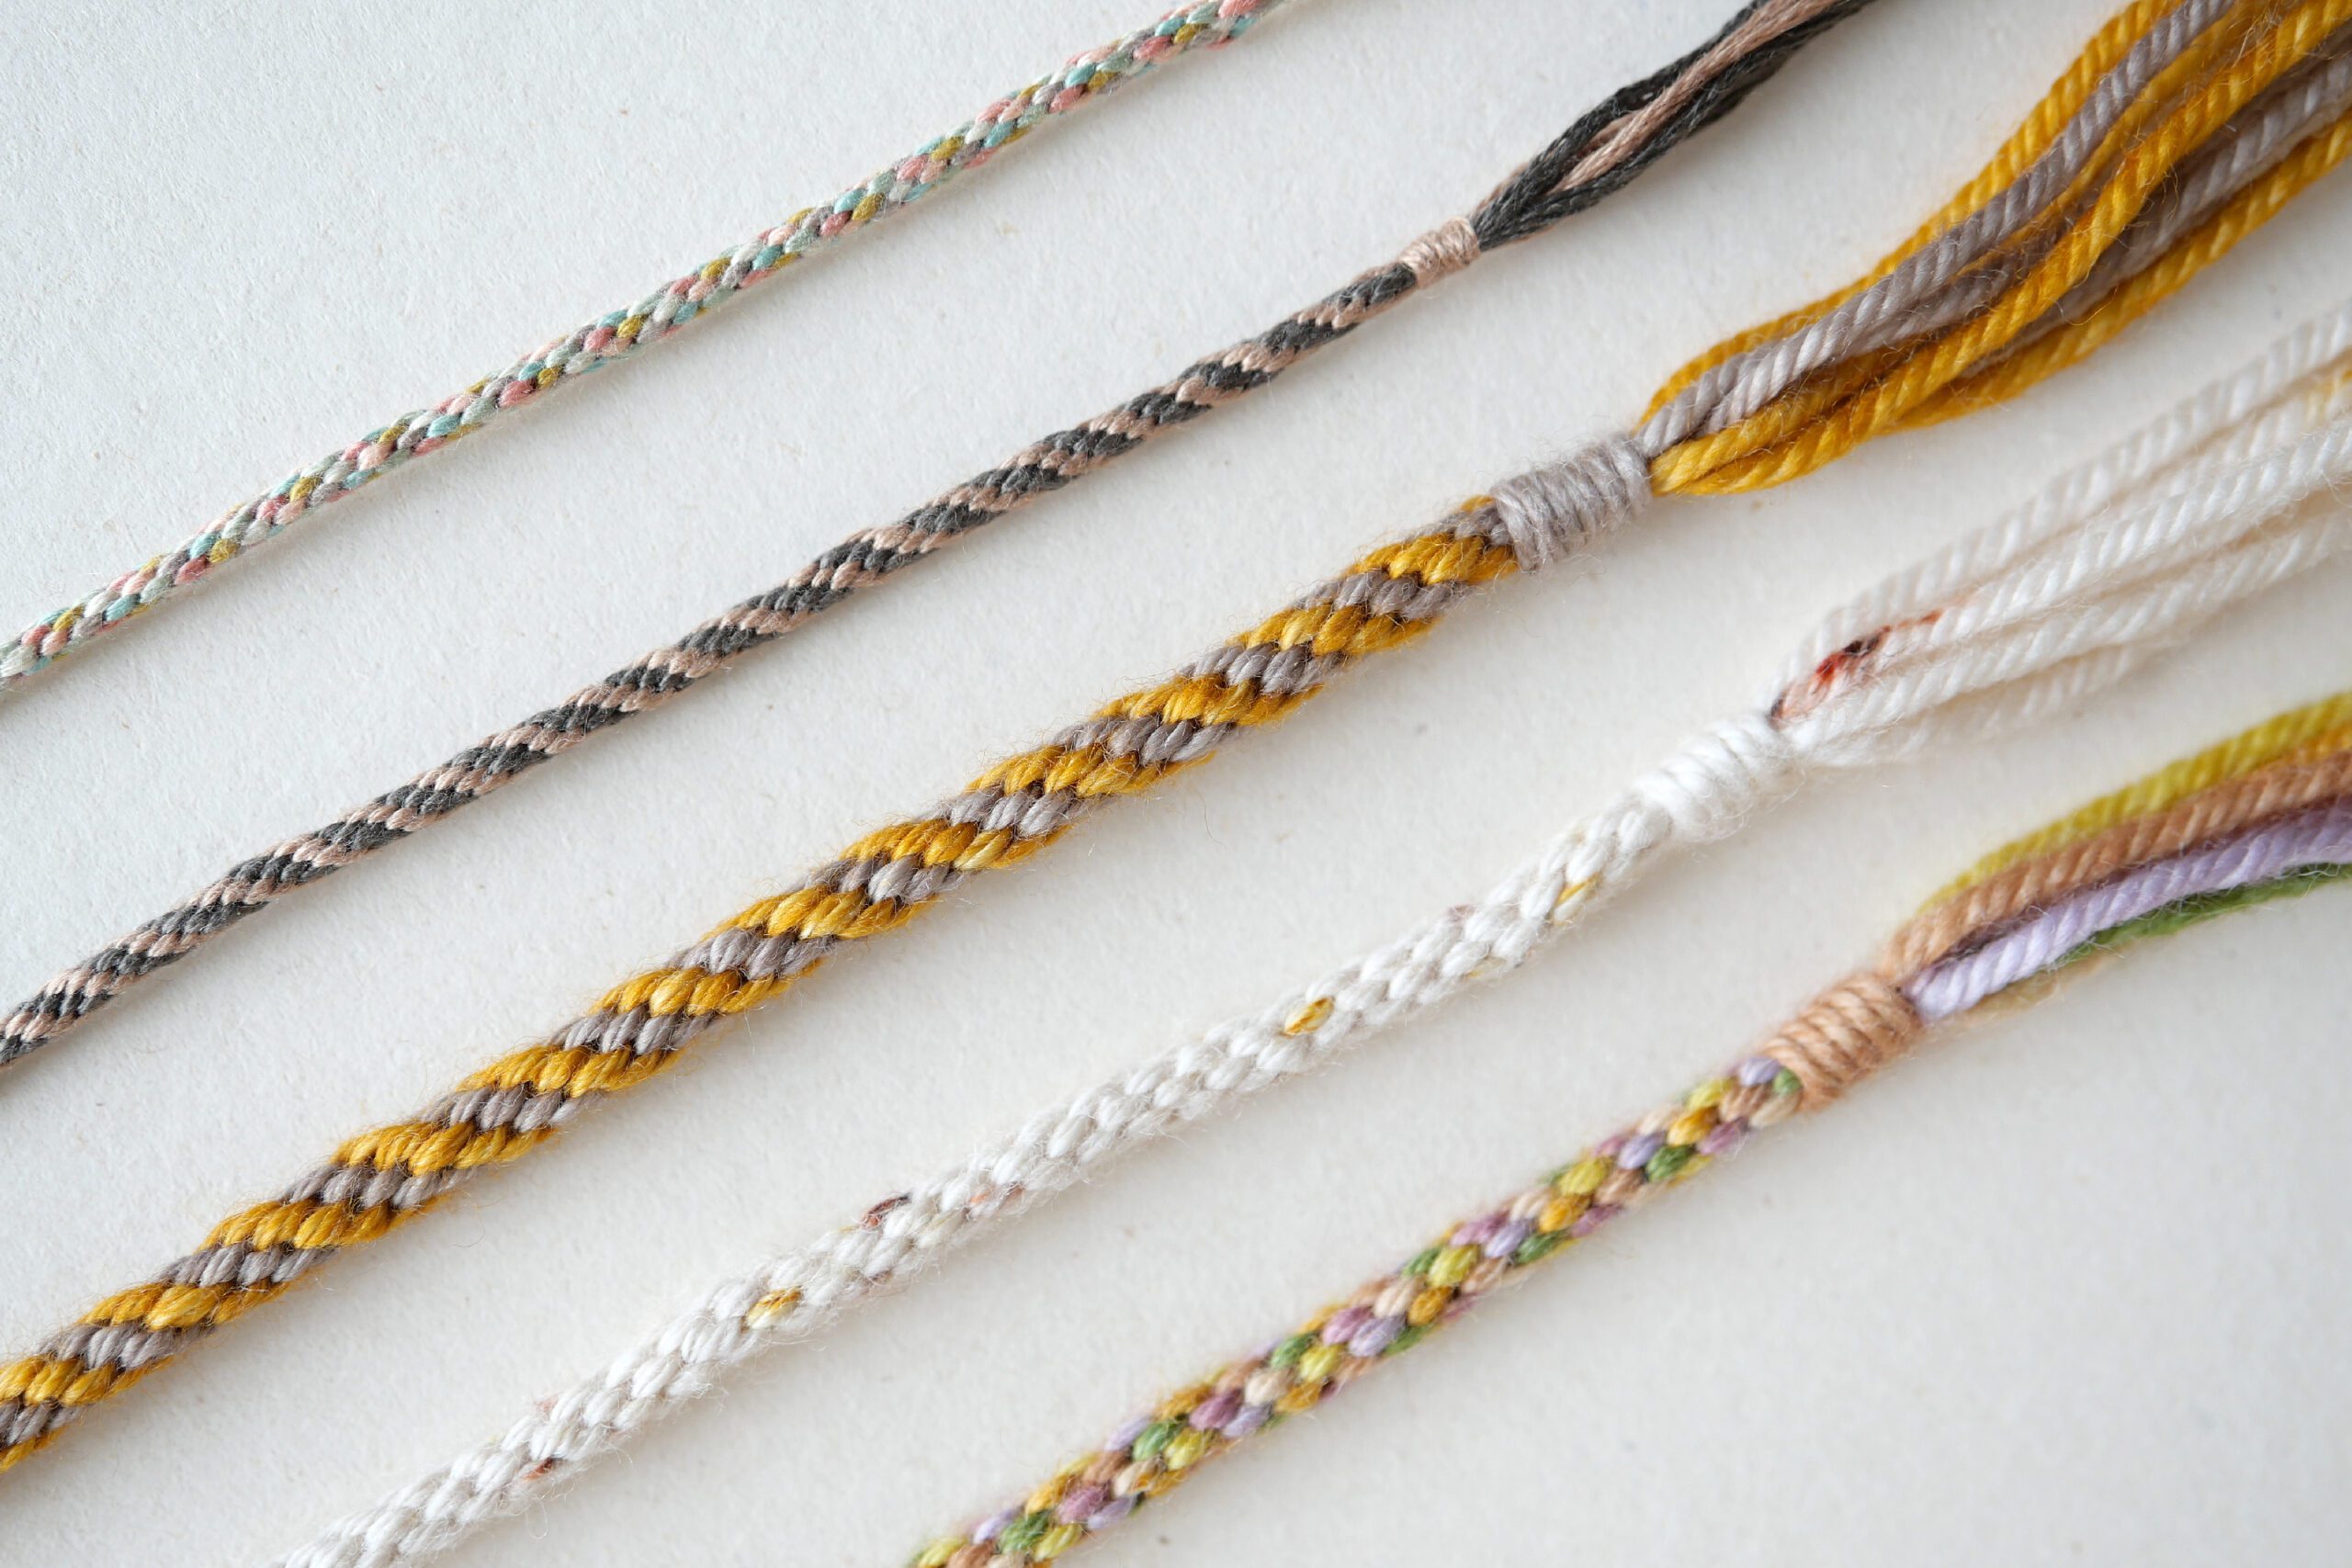
Kumihimo can be used for a variety of purposes. In this step, we used embroidery thread to make a thin and delicate bracelet. If you use a thicker wool or cotton yarn, the finished product will look different. I used wool yarn to braid a slightly thicker cord. Strong and solid, Kumihimo makes a great hand-knitted pouch cord.
In my next post, I will also show you how to knit the yellow and gray twists in the center of the photo.
Ideal Craft for Camping and Traveling
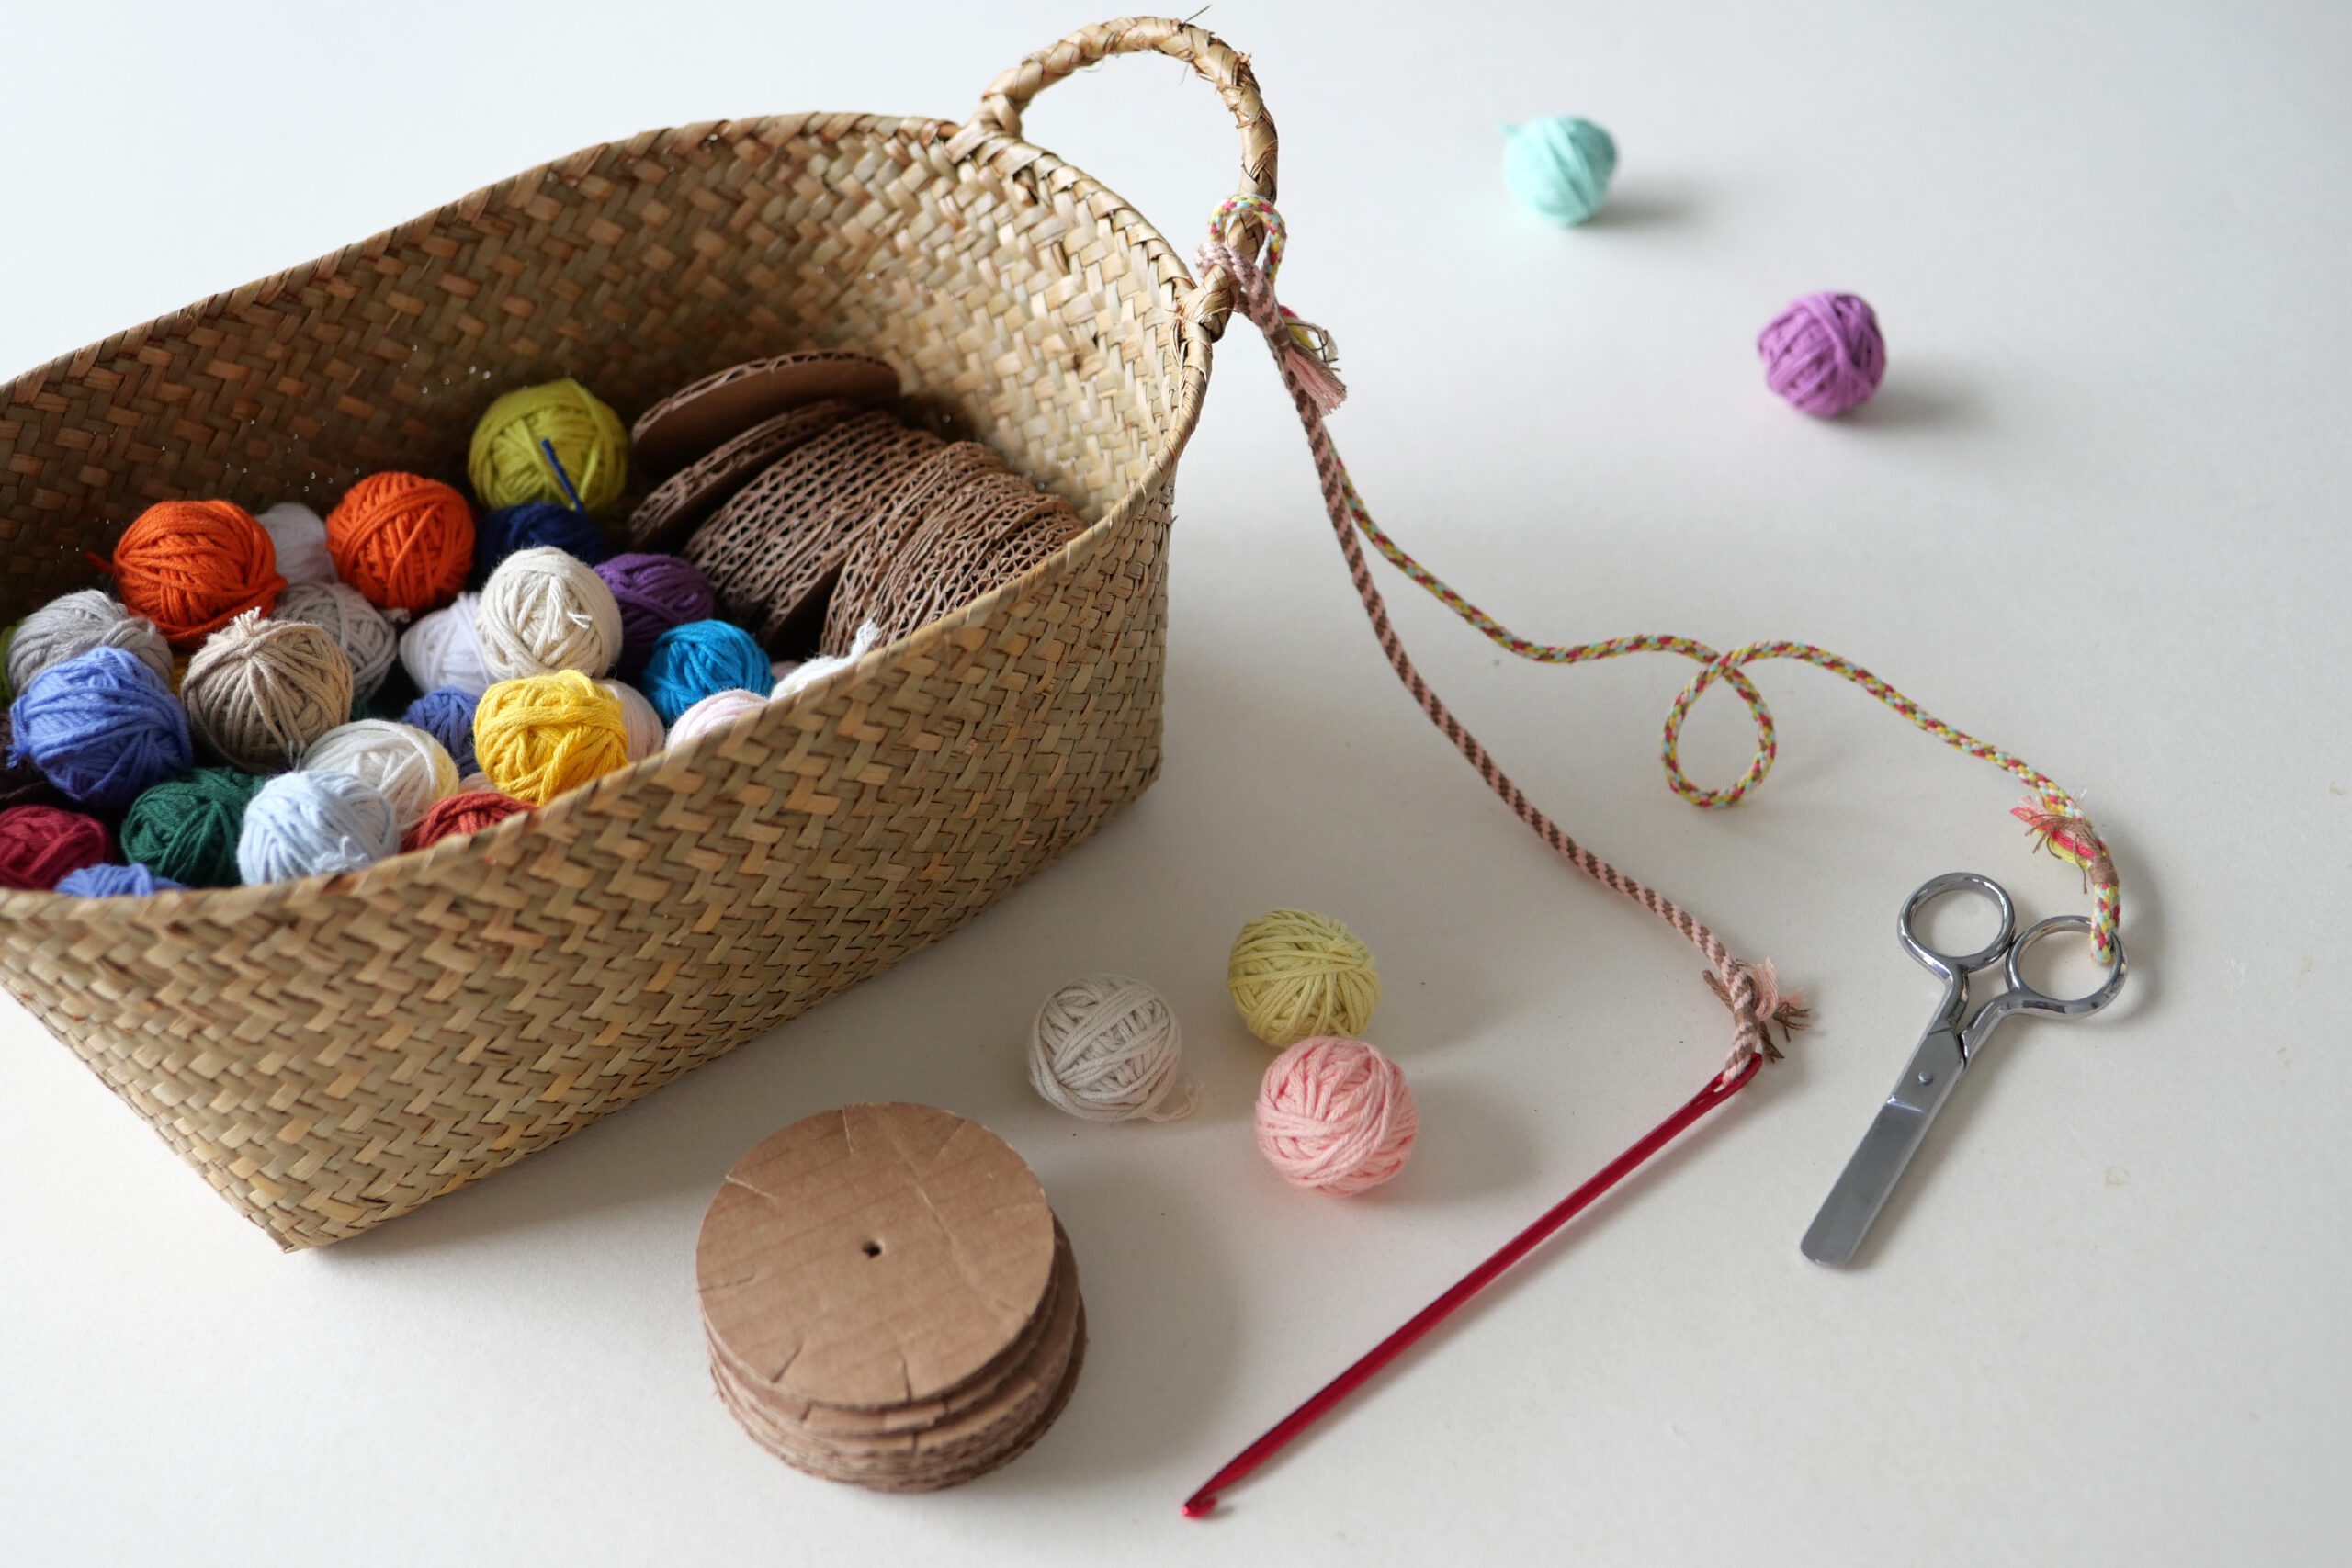
A Kumihimo basket was a surprise for the school’s camping trip.
Inside the basket are about 50 Kumihimo discs, cotton yarn in a variety of colors. Scissors and crochet hooks were tied to the basket with braided cord to prevent them from getting lost.
About 40 children and adults participated in the camp. I was happy to hear that everyone enjoyed the Kumihimo so much. I would recommend this as a great way to do some handwork around the campfire or during a few hours of driving.
*Circle cutter is useful for cutting many circles.
Kumihimo Friendship Bracelet
組紐をご存知ですか? 日本伝統の工芸品で何本もの糸を合わせて交差させながら紐を編む技法です。その歴史はとても古く、武具の一部や、神様に供える巻物を留める紐として、または着物の帯締めとして使われてきました。一見複雑に組まれたこの美しい紐は、丈夫で、糸の色や本数、組み合わせ方によって色や模様の仕上がりはさまざまです。文献を読むと、当時の方々はとてもおしゃれだったのだなと感じます。なぜならこんなに美しい紐を、身の回りを彩る装飾品として使っていたのですから。
今回ご紹介するのは、7本の糸とカードボードのディスクを使ったとてもシンプルな組紐です。これは娘の通う学校の手仕事の授業で教わりました。ここアメリカでも広く認知されていて子どもたちはみなこの組紐が大好きです。出来上がった紐を見ると複雑に織られているようですが、実際にはとてもシンプルで大人も子どもも誰もが楽しめるのです。
いつでもどこでもできるこの完璧なクラフトは旅行での移動中や、キャンプ、ちょっとした待ち時間にも最適です。
今回は、刺繍糸を使ってフレンドシップブレスレットの作り方をご紹介します。
用意するもの
– 段ボール もしくは カードボード 7×7cm
– 刺繍糸 *刺繍糸以外のお好きな糸で代用できます
– カギ編み針
– ハサミ
– 組紐ディスクのテンプレート *必要なら以下からダウンロードできます
こちらが組紐ディスクのテンプレートです。ご自由にダウンロードしてお使いください。
download the templateつくりかた
Step 1. 組紐ディスクをつくる
段ボールを丸く切り、中央に3mmほどの穴をあける。小さな穴を開けた後、鉛筆を差し込み穴を拡張すると簡単です。
円の周りに8等分の切込みを入れる。
*ディスクのテンプレートをご用意しました。必要でしたらダウンロードしててお使いください。
Step 2. 糸を用意する
7色の好きな色の糸を選びます。単色でも、全部違う色でもお好きな組み合わせに。糸は希望する出来上がり寸法の2〜2.5倍の長さに切ります。ブレスレットなら60cmもあれば十分です。
ディスク中央の穴に7本の糸を入れて、端を5cmほど残して結びます。
Step 3. スリットに糸を配置する
8つのスリットに1本づつ糸を挟み入れます。1つのスリットが余ります。そのスリットを自分のお腹に向けてスタートします。
Step 3. 糸を組む
自分のお腹の位置にある空いているスリットを中心に、右サイドの3つめの位置にある糸を、空いているスリットに移動します。そしてディスクを時計回りに回して、糸がなくなったスリットを再び自分のお腹の位置に向けます。そしてまた3つ目の糸を空いているスリットに移動する、これを繰り返します。
ポイントは2つだけ。常に開いているスリットは自分のお腹の位置に。そこから3つ手前の糸を開いているスリットに入れる。
Step 5. 組んでとかす
何度か繰り返していくと、中央の穴から組まれた紐が出てきます。出てきた紐はやさしく引っ張って穴から垂らしてください。
また、スリットを移動した糸の端は絡まりやすいので、いくつか編んだらきれいに垂れるようににコームするのを忘れずに。
Step 6. 完成です
希望の長さの組紐が編めたらディスクから糸をはずして、端を結びます。両端のフリンジが同じ長さになるように整えたら完成です。
八角形の組紐ディスク
円を切り出すのが難しい場合は八角形のディスクが簡単です。四角く切ったボードの四隅を切り落とすだけです。それぞれの辺の中央に切り込みを入れたら8つのスリットができます。
ディスクの形や切り込みの位置に神経質になる必要はなく、ざっくりと切り出してもうまくいくので安心してください。
*円形ディスクと八角形ディスクのテンプレートをご用意しています。必要でしたらダウンロードしててお使いください。
いろいろな太さと編み方
組紐はさまざまな用途に応用可能です。今回の手順では刺繍糸を使い、細く繊細なブレスレットができました。もう少し太い毛糸やコットン糸を使えば出来上がりの印象も違います。私はウールの糸を使って少し太めの組紐を編みました。丈夫でソリッドな組紐は、手編みのポーチの紐としても最適です。
また次回の投稿では、写真中央にある黄色とグレーのツイストの編み方をご紹介します。
キャンプや旅行に最適なクラフト
クラスのキャンピングトリップのお供に、サプライズで組紐バスケットを用意しました。
カゴの中には、50枚ほどの組紐ディスク、色とりどりのコットンヤーン。ハサミ、クロシェットホックは迷子にならないように、バスケットに組紐でくくり付けました。
子どもと引率の大人総勢40名ほどが参加したキャンプ。みながこの組紐をとても楽しんだと聞いて嬉しくなりました。キャンプファイアを囲みながら、または数時間のドライブ中の手仕事におすすめです。
*たくさんの円を切るにはサークルカッターが便利ですよ。