Coffee Filter Flowers
Flowers always cheer us up. Even the sight of falling petals is beautiful, perhaps the fragility of the petals attracts us.
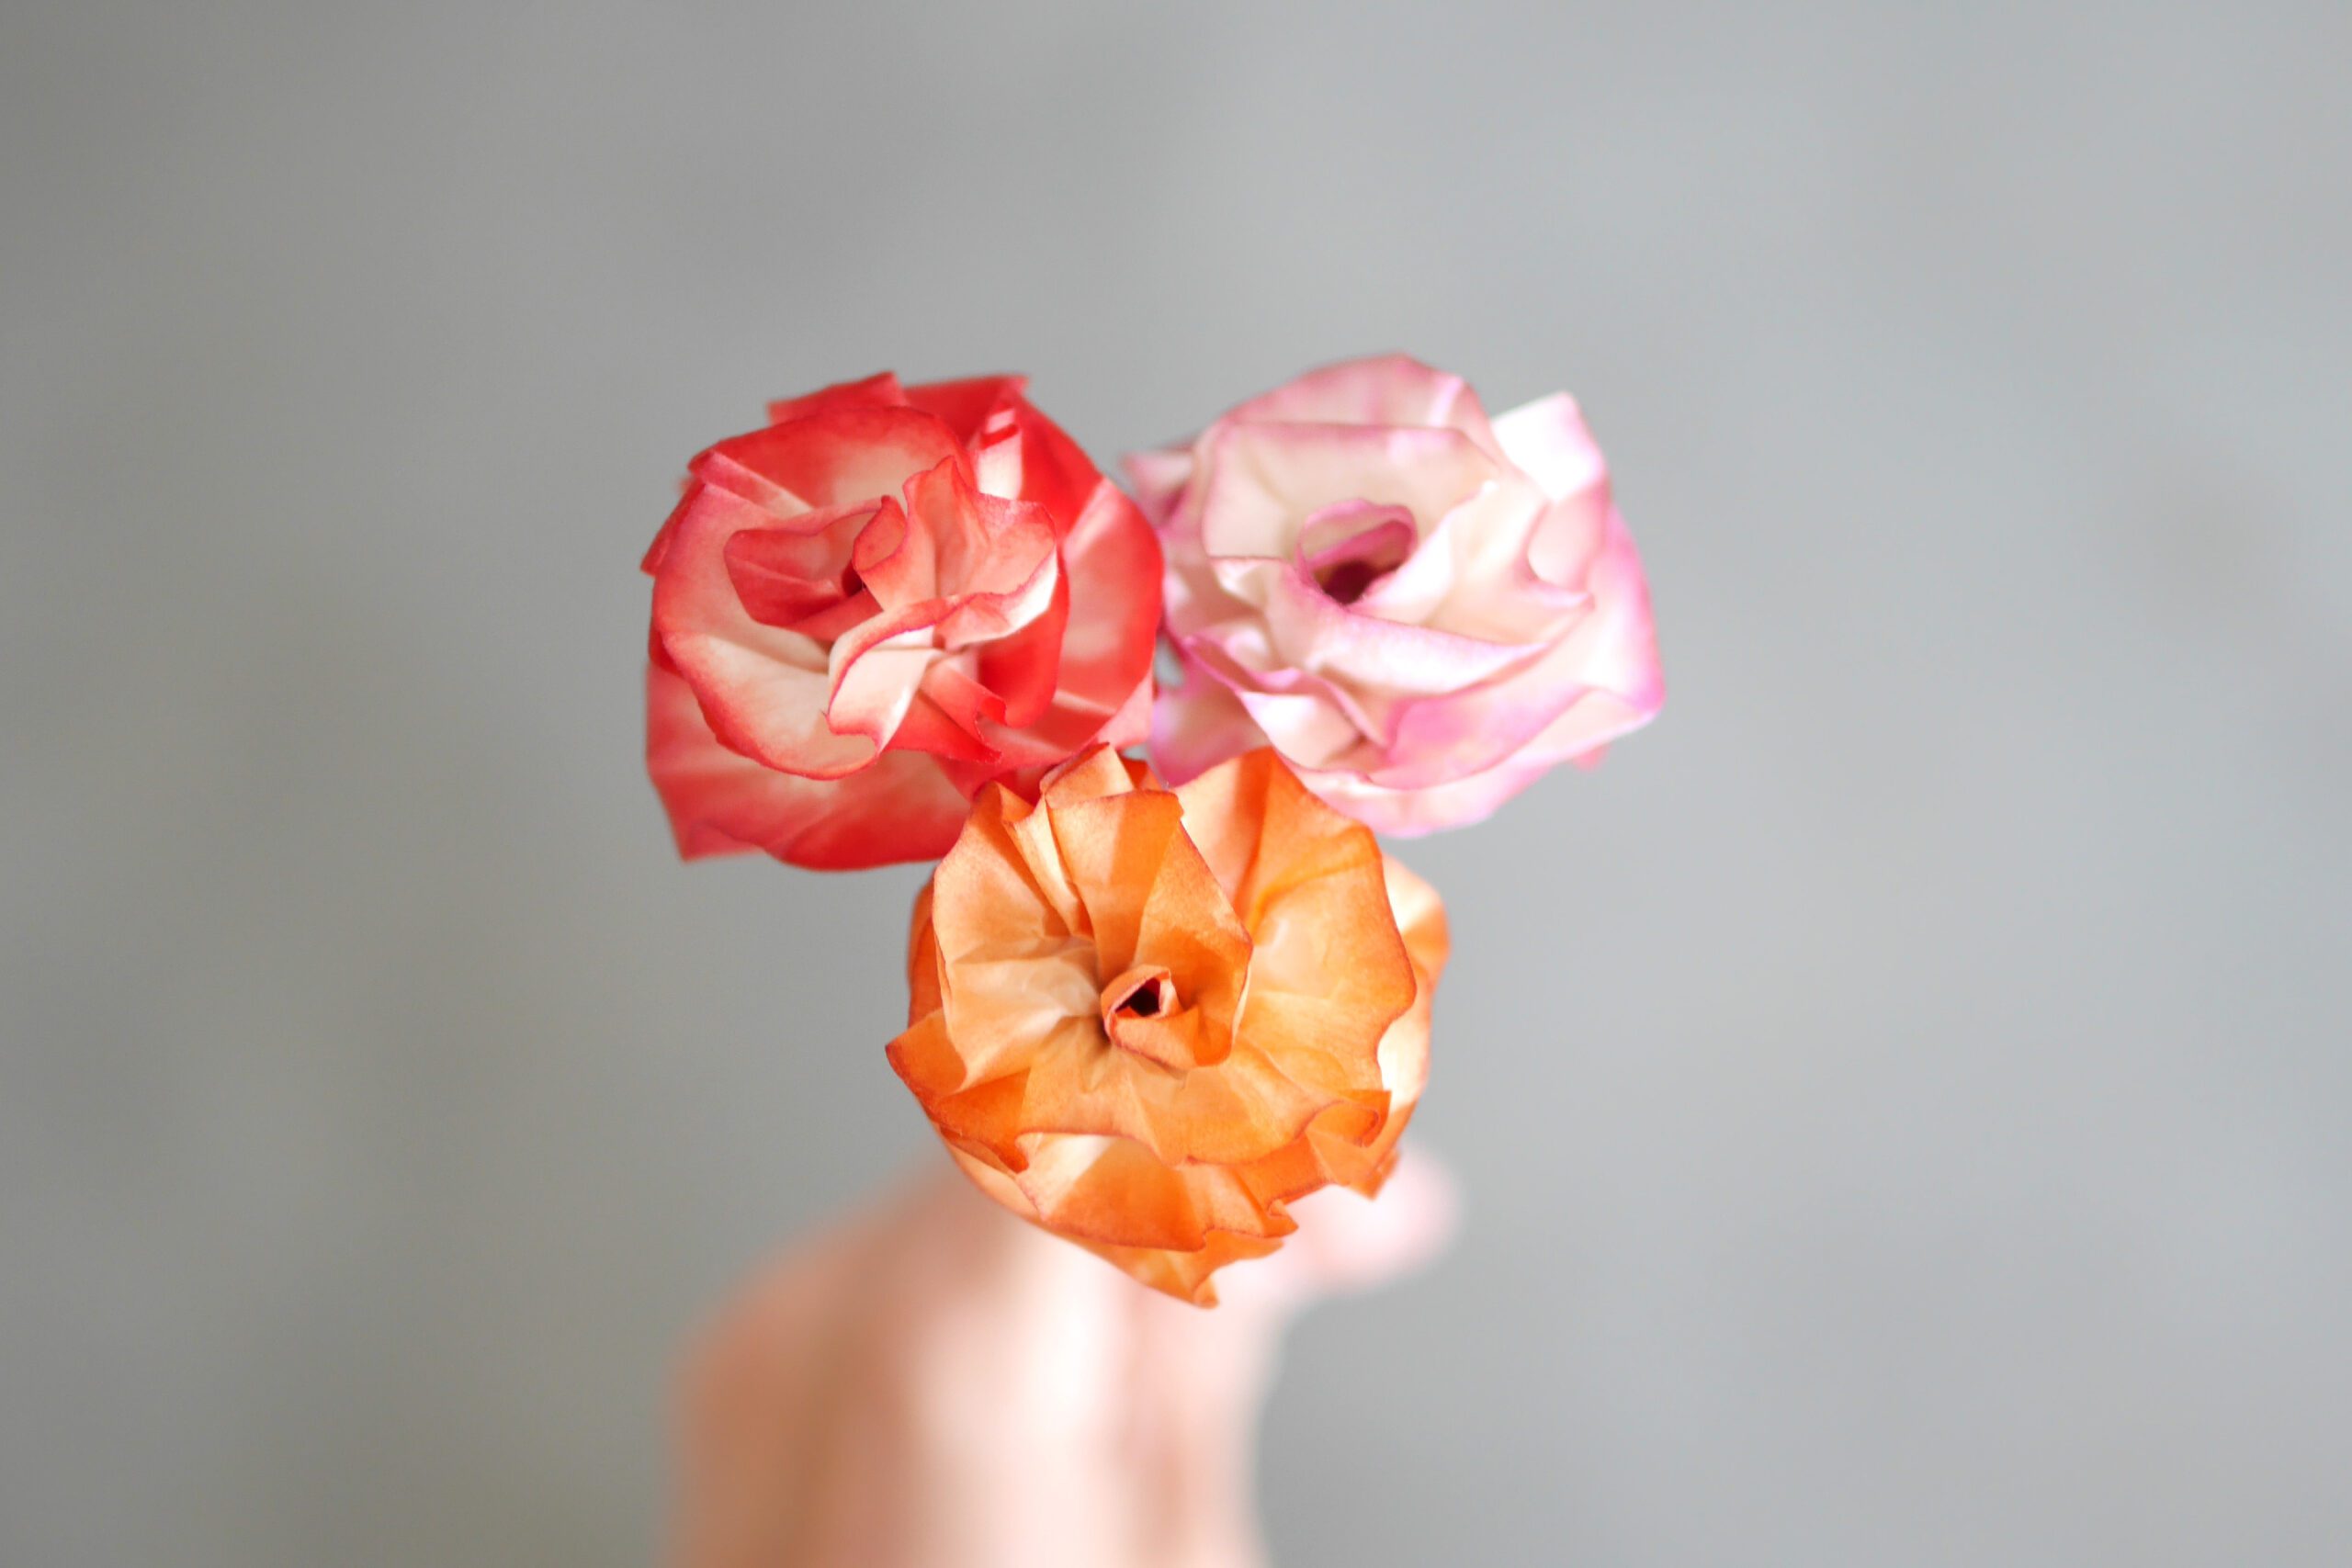
Handmade flowers using coffee filters. The half circle paper soaks up the colorful ink and becomes a beautiful gradation, just like flower petals. When the dyed paper is wrapped around a bamboo stick, a paper flower blooms. It will never wither and will continue to delight us forever.
This is a very simple craft that takes advantage of the highly permeable properties of coffee filters. Please leave the dyeing part to the children. They will dye many papers in no time. The parts that make up the flower are tricky, but you can do it slowly as if you were making the petals bloom in your hands. It’ll be easy once you get used to it.
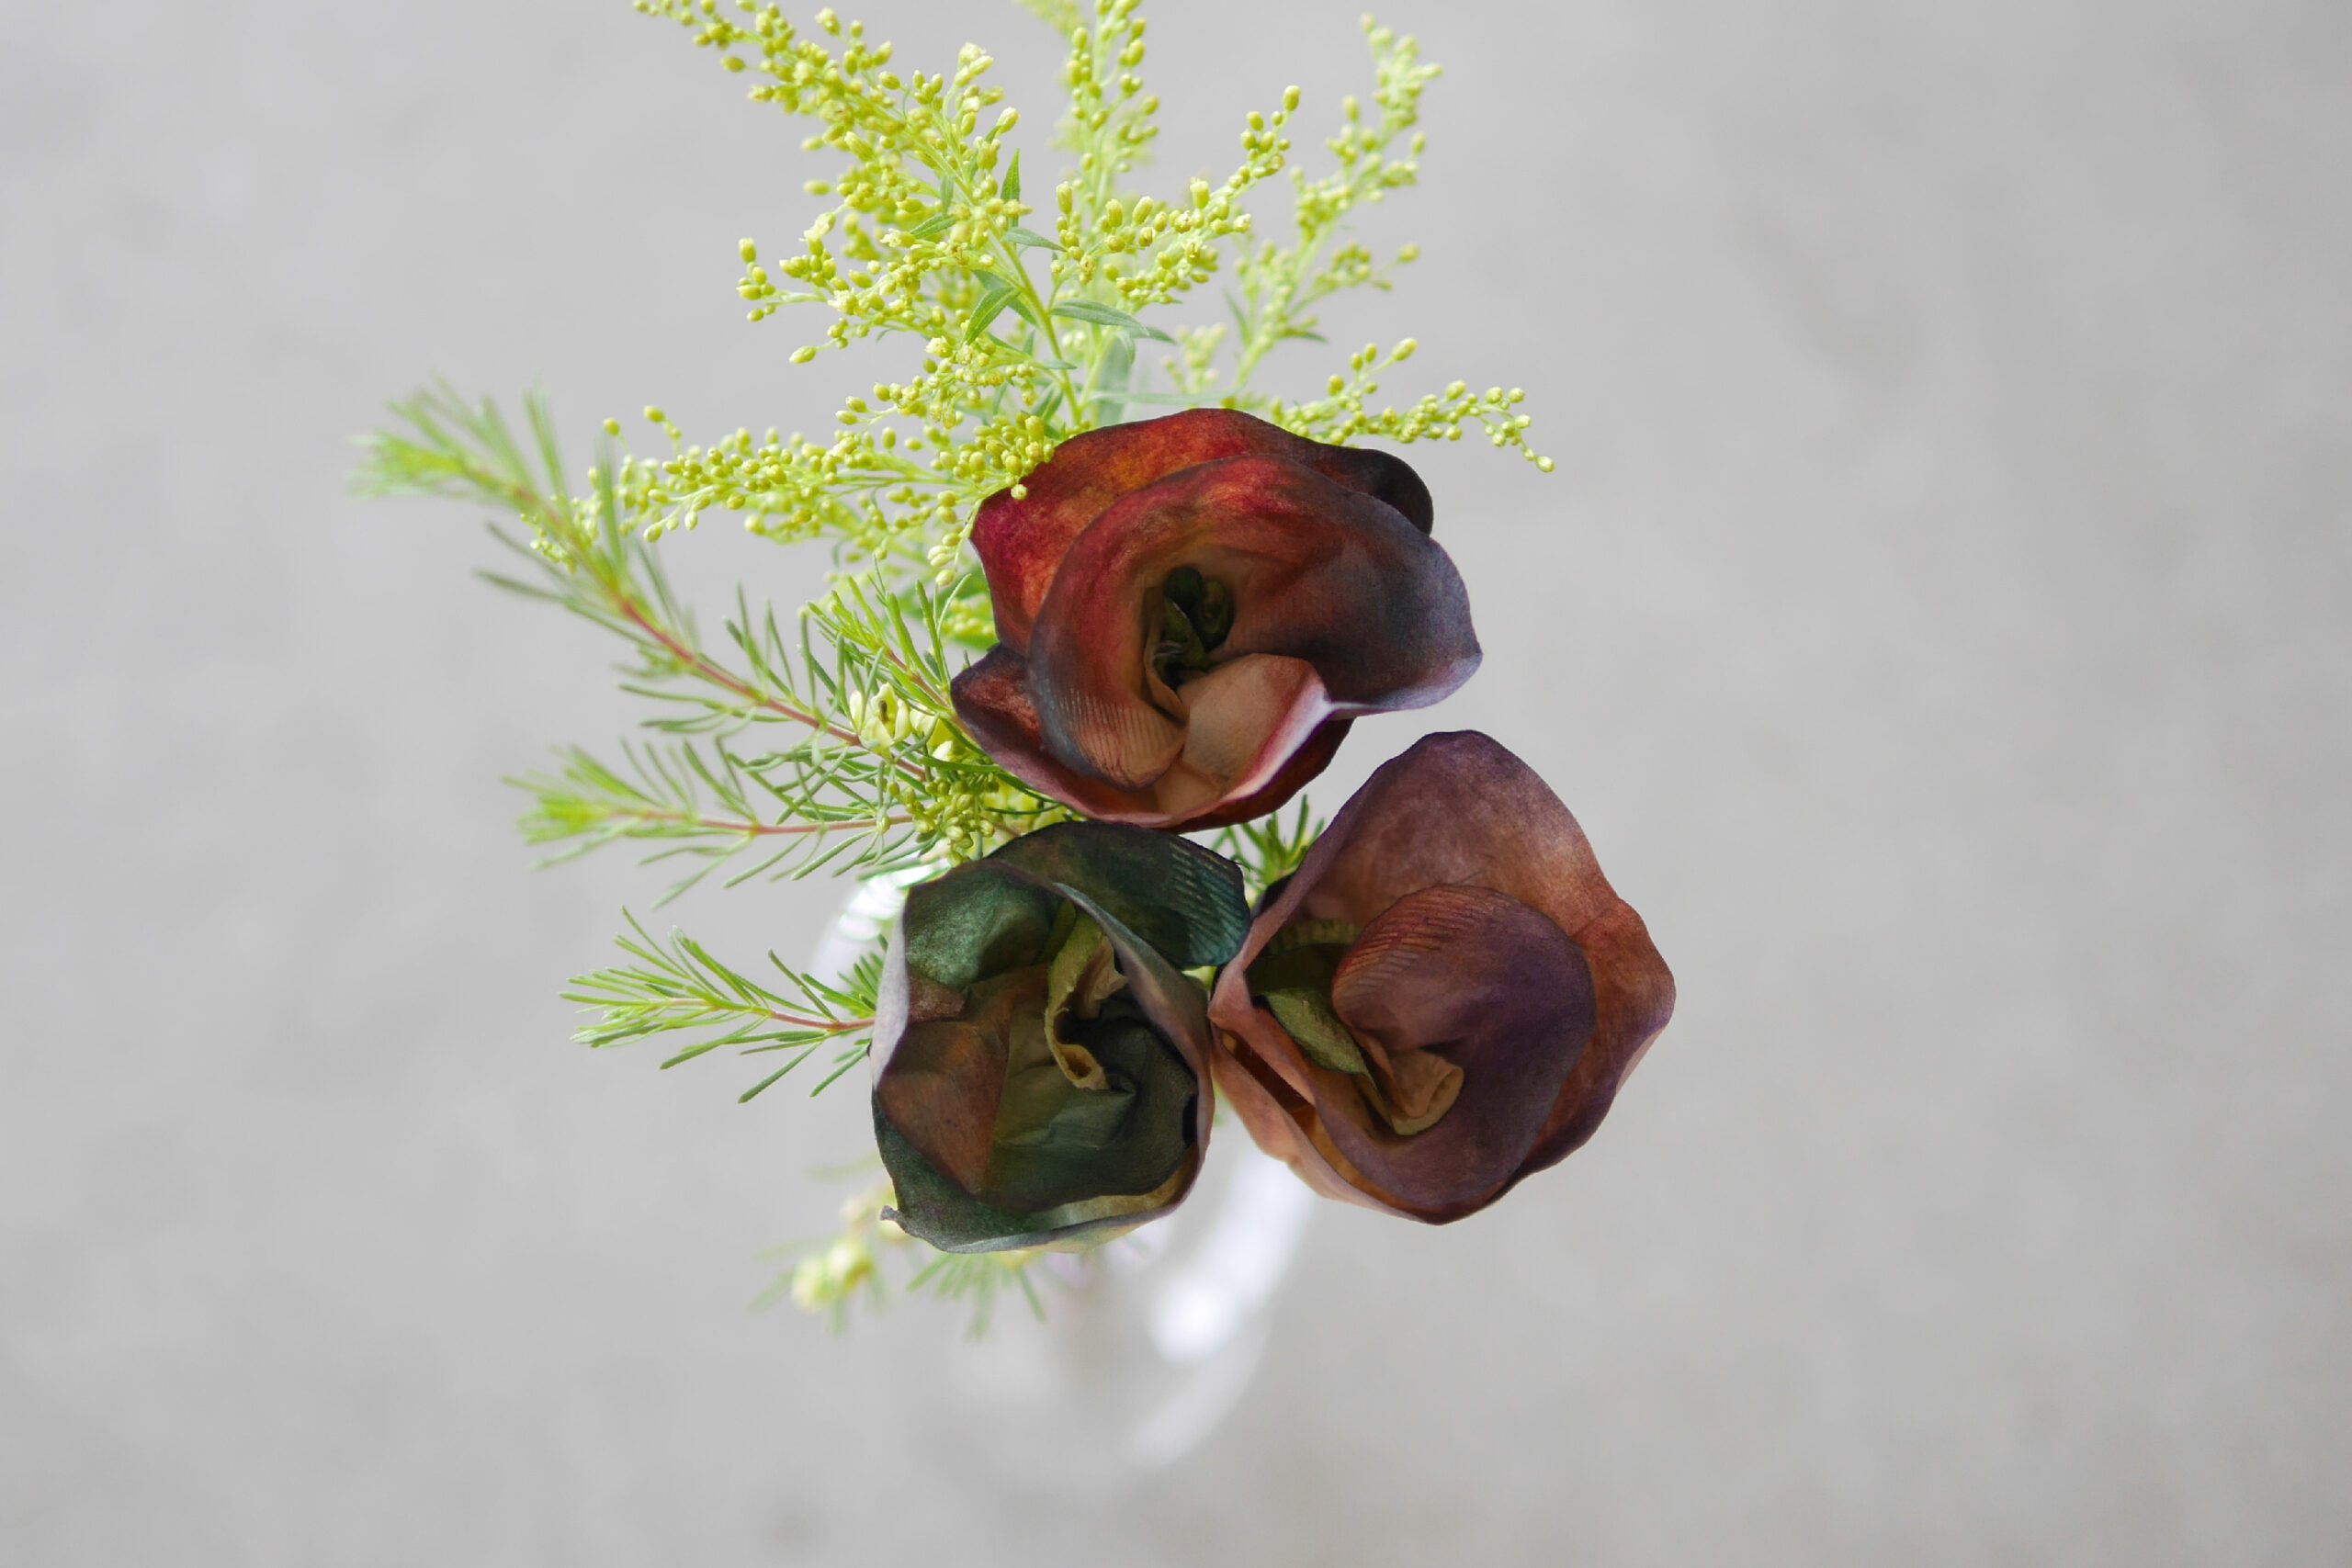
The handmade flowers, bundled with greenery and made into a bouquet, would make a wonderful Mother’s Day present or appreciation gift.
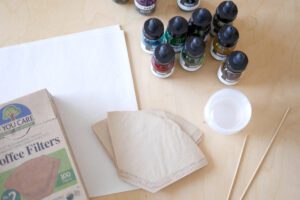
Materials
– Coffee filter
– Calligraphy paper*.
– Colored inks*.
– Bamboo String
– Glue gun
*Calligraphy paper: Thin paper for calligraphy. I used this.
*Color inks: In addition to color inks, use watercolor or any other paint of your choice for coloring.
Instructions for making
Step 1. Fold the Coffee Filter
Fold a coffee filter in half twice and soak it in water. Then, contain the excess water with a paper towel.


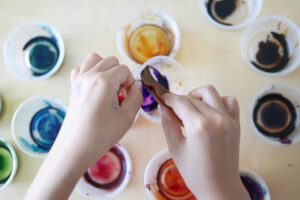
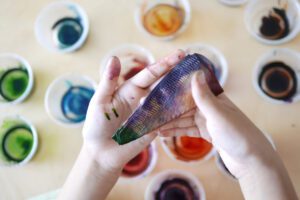
Step 2. Dye the Coffee Filter
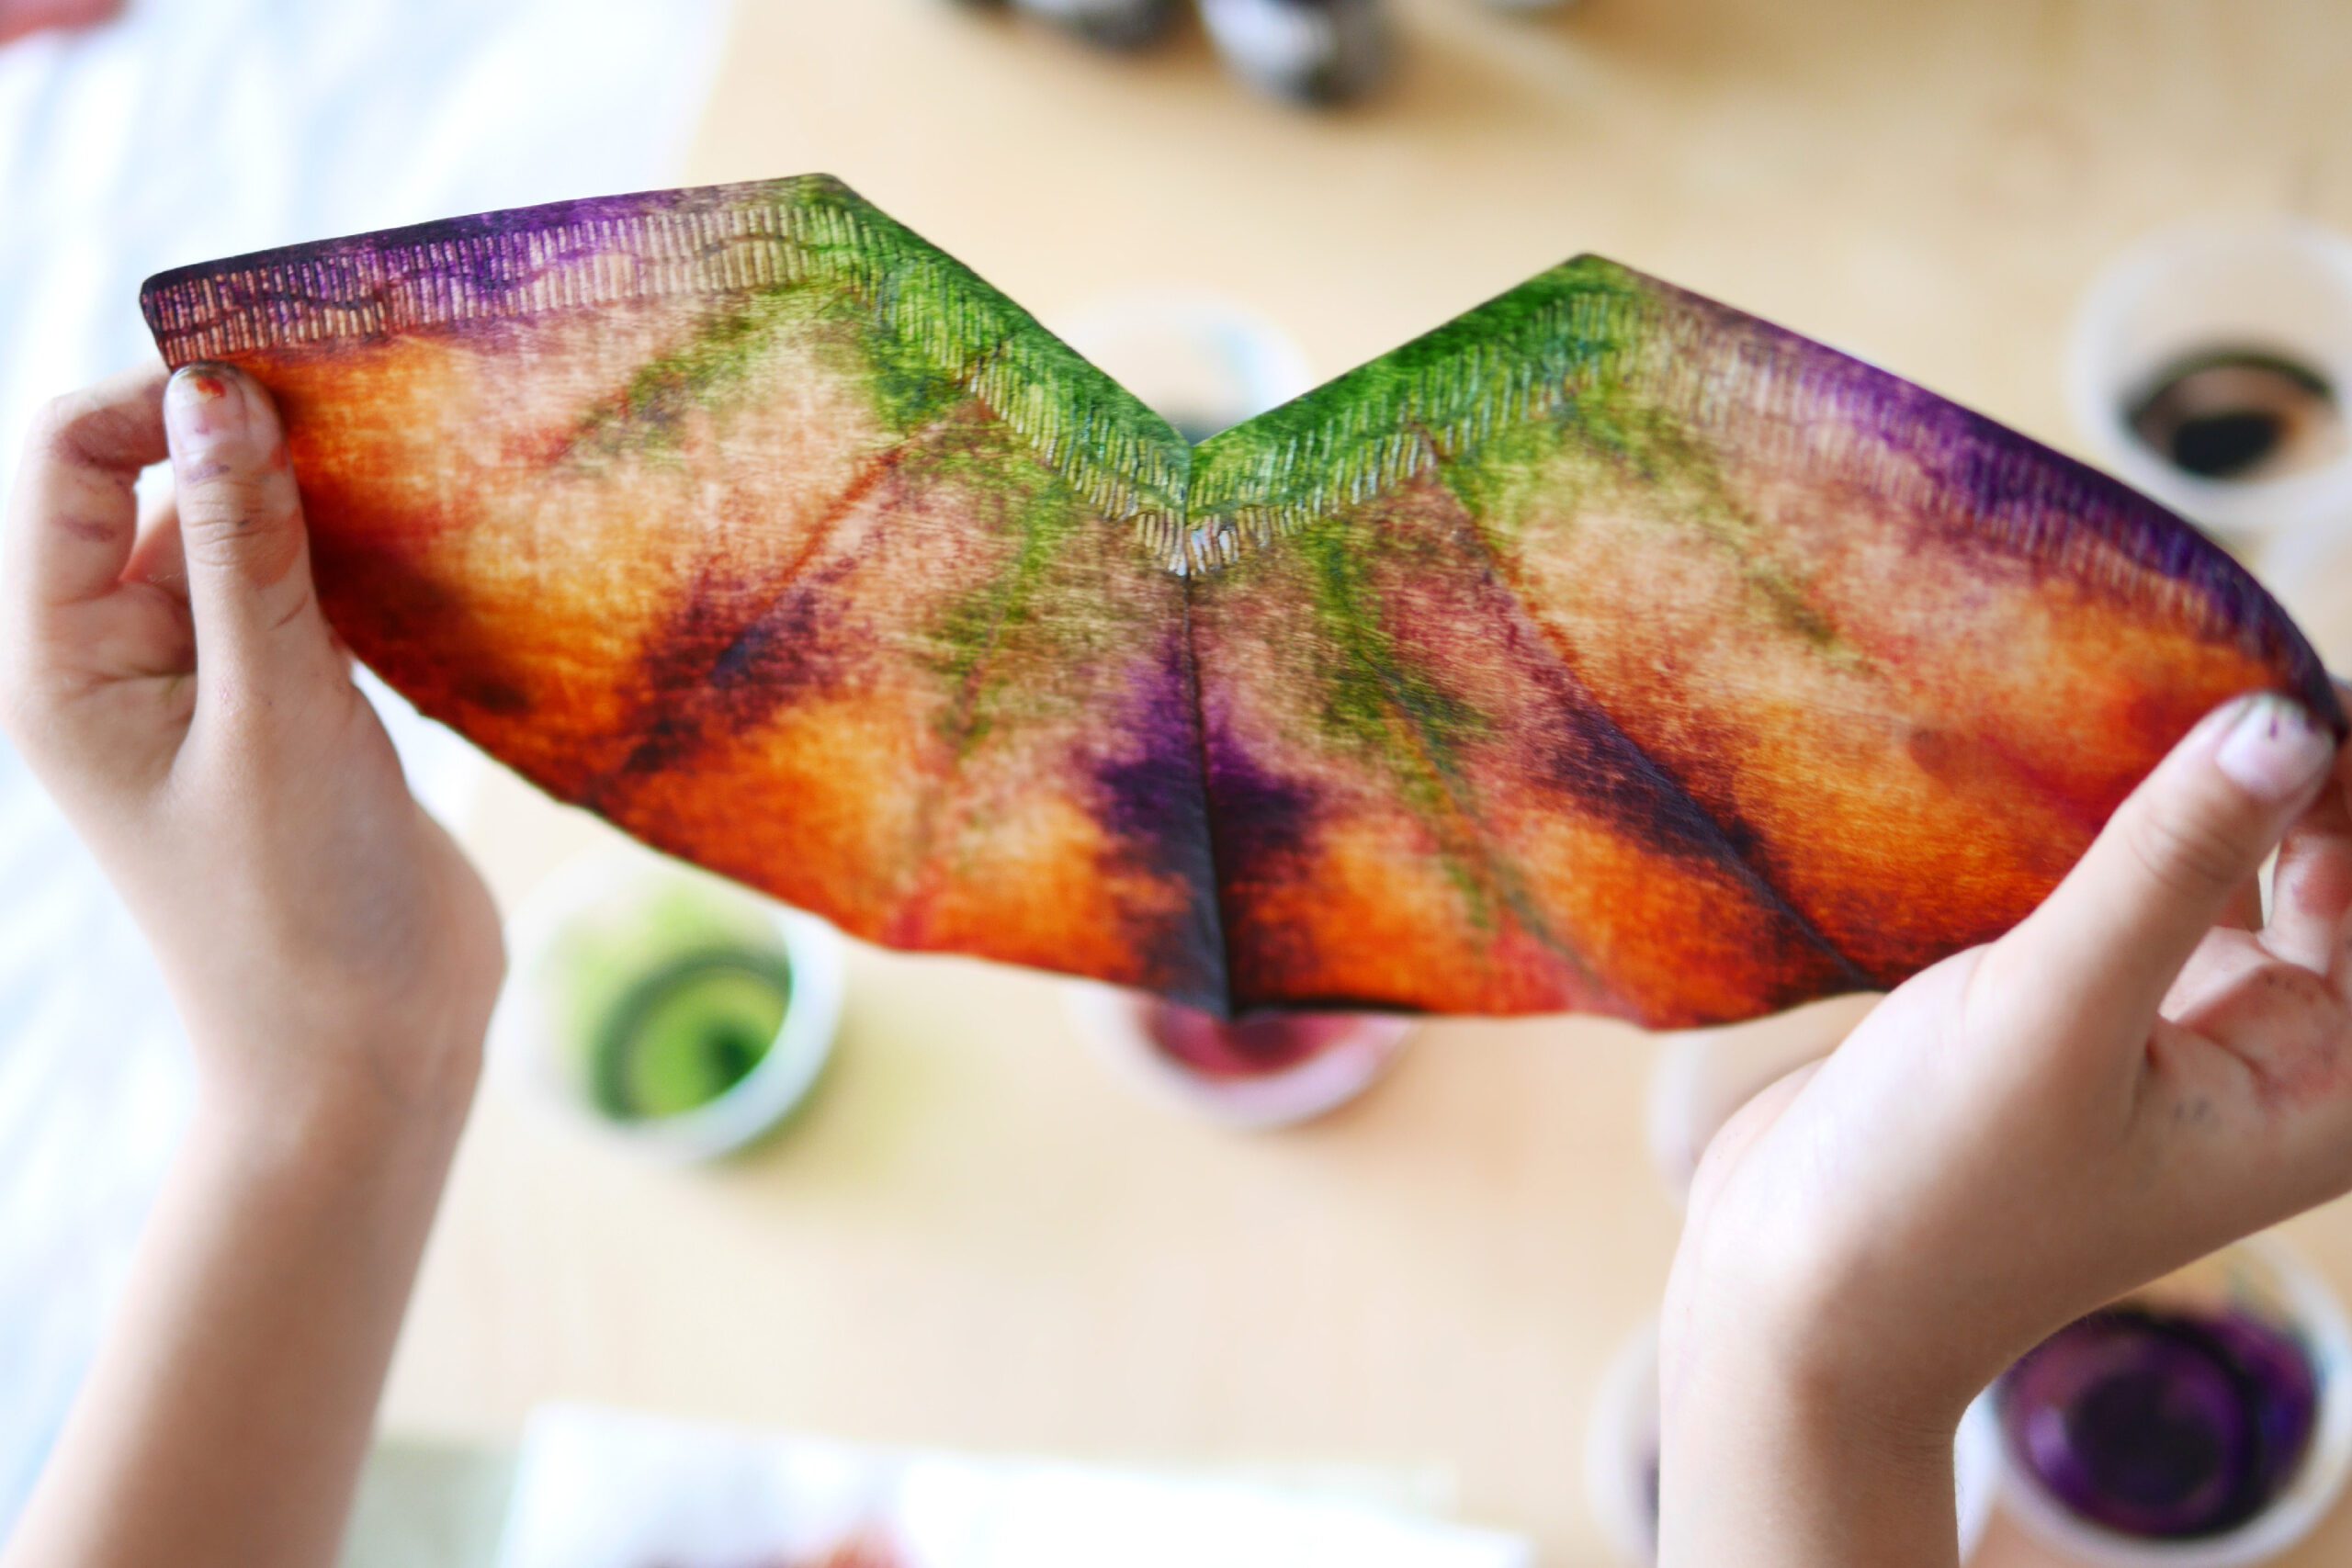
Next, dye the coffee filter into the ink. A single color is fine, but using three or four colors will create a beautiful gradation of overlapping colors. The bottom part near the stem is dyed green. After coloring, press down the excess water with a paper towel. Then open it up slowly. Lay them out on paper to dry. This will be the outer petal.

Step 3. Dye the Calligraphy Paper
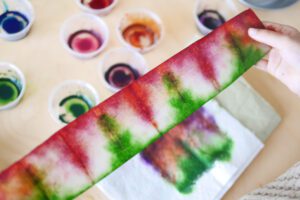
Cut the calligraphy paper vertically into four equal pieces (2 1/2×13inches). Dyed and dried in the same way as coffee filters. The top part, which is the petal, is dyed in a gorgeous color, and the bottom part is dyed green to resemble a stem. This will be the inner petal.

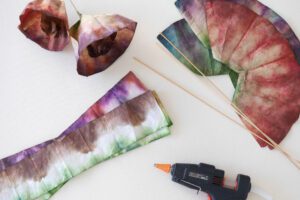
Step 4. Make up the Flower 1
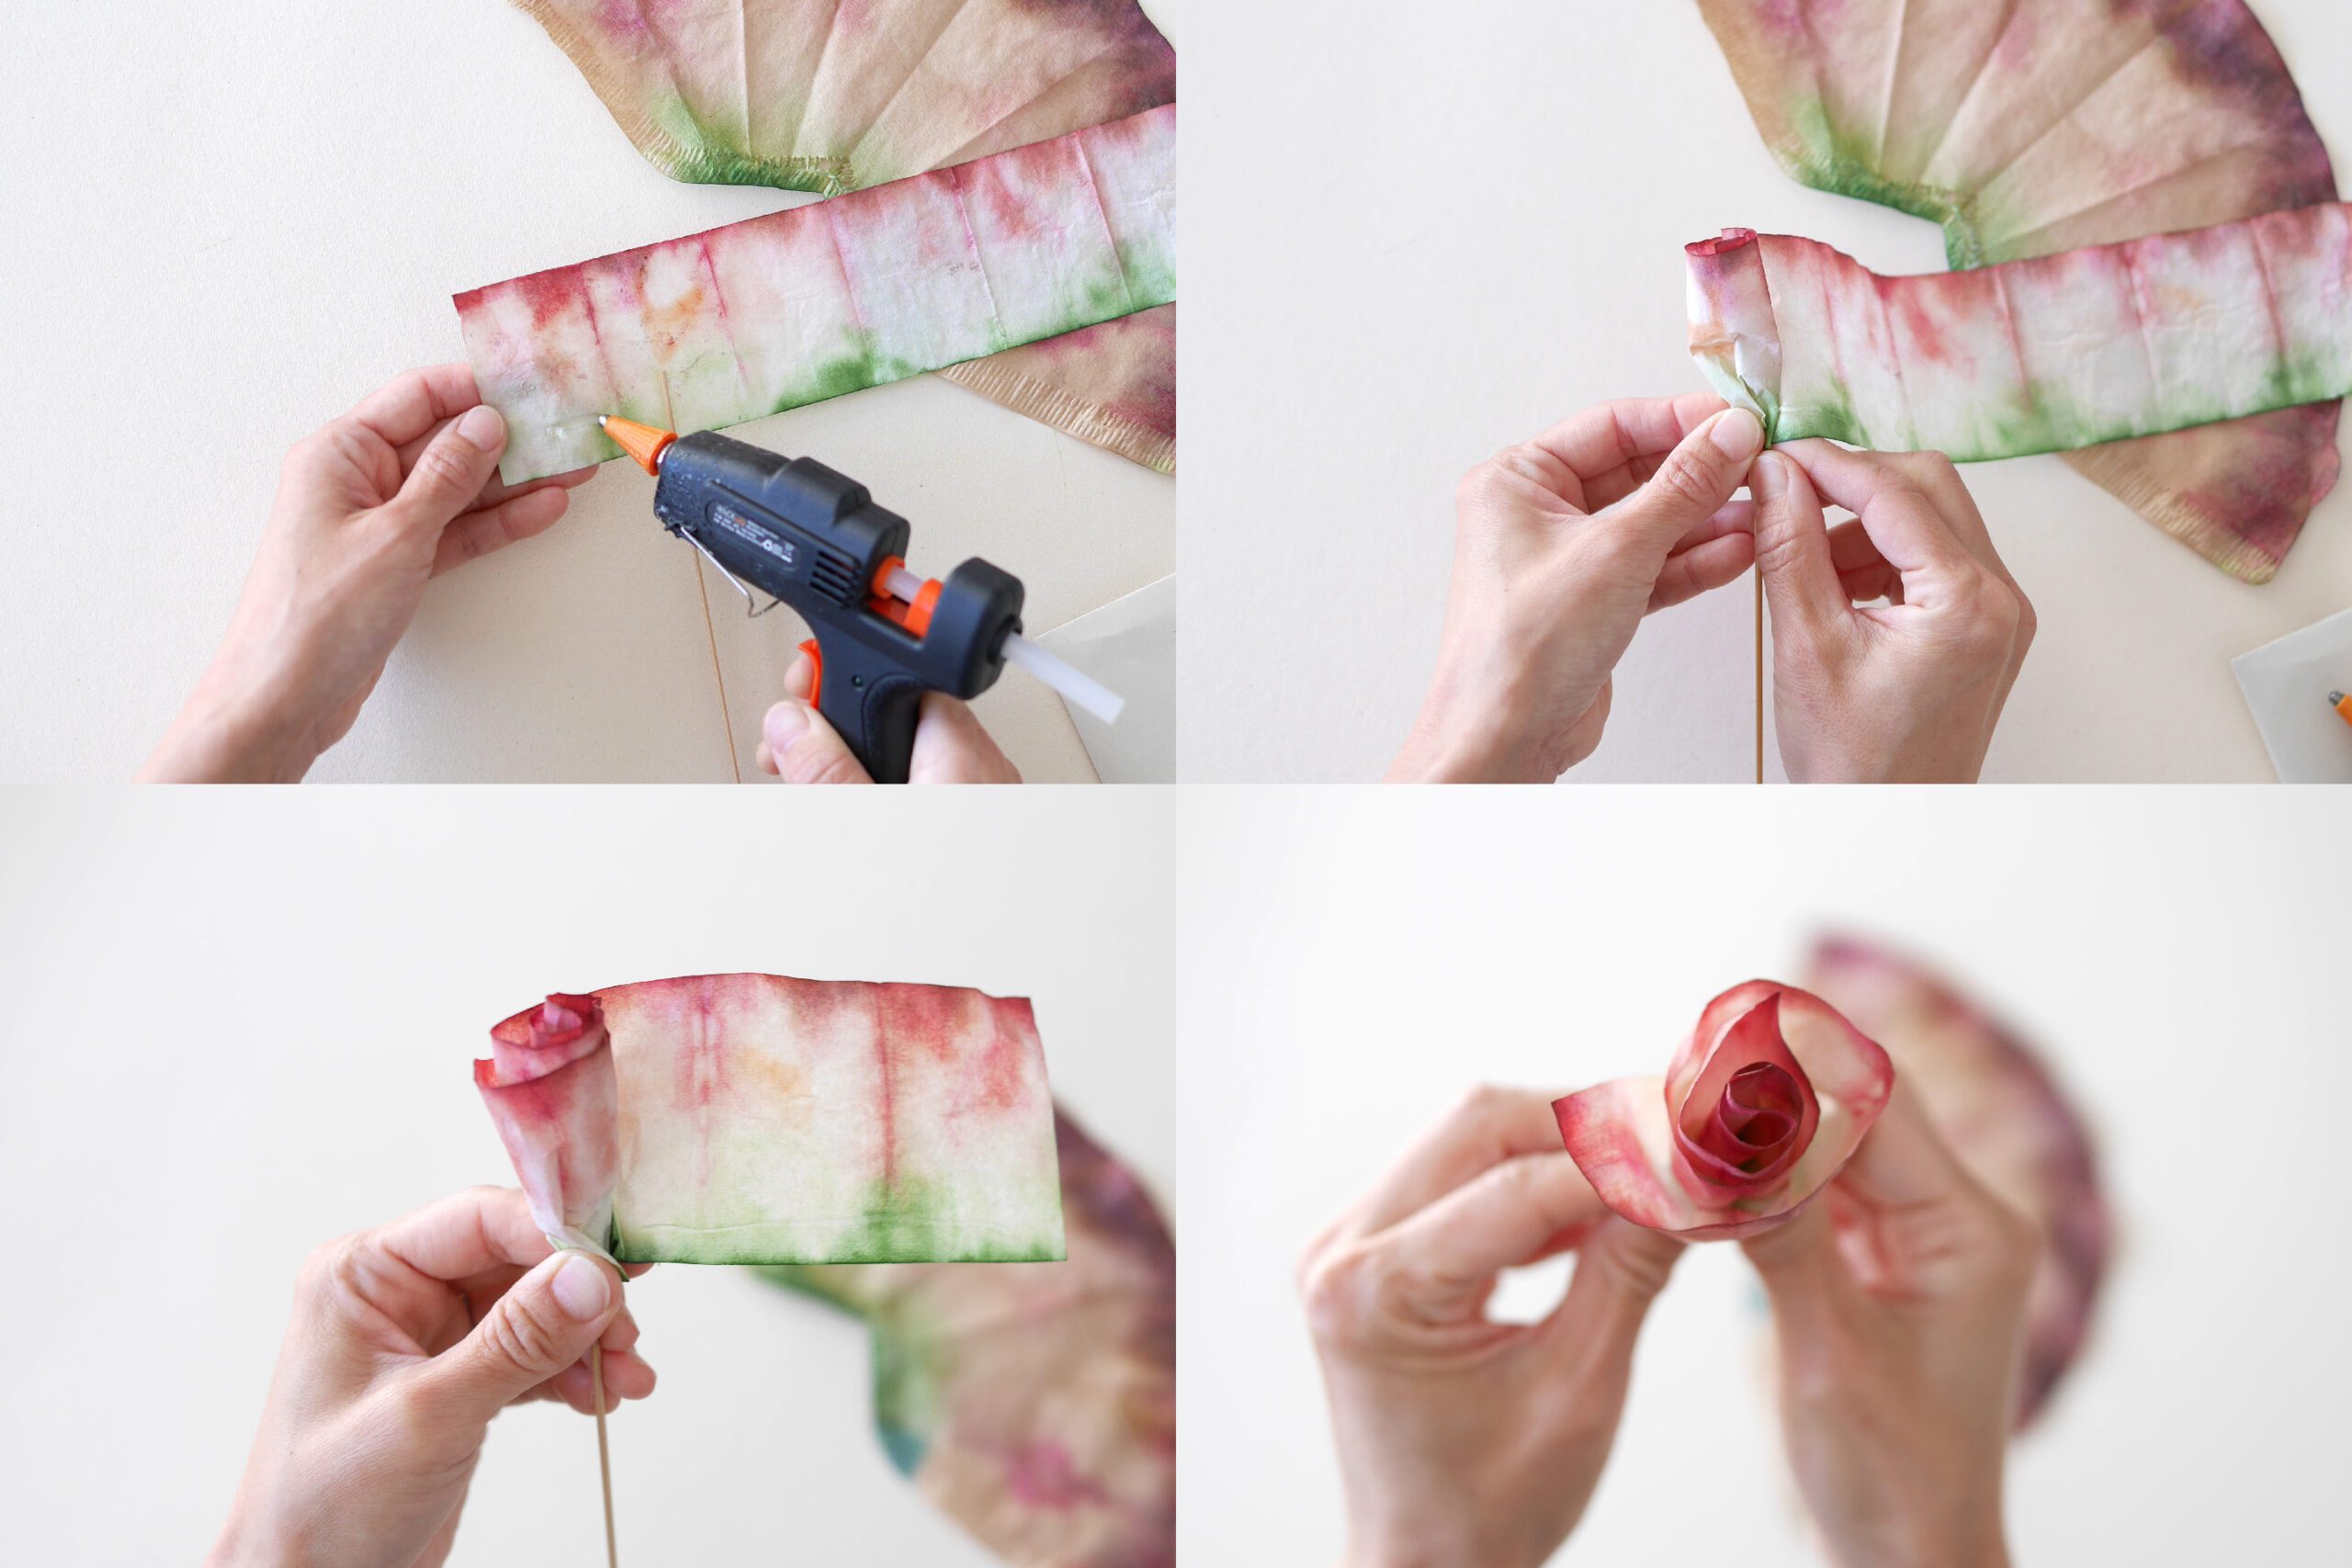
Apply a glue gun to the bottom part of the dyed calligraphy paper and secure it to the bamboo stick. Softly wrap the paper around the bamboo stick so that it becomes a petal. It is easier to make the petals if you apply the glue gun a little at a time instead of trying to wrap it all at once.
Step 5. Make up the Flower 2
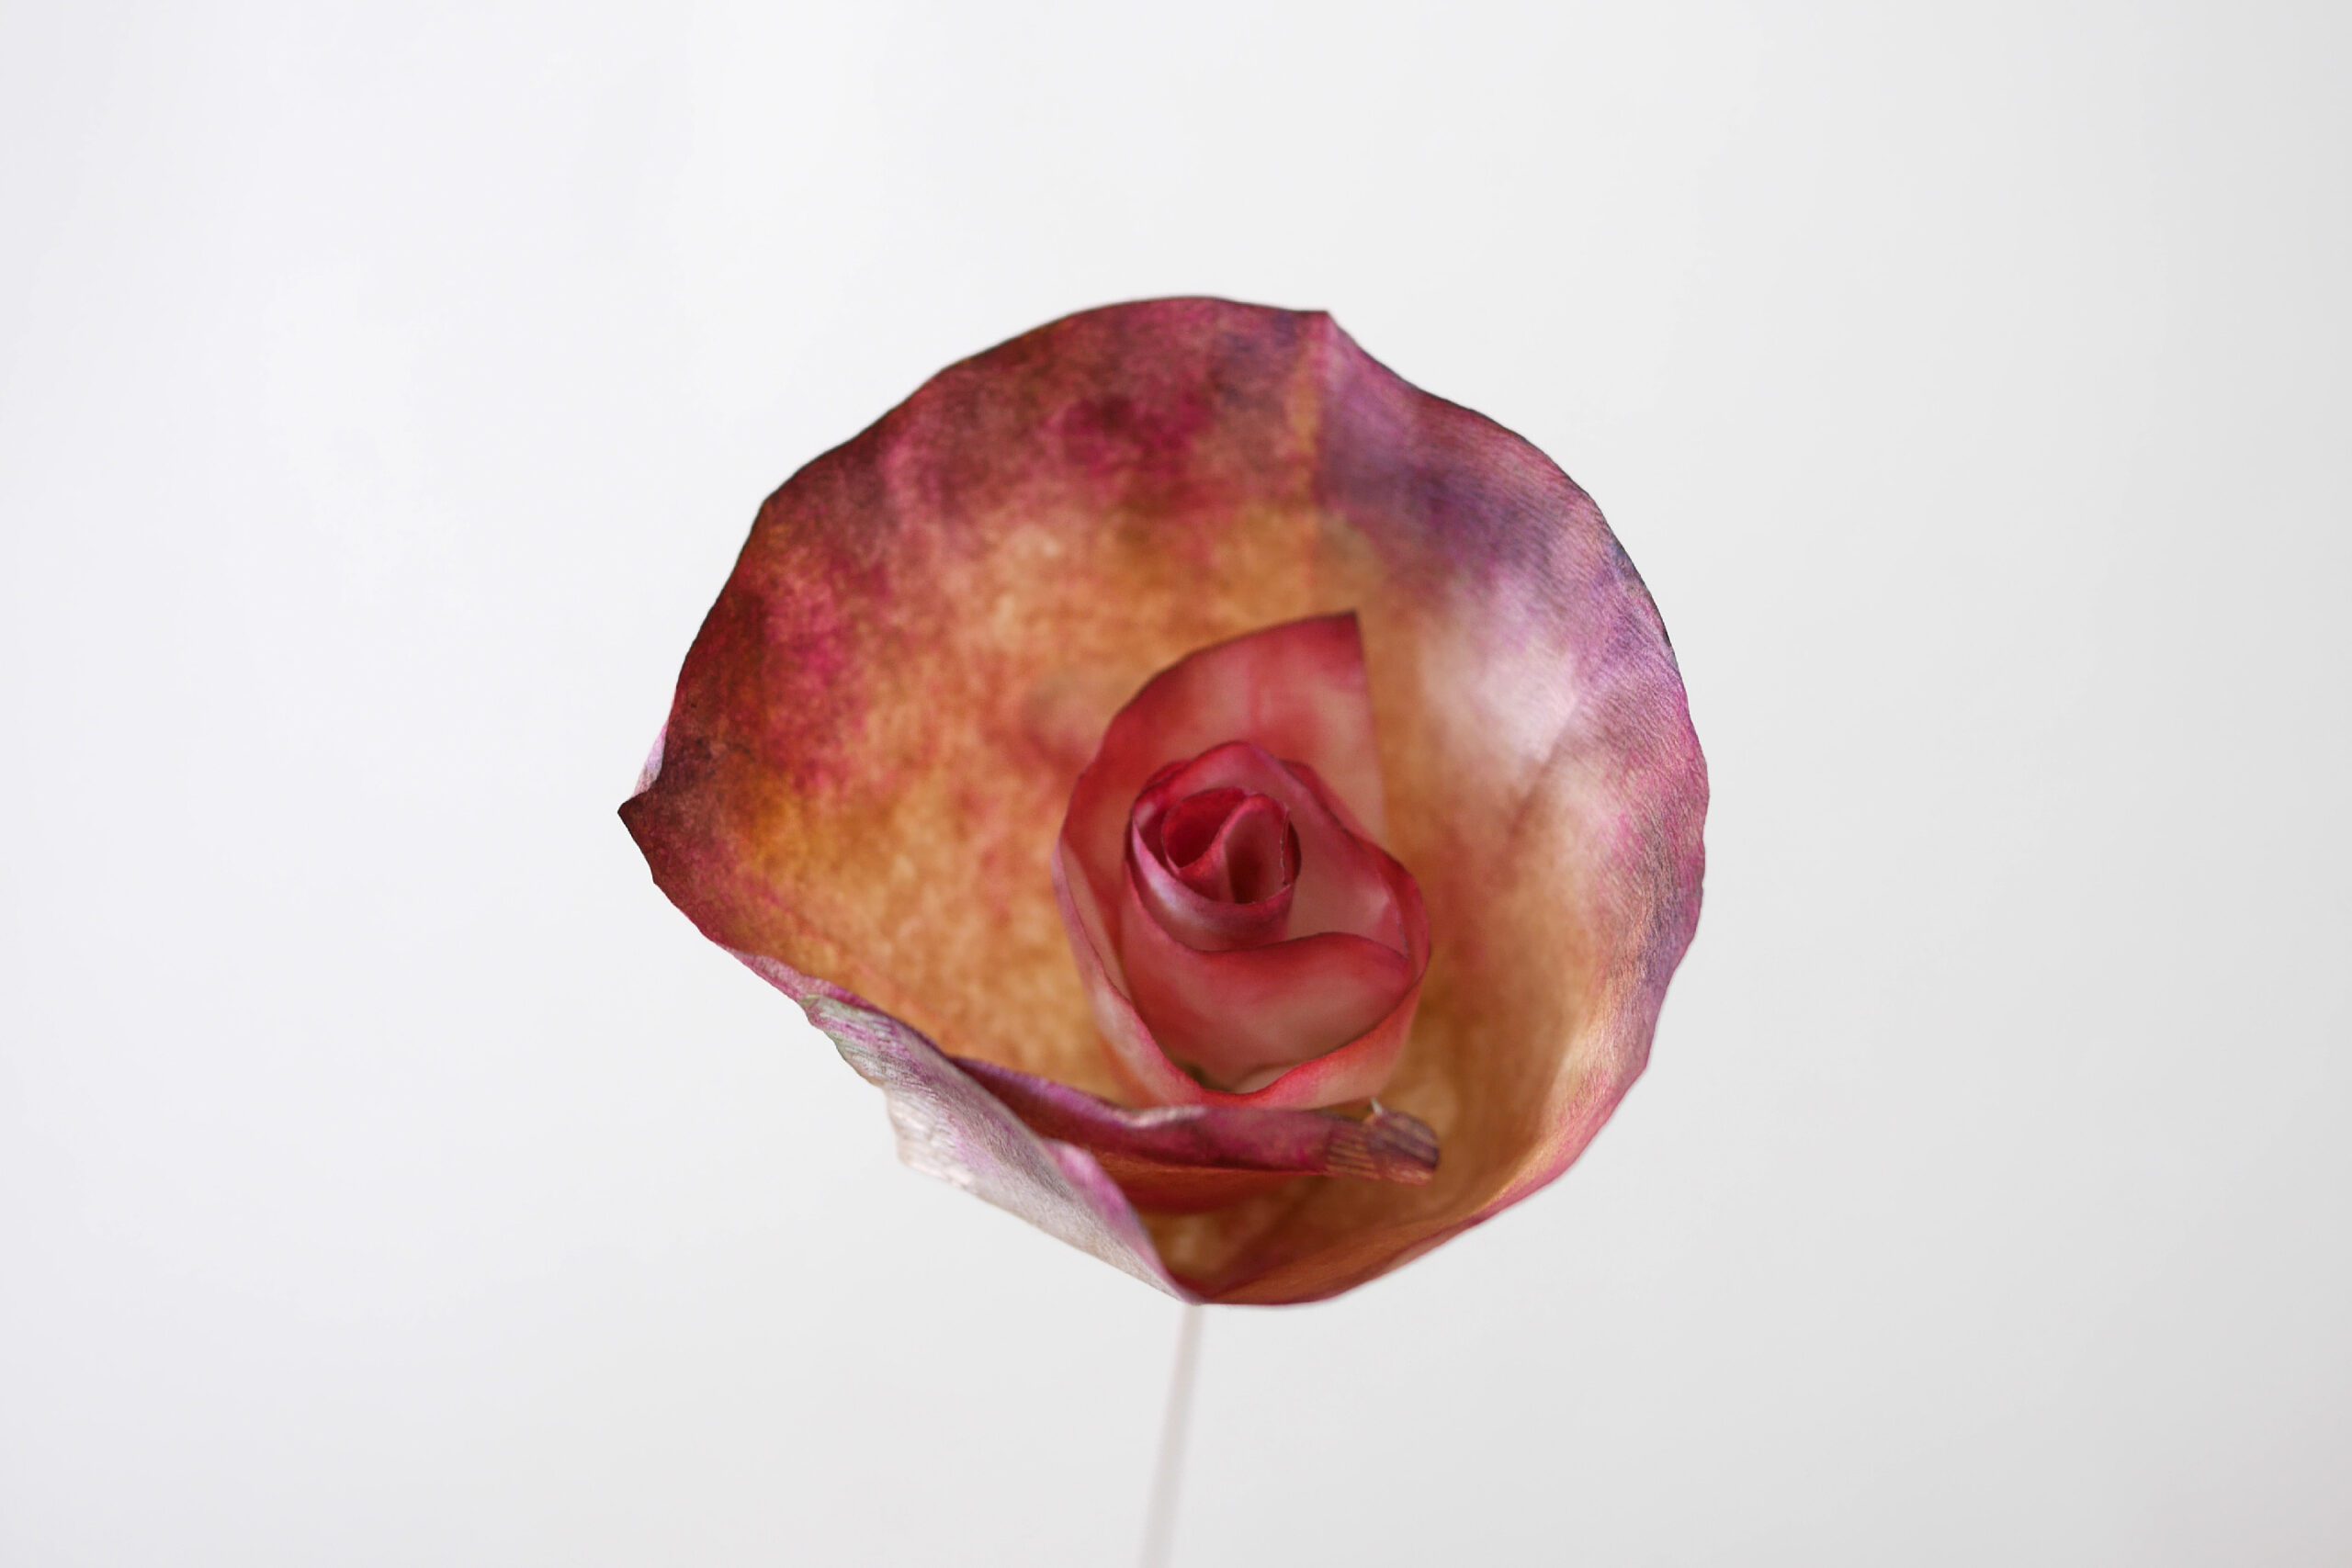
Fix the dyed coffee filter to the flower made in step 3. Put a glue gun on the bottom part of the half circle and wrap it around all the way to make up a large flower.

Step 6. Make a Bouquet
Combine coffee filter flowers with actual greenery to create a bouquet. The textures of the paper and plants, and the colors of the flowers and greens cause a beautiful contrast.

Flower Variations
Many variations of flowers can be made by changing the size and length of the paper. In addition to the large flowers shown in this tutorial, you can also wrap several layers of thin paper around a flower to make it look like a carnation. Please feel free to create your own way to make various flowers bloom.

Coffee Filter Flowers
花はいつだってわたしたちを元気にしてくれます。花びらが落ちるその姿さえも美しく思うのは、その儚さがわたしたちを惹きつけるからなのでしょうか。
コーヒーフィルターを使った手づくりの花。色とりどりのインクを吸い上げた扇型の紙は、美しいグラデーションとなりまるで花びらのよう。染め上げた紙を竹ひごに巻きつけたら、紙の花が咲きました。枯れることはありません。いつまでもそのままの姿で、わたしたちを楽しませてくれるでしょう。
浸透性の高いコーヒーフィルターの特性を活かしたとても簡単な工作です。染めるパートはぜひ子どもたちに任せてみてください。あっという間に何枚も染め上げてくれるでしょう。花を仕立てるパートは少しのコツがいりますが、ゆっくりと手の中で花びらを咲かせるように仕立ててください。慣れてくればなんてことはありません。
グリーンと一緒に束ねてブーケにしたら、母の日や日頃の感謝を伝える贈り物としても素敵です。
用意するもの
– コーヒーフィルター
– 半紙*
– カラーインク*
– 竹ひご
– グルーガン
*半紙: 書道用の薄手の紙です。こちらを使いました。
*カラーインク: 着色はカラーインクのほかに、水彩など好きな絵の具をお使いください。
つくりかた
Step 1. コーヒーフィルターを折る
コーヒーフィルターを半分に2度折り、水に浸します。そしてペーパータオルで余分な水分を押さえます。
Step 2. コーヒーフィルターを染める
次にインクに浸していきます。単色でも結構ですが、3〜4色を使うと色と色が重なり、美しいグラデーションとなって現れます。茎に近い下の方は緑色に染めました。着色したら余分な水分をペーパータオルで押さえます。そしてゆっくりと開いてください。紙の上に並べて乾かします。これが外側の花びらになります。
Step 3. 半紙を染める
半紙を縦に4等分(6×32cm)に切ります。コーヒーフィルターと同じように染めて乾燥させます。花びらとなる上部を華やかな色、下部を茎のイメージで緑に染めました。これが内側の花びらになります。
Step 4. 花を仕上げる1
染めた半紙の下の部分にグルーガンをつけ、竹ひごに固定します。花びらとなるようにふんわりと柔らかく巻き付けていきます。その時に、一度に巻こうとせず少しずつグルーガンをつけて固定していくと仕立てやすいです。
Step 5. 花を仕上げる2
Step 3でつくった花に染めたコーヒーフィルターを固定します。扇状の下の部分にグルーガンをつけて、大きな大輪の花となるように、ぐるりと一周巻きつけます。
Step 6. ブーケにする
コーヒーフィルターの花と、生きたグリーンを組み合わせてブーケにしてみましょう。紙と植物の質感、花と緑の色が美しいコントラスを引き起こします。
花のバリエーション
紙の大きさや、長さを変えると色々なバリエーションの花ができます。今回の手順でご紹介した大輪の花以外にも、細い紙を幾重にも巻き付けて、カーネーションのようにしたりもいいですね。つくり方はそれぞれ自由に、いろいろな花を咲かせてください。