Honeycomb Beeswax Candles
Candle making is a handwork that can be enjoyed throughout the year.
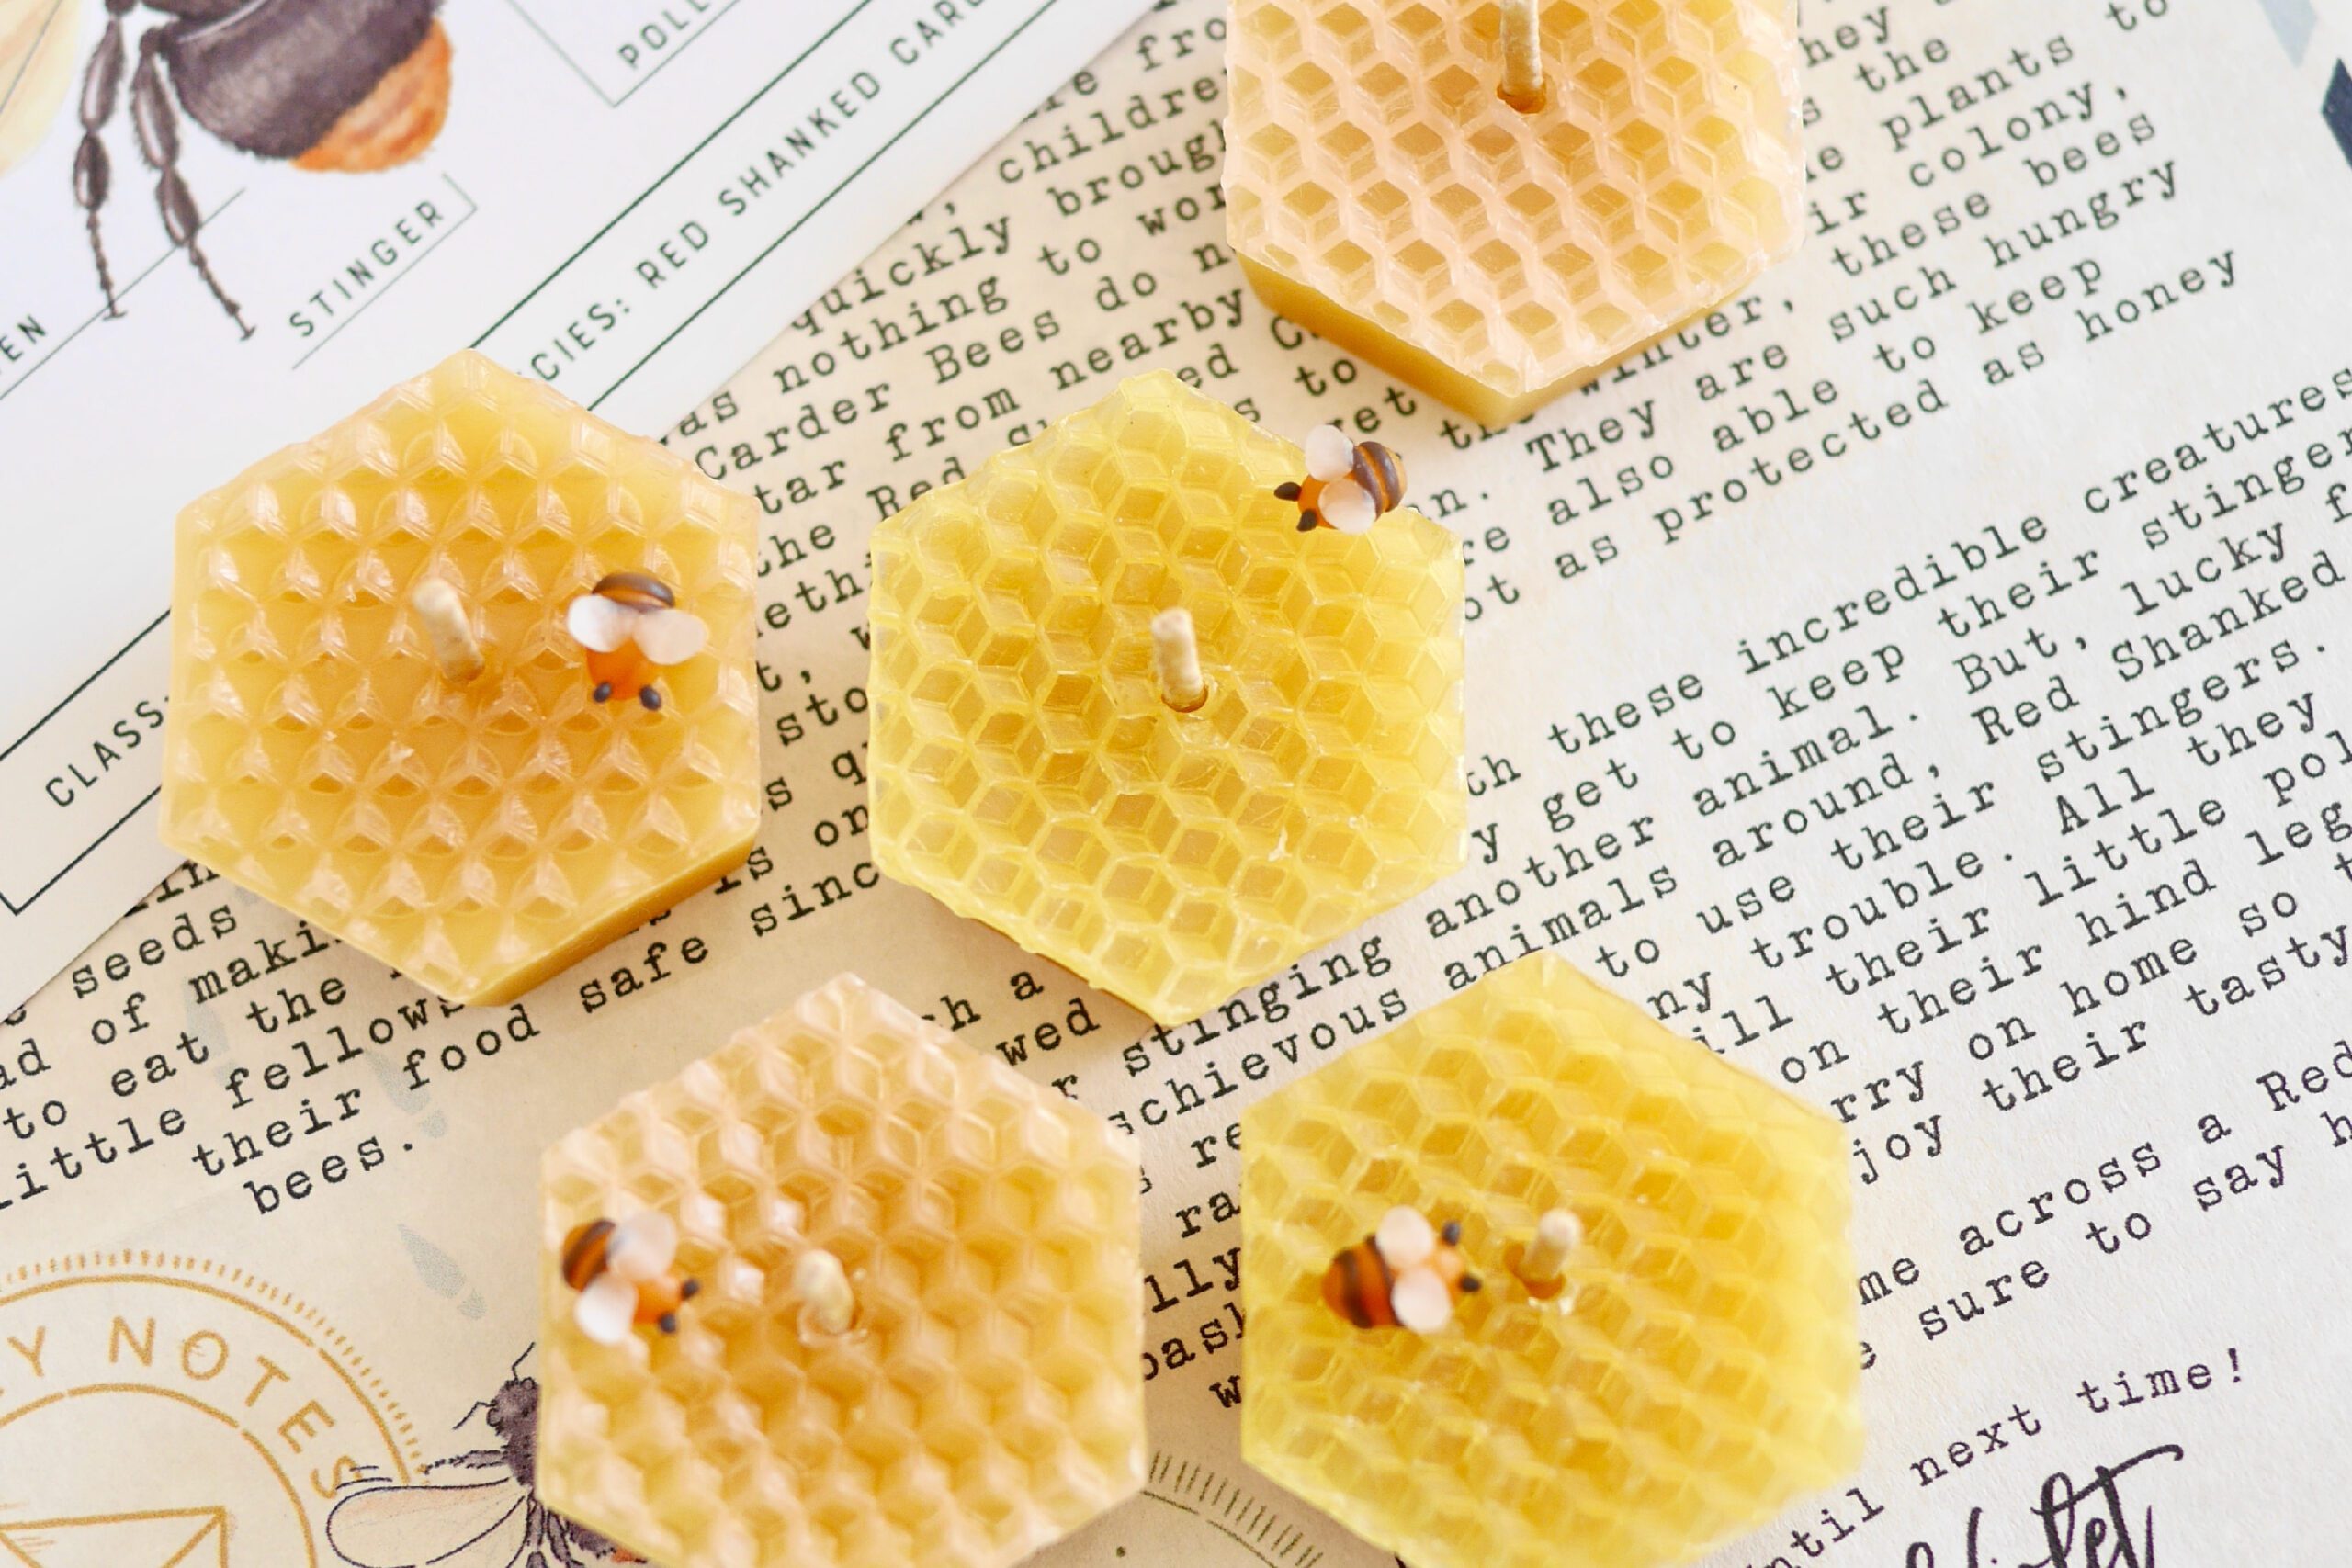
There are various ways to make candles, but using a silicone mold is an easy way to create candles in any shape you like. This time, we used a hexagonal mold and made a honeycomb candle with a few modifications.
Natural beeswax is said to have natural antimicrobial properties and purify the air. The candle is made of 100% beeswax and decorated with bees made from beeswax sheets and modeling beeswax. These are all 100% beeswax, so they are safe to add to the candles.
The beeswax candles celebrate the arrival of spring at this time of year when the bees begin their activities. They can be used for decoration or as small gifts. It is a small handwork that brings a sense of spring.
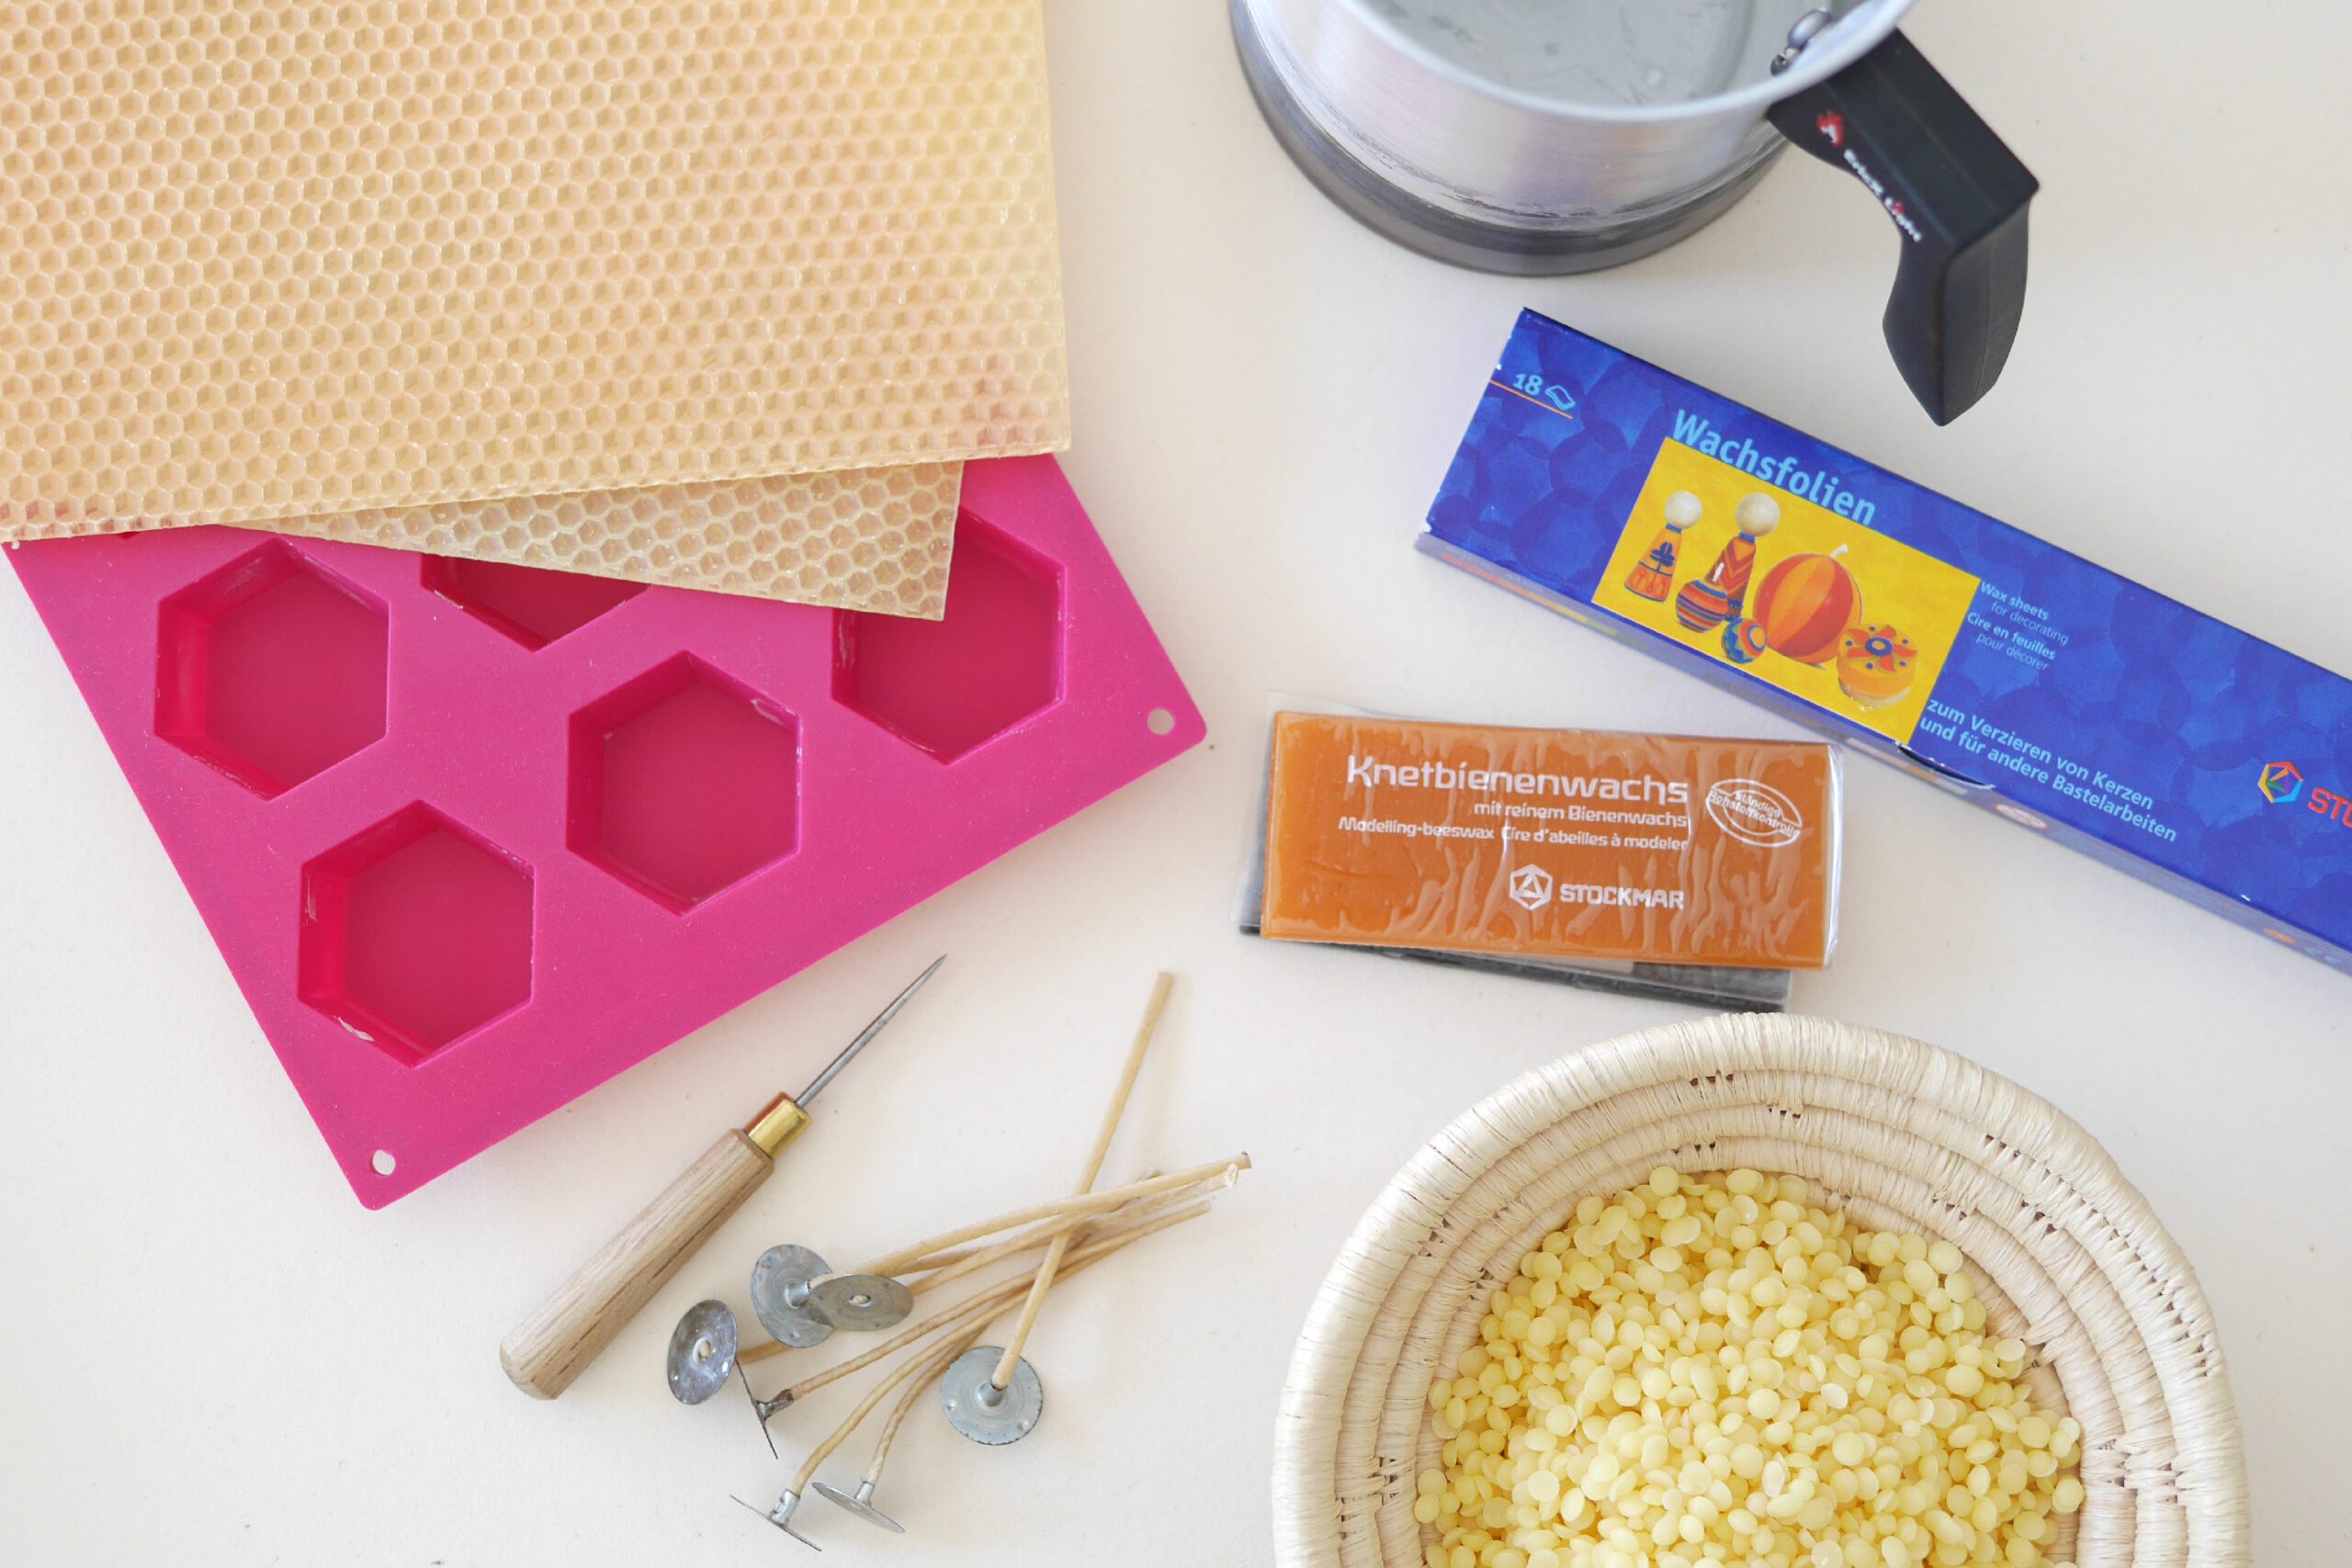
Materials
– Beeswax wax *I used beeswax pellets that melts easily
– Beeswax sheet
– Candlewick *I used a sustainer tab
– Pitcher for melting beeswax
– Pot for boiling water *A frying pan or shallow pot is convenient
– Hexagonal silicone mold *I used this
– Cutter
– Ruler
– Decorating wax sheets or modeling beeswax *Optional decoration
Instructions for making
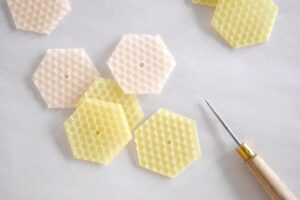
Step 1. Cut Beeswax Sheet into Hexagons
Cut the beeswax sheet into hexagons according to the size of the silicon mold. Make a hole in the center with an awl to put the core through.

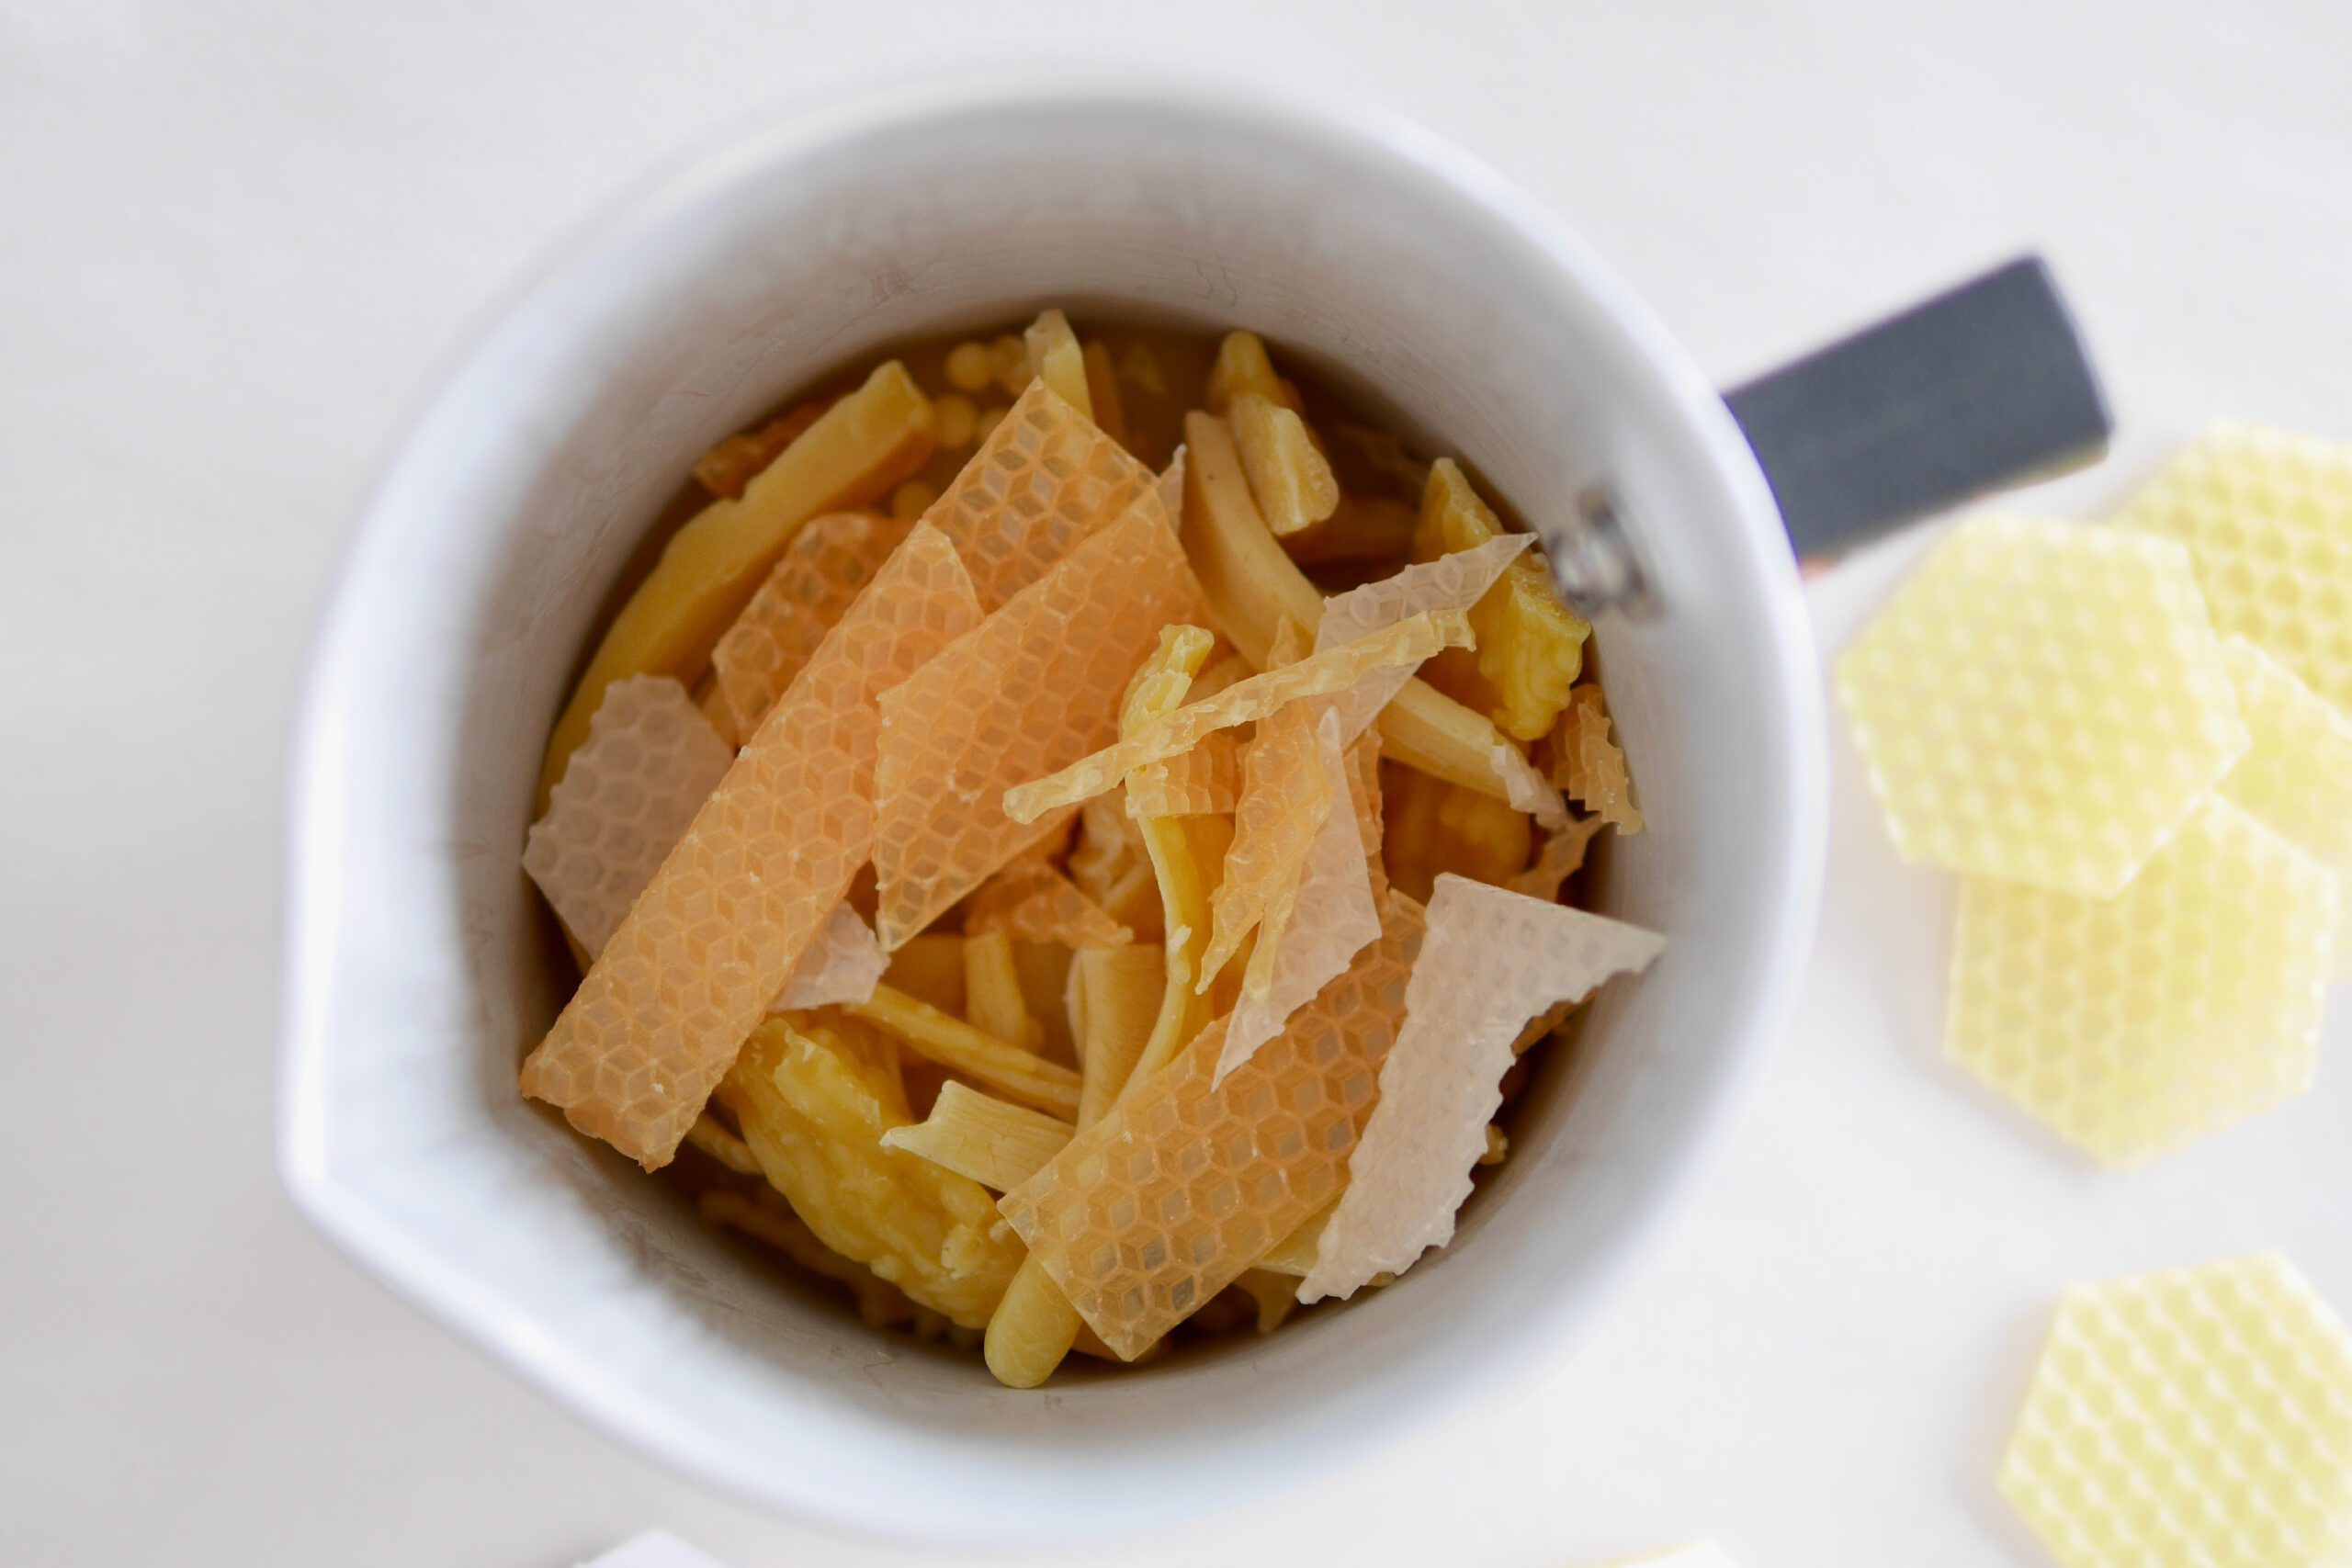
Step 2. Melt the Beeswax
Boil a pot of water, place a pitcher for melting beeswax in it, and melt the beeswax. I used the beeswax pellets, which is easy to melt. You can also melt a piece of leftover beeswax sheet together. Melt the beeswax until it is completely liquefied.
*Heating it over an open flame may cause it to ignite, so I recommend melting it in a hot water bath.
Step 3. Fix the Wick to the Mold
Prepare the wick a little longer than necessary to make it easier to work with. When the beeswax candle is fully melted, dip the sustainer tab that holds the wick in place with a small amount of wax and secure it in the center of the mold.
*With a wick that does not have a sustainer tab, dip the tip of the wick in wax and secure it to the mold in the same way.

Step 4. Pour the Wax into the Mold
Slowly pour the melted wax into the mold. Be very careful because it is hot.
Step 5. Place a Beeswax Sheet on Top
When the surface of the beeswax candle turns slightly white and begins to harden, place a hexagonal beeswax sheet on top of the candle to cover it and press down gently. The key is not to put the beeswax sheet on the candle while it is still hot. If you put it on while the candle is hot, the heat will melt the beeswax sheet. Place the beeswax sheet when the candle has cooled down a little. Place on a flat surface and wait until the wax has completely hardened.

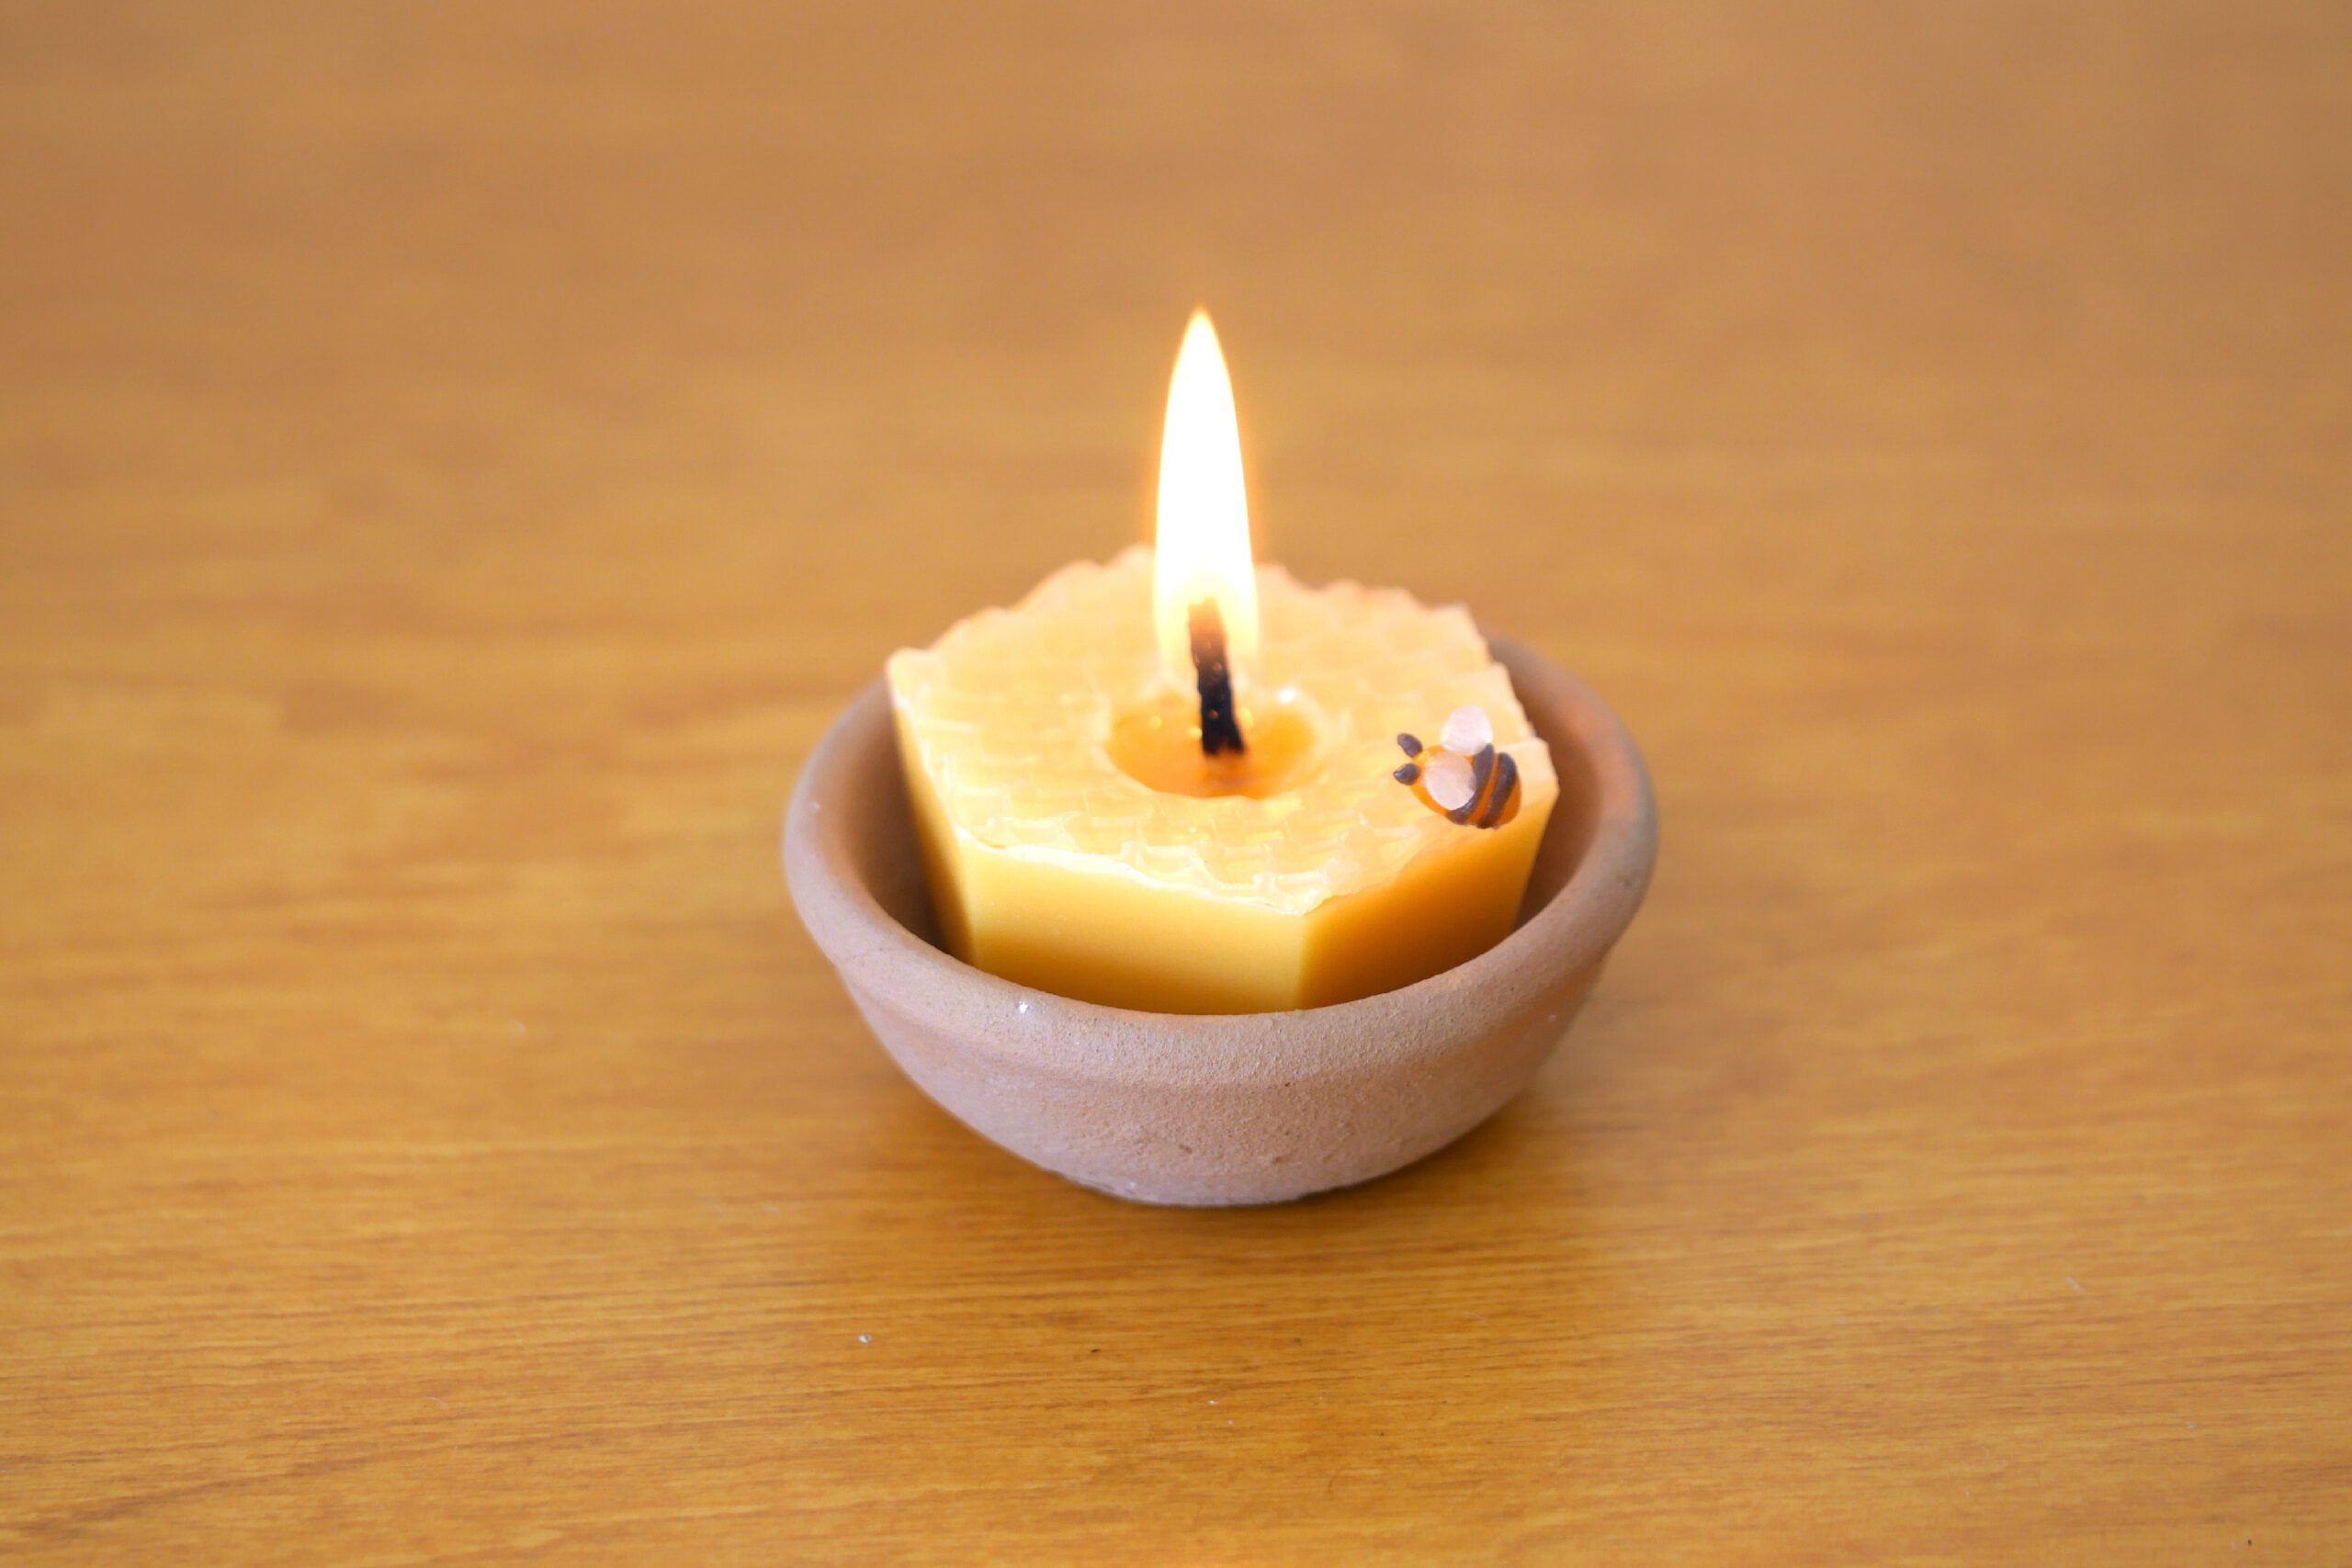
Step 6. Decorations and Finishes
When the candle is completely solid to the inside, remove it from the mold and cut the wick into 5mm lengths.
Decorating option: make a bee out of beeswax and place it on top of the beeswax candle.


Notes on use
When using candles, use them on a candle holder or nonflammable saucer. Do not place flammable items in the vicinity and keep out of reach of children and pets. Do not leave burning candles unattended.

Honeycomb Beeswax Candles
キャンドルづくりは一年を通じて楽しめる手仕事のひとつです。
つくり方には様々な方法がありますが、シリコンモールドを使えば簡単に好きな形のキャンドルがつくれます。今回は六角形のモールドを使って、そこに少し手を加えて蜜蜂づくしのハニカムキャンドルをつくりました。
天然の密蝋には自然の減菌作用があり空気を浄化する作用があると言われています。蜜蝋100%のキャンドルに、蜜蝋シートと蜜蝋粘土でつくった蜜蜂を飾りつけます。これらも全て蜜蝋100%なのでキャンドルに加えても安全です。
蜜蜂の活動が始まるこの時期に、春の訪れを祝う蜜蜂のキャンドル。装飾用としても、小さなギフトとしても。春らしさを感じる小さな手仕事です。
用意するもの
– 蜜蝋ワックス *溶けやすい粒状のものを使いました
– 蜜蝋シート
– キャンドルウィック *サステナータブ付きのものを使いました
– 蜜蝋を溶かすためのピッチャー
– 湯煎用の鍋 *フライパンや浅めの鍋が便利です
– 六角形のシリコンモールド *こちらを使いました
– カッター
– 定規
– デコレーションワックスシート もしくは 蜜蝋粘土 *飾りのオプションです
つくりかた
Step 1. 蜜蝋シートを六角形に切る
蜜蝋シートをシリコンモールドのサイズに合わせて六角形に切る。中心に錐で芯を通す穴を開ける。
Step 2. 蜜蝋を溶かす
鍋にお湯を沸かし、その中にピッチャーを入れて蜜蝋を湯煎で溶かします。私は溶けやすい粒状の蜜蝋を使用しました。余った蜜蝋シートの切れ端も一緒に溶かしてもいいですよ。蜜蝋が完全に液状化するまで溶かします。
*直火で加熱すると発火する恐れがあるので、湯煎で溶かす方法をおすすめします。
Step 3. 型に芯を固定する
芯は作業しやすいように必要な長さよりも少し長めに用意します。蜜蝋キャンドルが十分に溶けたら、芯を固定するサステナータブに少量のワックスをつけて、型の中心に固定します。
*サステナータブが付いていない芯でも芯の先にワックスをつけて、同じように型に固定してください。
Step 4. ワックスを型に流す
溶けたワックスを型にゆっくりと流し込みます。熱いので十分に注意してください。
Step 5. 蜜蝋シートを乗せる
蜜蝋キャンドルの表面がうっすら白くなり固まり始めたら、蓋をするように蜜蝋シートを乗せ、上からやさしく押えます。ポイントは、キャンドルが熱いうちに蜜蝋シートを乗せないこと。熱いうちに乗せると、熱で蜜蝋シートが溶けてしまいます。少し冷めた頃に乗せてください。平らな場所に置いて、ワックスが完全に固まるまで待ちます。
Step 6. 飾り付け
キャンドルの中まで完全に固まったら型から取り出し、芯を5mmほどの長さに切ります。
飾り付けのオプション:ビーズワックスで蜂をつくり、蜜蝋キャンドルの上に乗せます。
使用時の注意
キャンドルを使う時には、キャンドルホルダーや不燃性の受け皿の上で使用してください。周辺に燃えやすいものを置かず、子どもやペットの手の届かない場所でご使用ください。燃えているキャンドルを放置しないでください。