Kumihimo Twisted Braid
Kumihimo, a traditional Japanese craft introduced in the last post. There are many variations in Kumihimo braid techniques. This time, I will introduce how to braid twists using Two colors and eight threads are assembled using 16 slits. The method is quite simple. Follow the instructions and give it a try.
Kumihimo is my best companion when I have a little time to spare, when I have a chat after dinner, or while traveling, because I always want to keep my hands busy. Whenever when I going to trip, I always carry this kumi-himo in my bag.
Please see this post for basic Kumihimo with 7 threads.
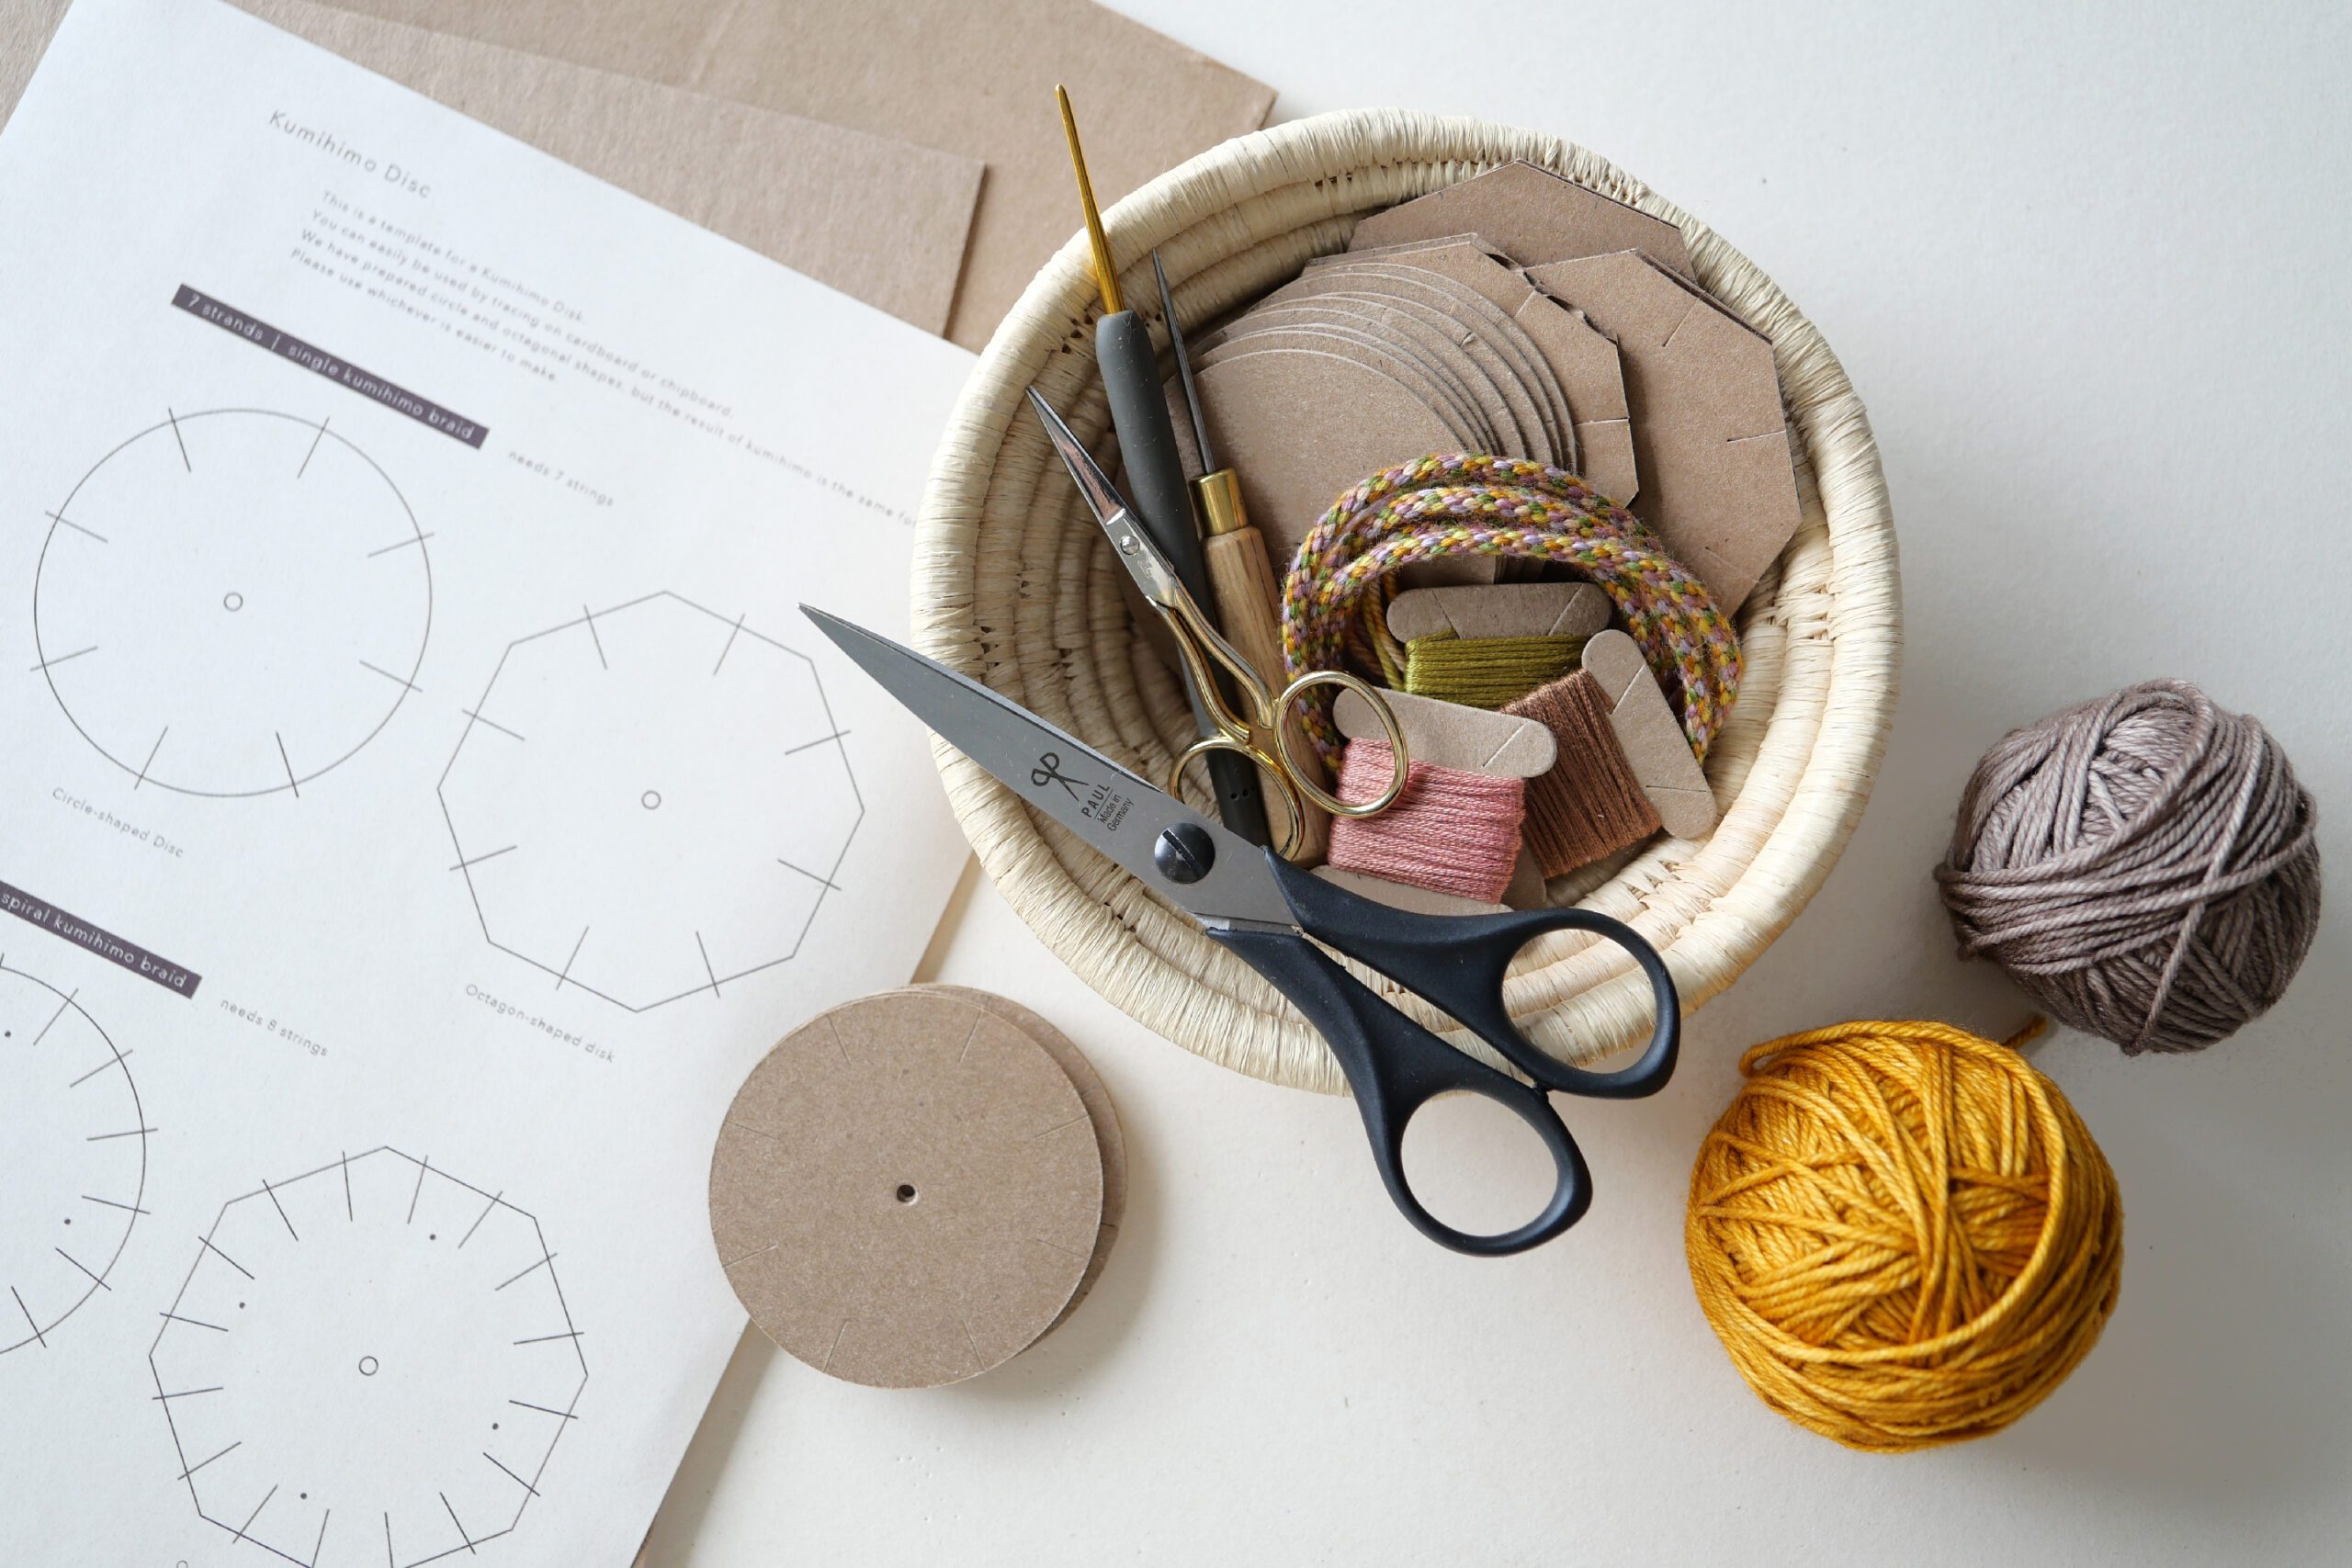
Materials
– Cardboard or chip board *7 x 7 cm
– Yarn *Of course, you can choose your favorite yarn or thread
– Crochet hook
– Scissors
– Template for Kumihimo disk *Option, If you need
Here is the template for the Kumihimo disc. Please feel free to download and use it.
download the templateInstructions for making
Step 1. Prepare a Kuimhimo Disk
Cut the cardboard into a circular or octagonal shape and cut 16 slits according to the template in the downloadable file.
Step 2. Prepare Yarn and Place in Slit
Prepare two colors of yarn and cut lengths 2 to 2.5 times the desired finished dimensions. Prepare 4 strands of each color in the same length.
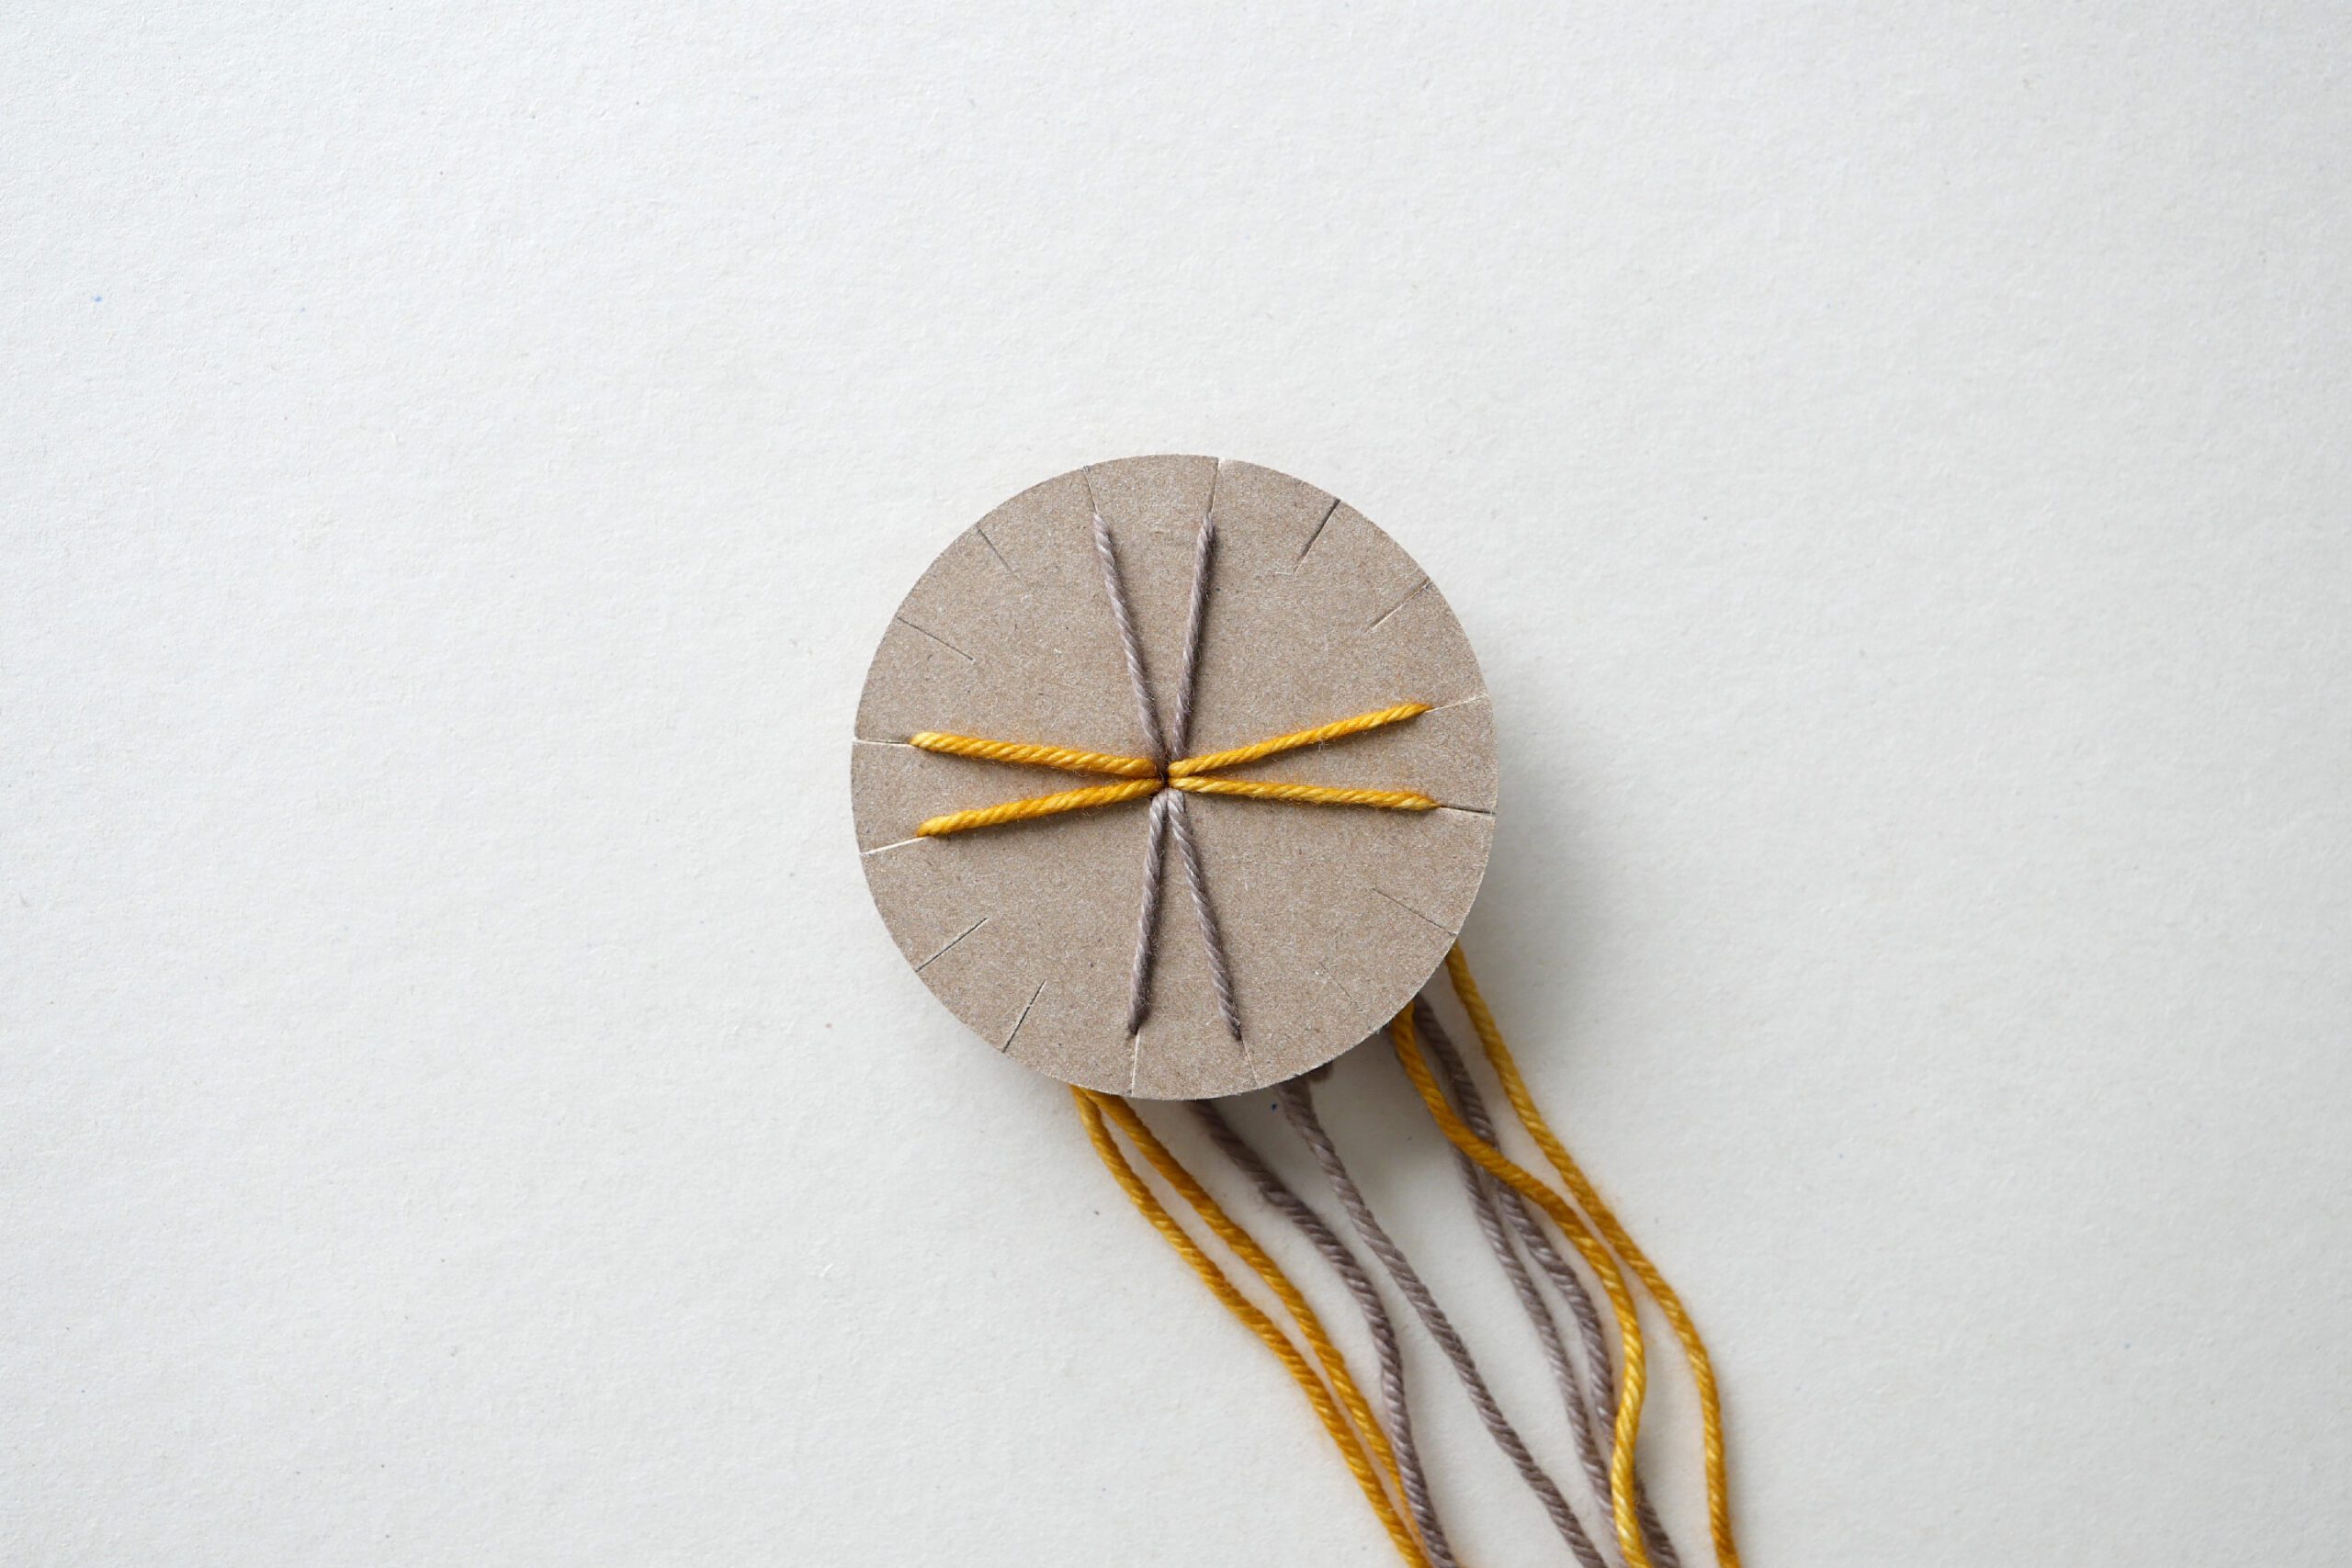
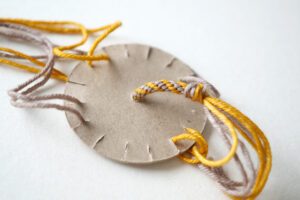
Place 8 yarns in the hole in the center of the disk and tie a knot, leaving 5 cm at the end.
Place 2 yarns in the top and bottom slits and 2 yarns in the left and right slits evenly, as shown in the photo.
Step 3. Braid the Yarn Pt.1
First, assemble from the gray yarns placed vertically. Move the top right gray yarn next to the bottom right gray yarn. Next, move the bottom left gray yarn next to the top left gray yarn.
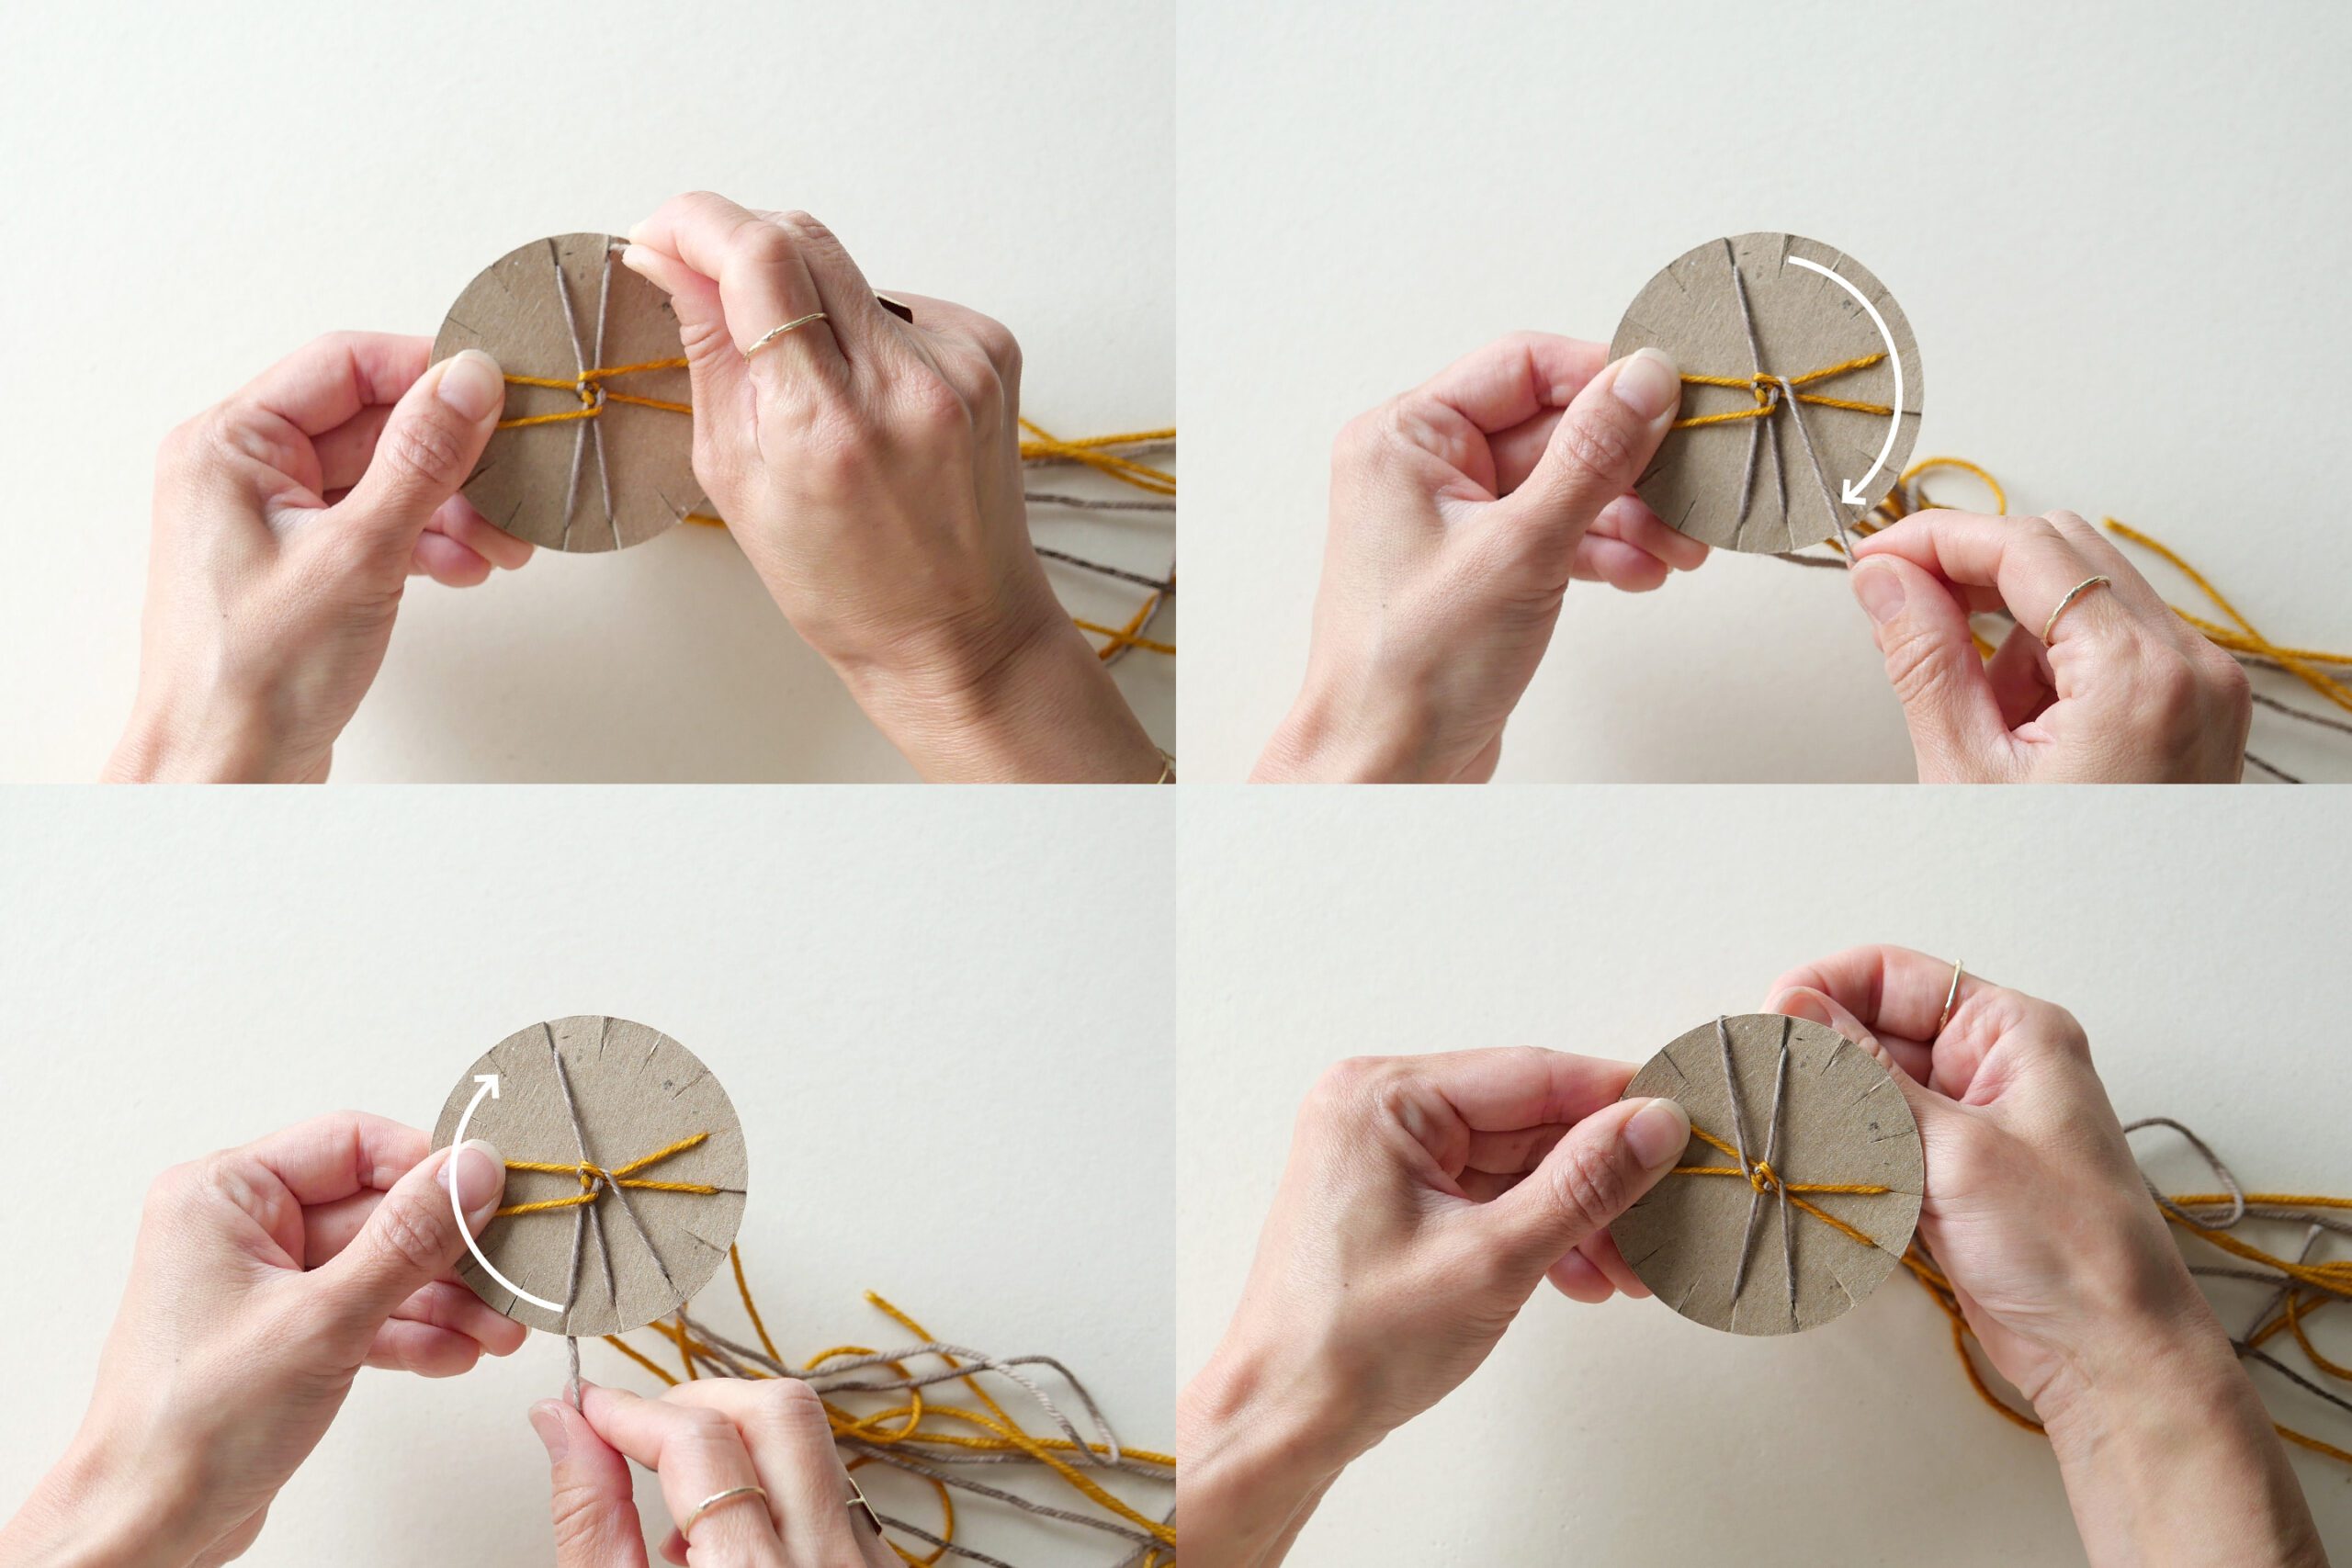
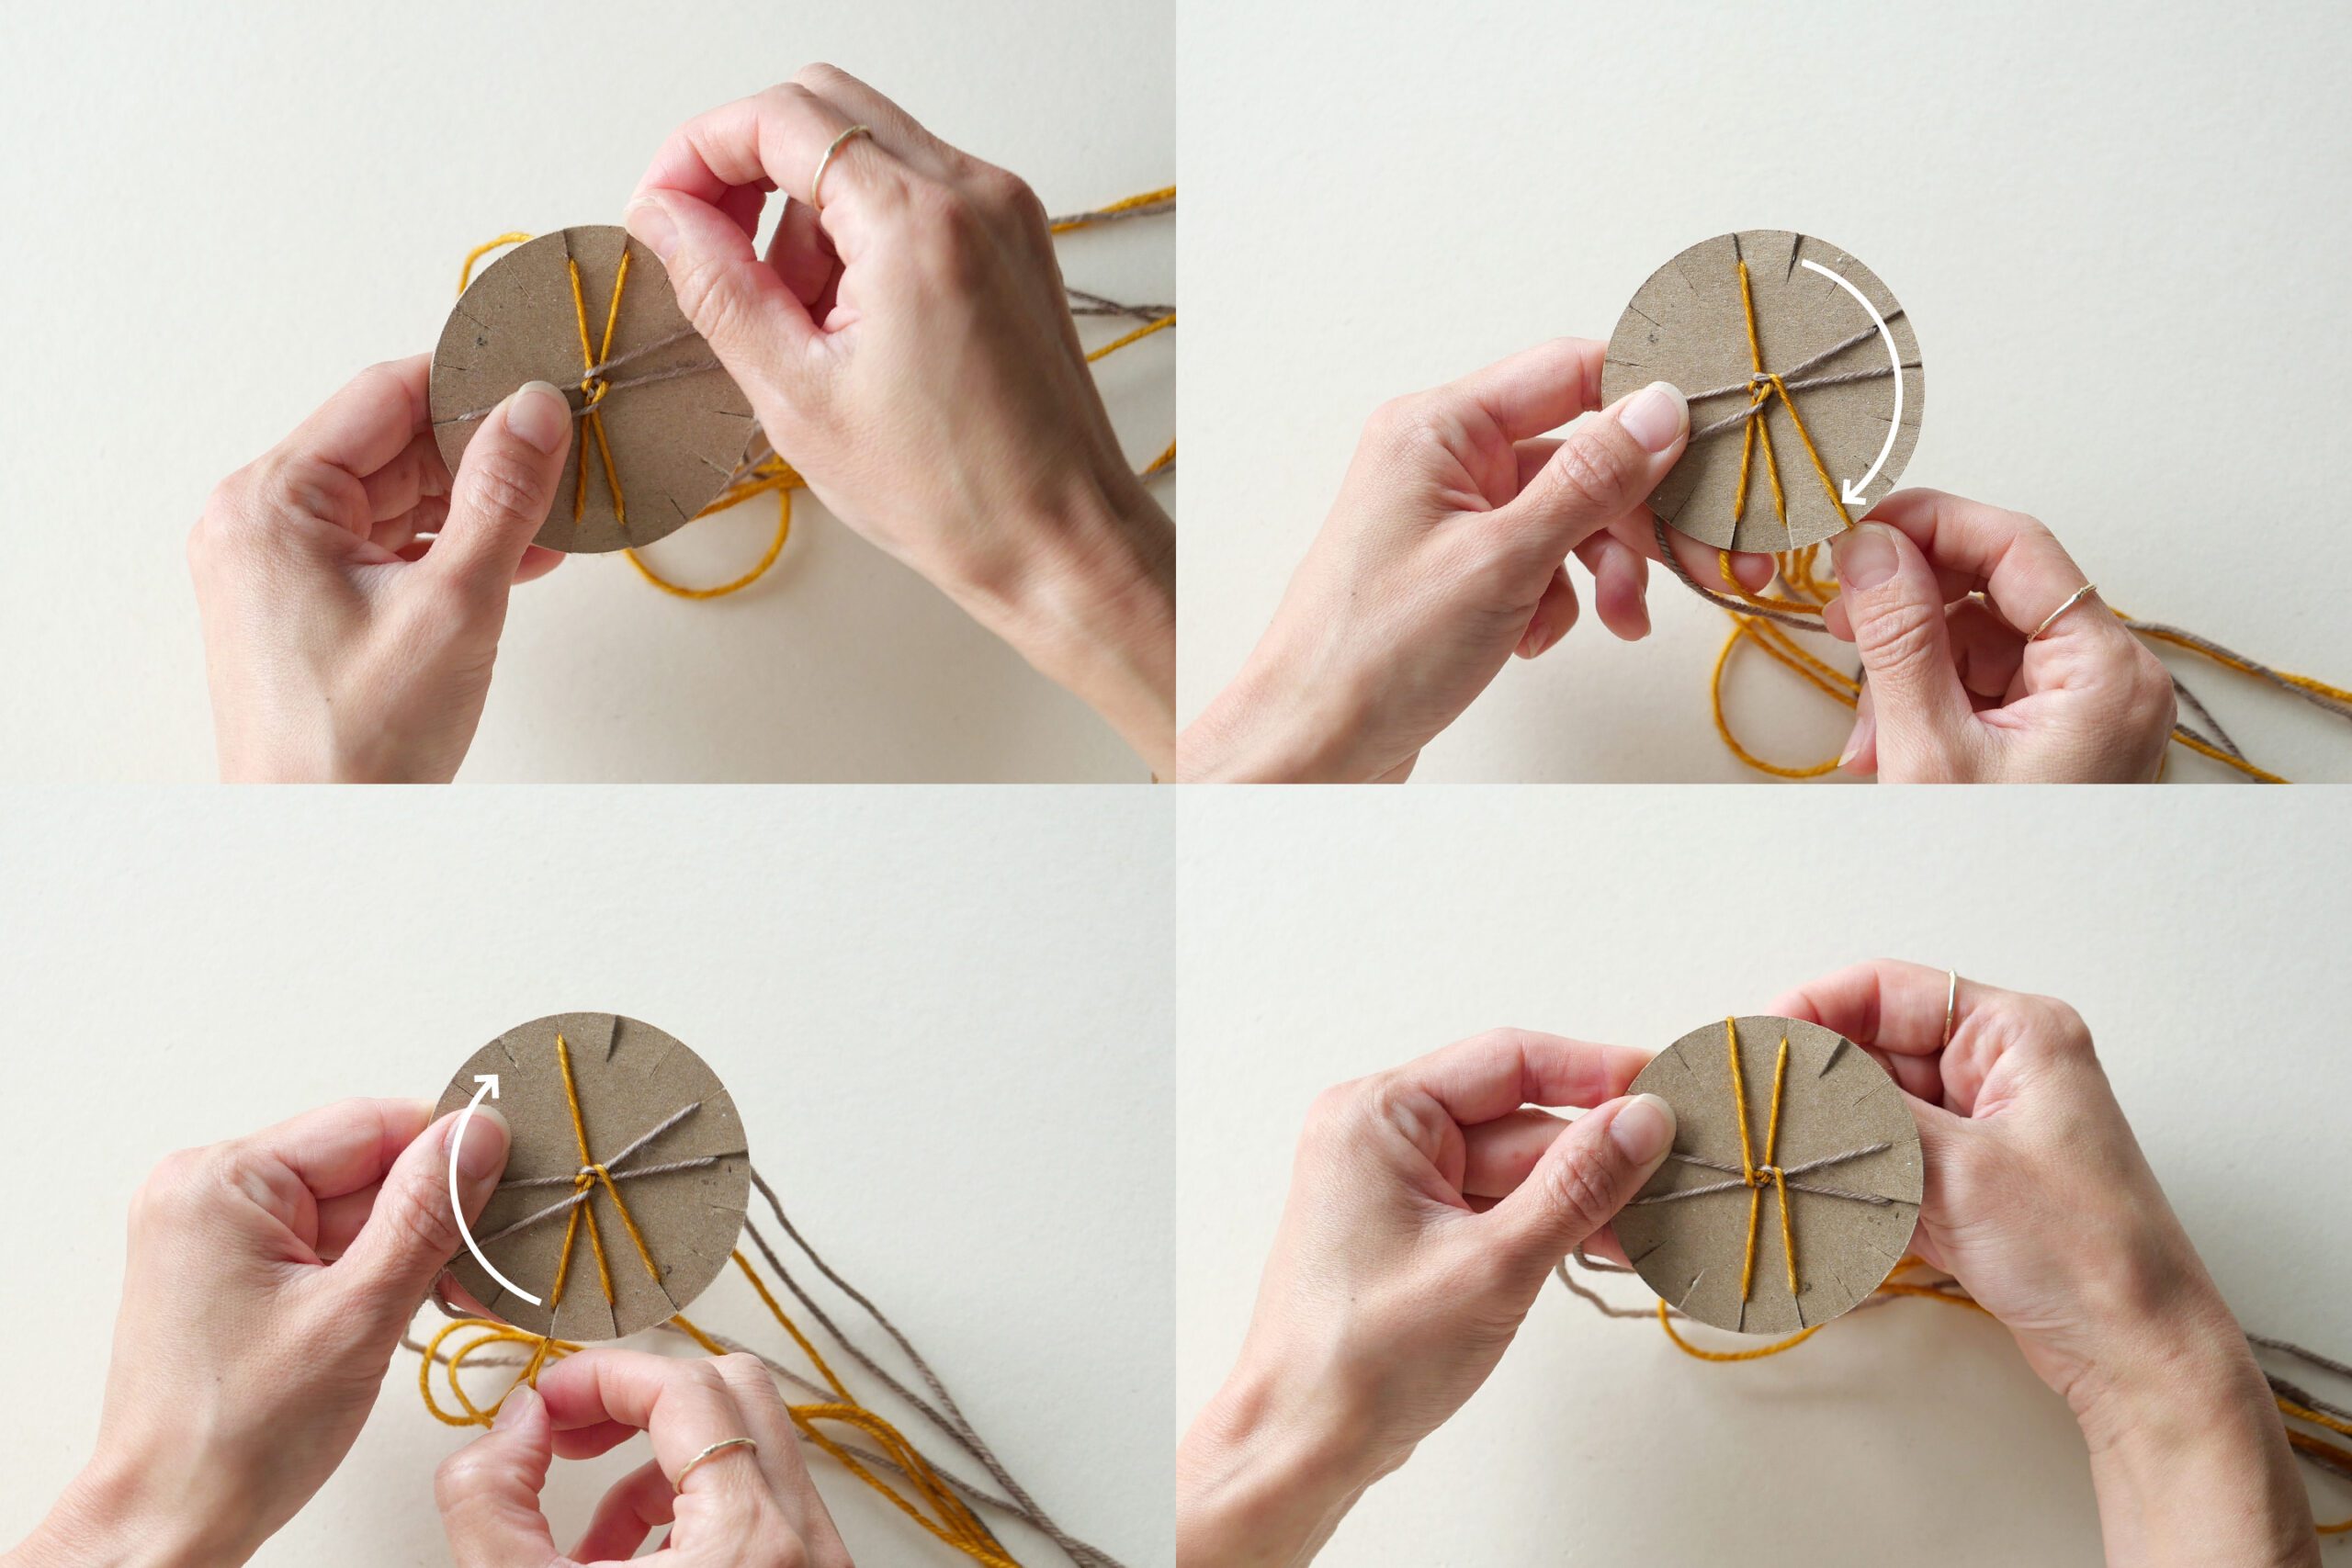
Step 4. Braid the Yarn Pt.2
Turn the disc and assemble the yellow yarns. Move the upper right yellow yarn next to the lower right yellow yarn. Next, move the bottom left yellow yarn next to the top left yellow yarn.
Repeat Step 3 and Step 4. Always move from top right to bottom right and from bottom left to top left. Turn and from top right to bottom right and bottom left to top left.
Step 5. Braided and Comb
After repeating several times, a braided yarn will come out of the hole in the center. The yarn that comes out should be pulled gently to let it hang down through the hole.
Also, the ends of the yarn tend to get tangled, so remember to comb them so that they hang neatly after a few knits.

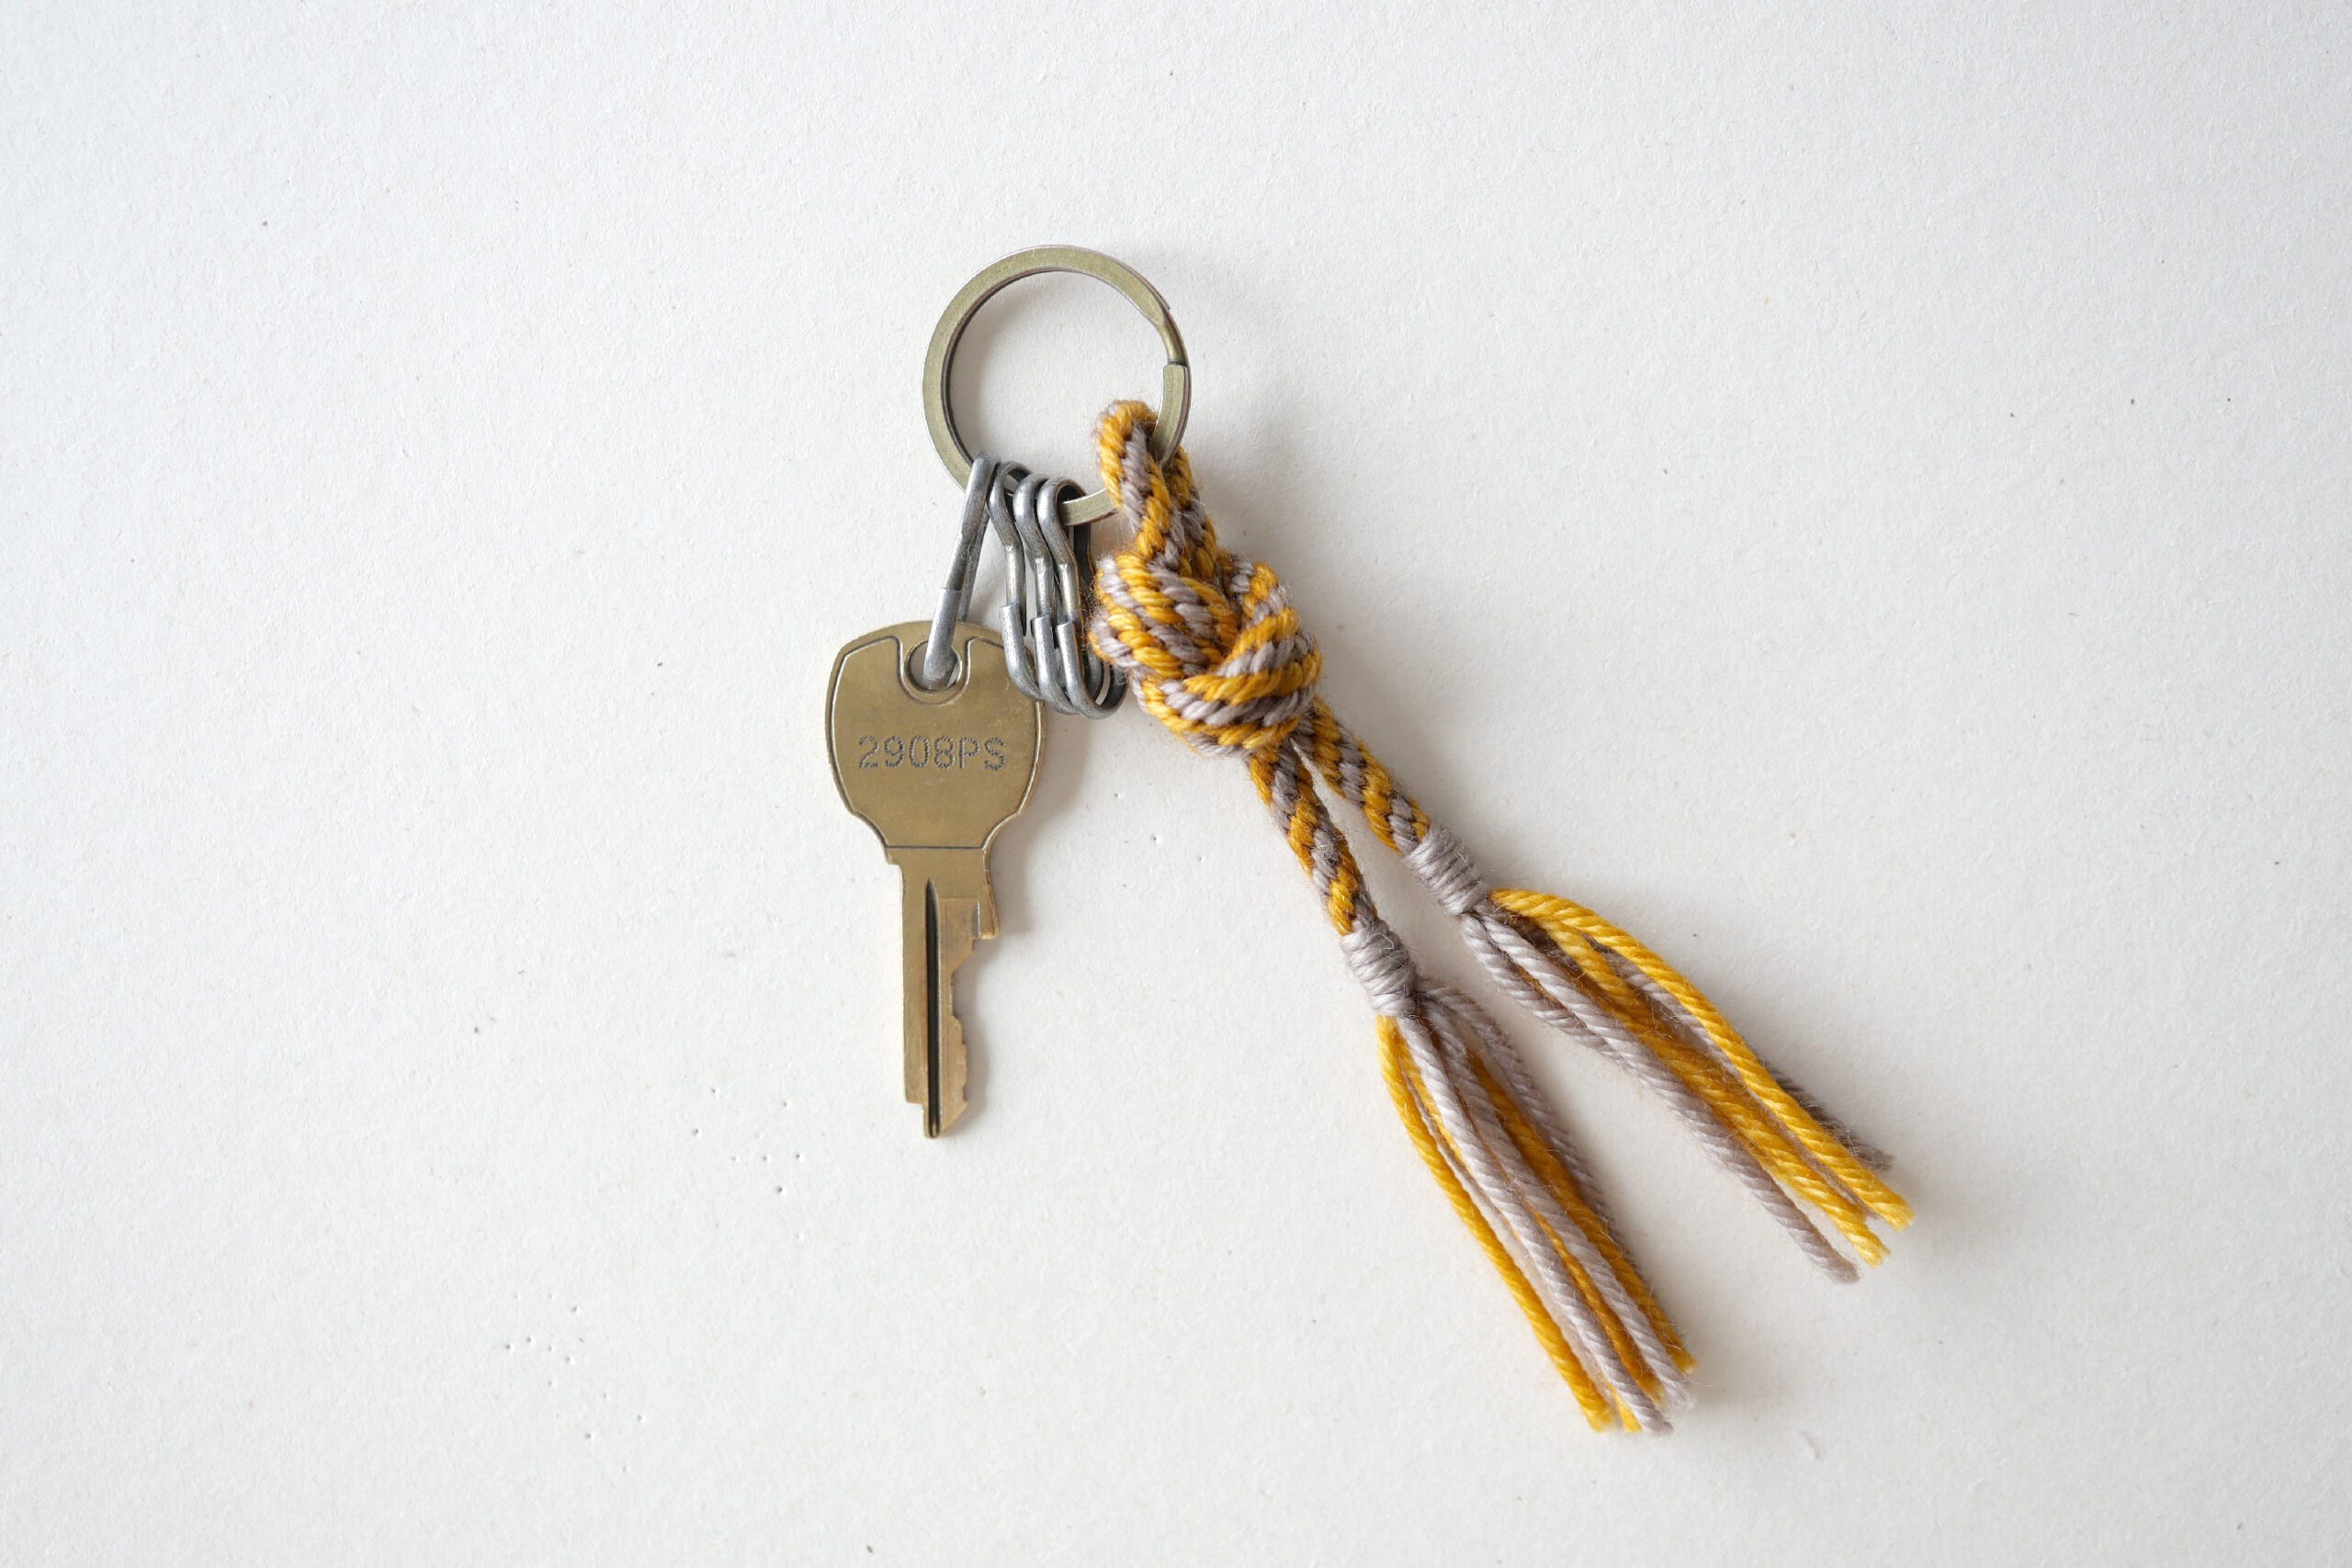
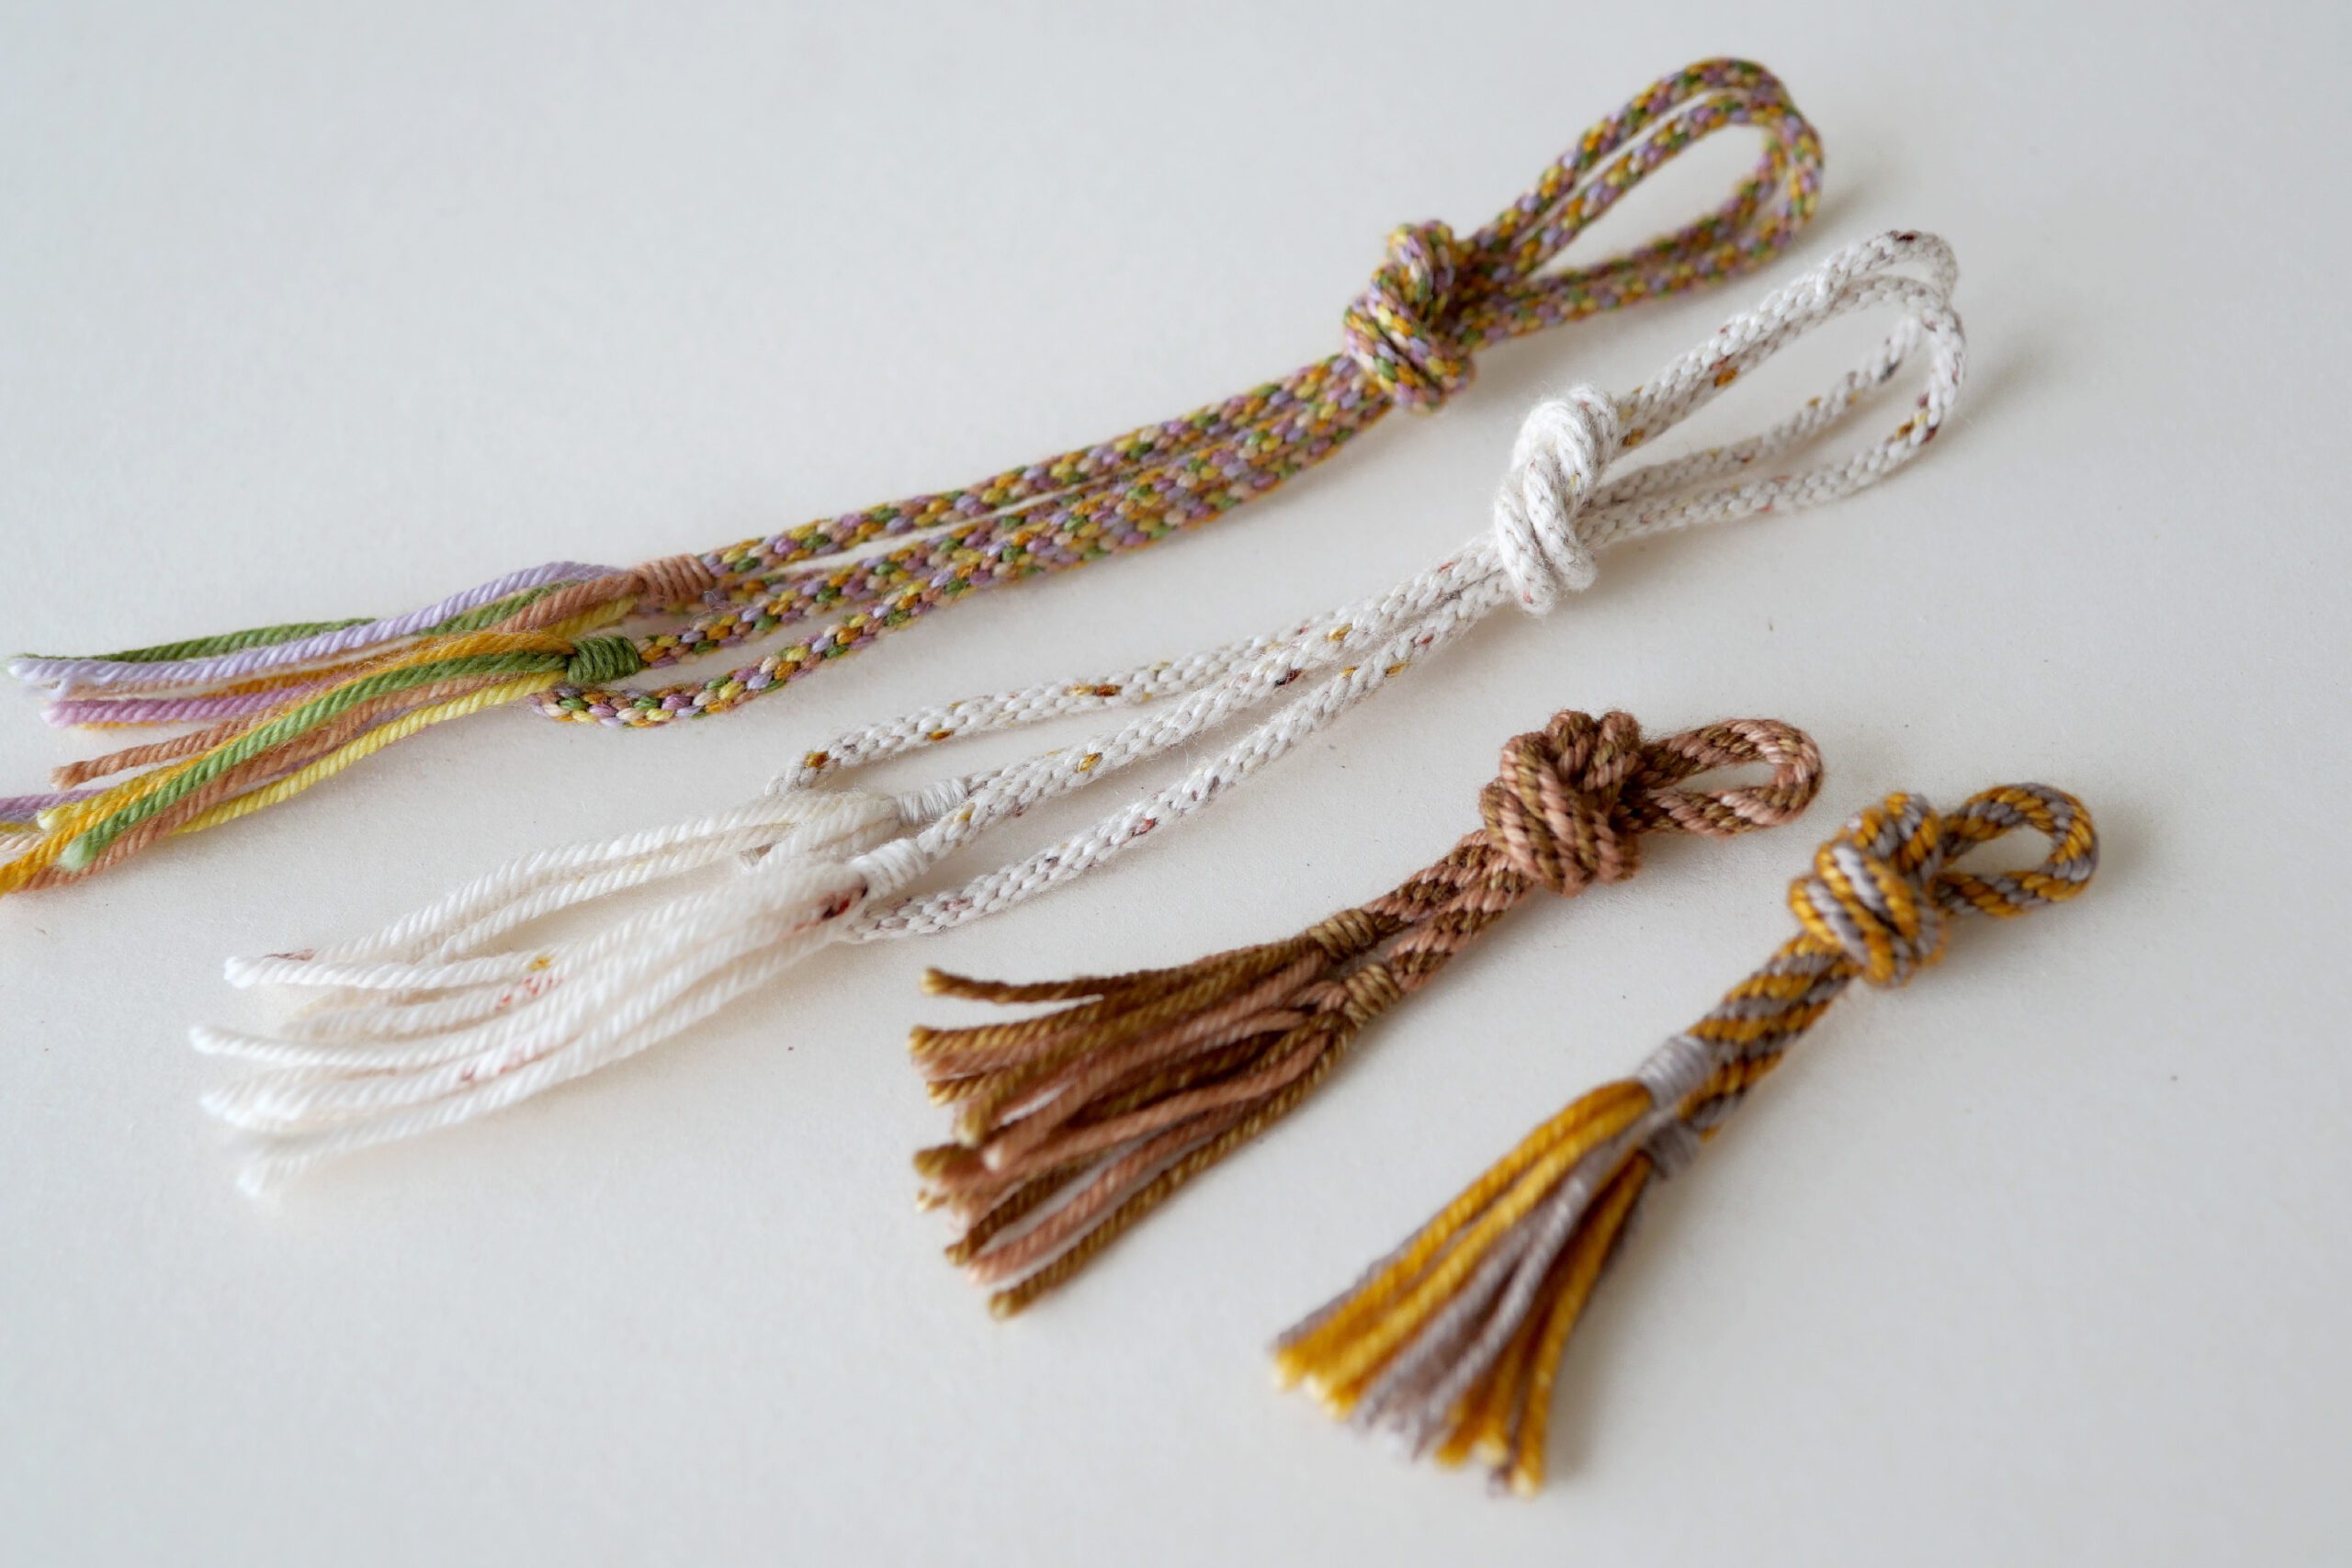
Step 6. Completed
When the desired length of braid is completed, remove the yarn from the disk and tie the ends together. Cut the fringes at both ends are the same length, the Kuminimo twisted braid is completed.

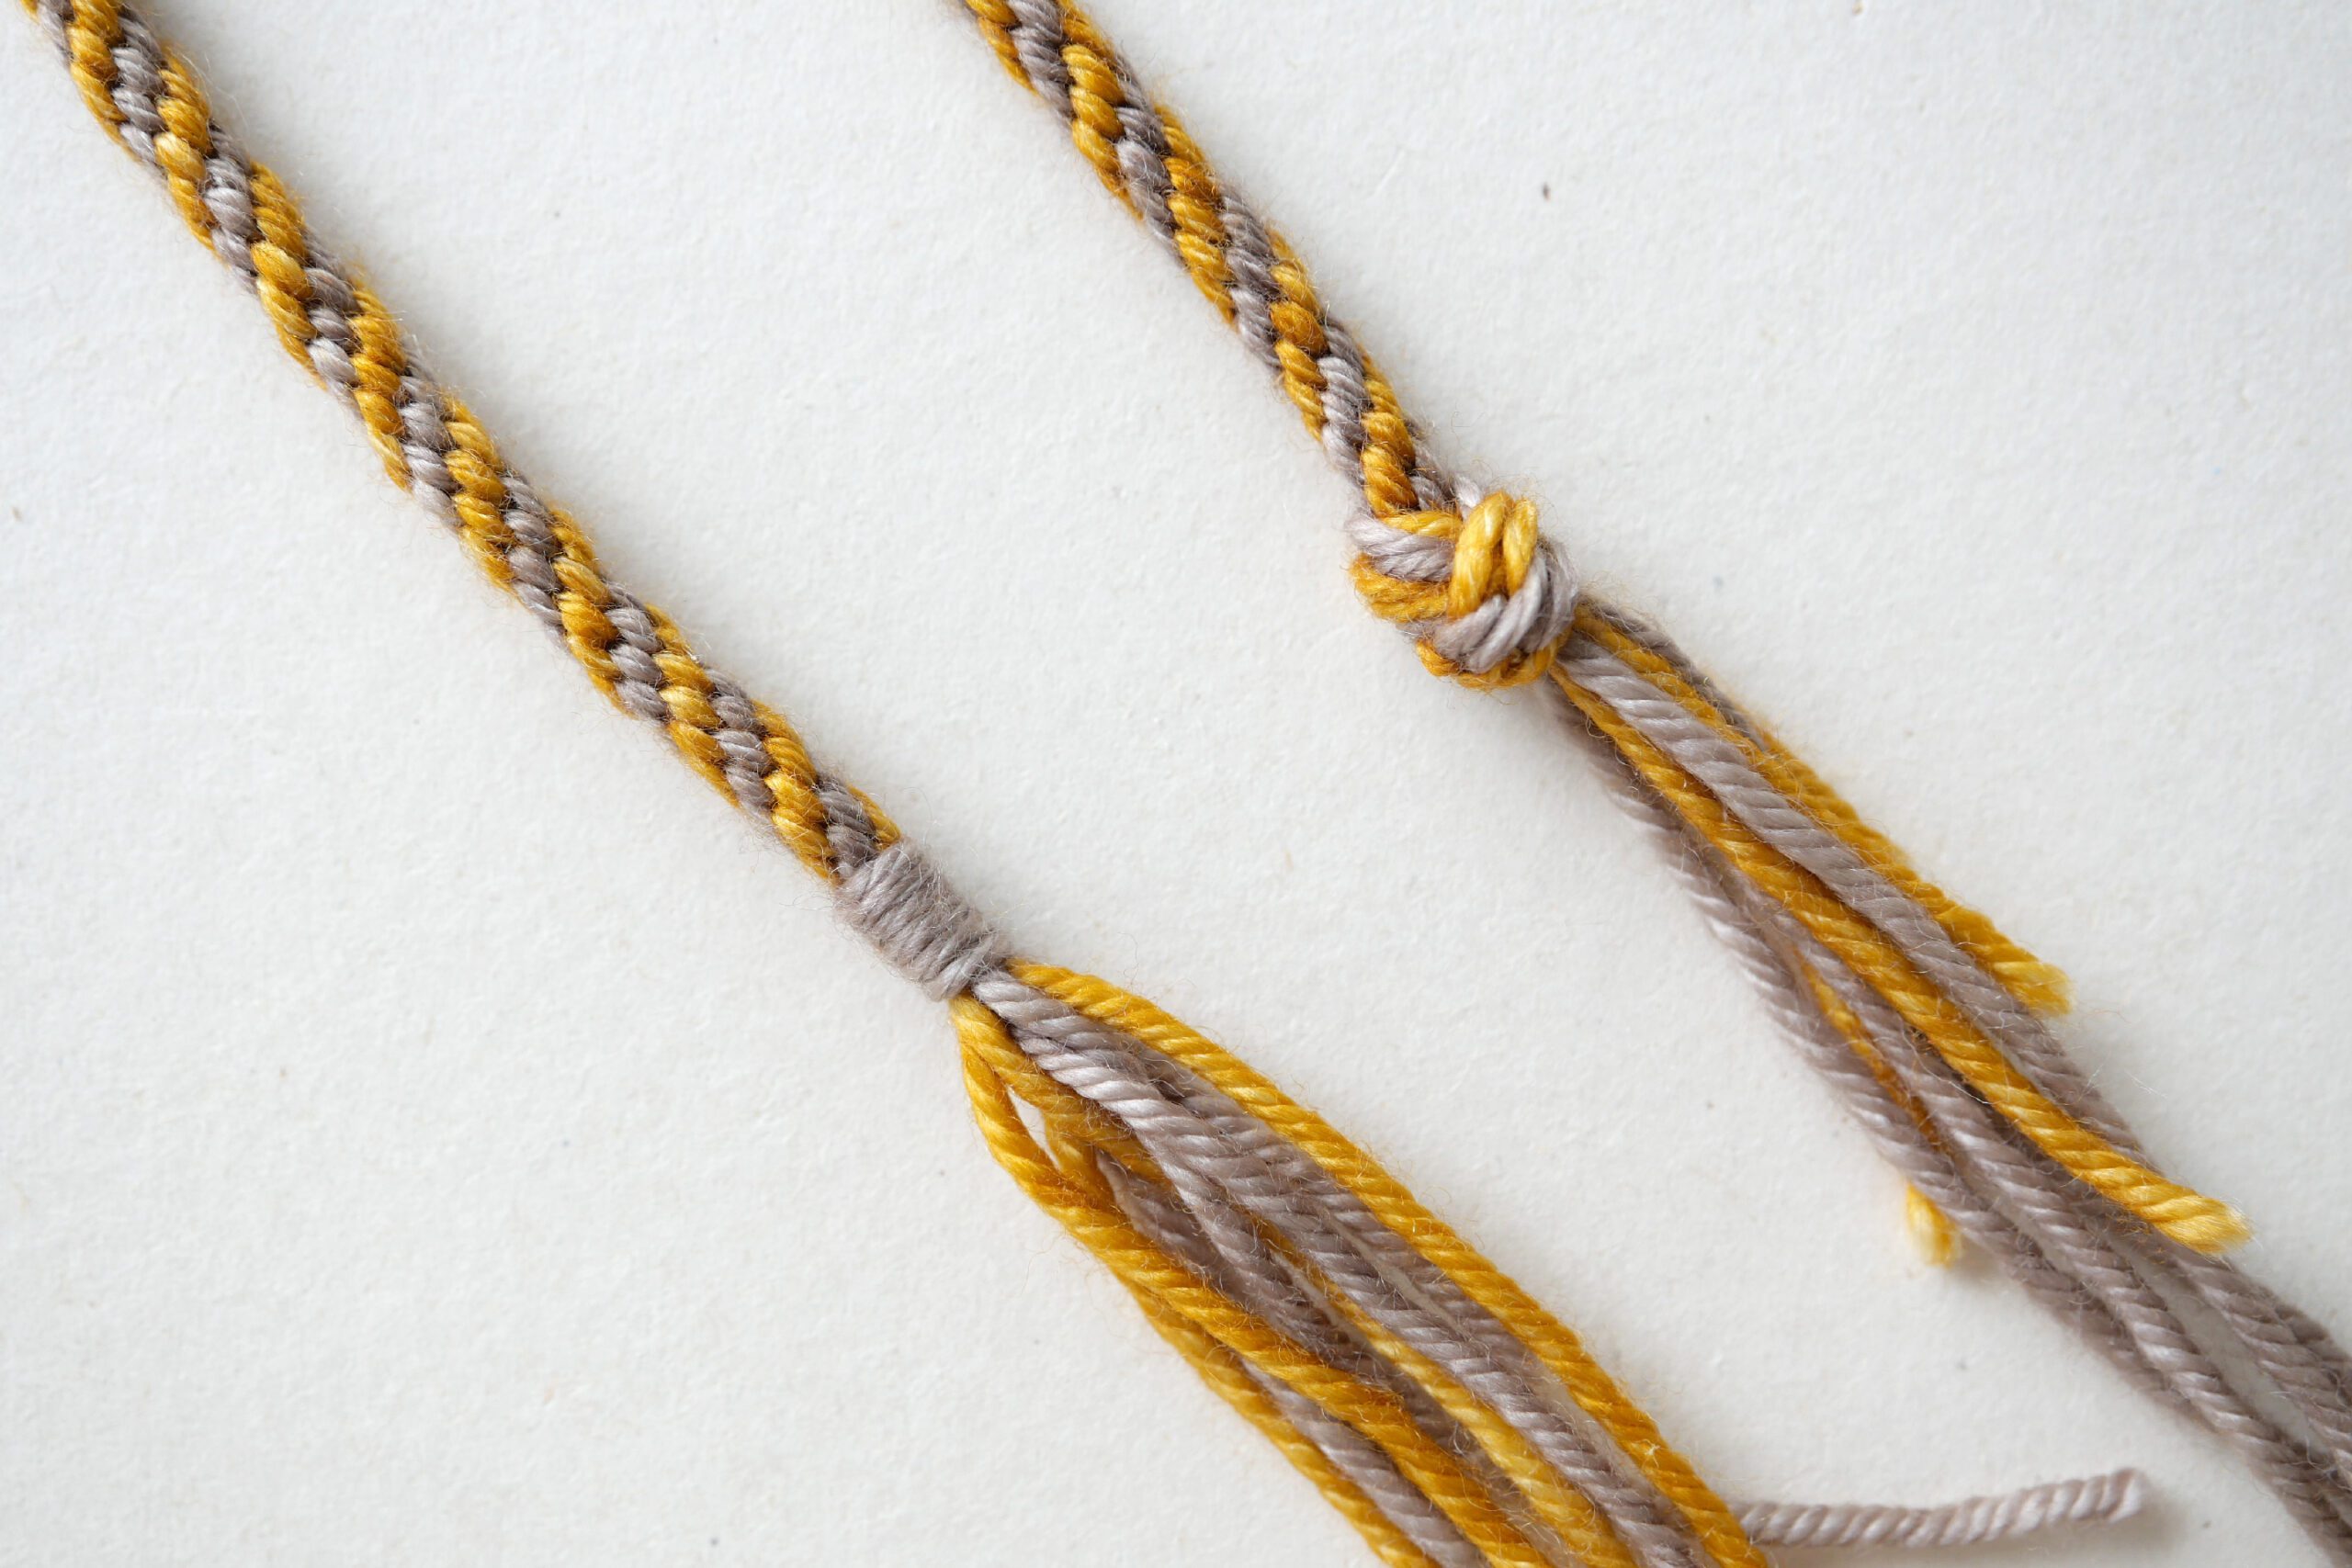
An Another Way to Fasten Yarn
If you want to be a little more particular about the knotting of the yarn, you can wrap the yarn around the knot and fasten it. This is the perfect option to make your knots look smart and beautiful. The steps are as follows.
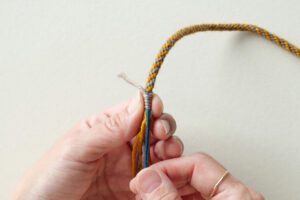
Step 1. Roll Up a Yarn
Prepare a 10 cm piece of thread. Here I’m using blue embroidery thread; hold the two folded embroidery thread together along the fringe you wish to fasten, with the looped end up. Take a piece of yarn from the fringe and wrap it and the embroidery thread tightly around the entire fringe. 4~6 times, pass the end of the yarn through the loop of embroidery thread.
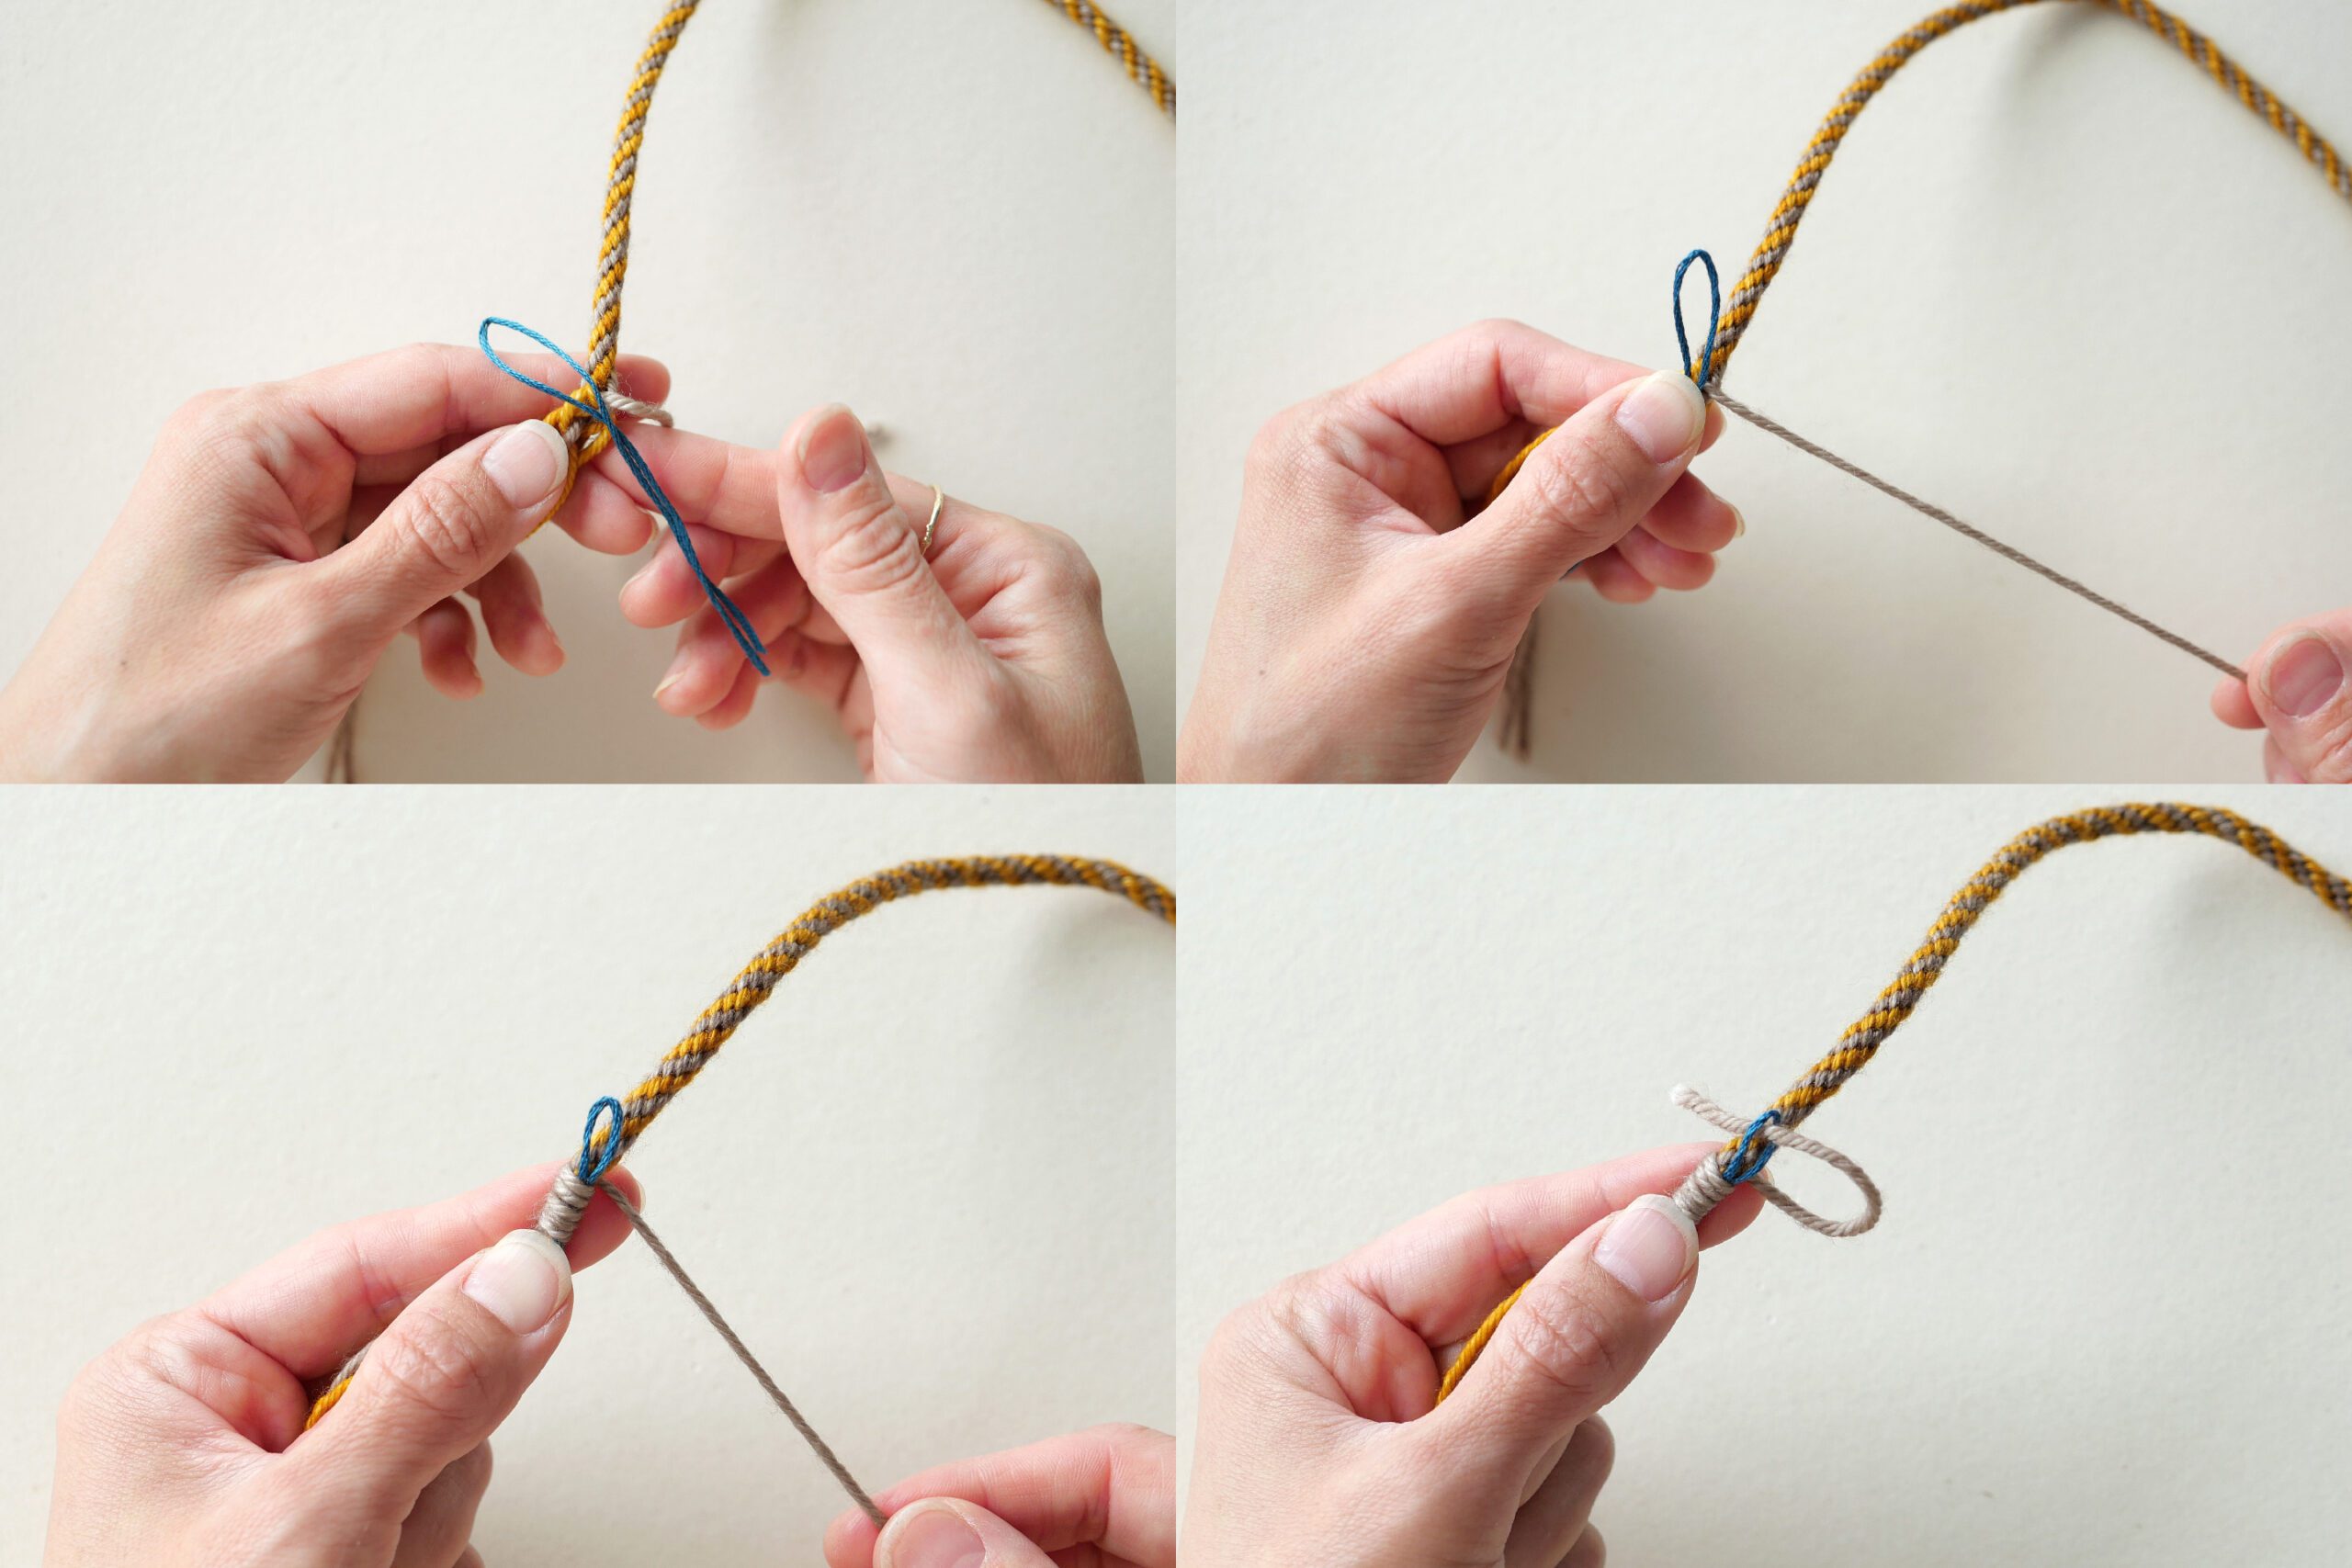
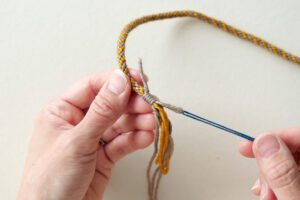
Step 2. Pull Out the Yarn
Once the yarn is threaded through the loop of embroidery thread, gently pull it out together from the bottom end of the embroidery thread. Once all is pulled out, cut the length of the fringe to complete the process.

Kumihimo Twisted Braid
前回のポストでご紹介した日本の伝統工芸の組紐。組紐には組み方に様々なバリエーションがあります。今回は2色の紐を使ったツイストの組み方をご紹介します。2色、8本の糸を16個のスリットを使って組んでいきます。組み方は至ってシンプル。手順に沿って挑戦してみてください。
ちょっとした時間の隙間に、食後の語らいのひとときや、旅のともに、組紐は常に手を動かしたい私にとって最高の相棒です。旅に出る時は、いつもこの組紐をバッグに忍ばせています。
7本の糸で組む基本の組紐はこちらのポストをご覧ください。
用意するもの
– 段ボール もしくは カードボード 7×7cm
– 毛糸 2色・各4本 *毛糸以外にも、刺繍糸などお好きな糸
– カギ編み針
– ハサミ
– 組紐ディスクのテンプレート *オプションです。必要なら以下からダウンロードできます
こちらが組紐ディスクのテンプレートです。ご自由にダウンロードしてお使いください。
download the templateつくりかた
Step 1. 組紐ディスクを用意する
ダウンロードファイルのテンプレートに沿って、段ボールを円形もしくは八角形に切り16本のスリットを切ります。
Step 2. 糸を用意し、スリットに配置する
2色の糸を用意し、希望する出来上がり寸法の2〜2.5倍の長さで切ります。それぞれの色を同じ長さで4本ずつ用意します。
ディスク中央の穴に8本の糸を入れて、端を5cmほど残して結びます。
写真の様に上下のスリットに2本、左右のスリットに2本の糸を均等に配置します。
Step 3. 糸を組む1
まず縦に配置してあるグレーの糸から組みます。右上のグレーの糸を、右下のグレーの糸の横に移動します。次に左下のグレーの糸を左上のグレーの糸の横に移動します。
Step 3. 糸を組む2
ディスクを半回転させて、黄色の糸を組みます。右上の黄色の糸を、右下の黄色の糸の横に移動します。次に左下の黄色の糸を左上の黄色の糸の横に移動します。
Step 3とStep 4を繰り返します。常に右上から右下へ、左下から左上へ。回転させて、また右上から右下へ、左下から左上へ。
Step 5. 組まれた紐
何度か繰り返していくと、中央の穴から組まれた紐が出てきます。出てきた紐はやさしく引っ張って穴から垂らしてください。
また、スリットを移動した糸の端は絡まりやすいので、いくつか編んだらきれいに垂れるようににコームするのを忘れずに。
Step 6. 完成です
希望の長さの組紐ができたらディスクから糸をはずして、端を結びます。両端のフリンジが同じ長さになるように整えたらツイスト組紐の完成です。
毛糸を留めるもうひとつの方法
糸の結び目についてもう少しこだわりたいなら、糸を巻きつけて留める方法があります。これは結び目がよりスッキリと美しく見える完璧なオプションです。手順は下に記します。
Step 1. 糸を巻きつける
10cmほどの紐を用意します。ここでは青い刺繍糸を使っています。2つに折った刺繍糸を、輪っかの部分を上にして留めたいフリンジに沿わせて一緒に持ちます。フリンジの中から一本の毛糸を取り、刺繍糸も一緒にフリンジ全体にきつく巻き付けます。4~6回ほど巻き付けたら毛糸の端を刺繍糸の輪っかの部分に通します。
Step 2. 糸を引き抜く
毛糸を刺繍糸の輪に通したら、刺繍糸の下端から一緒にゆっくりと引き抜きます。全て引き抜いたら、フリンジの長さを整えて完成です。