Orizome with Food Color
Orizome, which folds and dyes paper is a very simple method of dyeing that even small children can enjoy.
In the past, I have used colored inks as dyeing materials, but I have always wondered if it could be done with easier and safer materials. At the same time, I wanted to use this beautiful handmade Orizome paper for food wrapping. The answer lies in one simple place. It uses food coloring.
I have always been skeptical of using artificial colors on food. Even now, when necessary, I use natural coloring such as beets, green tea, and turmeric instead of food coloring. But what about for crafts? Once I had a flexible mindset, I realized that this was the safest ink for the craft.
I immediately tried several food colors. I experienced beautiful dyeing with better colors than ever before with no problems at all. Of course, you can also combine colors with each other like paints to create your favorite colors. I share here a beautiful color chart to help you think the same way. The materials, folding guide, and basic process are described in detail here. Please take a look at it as well.
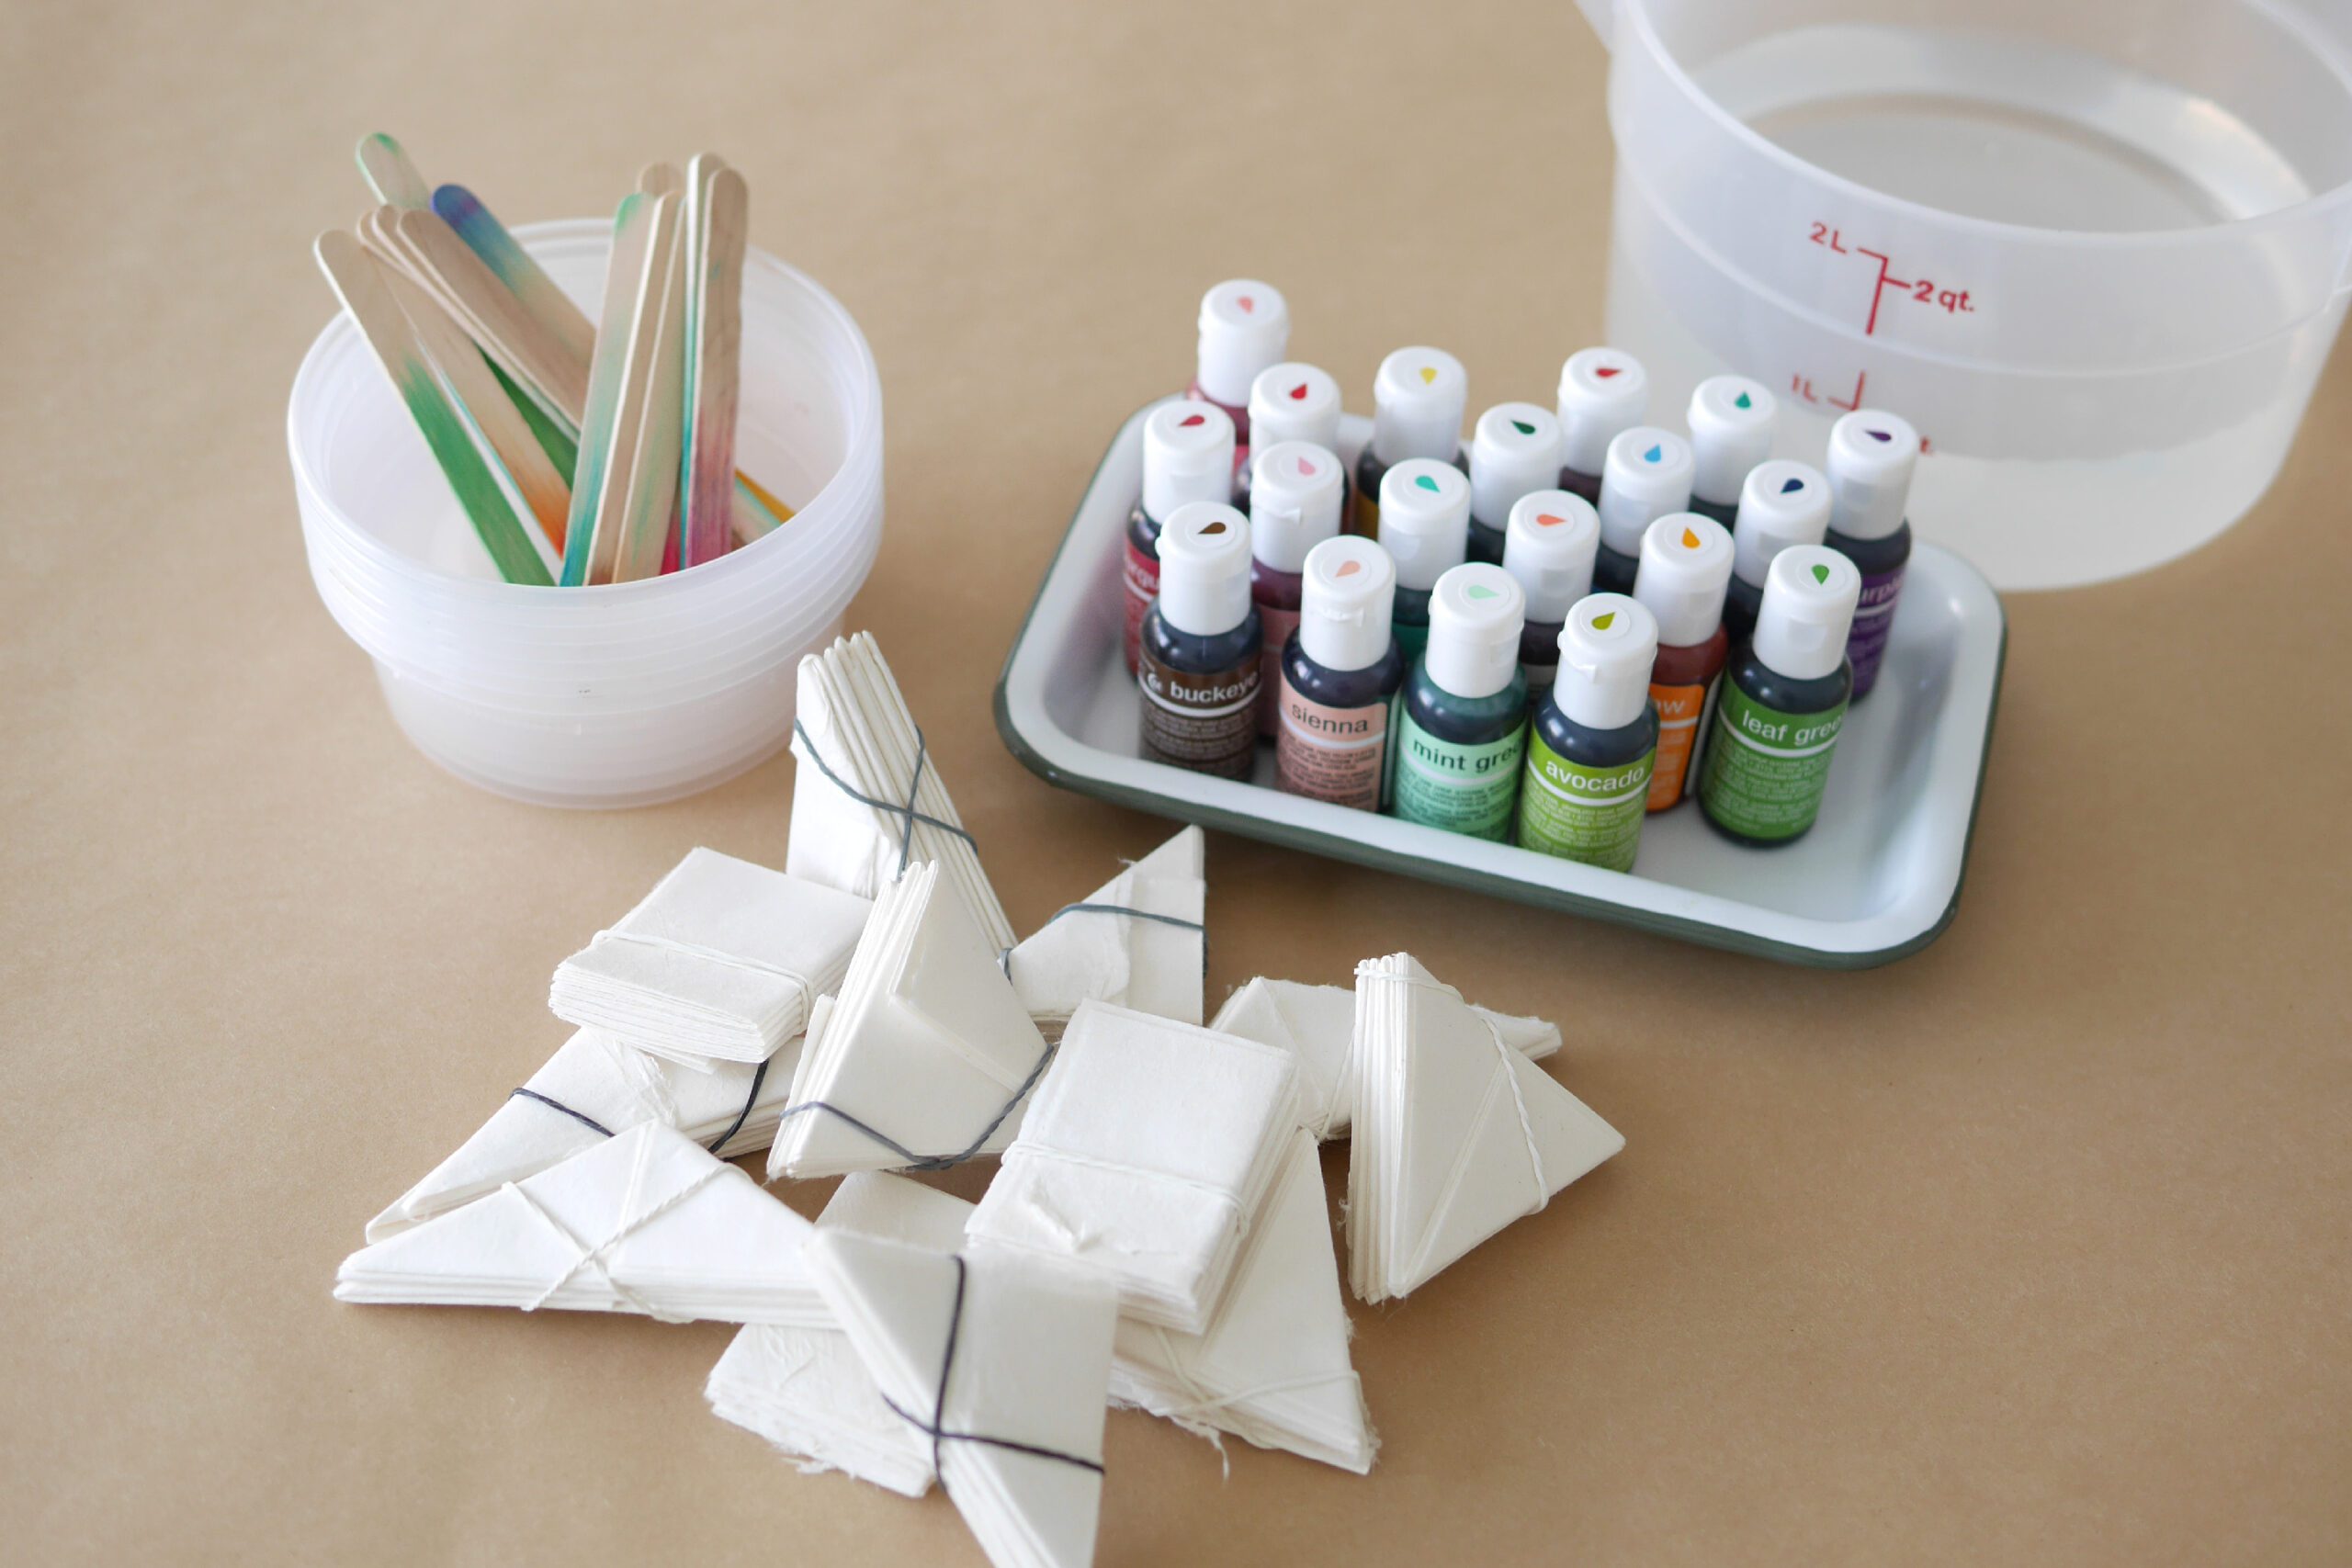
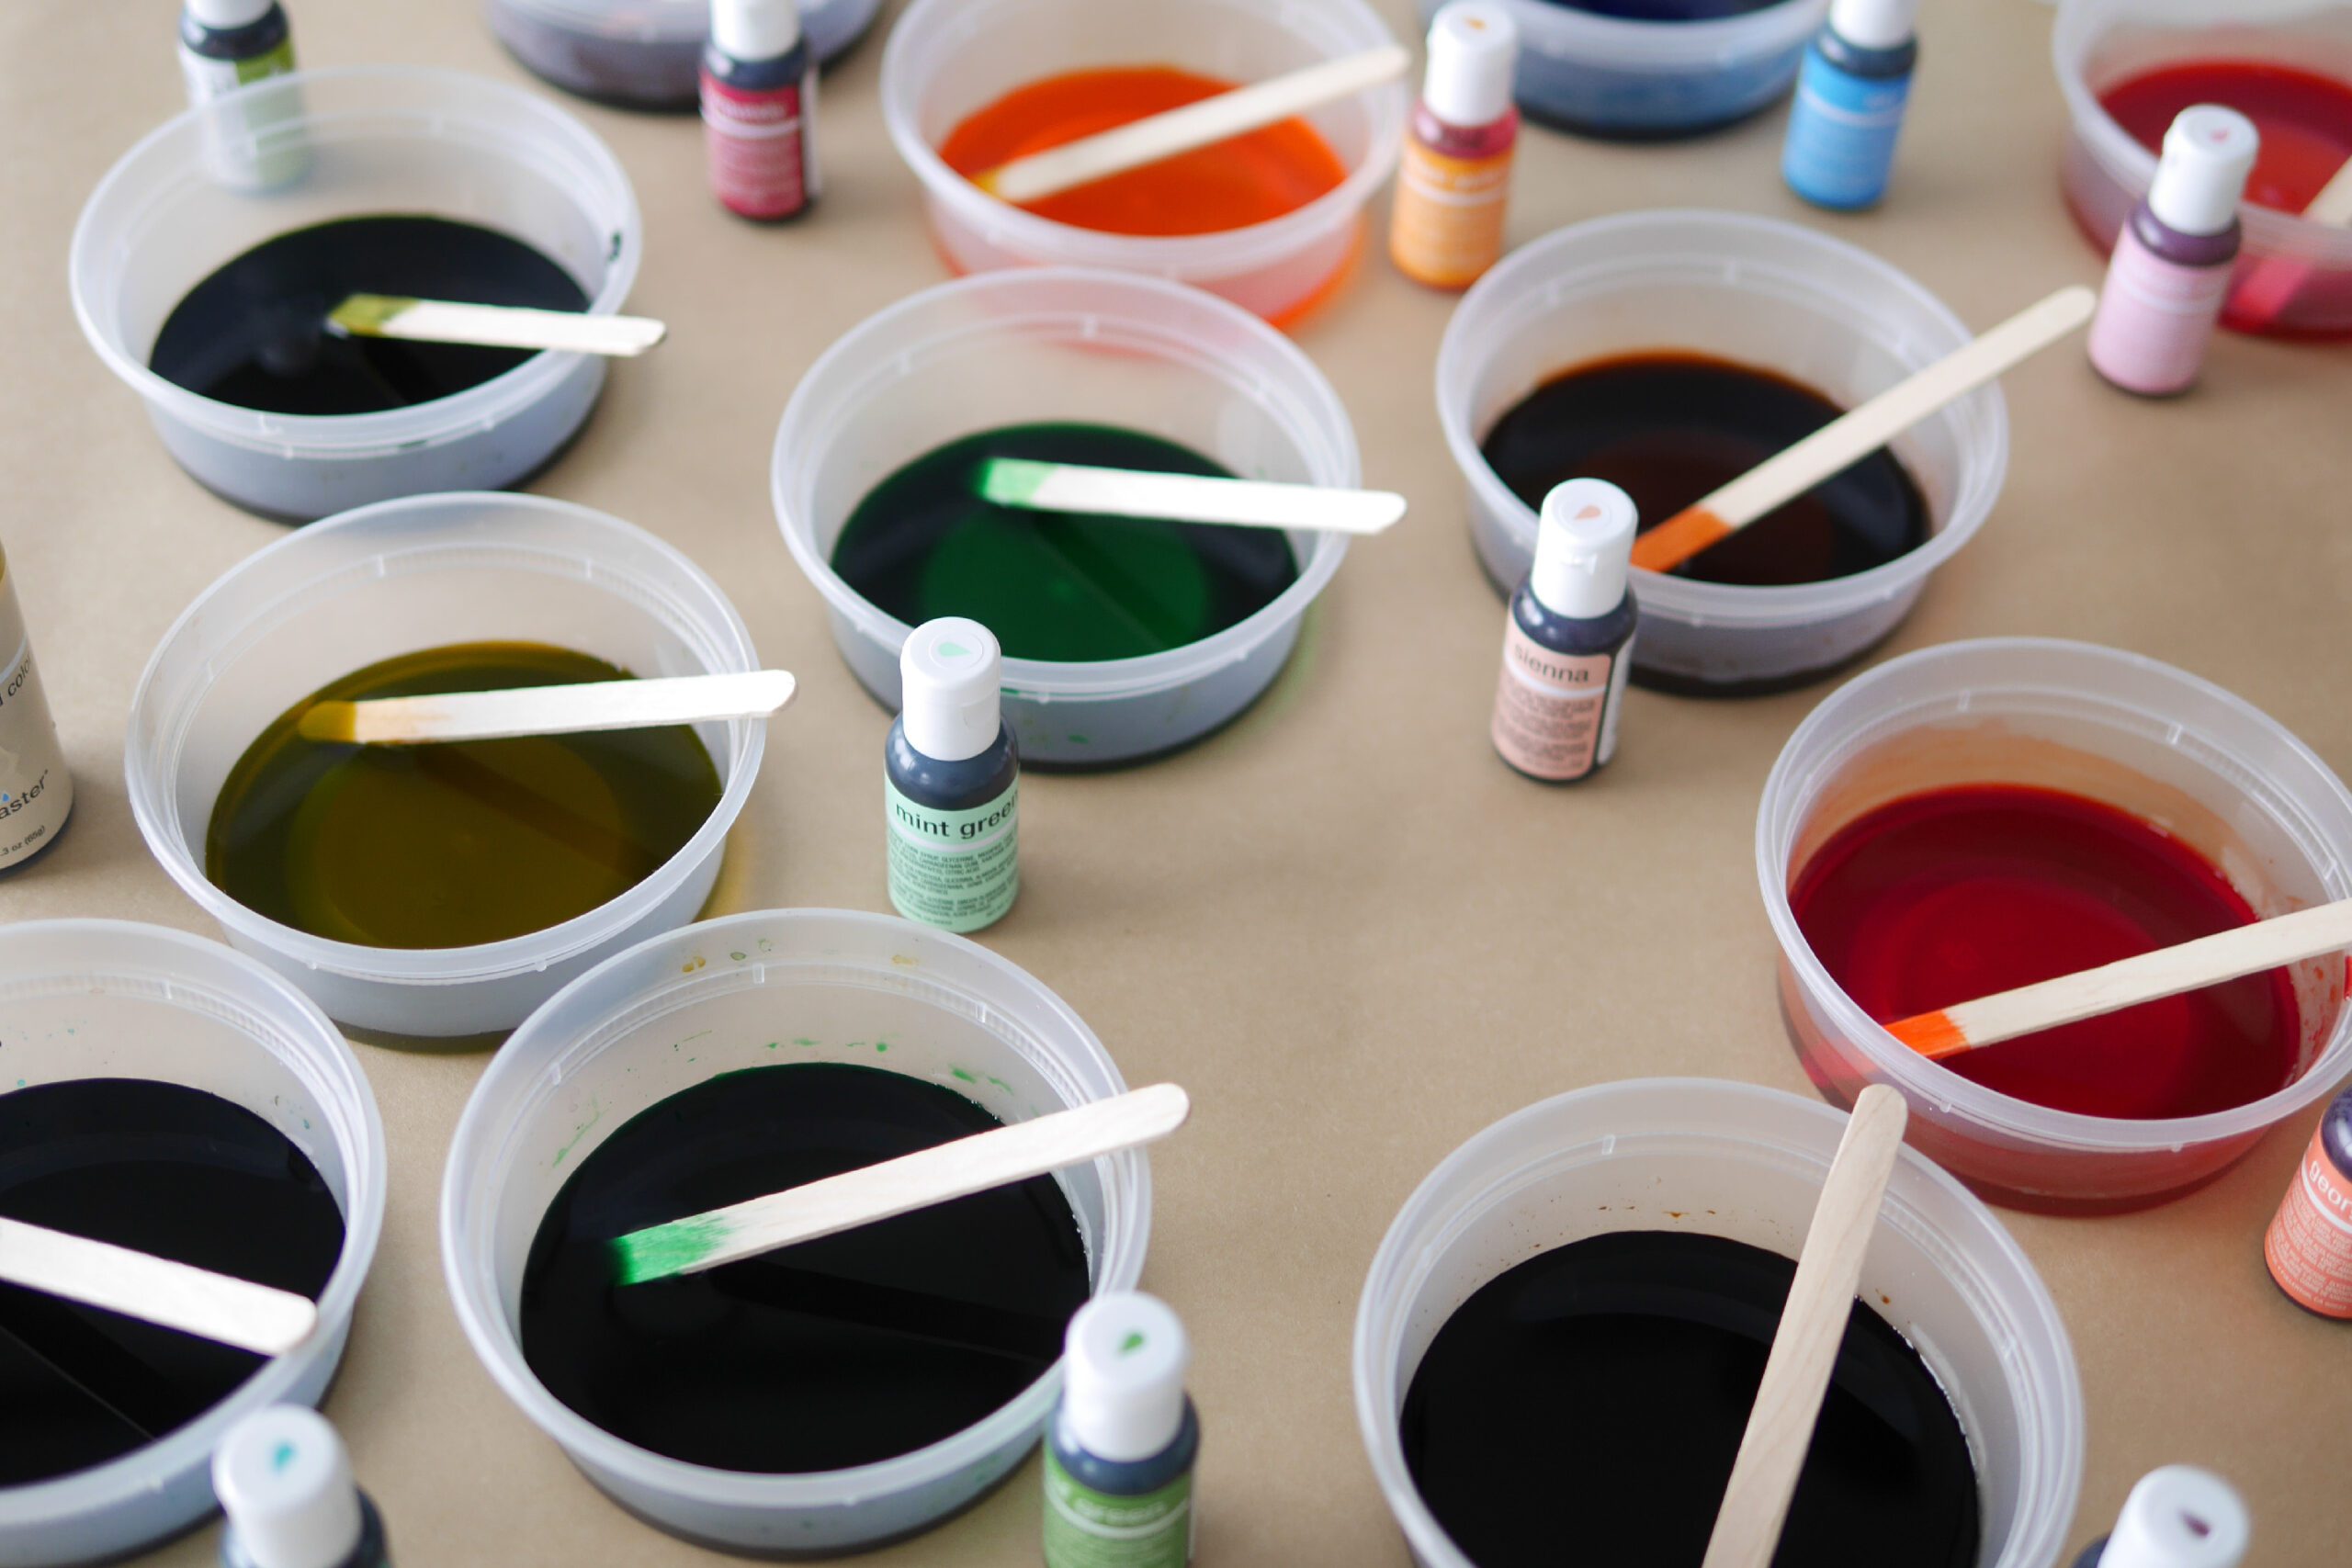
Materials
– Japanese paper, Mulberry paper, Calligraphy paper
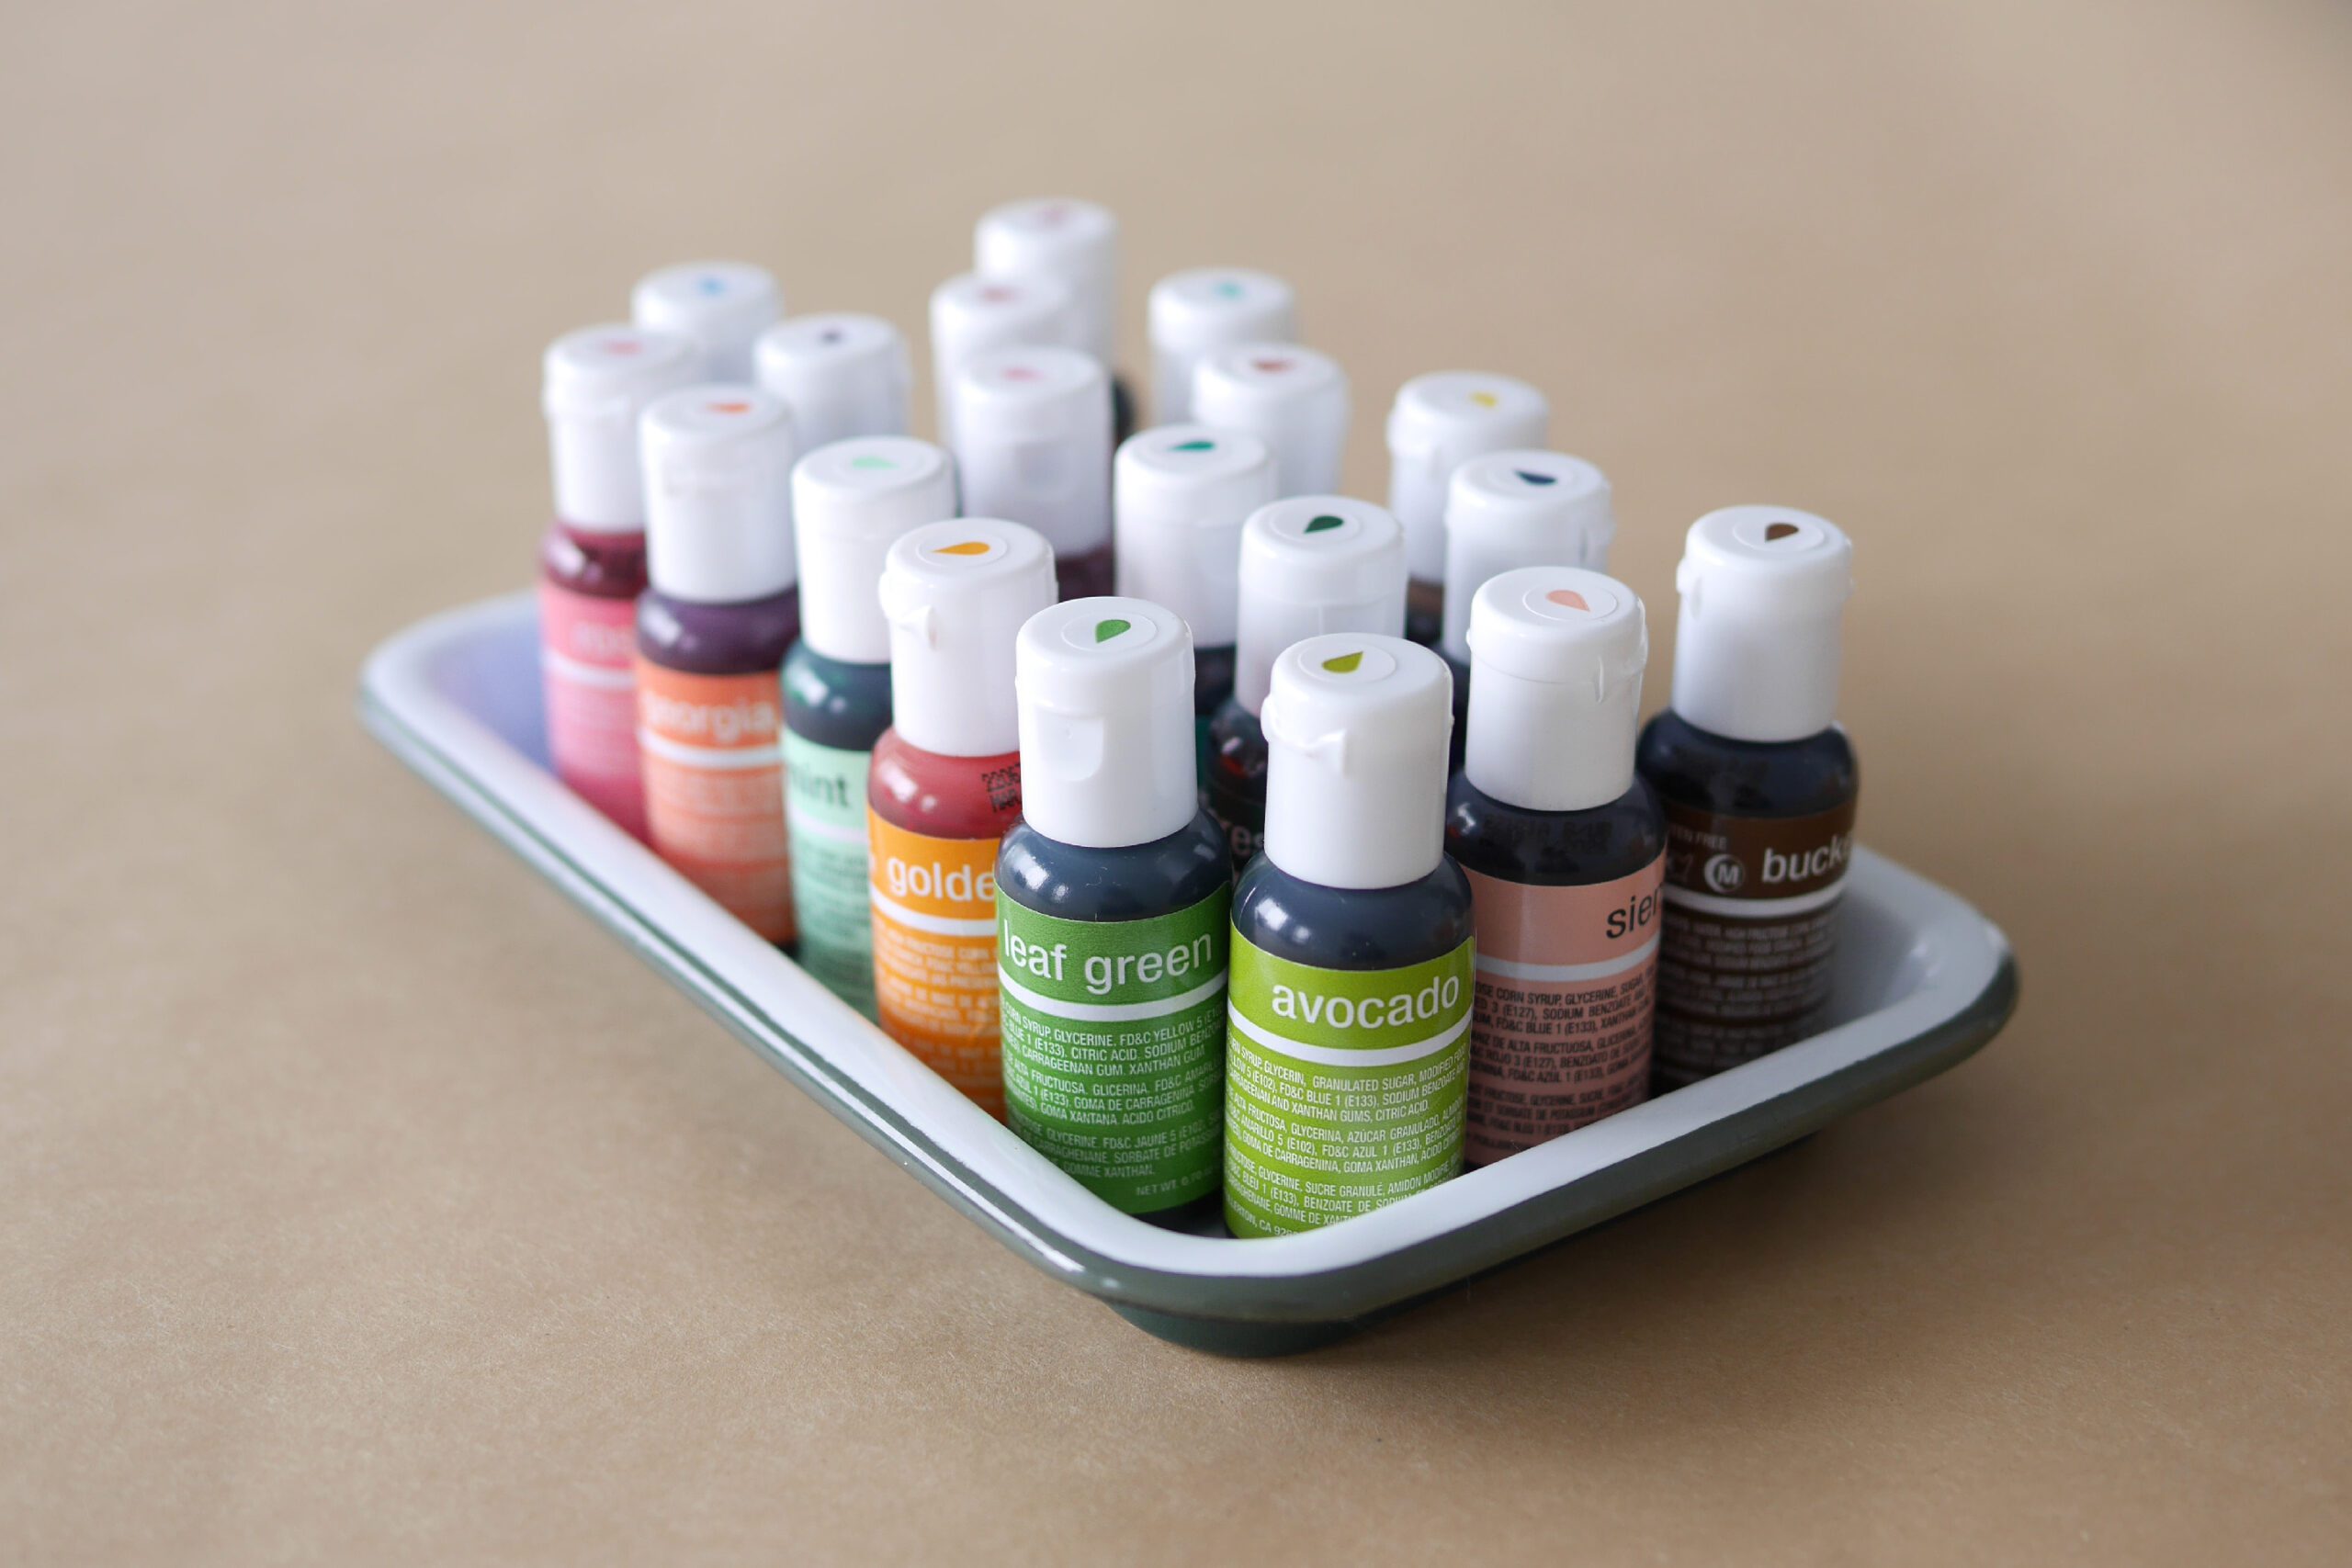
– Food Color *I used This
– Rubber bands or string *if necessary
– Cups for dye
– Paper towel
*Although the ink is safe, it is highly pigmented and should be worked with gloves.
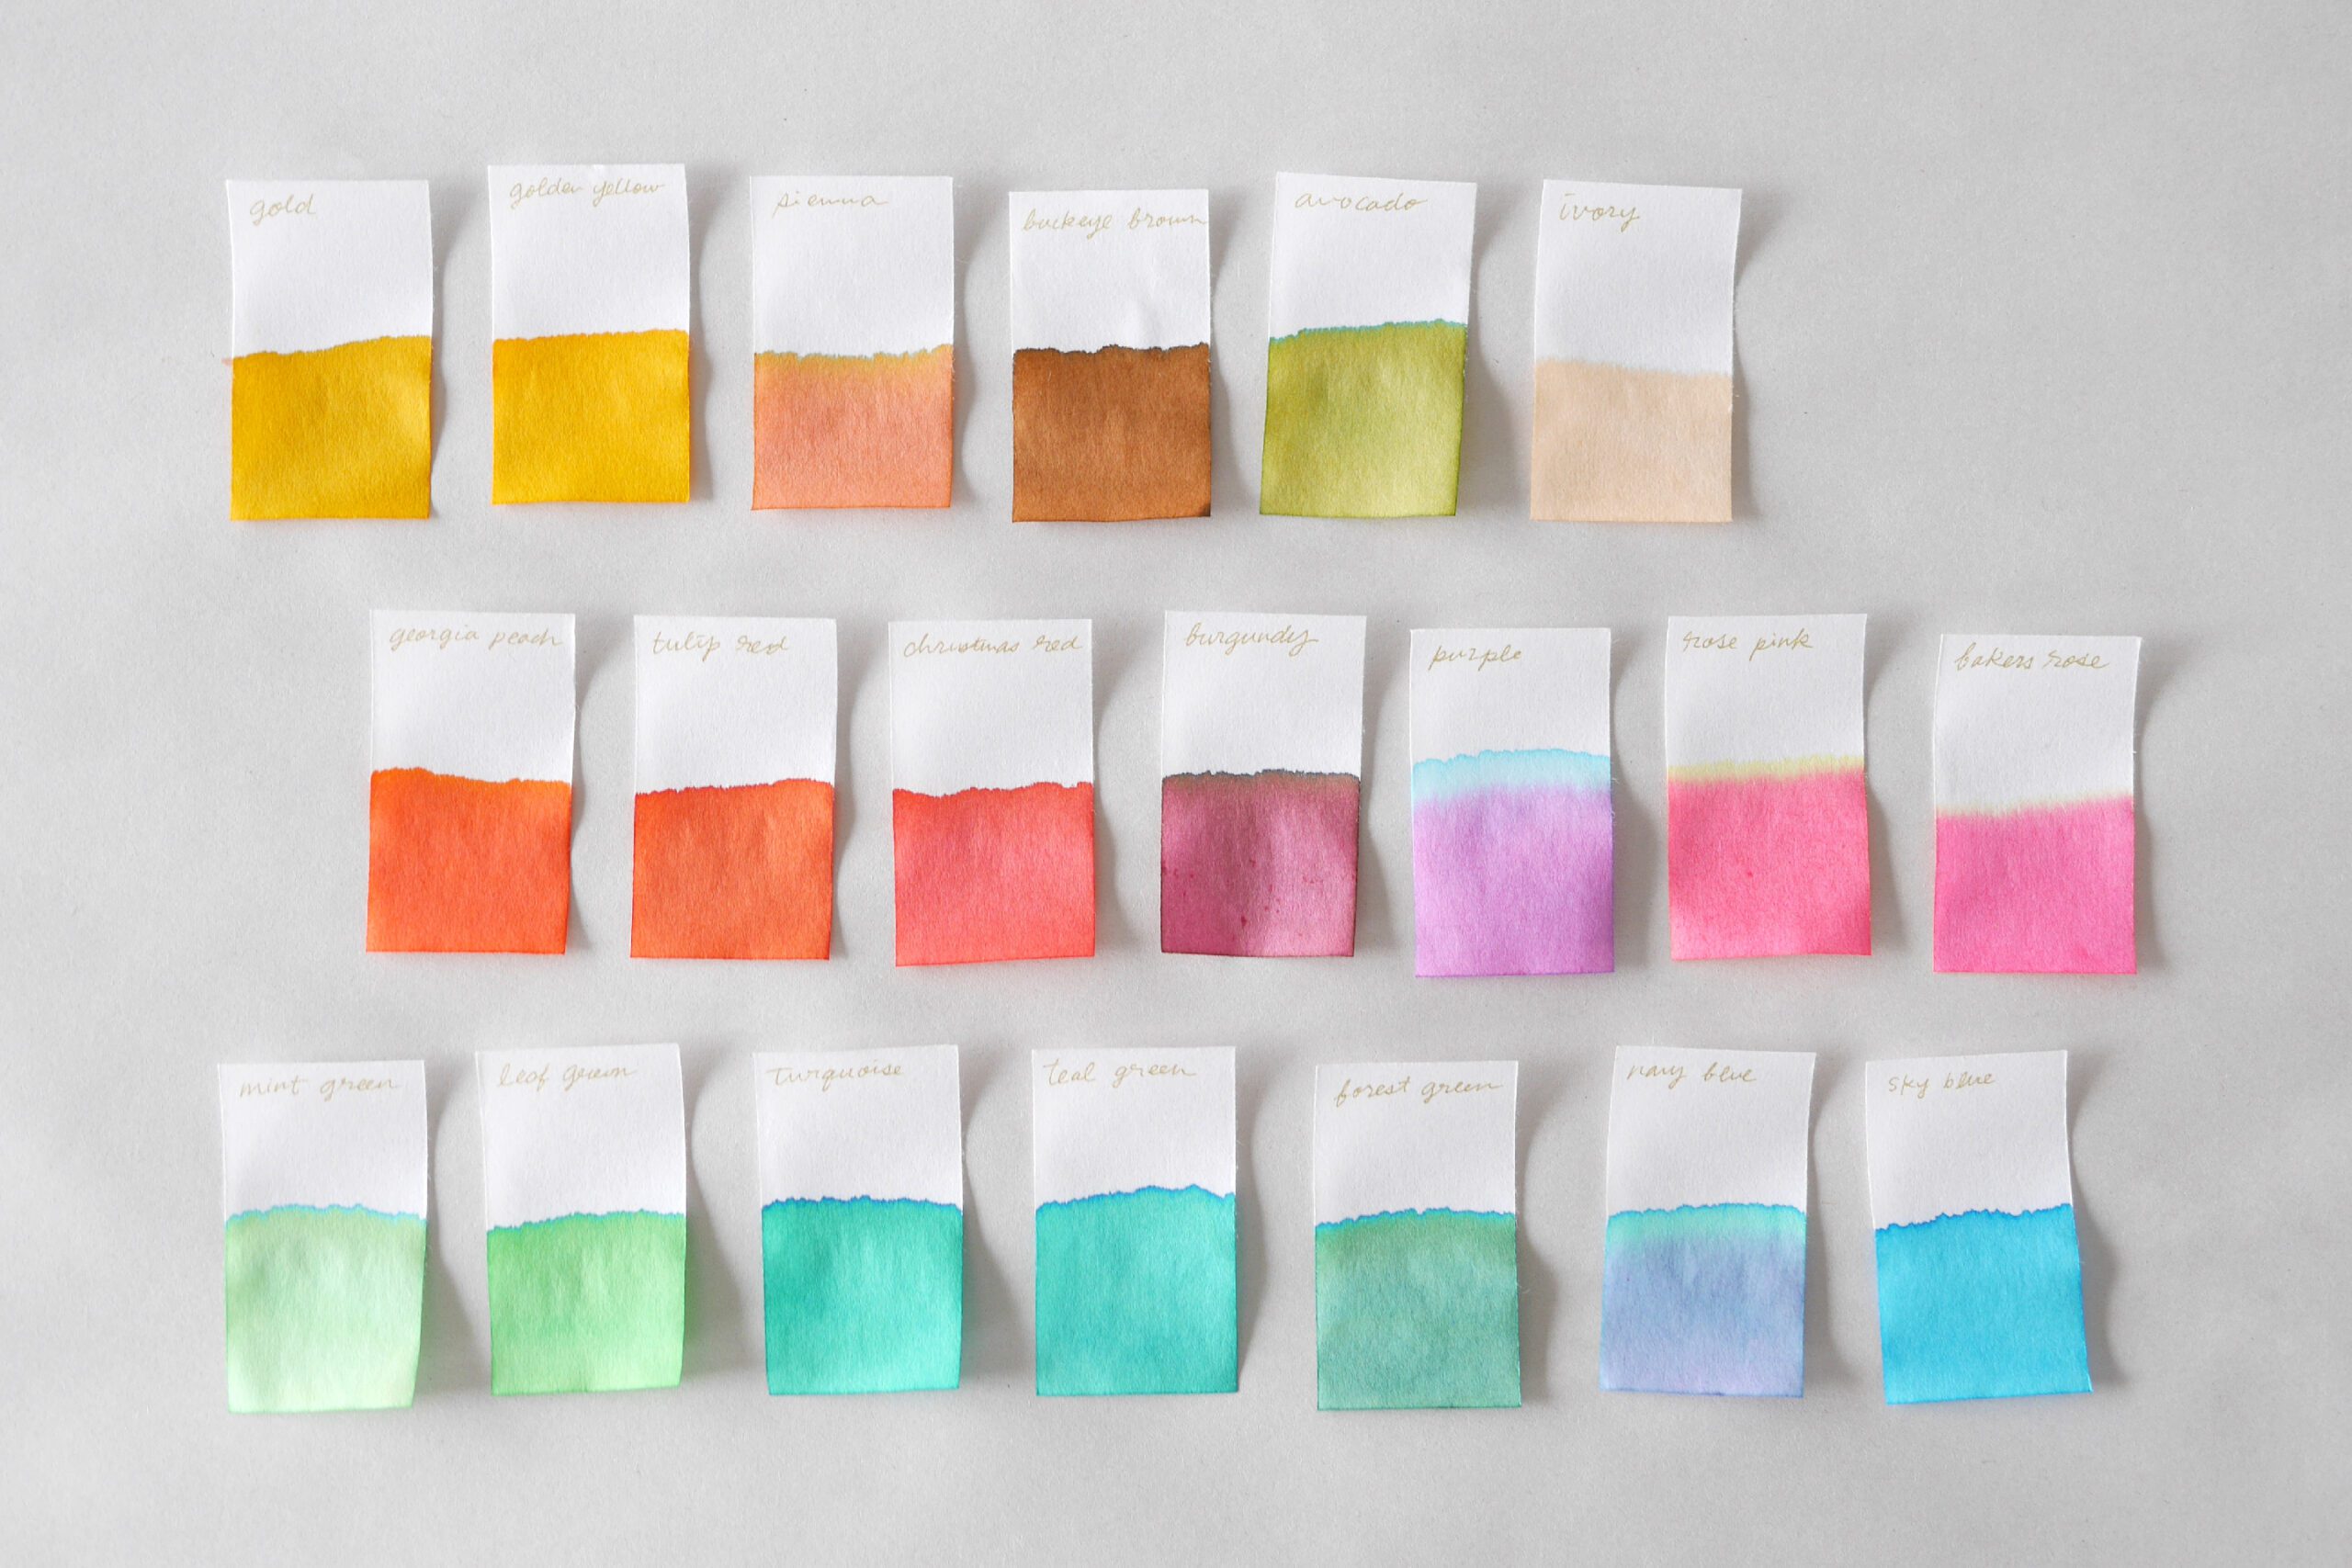
Color Chart of Food Color
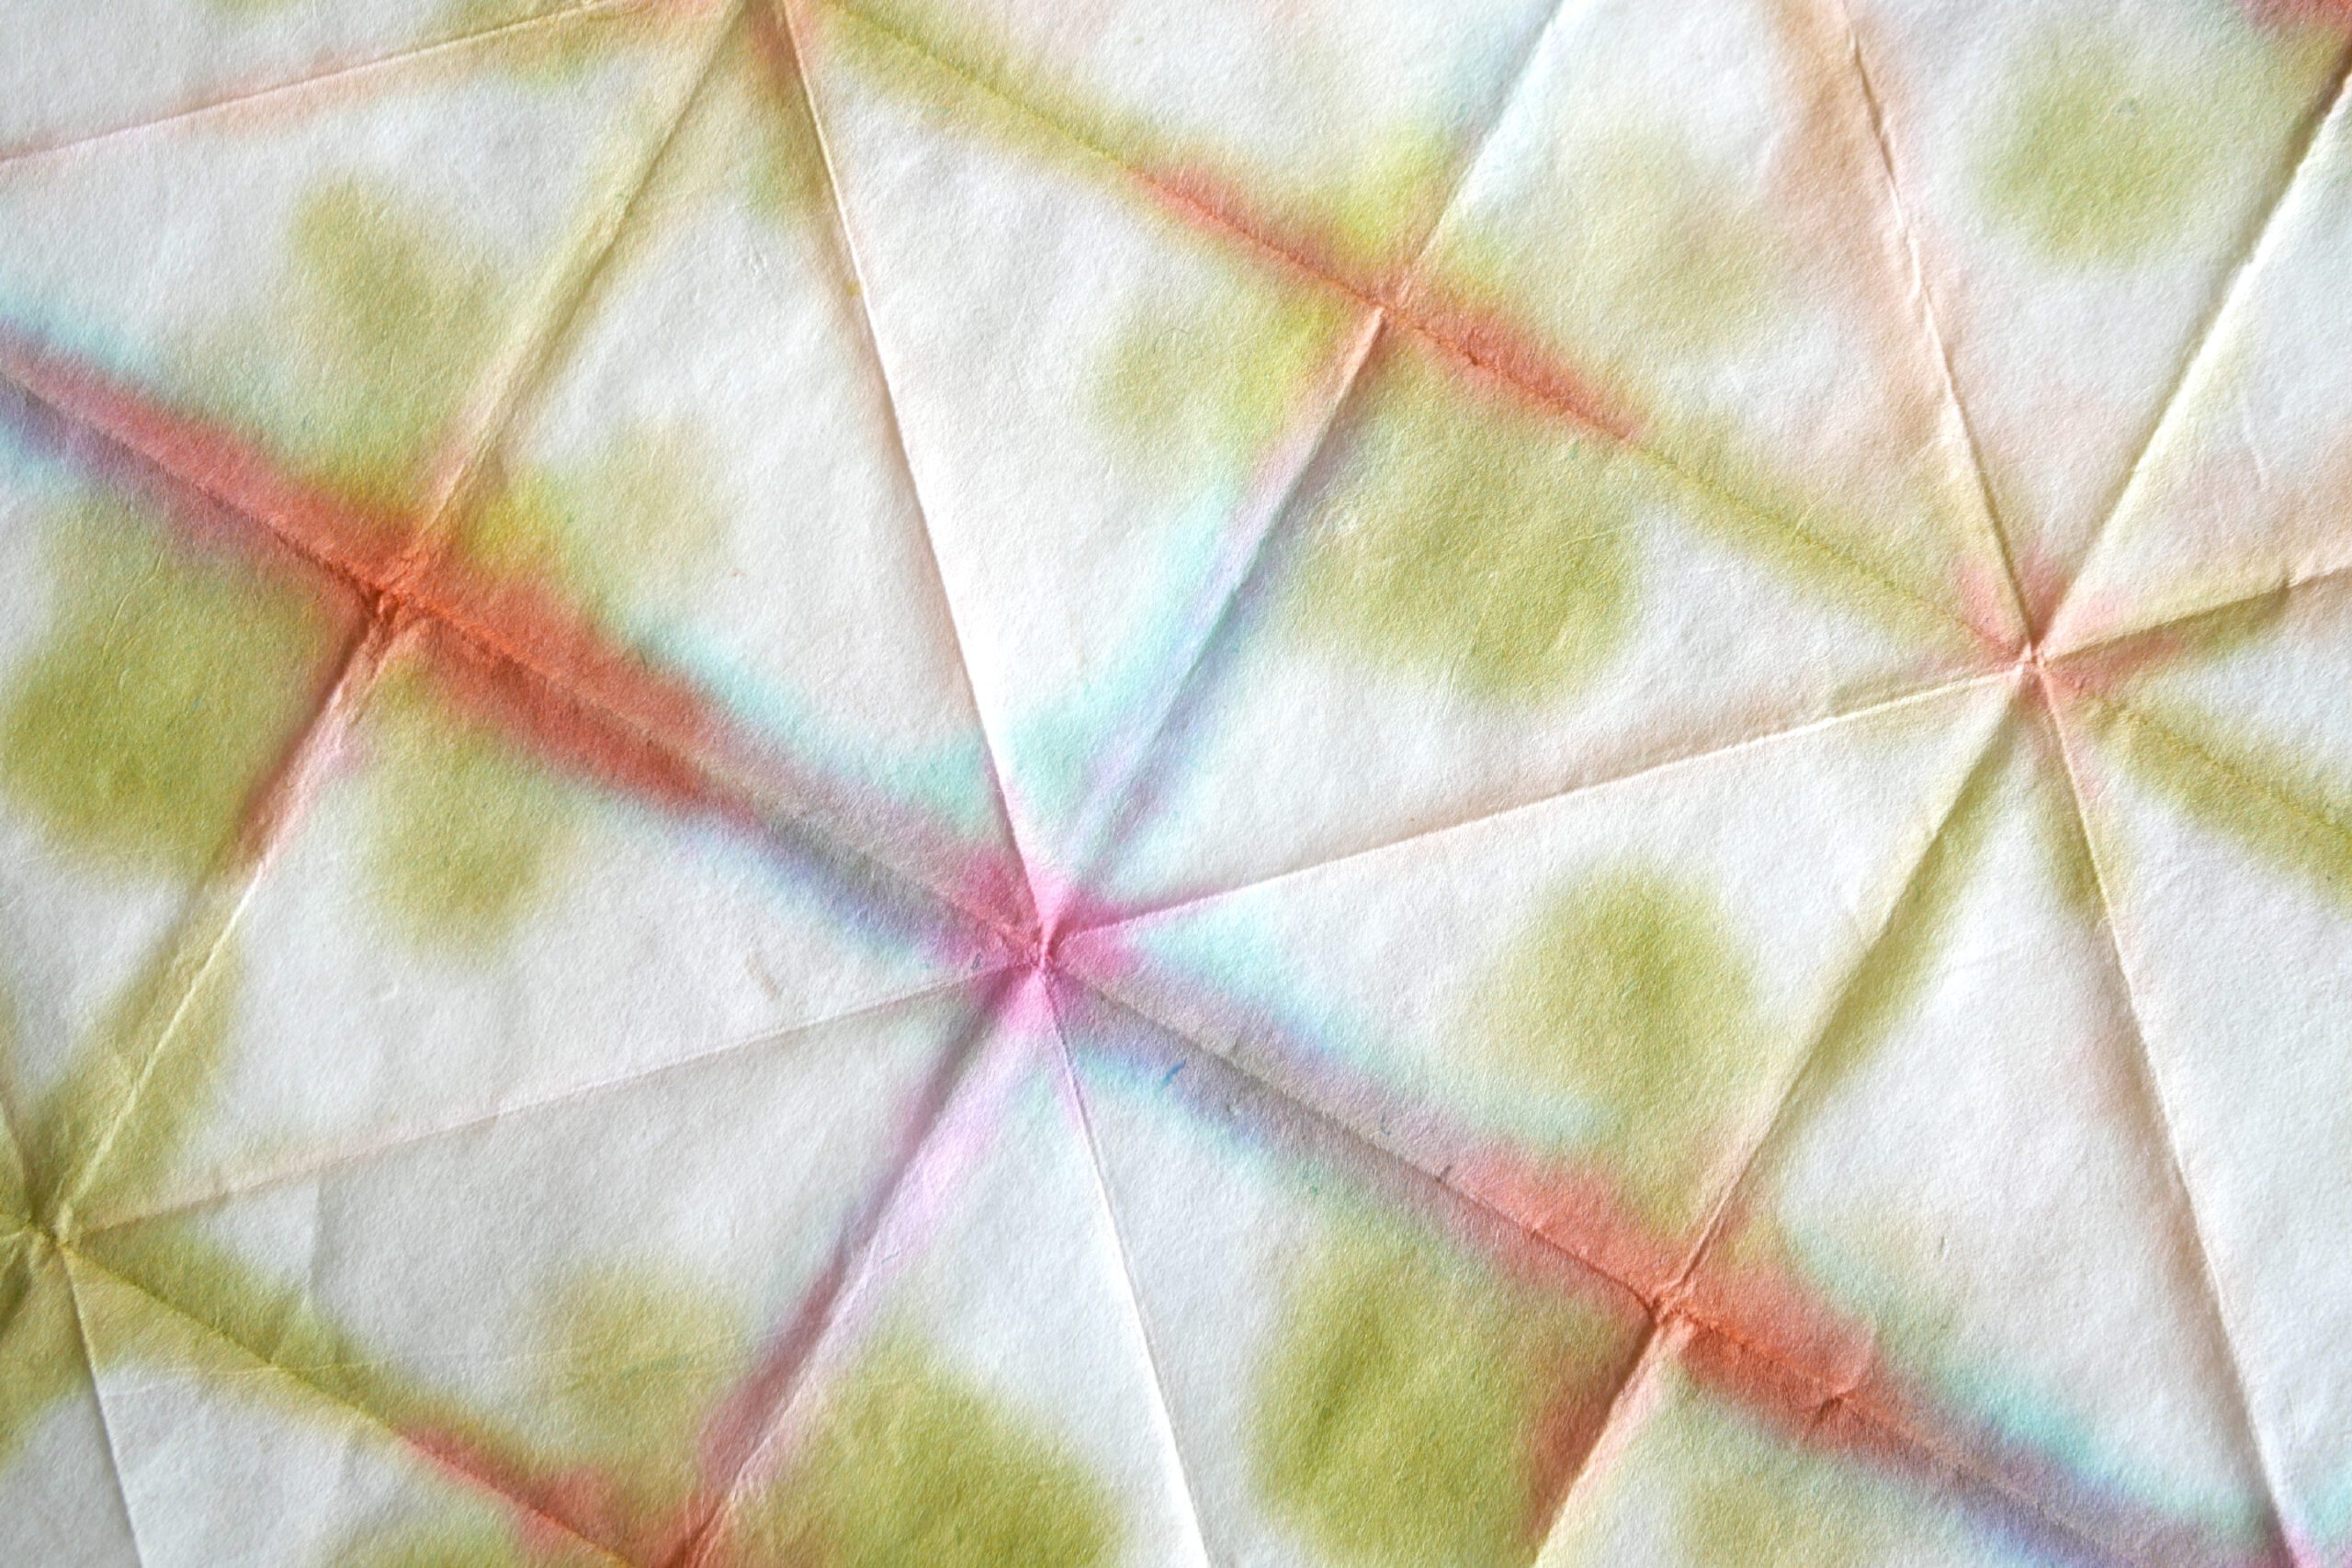
Here are the food colors I will be using; I tested a sample of 20 colors. This color chart shows the hue of each color as a single color. You don’t have to have all the colors, but just like with paints, you can combine colors to create a variety of colors.
An interesting point is that the purple, for example, was made by mixing red and blue, so the blue bled into the tips of the gradient. Rose pink, on closer inspection, has yellow blotches. Some colors produce this kind of gradation expression, so I felt it was interesting to see the subtle nuances of color in the dyed result.
Instructions for making
Step 1. Paper Preparation
For paper folding instructions, please check here for more details. Triangle, square…the dyed pattern will change depending on how you fold it. Soak the folded paper in water and squeeze out excess water. Soaking the paper in water allows the ink to bleed easily and the colors to spread naturally.
Step 2. Ink Preparation
Put a small amount of food color in a cup and dilute it with about 10 times as much water. Mix well so that the gel ink dissolves completely in the water.
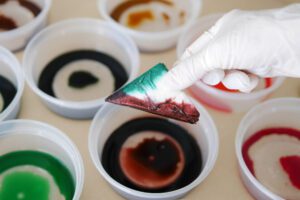
Step 3. Dye
Each side of the paper is dipped in a different color. After dyeing, excess water is pressed down with paper towel, then the dyed paper is carefully opened.


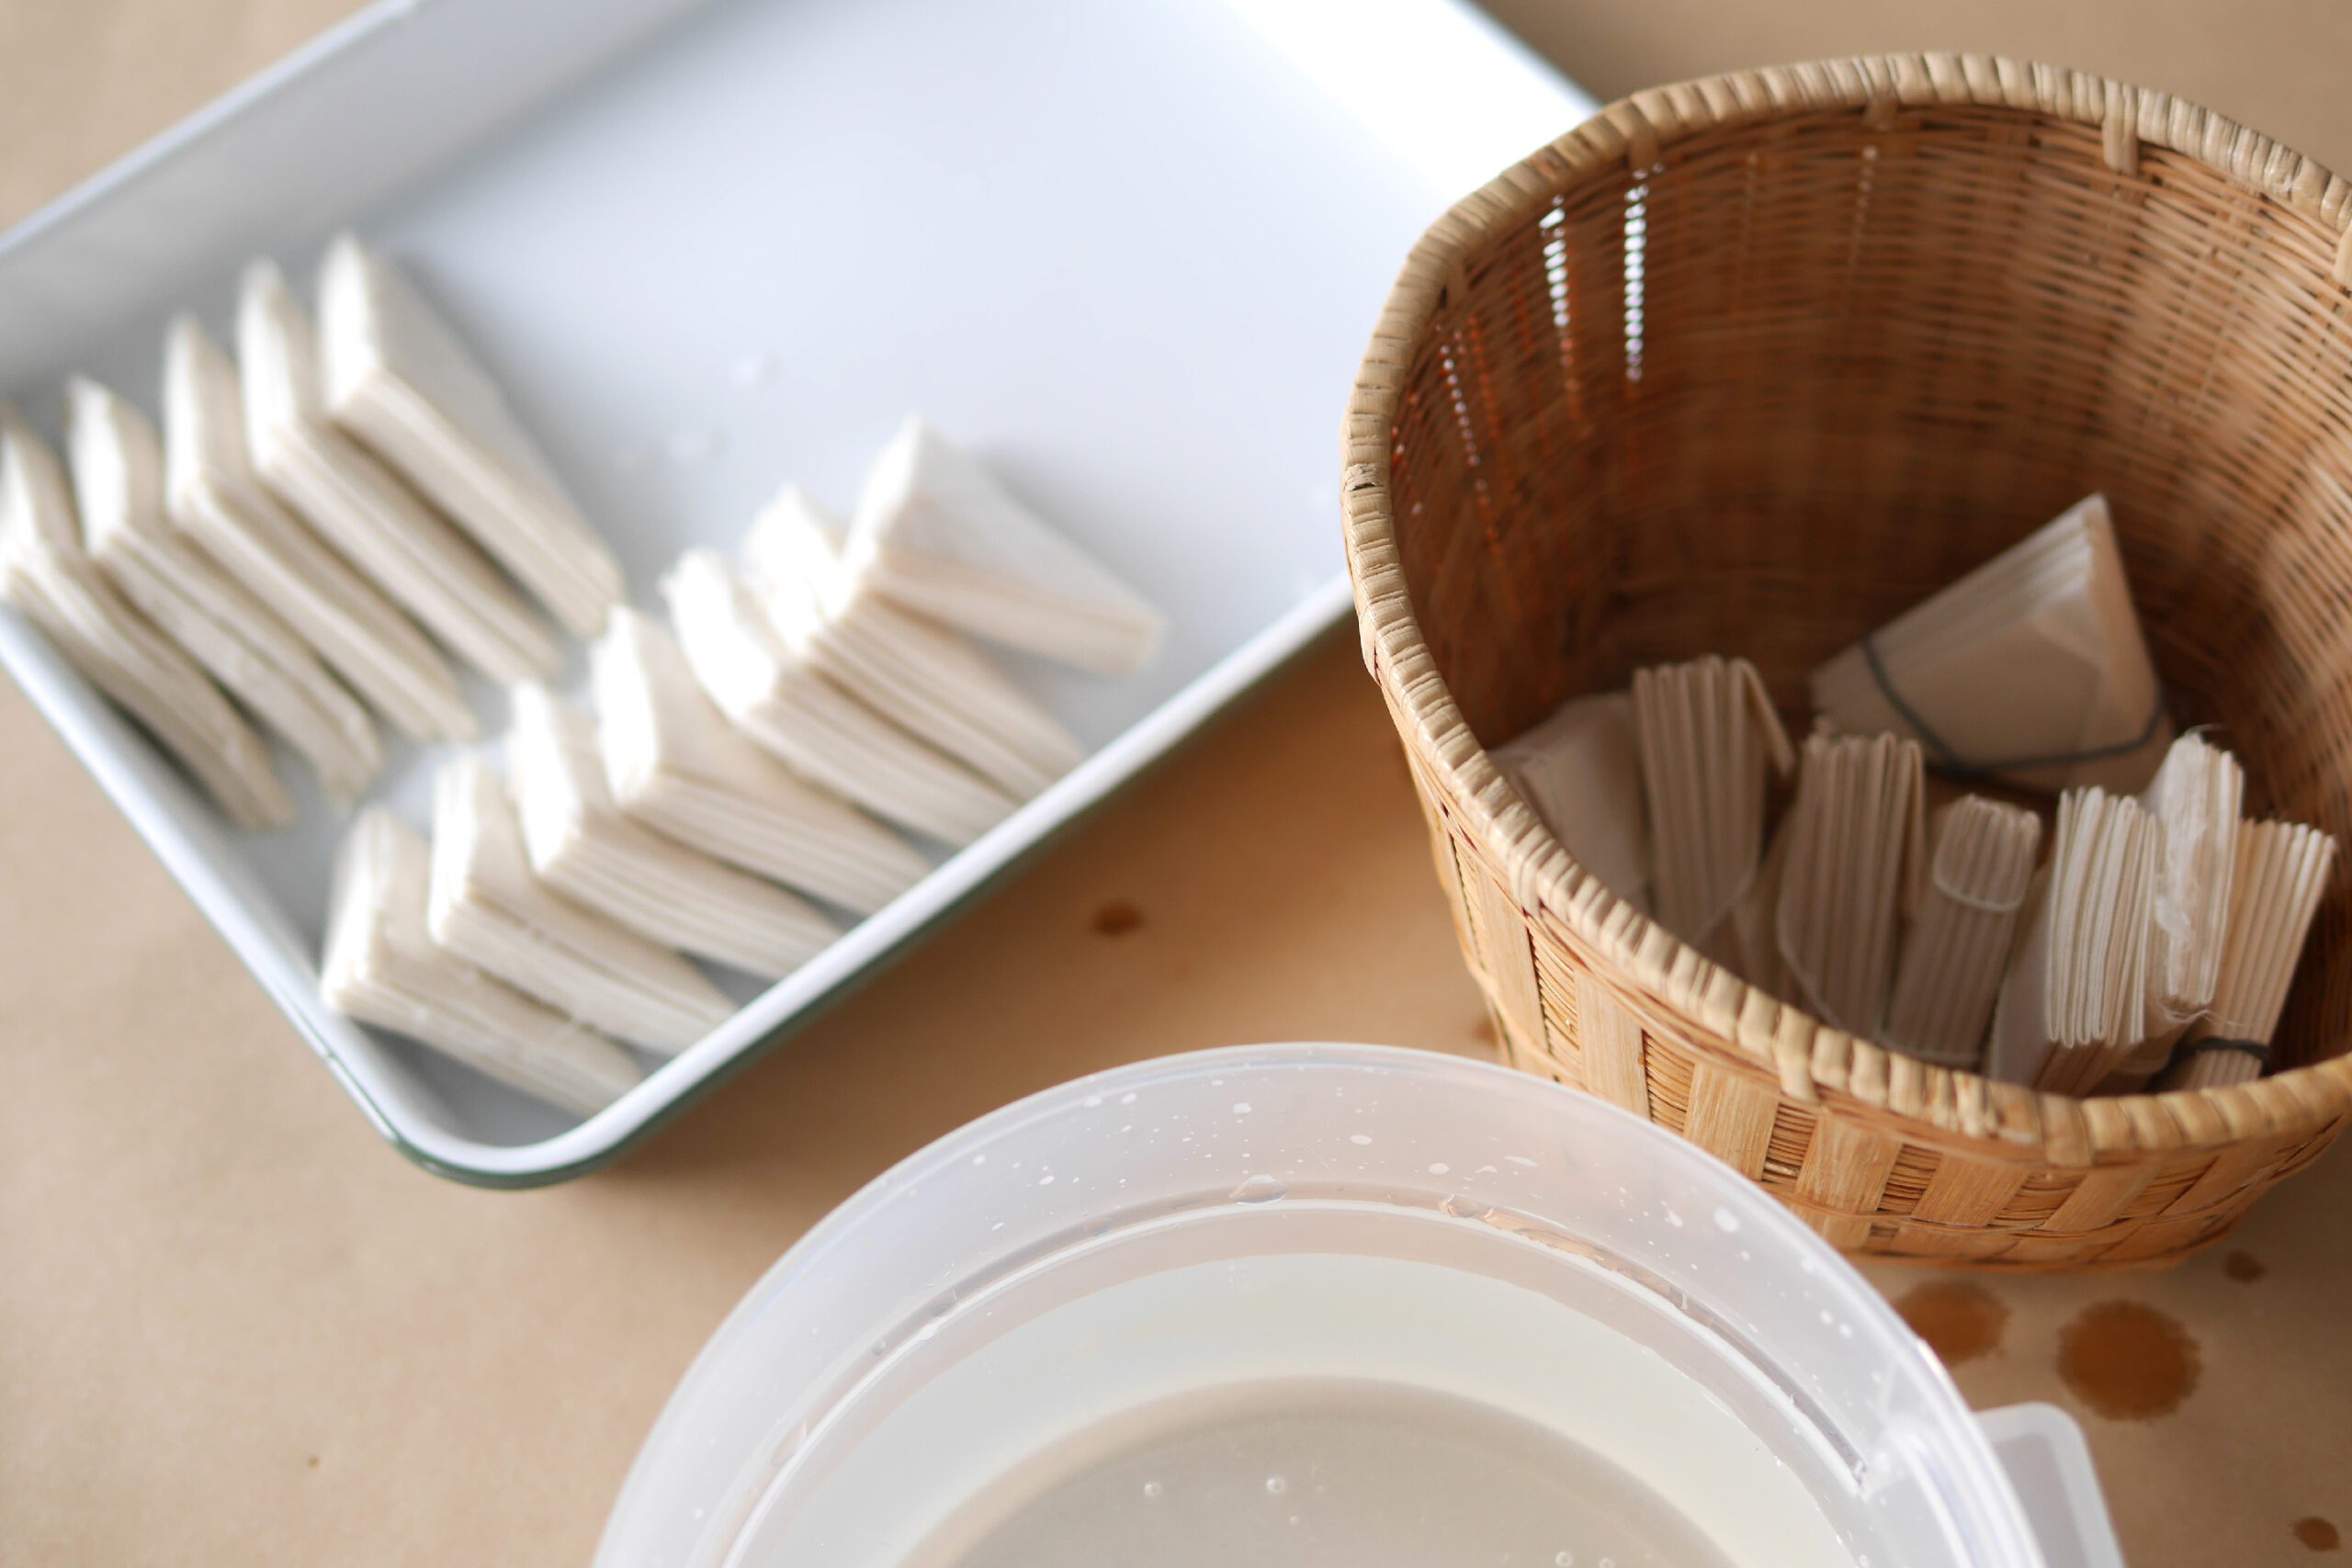
Step 4. Dryness
Place the dyed paper on a flat surface to dry. As it dries, the color will settle and the density will be shallower than when wet.
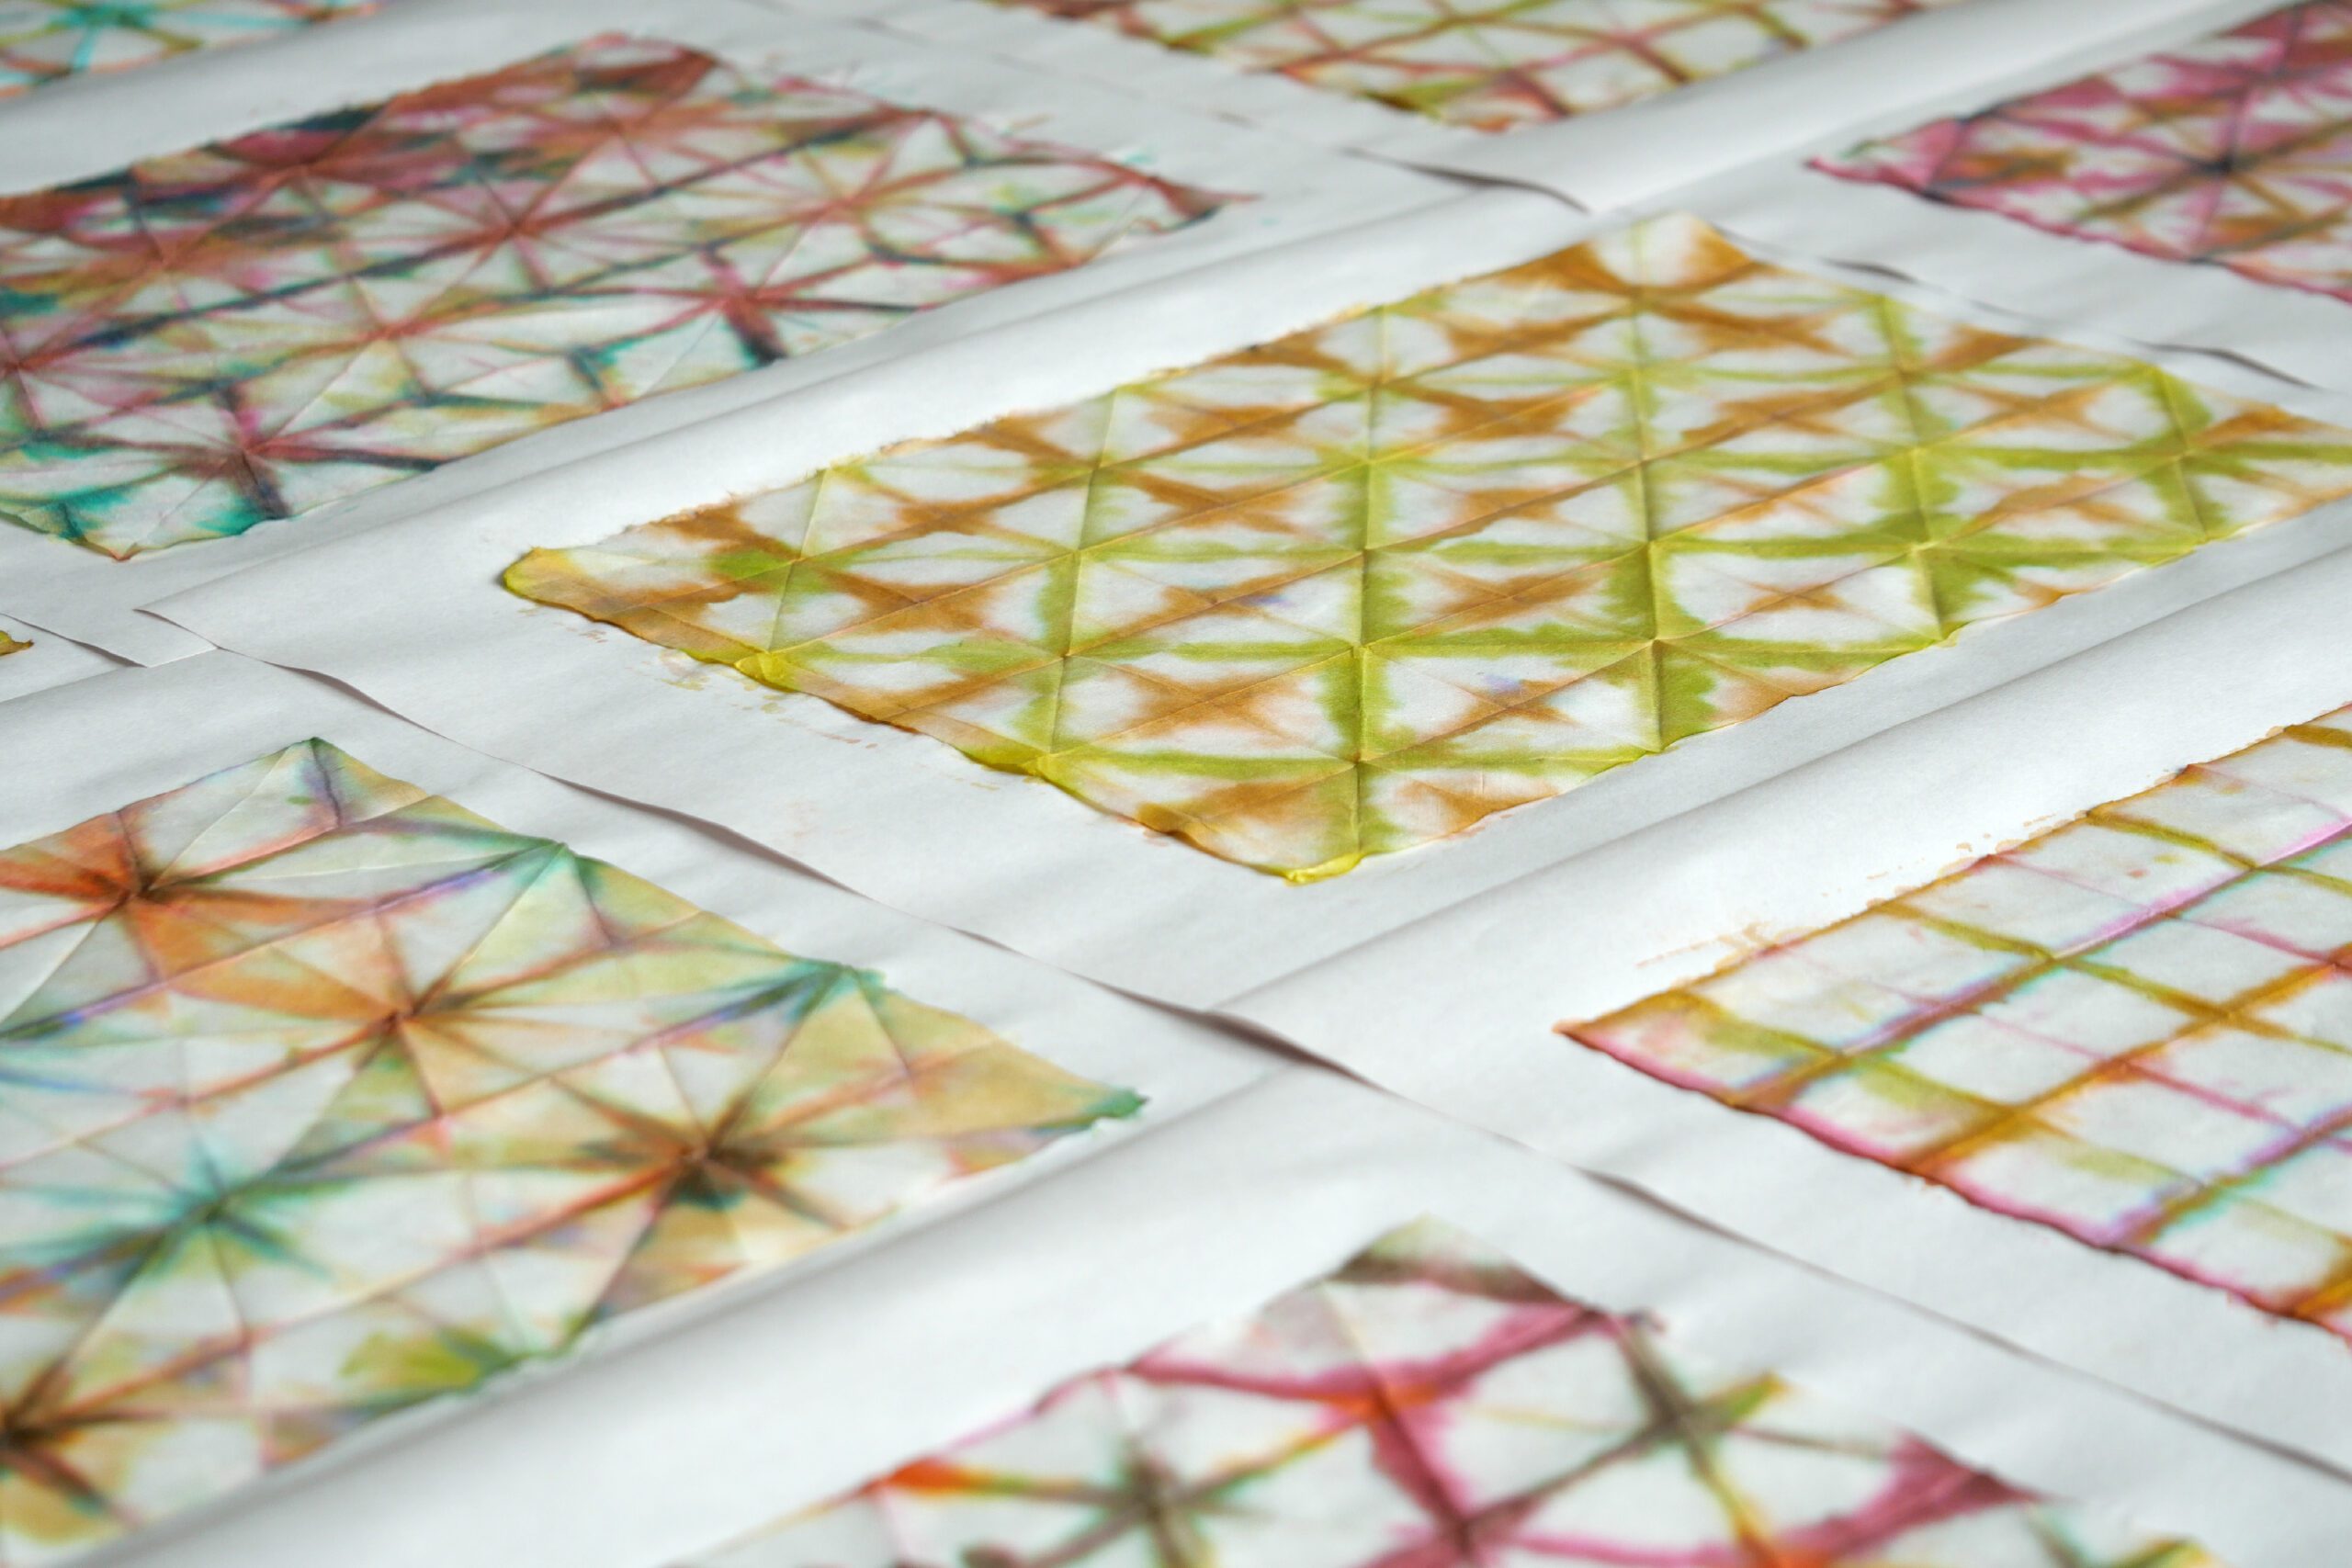
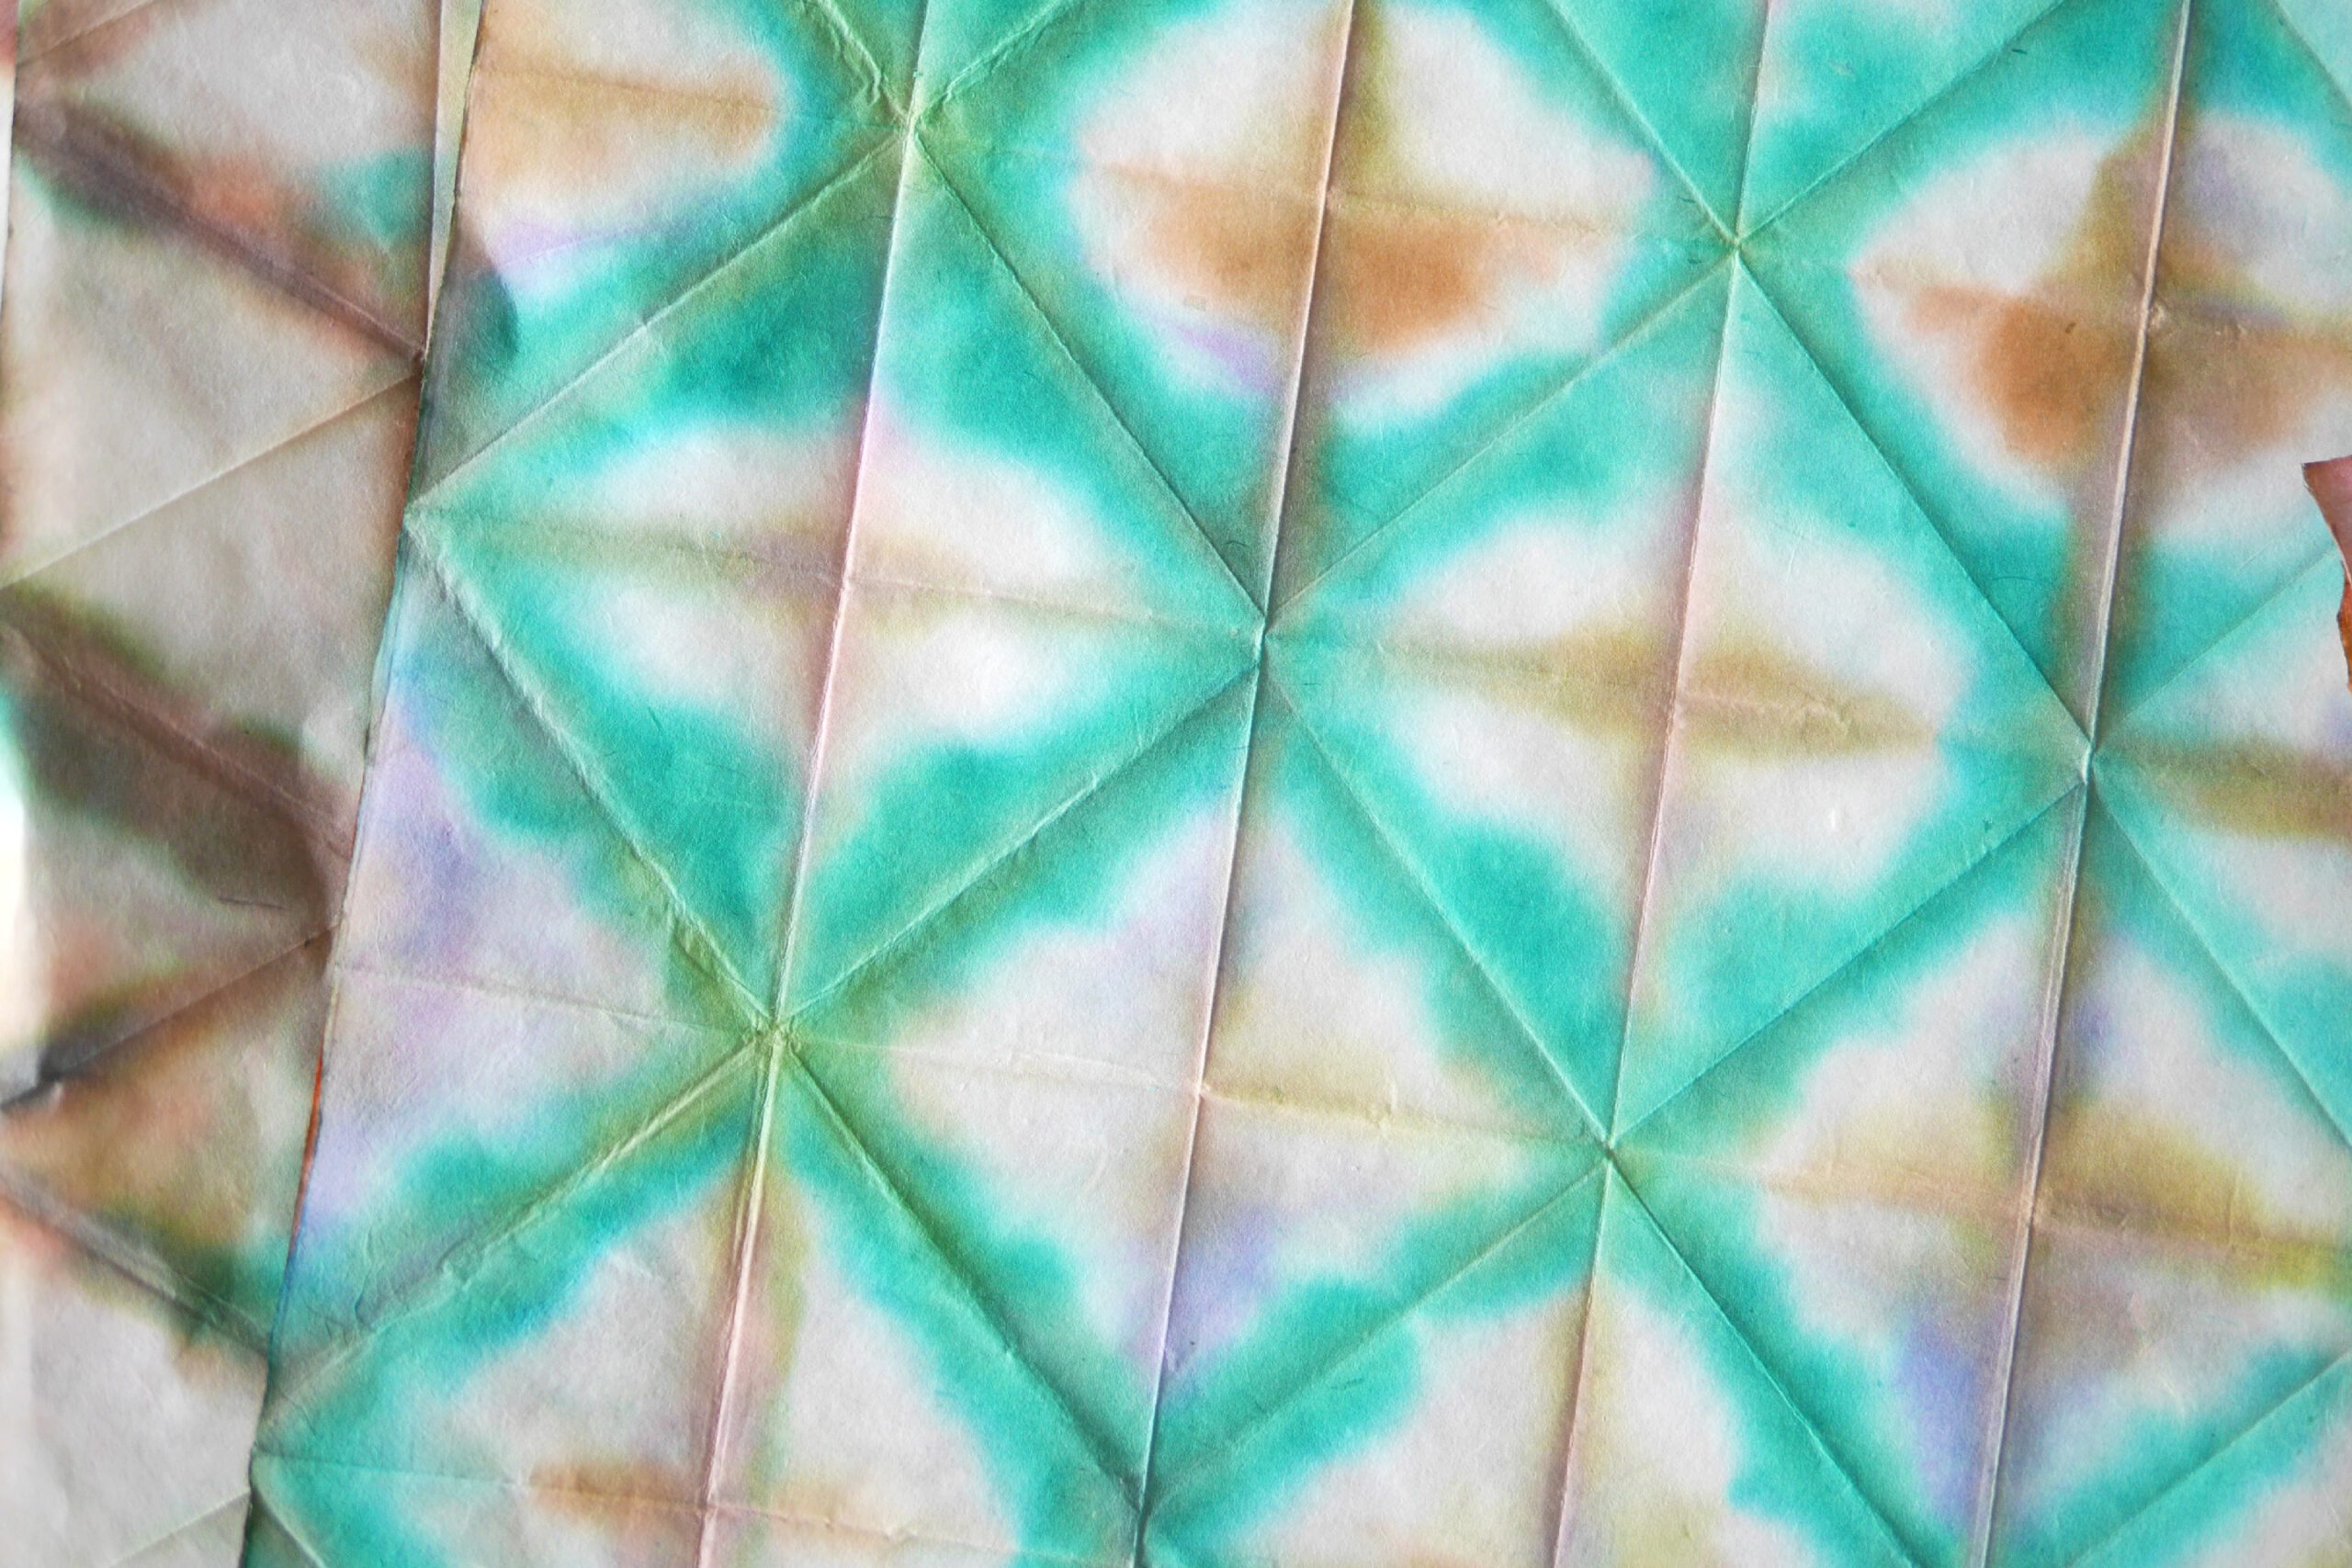
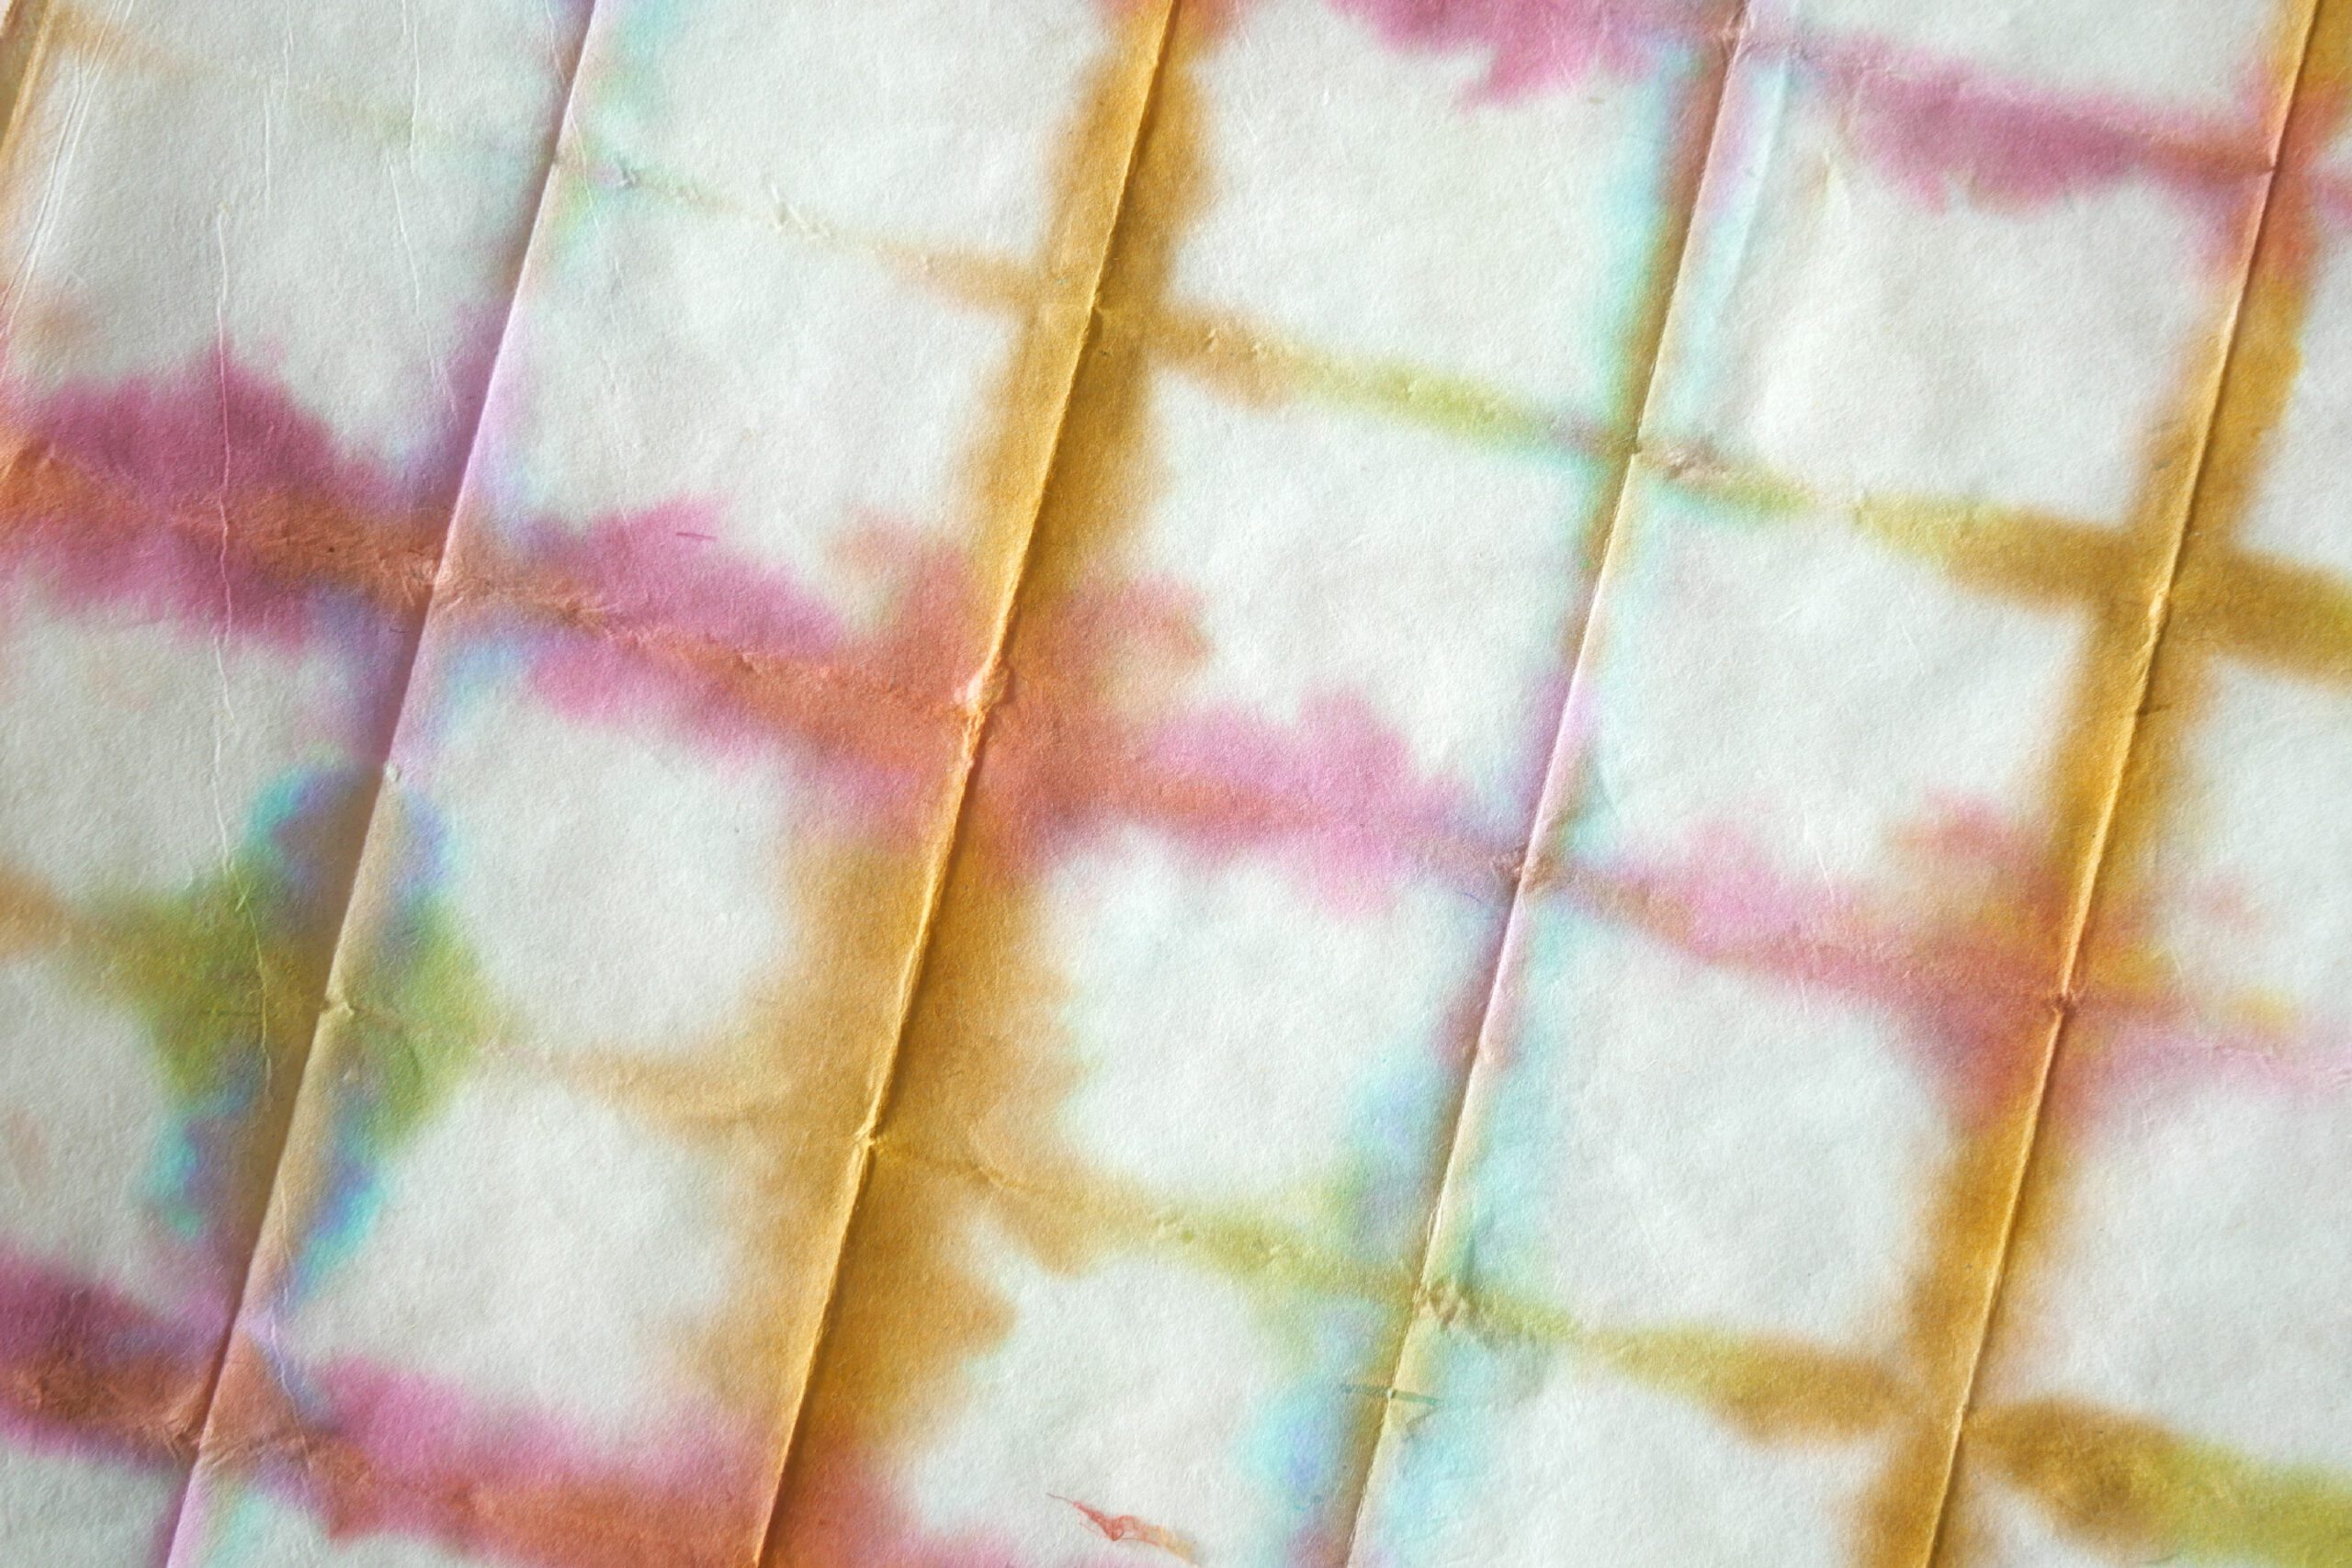
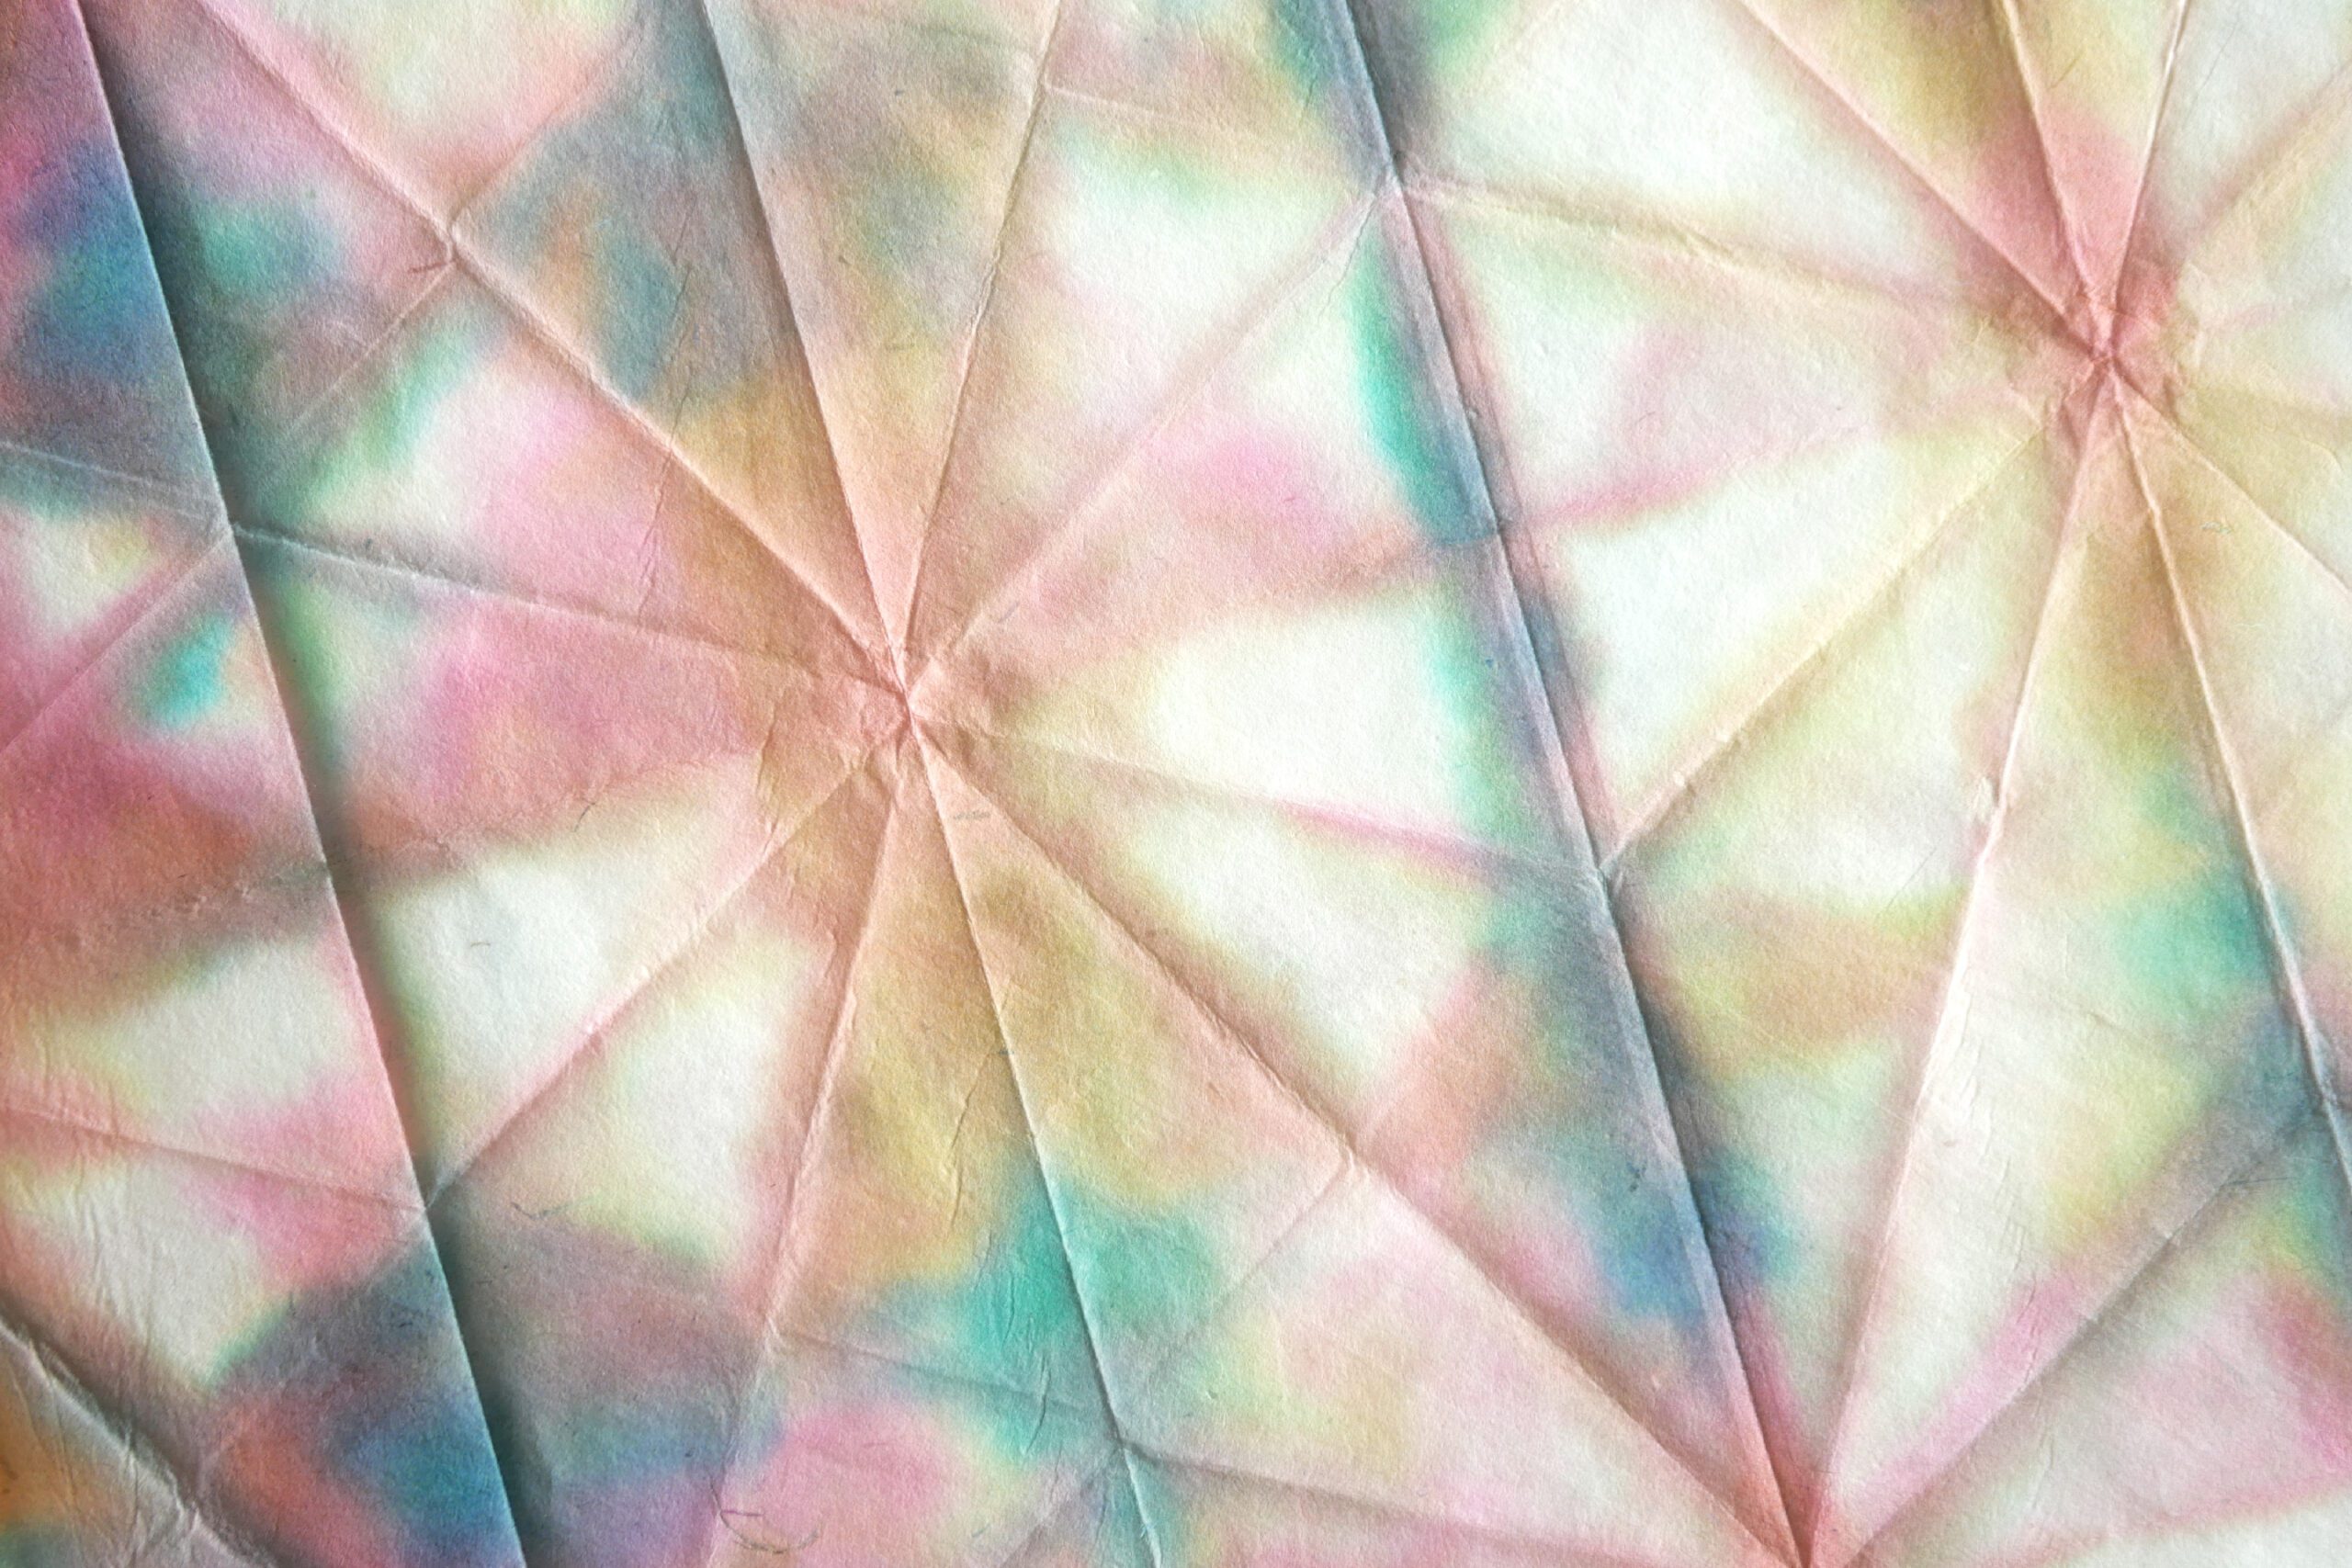
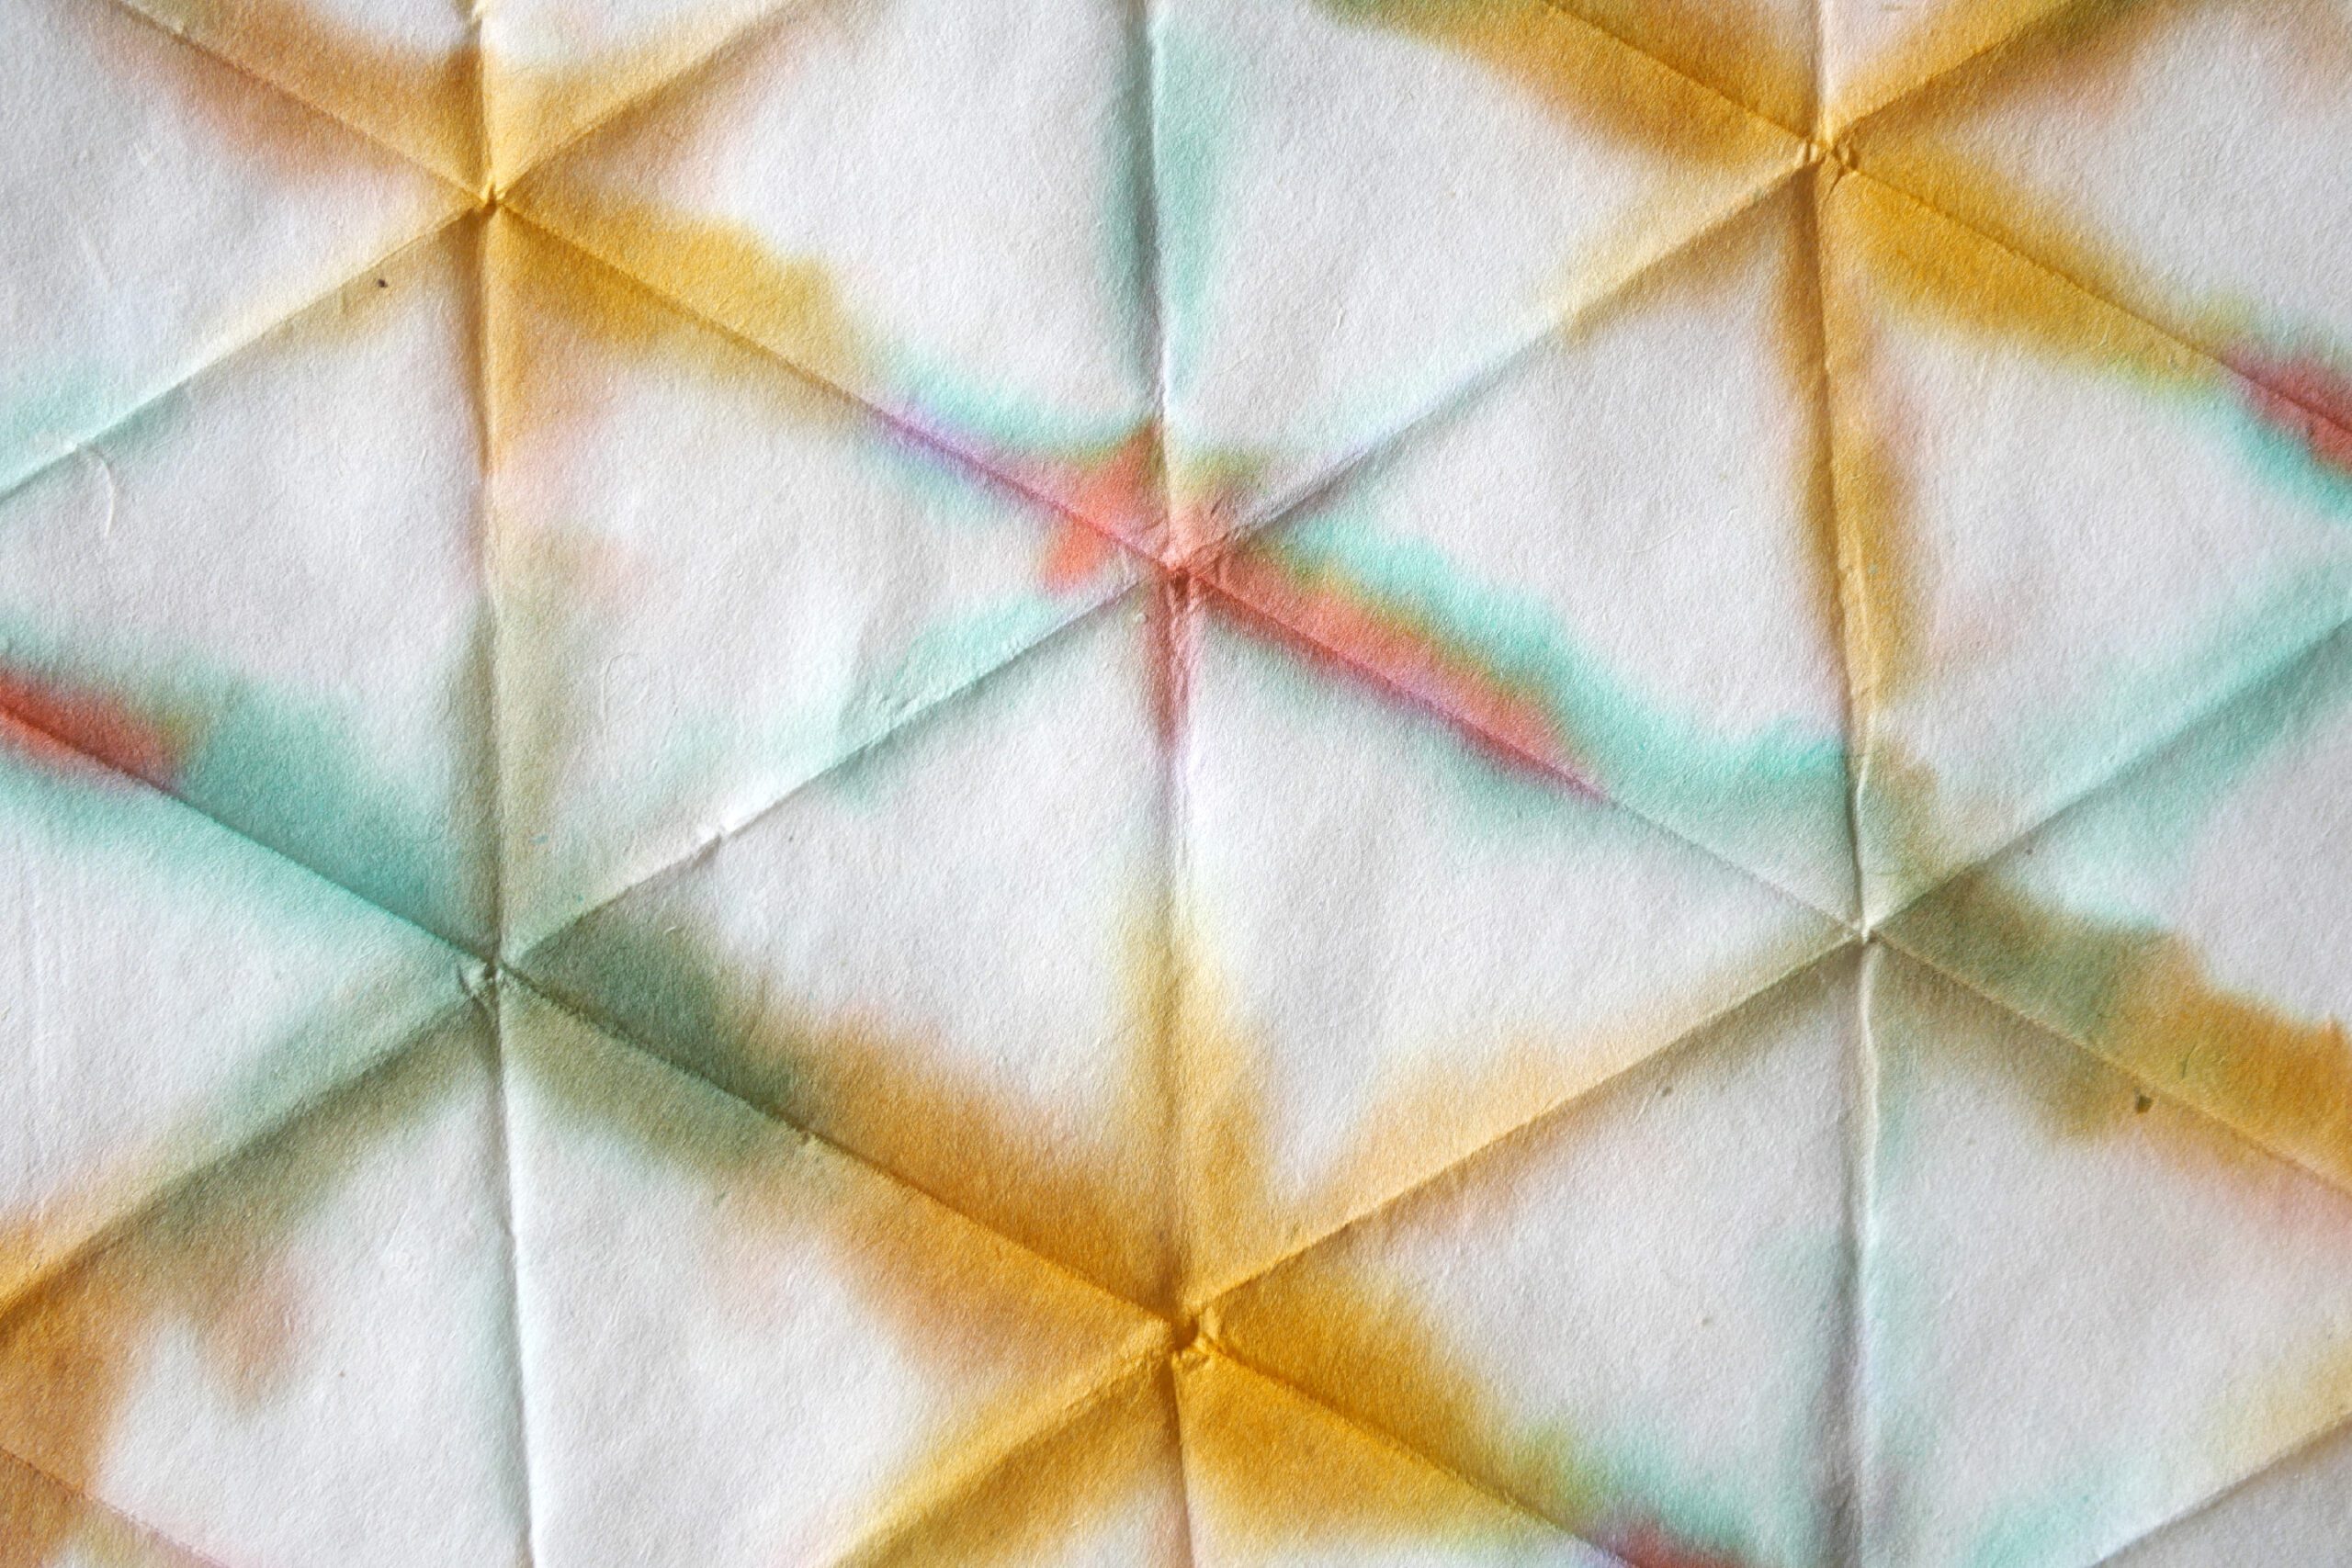
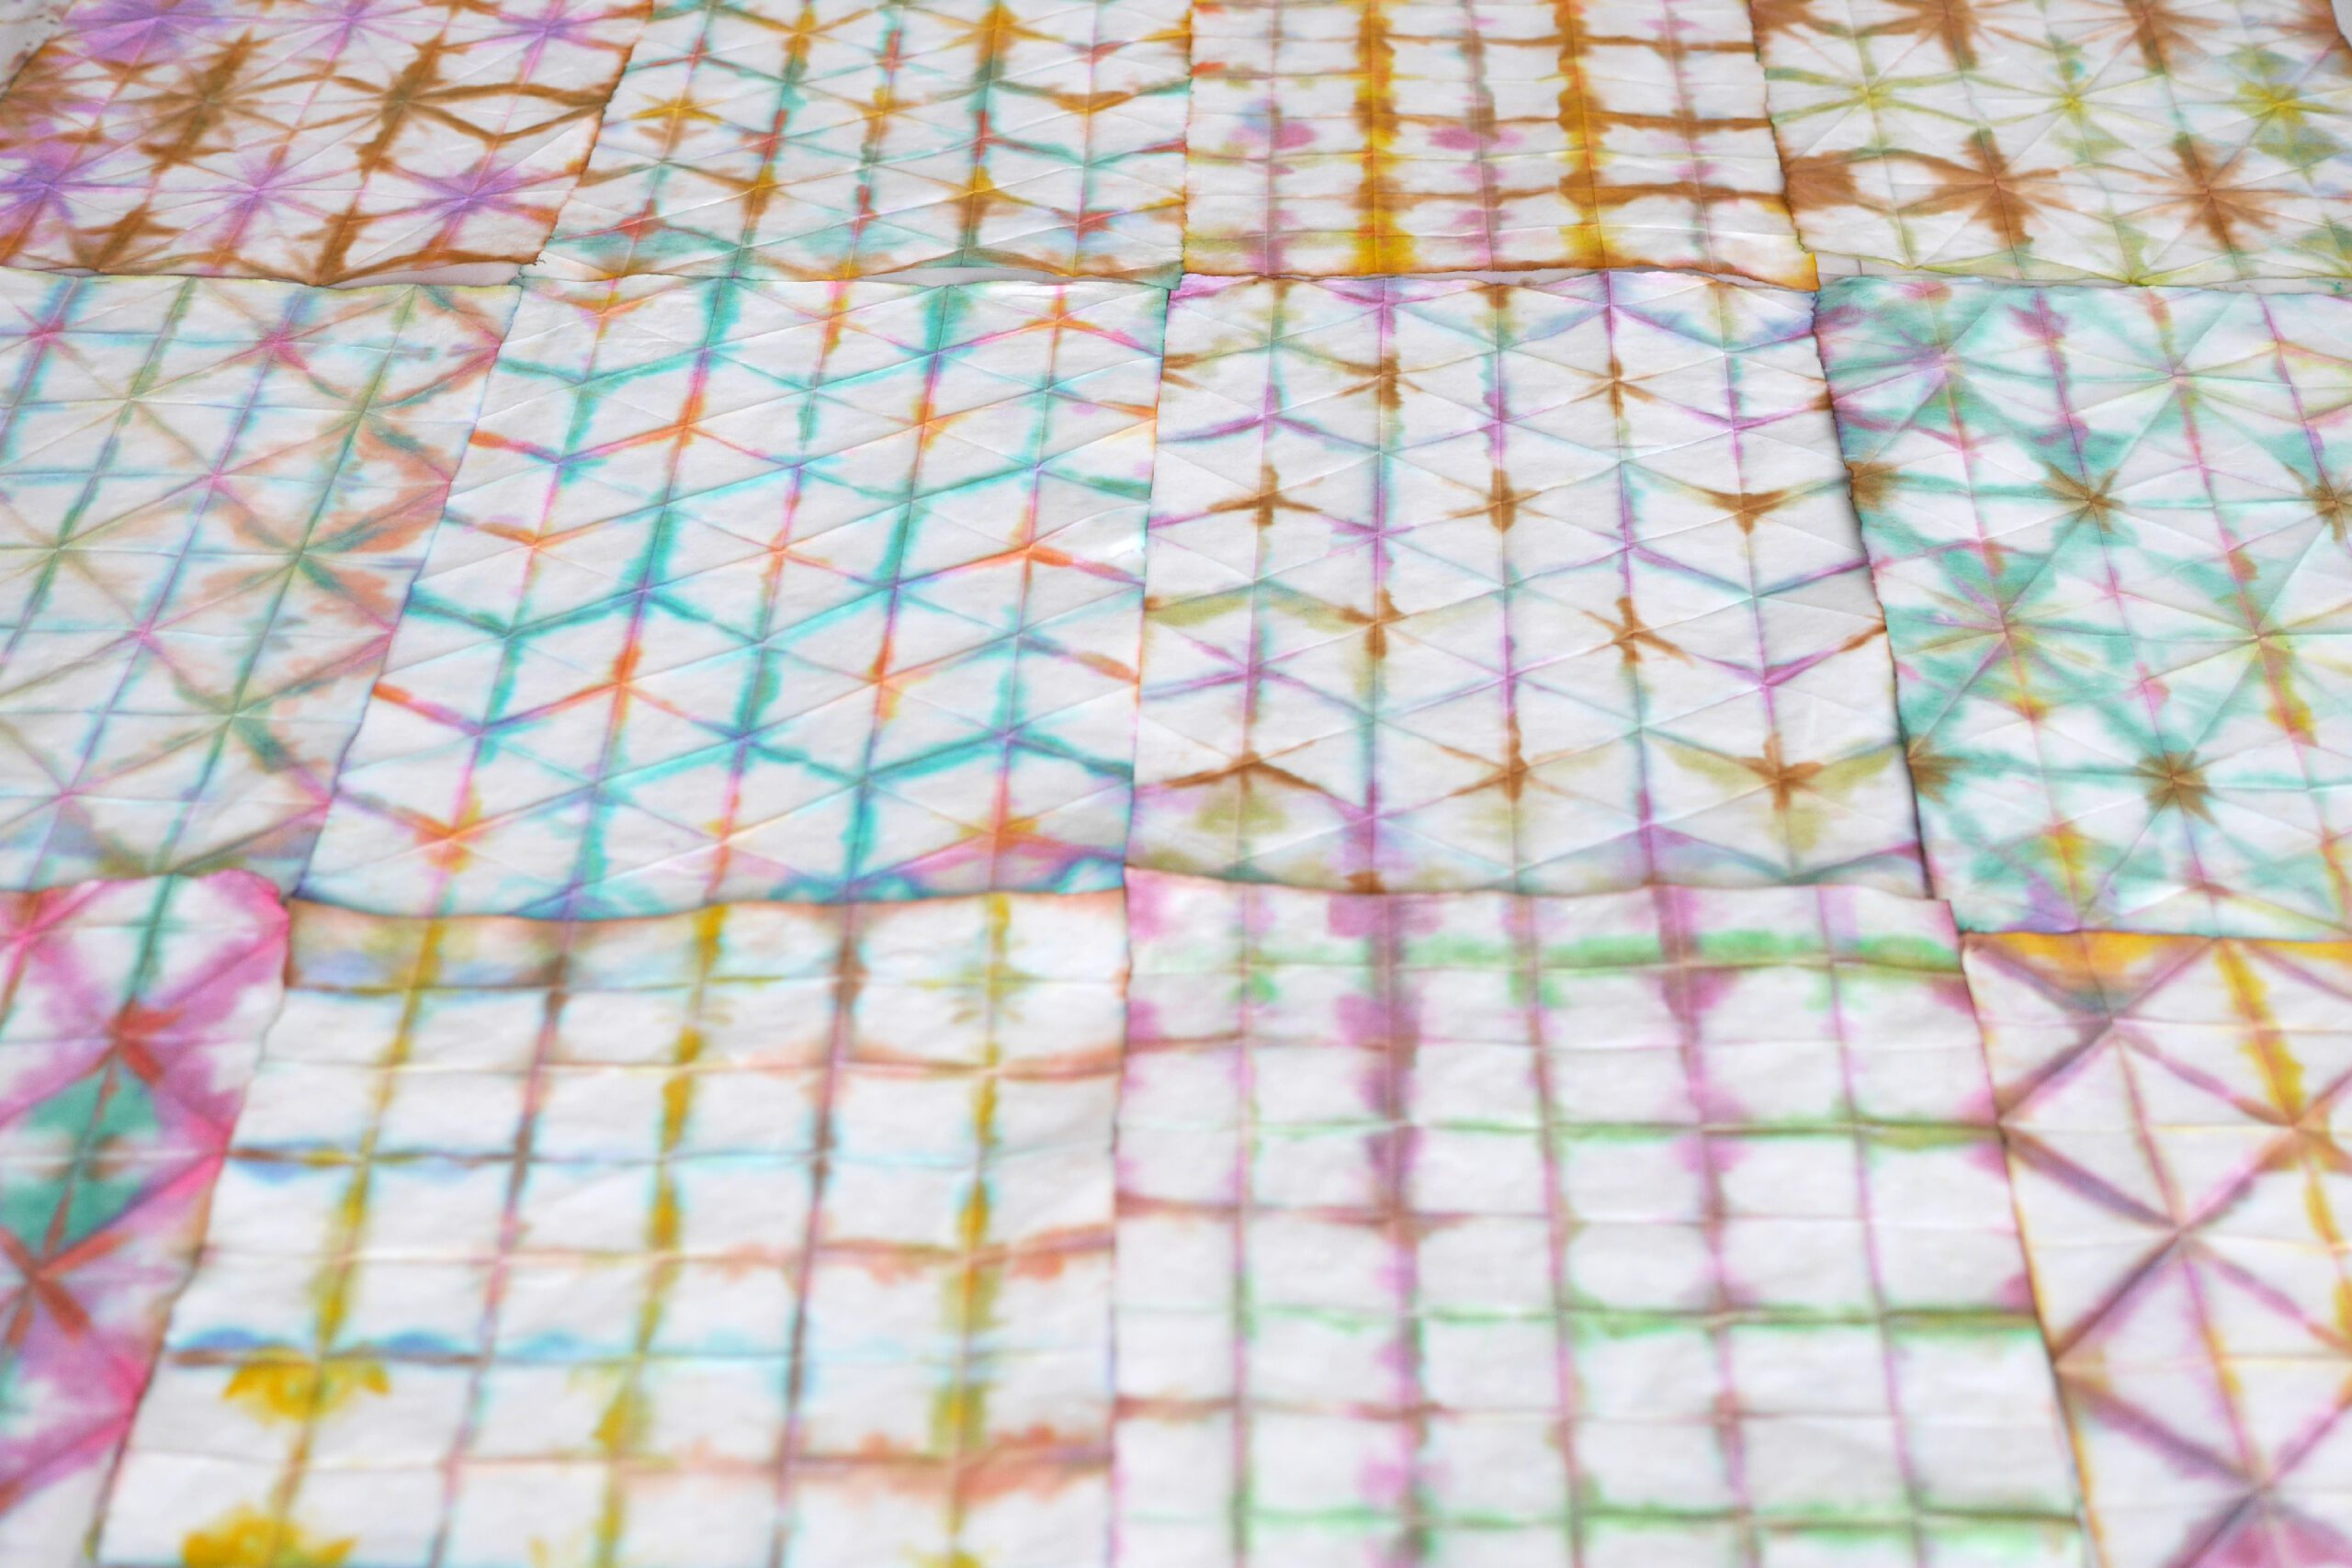
Color Variations
Once the ink has run to the edges, pull the paper up from the cup and allow it to dry. When it is completely dry, it is finished.
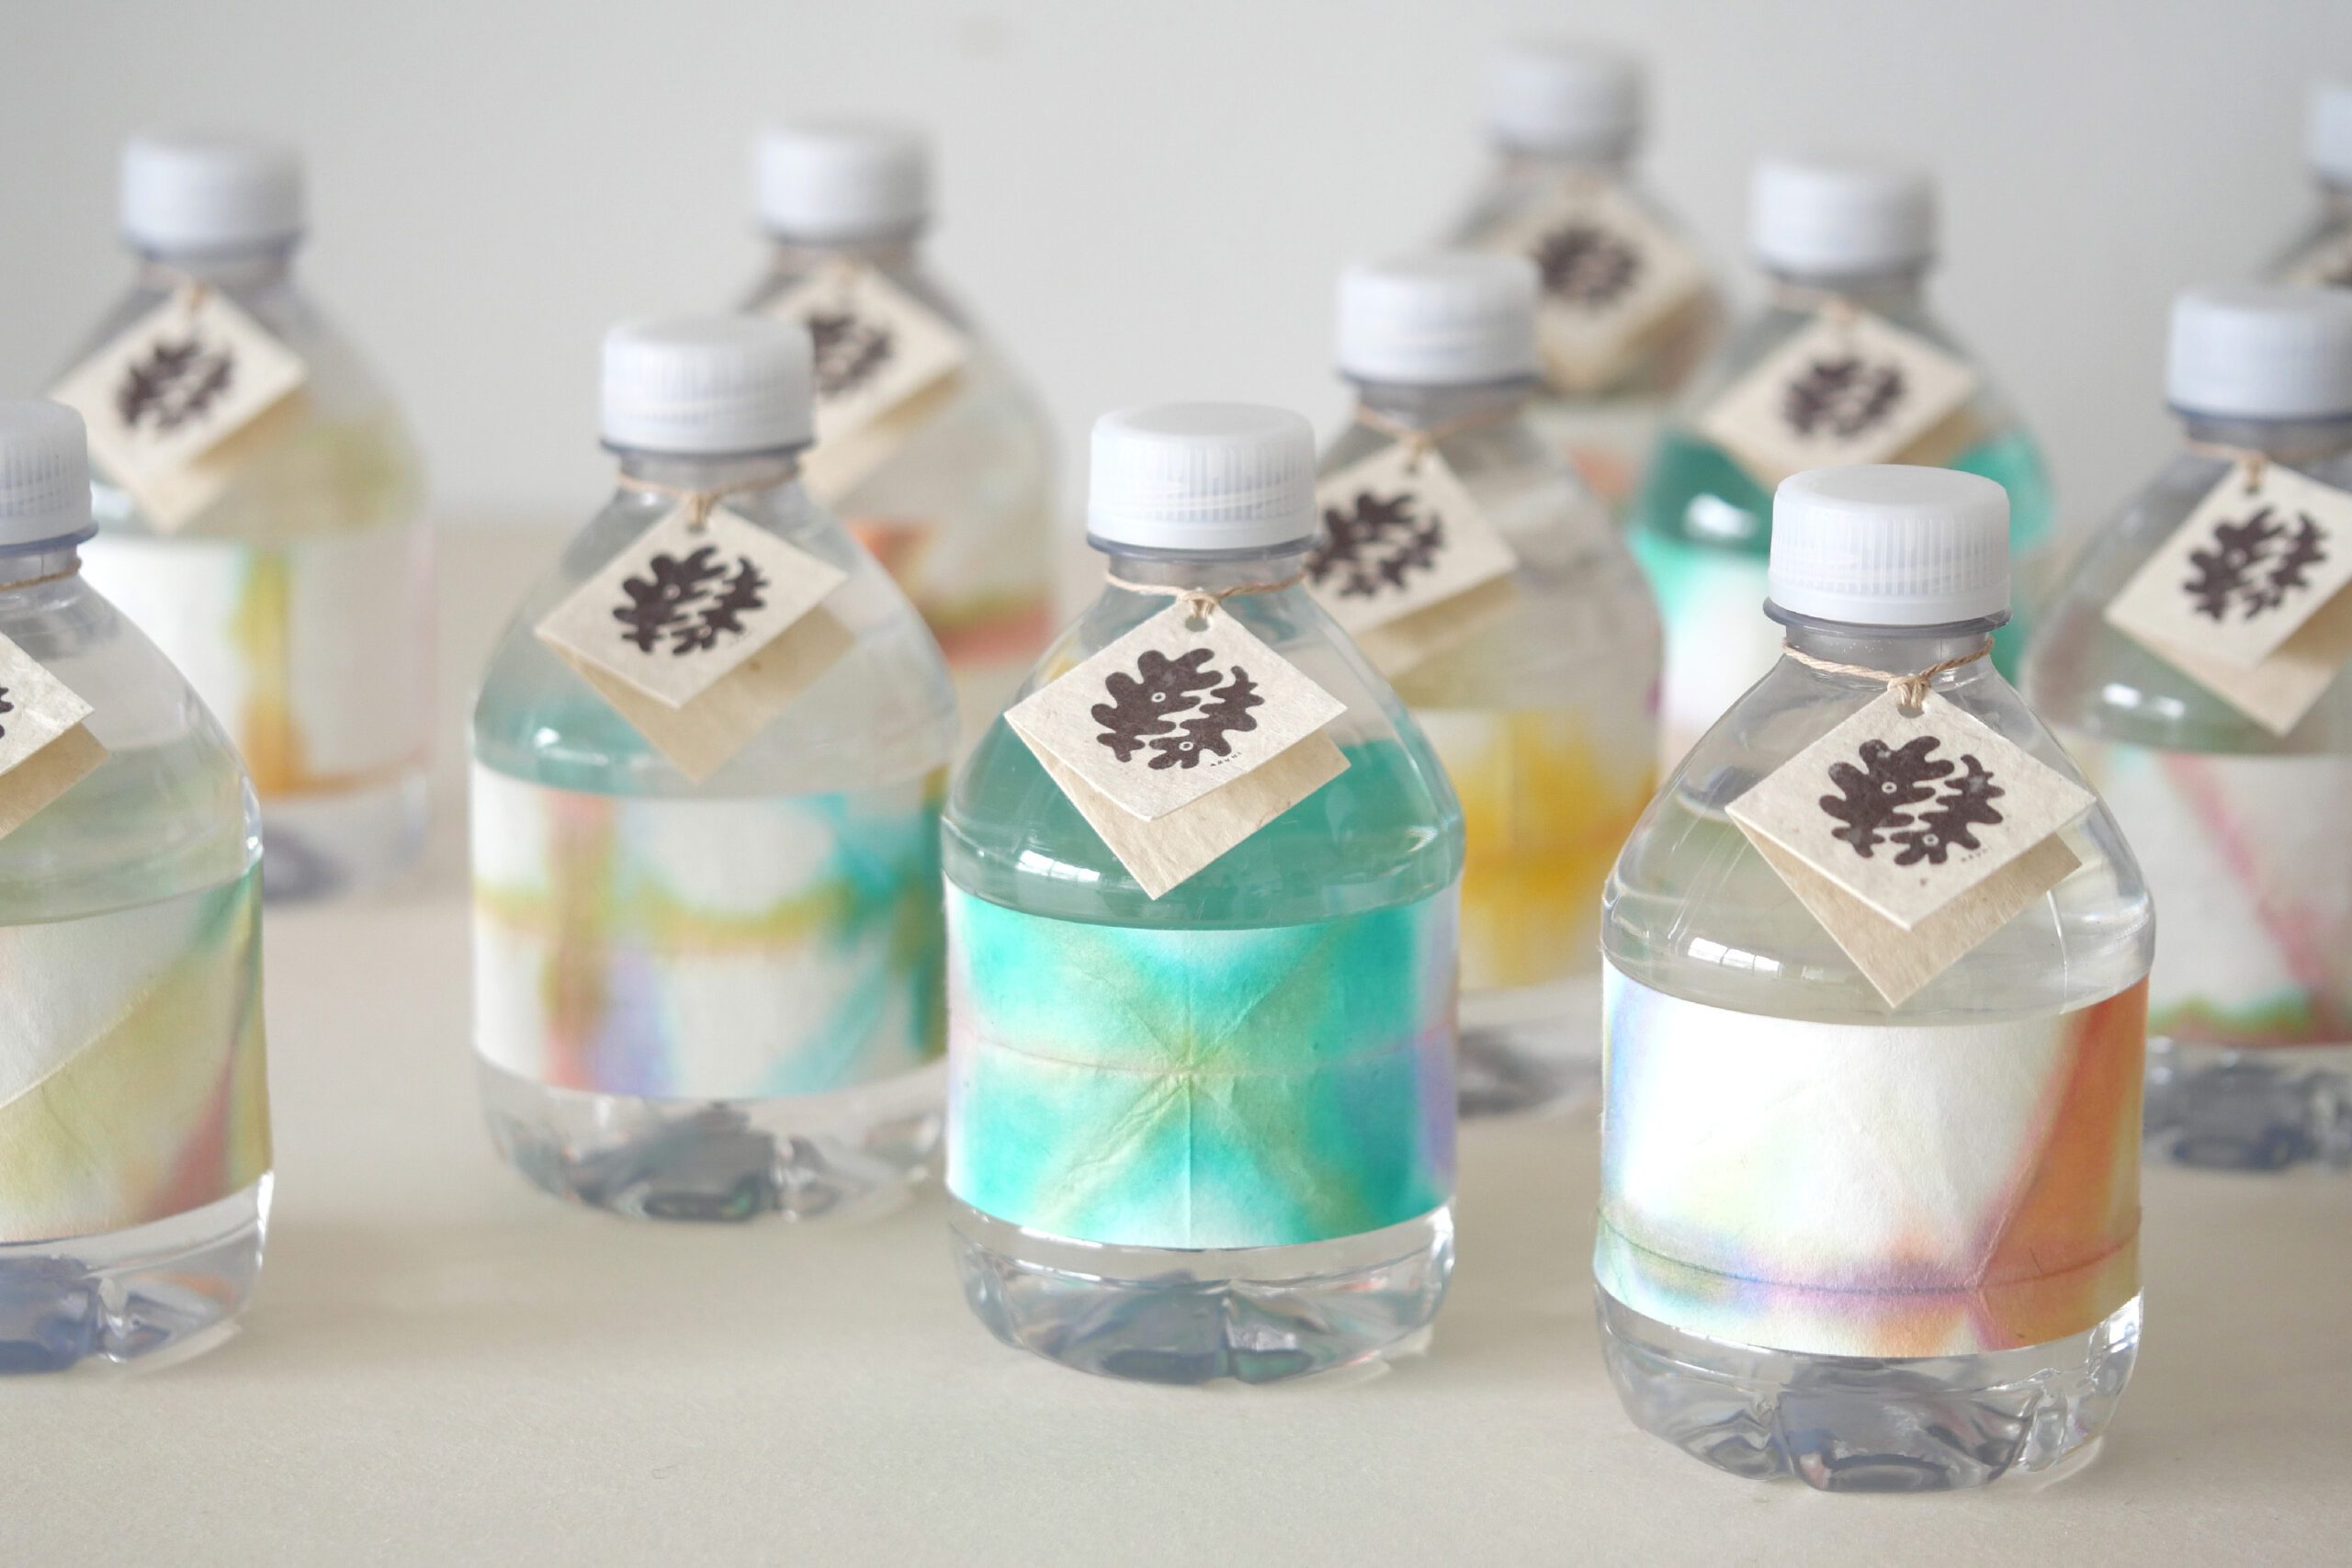
For Food Wrapping
The use of food coloring allows for wrapping on food products. It will be used in the future for decorations at catering and events.
Orizome with Food Color
紙を折って染める折り染め。小さな子も楽しめるとてもシンプルな染色のメソッドです。
これまで私は折り染めの染色材としてカラーインクを使ってきましたが、常にもっと簡単で安全な材料でできないかと考えていました。と同時に、この手づくりの美しい折り染めを、食品へのラッピングに使いたいと考えていました。答えは簡単なところにありました。フードカラーを使えばいいのです。
私はこれまで人工的な着色料を食品に使うことに懐疑的でした。いまでも必要な時には、着色料を使う代わりにビーツや抹茶、ターメリックなど自然のもので着色をしています。でも工作にはどうでしょう。柔軟な考えを持ったら、クラフトにとってこれ以上ない安全なインクだと気がついたのです。
早速いくつかのフードカラーを試してみました。全く問題なくこれまで以上に発色の良い美しい染色が体験できました。もちろん、絵の具のように色同士を組み合わせて好きな色を作ることもできます。同じように考えているあなたへの参考になるように美しいカラーチャートをここにシェアします。折り染めの材料や、折り方のガイド、基本的な工程はこちらに詳しく記述しています。ぜひ併せてをご覧ください。
用意するもの
– 和紙
– フードカラー *こちらを使いました
– 輪ゴム、もしくは紐 *必要であれば
– 染料用カップ
– ペーパータオル
*安全なインクではありますが、色素が強いので、手袋をして作業することをおすすめします。
フードカラーのカラーチャート
こちらが今回使うフードカラーです。20色のサンプルを試しました。このカラーチャートは各色、単色での発色です。全部の色を揃えなくても、絵の具と同じように色同士を組み合わせればさまざまな色がつくれます。
興味深い点は、例えば紫は赤と青を混ぜて作っているので、グラデーションのボケ足に青が滲みました。ローズピンクは、よく見ると黄色が滲んでいます。色によってはこのようなグラデーションの表現が出るので、染め上がりにも微妙な色のニュアンスが出て面白いと感じました。
つくりかた
Step 1. 紙の準備
紙の折り方はこちらに折り方のガイドがあります。三角形、四角形…折り方によって染め上がりの模様が変わります。折った紙を水に浸し、余分な水分を搾ります。水に浸すことによって、インクが滲みやすくなり、自然に色が行き渡ります。
Step 2. インクの準備
カップにインクを少量入れて、10倍ほどの水で薄めました。ジェル状のインクが水に完全に溶けるようによく混ぜ合わせてください。
Step 3. 染める
紙の各辺を違う色で浸していきます。染色後、余分な水分をキッチンペーパーで押さえてから、染め上げた紙を慎重に開きます。
Step 4. 観察する
染めた紙を平らな面に置いて乾かします。乾くと色が落ち着き、濡れているときよりも濃度が浅くなります。
色のバリエーション
こちらが今回染めた紙です。ビビッドな発色で、これまでのカラーインクを使った折り染めとまた違った雰囲気があります。色の滲みで予期しない発色が出て、紙を開いた時のワクワク感はともて楽しいものです。
食品へのラッピング
フードカラーを使うことによって、食品へのラッピングが可能になりました。ケータリングやイベントでの装飾にこれから活躍することでしょう。