Paper Lanterns for Lantern Walk
As we head toward the winter solstice, the days gradually get shorter and shorter in November. Finally, winter has begun.
At the Waldorf school where my daughter attends, we hold a lantern walk as a traditional event every year.
The children take their lanterns and go for a night walk. Shining the light of the lantern, we feeling connected to others and remembering in our hearts that each of us is a light in the darkness. Let the light of the lantern illuminate the inner light that burns brightly.
This project is a lantern made by pasting small pieces of Japanese paper onto balloons. The paper is attached one by one with a bond diluted with water. If you add leaves or flowers you found on your autumn walk, beautiful shadows will appear when the light penetrates through them. Now, let’s go out for an autumn walk with the lanterns.
Materials
– Japanese calligraphy or Decorative Tissue Paper *thin paper is preferred
– Balloons
– Craft glue
– Brush
– Fallen leaves, flowers *pre-pressed is best
– String
– LED Tea Light Candle
Instructions for making
Step 1. Cut Paper and Prepare Glue
Cut paper into small pieces and dilute the bond with water. You can tear the paper by hand or cut it with scissors. If it is too large, it will be difficult to paste, so this time I cut it into 2-3 cm squares. Thin the glue to about 1:5 of craft glue and water. It is easier to work with if it is a little watery rather than thick. Try working with it and adjust it so that it is easy to apply.
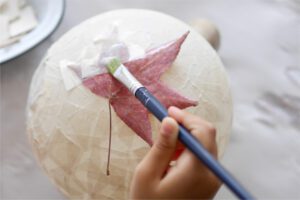
Step 2. Paste the Paper
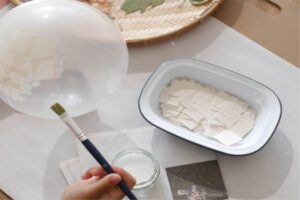
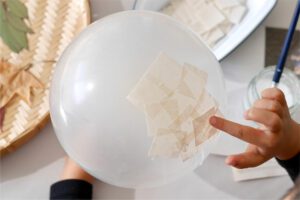
Apply water glue to the inflated balloons with a brush, and then paste the paper on the balloons one by one without gaps. The key is to apply water glue firmly all over the balloon. Apply water glue on top of the paper as well. Since the balloons will be taken out at the end, the paper should be applied to the bottom half to 2/3 of the balloons.
Step 3. Paste to Layer
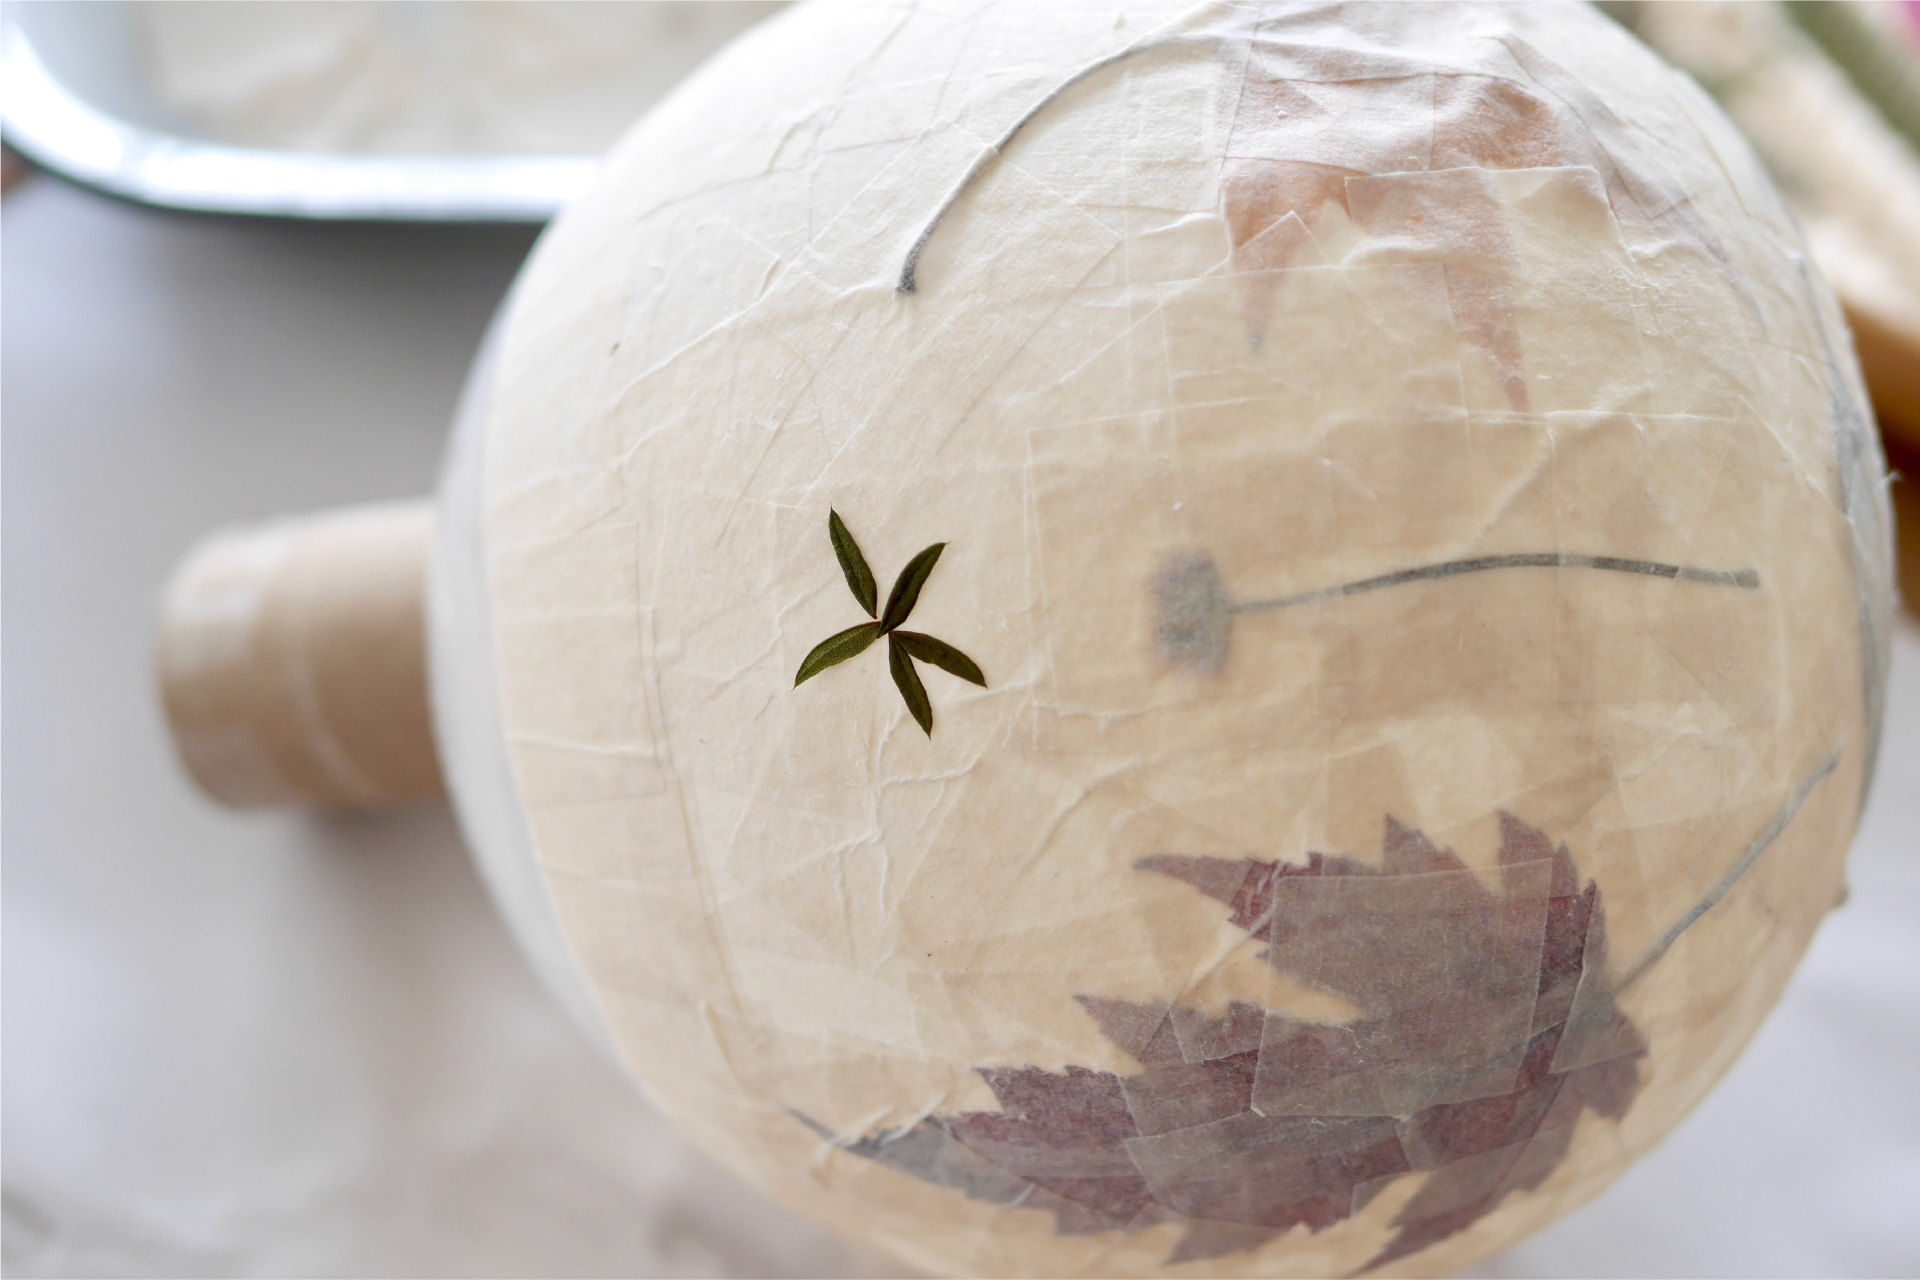
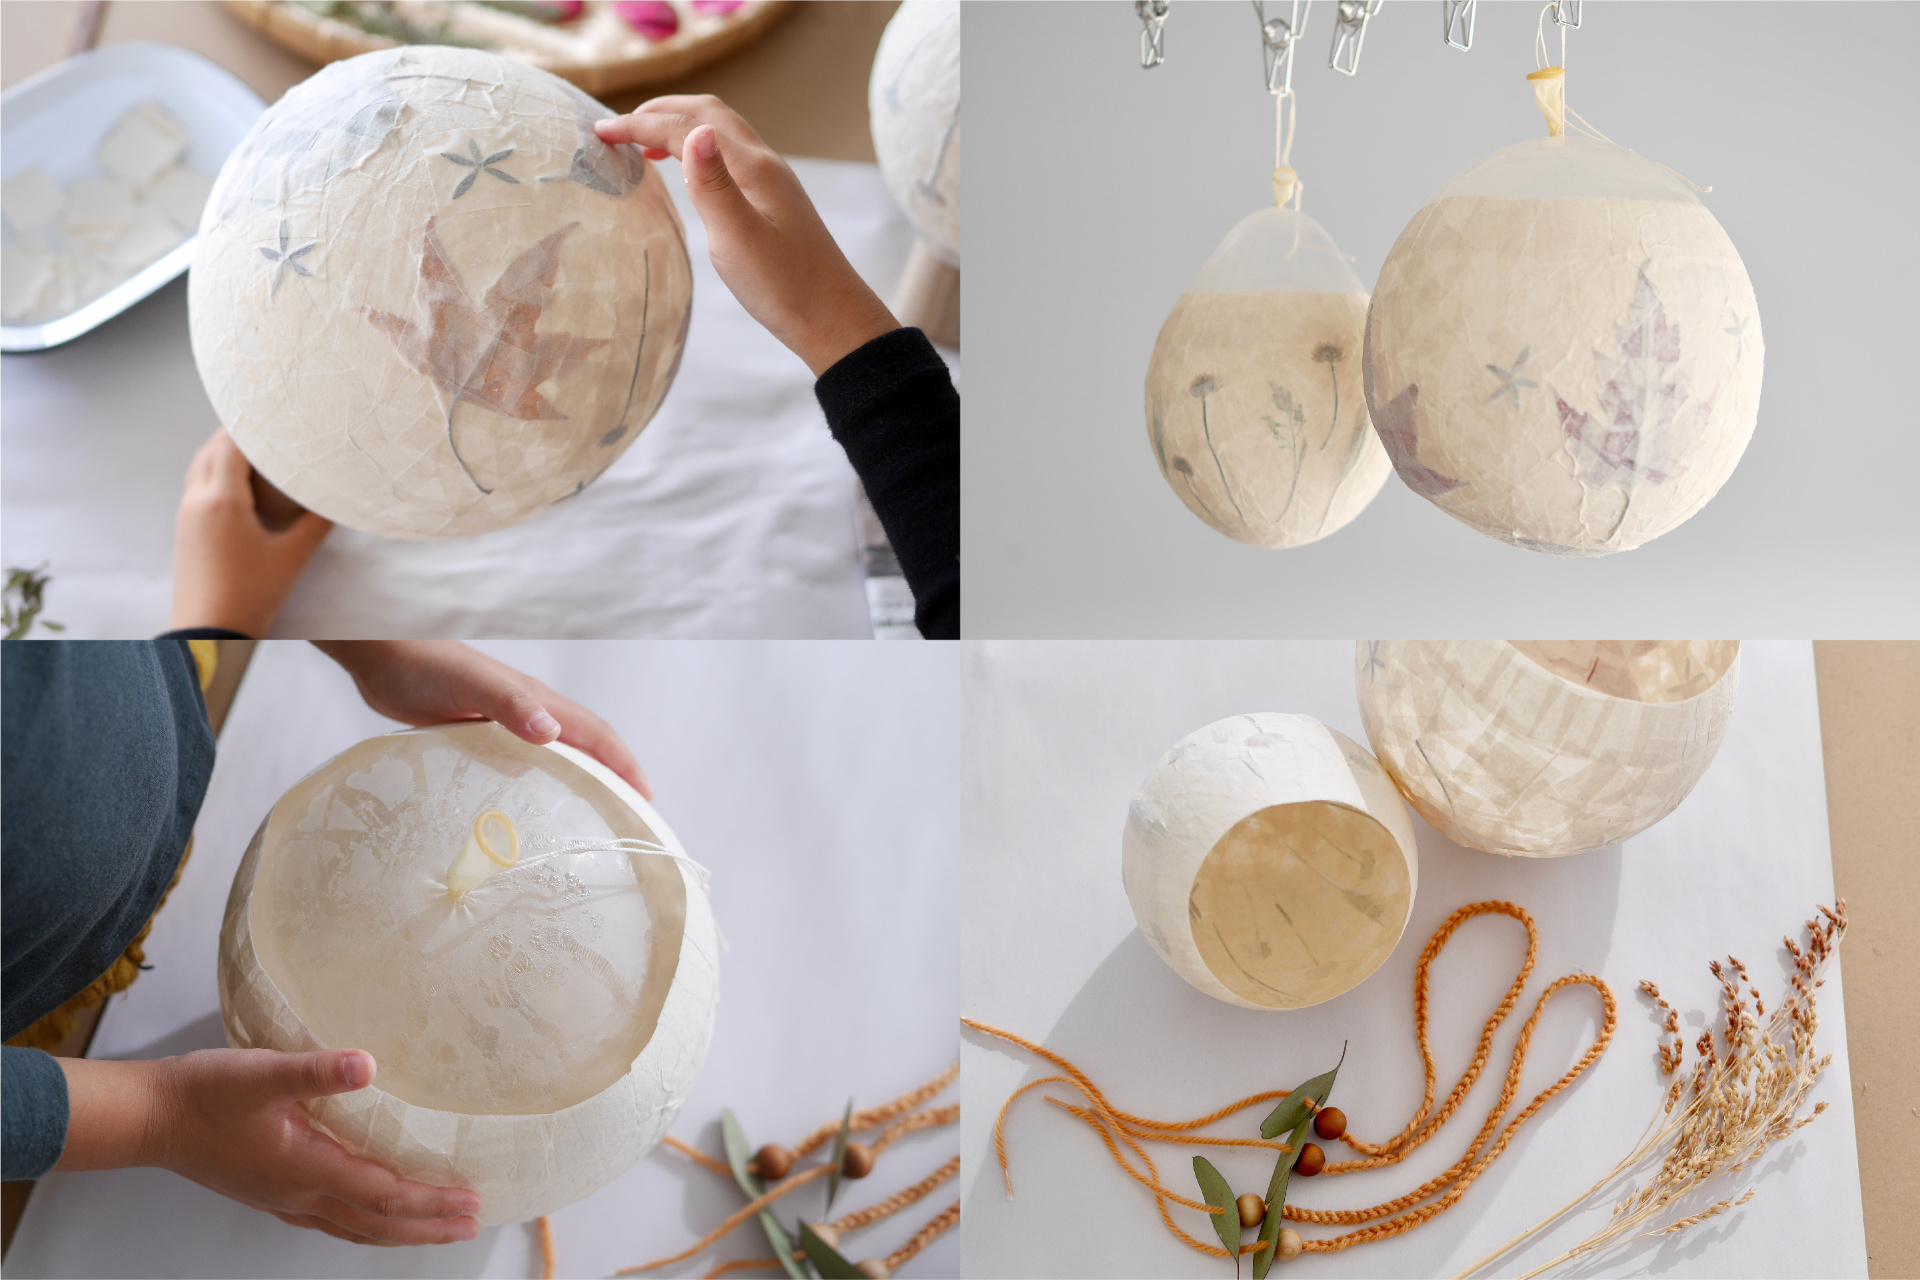
Once the paper has been applied to cover the entire surface without any gaps, apply the paper in layers so that there are two or three layers. If you put fallen leaves or flowers in the middle layer, they will be shaded by the transmitted light. Firmly affix water glue and paper over the fallen leaves as well to secure them in place. You should have about three layers of paper. Hang to dry overnight.
Step 4. Dry and Finish
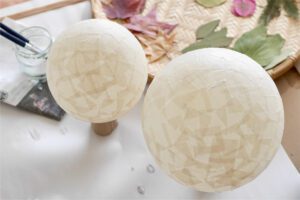
When the glue is completely dry, punch a hole in the balloon and slowly remove the air.
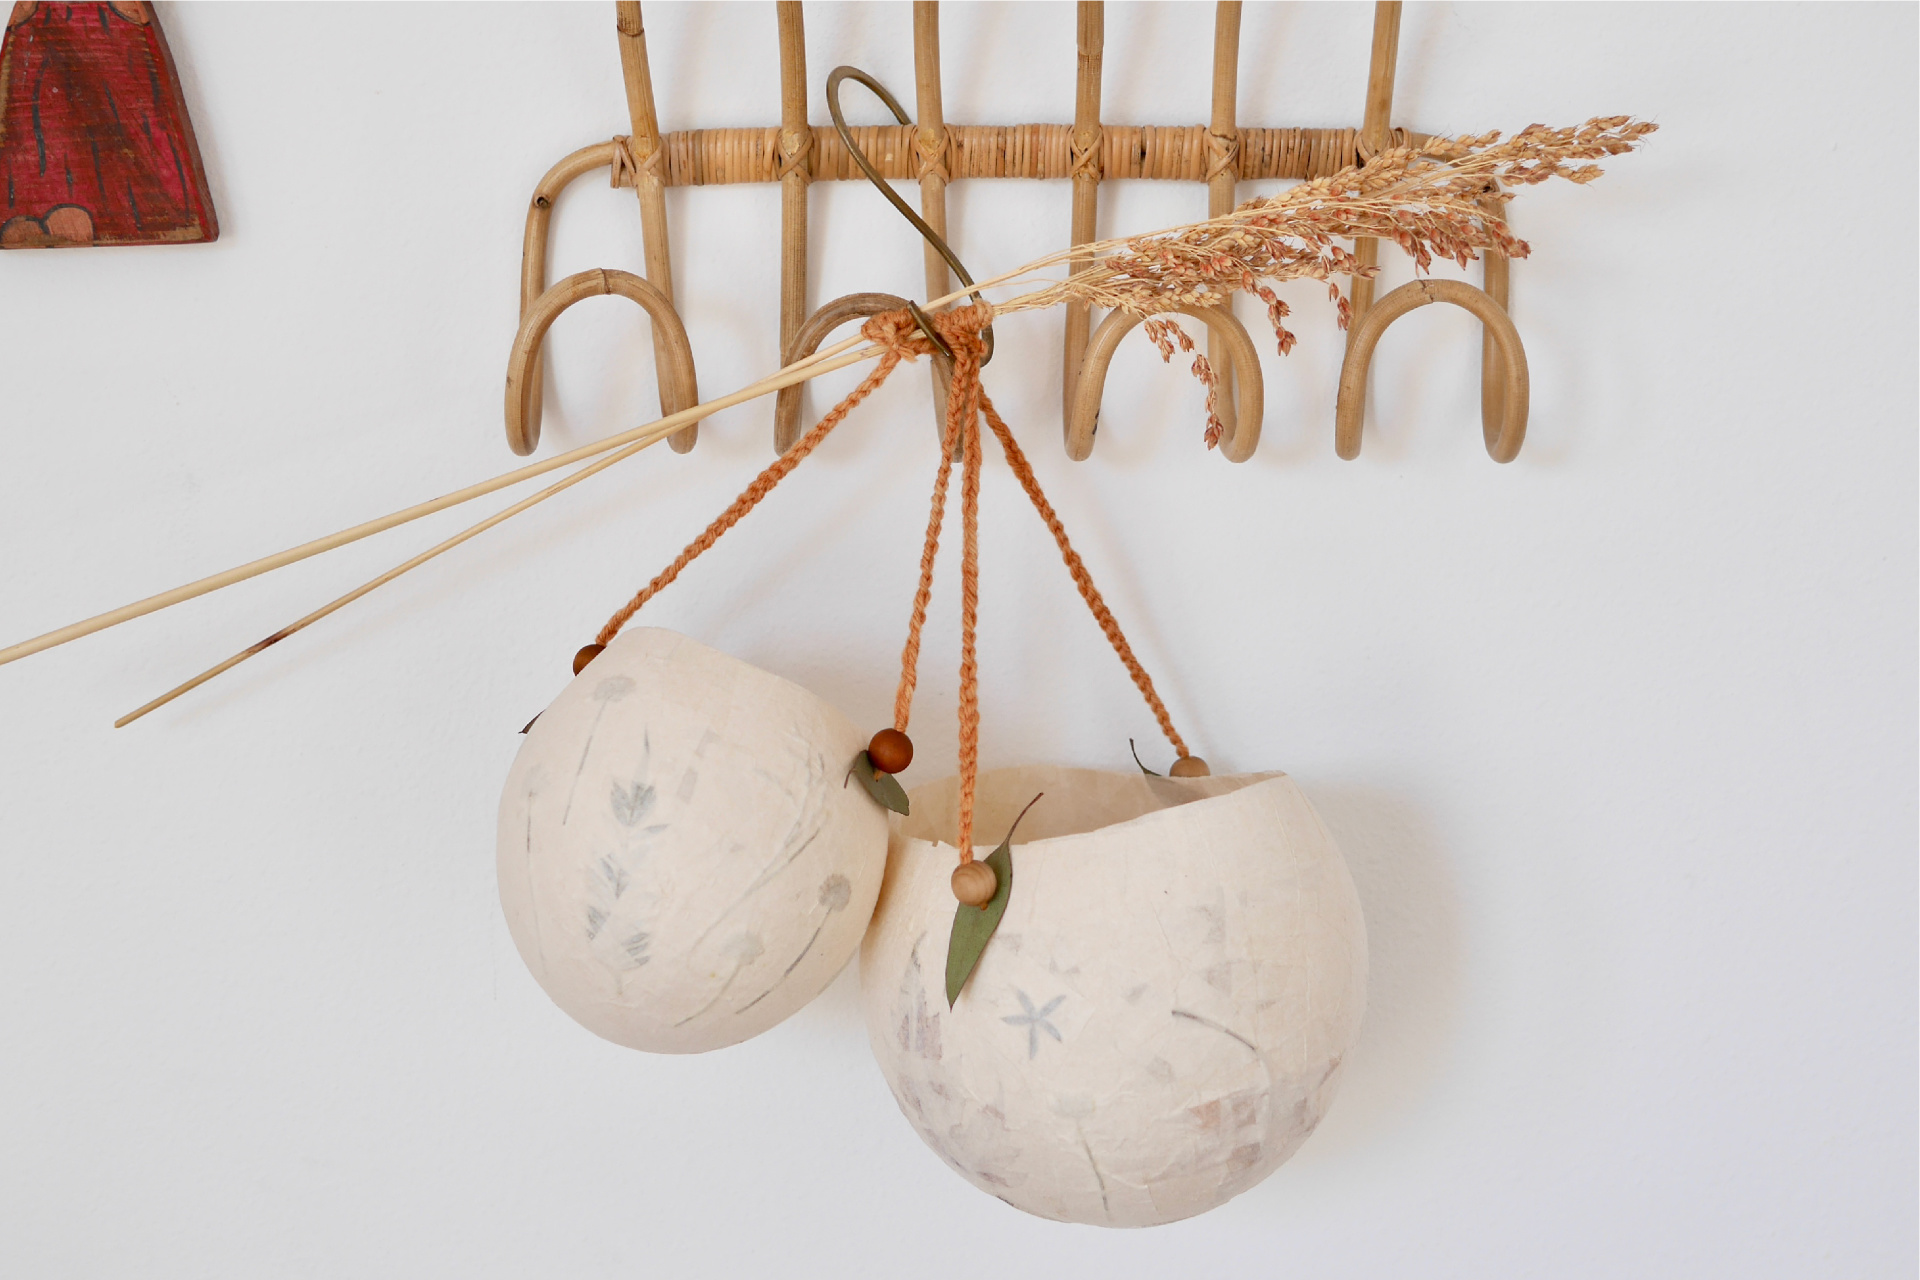
Attach a string and stick, place a candle-shaped LED light inside, and you are done.
* Do not use real candles or lights that emit heat, as they may catch fire.
Production Note
If the paper is applied thickly, the light will be gentle; if it is applied thinly, the light will be bright. In this case, I used half-sheets of paper. The first layer was entirely covered with paper, the second layer was covered with paper with fallen leaves on top, and the third layer was again covered with paper. The strength is sufficient and the light transmission is as shown in the picture.
Also, colored paper can be used to create a gorgeous impression. It is fun to cut the colored paper into triangles or various shapes to create a pattern.
It is fun to experiment with different ways of pasting the paper, as the way the light appears changes depending on the way it is pasted.
Paper Lanterns for Lantern Walk
冬至へ向かい、だんだんと日が短くなっていく11月。いよいよ冬のはじまりです。
娘が通うウォルドルフスクールでは、毎年伝統的な行事としてランタンウォークを行います。
子どもたちはランタンを持ち夜の散歩に出かけます。ランタンの光を照らし、他の人とのつながり感じ、私たち一人一人が暗闇の中の光であることを心に思い起こします。明るく燃える内なる光を照らすように。
今回のプロジェクトは、小さく切った和紙を風船に貼り付けて作るランタンです。水で薄めたボンドで一つ一つ紙を貼り付けていきます。途中、秋の散歩で見つけた葉っぱや花をいれると、光が透過した時に美しい影が現れます。さぁ、ランタンを持って秋の散歩に出かけましょう。
用意するもの
– 半紙、あるいはお花紙 *薄手の紙が好ましいです
– 風船
– ボンド
– 筆
-落ち葉、花 *事前にプレスしておくといいでしょう
– 紐
– キャンドル型のLEDライト
つくりかた
Step 1. 紙を切って糊を用意する
紙を小さく切り、ボンドは水で薄めます。紙は手でちぎっても、ハサミで切ってもいいです。大きすぎると貼りにくいので、今回は2〜3cm四方に切りました。糊はボンドと水が1:5くらいの濃度に薄めます。とろみがあるよりも、少し水っぽいかなと思うくらいが作業がしやすいです。作業をしてみて塗りやすいように調整してください。
Step 2. 風船に紙を貼る
膨らませた風船に、筆で水糊を塗り、一枚づつ隙間なく紙を貼っていきます。全体的にしっかりと水糊を塗るのがポイントです。紙を貼った上からも水糊を塗ってください。最後に風船を取り出すので、紙を貼る位置は風船の下半分〜2/3くらいの位置までにします。
Step 3. 紙を重ねて貼る
全体を覆う様に隙間なく紙が貼れたら、2重、3重の層になるように紙を重ねて貼っていきます。途中の層に落ち葉や花を入れると、透過した光の影になります。落ち葉の上にもしっかりと水糊と紙を貼っていき、固定します。紙は3層ほど重ねるといいでしょう。吊り下げて一晩乾燥させます。
Step 4. 乾かして仕上げる
糊が完全に乾いたら、風船に穴を開け、ゆっくりと空気を抜いて取り出します。
紐と棒を付けて、中にキャンドル型のLEDライトを入れたら完成です。
*本物のキャンドルや熱が出るライトは燃え移ることがあるので使用しないでください。
制作ノート
紙を厚く貼れば緩やかな光に、薄く貼れば明るい光になります。今回は半紙を使い、一層目は全体的に紙を貼り、二層目に落ち葉を入れて紙を上から重ね、三層目にまた紙を重ねました。強度は十分で、光の透過は写真の通りです。
また、色紙を使えば華やかな印象になります。色紙を三角形やいろいろな形に切って模様の様にしても楽しいですね。貼り方によって光の見え方が変わるのでいろいろ試してみるのも楽しいと思います。