Pop-up Card with Paper Wreath
The holiday season has begun and it’s time to show our appreciation to our friends, school teachers, and those who have helped us. The best gift to express your gratitude is a card. I hope that a card with a handwritten message will bring joy to the recipient.
This time, there is a little twist and surprise. I have created a pop-up card with a paper wreath that is perfect for the holiday season. The method of making this card is the orthodox paper cutout method. The pattern is created by cutting the folded paper with scissors. When the cut paper is unfolded, the pattern becomes a series of patterns, forming the shape of a wreath. Decorations are added using the paper cut-out technique to create a floating wreath card.
*The pattern shown here is a little complicated, so we have prepared a free downloadable pattern for you. You can also cut it into any shape you like without using the pattern.
*In the next blog post, I will introduce a simpler pattern that you can make with your children, so please look forward to that as well.

Materials
– Origami *15cm square colored paper
– Card *I used 15cm x 20cm folded in half this time
– Scissors
– Glue
– Tape
– Paper pattern *Download below
Here is a pattern. Please download and use it.
download the patternInstructions for making
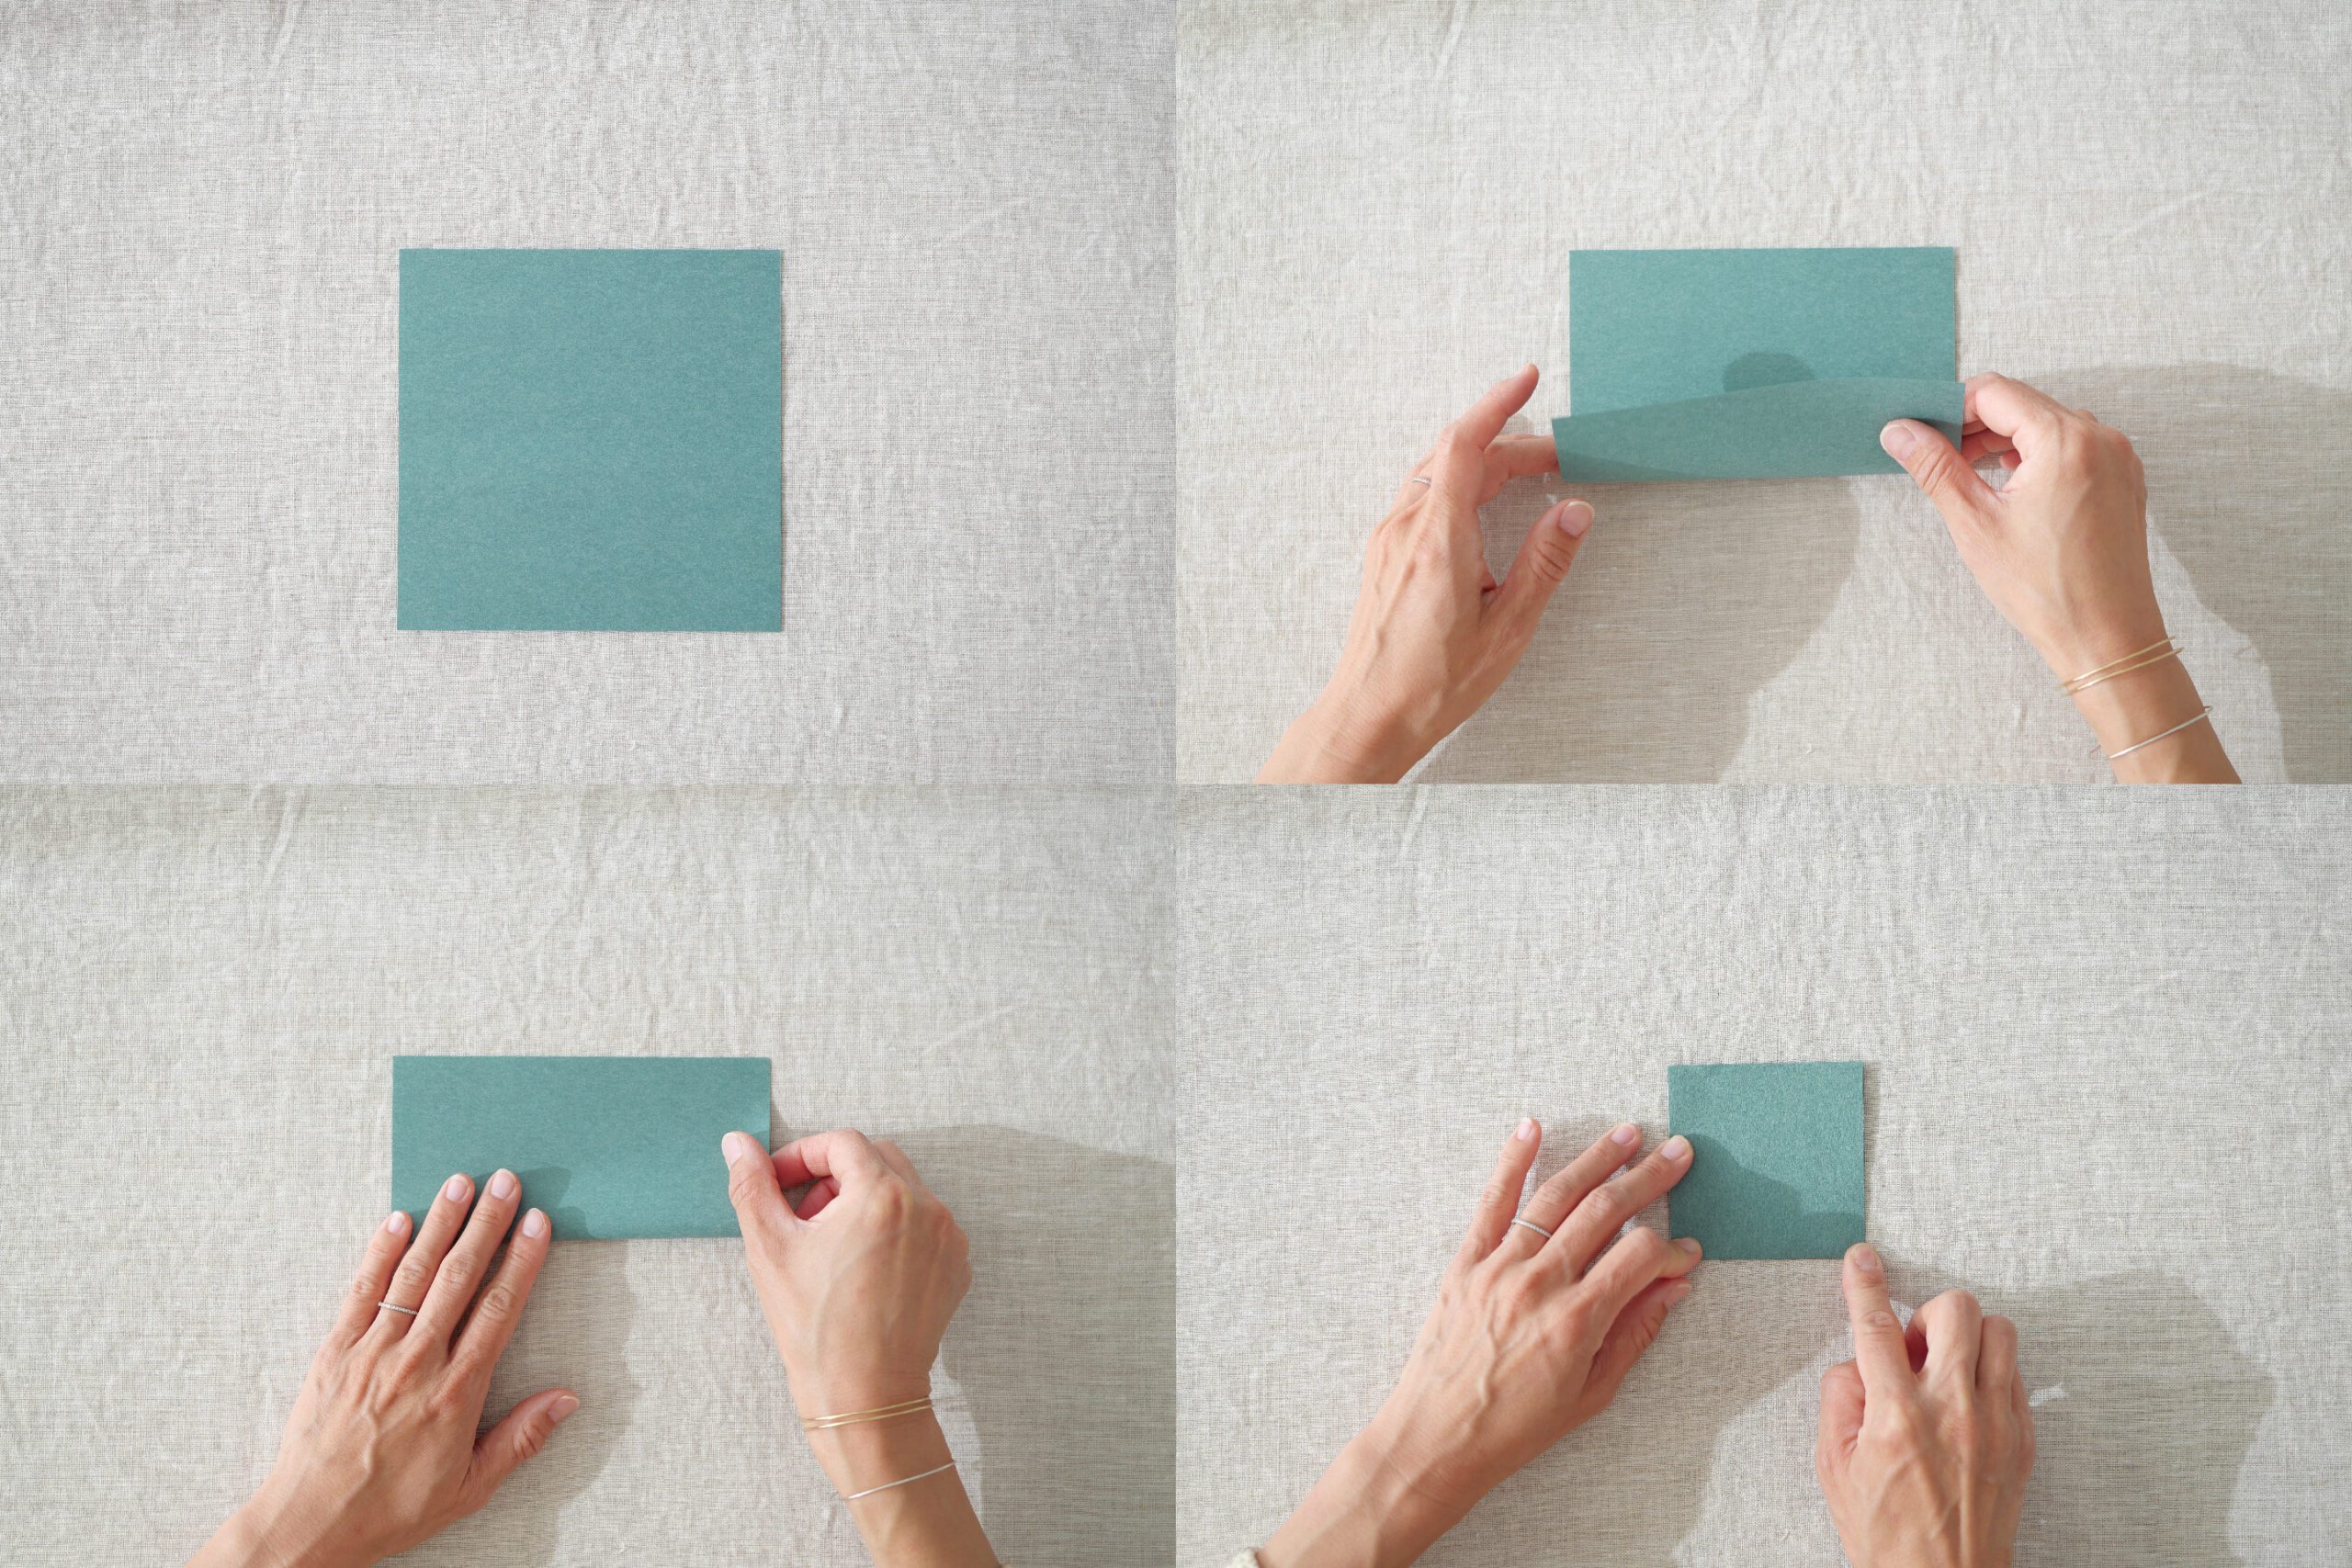
Step 1. Fold the Paper and Match with Pattern
First, cut a wreath shape. Fold the green origami paper in four. First fold it in half, then fold it in half again. Align the dotted line of the downloaded pattern exactly with the crease of the four folds and tape the edges together.
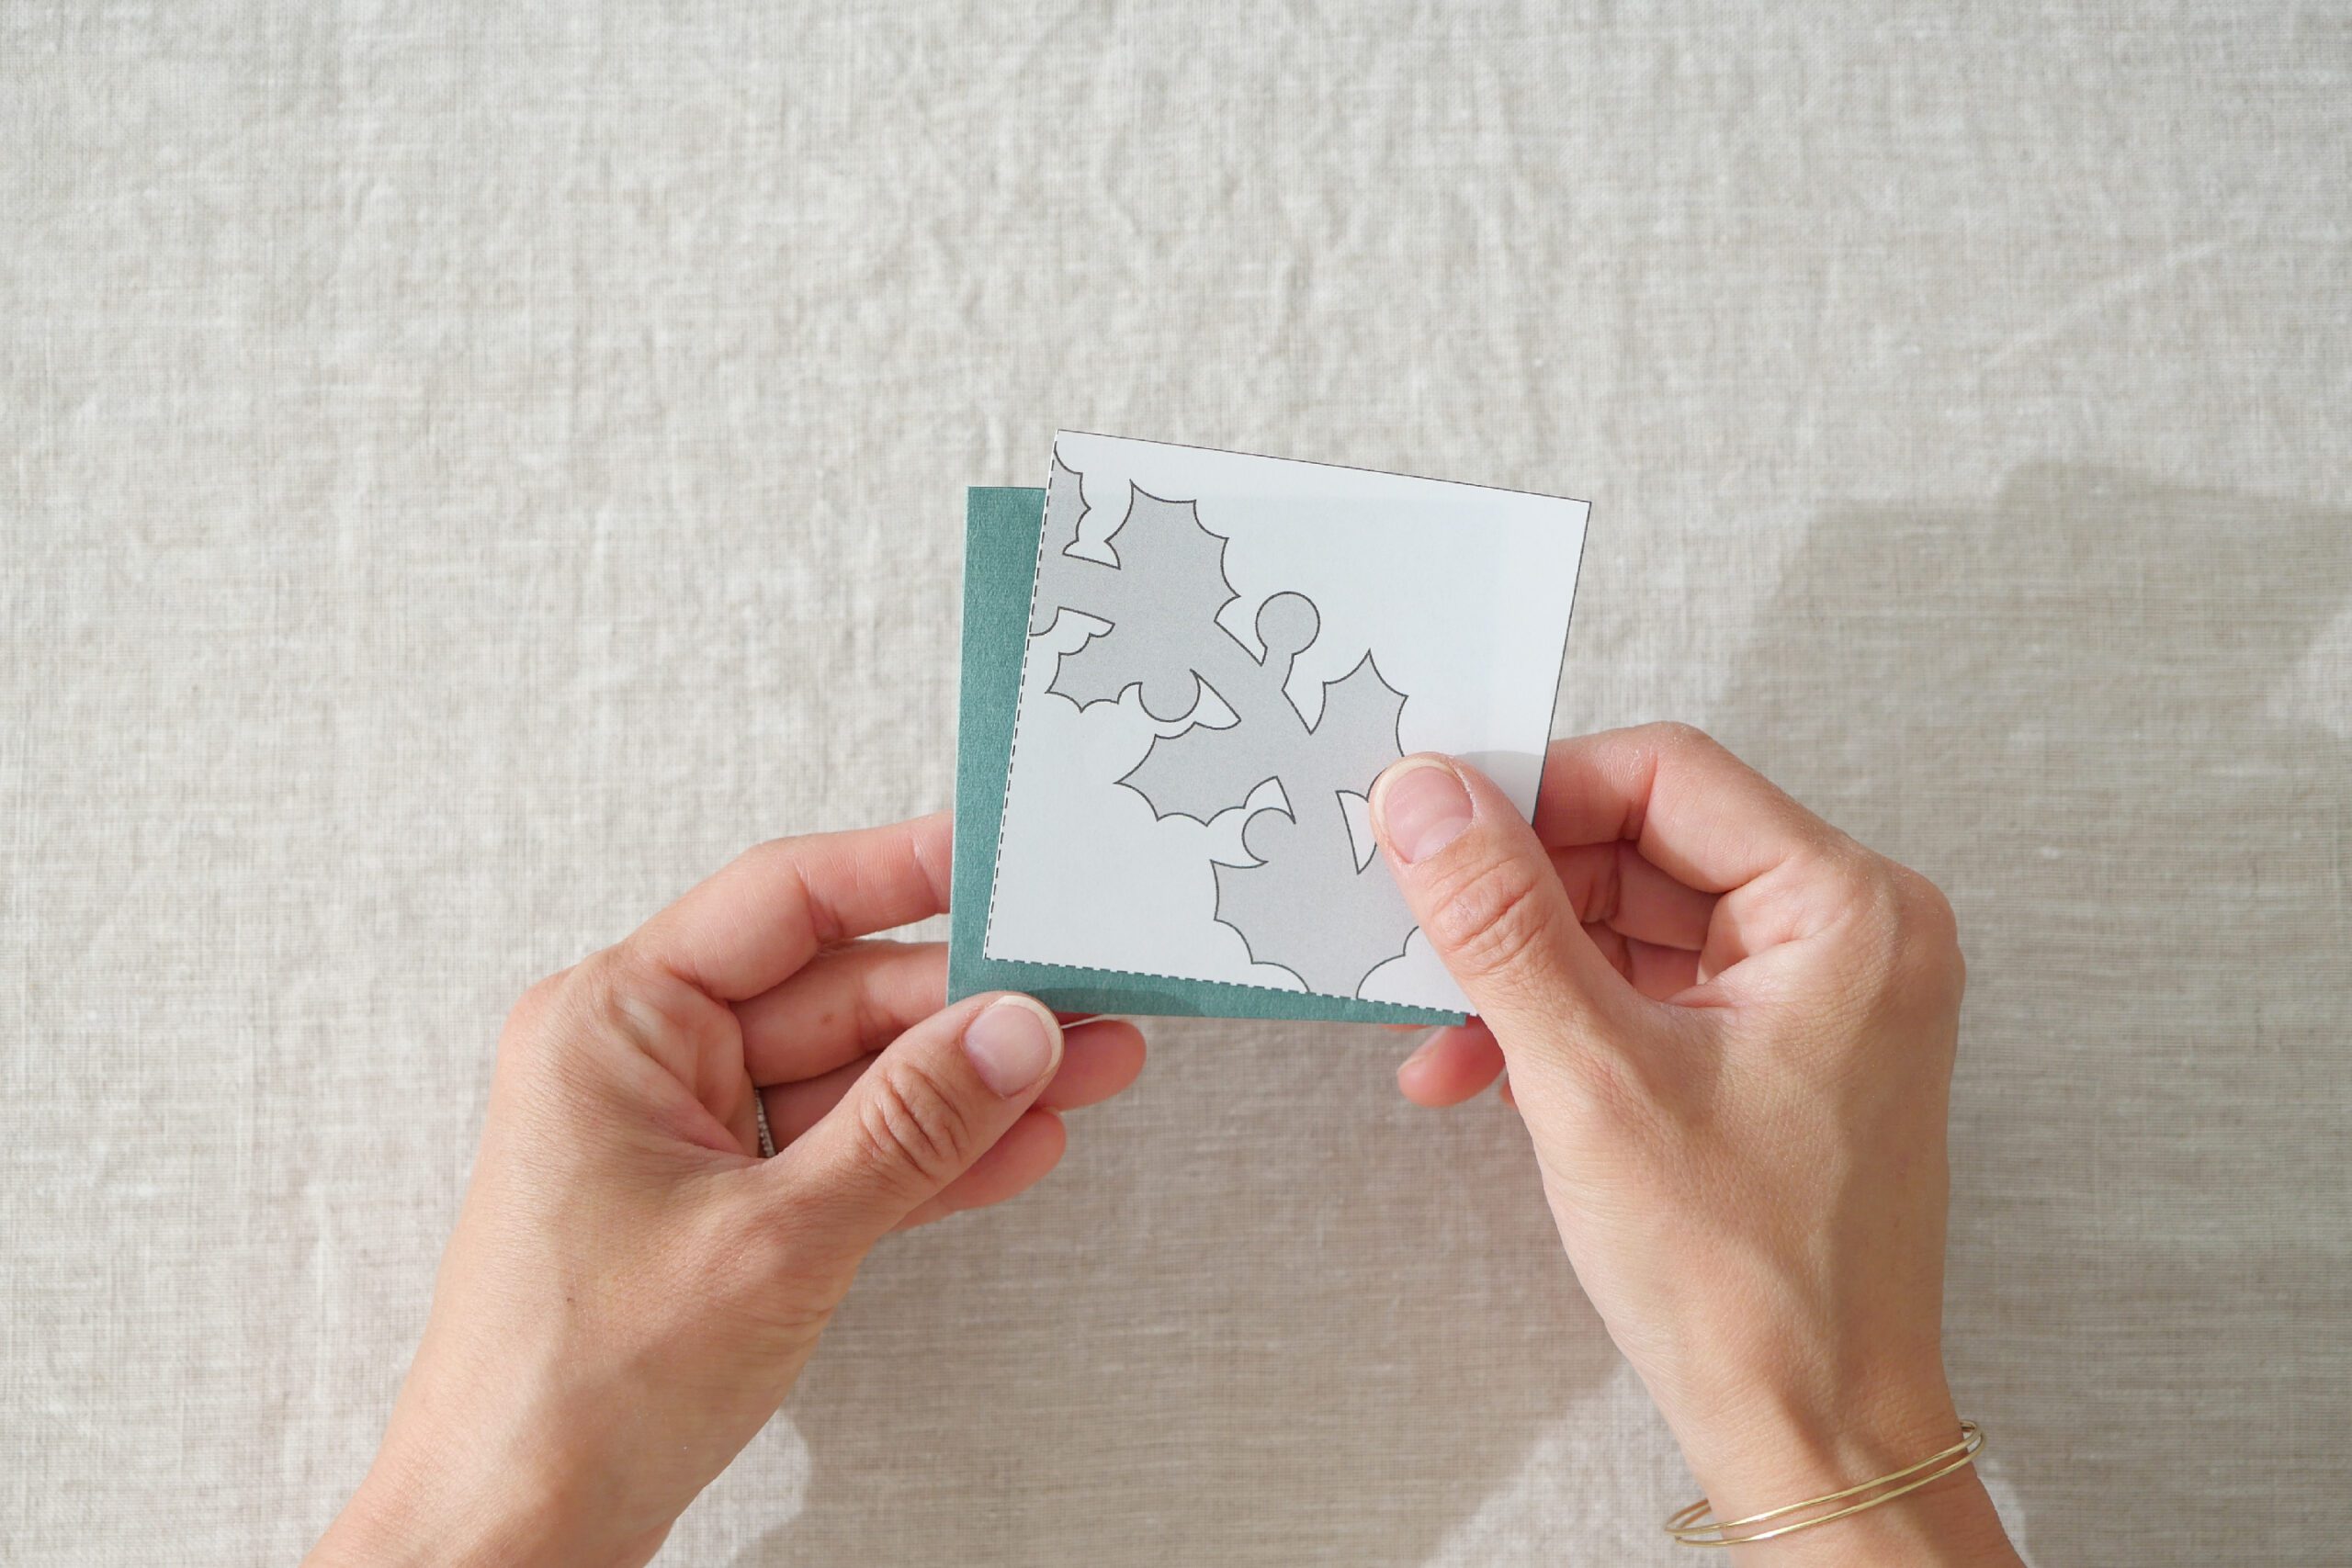
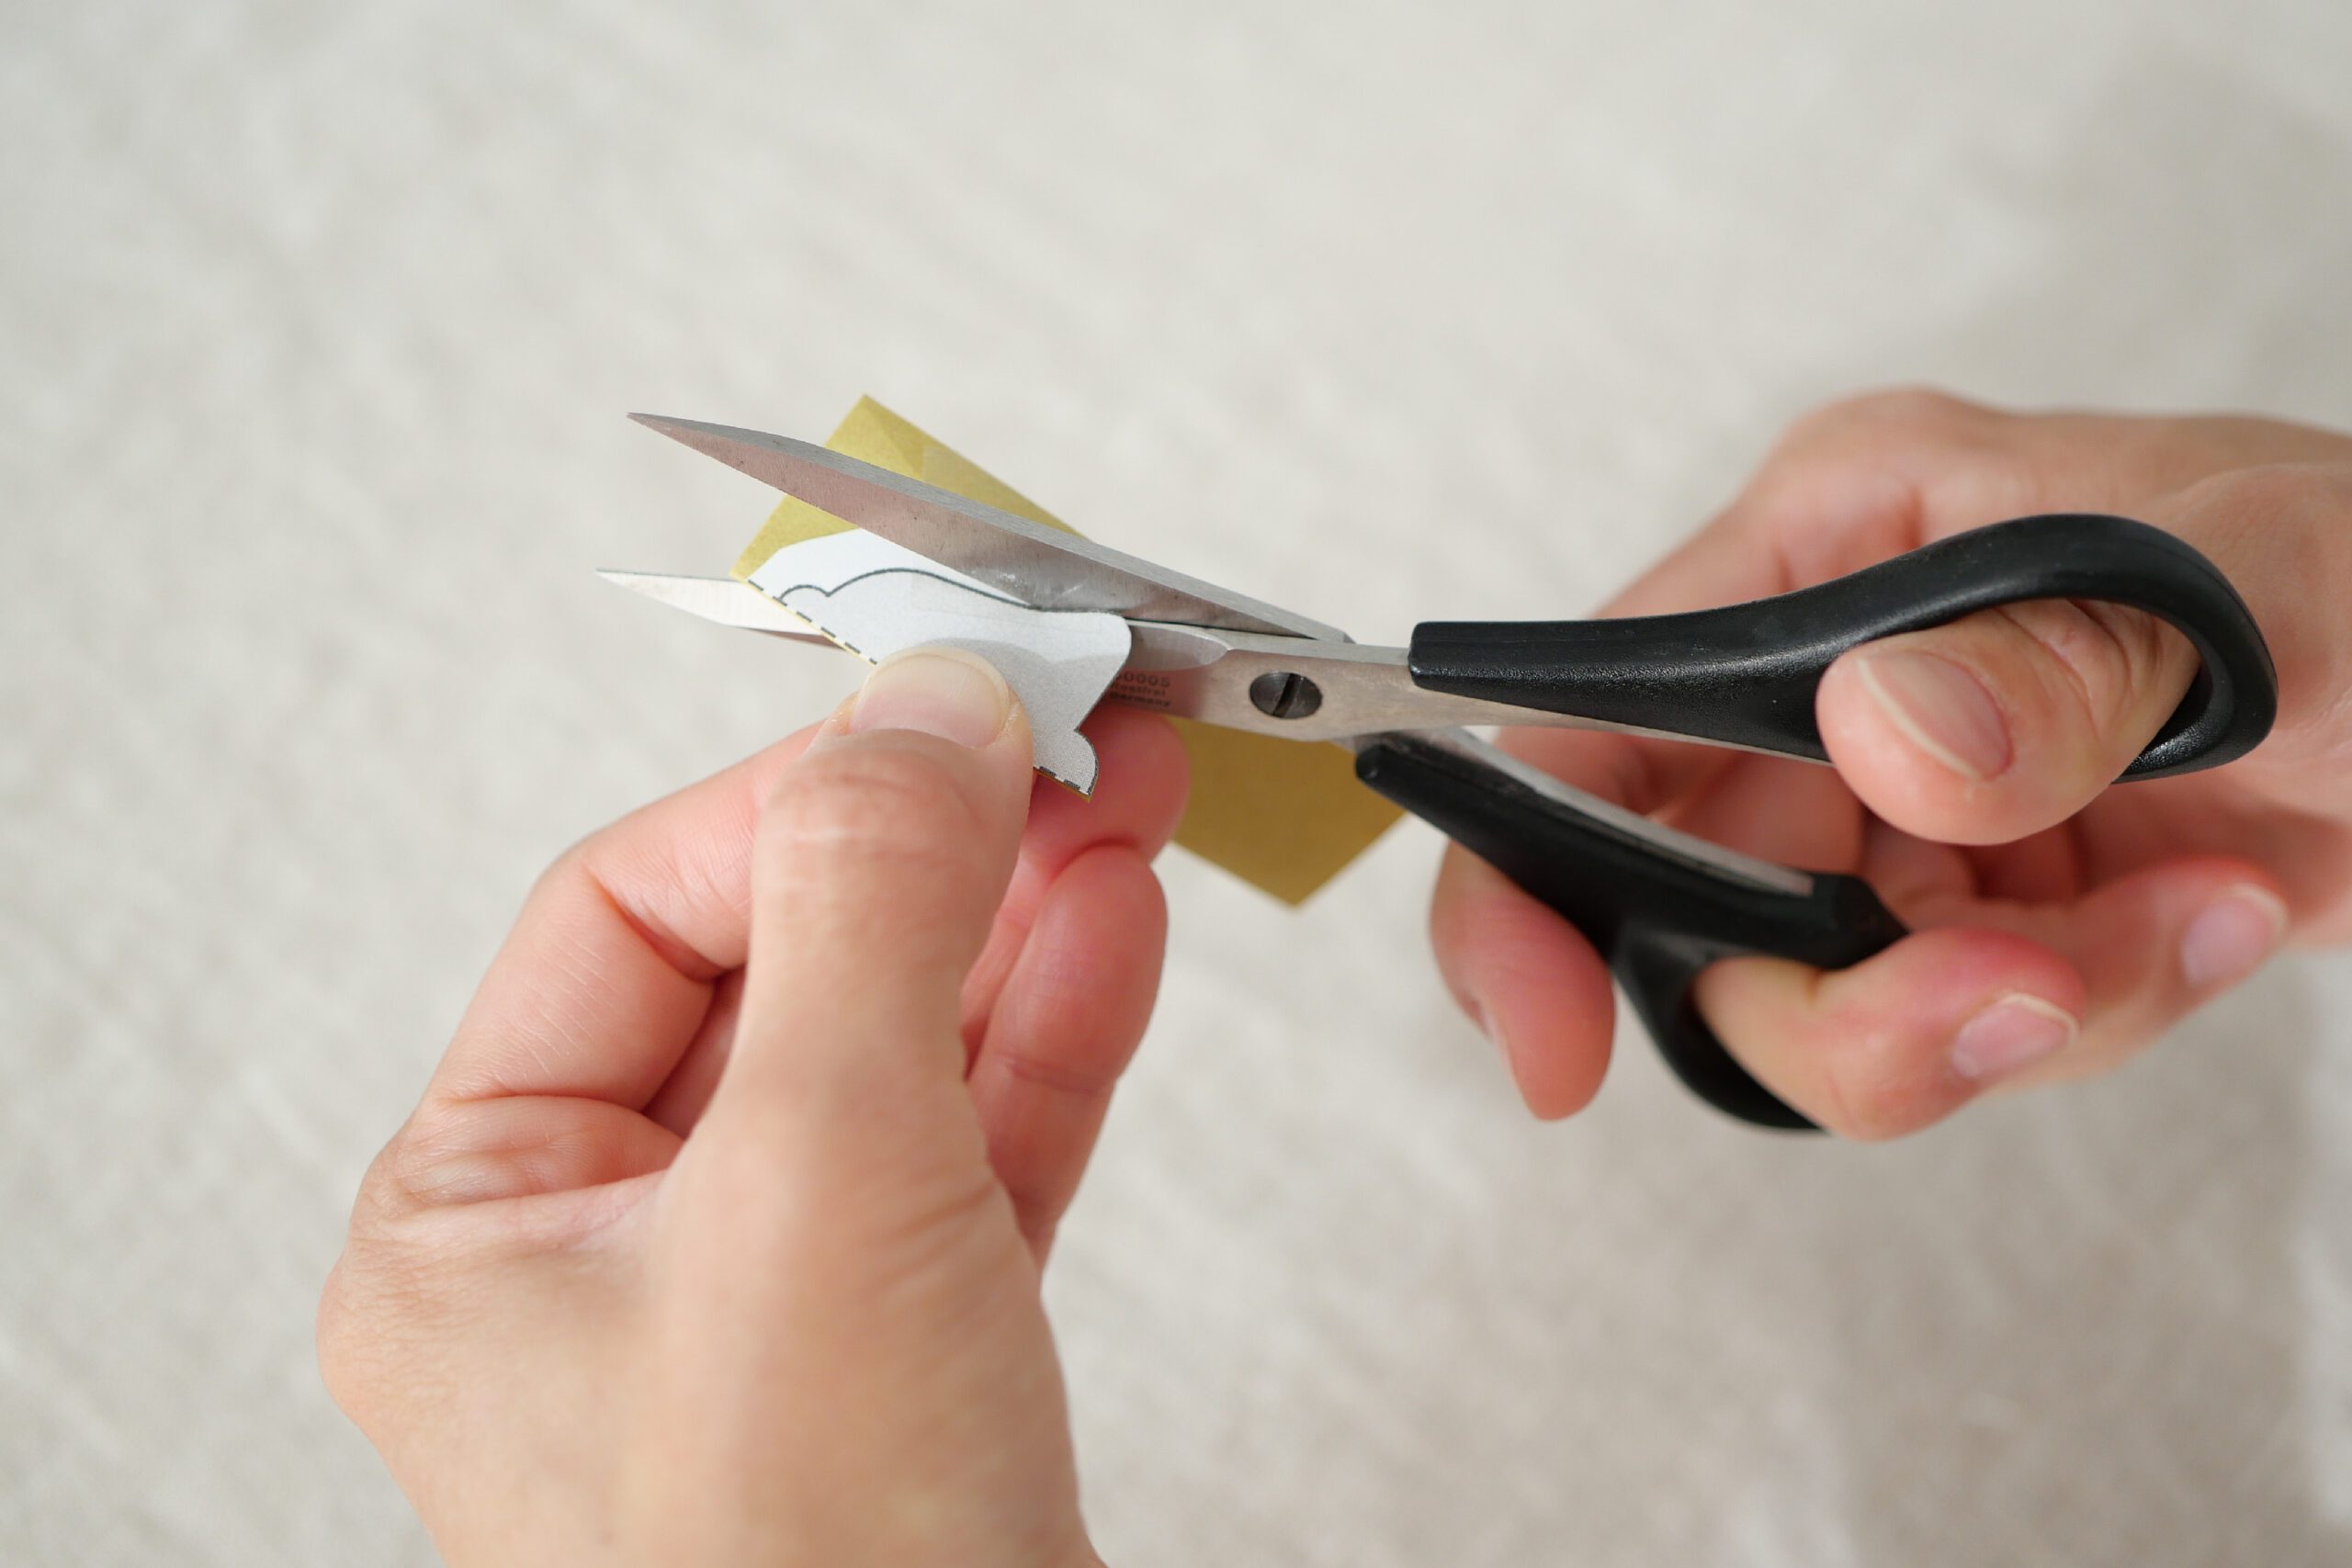
Step 2. Cut Along the Pattern
Cut along the lines of the pattern with scissors. Curved lines and fine details can be cut cleanly by moving the scissors as if turning the paper, rather than moving the scissors.

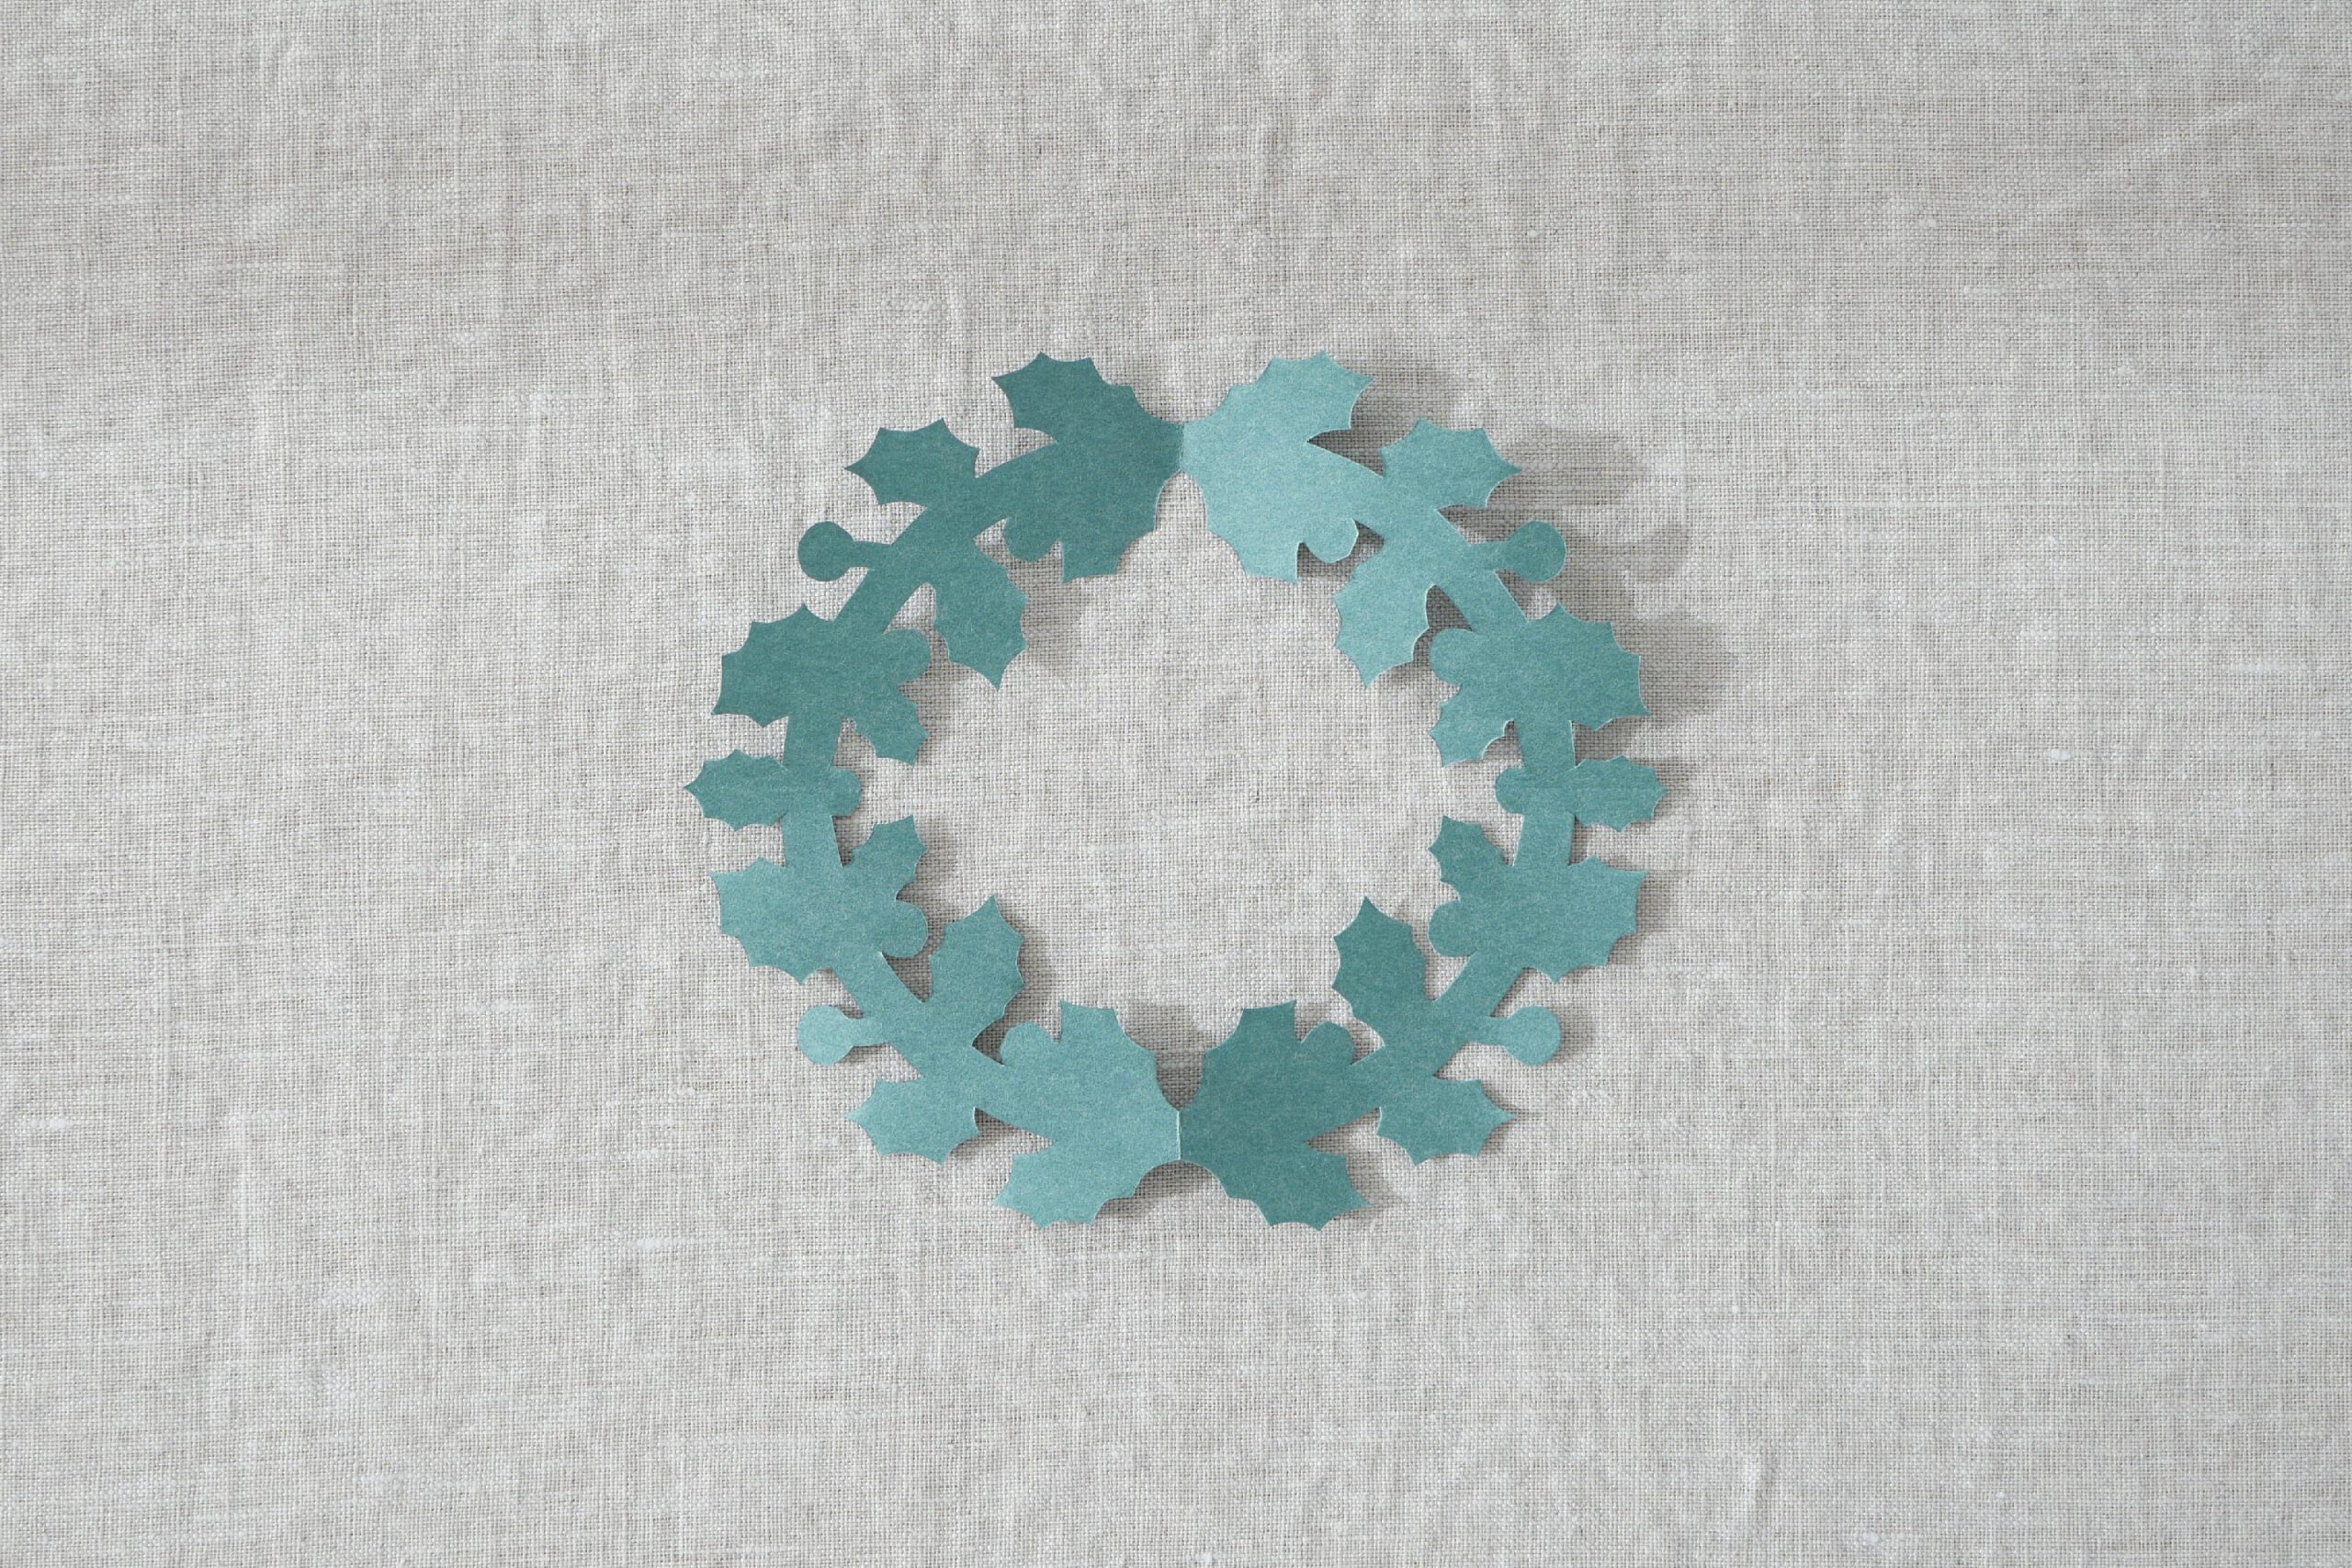
Step 3. Unfold a Paper
Gently and carefully unfold the cut wreath. The circle of paper wreaths has expanded.

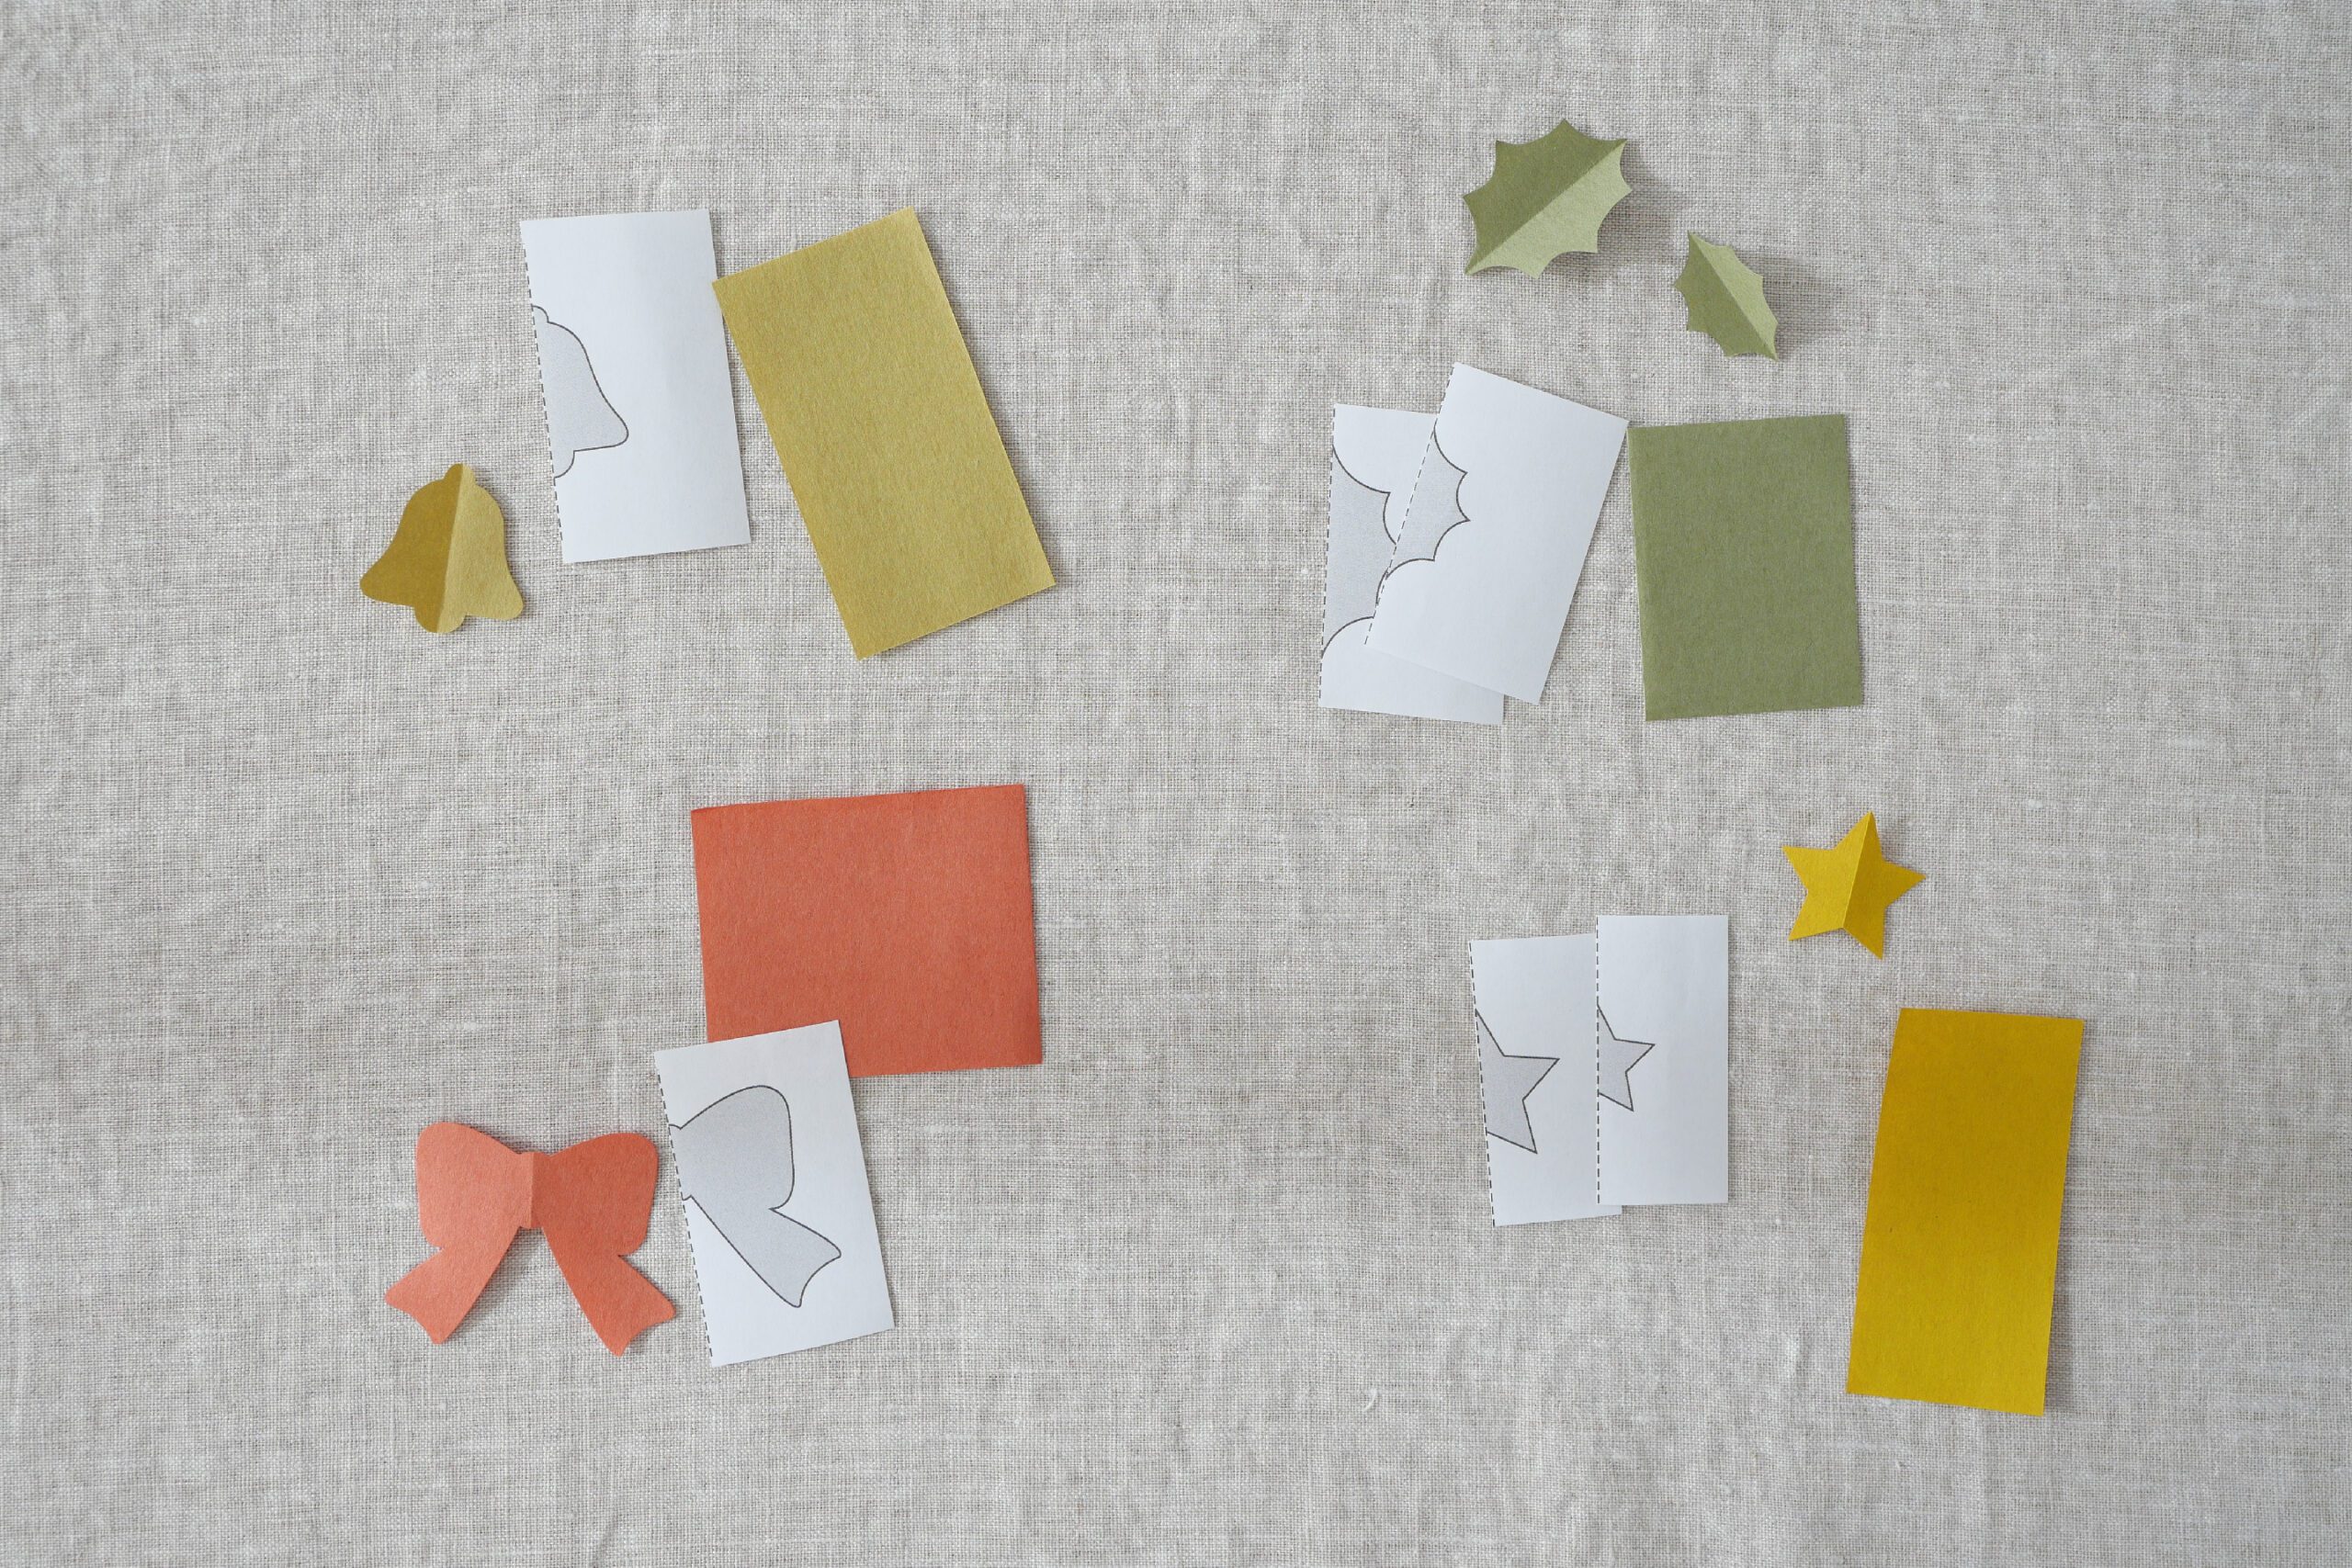
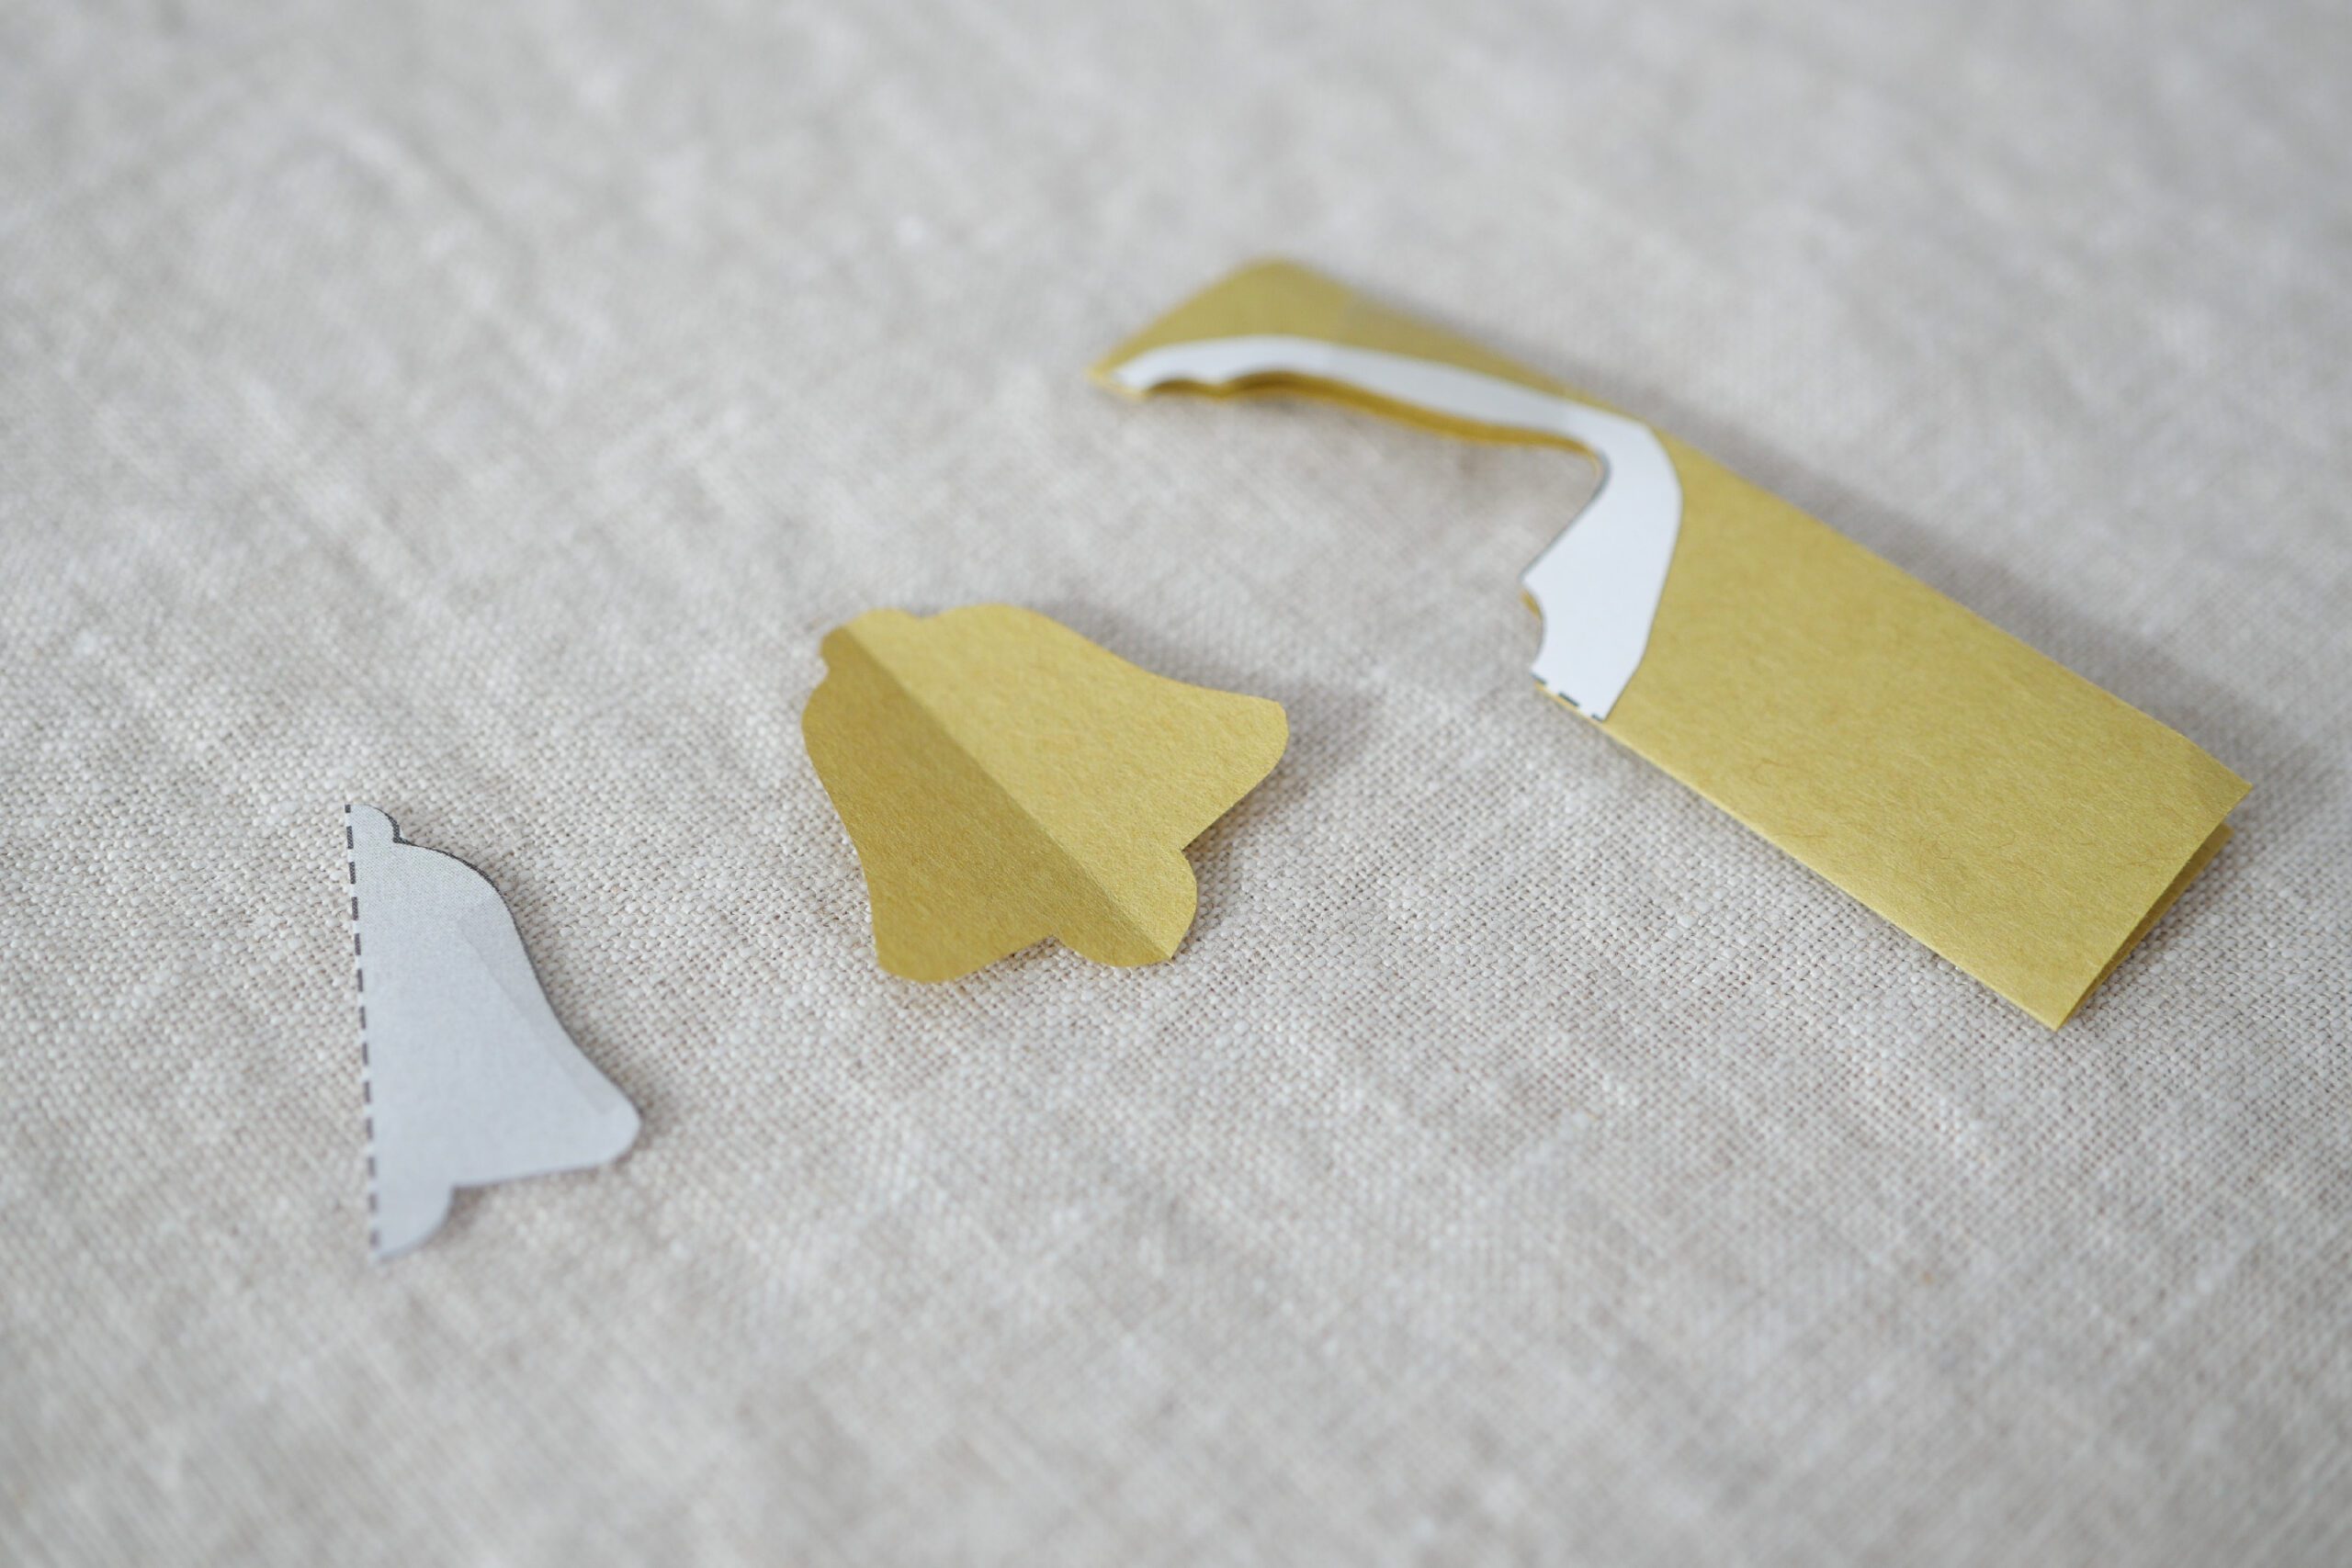
Step 4. Cut Decorative Parts
Prepare patterned paper for bell, bow, holly leaves, and stars. All of the decorative parts are cut by applying the pattern to a piece of paper folded in two. Prepare one sheet each of bell and bow, and about 4 to 6 sheets of holly leaves, both large and small.


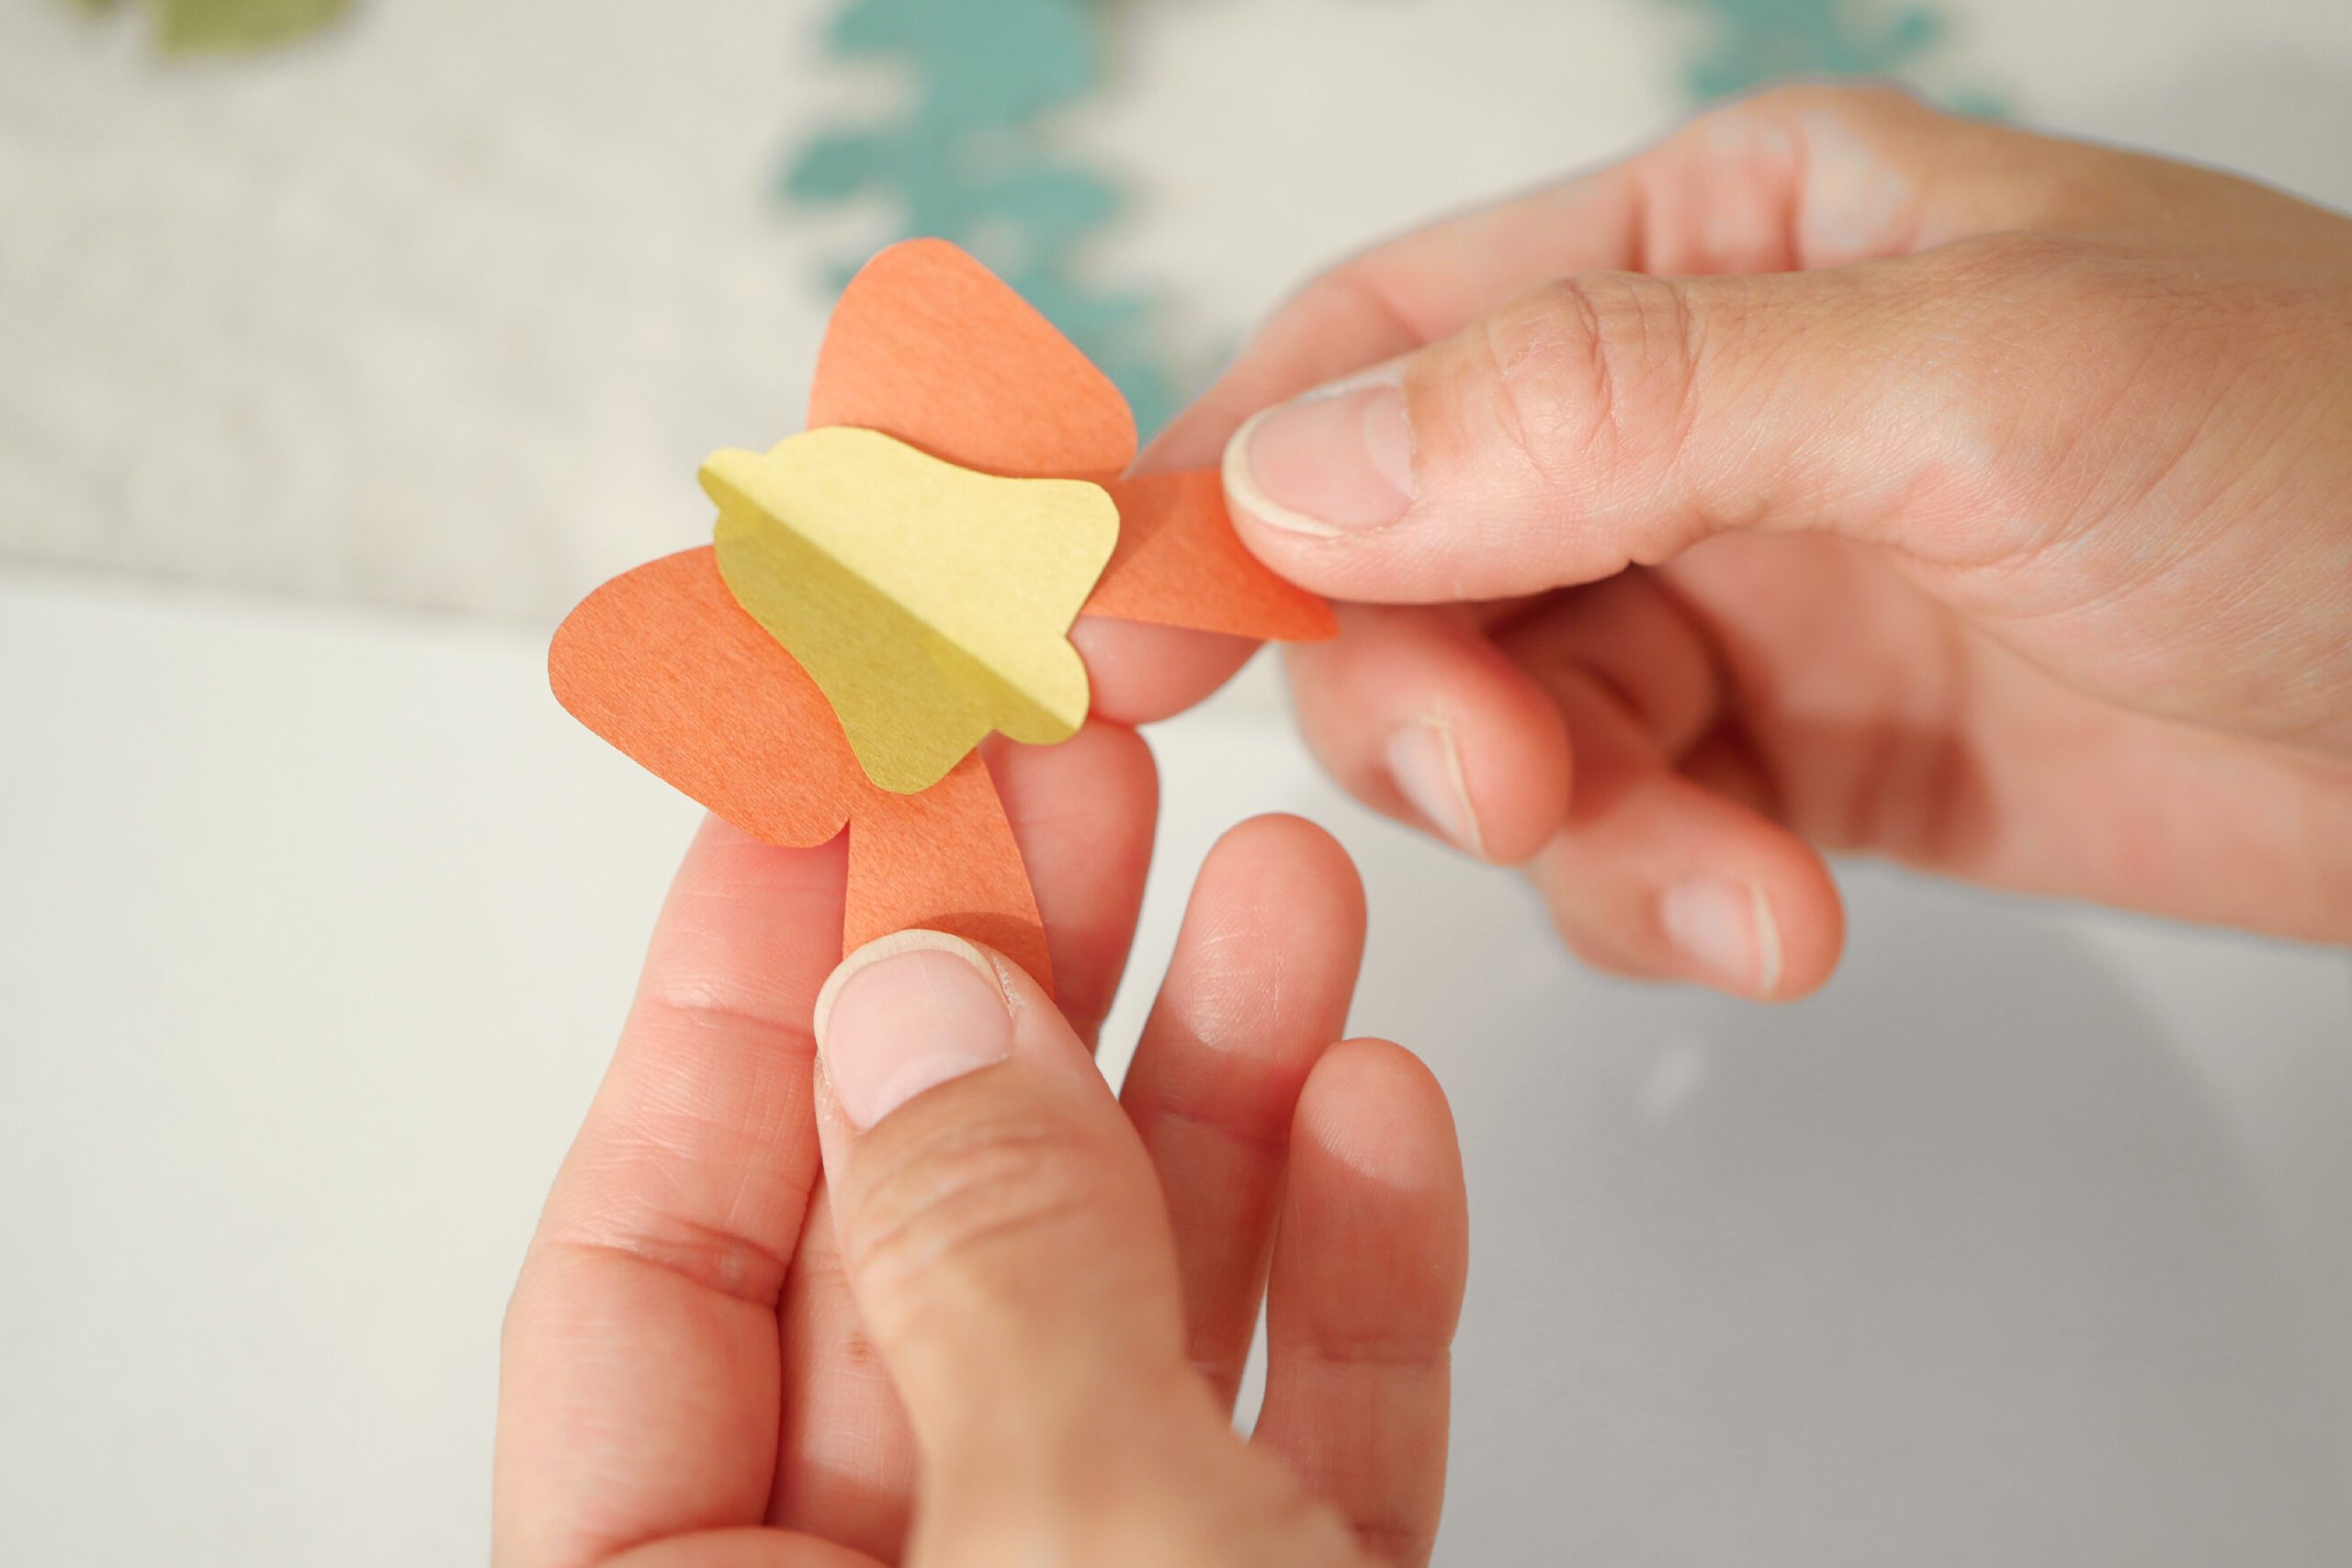
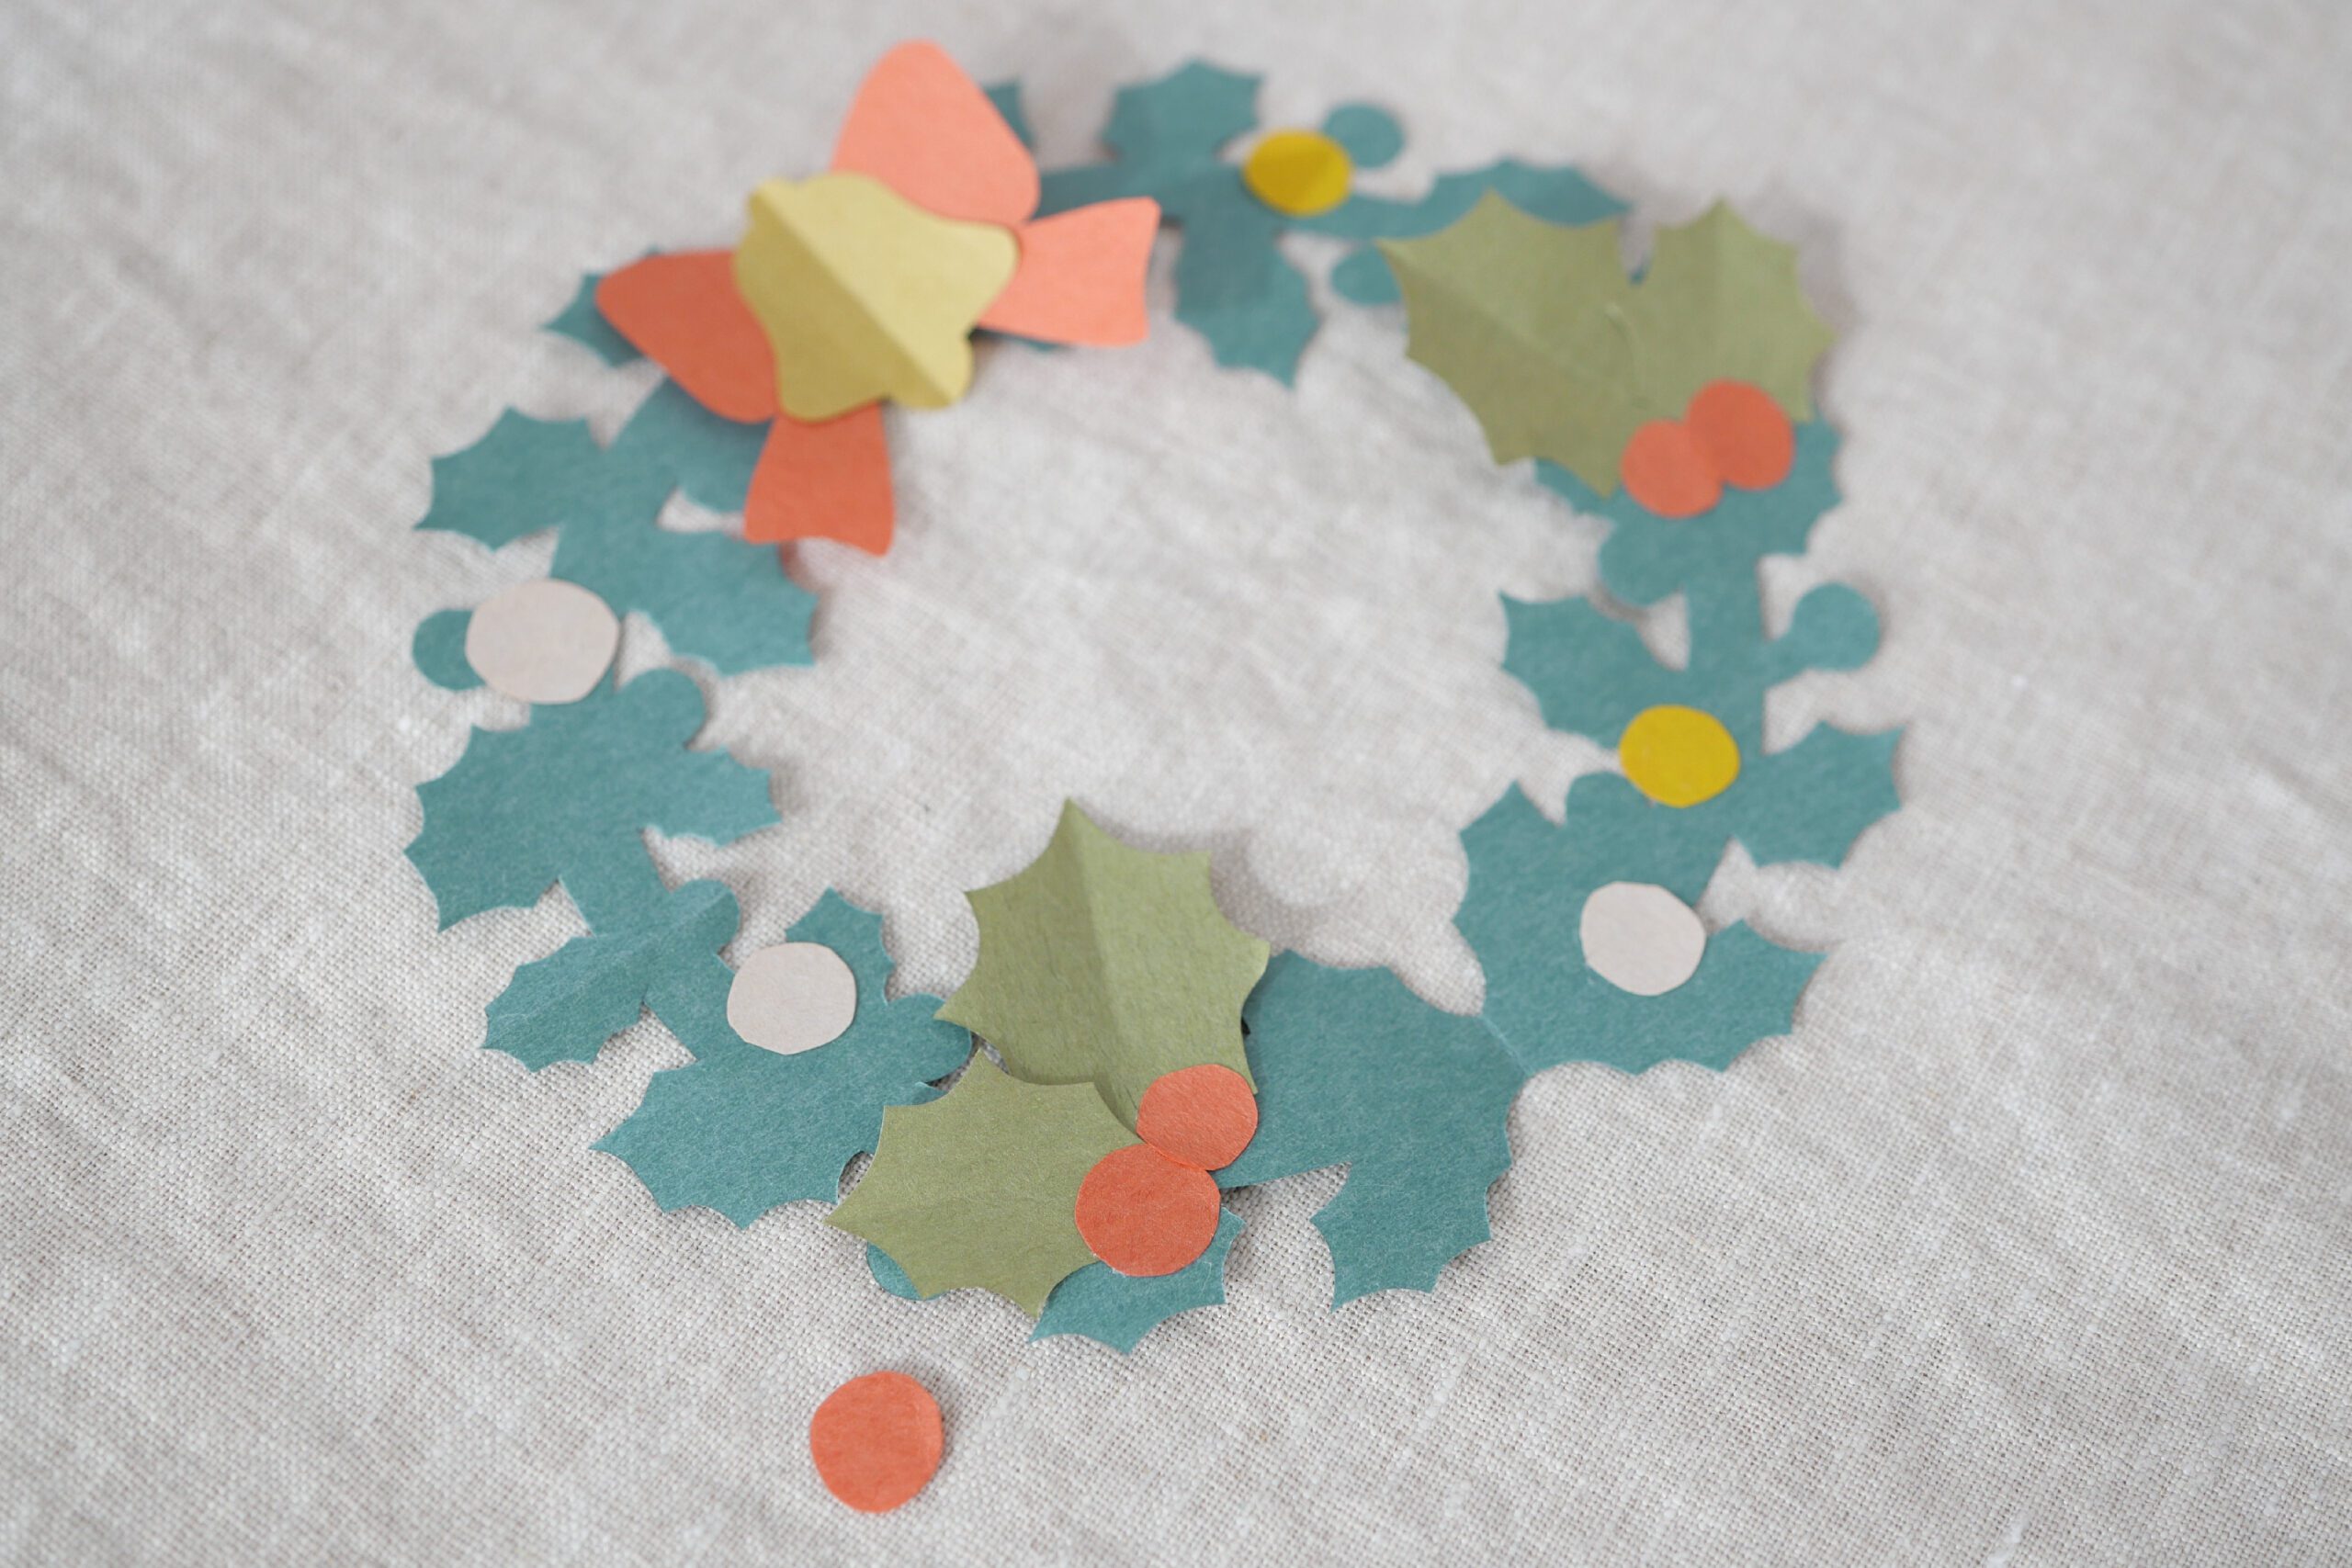
Step 5. Decorate
Once each part is ready, you can begin decorating. First, glue the bell and bow to the folds of the wreath folded in half. Decorate the holly leaves in the desired position and in the desired number of pieces, taking care to balance it out.


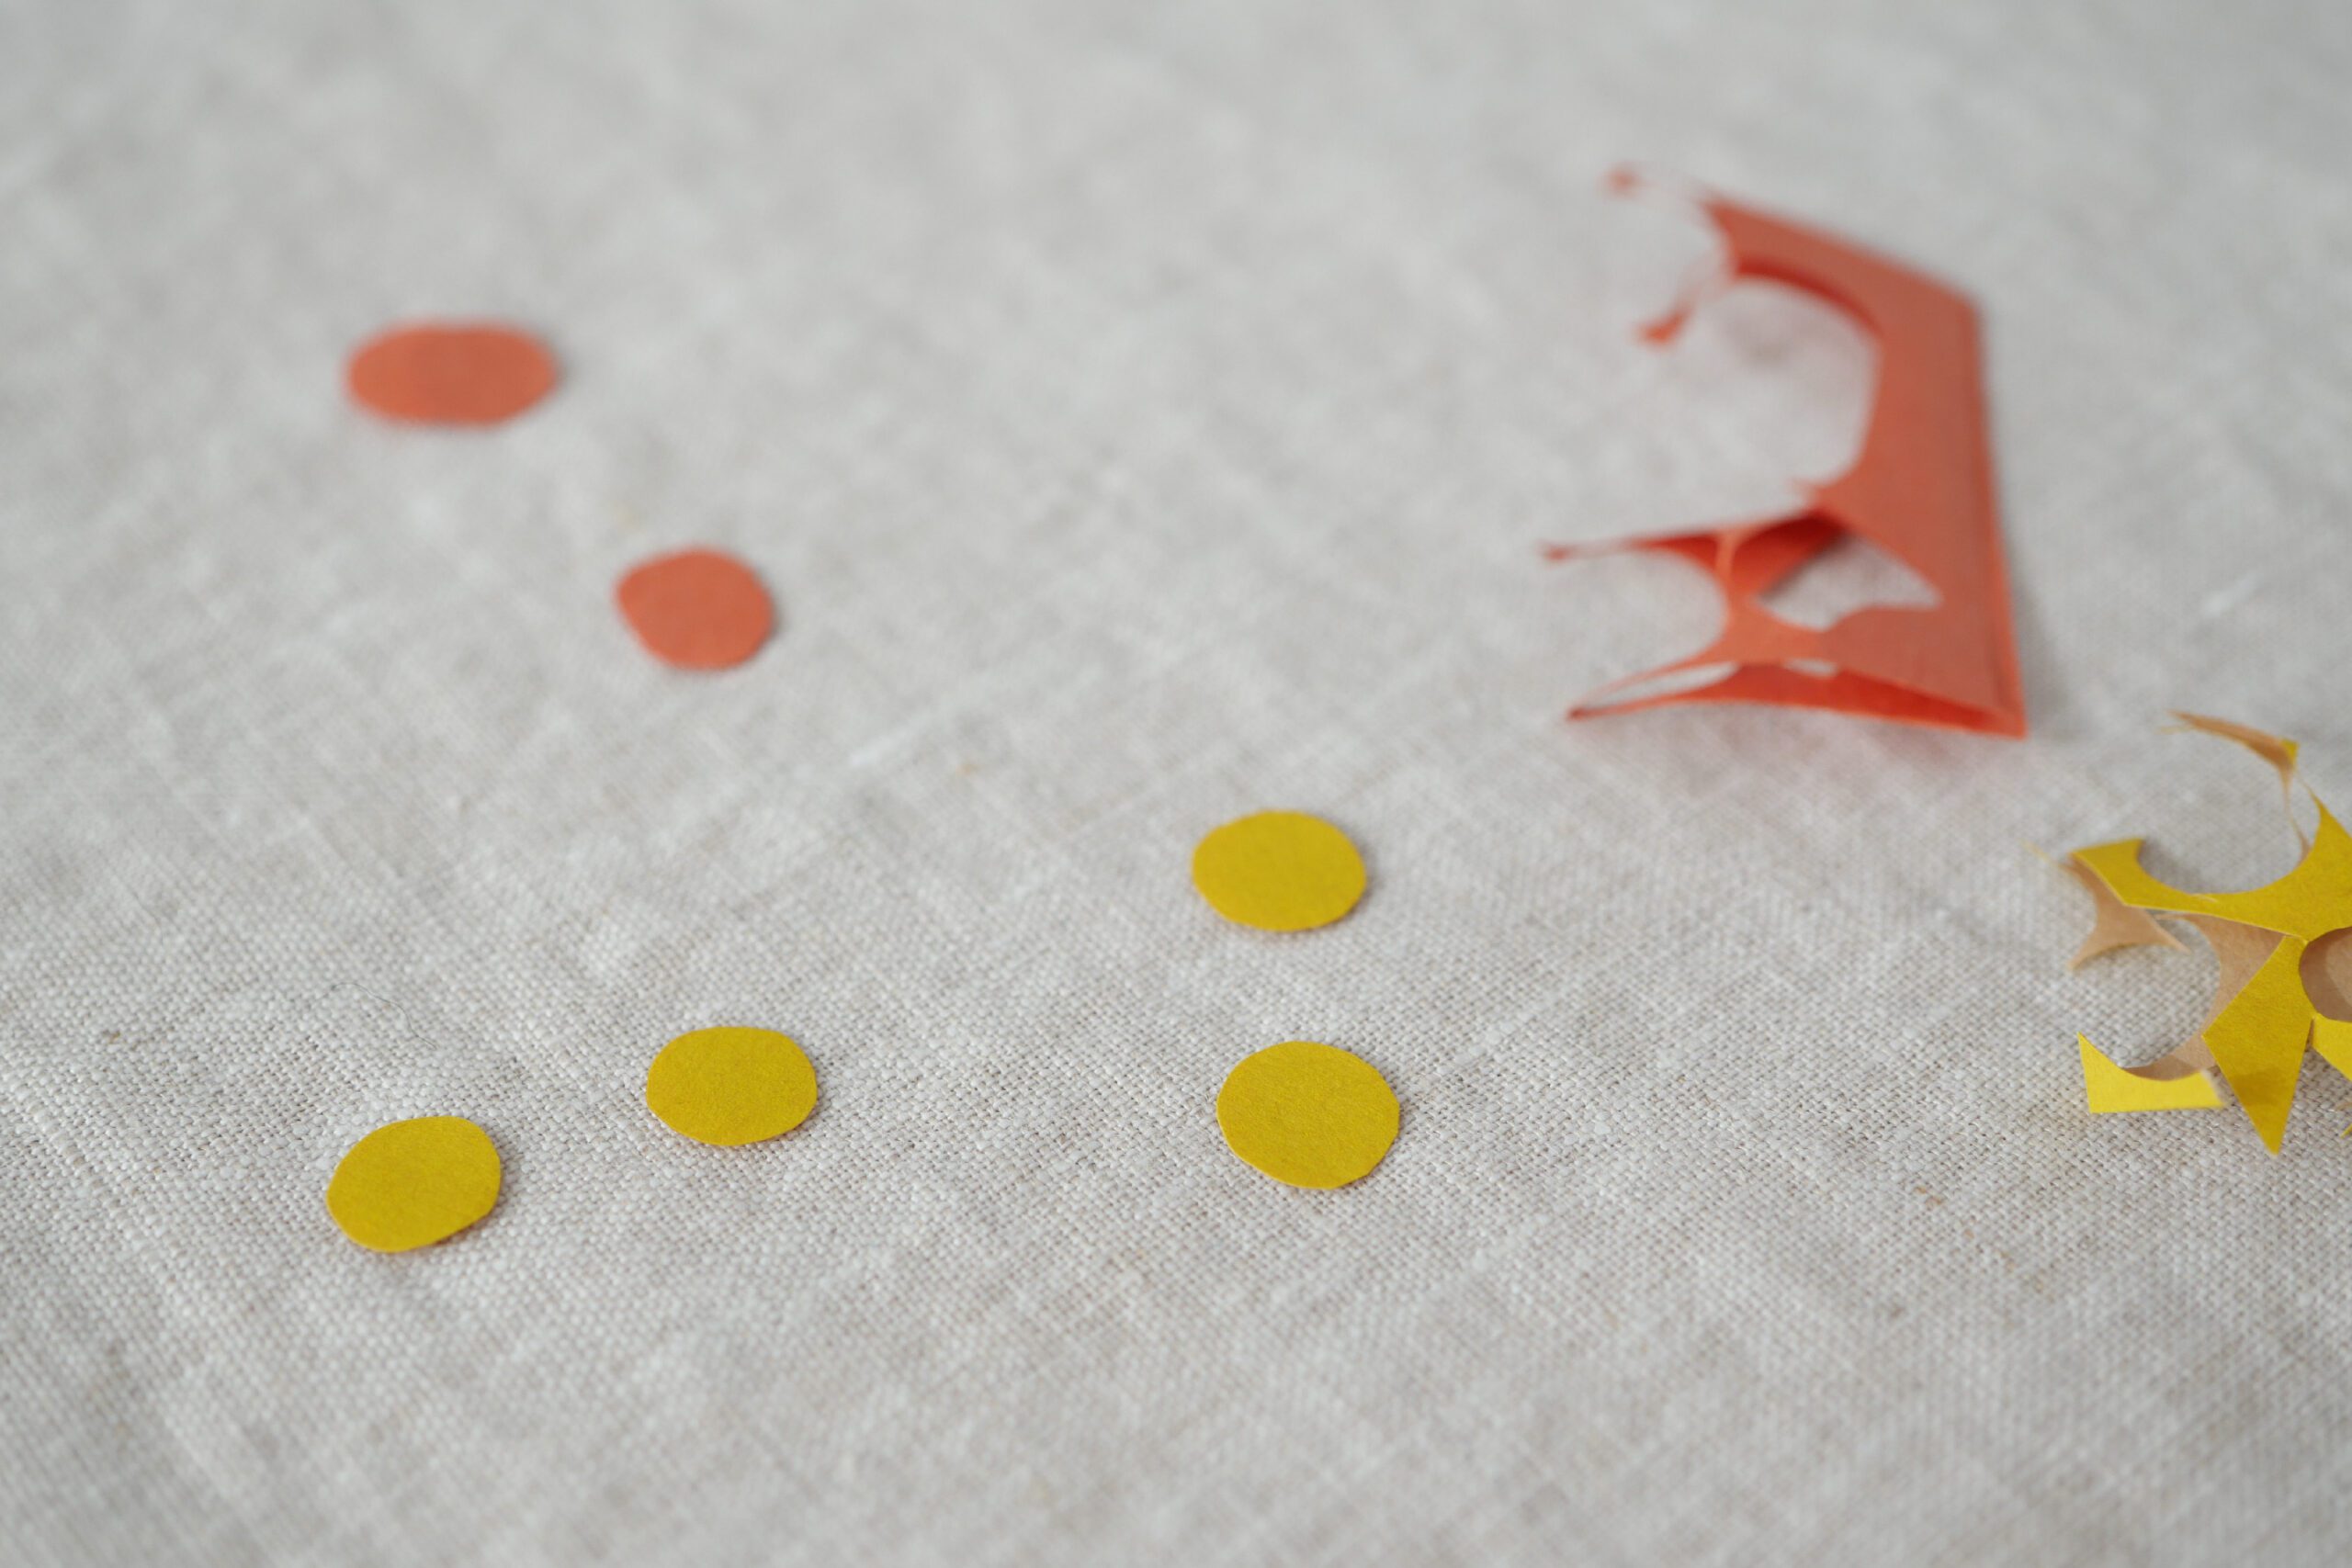
Using scraps of paper, cut out holly leaf berries and shimmering light decorations. Just cutting them into circles will be enough to make a decorative piece. Attach them to the paper wreath in a balanced manner.


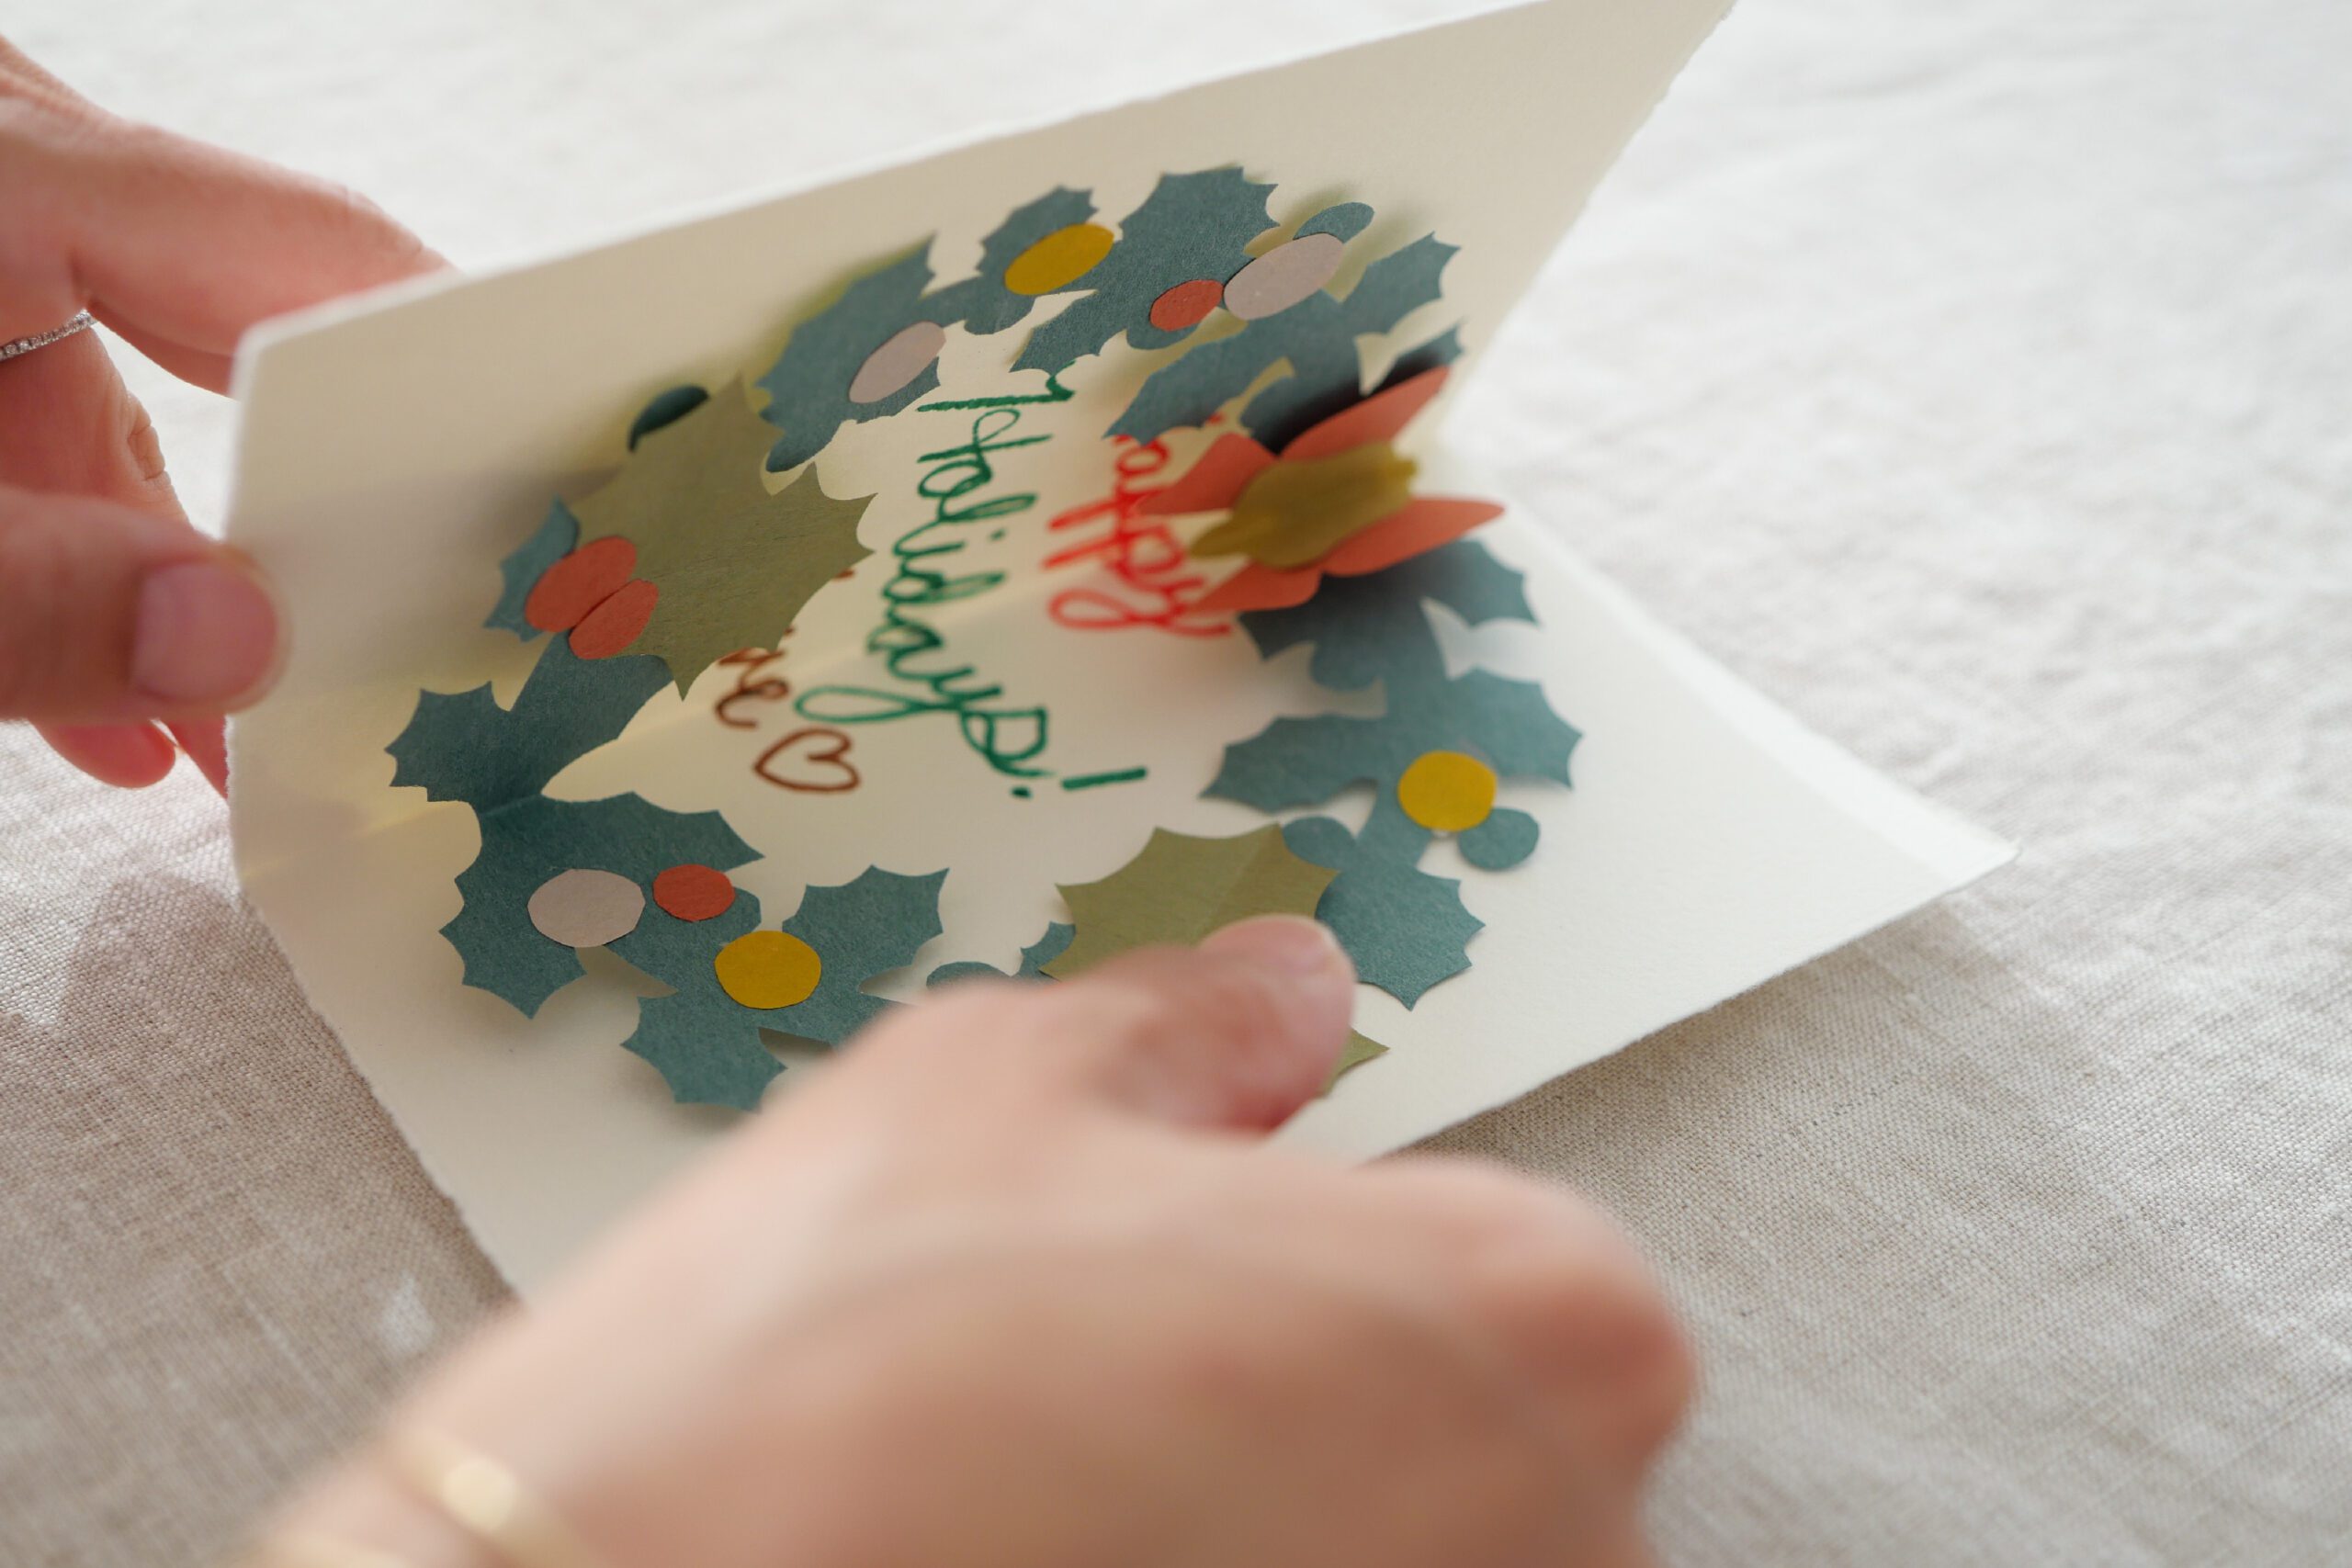
Step 6. Write a Message
Write your message before attaching the wreath to the card. It’s my daughter’s turn! It is best to write your message in the center of the folded card.

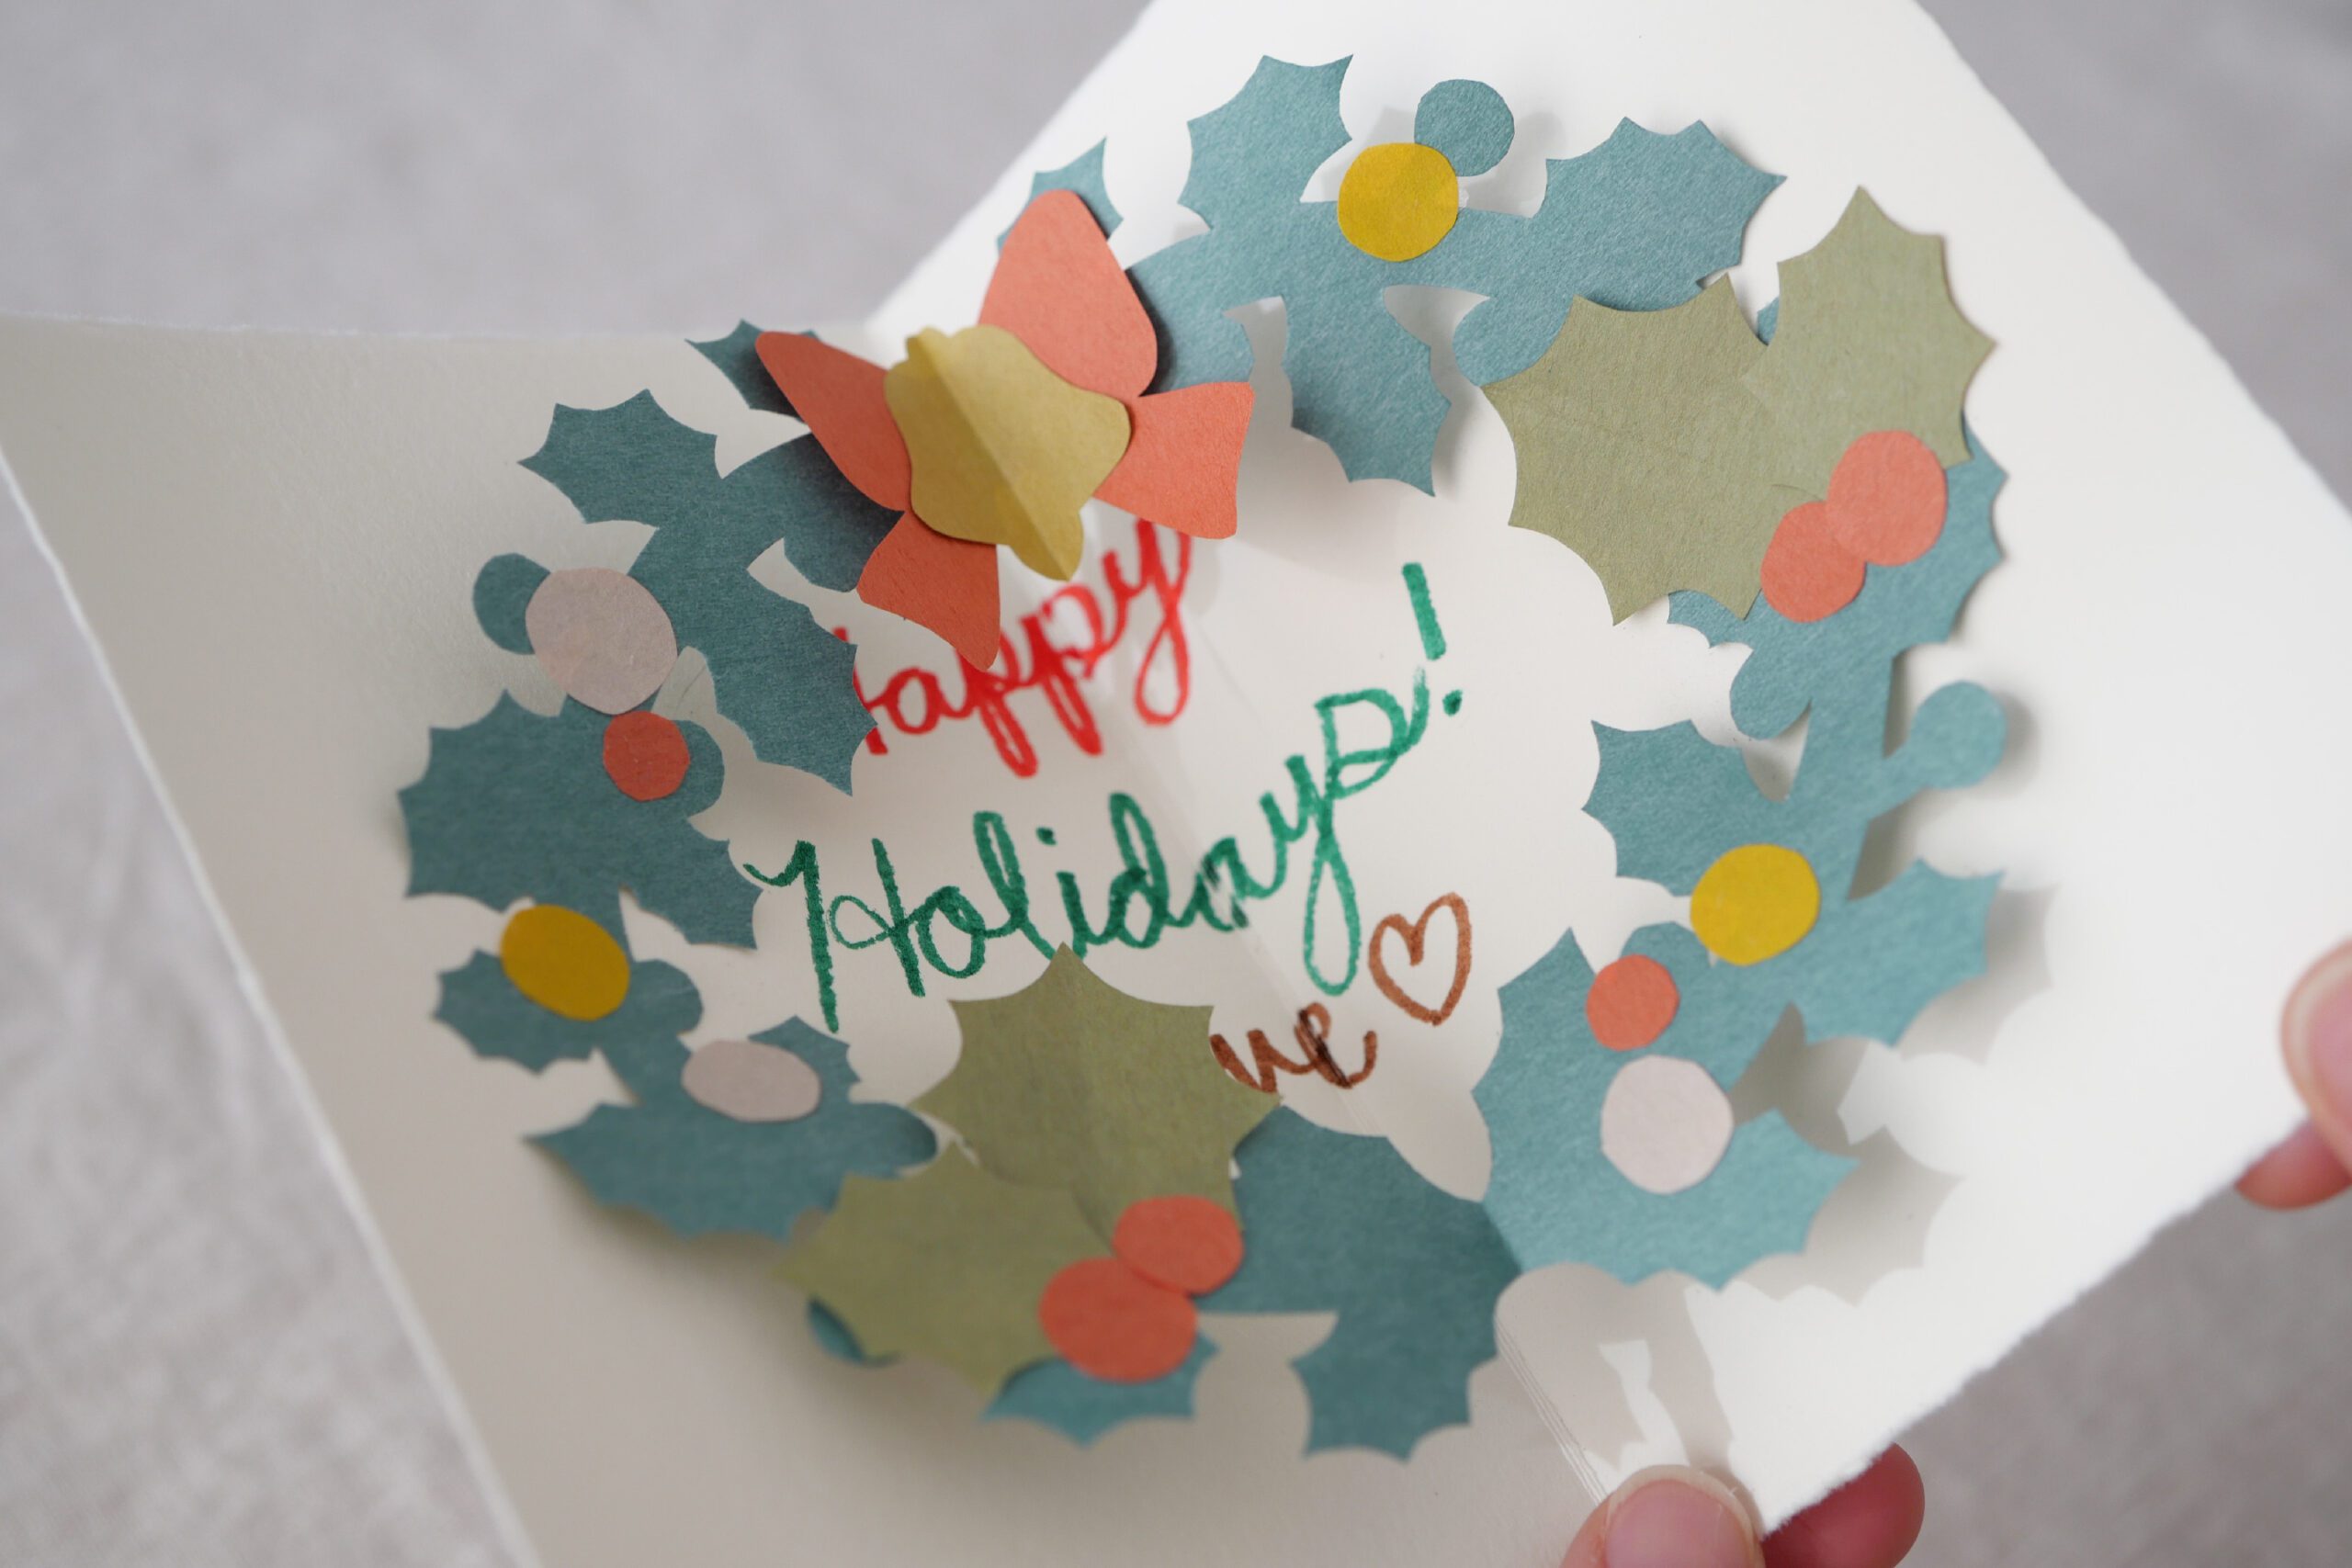
Step 7. Glue the Wreath
Glue the edges of the wreath so that the wreath floats up from the card. Gently open it and you have a beautiful finished floating wreath card.


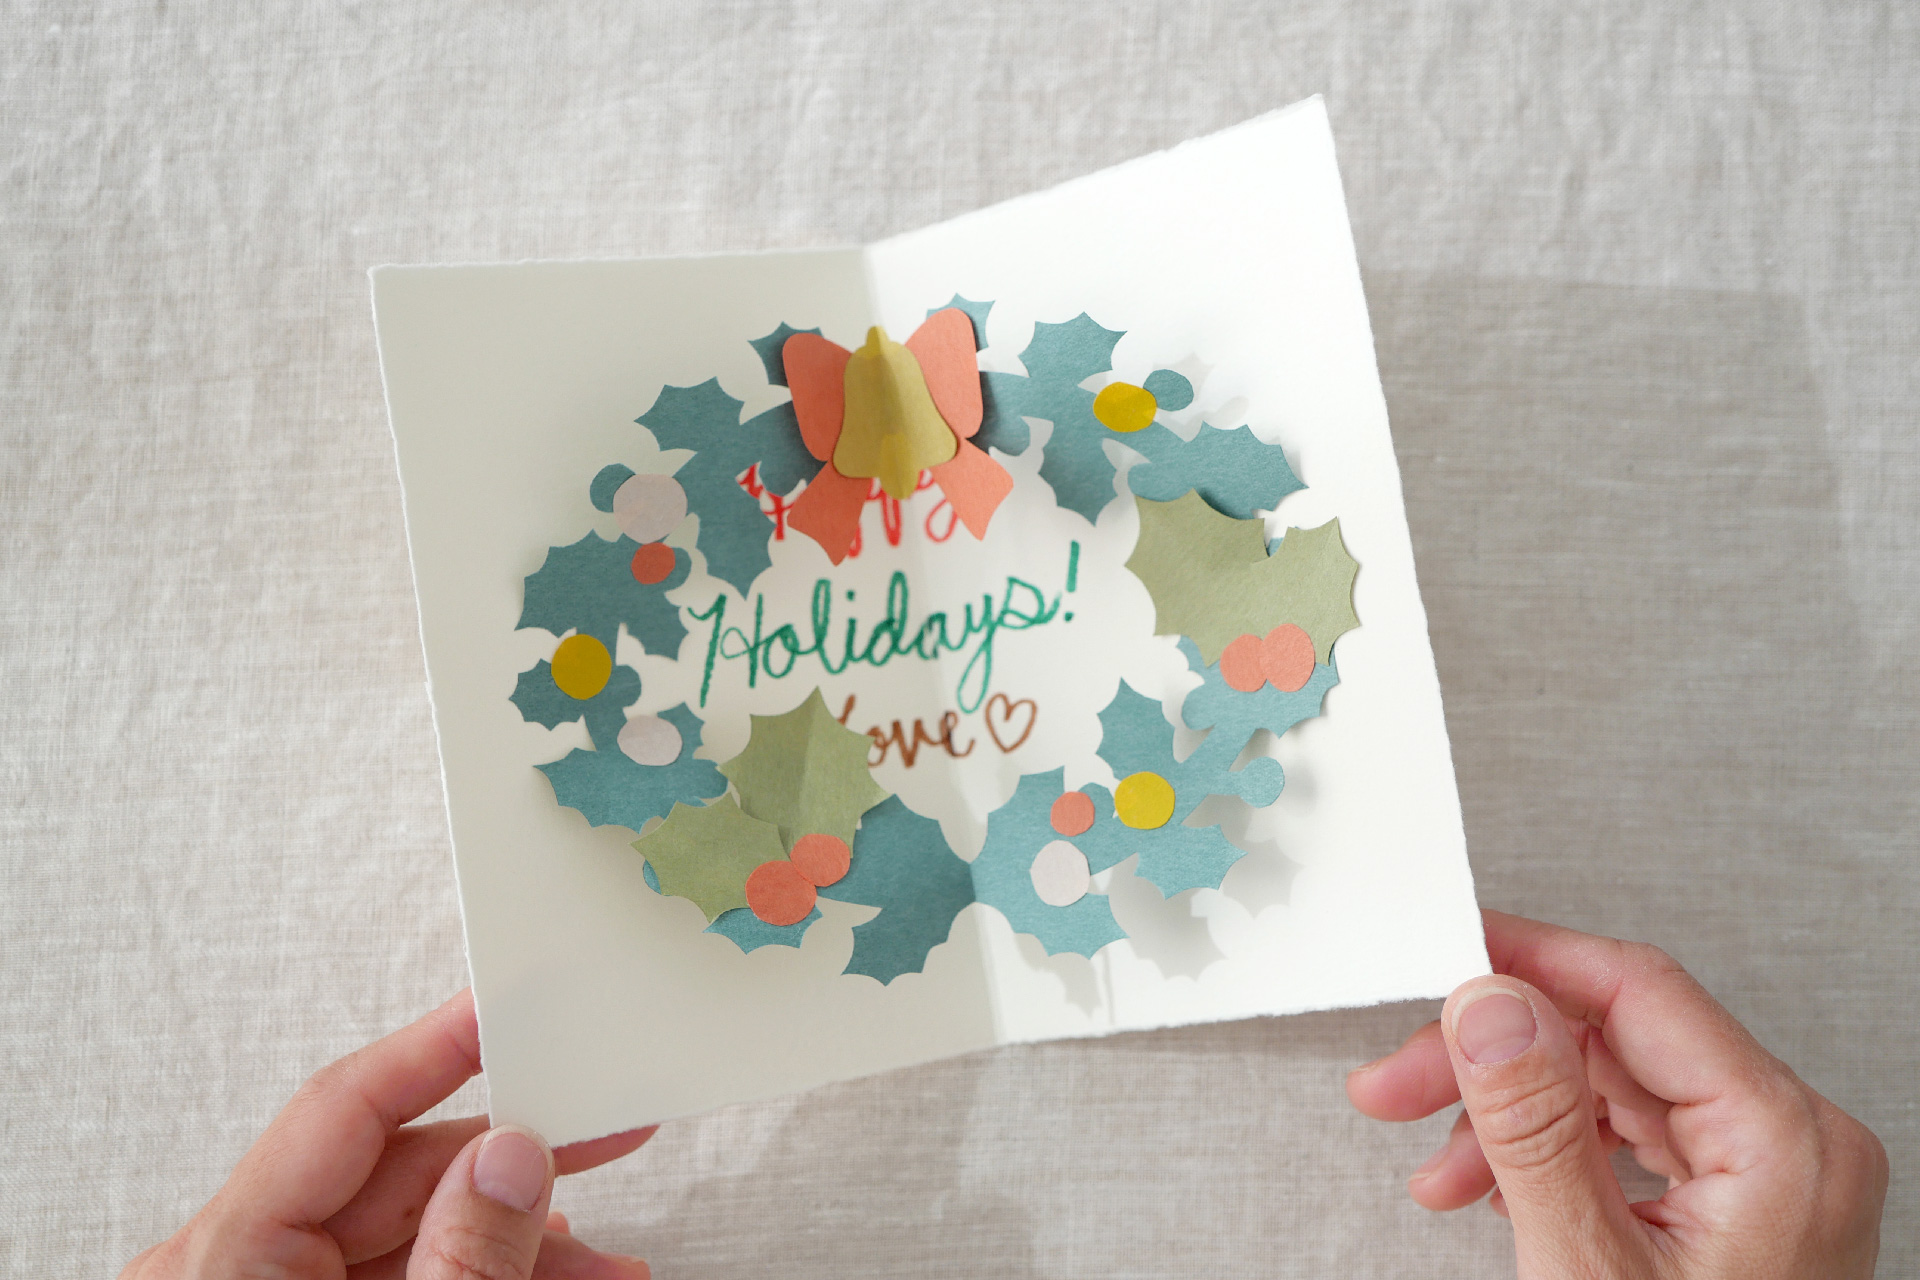
Pop-up Card with Paper Wreath
ホリデーシーズンが始まり、友人や学校の先生、お世話になった方々に感謝の気持ちを表す時がやってきました。感謝の気持ちを伝えるのに一番の贈り物、それは手づくりのカードです。手書きのメッセージを添えたカードは、受け取る相手に喜びを与えてくれると願っています。
今回はそこに少しの工夫と驚きを。ホリデーシーズンにぴったりなペーパーリースをポップアップカードに仕上げました。つくり方はオーソドックスな切り絵の手法。折り畳んだ紙をはさみで切って模様をつくります。切った紙を広げるとパターンが連続模様となり、リースの形が現れます。切り紙のテクニックでデコレーションを飾れば、浮き上がるリースカードの出来上がりです。私たちの思いがこのカードと共に届きますように。
*今回ご紹介するのは少し複雑なパターンなので無料でダウンロードできる型紙をご用意しました。型紙を使わずに、ご自分で好きな形に切ってもいいと思います。
*次回のポストでは、お子さんと一緒につくれるよりシンプルな型紙をご紹介しますのでそちらもお楽しみに。
用意するもの
– 折り紙 *もしくは15cm四方の色紙
– カード台紙 *今回使用したのは15cm × 20cmの二つ折りです
– ハサミ
– 糊
– テープ
– 型紙
こちらが型紙です。ダウンロードしてお使いください。
download the patternつくりかた
Step 1. 紙を折って、型紙を合わせる
はじめにリースの形を切ります。緑色の折り紙を4つ折りにします。初めに半分に折り、さらにもう半分に折ります。ダウンロードした型紙の点線部分を、4つ折りの折り目にぴったり合わせて、端をテープで止めます。
Step 2. 型に沿って切る
型紙の線に沿ってハサミで切ります。曲線や細かい部分は、ハサミを動かすのではなく、紙を回すように動かして切るときれいに切れます。
Step 3. 紙を広げる
切り終わったリースをやさしく慎重に広げます。ペーパーリースの輪が広がりました。
Step 4. デコレーションパーツを切る
ベル、リボン、ホーリーリーフ、星の型紙を用意します。デコレーションパーツはいずれも2つ折りにした紙に型紙を当てて切ります。ベル、リボンは各1枚、ホーリーリーフは大小合わせて4〜6枚ほど用意します。
Step 5. デコレーションする
それぞれのパーツの準備ができたら、デコレーションに取り掛かります。まずは半分に折ったリースの折り目に合わせて、ベルとリボンを糊で貼ります。ホーリーリーフはバランスを見て好きな位置に好きな枚数飾り付けましょう。
紙の切れ端使って、ホーリーリーフの実や、光の煌めきの飾りを切ります。丸く切るだけでも十分な飾りになります。それらをバランス良くペーパーリースに貼り付けます。
Step 6. メッセージを書く
カードにリースを貼り付ける前にメッセージを書きます。娘の出番です!二つ折りのカードの中心にメッセージを書くと良いでしょう。
Step 7. カードにリースを貼る
カードからリースが浮き上がるように、リースの端を糊で貼り付けます。そっと開くと、浮き上がるリースカードの出来上がりです。