Pop-up Flower Card
My daughter has loved paper and scissors since she was a little girl. If I keep a drawer full of colored paper, she will freely take it out and begin to make something. She especially loves flowers, and from the time she was about three years old, she often made flowers like this one. Each time I would praise her, she would become happy again and make many more. I am just amazed at the children’s ability to create, whether from things that we have seen somewhere to those that they imagine in their mind. And when this happens, I join her in moving the scissors and create together. Then we look at each other’s creations side by side, saying things like, “I like this one,” or “I like this color combination”.
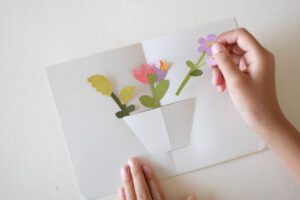
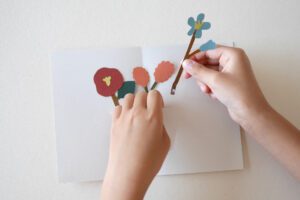
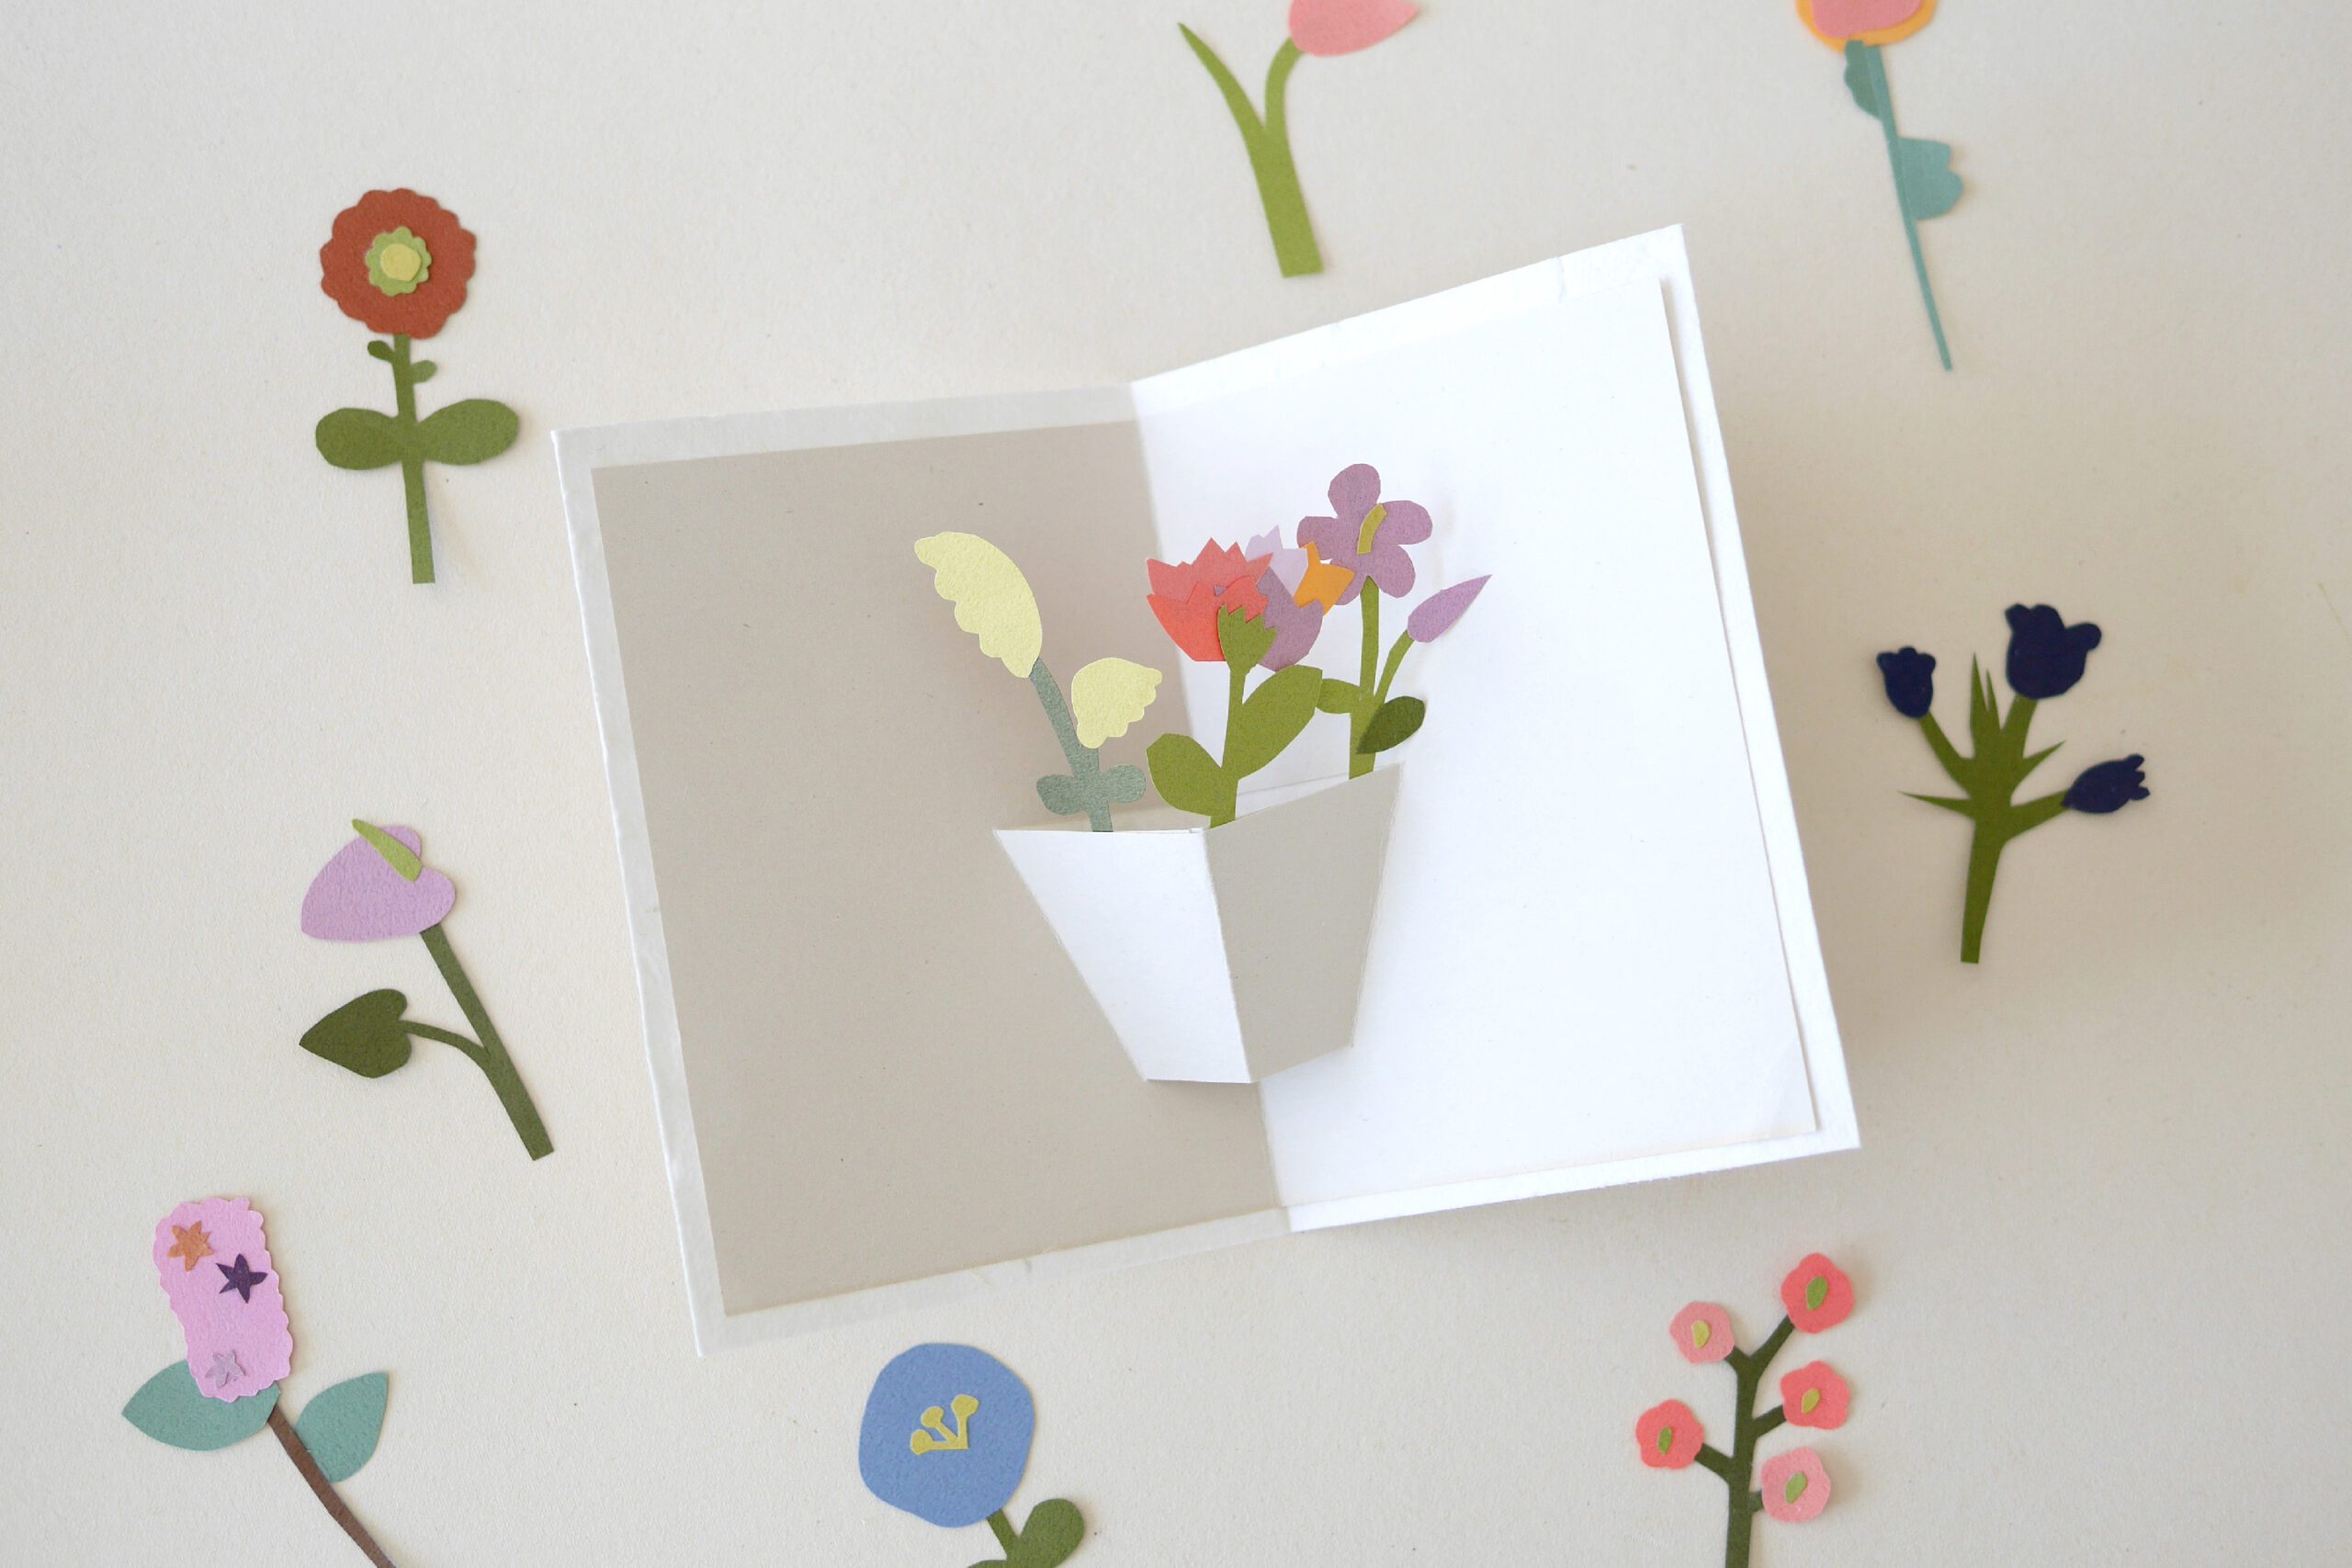
Now, we made a card with these flowers. The card is cut and folded three-dimensionally to reveal a flower vase. Insert a flower into the vase, and you have a card that pops up. How about a congratulations or gratitude card at this time of year when flowers are in full bloom.
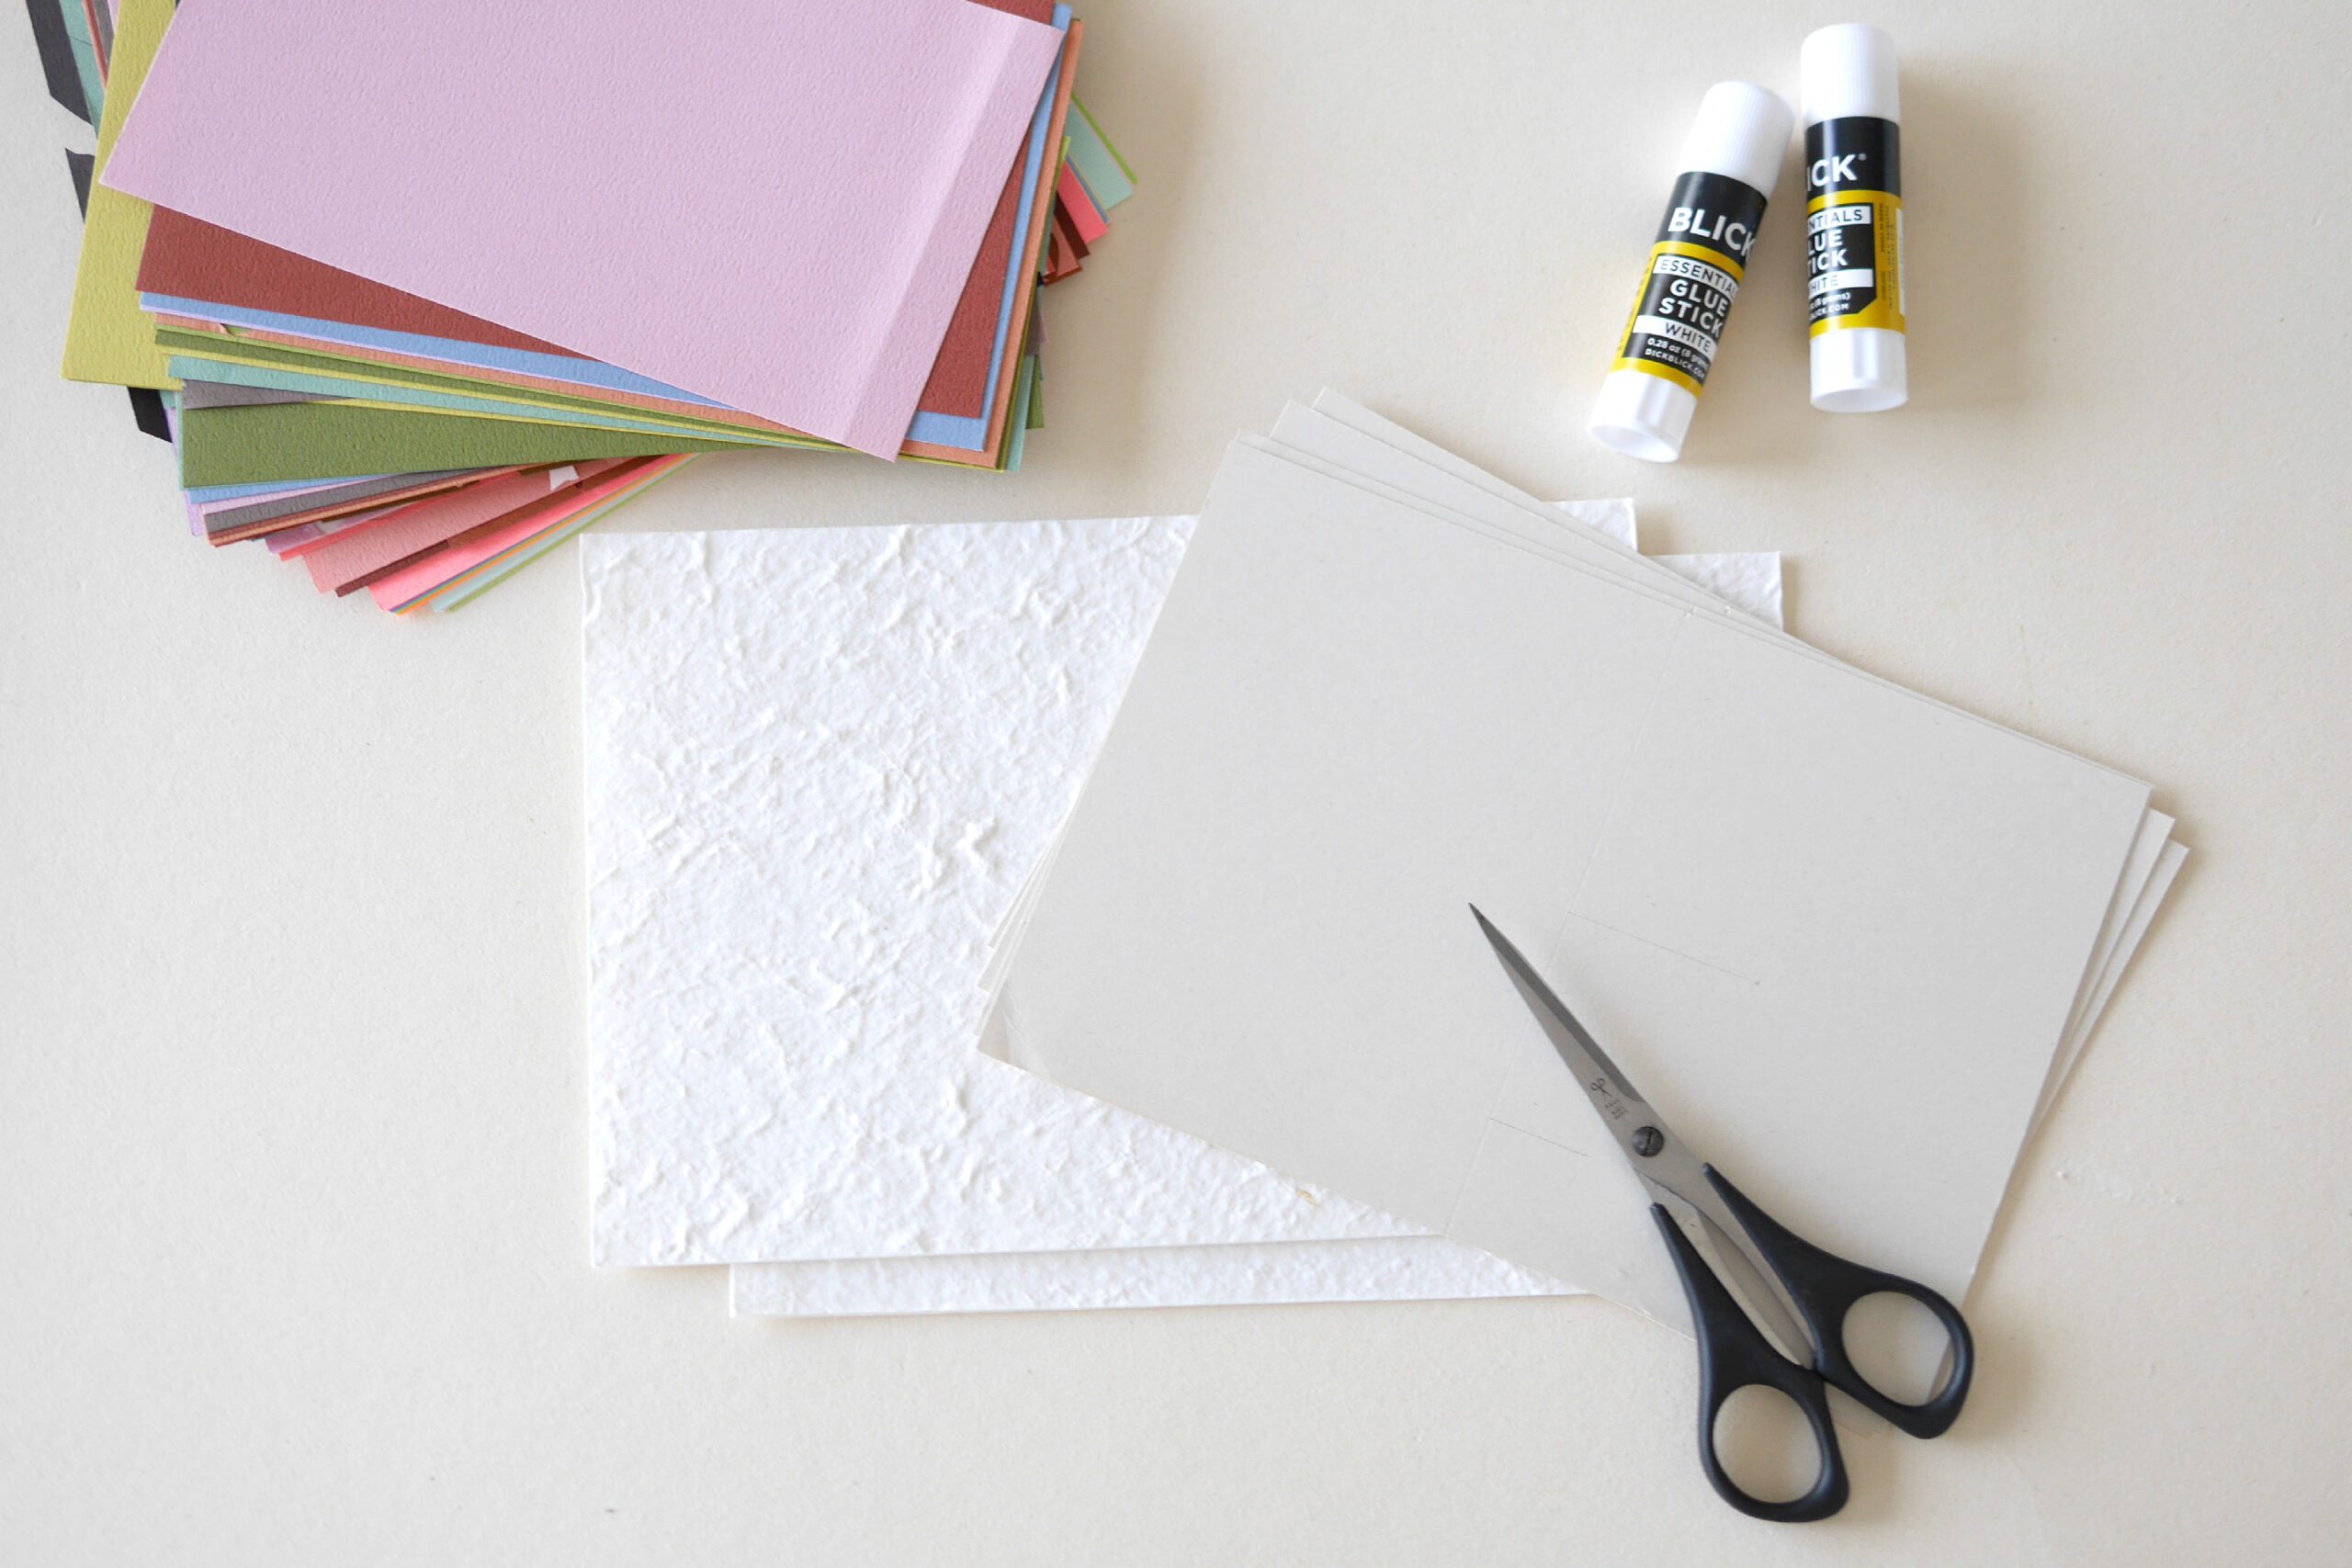
Materials
– Colored paper
– Scissors
– Glue
– Card on the base*
– Card on the cover*
*Card on the base: We made it in 8 x 5 1/2 inch
*Card on the cover: One size larger than the card base
Instructions for making
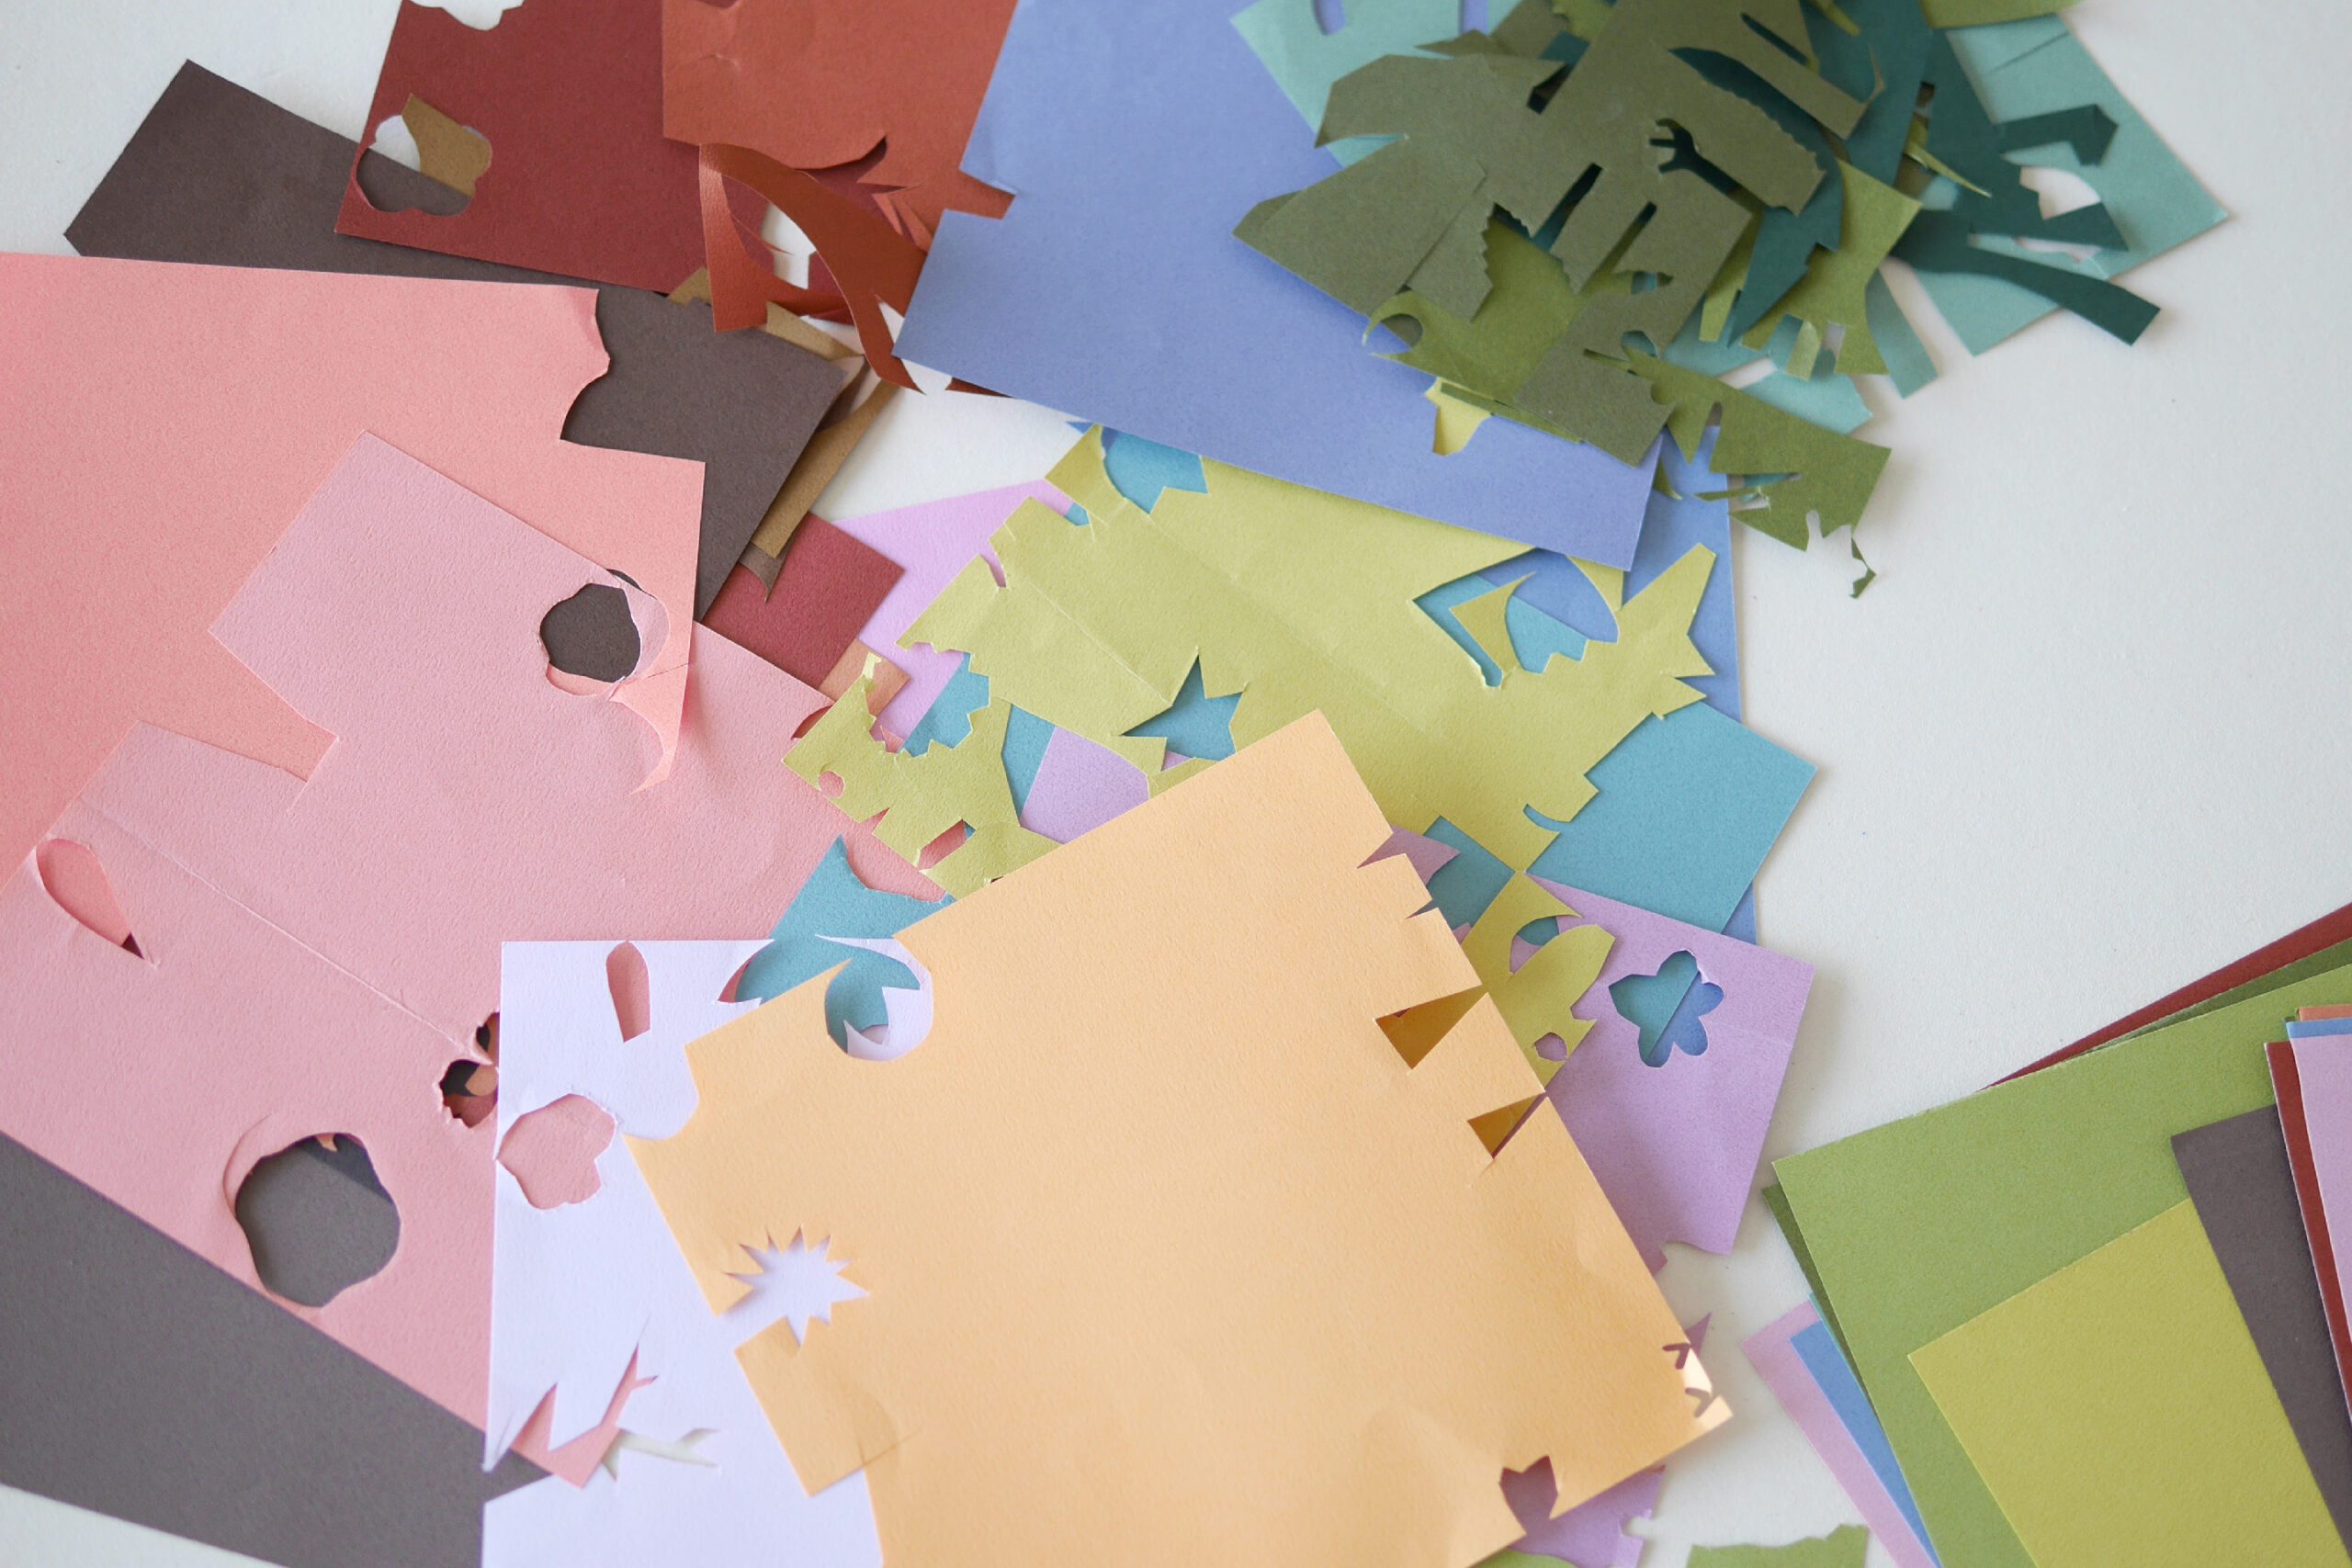
Step 1. Cut into Flower Shapes
Cut colored paper into flower shapes. Roses, carnations, lily, lilacs, dandelions, tulips…. What kind of flowers do you like? Please use your imagination and move the scissors as you like. Of course, you can cut them after making a draft.


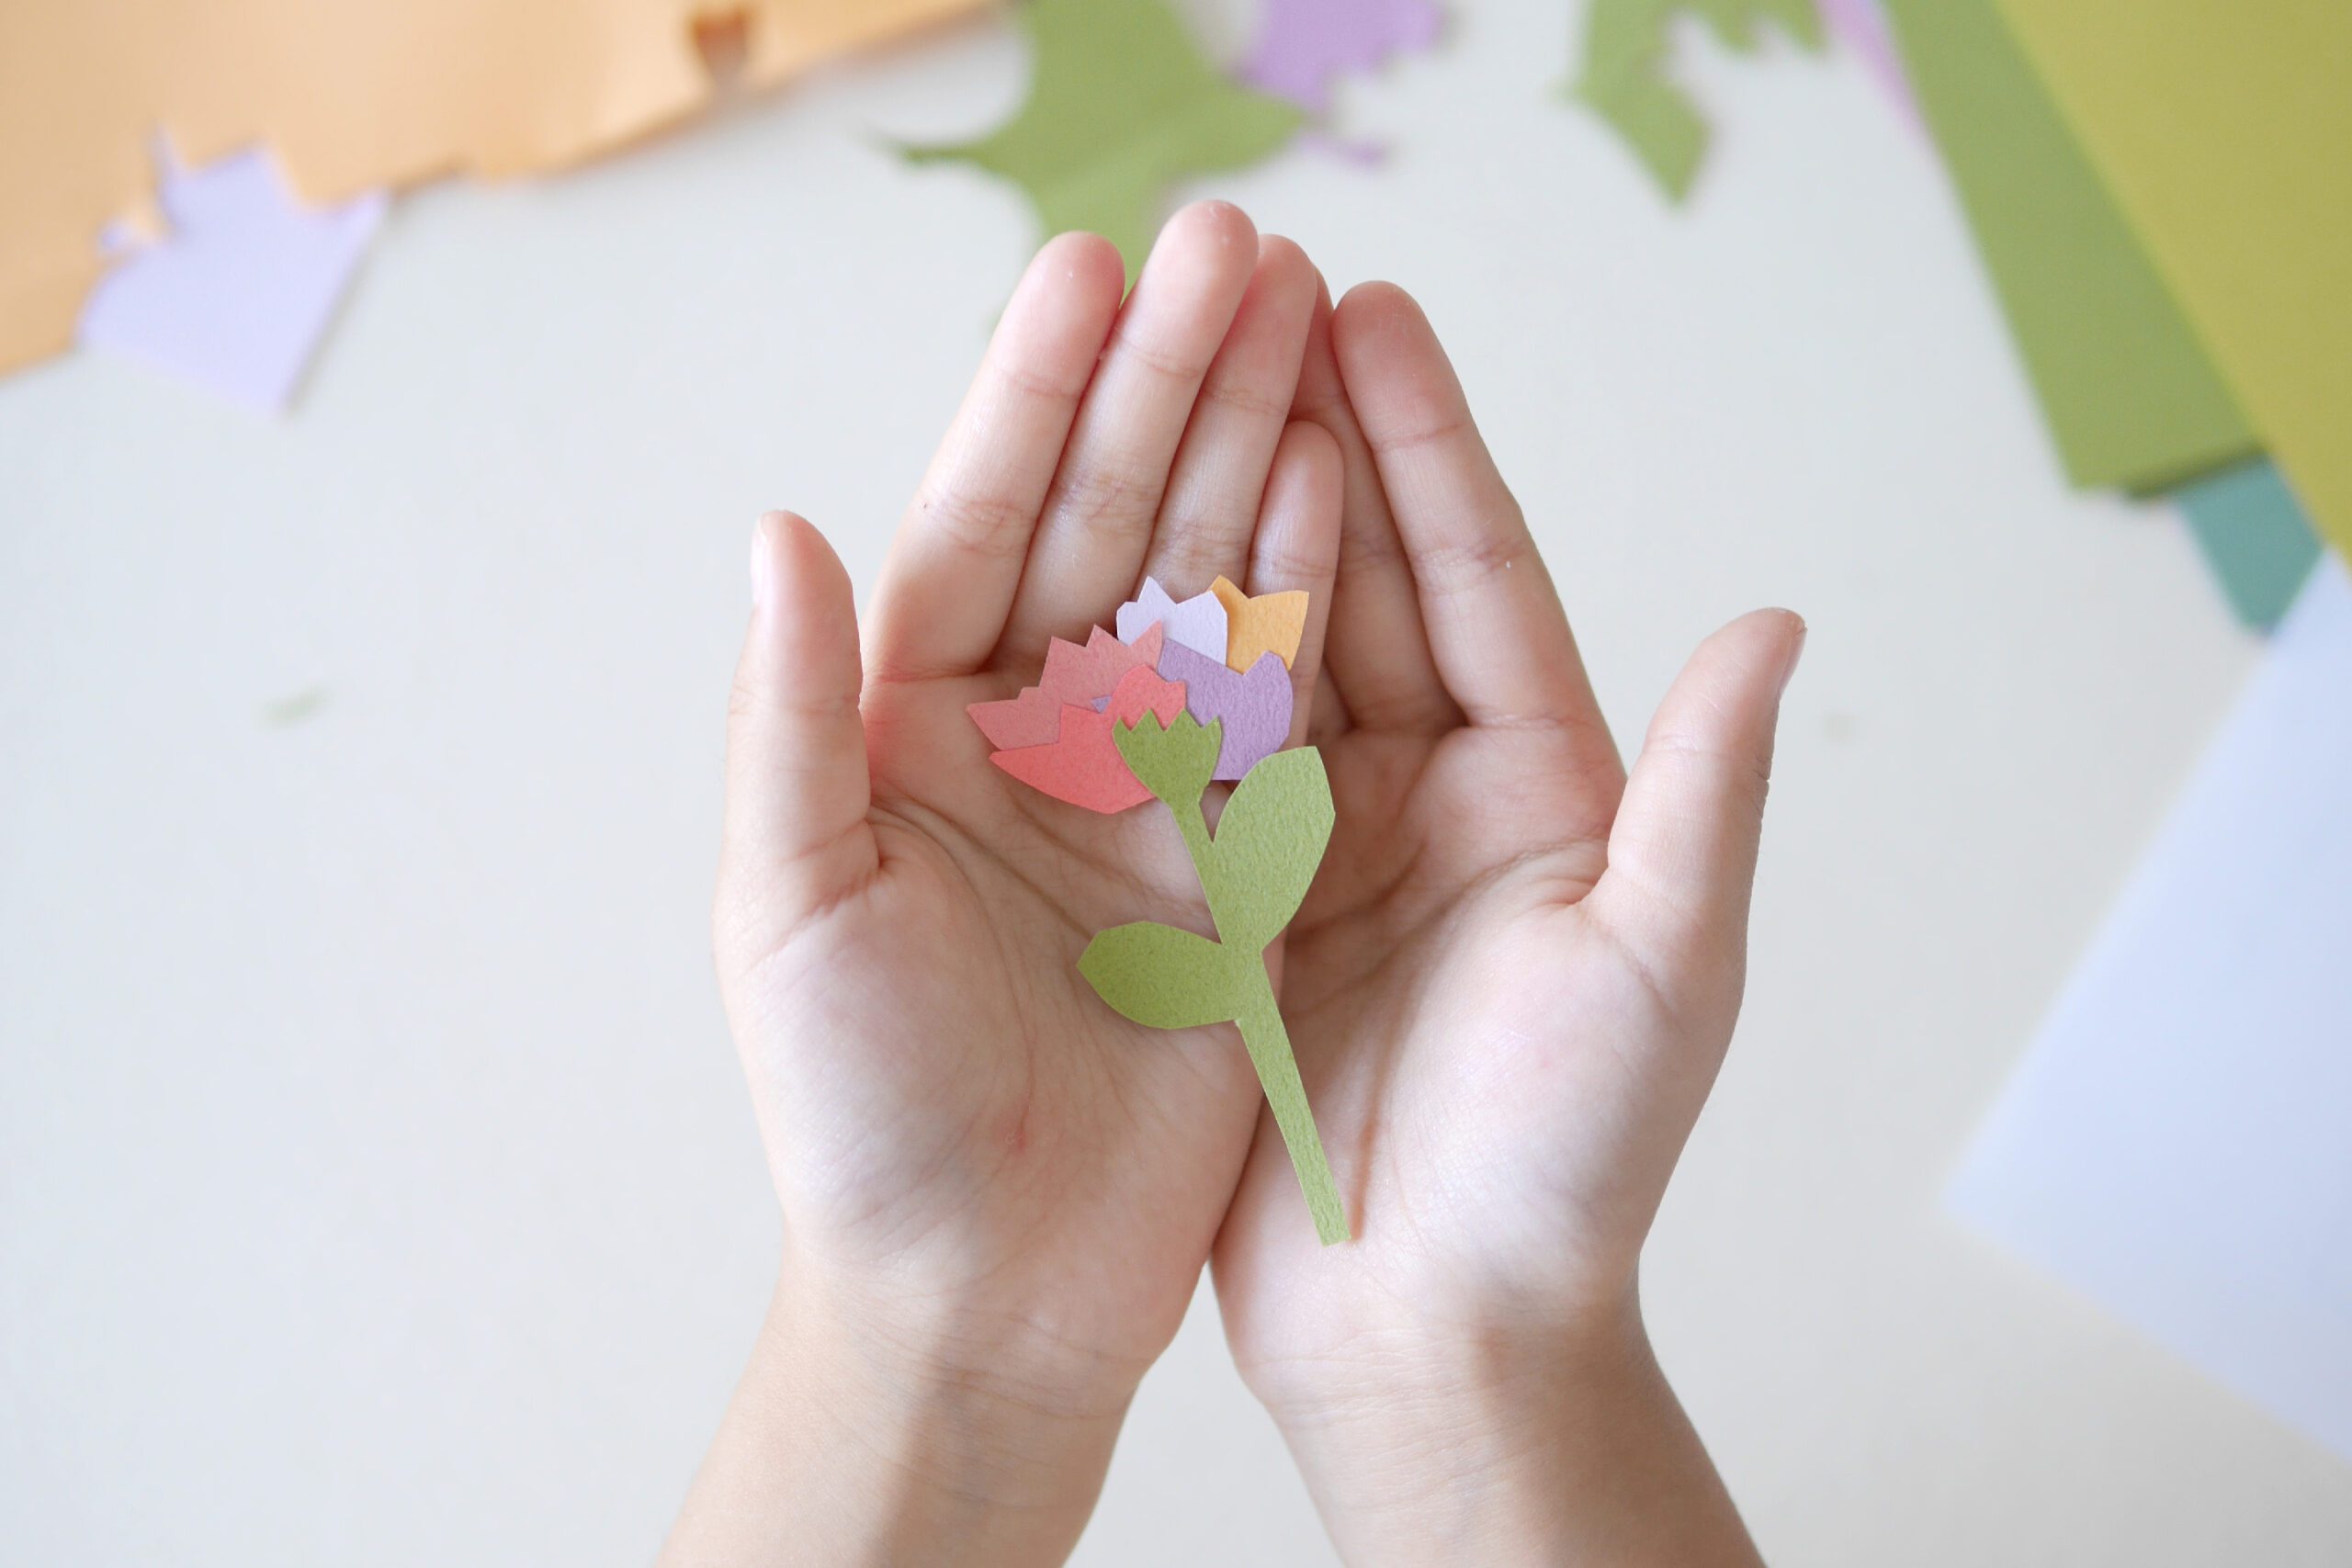
Step 2. Make up the Flower
Cut petals, stems, leaves, and other parts are glued together to form a flower.
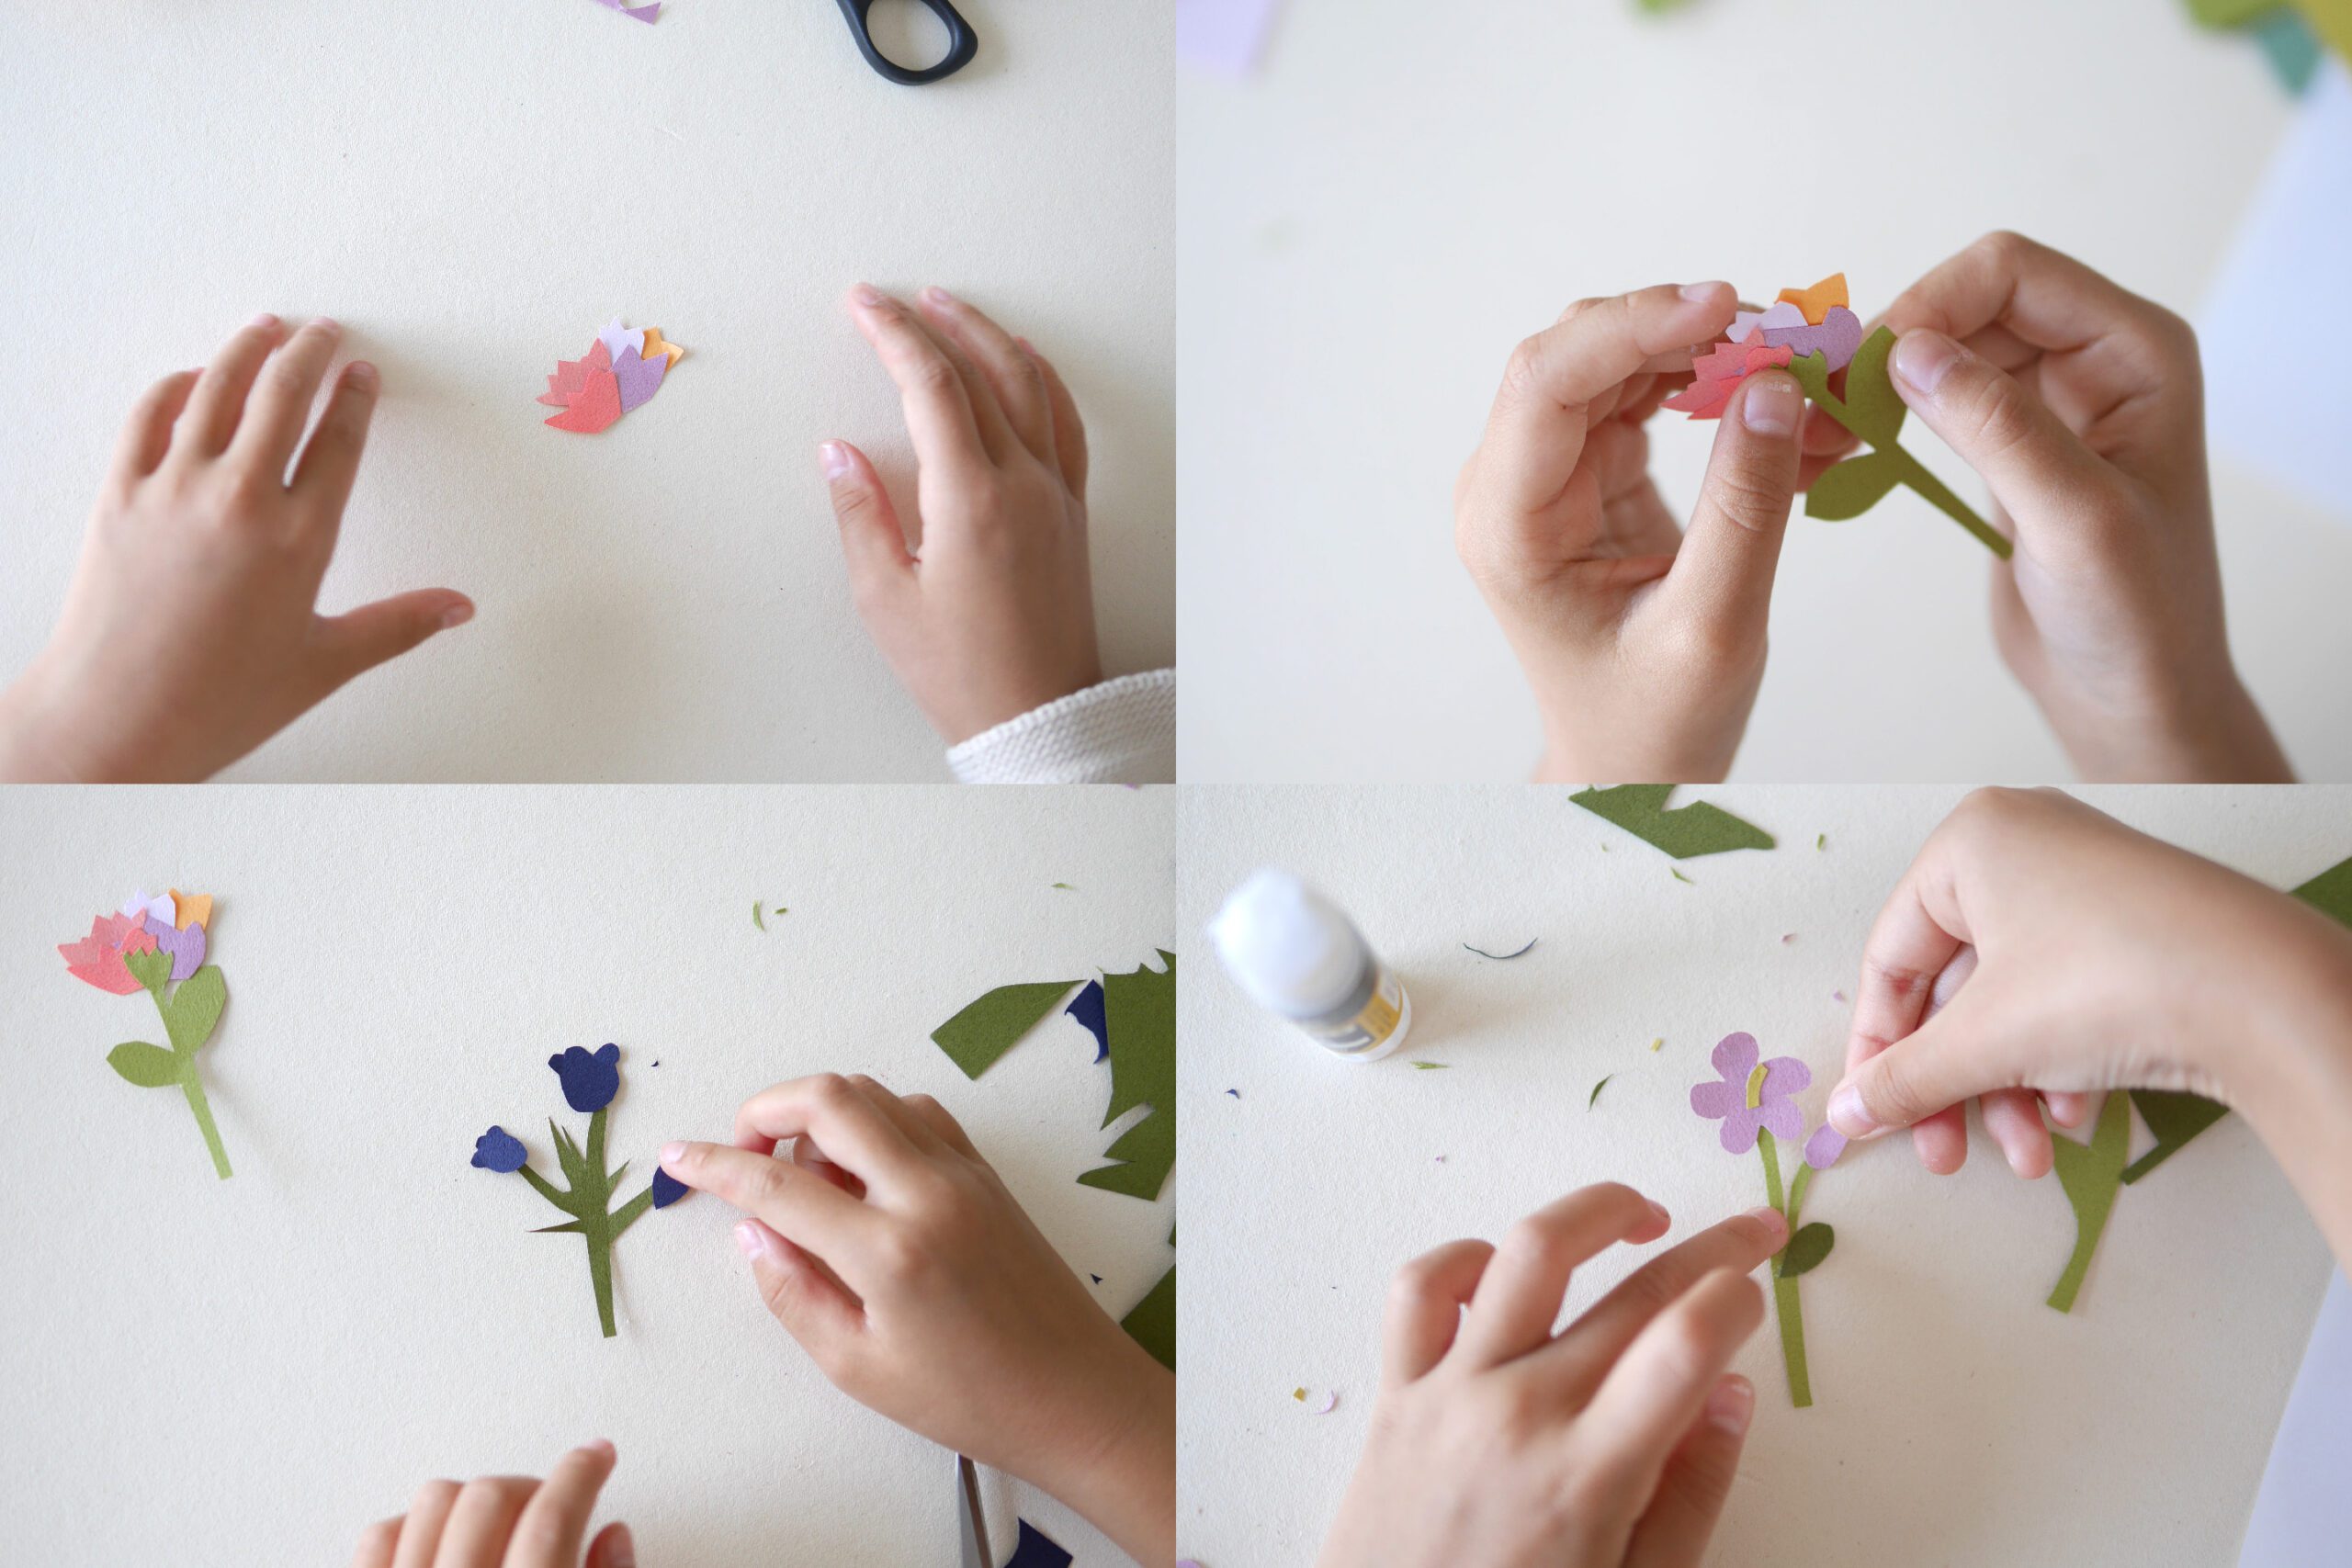
The finished flowers. The flowers were colorful, ranging from carnations, tulips, lilacs, and flowers that I have seen somewhere before, to those that are imagined.

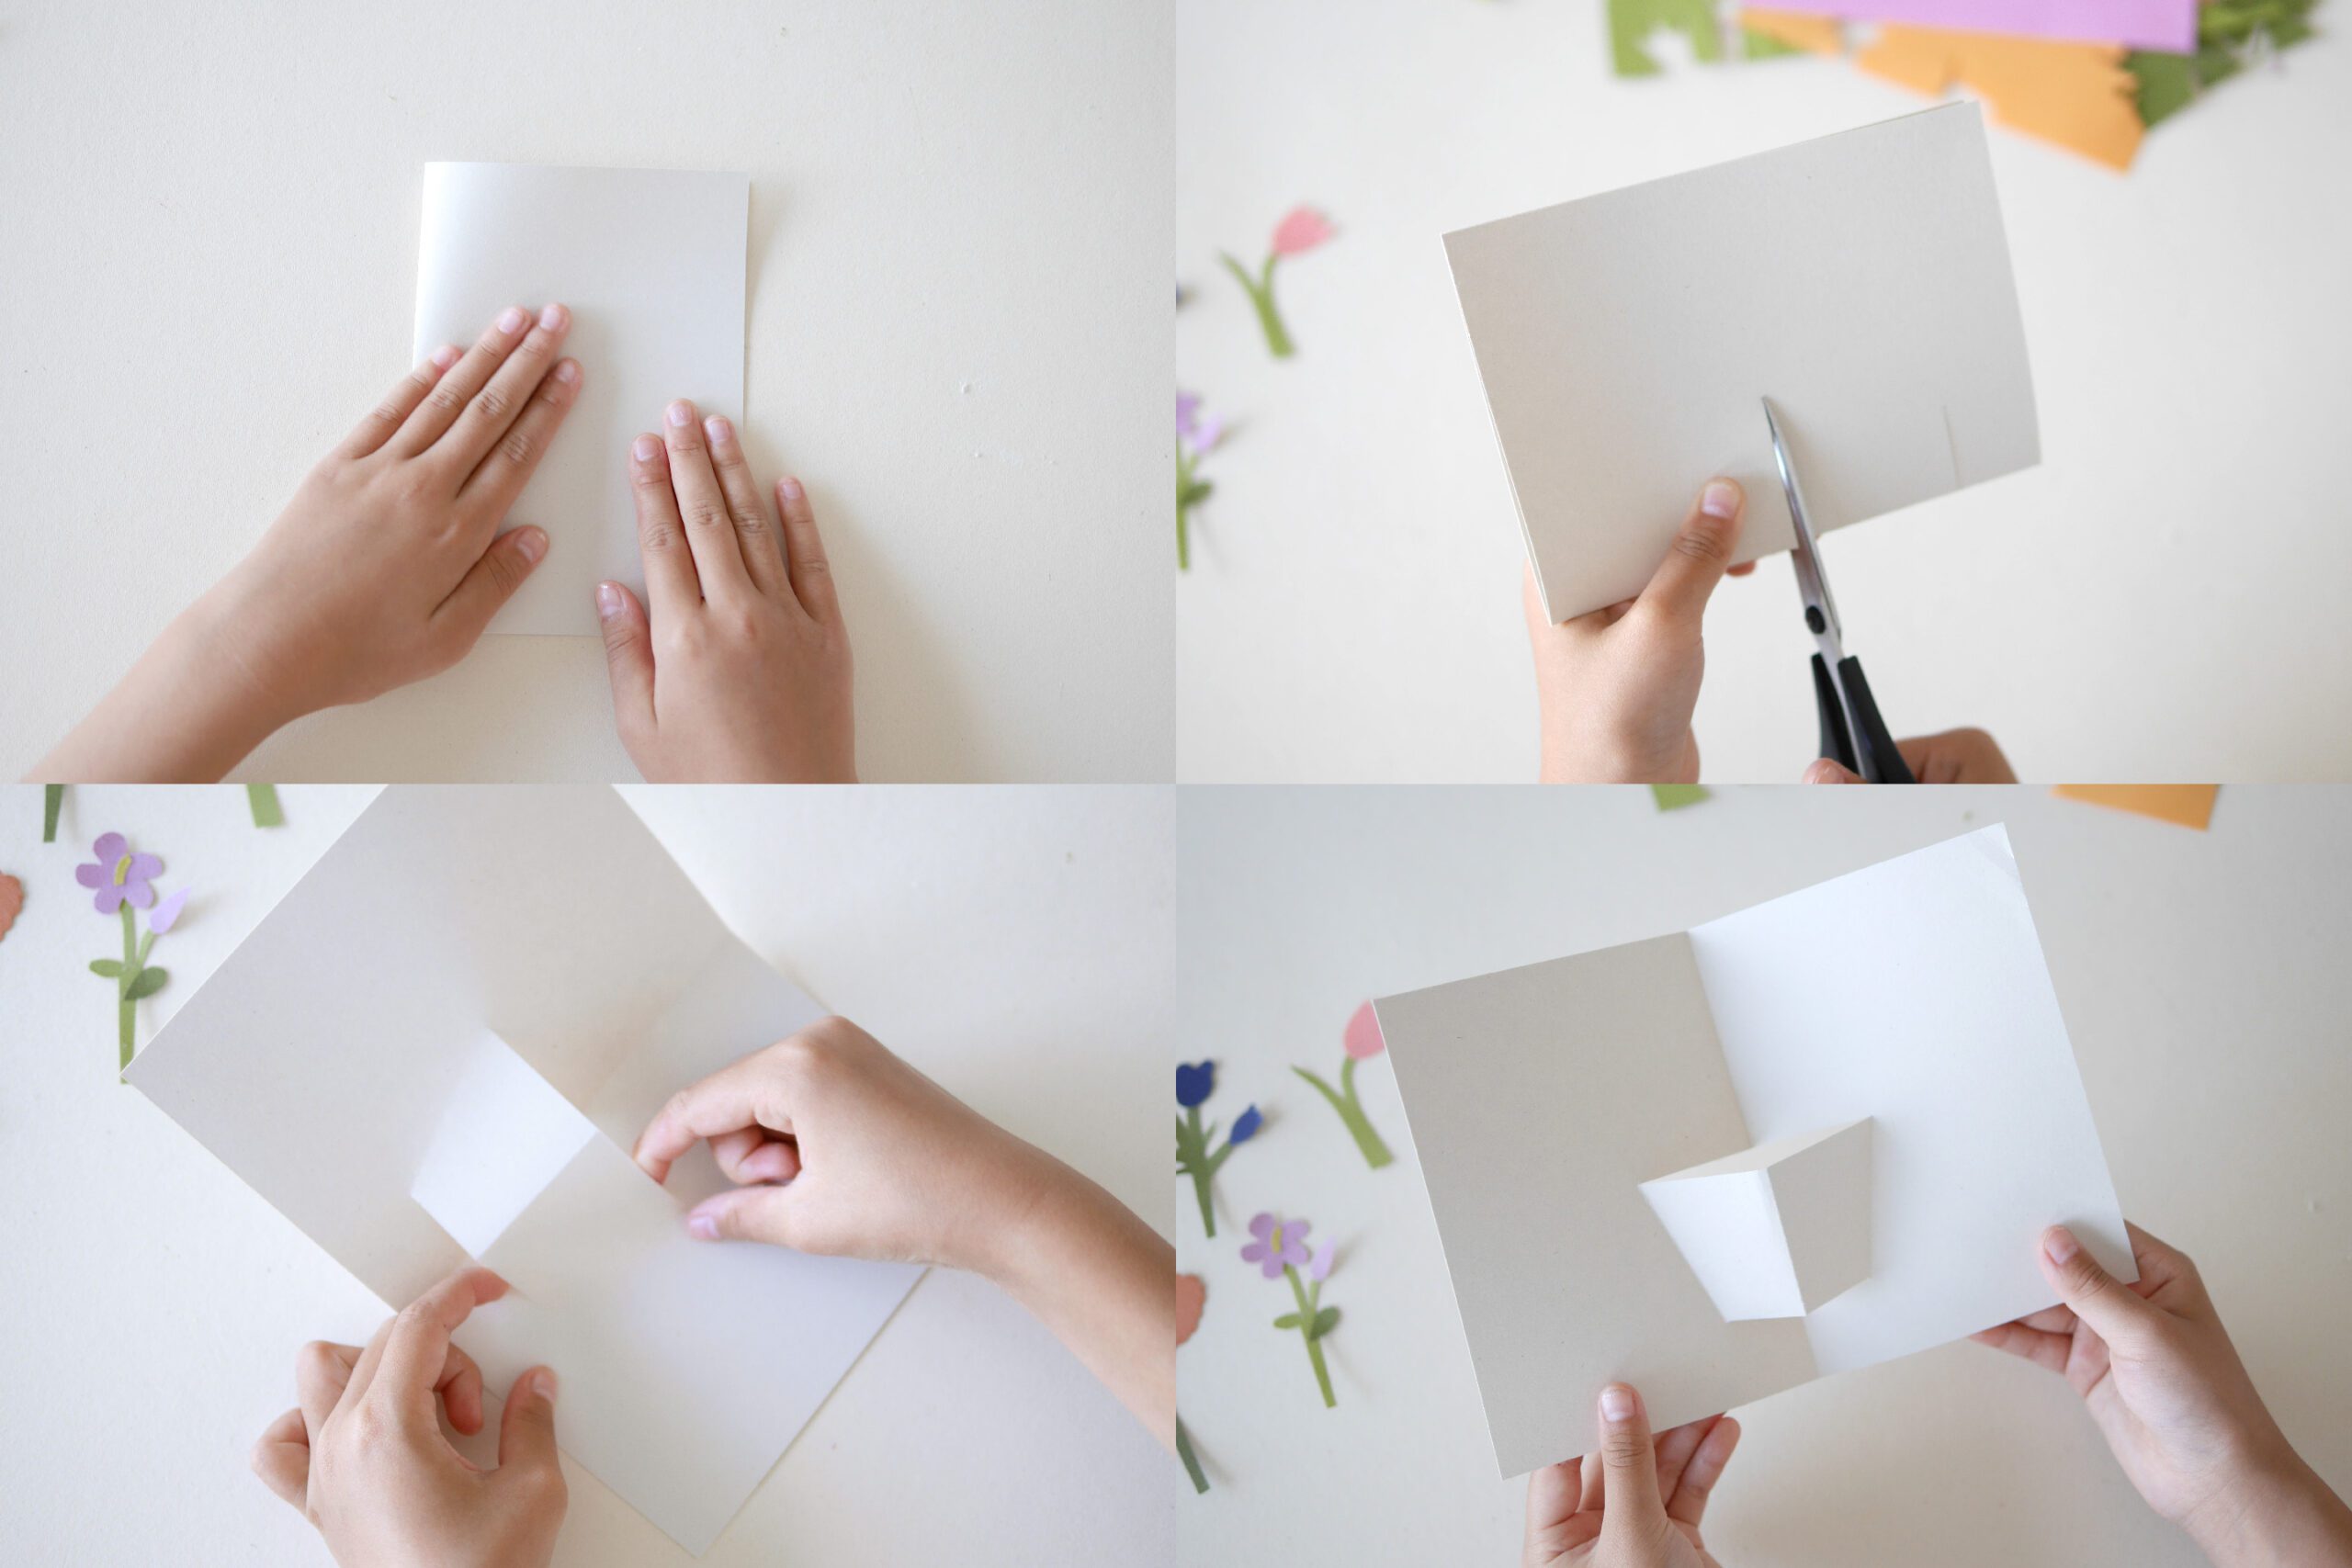
Step 3. Fold the Card
Fold the 8 x 5 1/2 inch paper that will serve as the card base in two. Cut two vertical sections from the folded side with scissors. The first is 1 1/2 inches long in the center of the card. Next, make a 1-inch-long cut under it. Fold the cut section three-dimensionally toward you to look like a flower base.
Step 4. Paste the Flowers
Paste the flowers as if you were inserting them into a flower base, and combine 2~3 flowers to make a bouquet. Finally, paste a cover that is one size larger than the card.
About Craft Materials
I always keep craft materials in a place where children can get them out by themselves. I feel that the hurdle to creativity is much lower if the materials are within reach, without us having to go out of our way to prepare them. Plain paper, colored paper, scissors, glue, colored pencils etc. You can use as much as you want, whenever you want. All we can do is quietly watch over them when they are concentrating, check the materials from time to time, and gently replenish what is missing. If I may say so, I feel that such an environment nurtures children’s creativity.
About Colored Paper
The colored paper we used this time is NT RASHA. This paper is very popular in Japan. The soft and simple texture of this paper is characterized by its rich variety of colors. Unfortunately, NT RASHA is only available in Japan, but you can get a similar paper in a collection of high-quality “Japanese colors” in the stationery section of DAISO.
Pop-up Flower Card
娘は小さな頃から紙とハサミが大好きでした。引き出しに色紙をたっぷりと入れておくと、自由に出してせっせと何かを作り始めるのです。とりわけ花が好きで、3歳くらいからこんな花をよくつくっていました。その都度私が褒めるものですから、また嬉しくなってたくさんつくってくれるのです。どこか見たことのあるような花から、頭に描いた想像の花まで、子どもの造形力は関心するばかりです。そんな時は私も一緒になってハサミを動かします。そしてお互いがつくったものを並べて、「これいいね」「この色の組み合わせ好き」など言い合いながら眺めるのです。
さて、そんな花をカードに仕立てました。カードに切り込みを入れ立体的に折ると、フラワーベースが現れます。その中に花を挿せば、飛び出すカードの出来上がり。花が咲き誇るこの時期に、お祝いや感謝を伝えるカードにいかがでしょうか。
用意するもの
– 色紙
– ハサミ
– 糊
– 台紙となるカード*
– 表紙となるカード*
*台紙となるカード:今回は8×5 1/2 inchでつくりました
*表紙となるカード:台紙より一回り大きいサイズ
つくりかた
Step 1. 花の形を切る
色紙を花の形に切ります。バラ、カーネーション、すずらん、ライラック、たんぽぽ、チューリップ…。あなたはどんな花が好きですか? 自由に、想像力を働かせて思うままにハサミを動かしてください。もちろん下書きをしてから切ってもいいですよ。
Step 2. 花を仕上げる
切った花びら、茎、葉っぱなどのパーツを糊で貼り合わせ、花に仕立てます。
出来上がった花たち。カーネーションや、チューリップ、ライラック、どこか見たことのある花から、想像したものまで、色とりどりの花が並びました。
Step 3. カードを折る
カードの台紙となる8×5 1/2 inchの紙を二つに折ります。二つ折りにした側から垂直に2箇所をハサミで切ります。ひとつめは、カードの中央に1.5インチの長さに。次にその下に1インチの長さに切り込みを入れてください。切った部分を立体的に手前に折りフラワーベースに見立てます。
Step 4. 花を貼る
フラワーベースに挿し込むように花を貼ります。2~3個の花を組み合わせて、ブーケのように。最後にカードより一回り大きい表紙を貼って完成です。
工作の材料について
工作の材料は常に子どもが自分で出せる場所に置いておきます。こちらがわざわざ用意しなくても、自分の手の届くところに材料があれば創作のハードルがグッと低くなる気がするのです。紙も色紙もハサミも糊も色鉛筆も。いつでも自分のタイミングで好きなだけ使っていい。こちらができることは、集中している時は静かに見守り、ときどき材料を確認して足りないものをそっと補充する。強いて言えば、そんな環境が子どもの創造力を育てる気がします。
色紙について
今回使った色紙は、NTラシャ。日本ではとてもポピュラーな紙です。柔らかく素朴な質感のこの紙の特徴は、色数の豊富なこと。残念ながらNTラシャは日本でしか手に入りませんが、上質な”日本の色”をまとめた近しい紙がDAISOの文具セクションで購入可能です。