Pressed Flower Card
It’s May, which means it’s time to start seeing violas in gardens and at farmer’s markets, and we’ve been getting to know violas on the ARUHI blog through projects such as Edible Sugared Violas and Flower Stamps. This time we tried pressed flowers. Colorful, tiny, pretty violas are perfect for pressed flowers.
My grandmother was a flower lover and grew violas, arrowroot plants, cosmos, and other flowers in her small garden. She was also a master pressed flower artist, and I remember her arranging the picked flowers one-by-one on a piece of tissue and carefully tucking them into a thick book. She would also collage the finished pressed flowers on paper, frame them, and enjoy them as beautiful art to decorate her room. I have watched my grandmother make pressed flowers since I was a child and worked together with her. So for me, it’ has been a familiar and fun pastime since I was a child.
We decided to make a Teachers appreciation week card using pressed violas. I hope that card expresses the feelings of gratitude to the teachers with a refreshing breath of spring
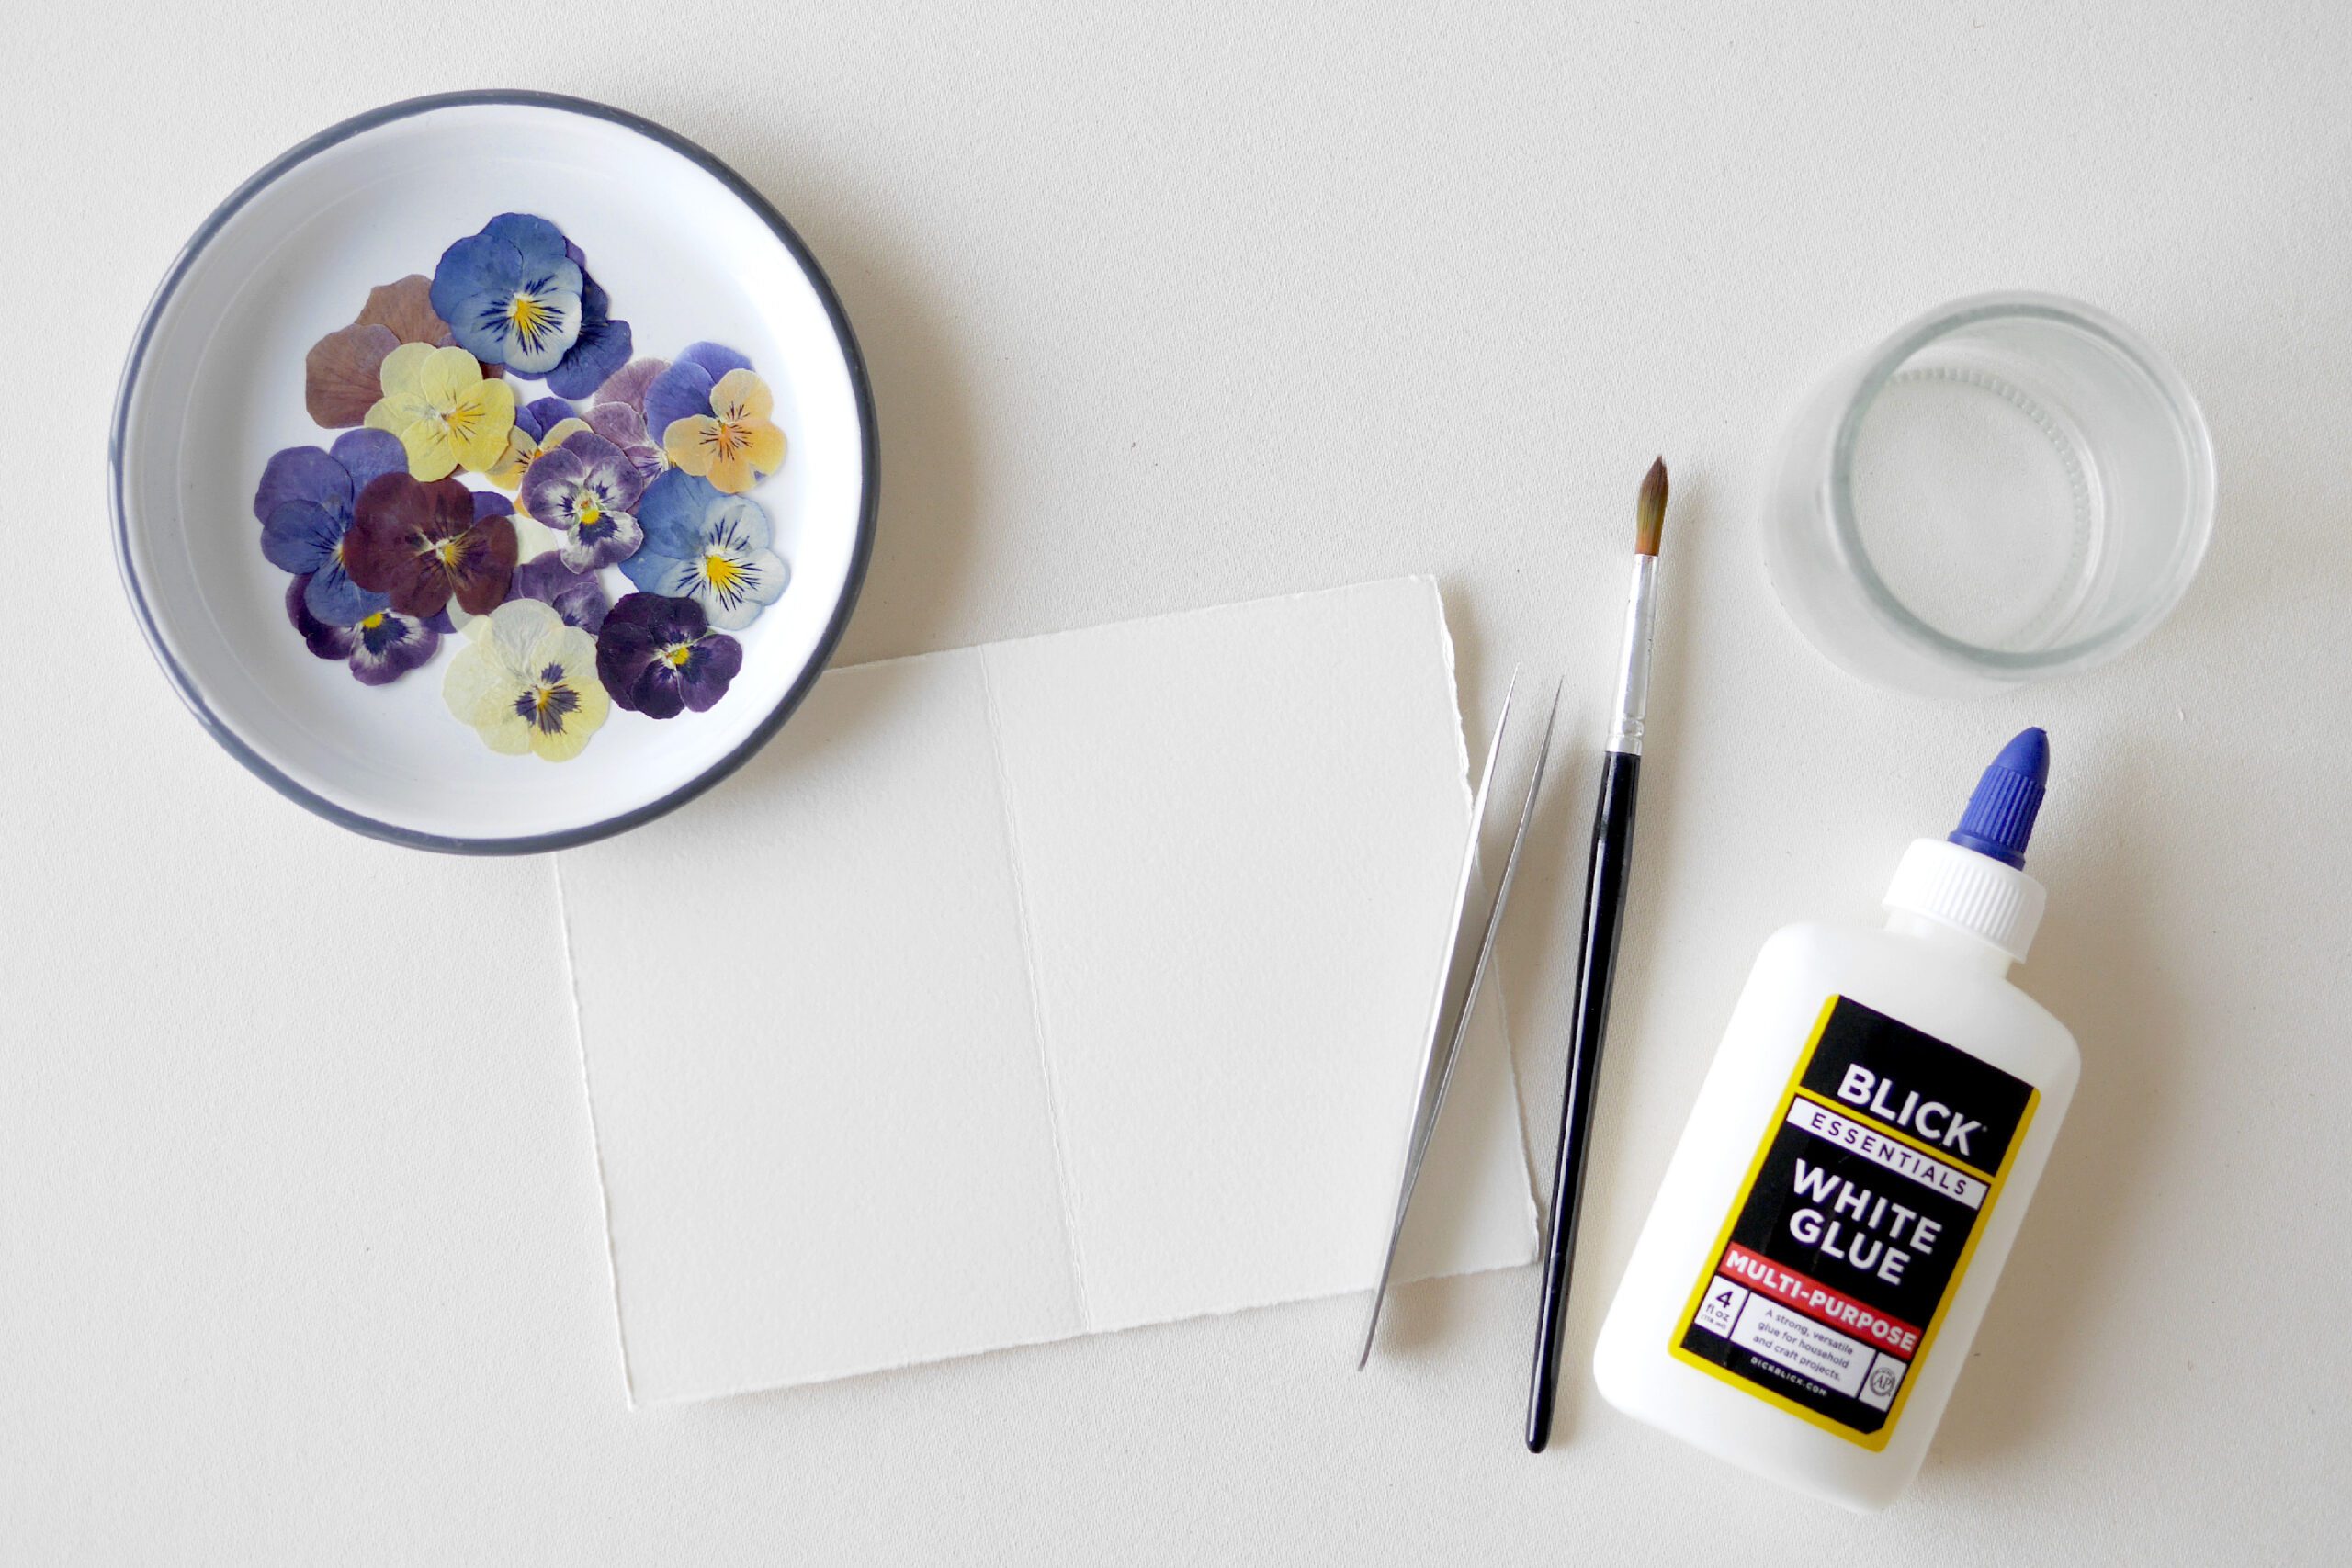
Materials
– Flowers
– Flower press or thick book
– White glue
– Empty bottle for glue
– Brush for applying glue
– Tweezers *optional
– Card
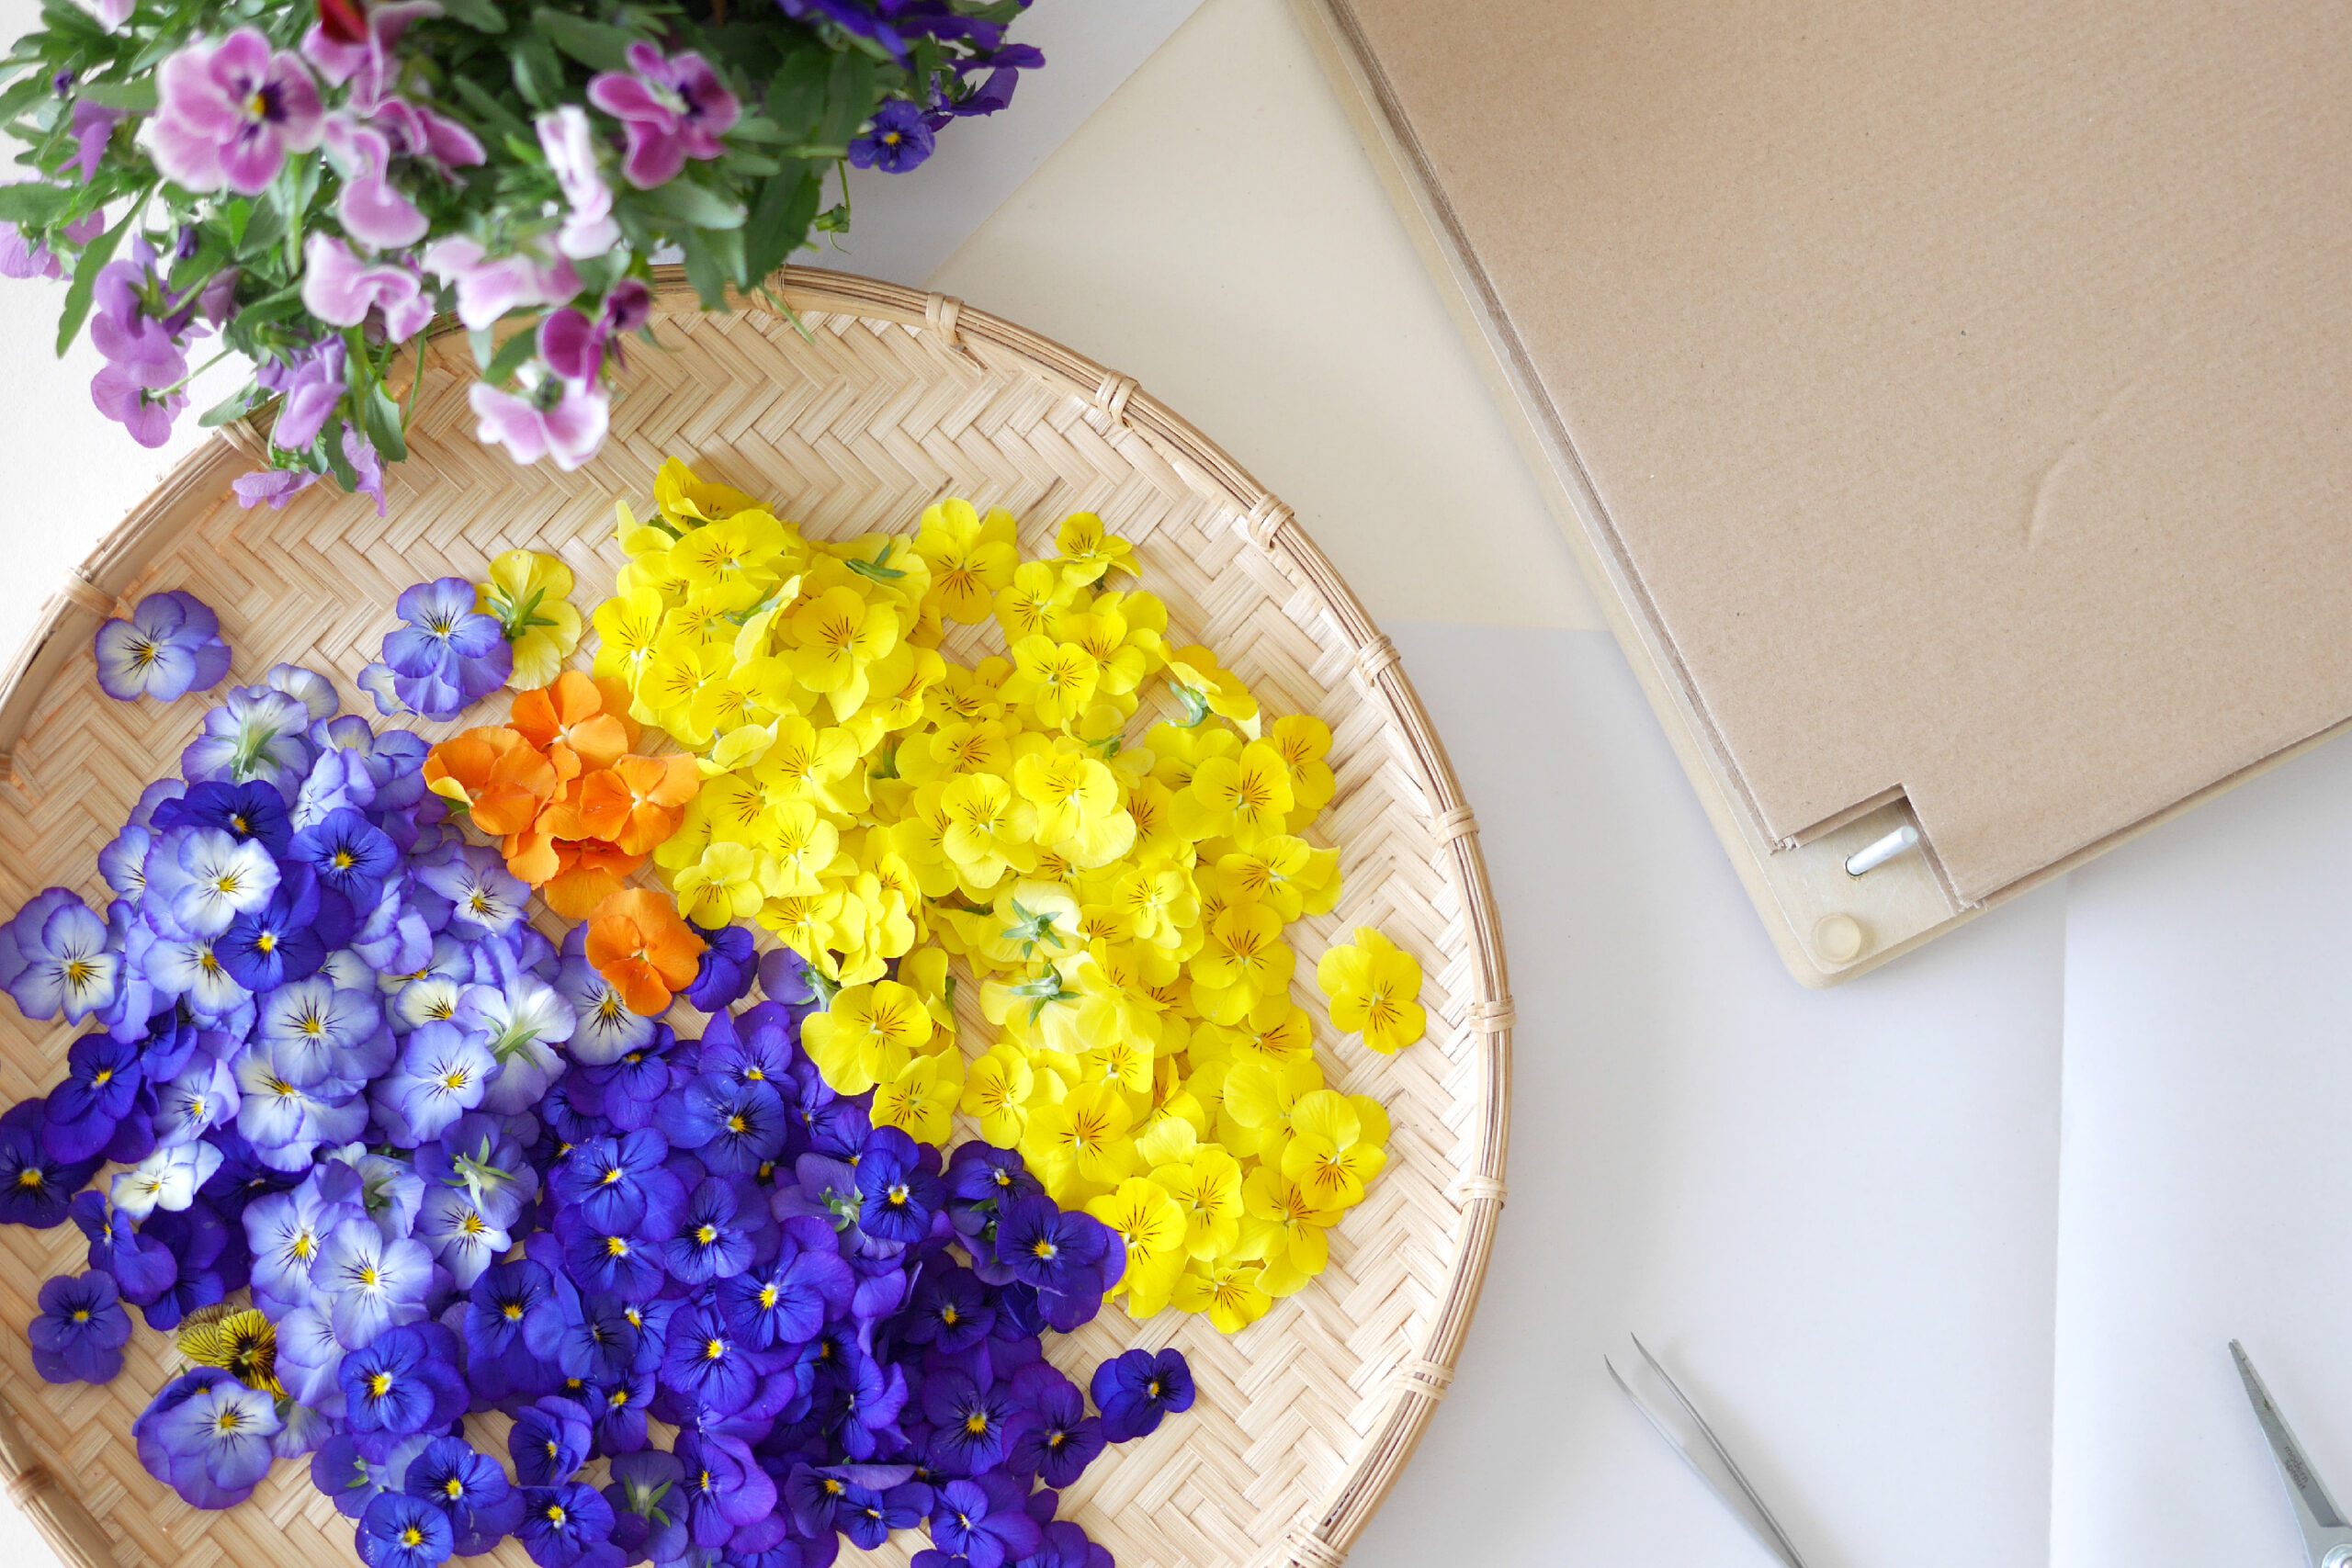
Flowers Suitable for Pressed Flowers
Viola, acacia, sweet pea, clover, white stuffed grass, eucalyptus leaves, etc. Flowers that are not thick and have little moisture are said to be suitable for pressed flowers. Flowers with many petals, such as roses and marigolds, can be pressed one by one after the petals are broken up.
Instructions for making
Step 1. Making Pressed Flowers
Lay a thin sheet of paper (tissue paper, washi paper, copy paper, etc.) on top of the newspaper, arrange the flowers one-by-one so that they do not overlap, and place them between the flower presses. At this point, place the flowers front side down and press, so that the petals will be flat and beautiful.
If using a thick book, place the flowers on a sheet of newspaper and tissue paper, then place the book between the flowers and place a weight on top.
The pressed flowers will be ready in approximately one to two weeks.


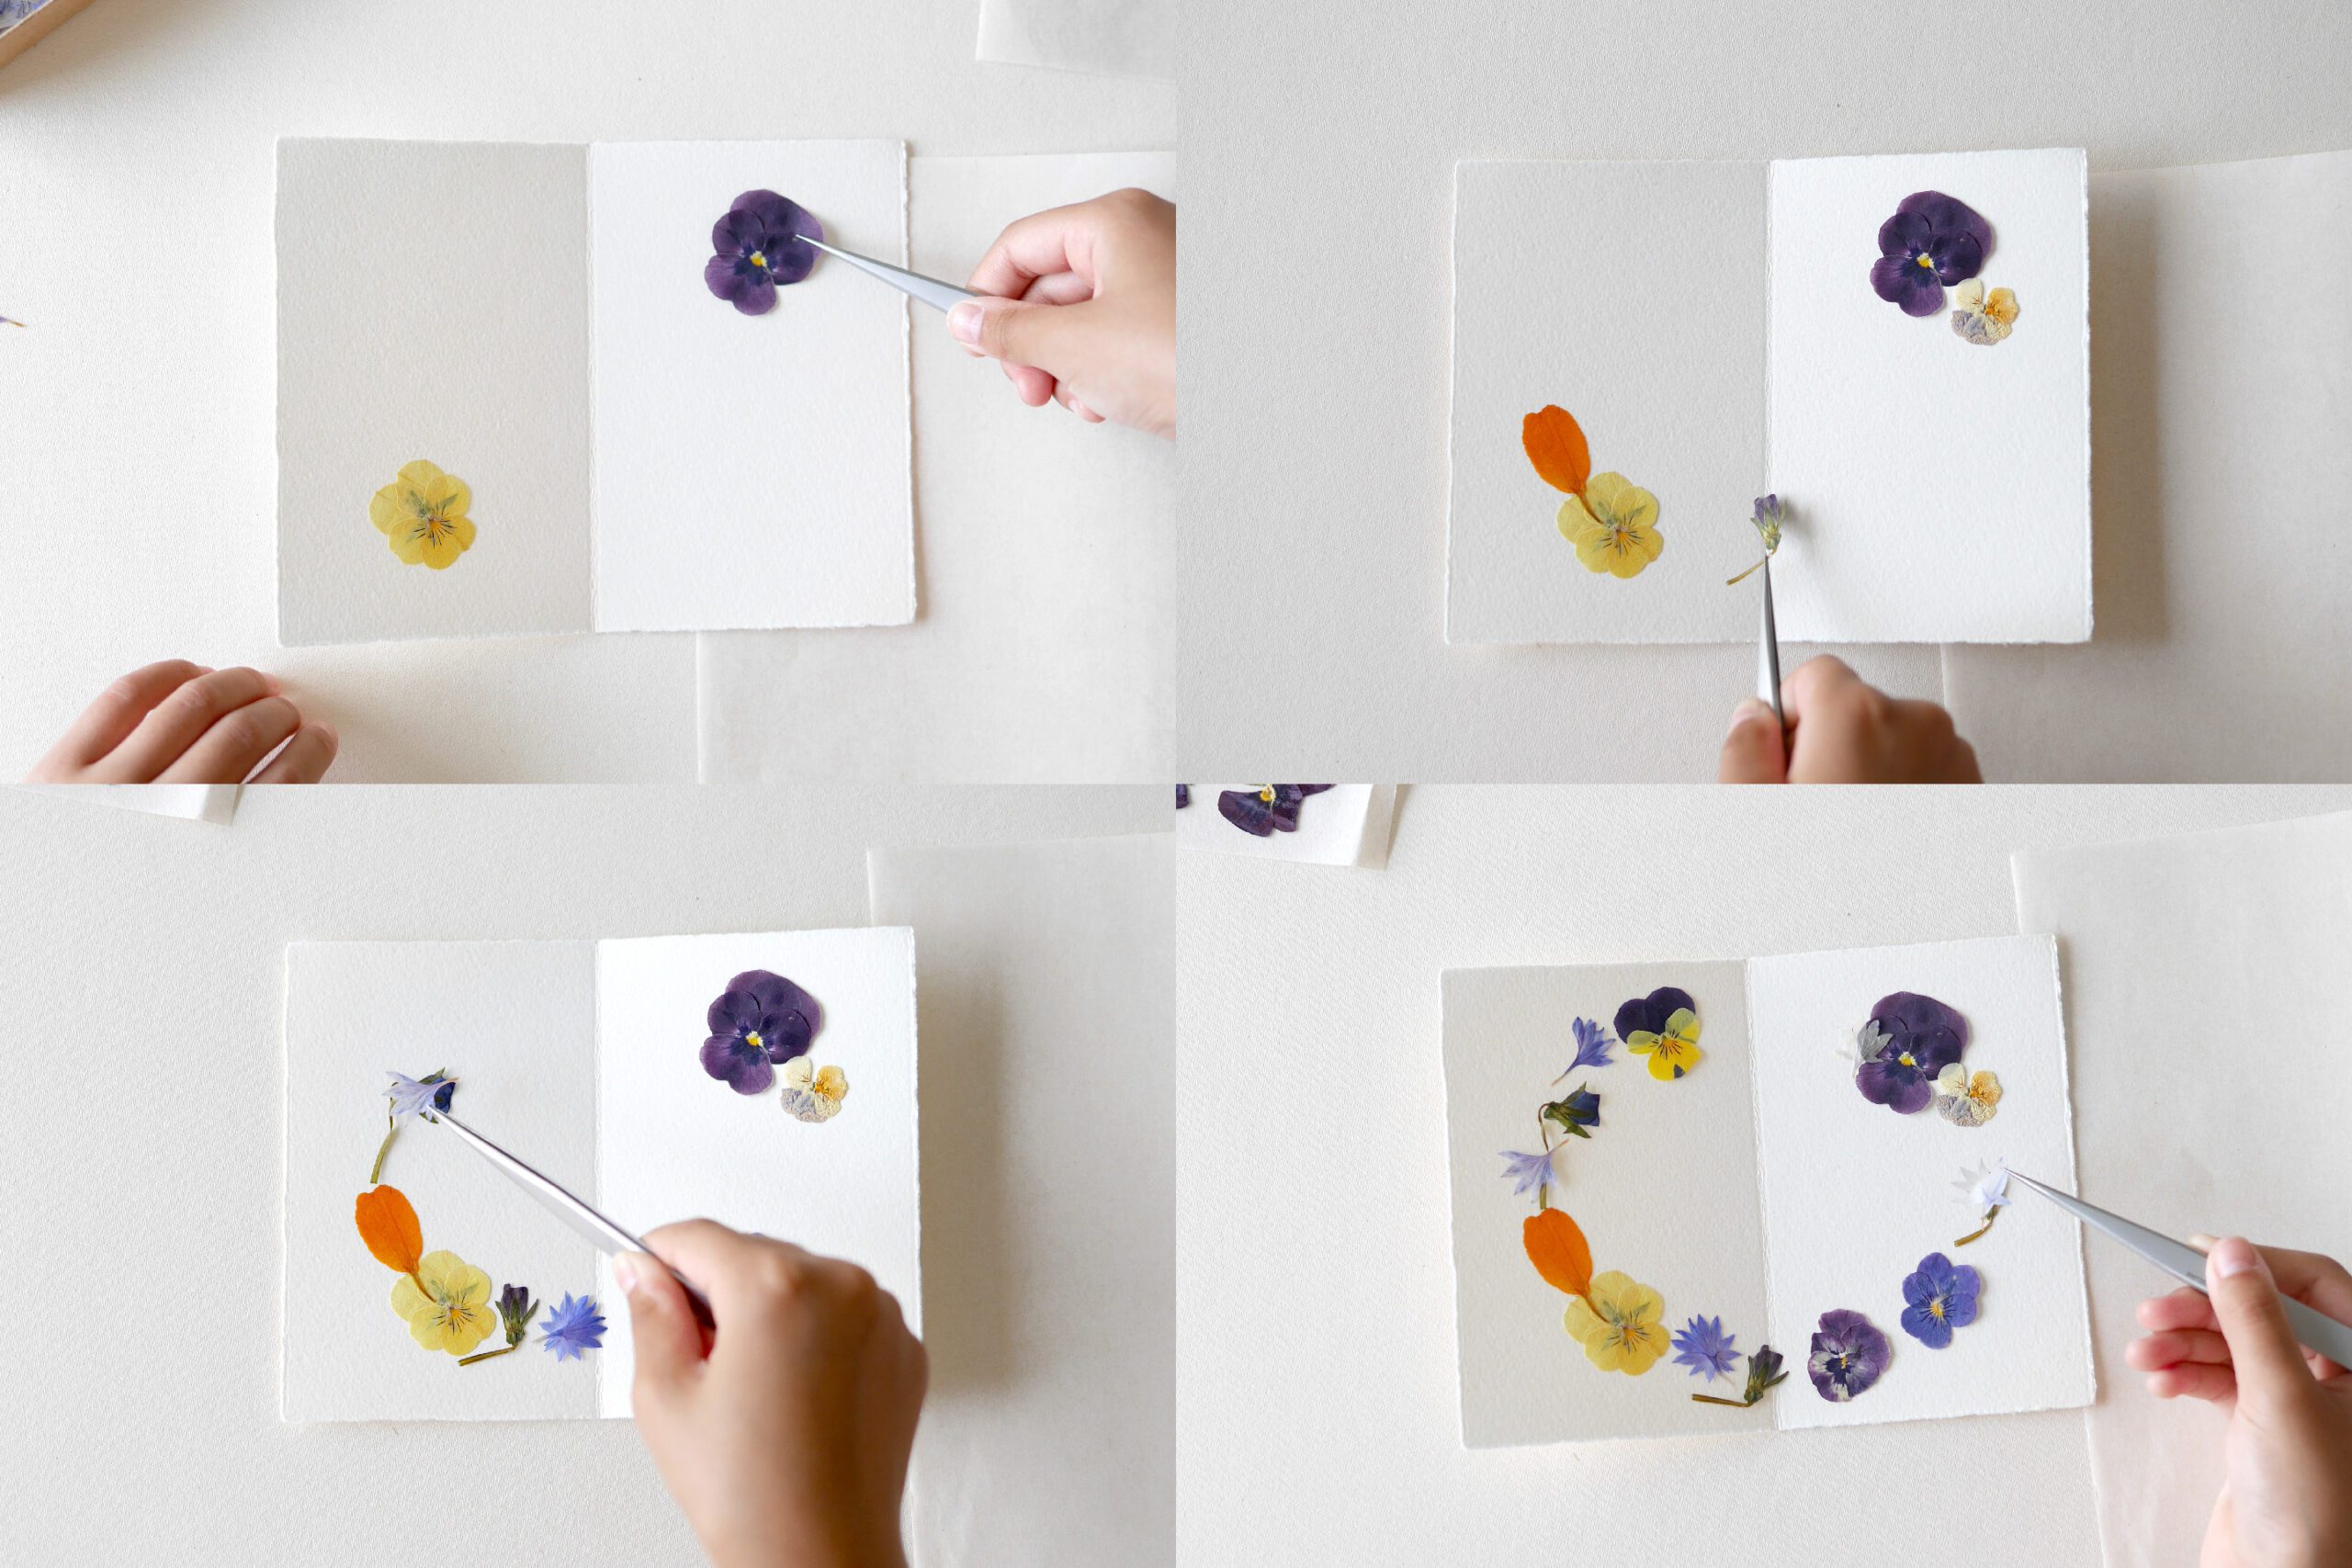
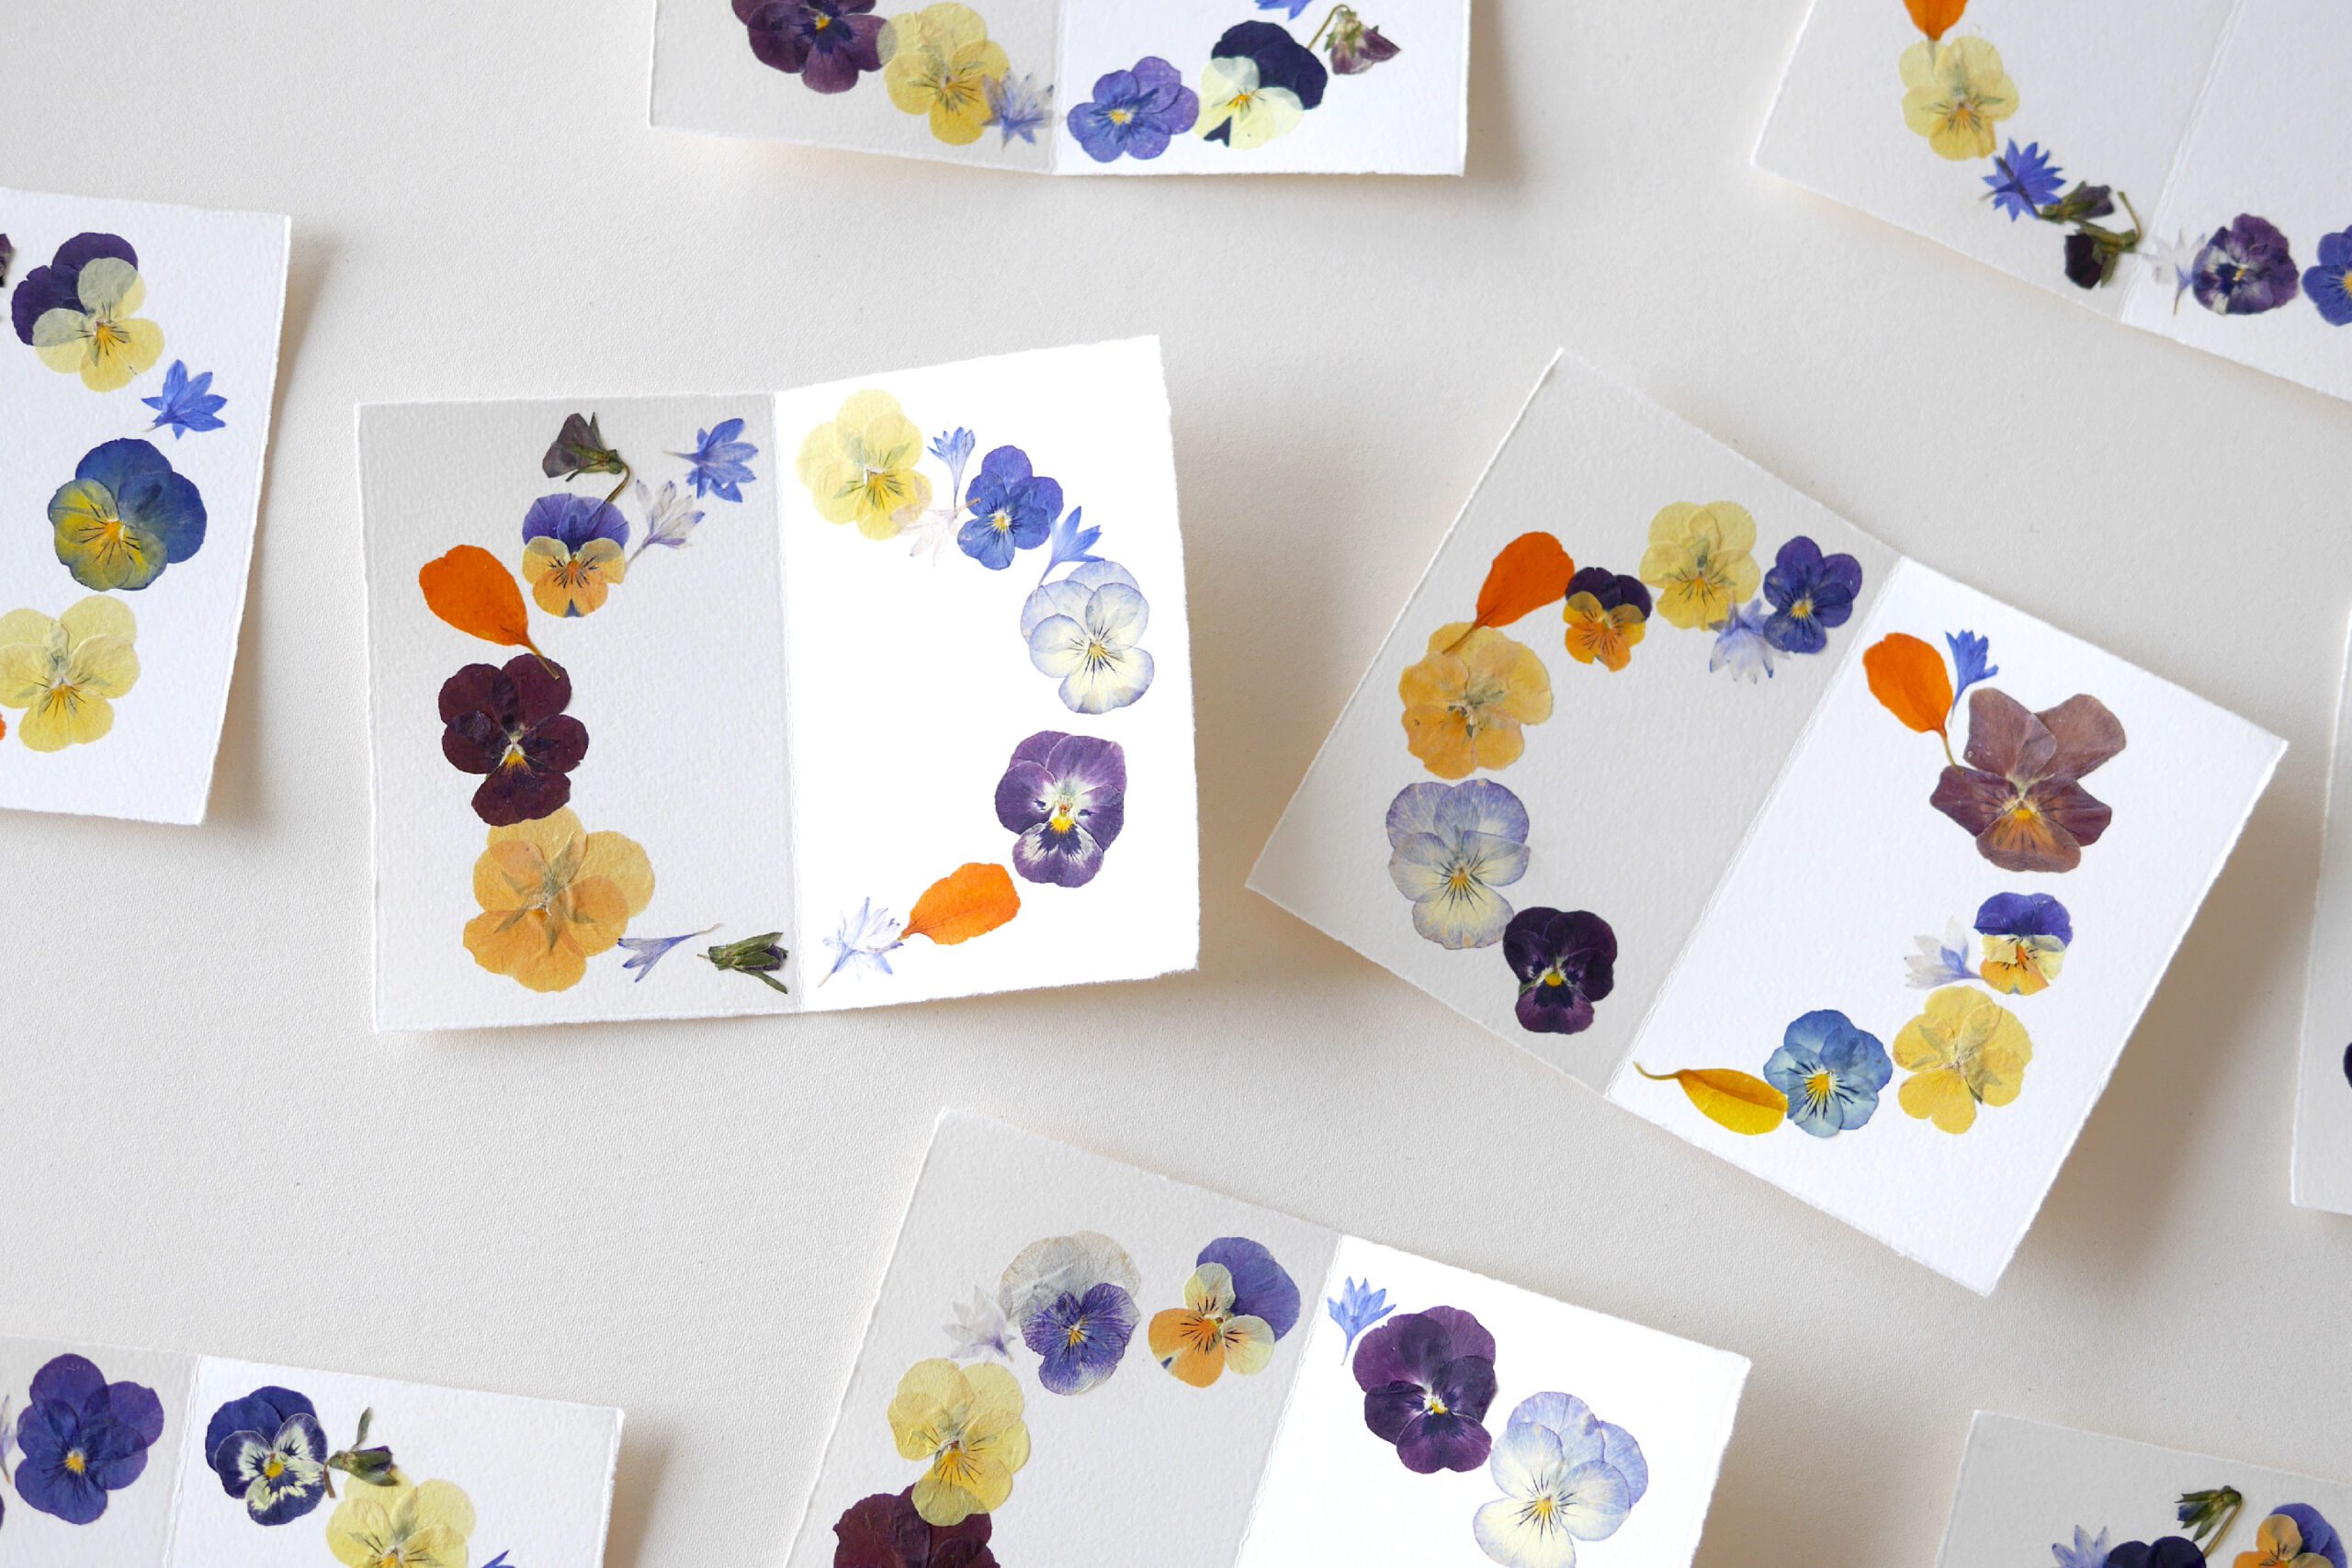
Step 2. Layout on a Card
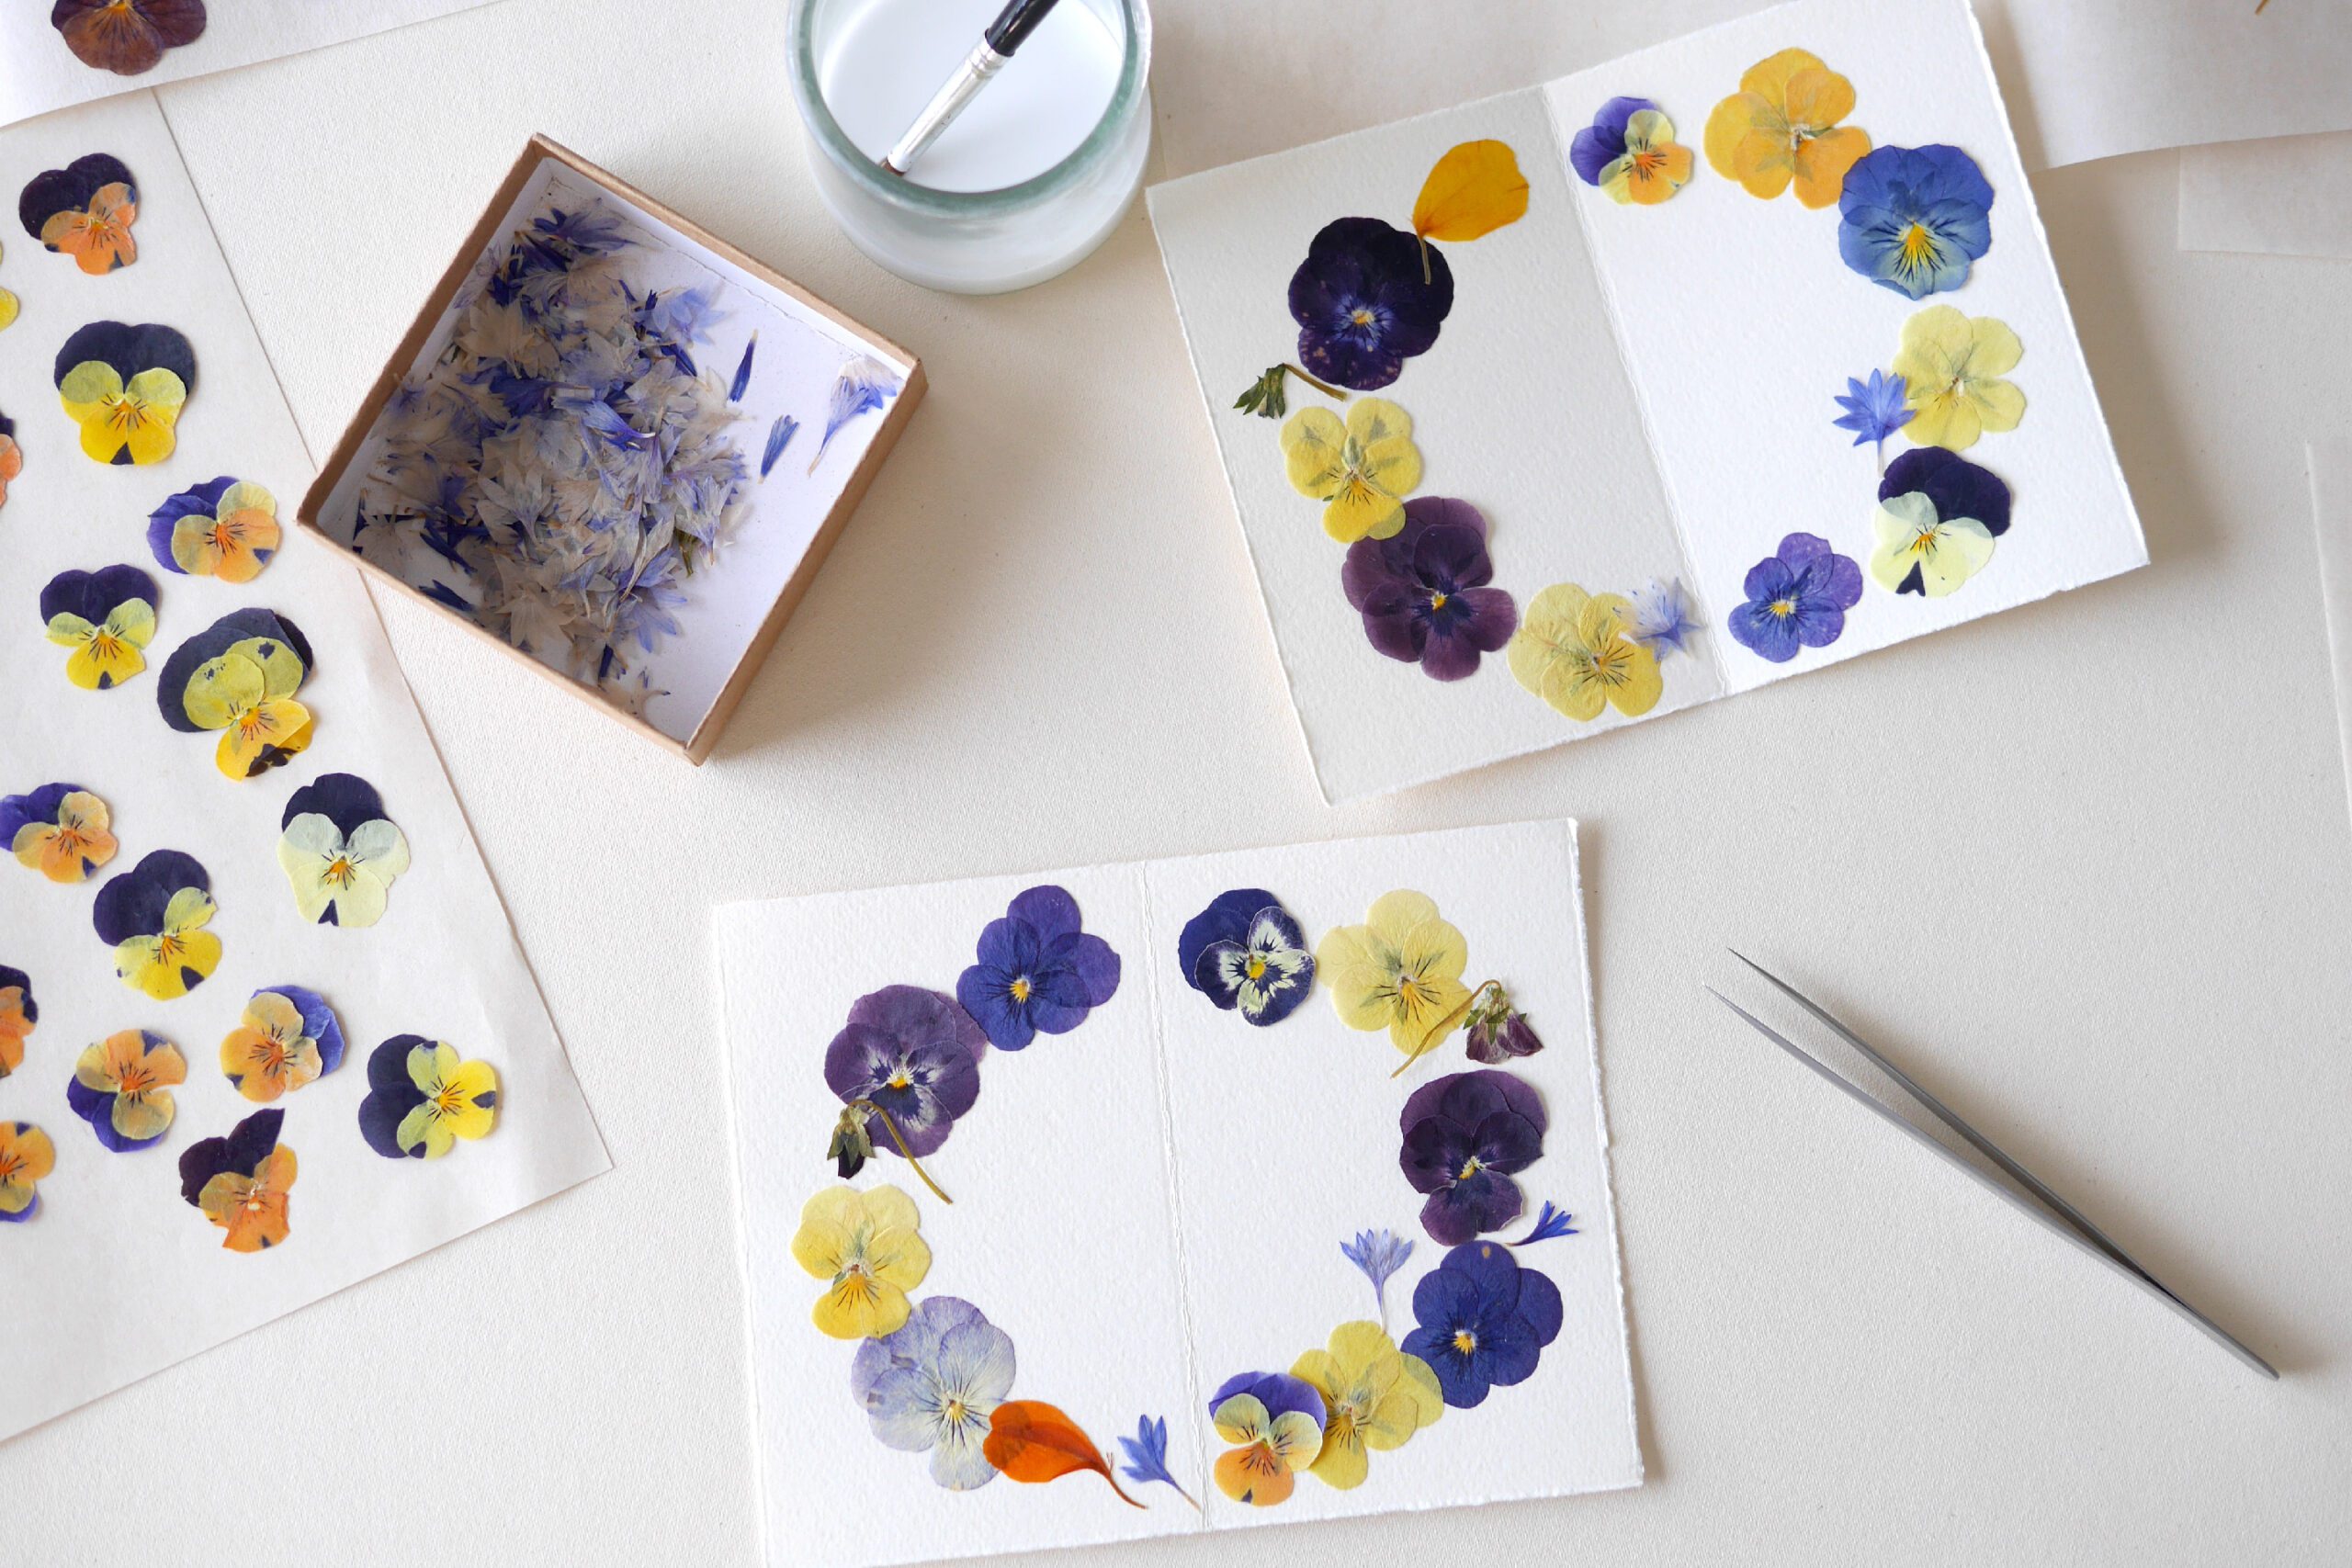
In this case, we arranged them to look like a round floral wreath. There are no particular rules. Place them as you like.


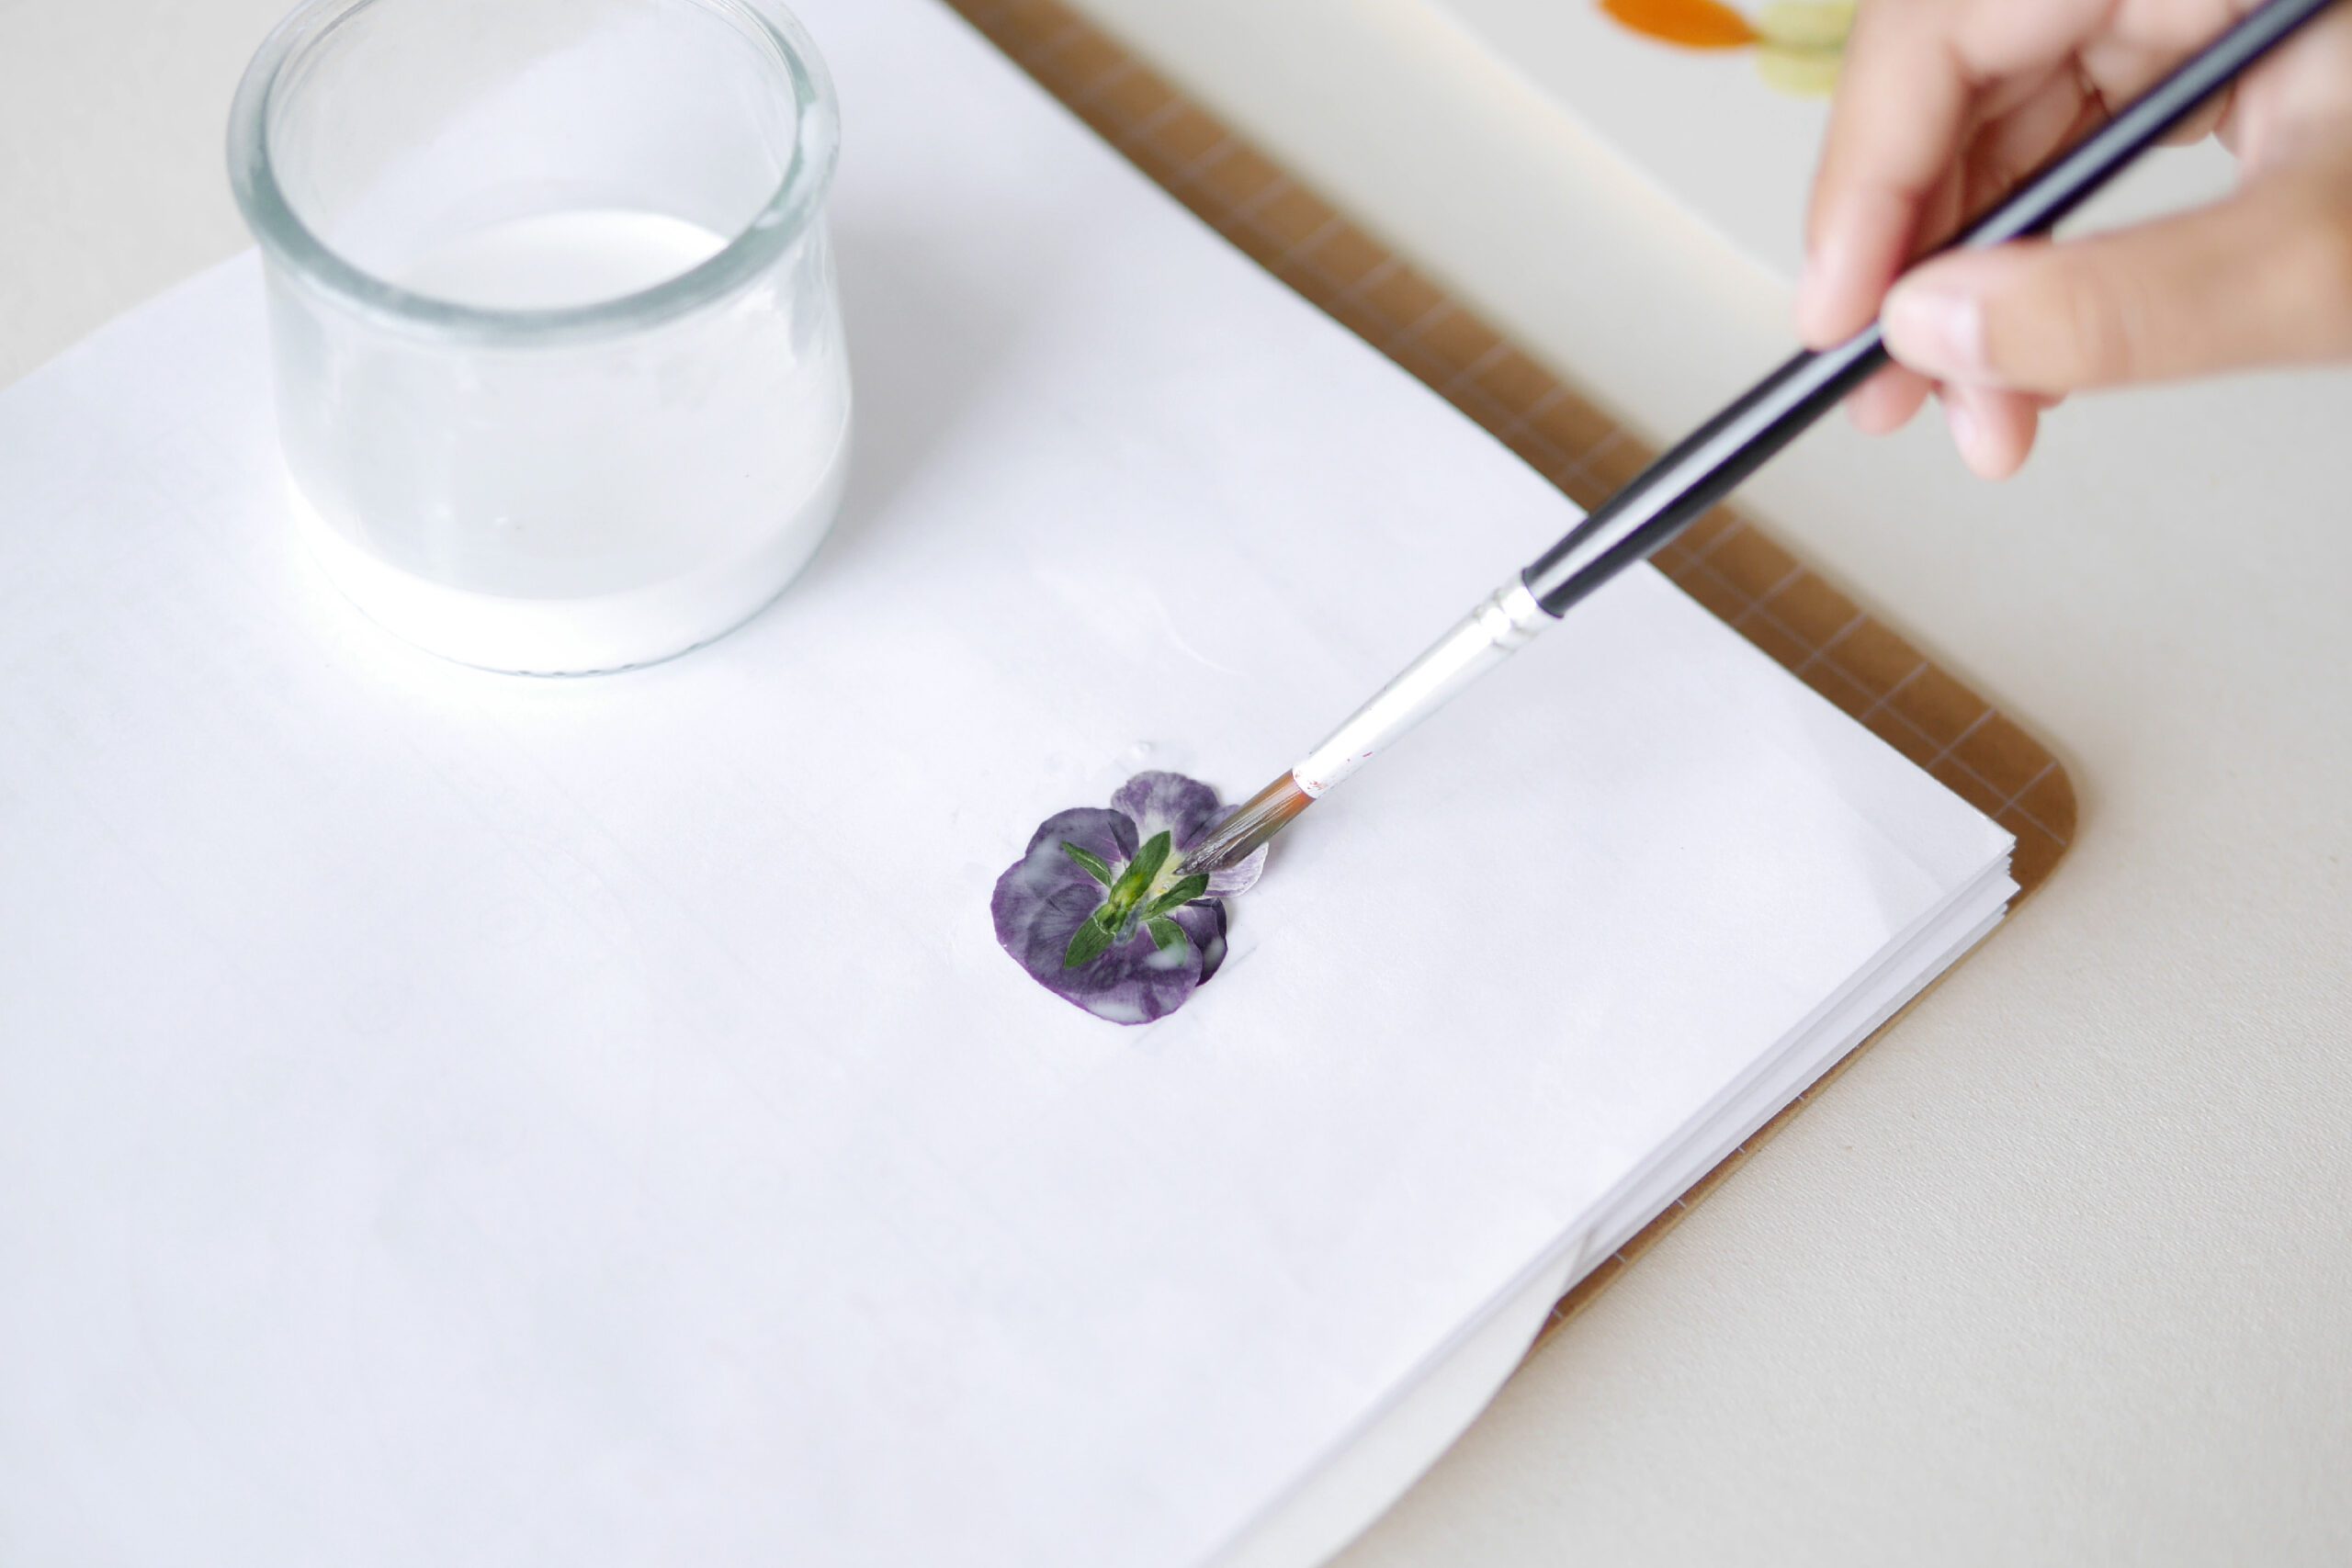
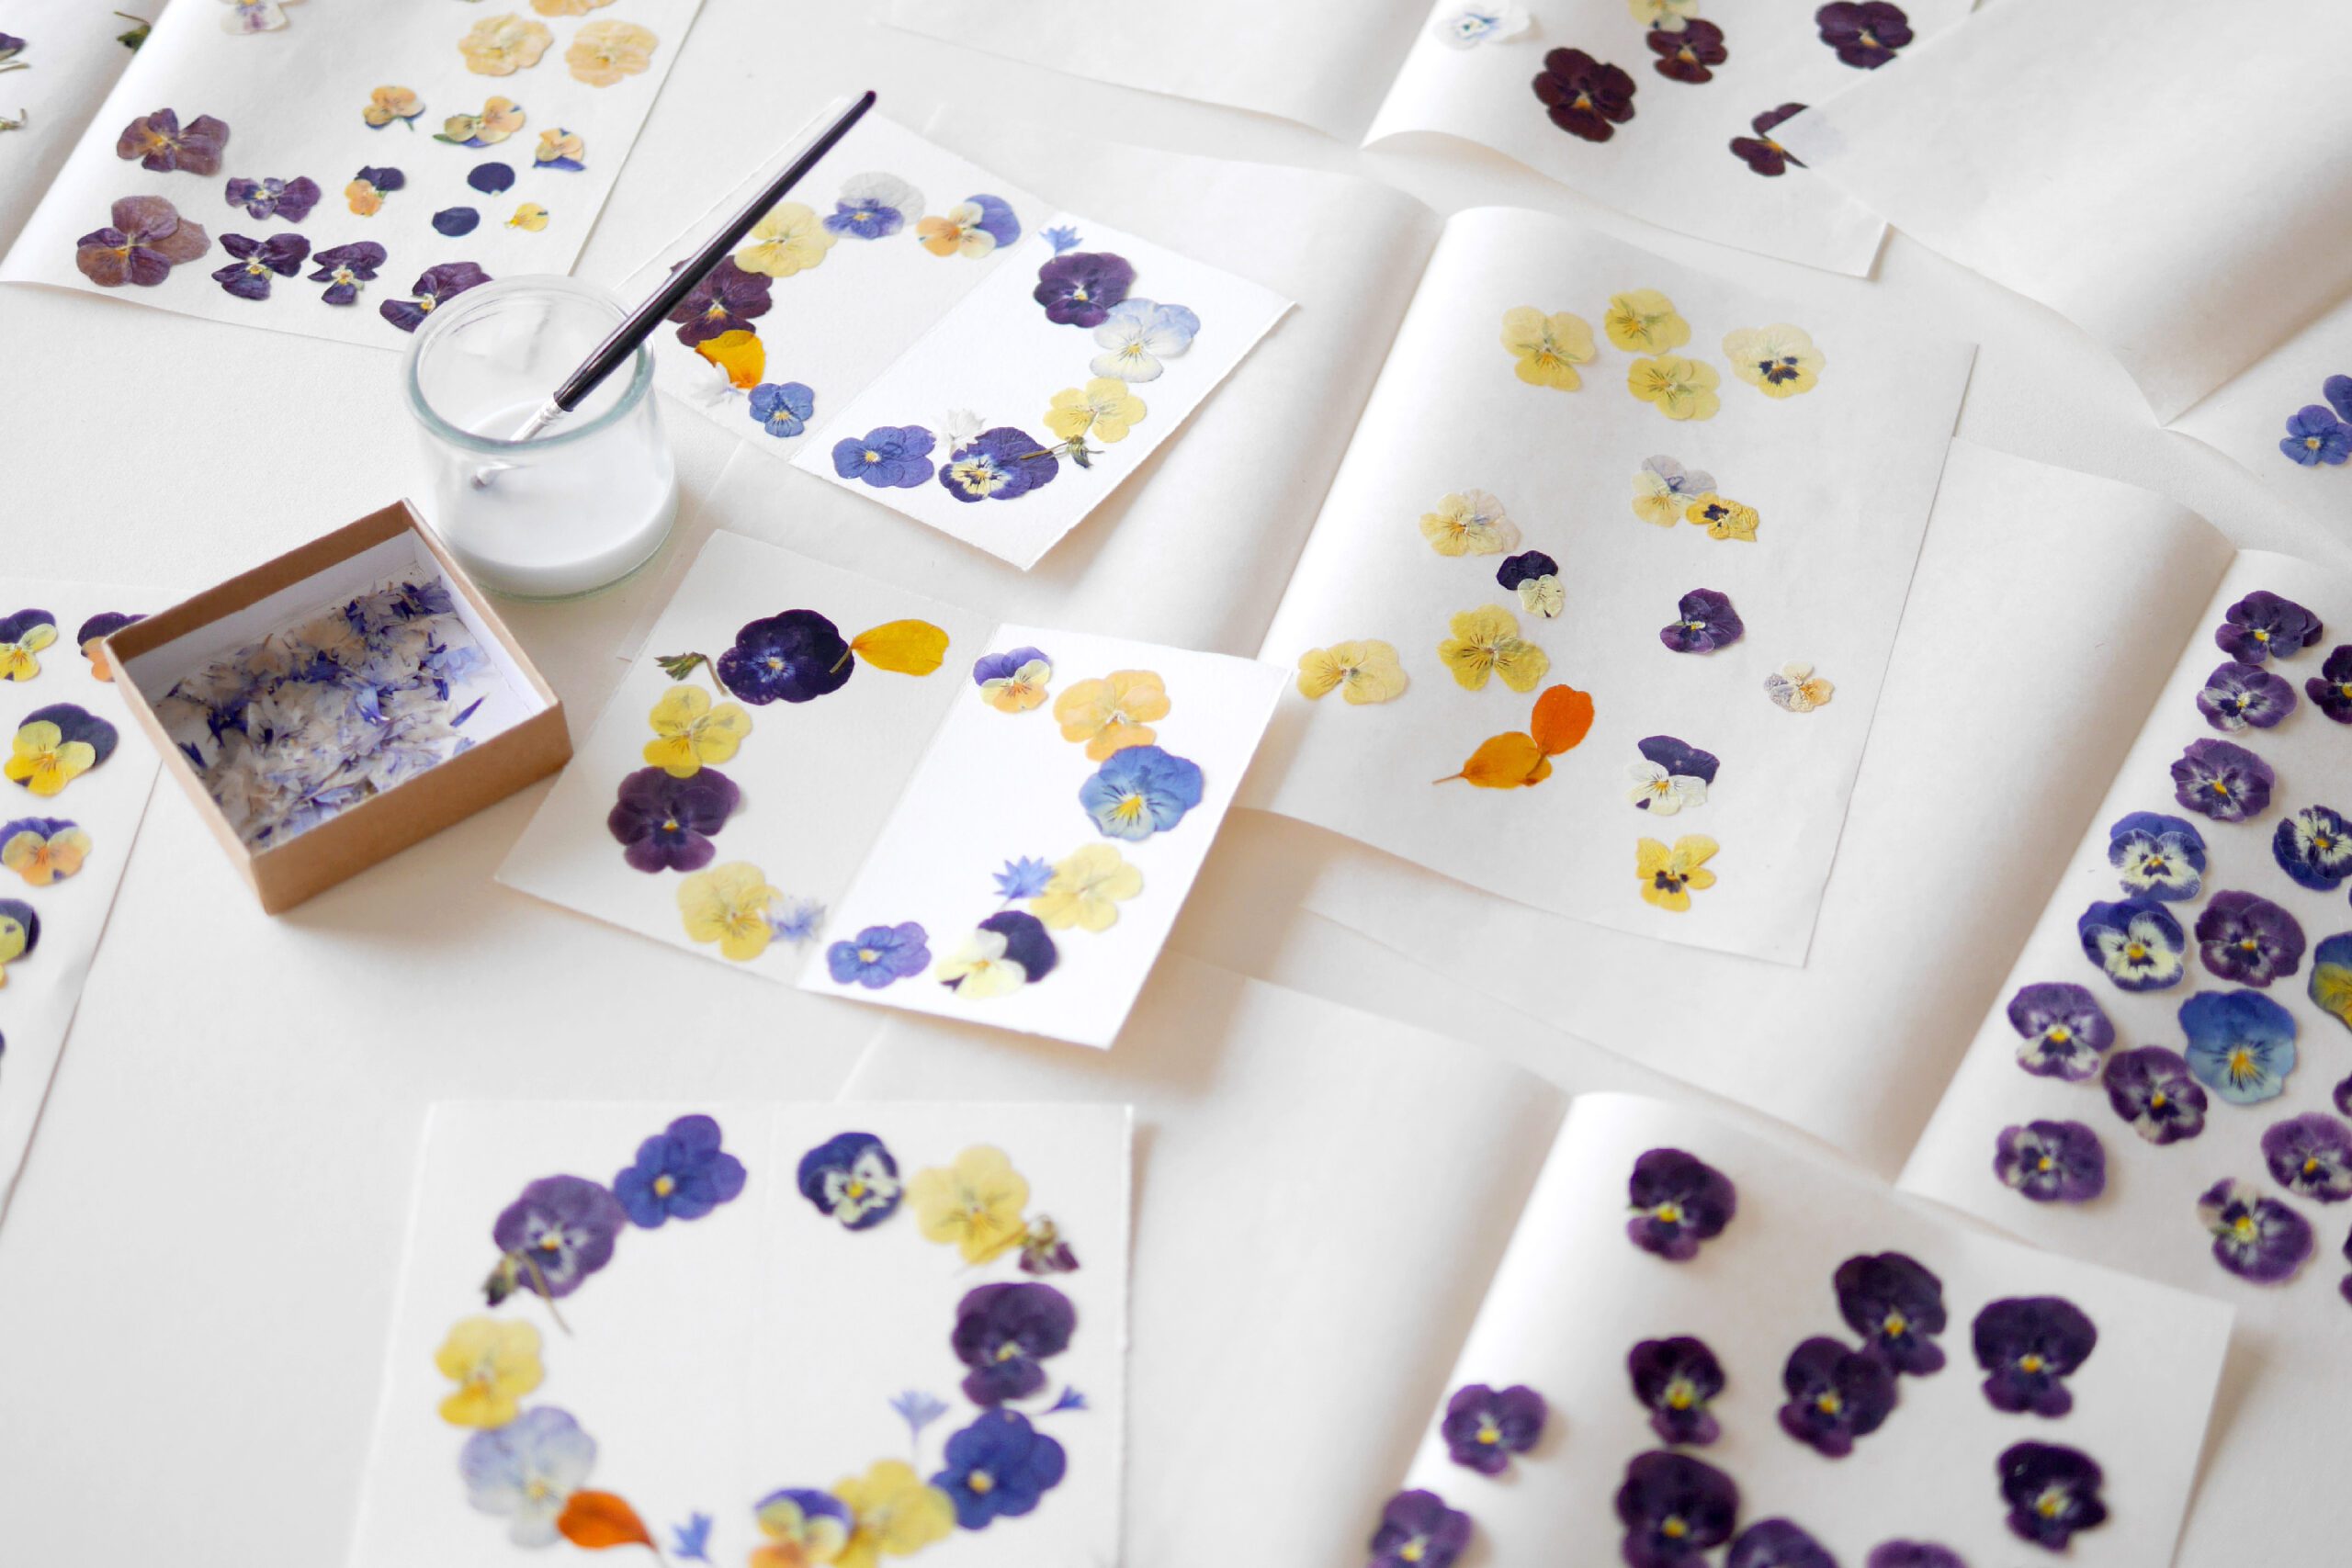
Step 3. Pasting
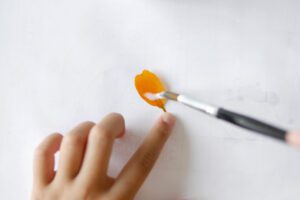
Put white glue in an empty bottle and stretch it with a small amount of water to make a water glue. Flowers are delicate, so a little bit of glue is all that is needed to apply them firmly. By stretching the white glue with water, it is easier to work with and produces a beautiful finish.
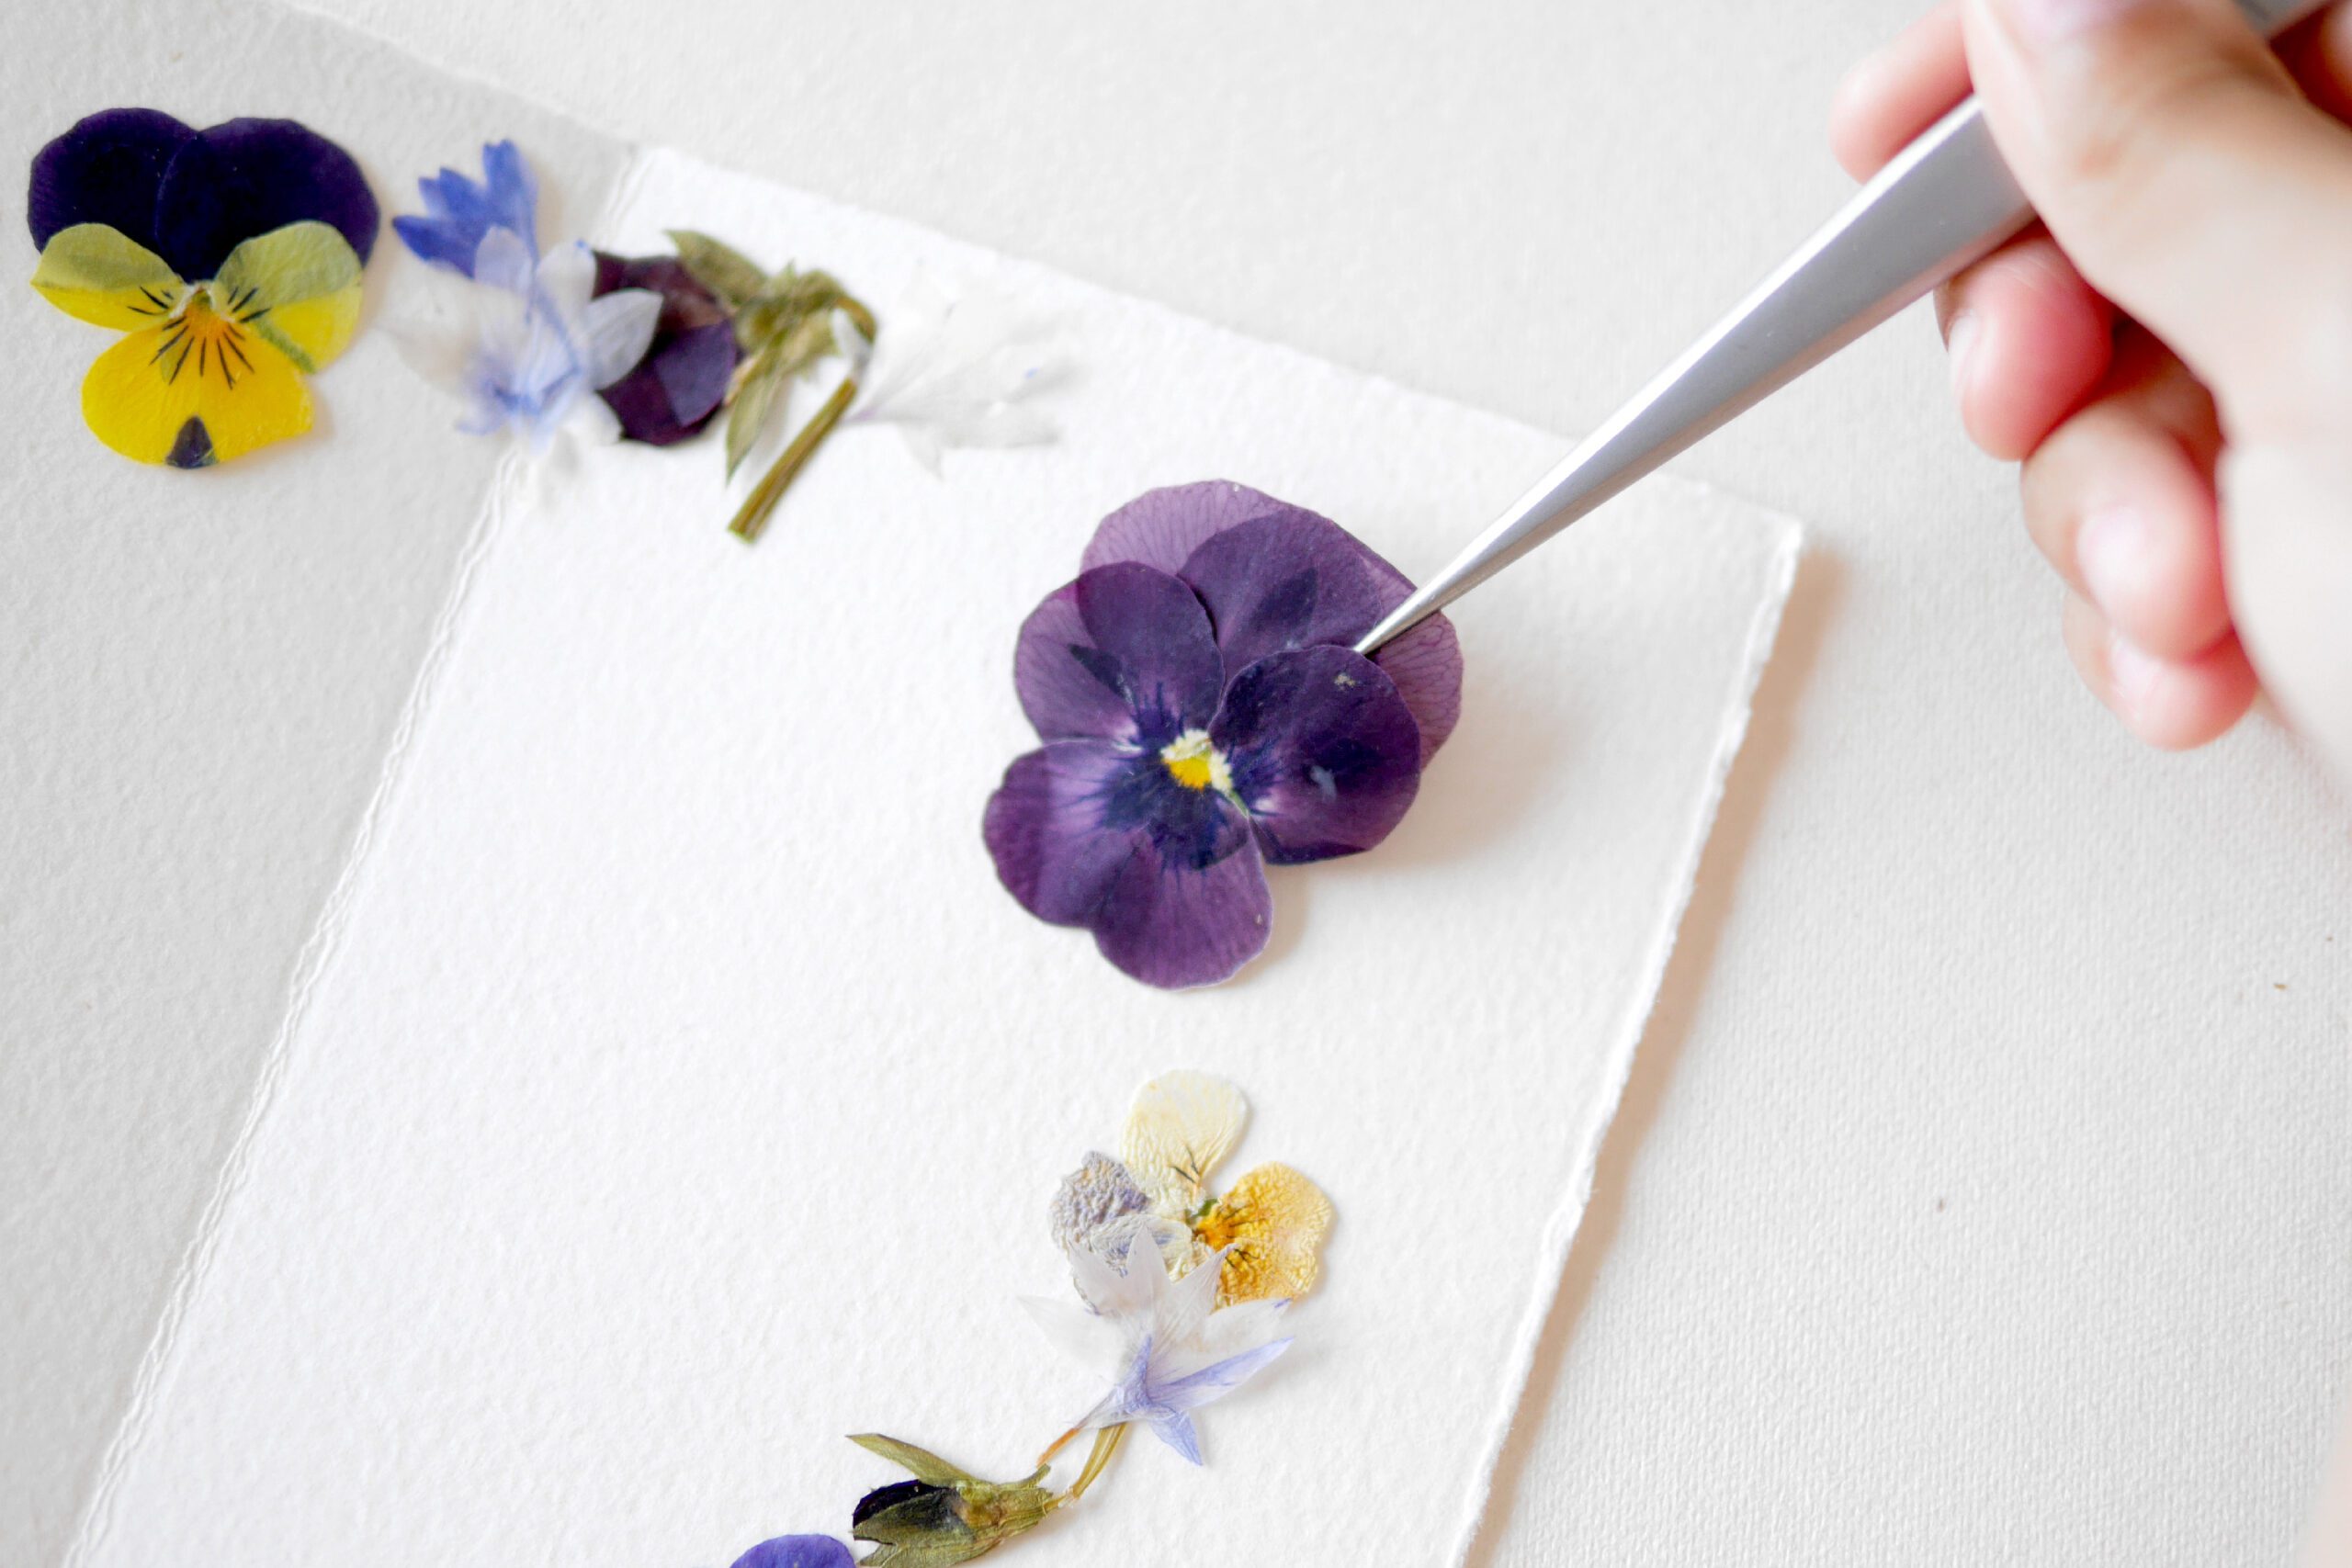
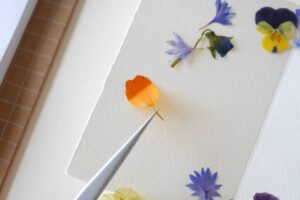
Take one of the pressed flowers you have laid out and apply the glue to the back of the flower with a brush. Using tweezers, carefully place the flower in its original position and glue it in place. Glue the other flowers in the same way.
Step 4. Finishing Touches
Where petals overlap and float, use a brush to apply glue to the gaps as well for a beautiful finish. Once all the flowers are glued in place, the project is complete. The flowers we used this time are viola, marigold petals, and arrowroot petals.
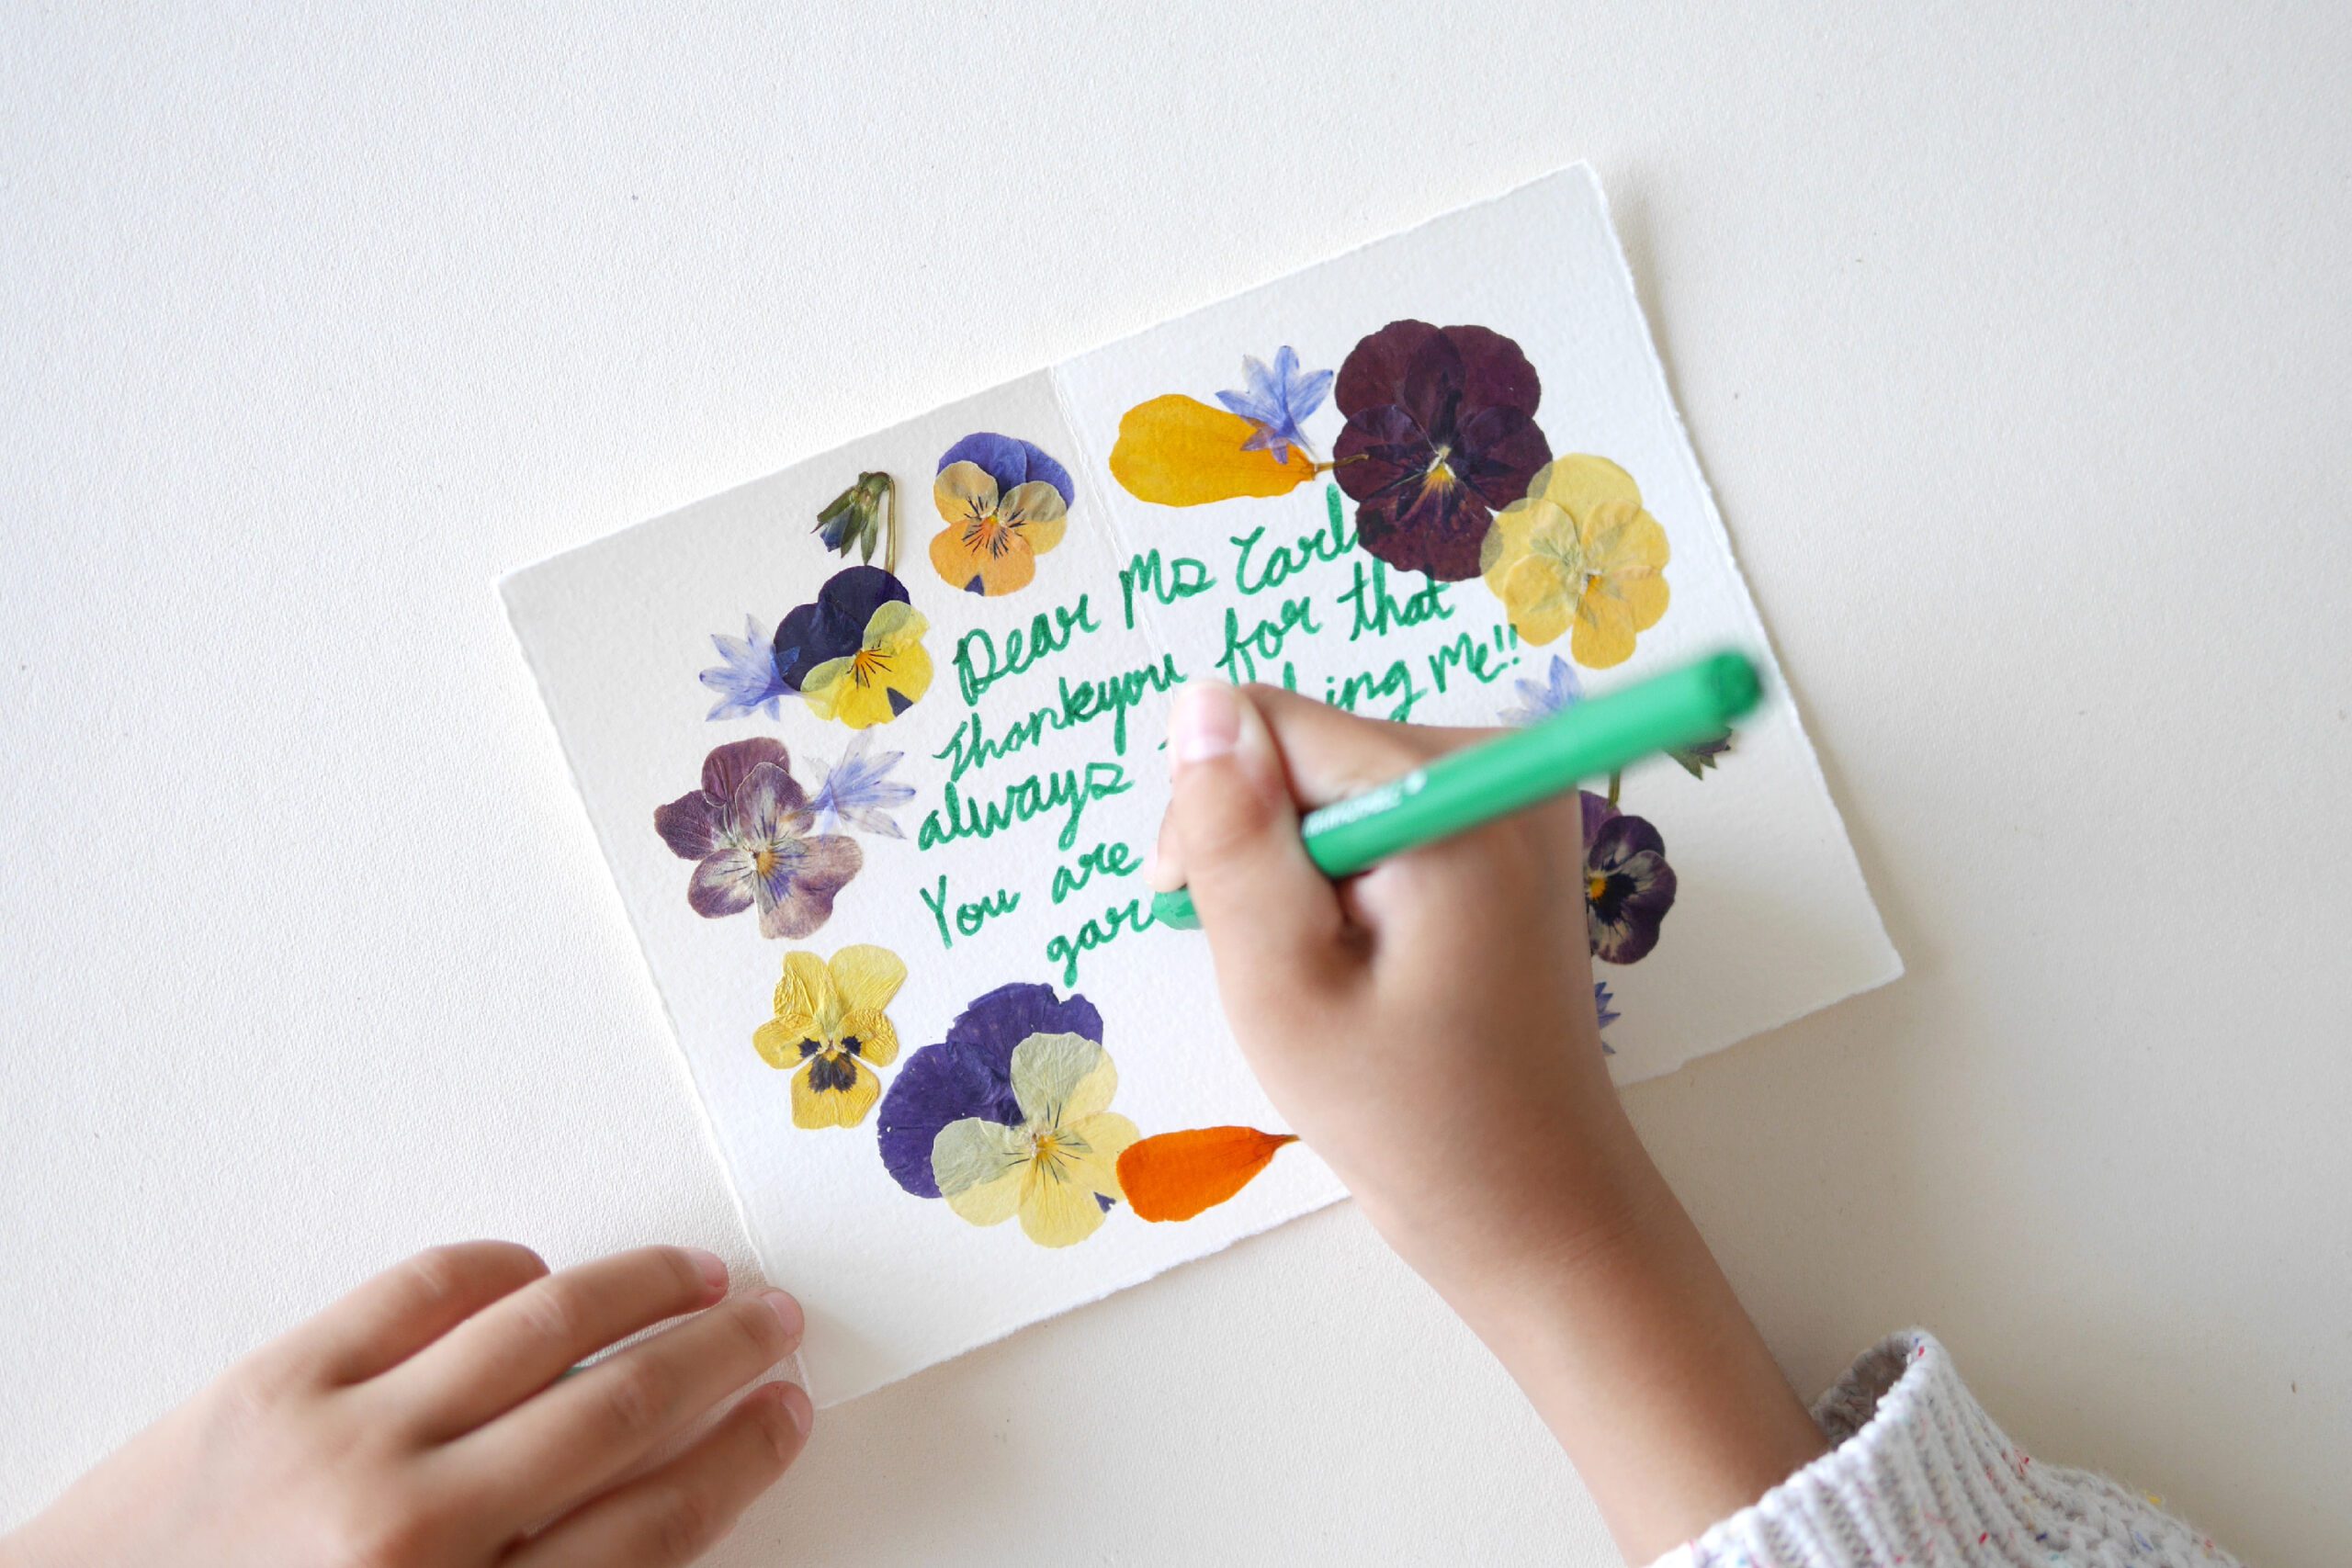
As a Teacher Appreciation Card
My daughter wrote a message to the teachers on this card. She expressed her appreciation to the teachers along with the mood of the blooming spring.

Pressed Flower Card
5月に入り、庭先やファーマーズマーケットでビオラの花を見かける時期になりました。ARUHIのブログではこれまでに、Edible Sugared Violasや、Flower Stampsといったプロジェクトでビオラを親しんできました。今回取り組んだのは押し花。色とりどりで小さなかわいらしいビオラは、押し花にも最適なのです。
私の祖母は花が好きな人で、小さな庭ですみれや矢車草、コスモスなどを育てていました。祖母は押し花の名人でもあり、摘み取った花をティッシュの上に一枚ずつ並べて、分厚い電話帳に丁寧に挟んでいた姿を思い出します。彼女はまた、出来上がった押し花を紙の上にコラージュし、額装し、部屋を飾る美しいアートとして楽しんでいました。そんな祖母の姿を子どもの頃から眺め、一緒になってつくっていたものですから、私にとって押し花は、小さな頃から親しみのある楽しい遊びの一つでした。
今回私たちはビオラの押し花を使って、Teachers appreciation weekのカードをつくることにしました。先生方へ日ごろの感謝を伝えるためのカード。春の息吹とともに、想いが伝わりますように。
用意するもの
– 花
– フラワープレス もしくは 厚い本
– ホワイトグルー
– 瓶
– 筆
– ピンセット *オプション
– カード
押し花に適した花
ビオラ、ミモザ、スイトピー、クローバー、白詰草、ユーカリの葉など。厚みがなく、水分の少ない花が押し花に向くと言われています。バラやマリーゴールドなどの花びらがたくさんある花は、花びらをバラしたあと一枚ずつ押し花にしても素敵です。
つくりかた
Step 1. 押し花をつくる
新聞紙の上に薄手の紙(ティッシュペーパー、和紙、コピー用紙など)を敷き、花が重ならないように一枚ずつ並べ、フラワープレスに挟む。このとき、花の正面を下にして配置しプレスすると、花びらが平坦に綺麗に仕上がります。
厚手の本を使う場合は、新聞紙とティッシュペーパーの上に花を並べたあとに、本に挟み上から重しを乗せる。
だいたい1〜2週間ほどで押し花ができあがります。
Step 2. カードにレイアウトをする
今回は、丸いフラワーリースのようなイメージで配置しました。特に決まりはありません。好きなように置いてください。
Step 3. 糊付け
空き瓶にホワイトグルーを入れ、少量の水で伸ばし水糊を作ります。花は繊細ですので、少しの粘着力でもしっかりと貼れます。ホワイトグルーを水で伸ばすことによって、作業もしやすく美しい仕上がりとなります。
レイアウトした押し花を一つ取り、筆で花の裏側に糊を塗ります。ピンセットを使って元の位置に慎重に置き接着します。ほかの花も同じように接着します。
Step 4. 仕上げ
花びらが重なって浮いているところは、筆を使って隙間にも糊を貼ると美しい仕上がりになります。全ての花を接着したら完成です。私たちが今回使った花は、ビオラ、マリーゴールドの花びら、矢車草の花びらです。
Teacher Appreciation のカードとして
娘はこのカードに先生方へのメッセージを書きました。花咲く春の気分と一緒に先生方へ感謝を込めて。