Squeegee Painting
Unpredictable, bold and colorful. Very experimental and intuitive. We were fascinated and engaged in this unique and unprecedented painting experience.
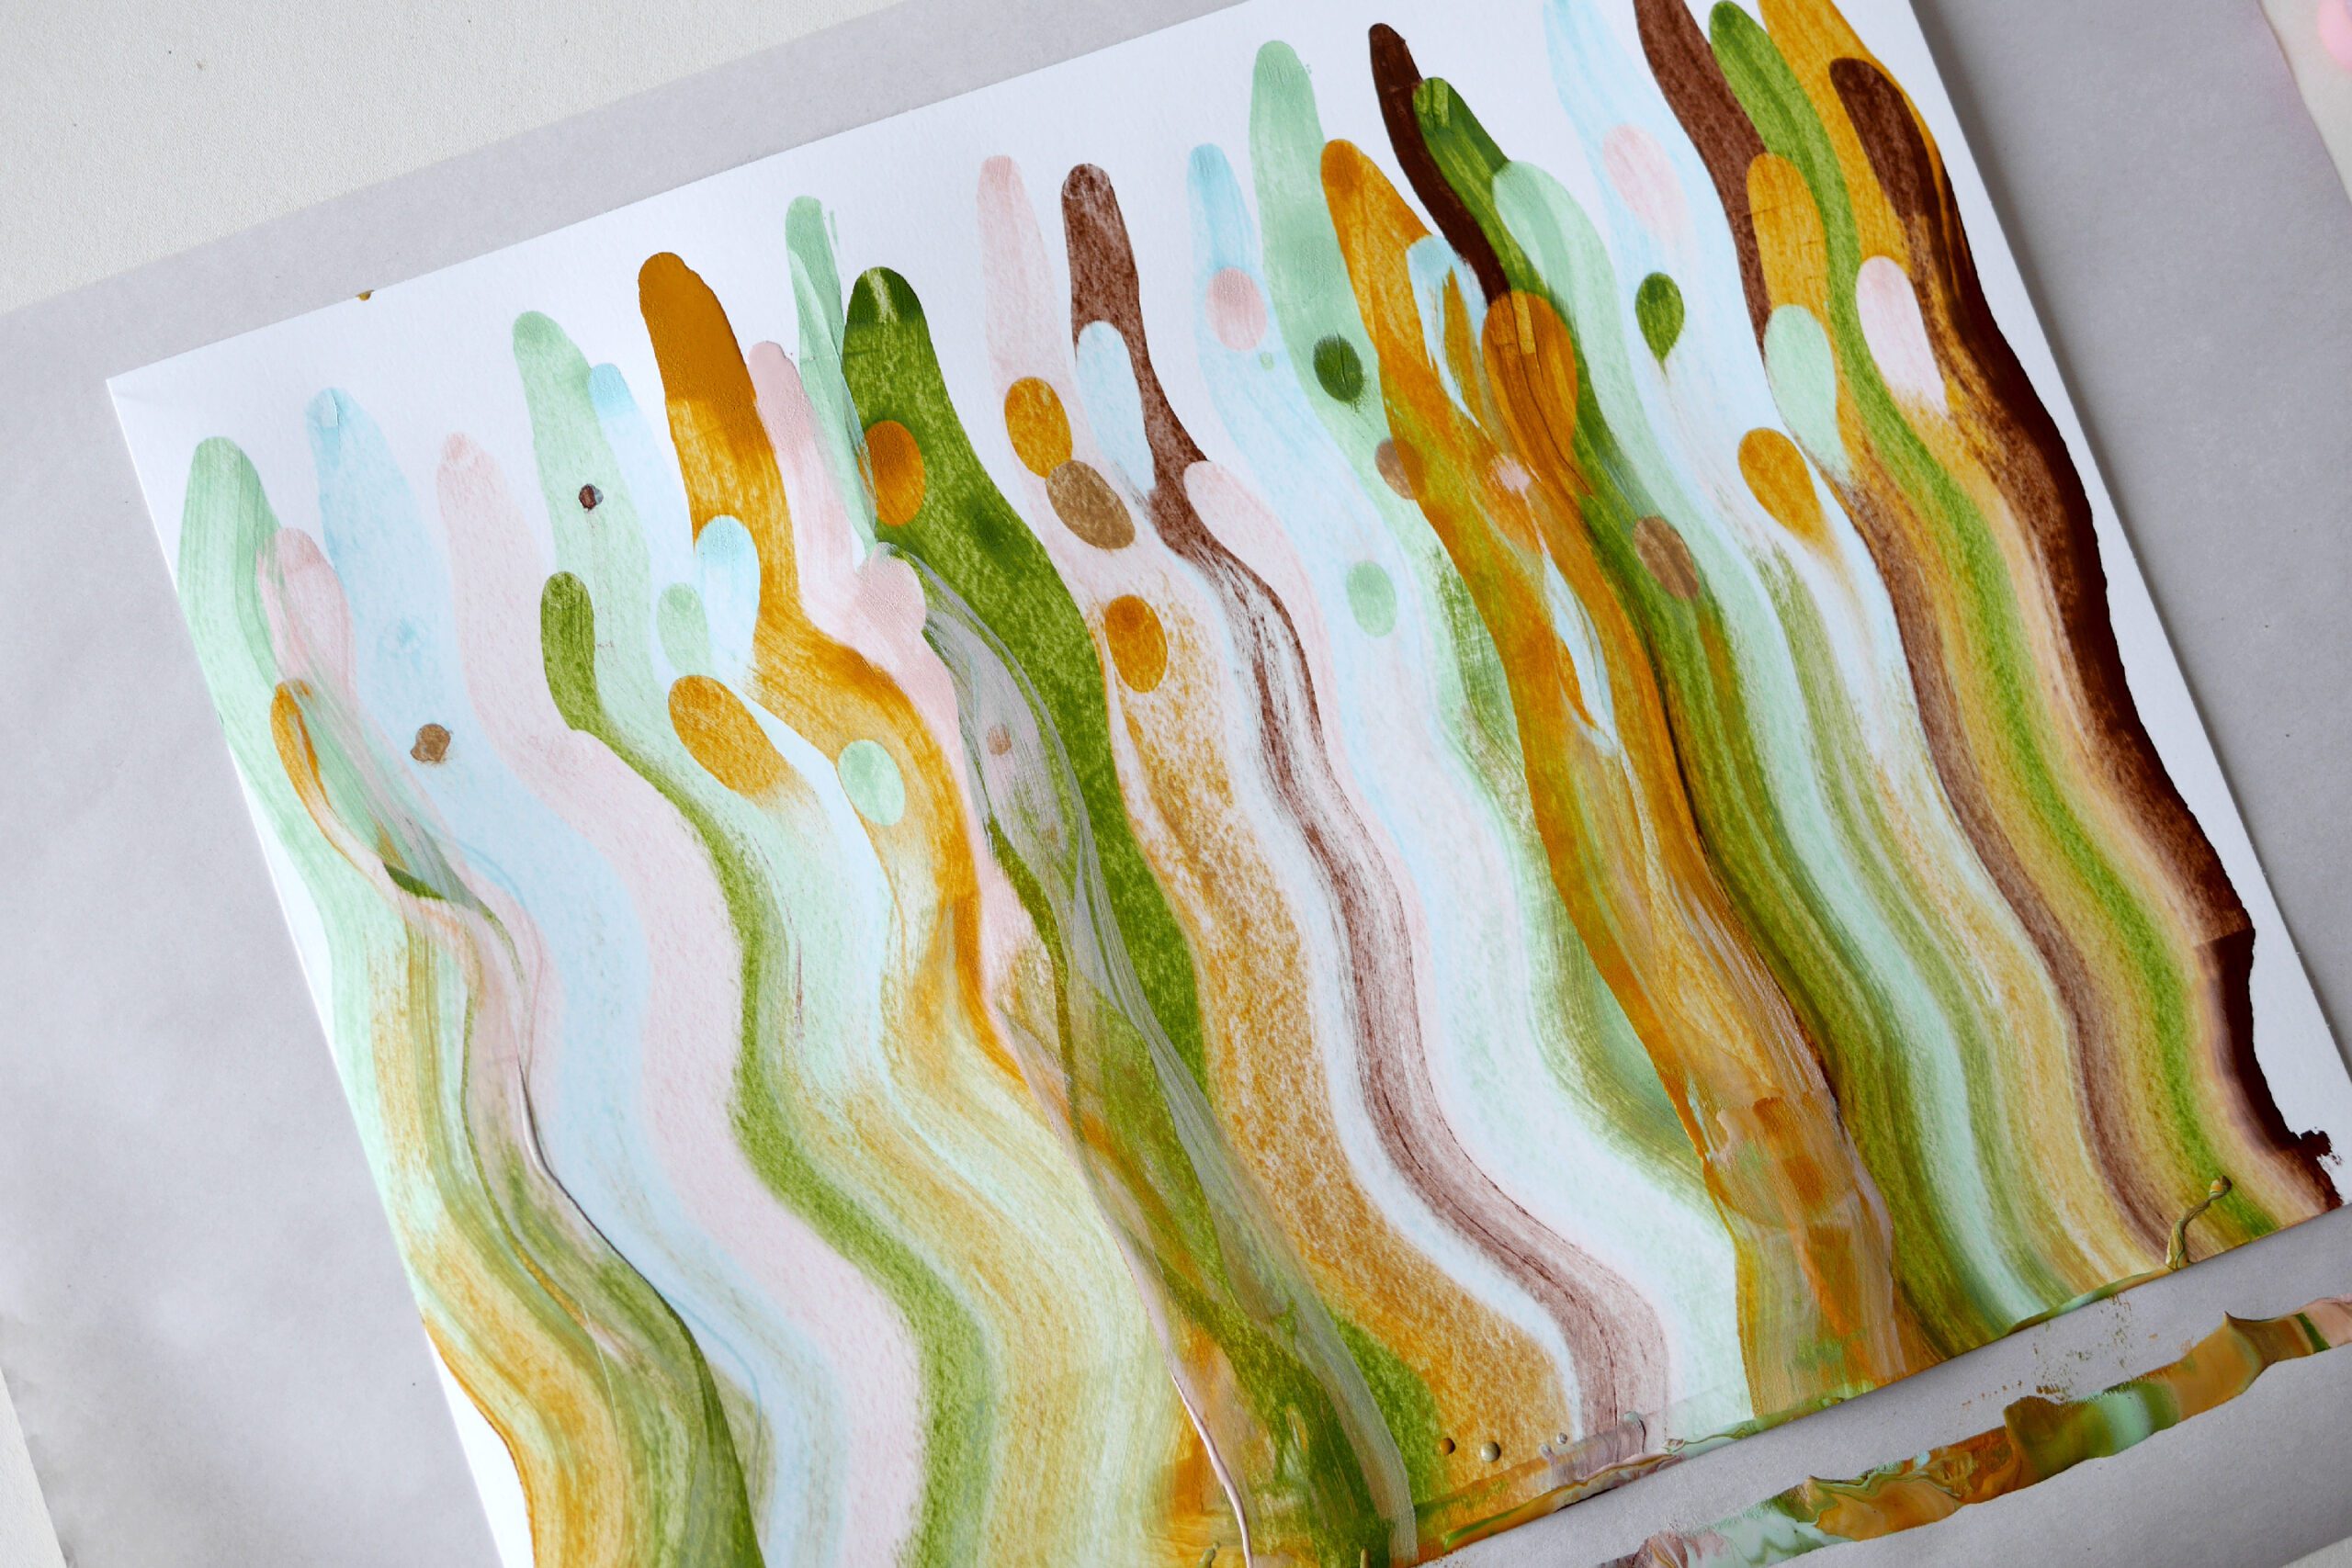
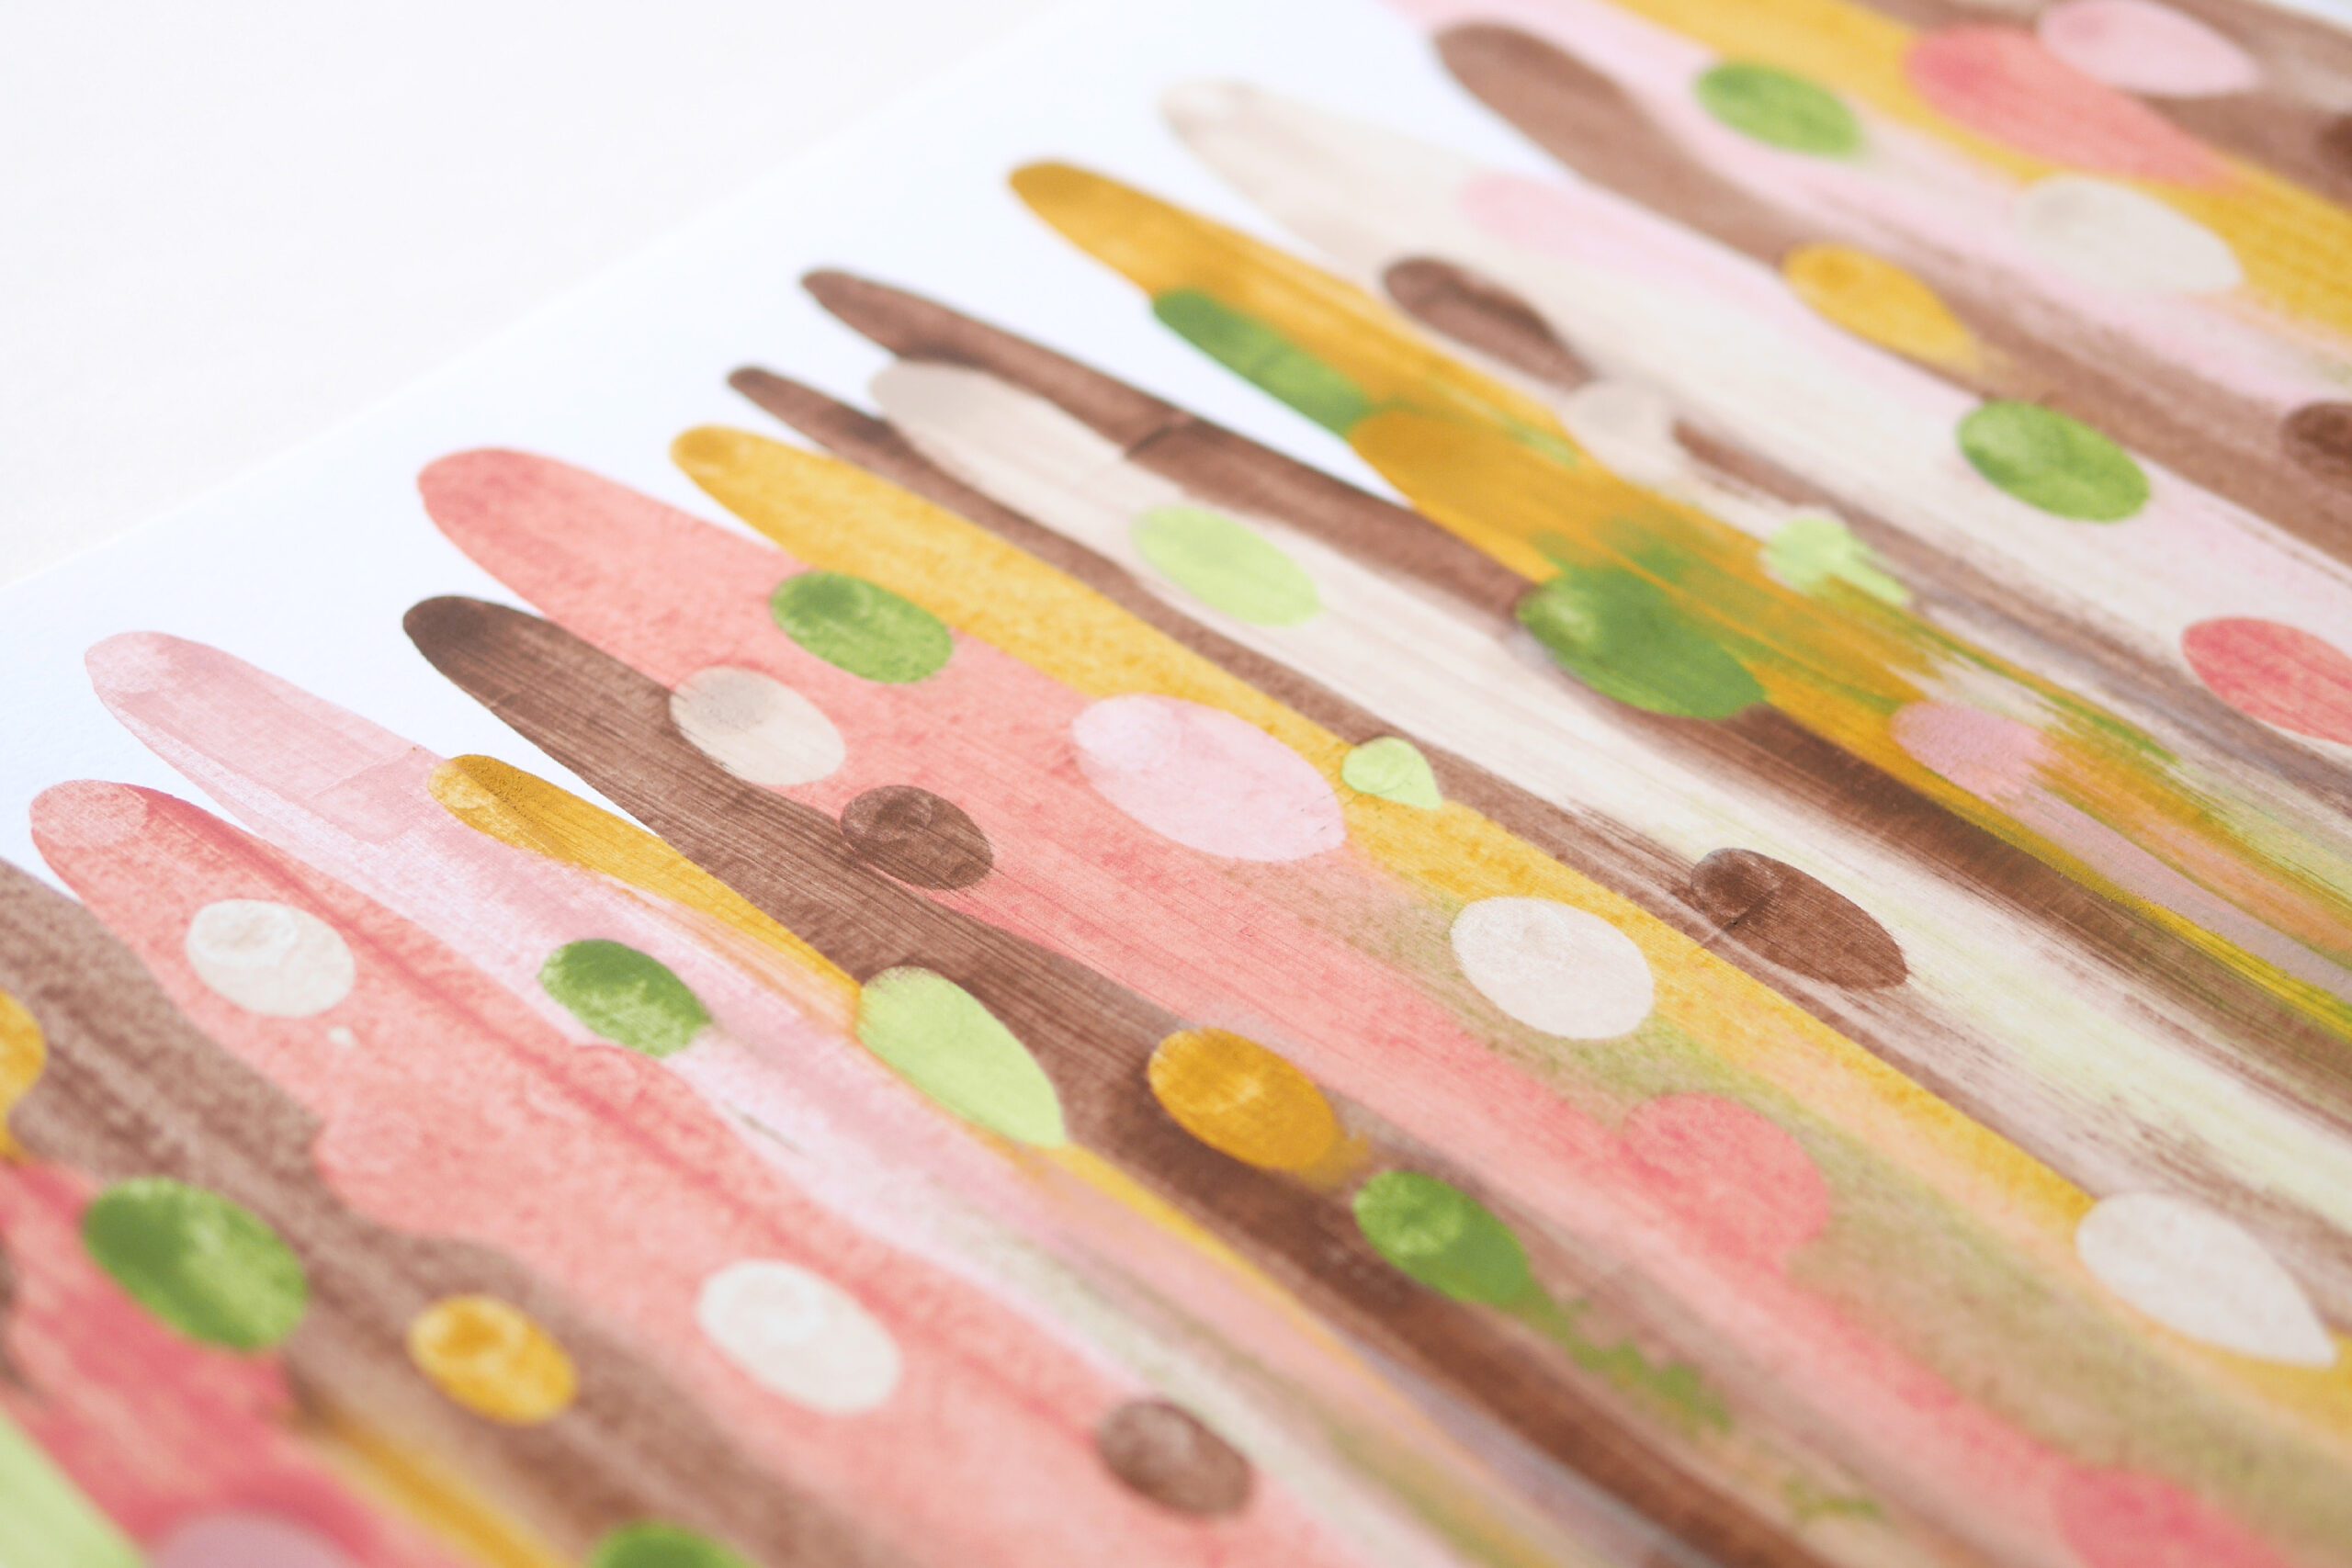
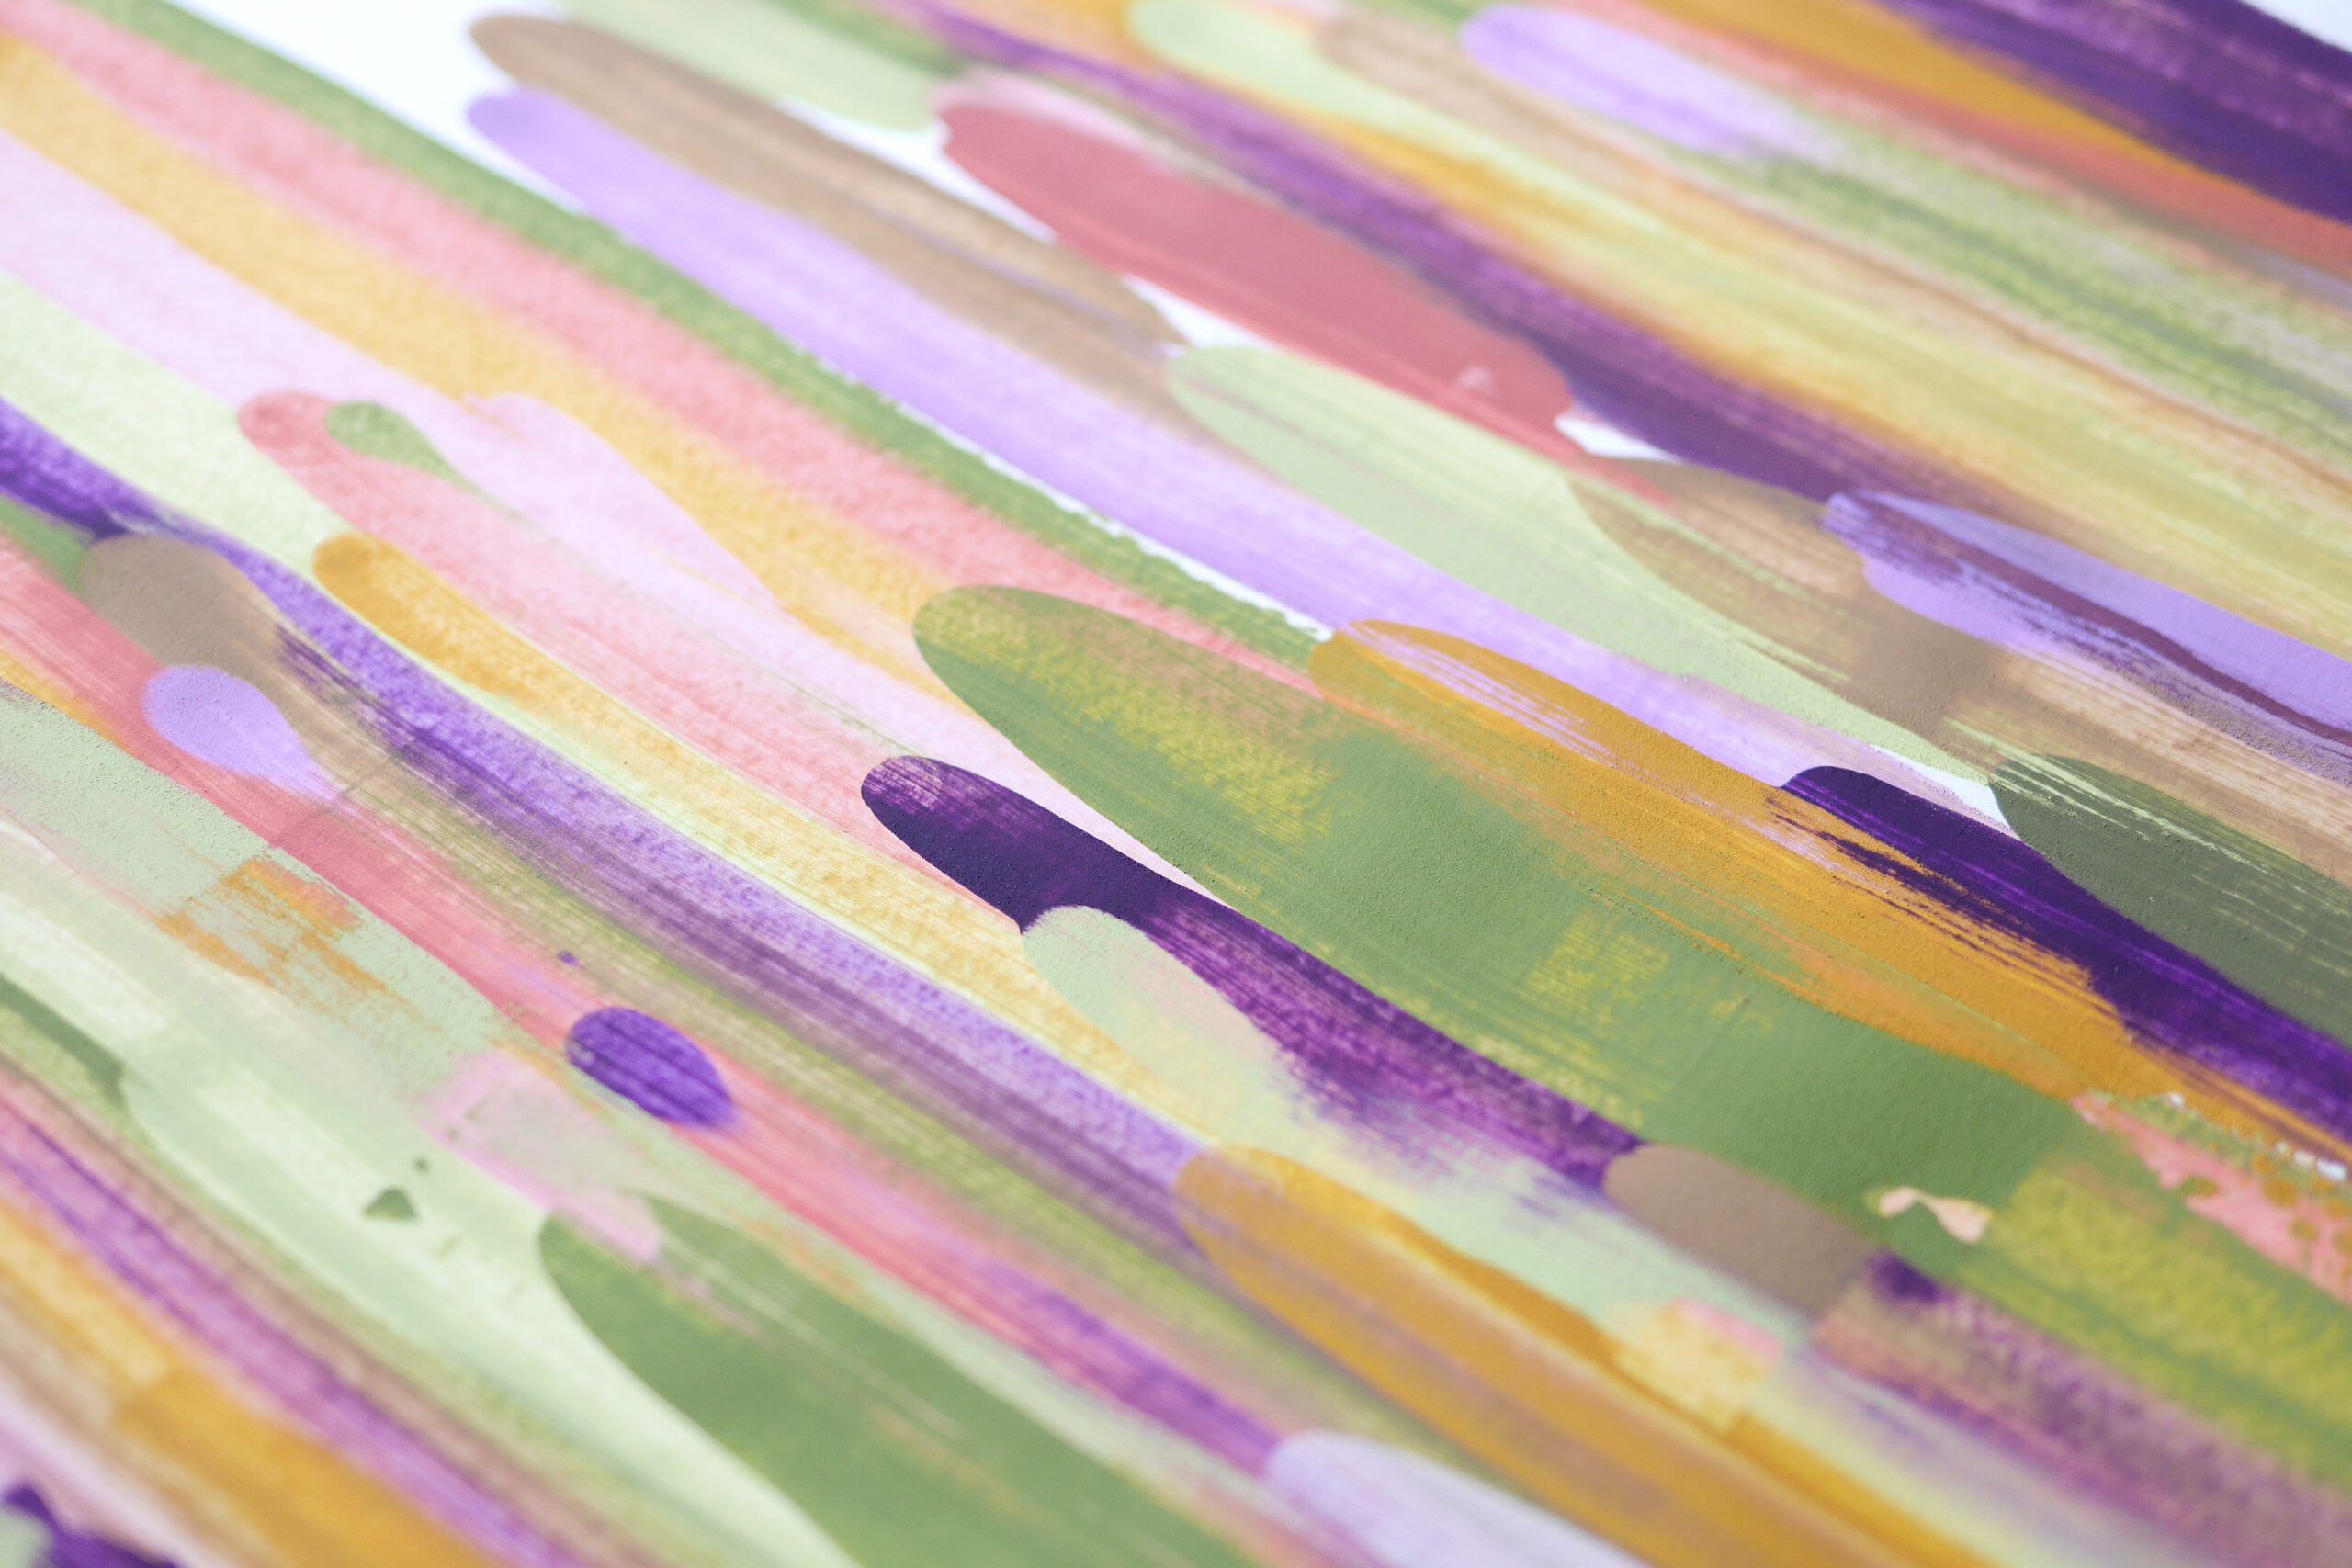
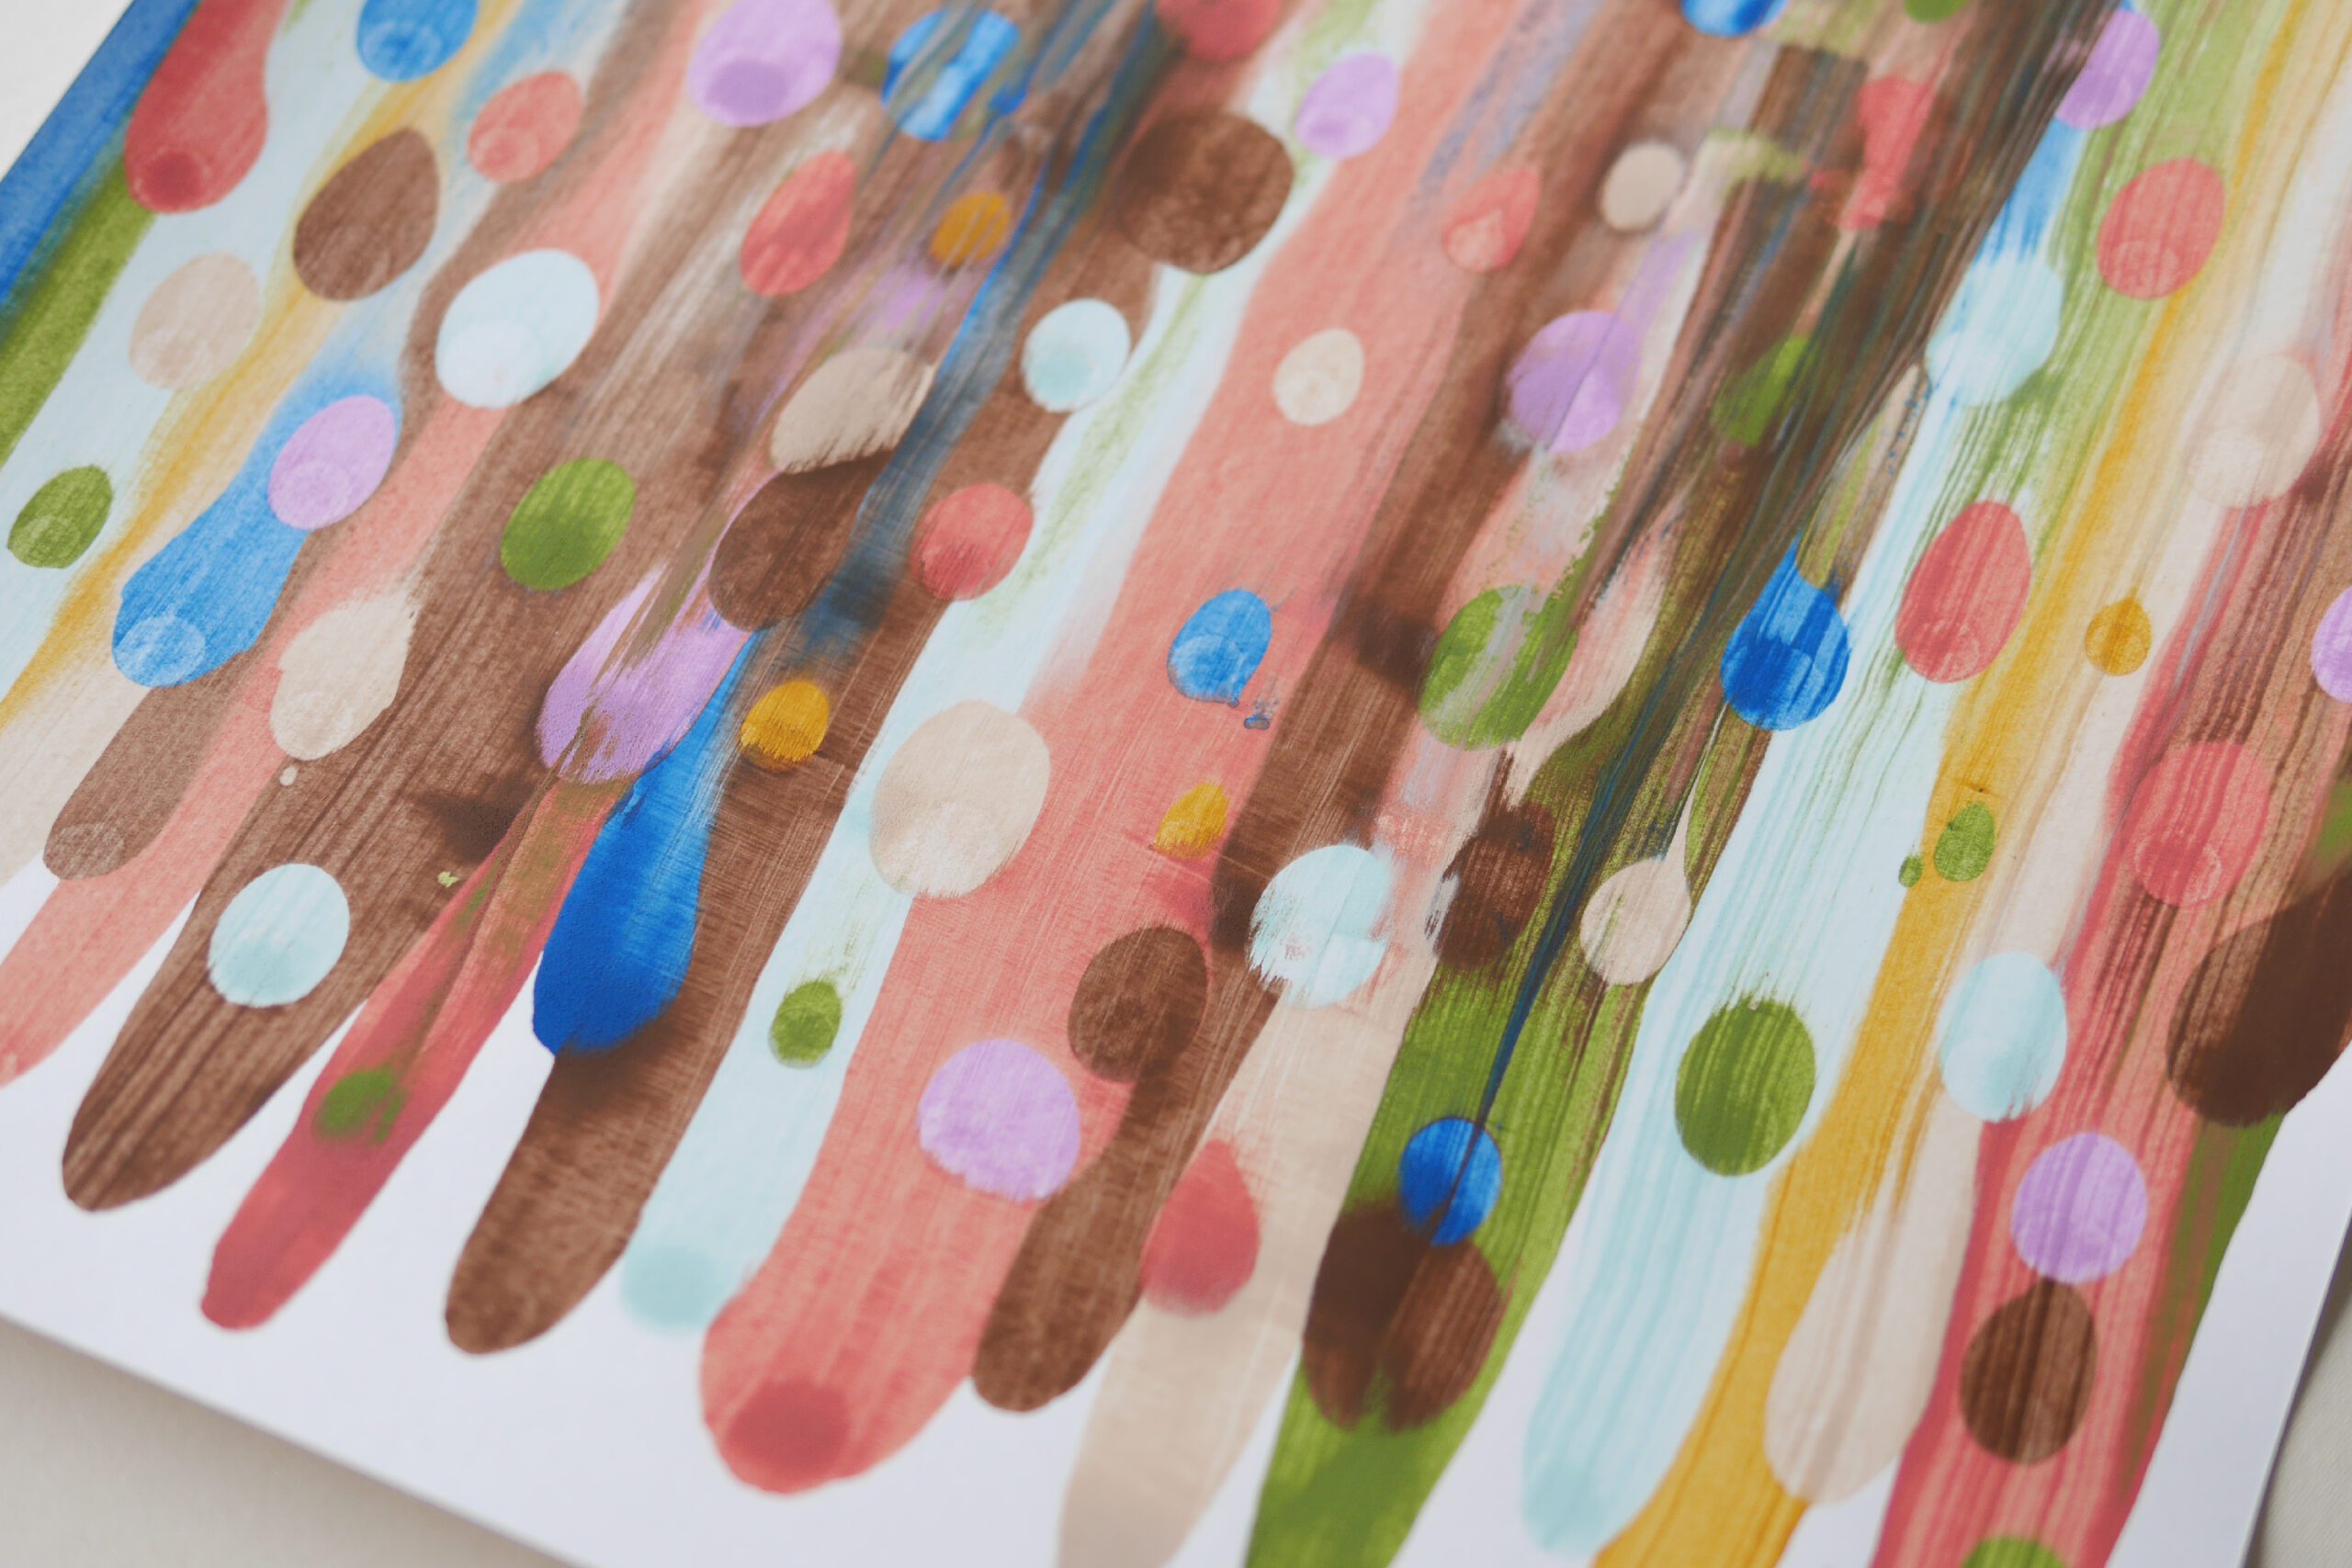
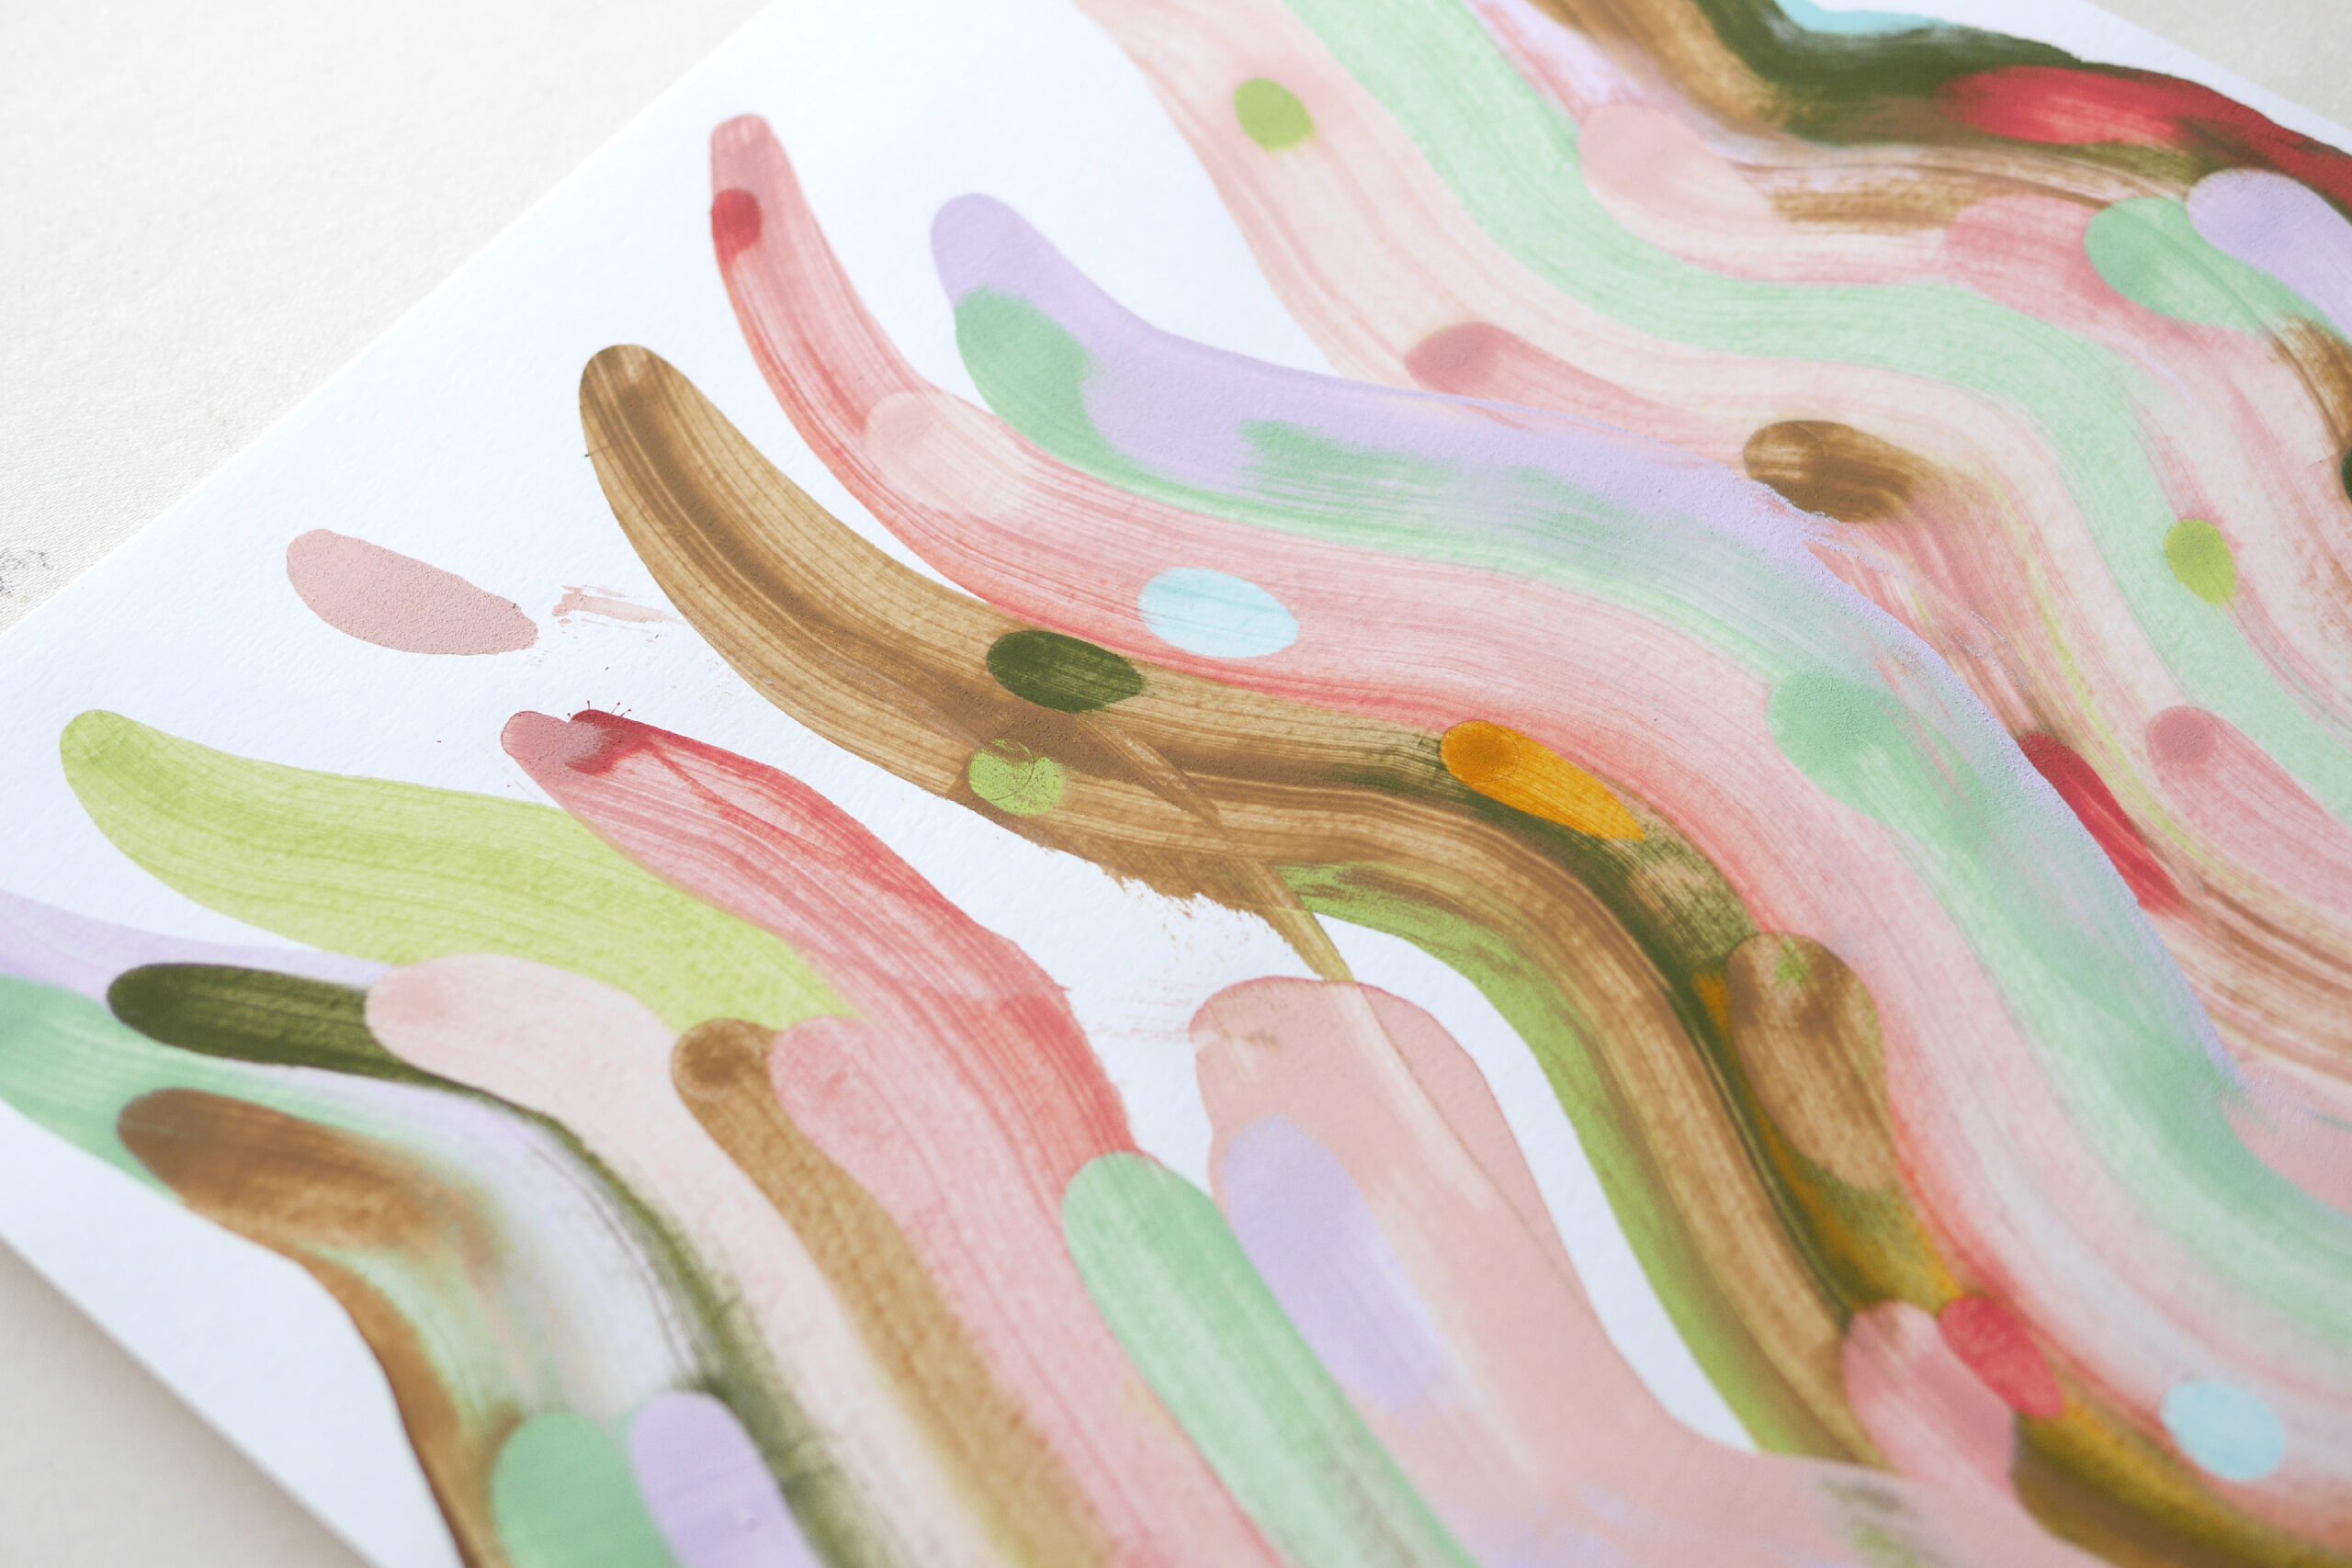
This squeegee art does not require paintbrushes or special tools needed for traditional painting. Just choose your favorite color, place a drop of paint on the paper, and let the squeegee do the rest. As you pull the squeegee straight or move it in waves, paint trails appear on the canvas like ski trails of paint. It is an abstract and unique art piece filled with many colors.
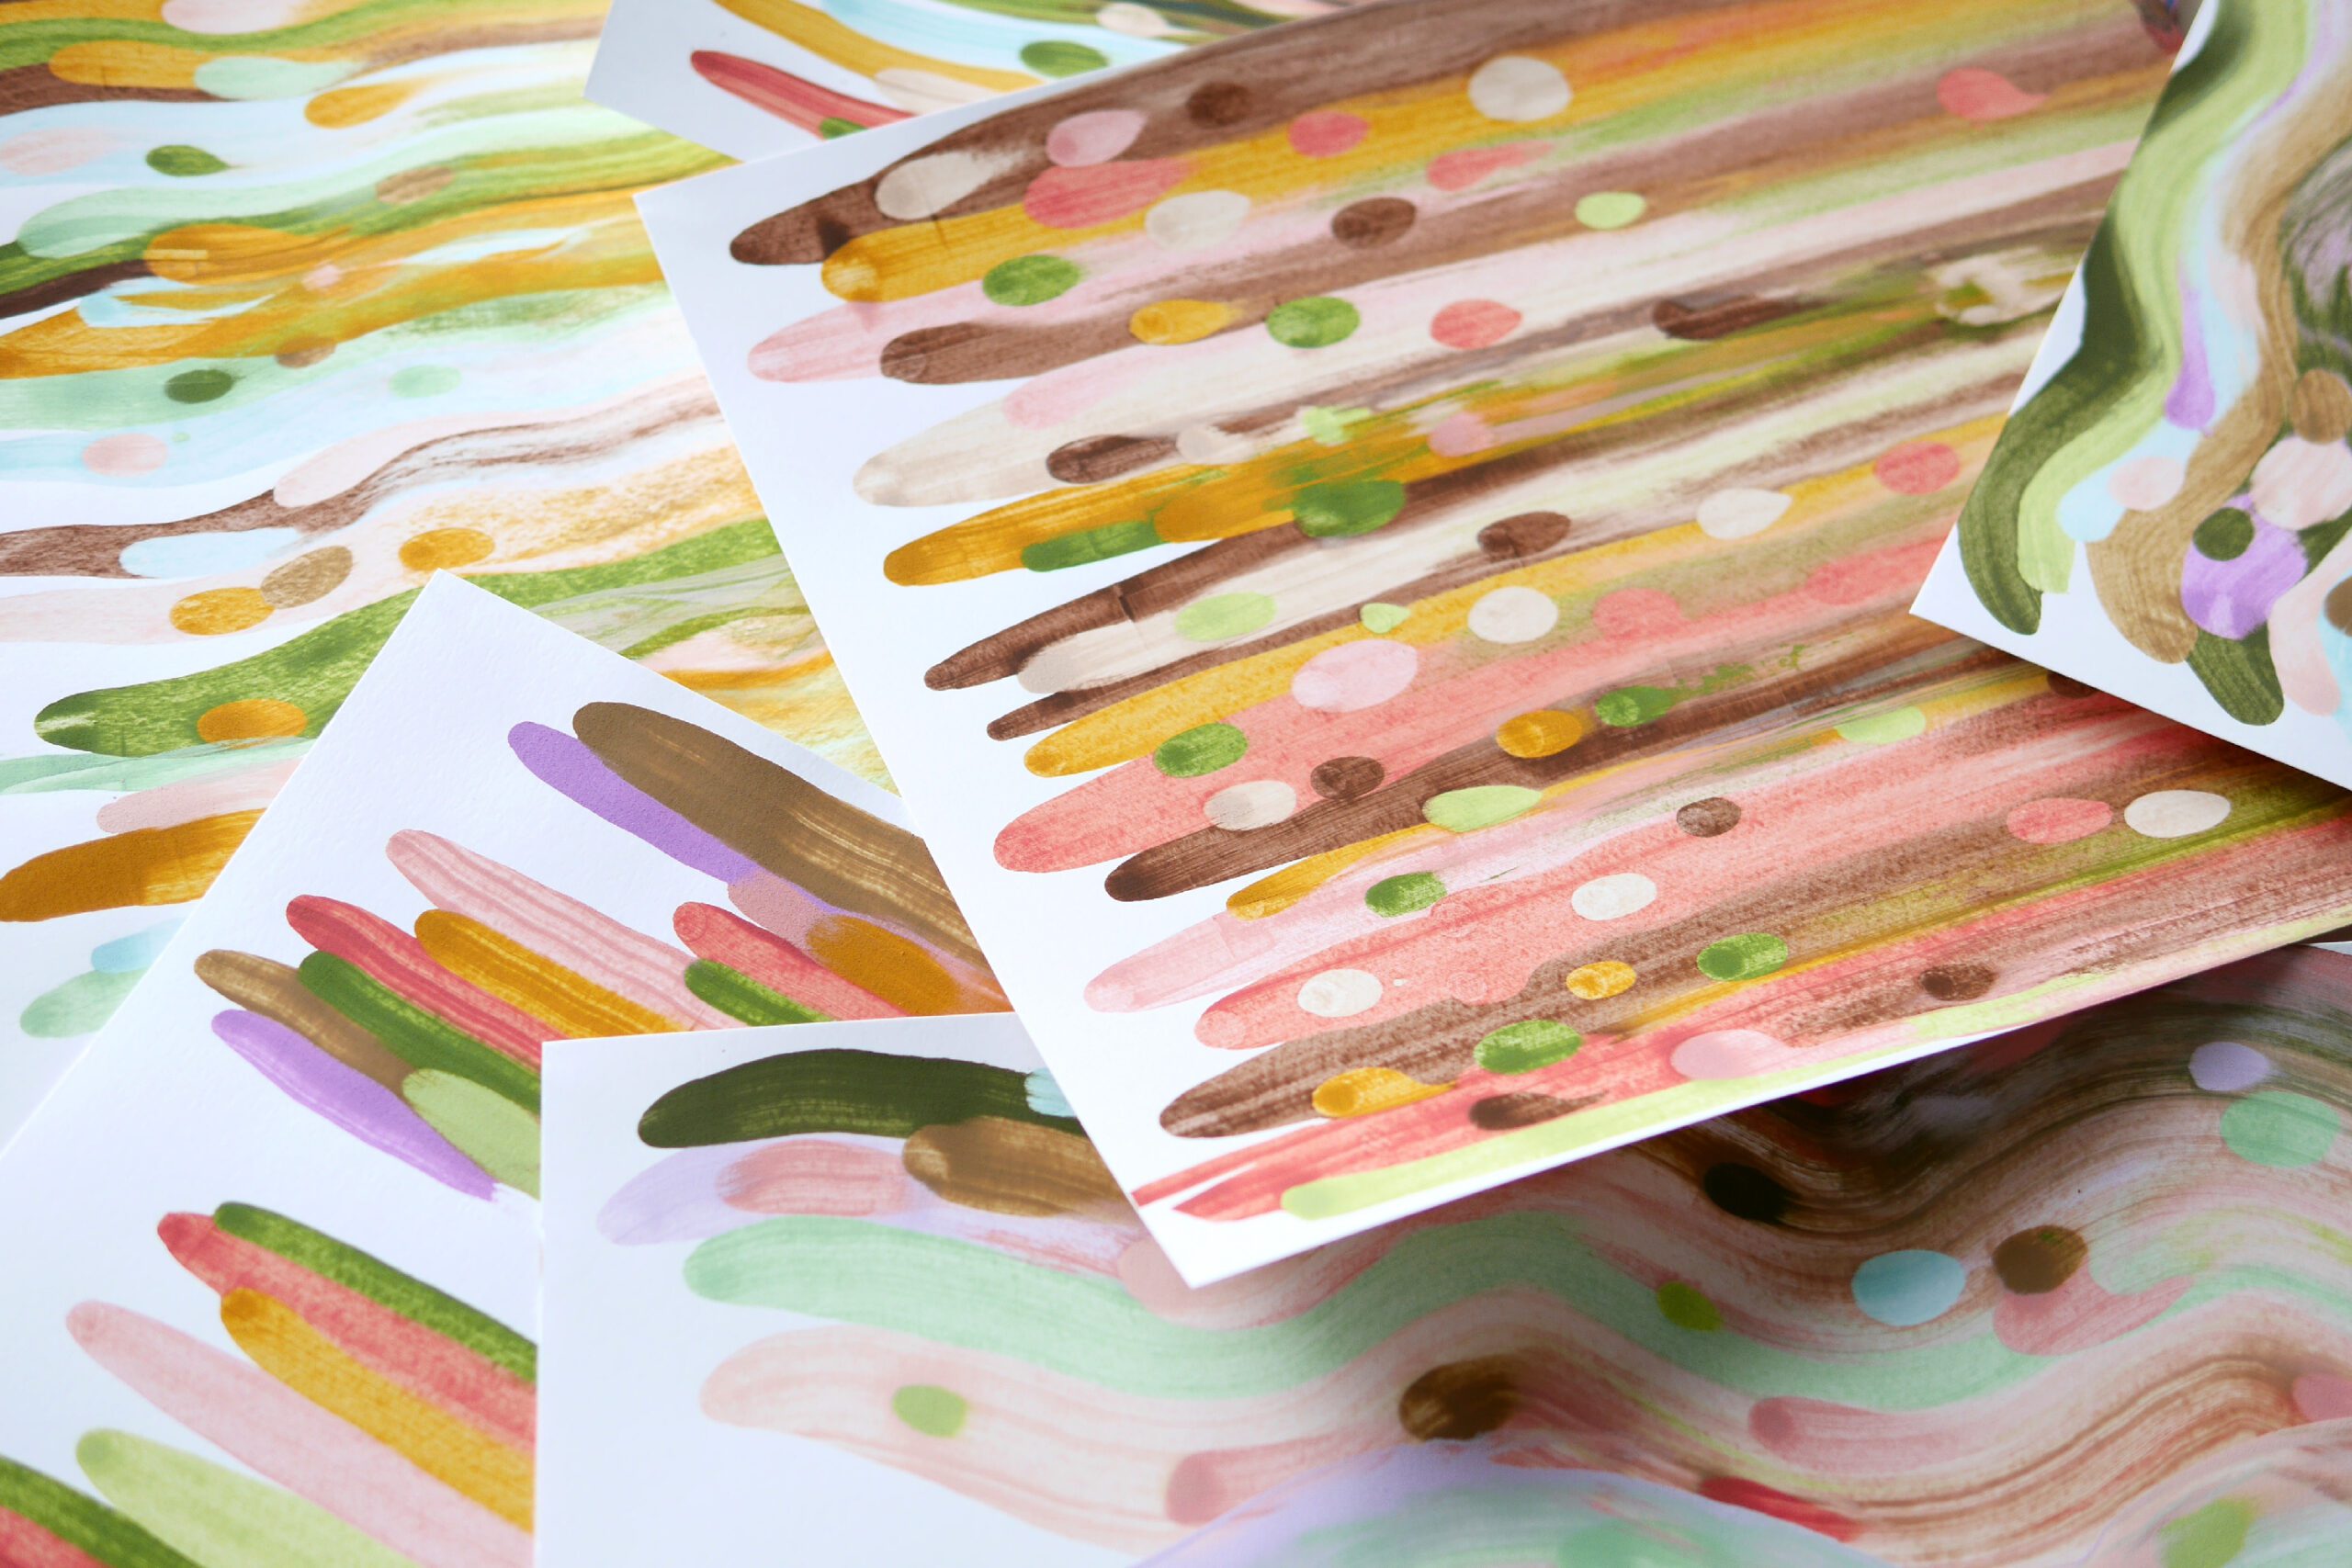
We enjoyed experimenting with this squeegee art for many pieces, fascinated by the fun of thinking of color combinations, the overlapping colors and paint trails created by squeegeeing.
Materials
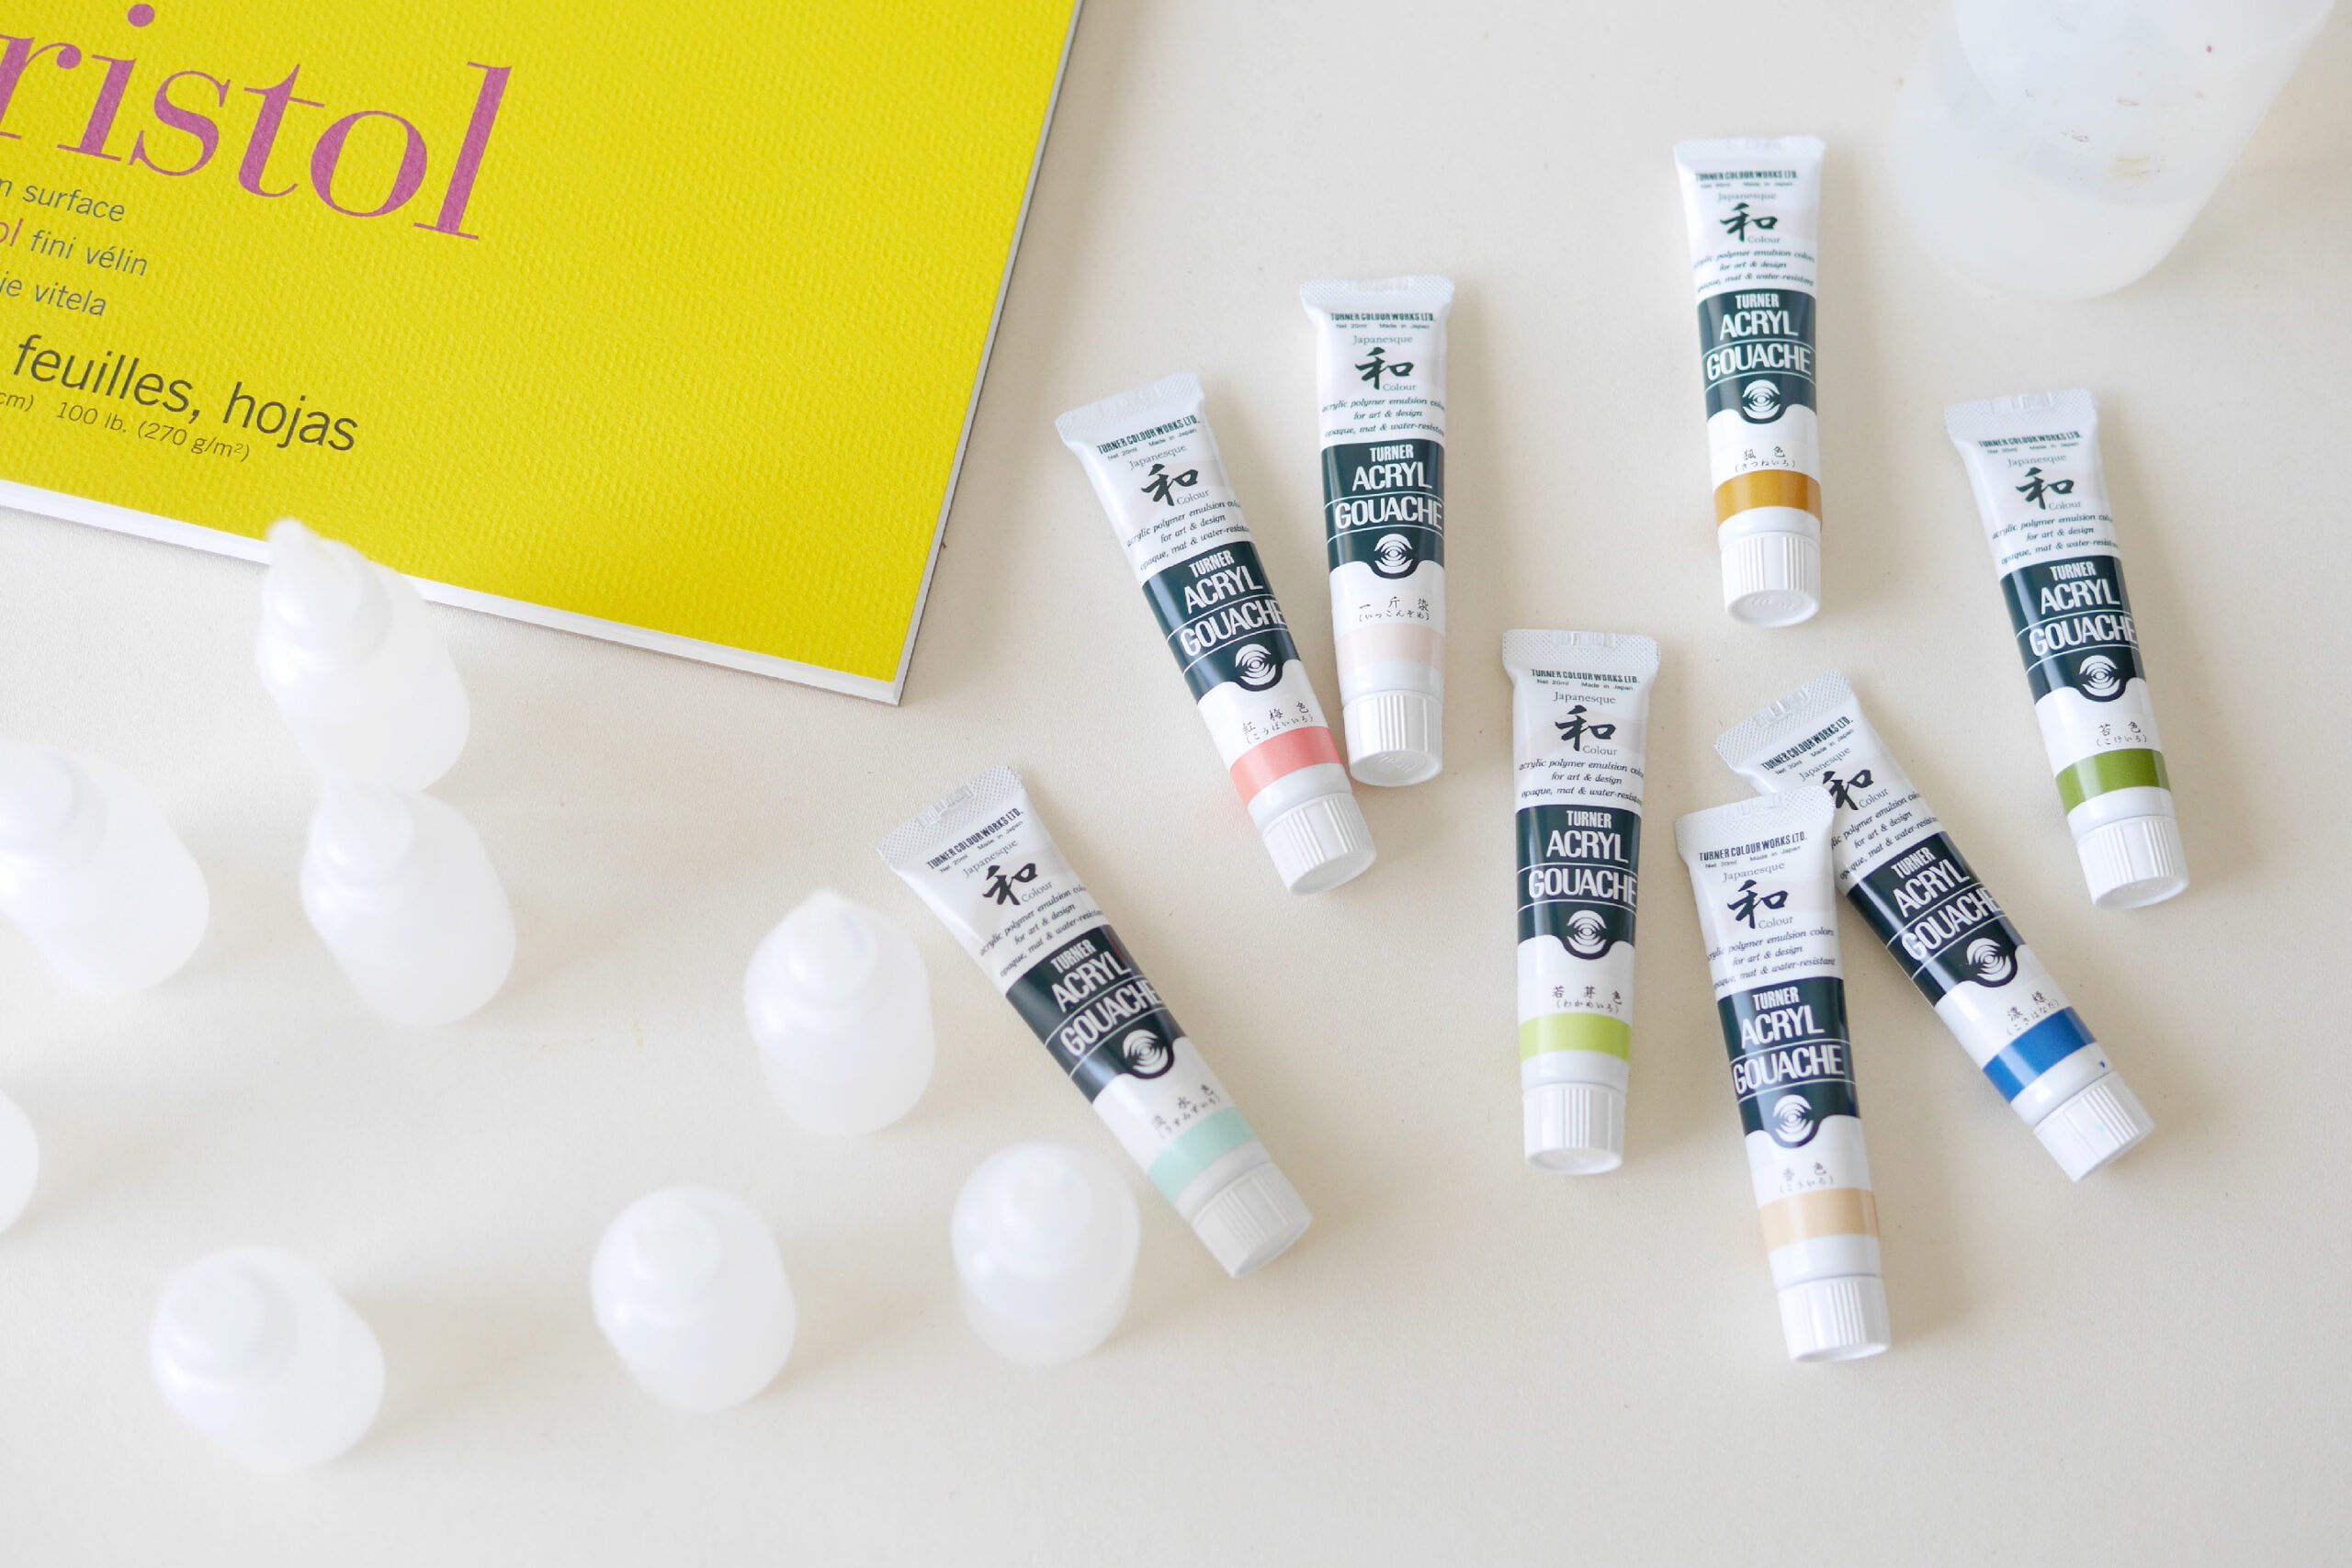
– Watercolor paper or other thick paper*.
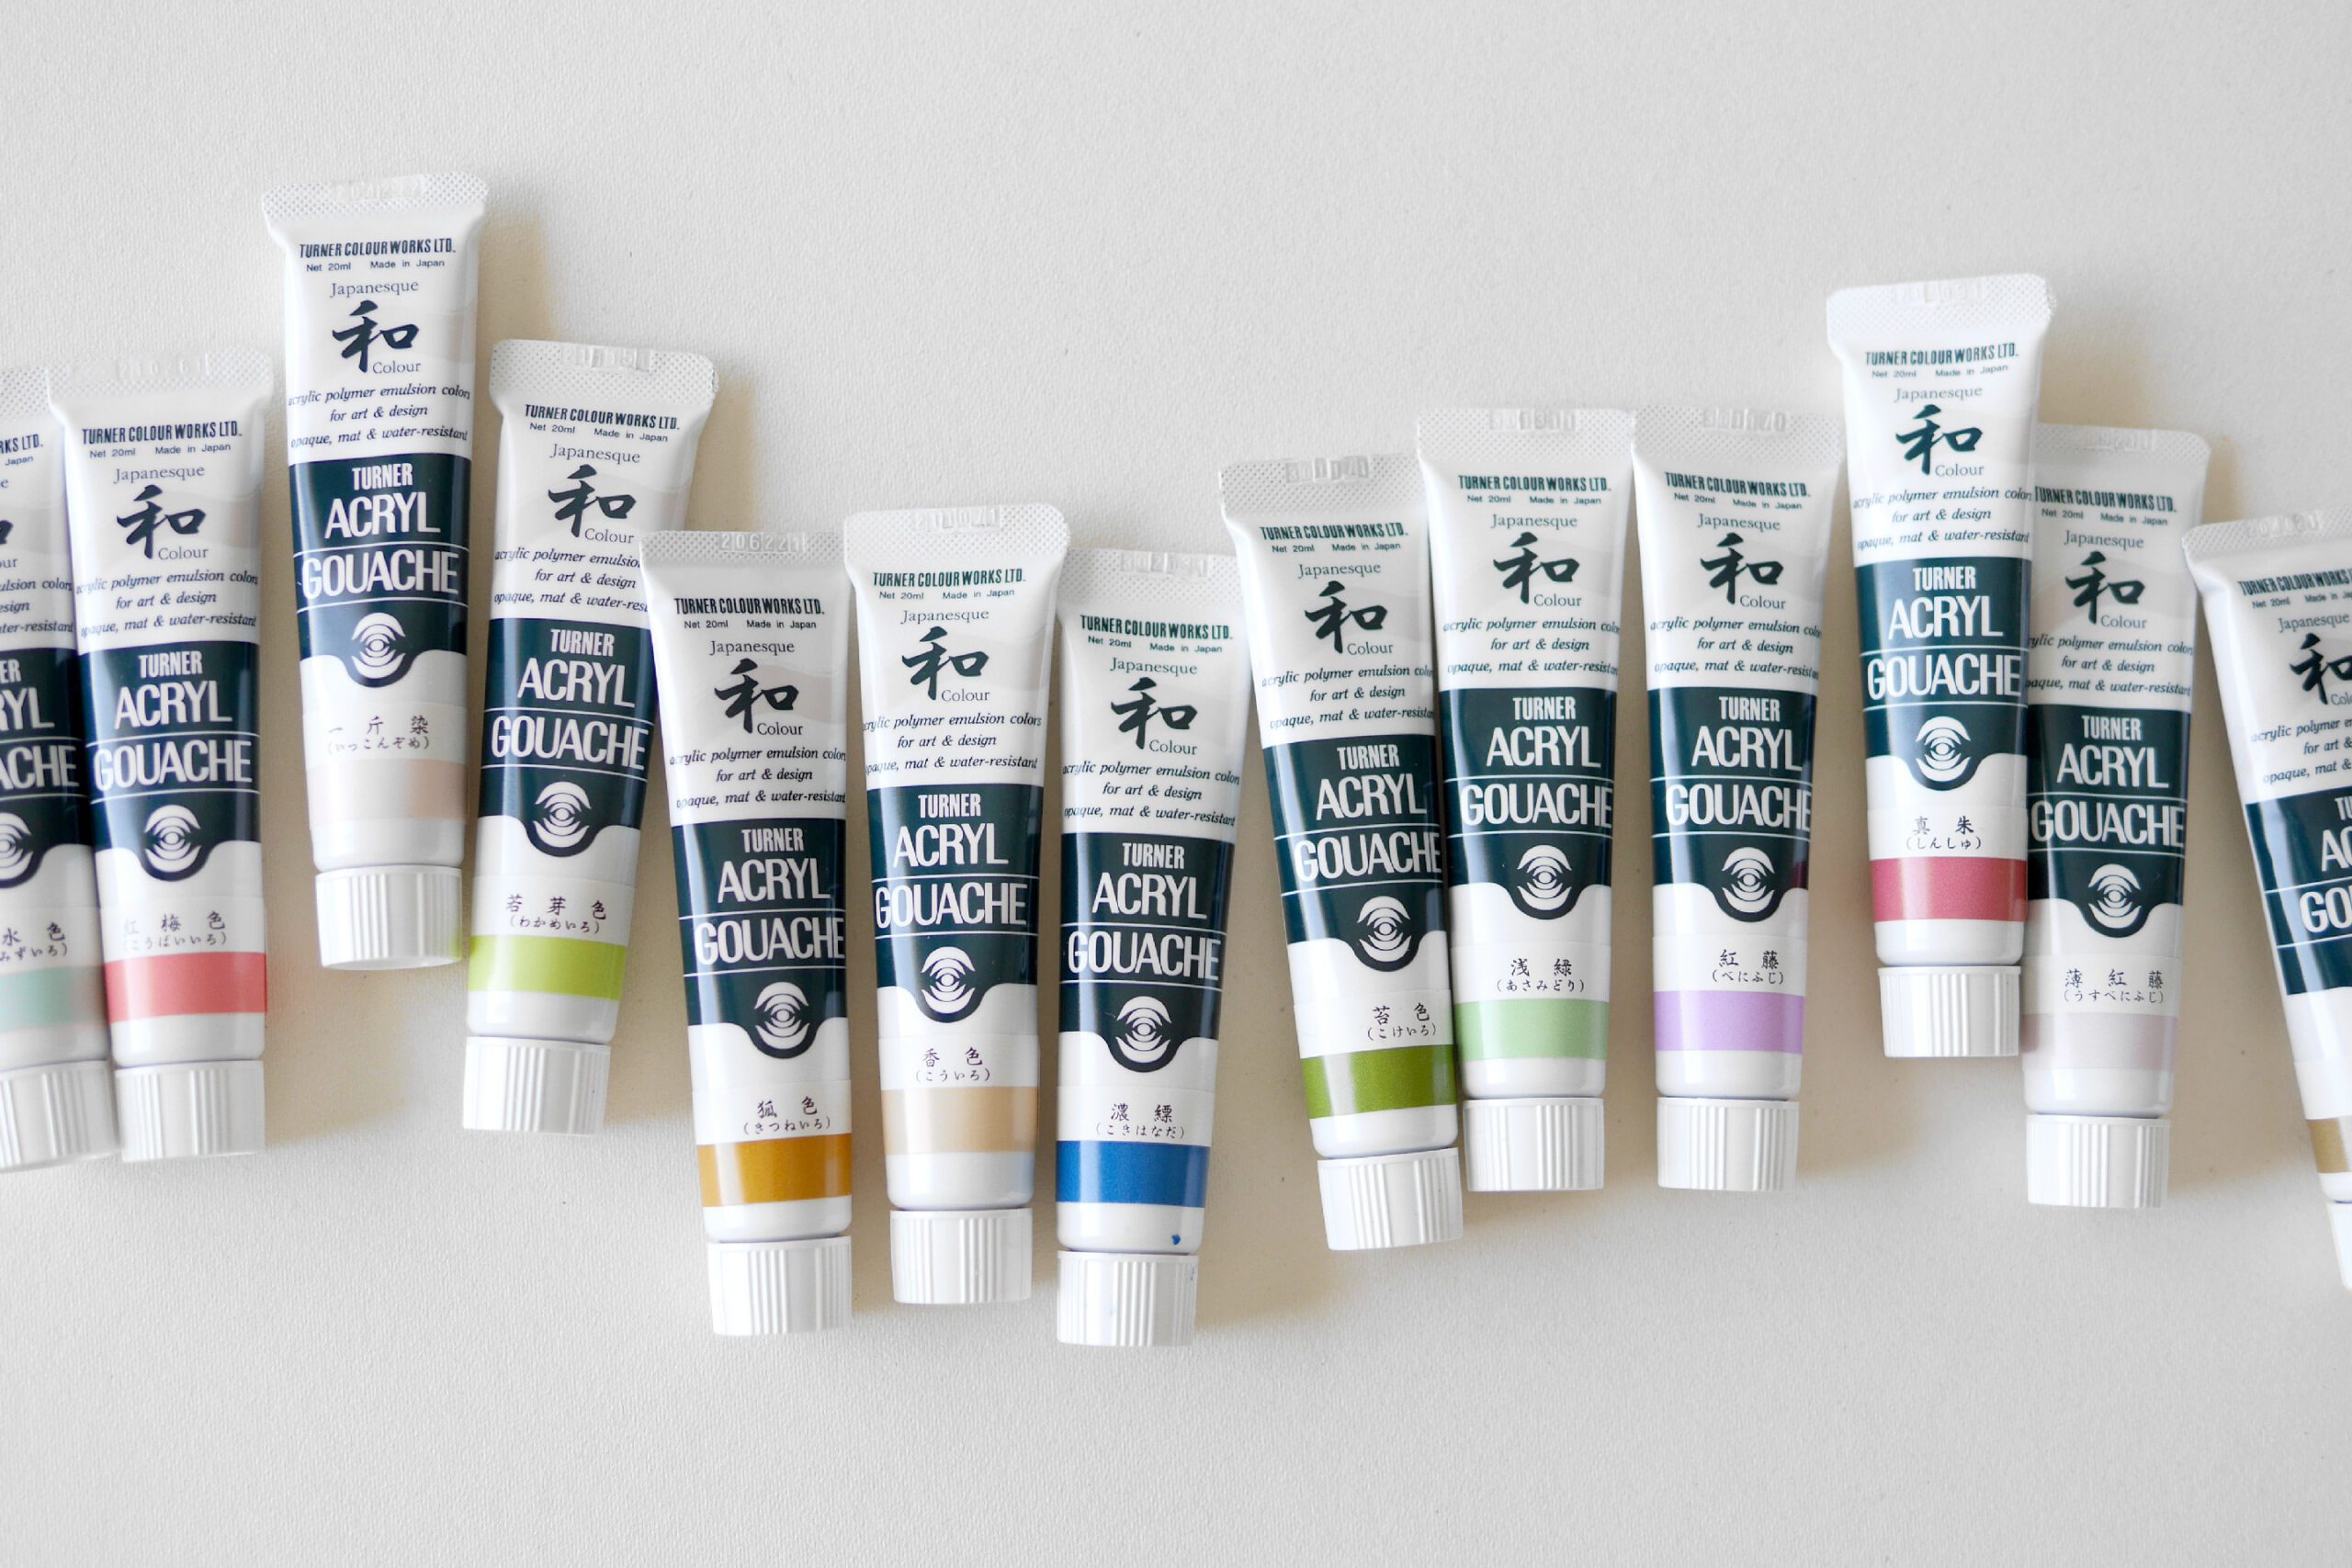
– Acrylic paint
– Water
– Newspaper to protect the work surface
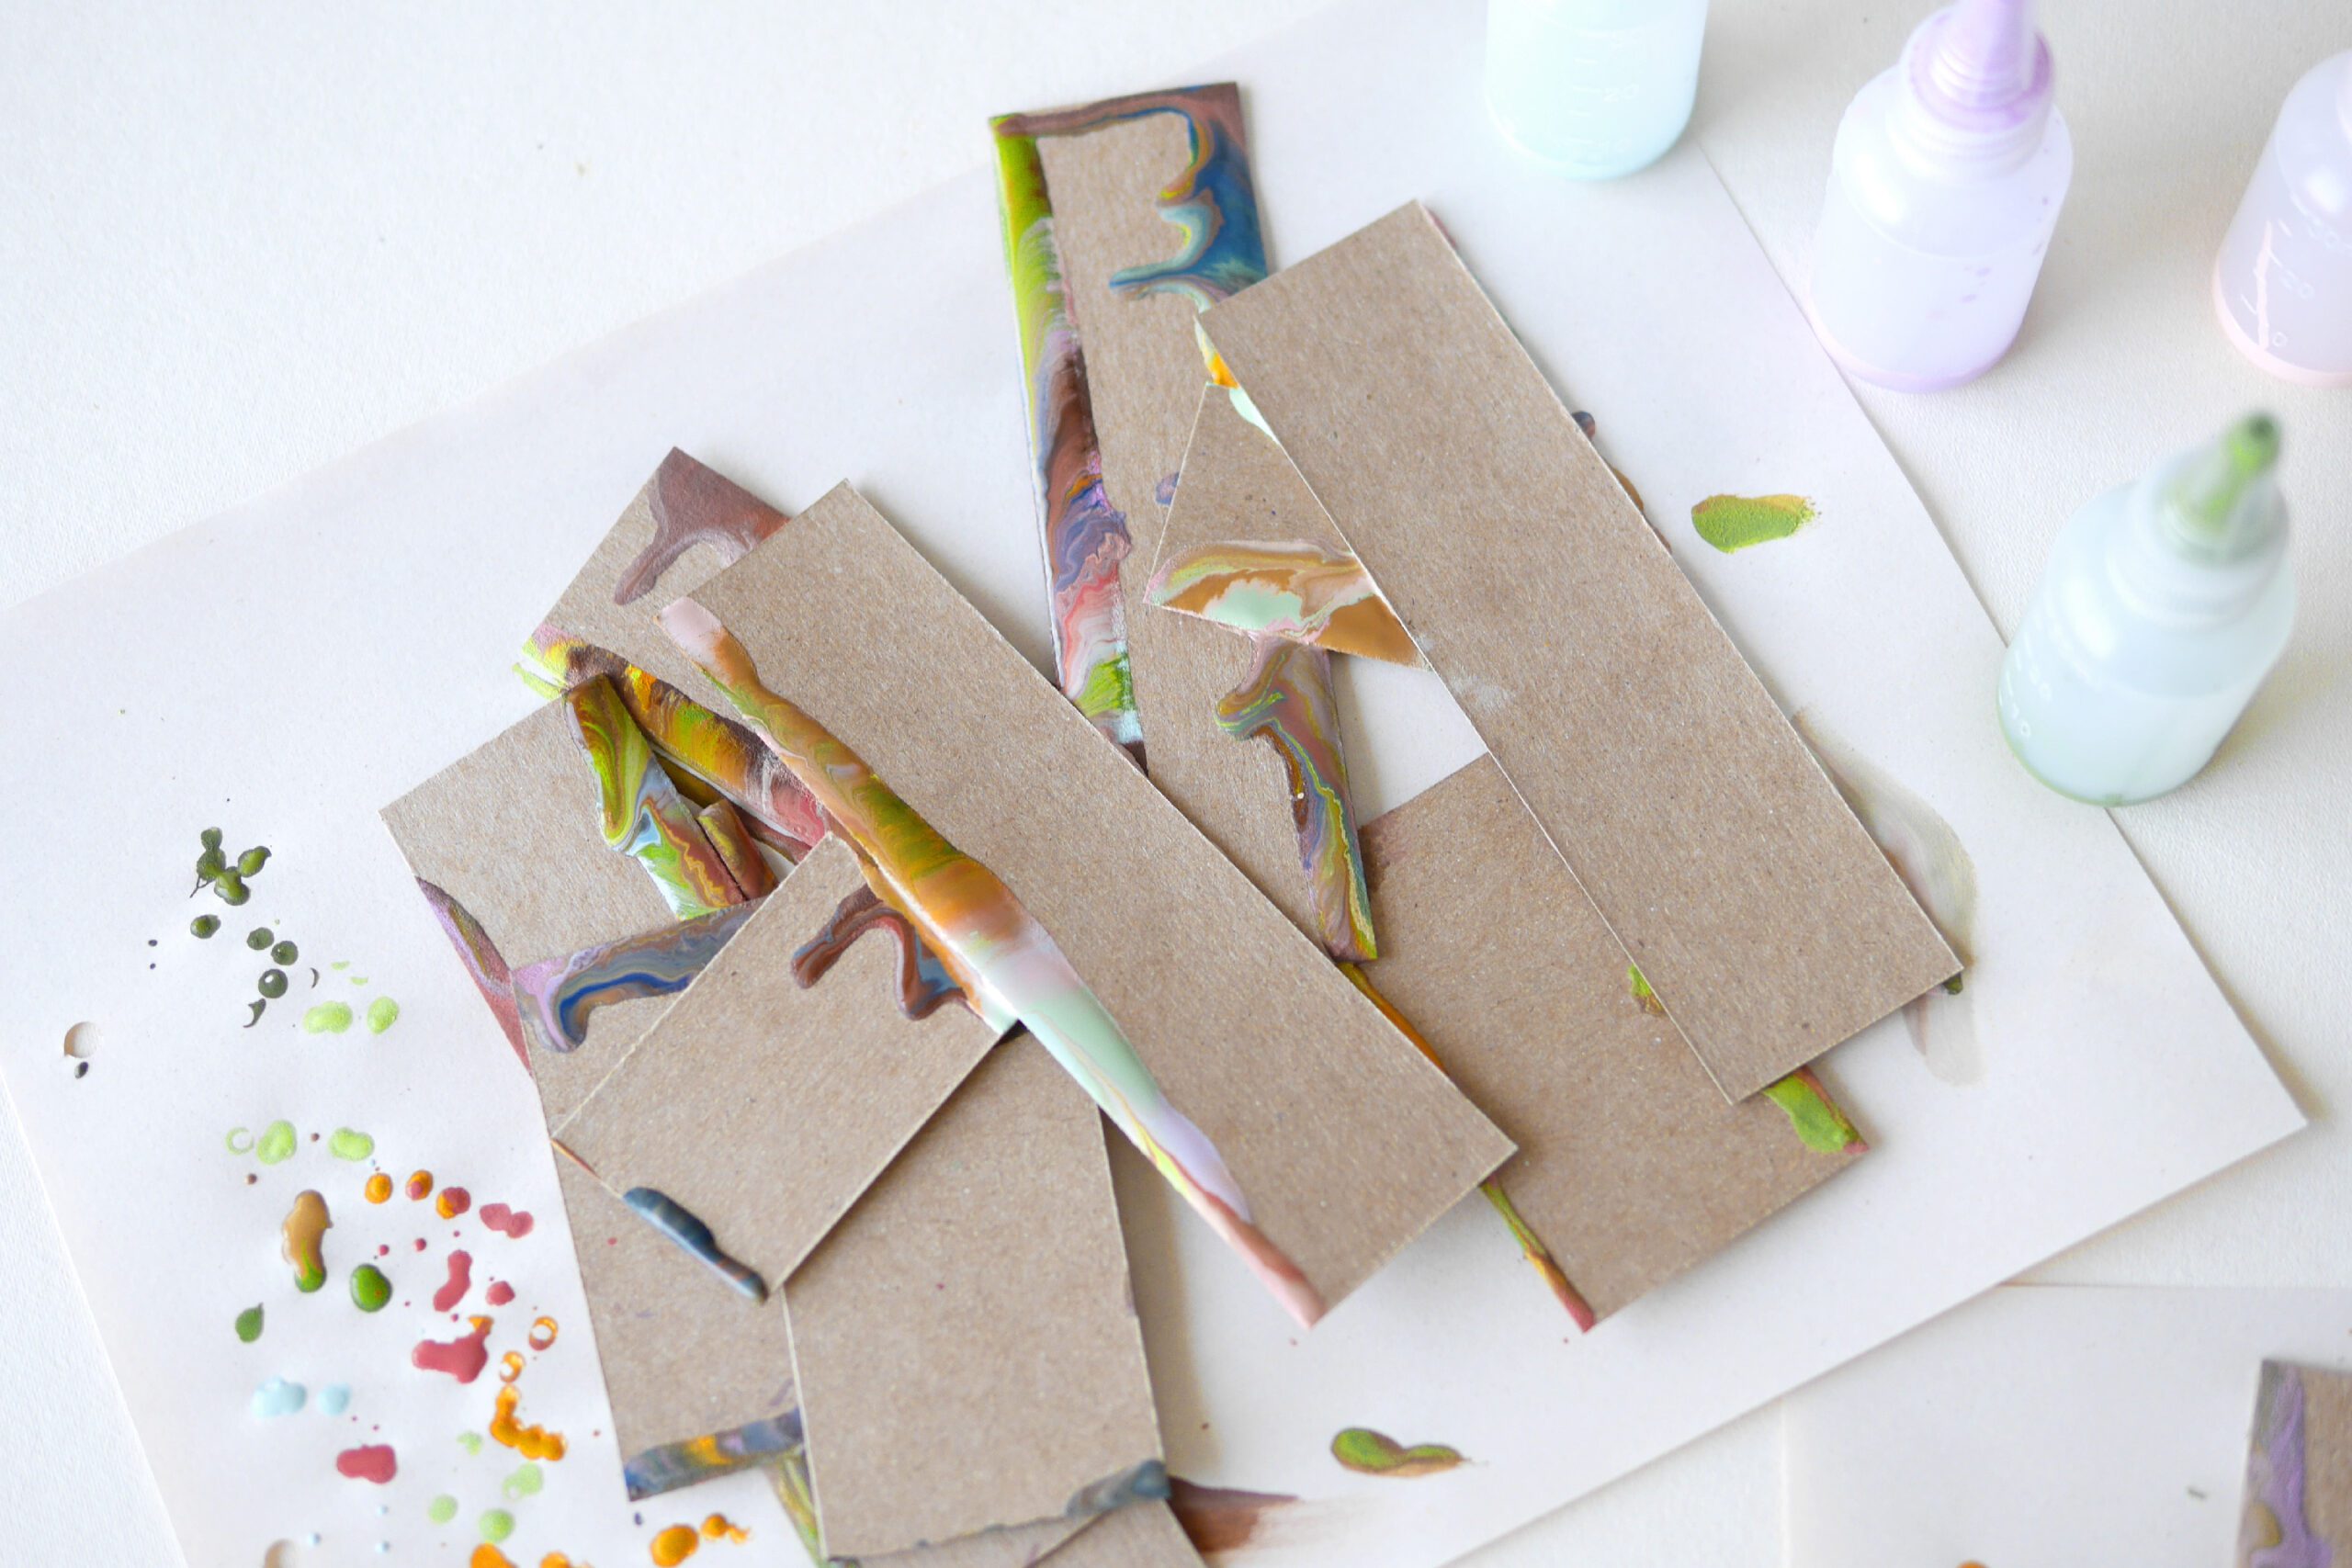
– Squeegee or Thick, recycled paper to replace squeegee
– Bottles to hold paint *Optional
*Thick paper: smooth paper is best, as the surface will be rubbed with the squeegee
*Thick recycled paper: chipboard, cardboard, tissue box boxes, or anything else that can be recycled will suffice. Used in place of squeegee.
Instructions for making
Step 1. Mix the Acrylic Paints
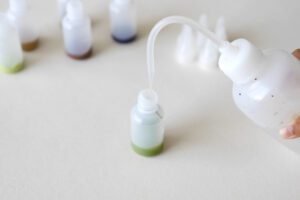
Fill a bottle with Acrylic paint and water. Acrylic paint ingredients alone are somewhat hard, so dilute them with a small amount of water. We added about 1 teaspoon of water for about 10 ml of acrylic paint. The density varies depending on the color of the paint, so check and adjust the amount of water. Shake the bottle to mix the paint and water well.
If you do not use a bottle, you can drop the thawed paint directly onto the paper with a paintbrush.


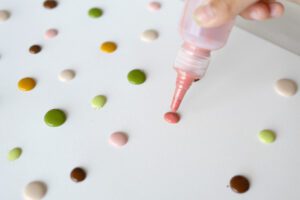
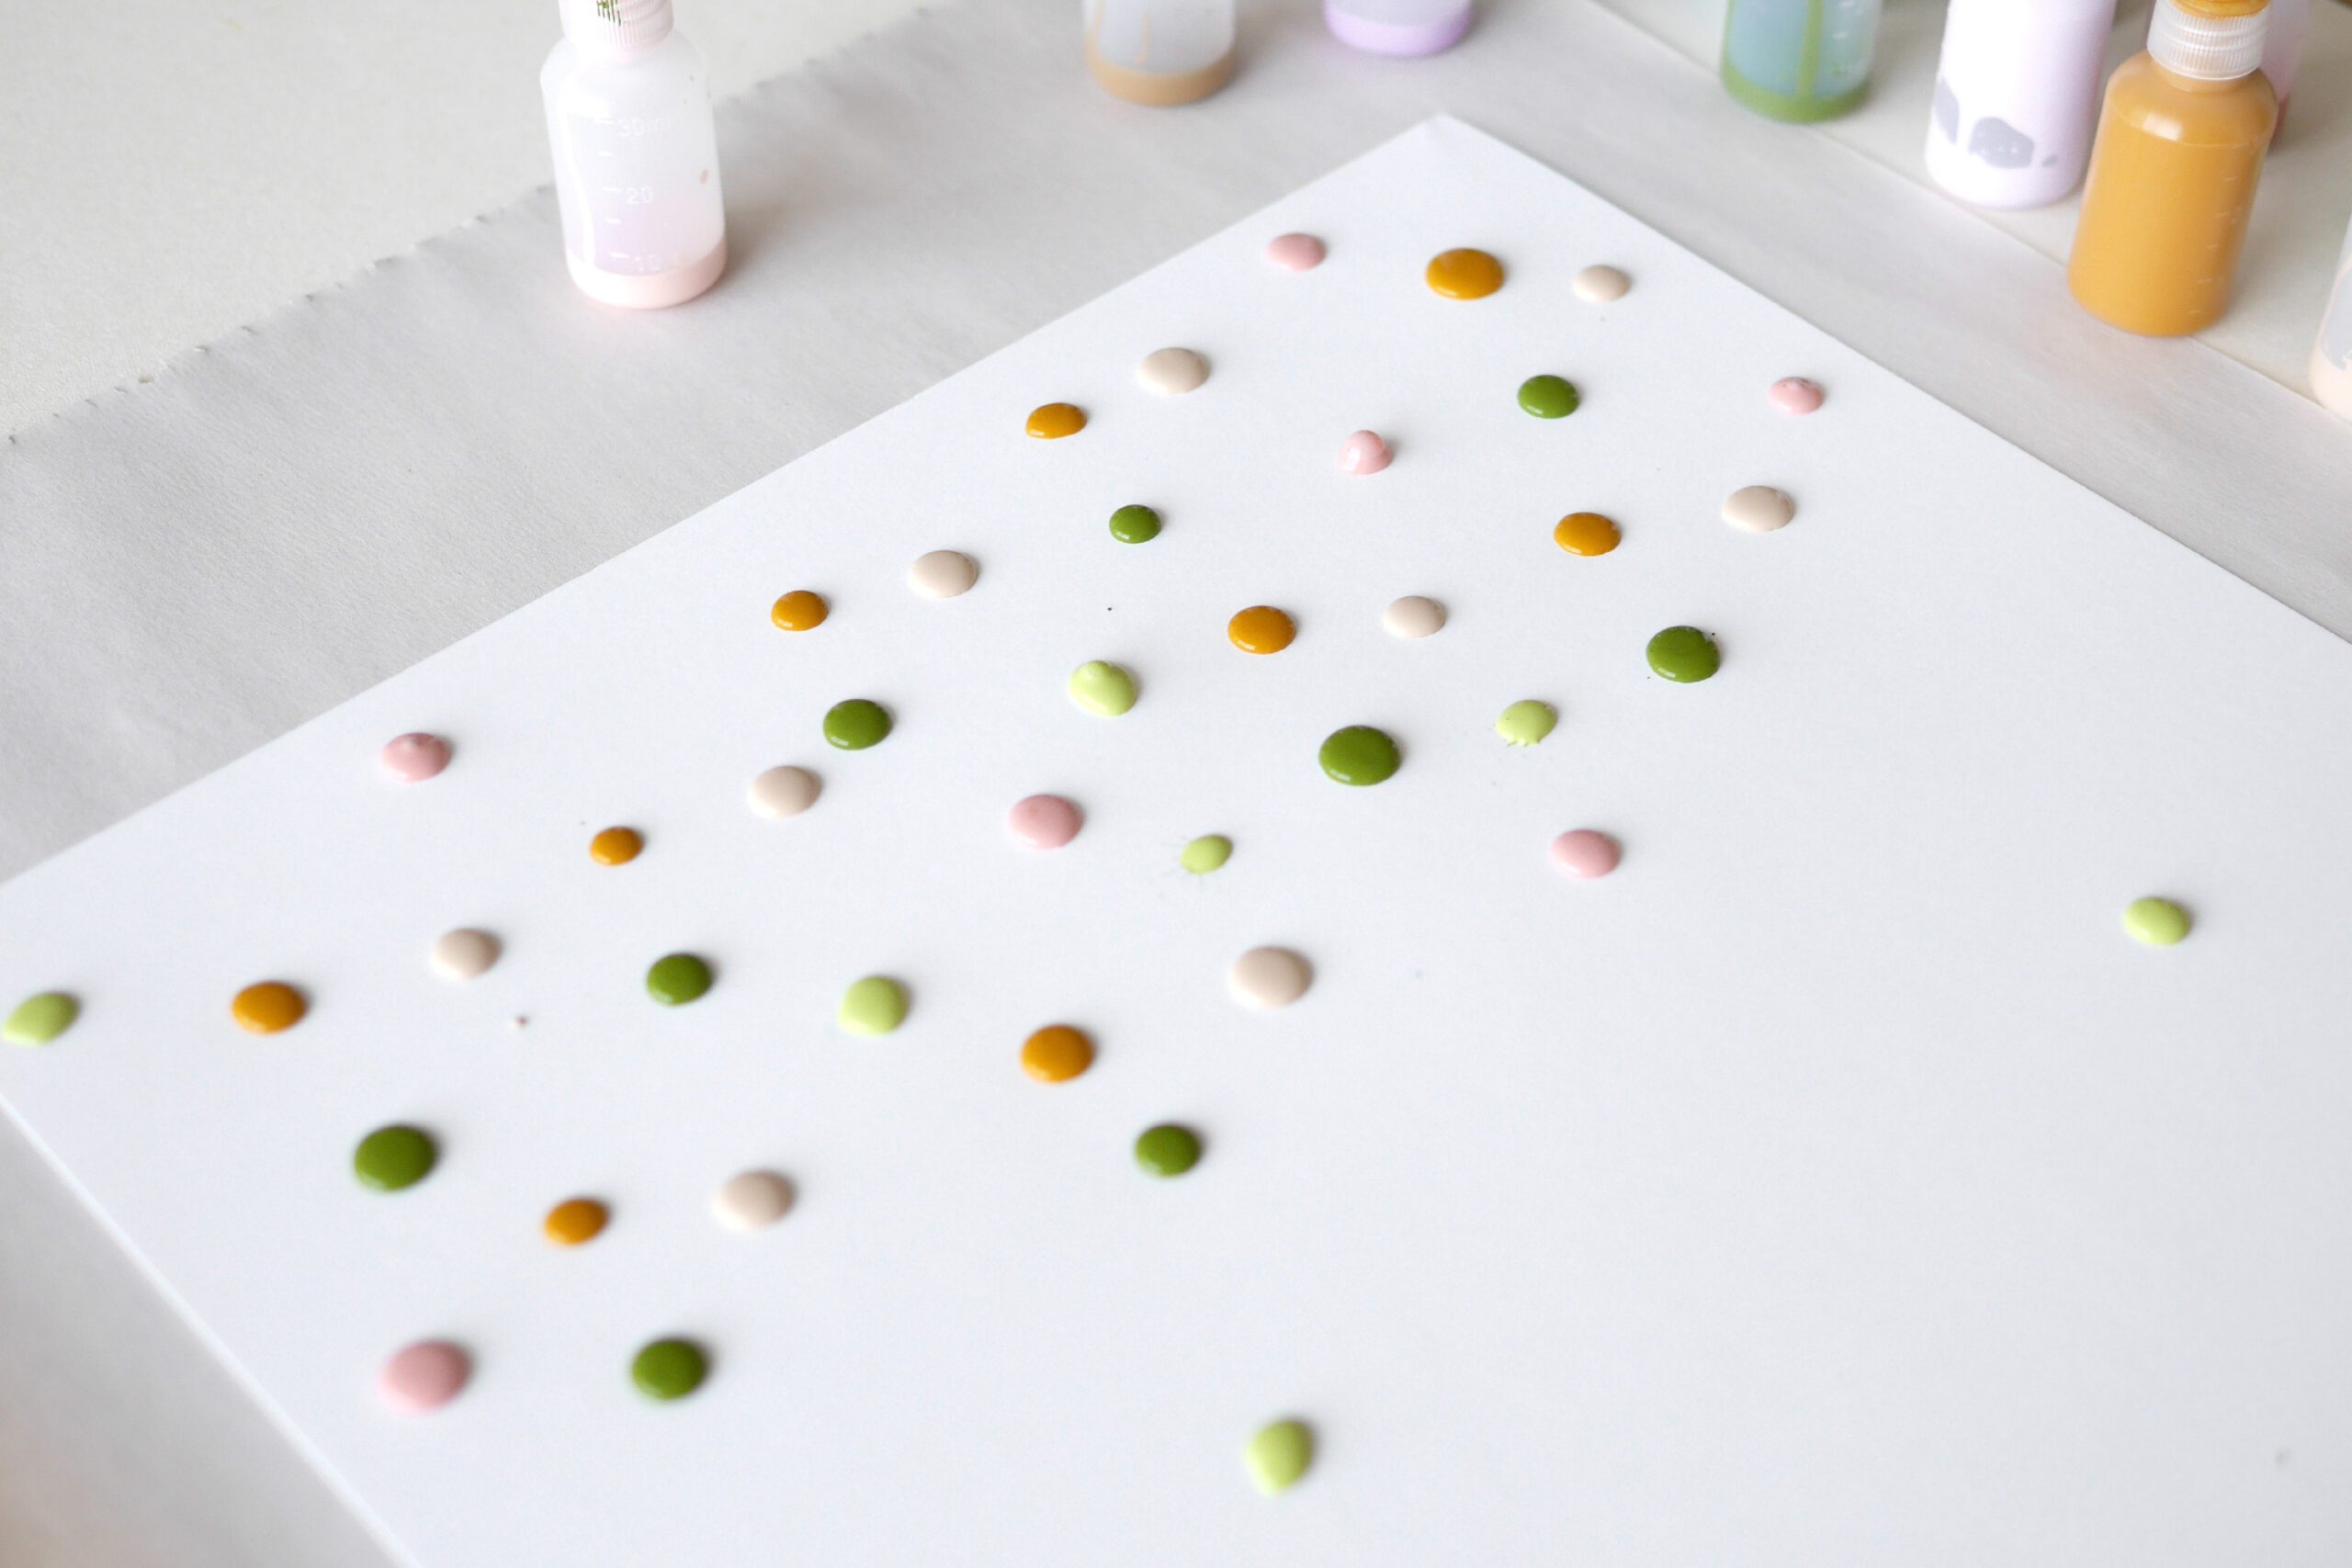
Step 2. Drop the Paint on
Lay down a sheet of newspaper to protect the work surface from paint runoff and place a piece of thick paper on top of it.
Drop the paint onto the paper. Experiment with different combinations of colors, locations, and sizes of drops.

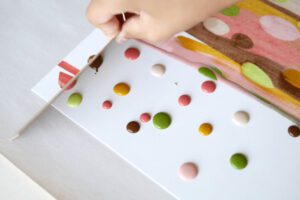
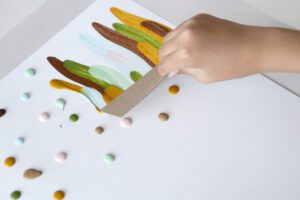
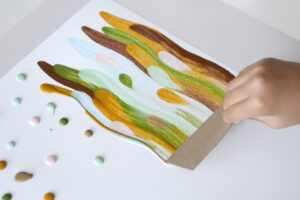
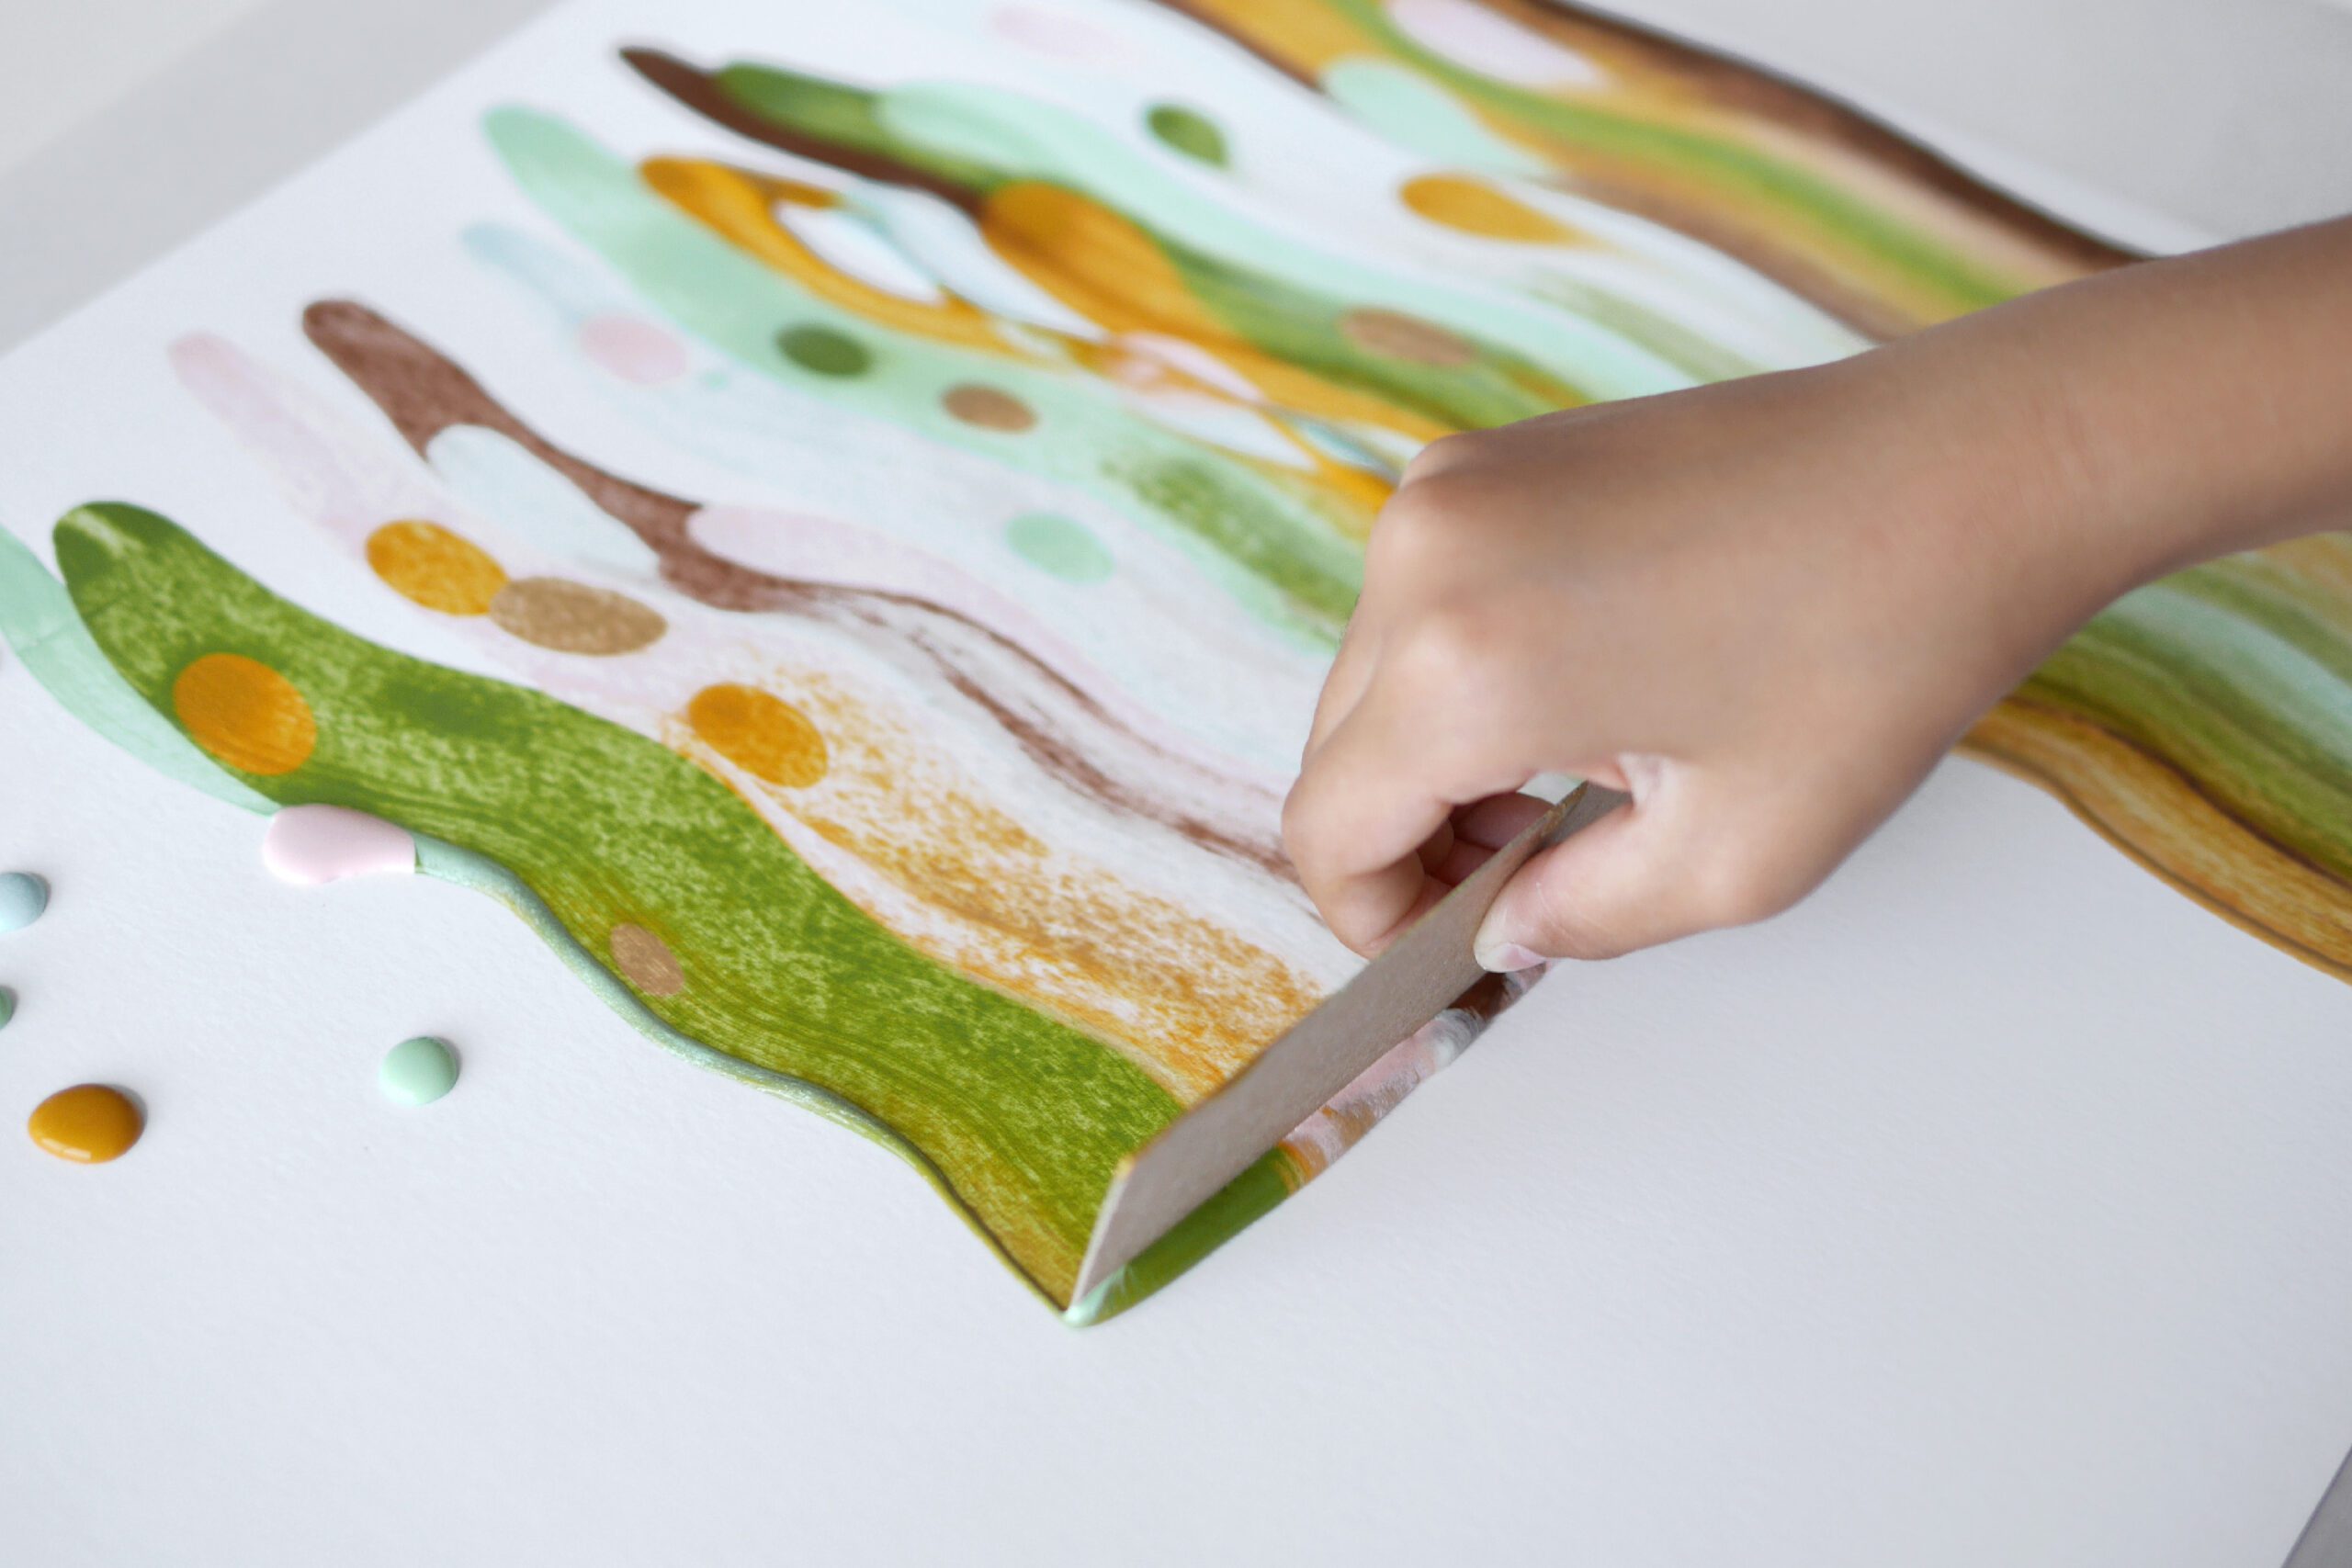
Step 3. Use Squeegee
Use a squeegee or a piece of recycled board paper about 5inch in size.
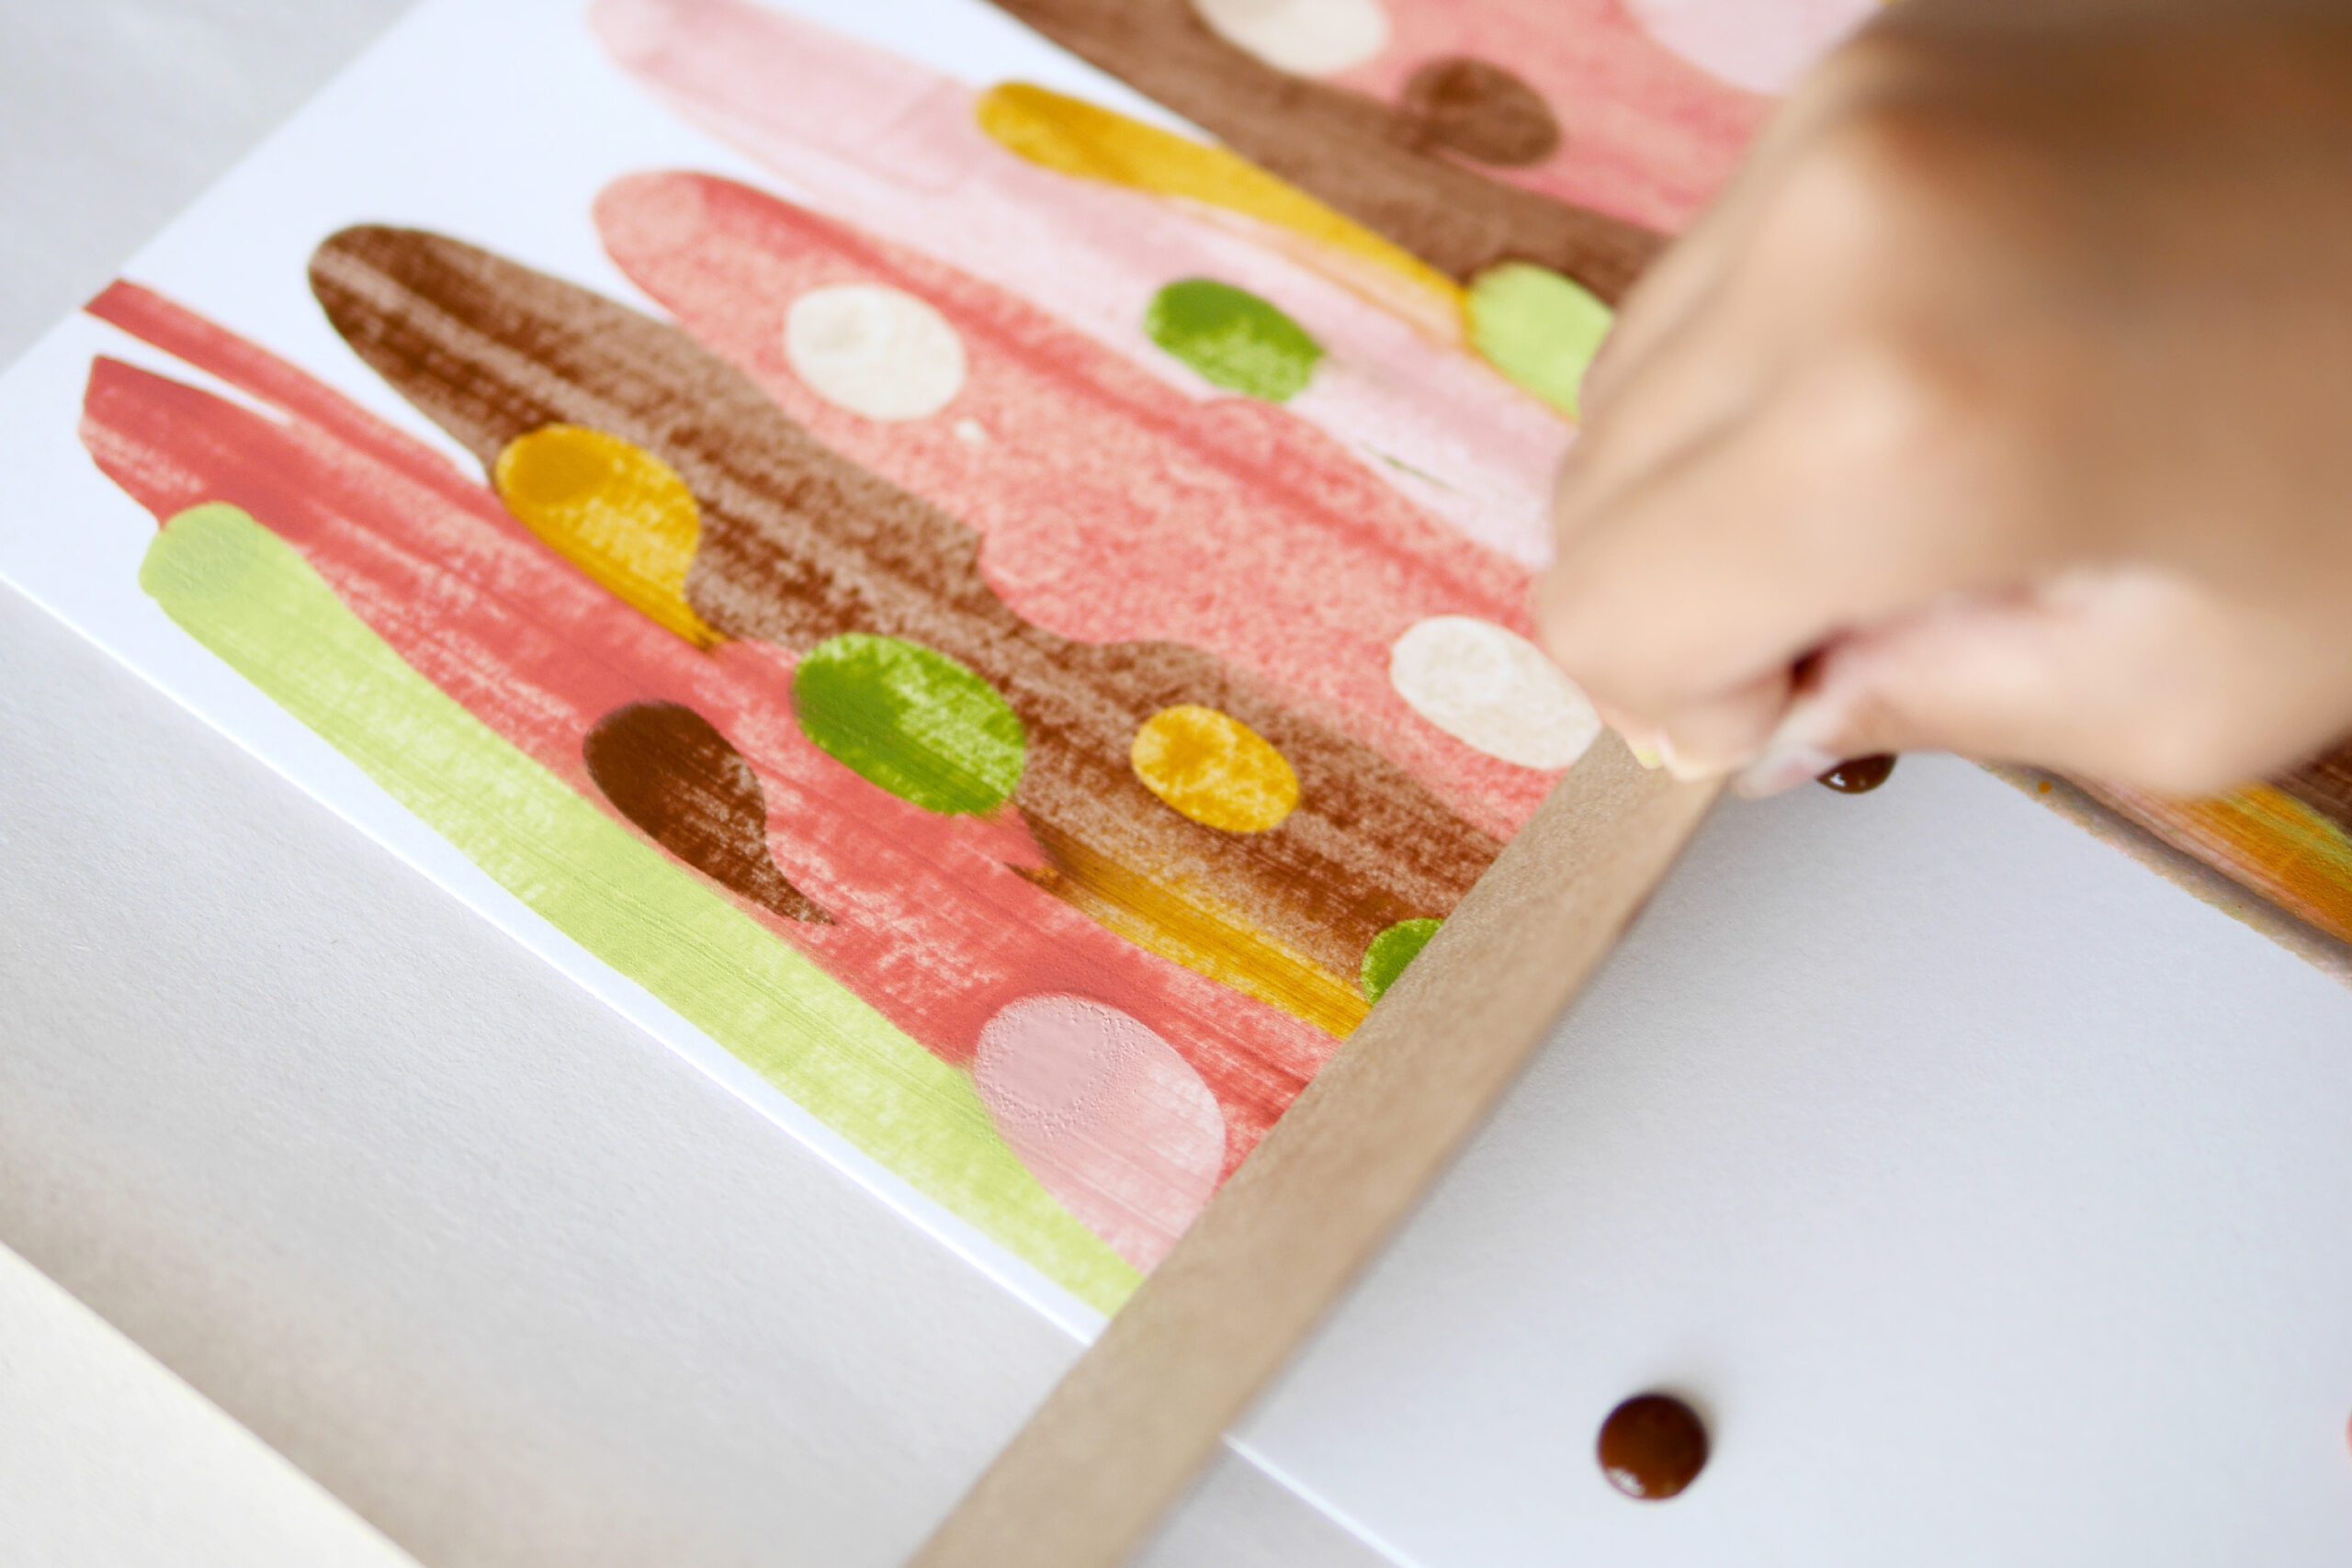
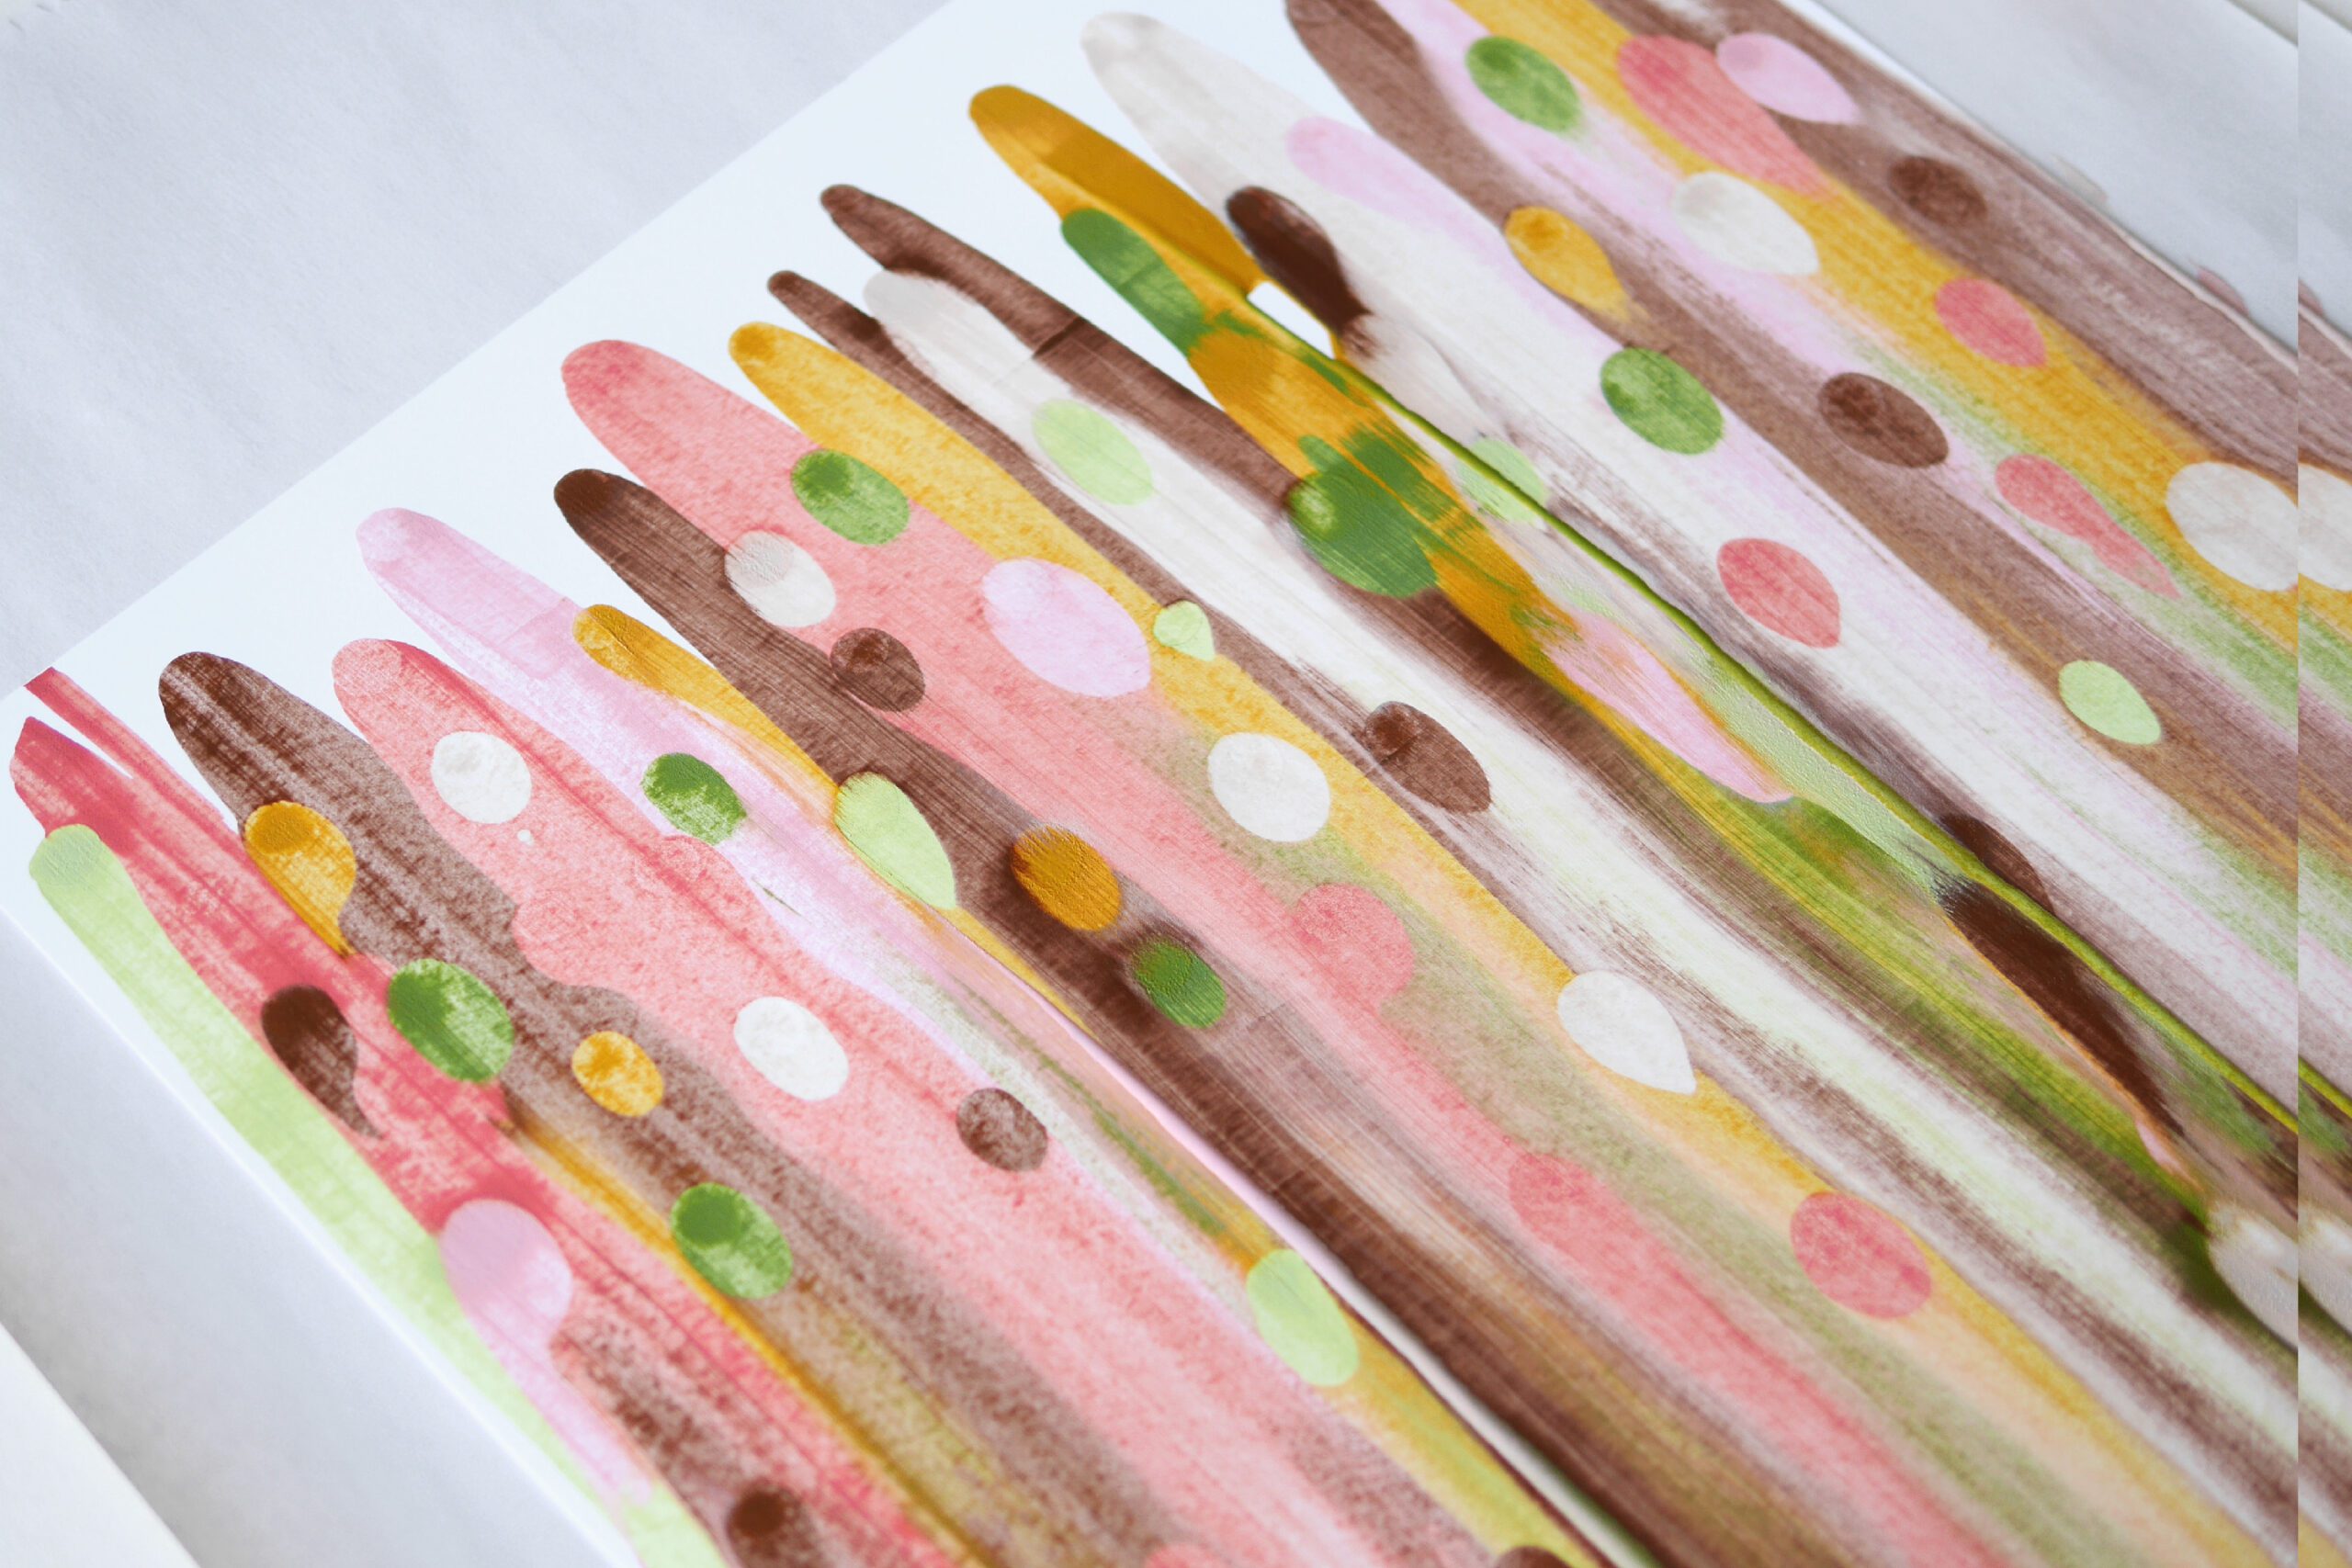
Hold the squeegee at a slight angle to the paper and slide it over the paint. If additional color is needed, repeat the squeegee process, adding more paint until you are satisfied. Final results will vary depending on squeegee pressure and speed.


Replace chipboard or cardboard squeegees with unused ones on each side. Avoid staining the canvas with excess paint from the squeegee.
Step 4. Squeegee Motion
The next thing I tried was to change the movement of the squeegee. When the squeegee was pulled in a wavy motion, the shape of the squeegee came out as it was. Try various other techniques such as drawing circles or changing the squeegee direction from vertical to horizontal.

Step 5. Dry
Place on a flat surface and allow the paint to dry thoroughly. The finished paper may absorb water and become wavy. If this is the case, try placing a weight on top of the paper and leave it overnight to flatten it out.
Use This Paint Paper
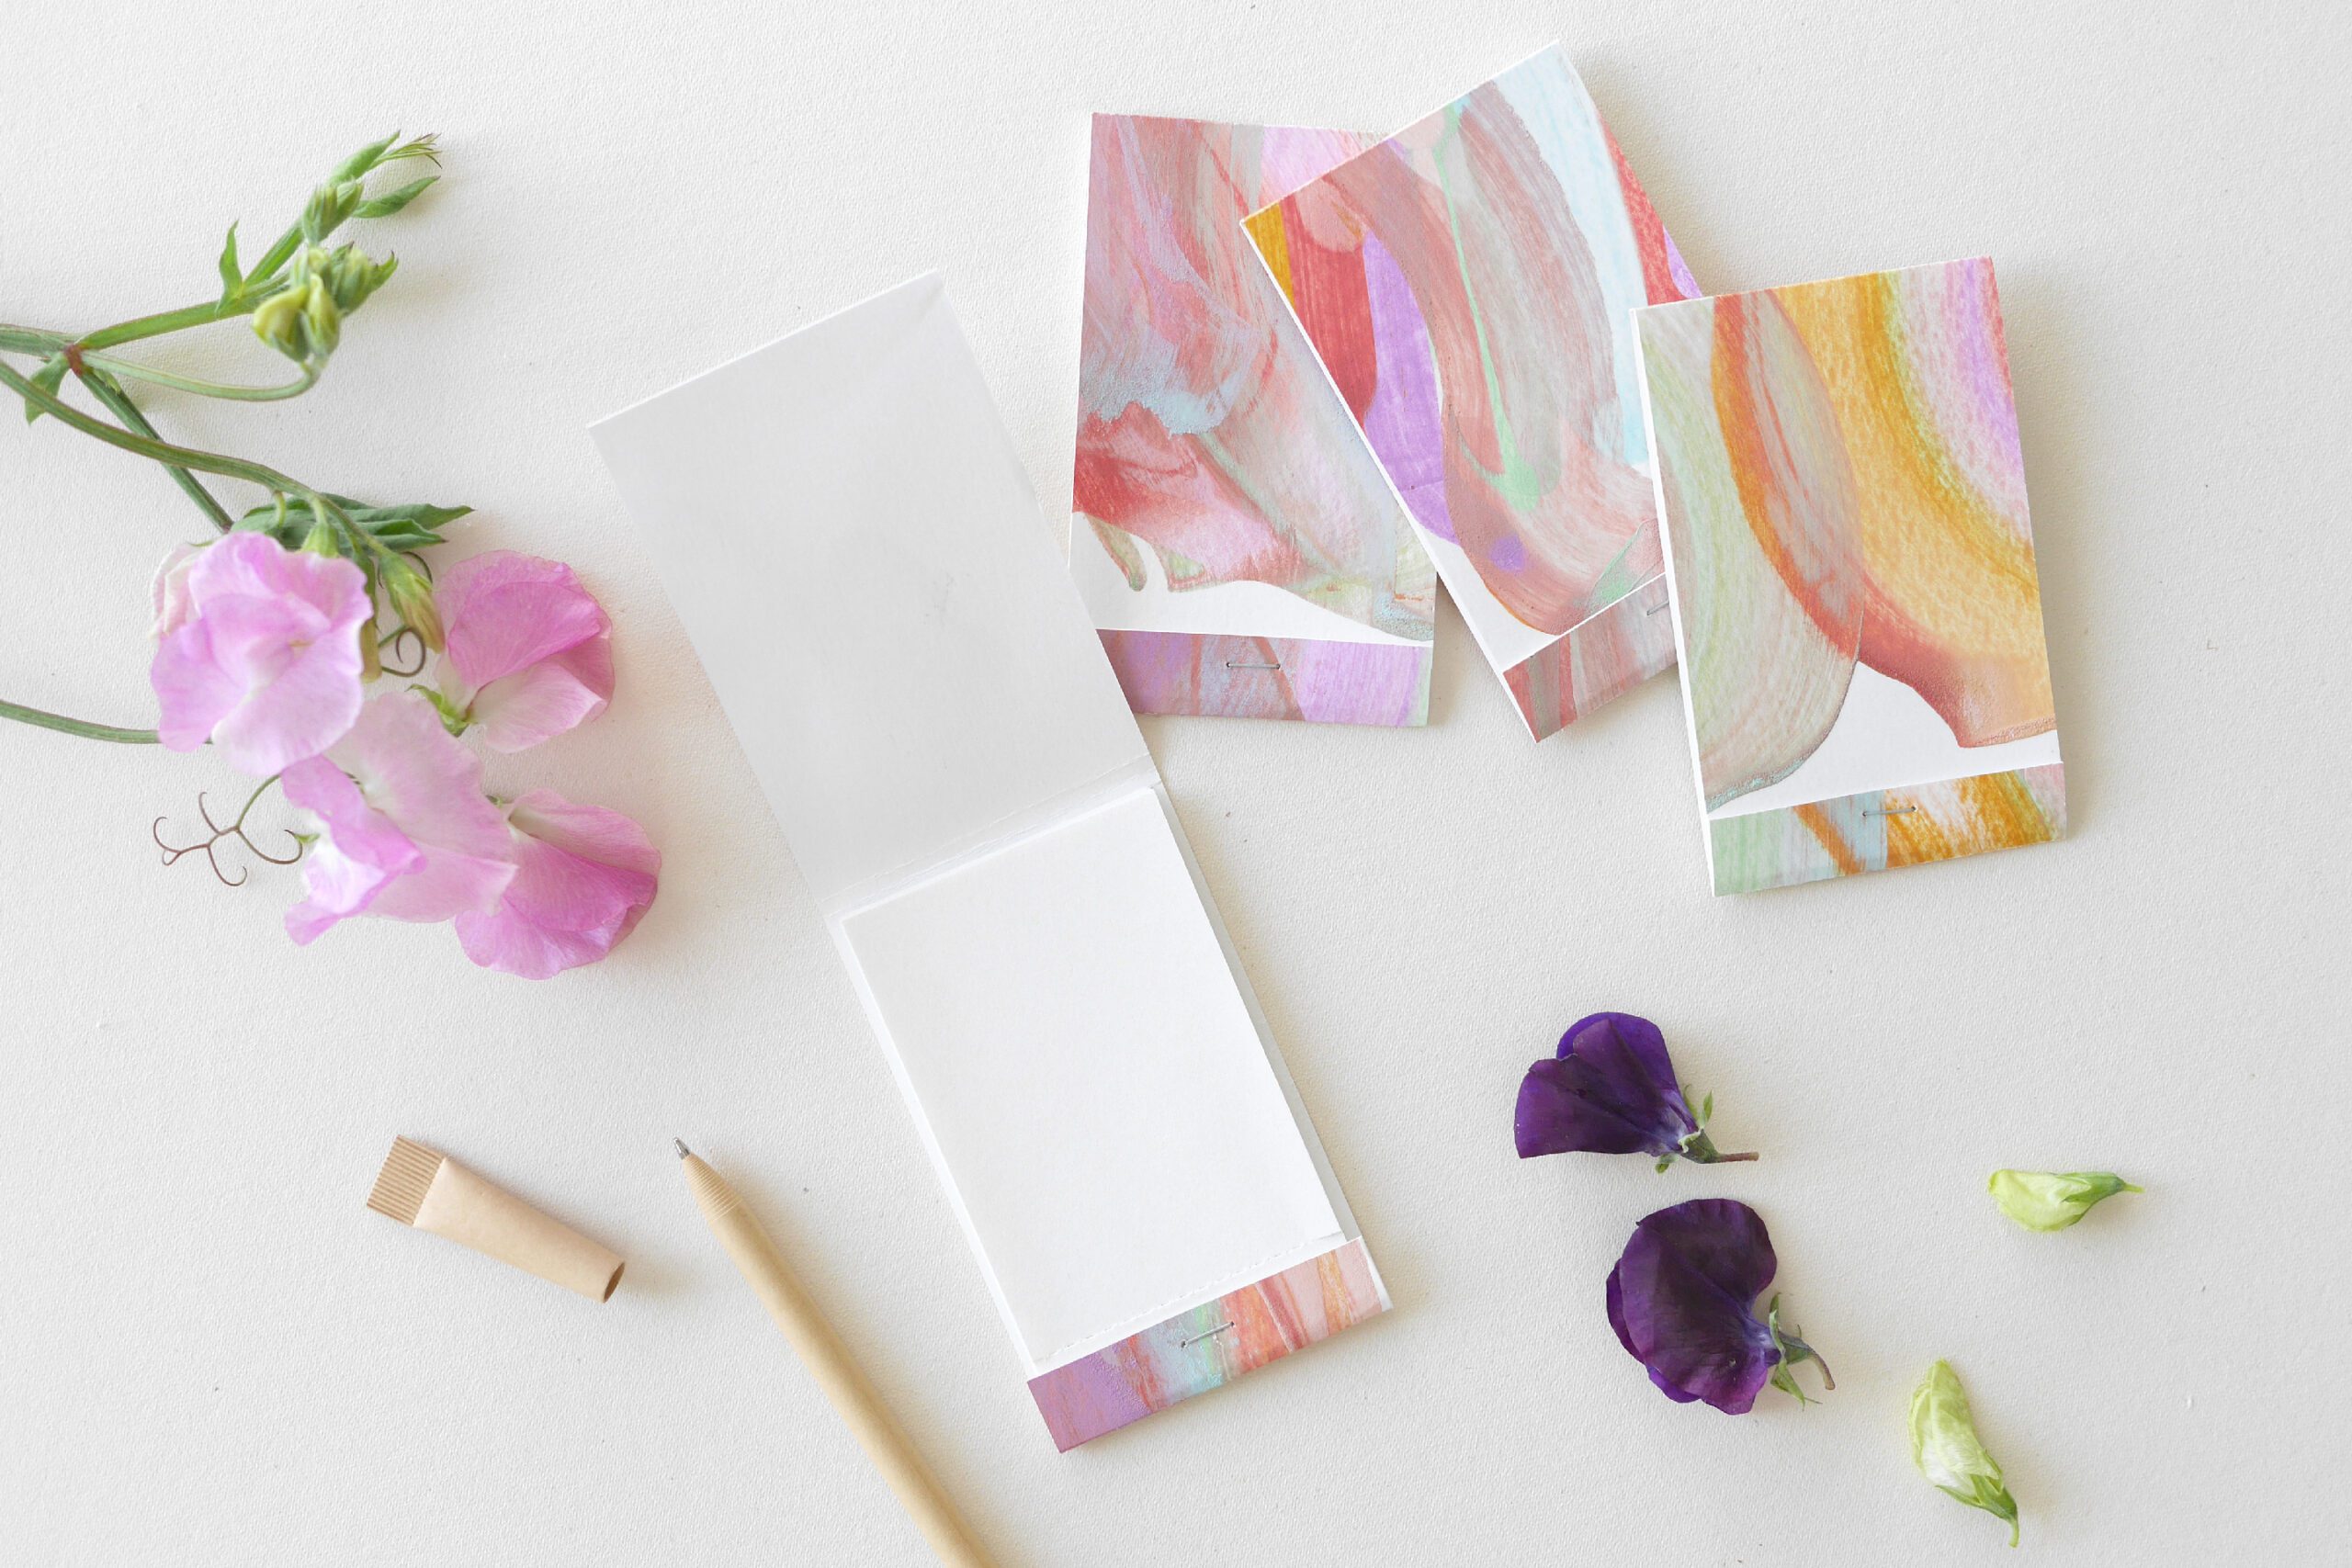
Besides displaying this bold art as is, the best way is to cut it to the right size and make it into a card. Or, if you are more crafty, I recommend using it as the cover of a notebook made of recycled paper, as we did. We will show this idea in a future post.
Squeegee Painting
予測不能で、大胆でカラフル。とても実験的で感覚的。私たちはこれまでにないユニークなペイントに魅了され、夢中になった。
このスキージアートは従来のペイントに必要な絵筆や特別な道具は必要ありません。好きな色を選び、紙の上にペイントの雫を置いたらあとはスキージの動きに任せましょう。スキージを真っ直ぐに引いたり、波打つように動かすと、絵の具の跡がまるでシュプールのようにキャンバスの上に現れました。たくさんの色で溢れた抽象的でユニークなアートピースです。
私たちは、色の組み合わせを考える楽しさと、スキージした時にできる色の重なり、絵の具の跡に夢中になりこのスキージアートの実験を何枚も楽しみました。
用意するもの
– 水彩紙などの厚手の紙*
– アクリル絵の具
– 水
– 作業面を保護する新聞紙
– スキージ もしくは 代わりとなる厚手のリサイクル紙*
– 絵の具を入れるためのボトル *オプション
*厚手の紙:表面をスキージーで擦るので、スムースで凸凹がない紙が適しています
*厚手のリサイクル紙:チップボード、段ボール、ティッシュボックスの箱など、リサイクルできるもので十分です。
つくりかた
Step 1. 絵の具を混ぜる
ボトルに絵の具と水を入れる。アクリル絵の具の原料のみだとやや硬いので、少量の水で薄めます。私たちは約10mlのアクリル絵の具に対して、ティースプーン1杯ほどの水を入れました。絵の具の色によって濃度が違うので、確認しながら水分量を調整します。ボトルを振って、絵の具と水をよく混ぜます。
ボトルを使わない場合は、解いた絵の具をそのまま絵筆で紙の上に落とすことができます。
Step 2. 絵の具を垂らす
作業面を塗料の流出から保護するために新聞紙を敷き、その上に厚手の紙を置きます。
紙の上に絵の具を落とします。色、場所、雫の大きさ、さまざまに組み合わせを試してください。
Step 3. スキージを使う
スキージ、もしくは5inchほどの大きさのリサイクルのボード紙を代わりに使用します。
用紙に対してわずかに角度を傾けてスキージを持ちペイントの上を滑らせます。色の追加が必要な場合は、満足のいくまでペイントを追加し、スキージのプロセスを繰り返します。スキージの圧力とスピードにより、最終的な結果が異なります。
チップボードや段ボールのスキージは、一面ずつ未使用のものに交換してください。スキージに付いた余分な絵の具でキャンバスを汚すのを防ぎます。
Step 4. スキージの動き
次に試したのはスキージの動きの変化。スキージを波打つように引くと、その形がそのまま出ました。他にも円を書いたり、縦から、横からとスキージの方向を変えたりとさまざまなテクニックを試してください。
Step 5. 乾燥させる
平らな場所に置いて、絵の具を十分に乾燥させます。仕上がった紙が水分を吸って波打っていることがあります。その場合は、用紙の上に重しを乗せて一晩をおくと、フラットな状態になるのでお試しください。
このペイント用紙を使って
この大胆なアートはそのまま飾る他に、適切な大きさにカットしてカードにするのはベストな方法です。それとももっとクラフトを楽しみたい方には、私たちのようにリサイクルペーパーを使ったノートブックの表紙として使うことがおすすめです。このアイデアについては、次回のポストでご紹介します。