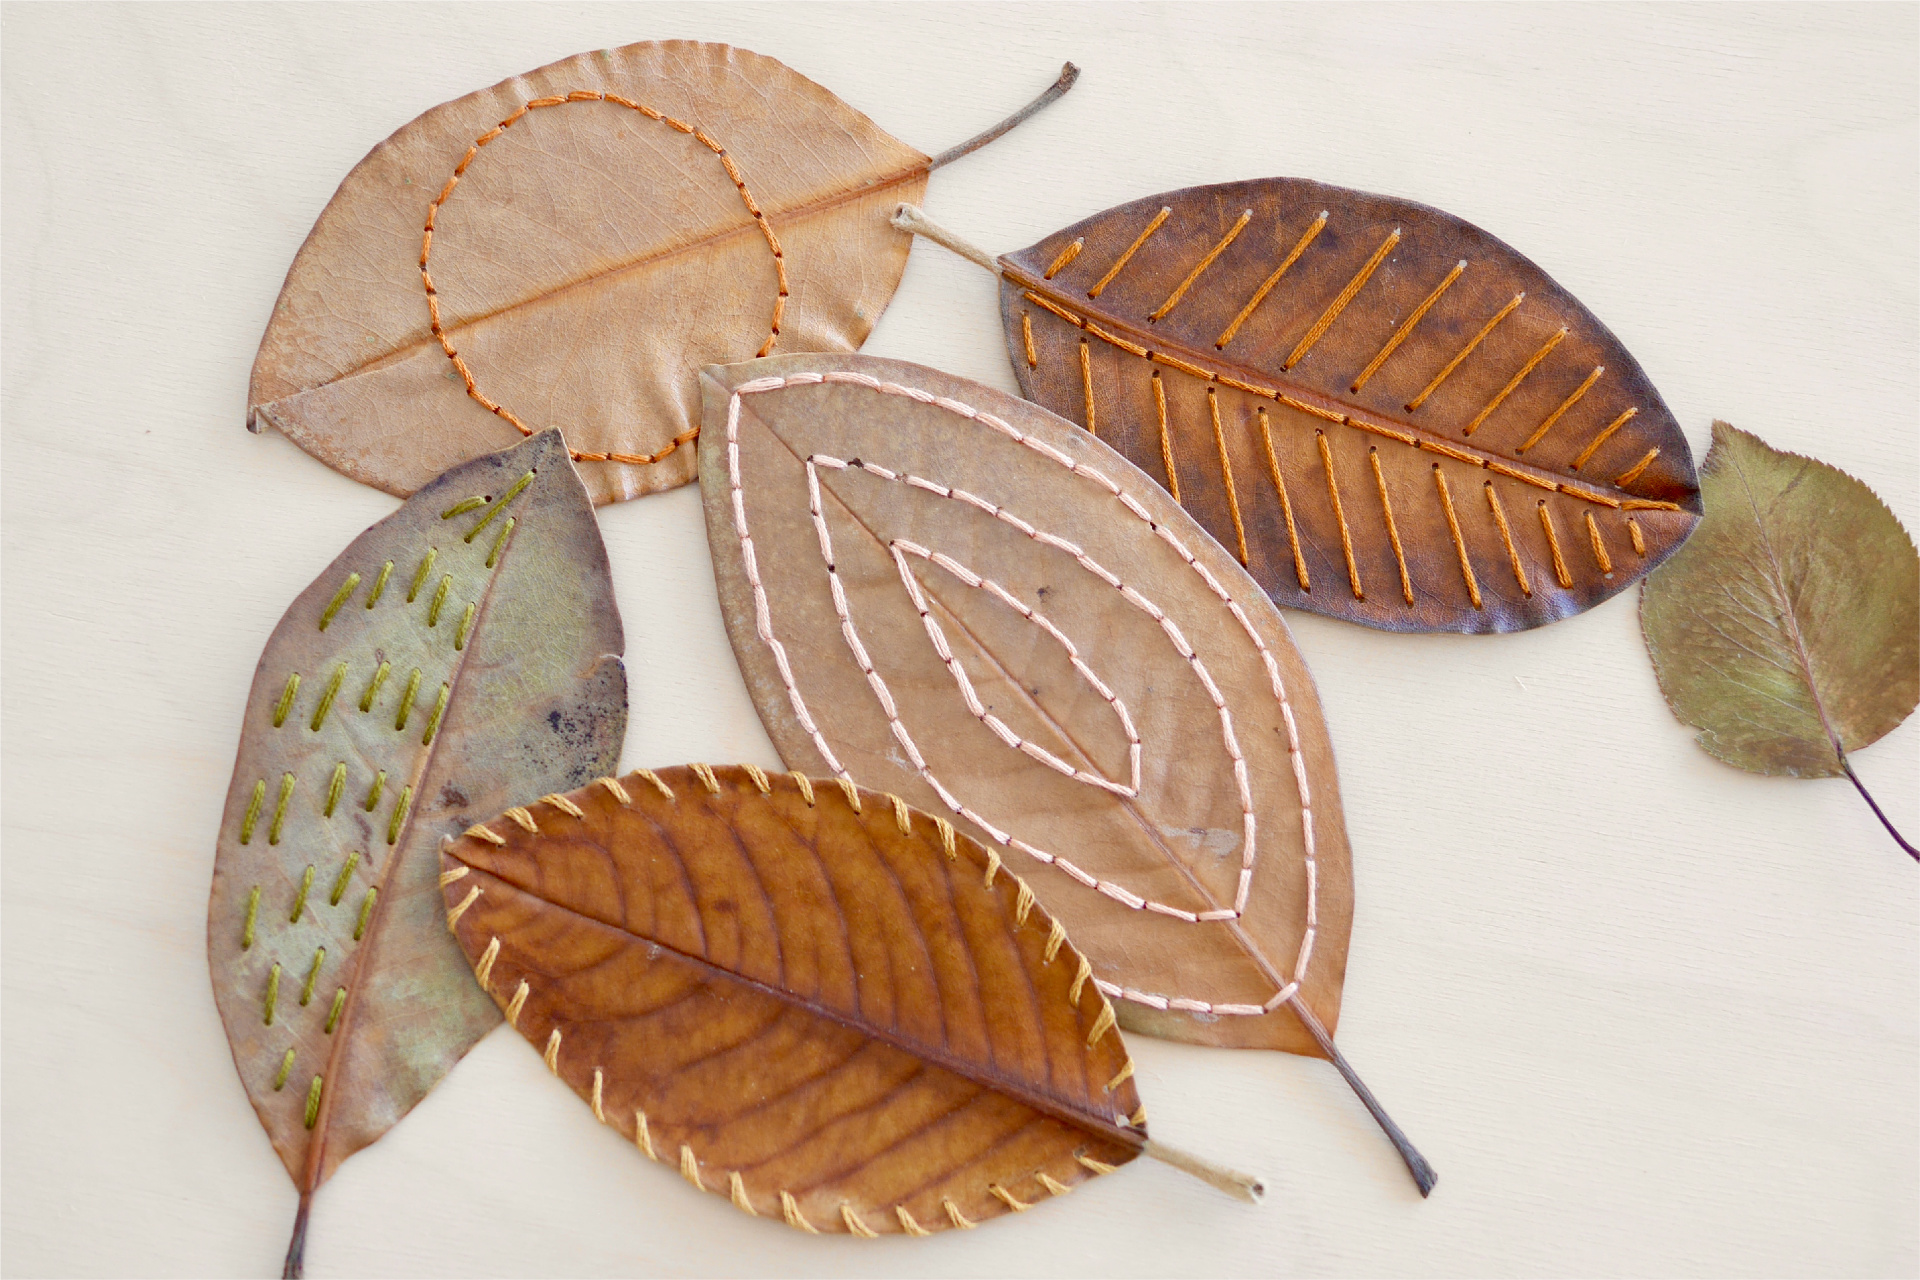
Stitched on Fallen Leaves
This is a perfect way to introduce sewing to children for the first time. Dolphin stitches, back stitches, blanket stitches, and other stitches can be used to decorate the leaves. Because dried leaves are fragile, you should teach the children to handle them gently. When finished they can be used as bookmarks, or can be framed and displayed as artworks that are one-of-a-kind in the world.
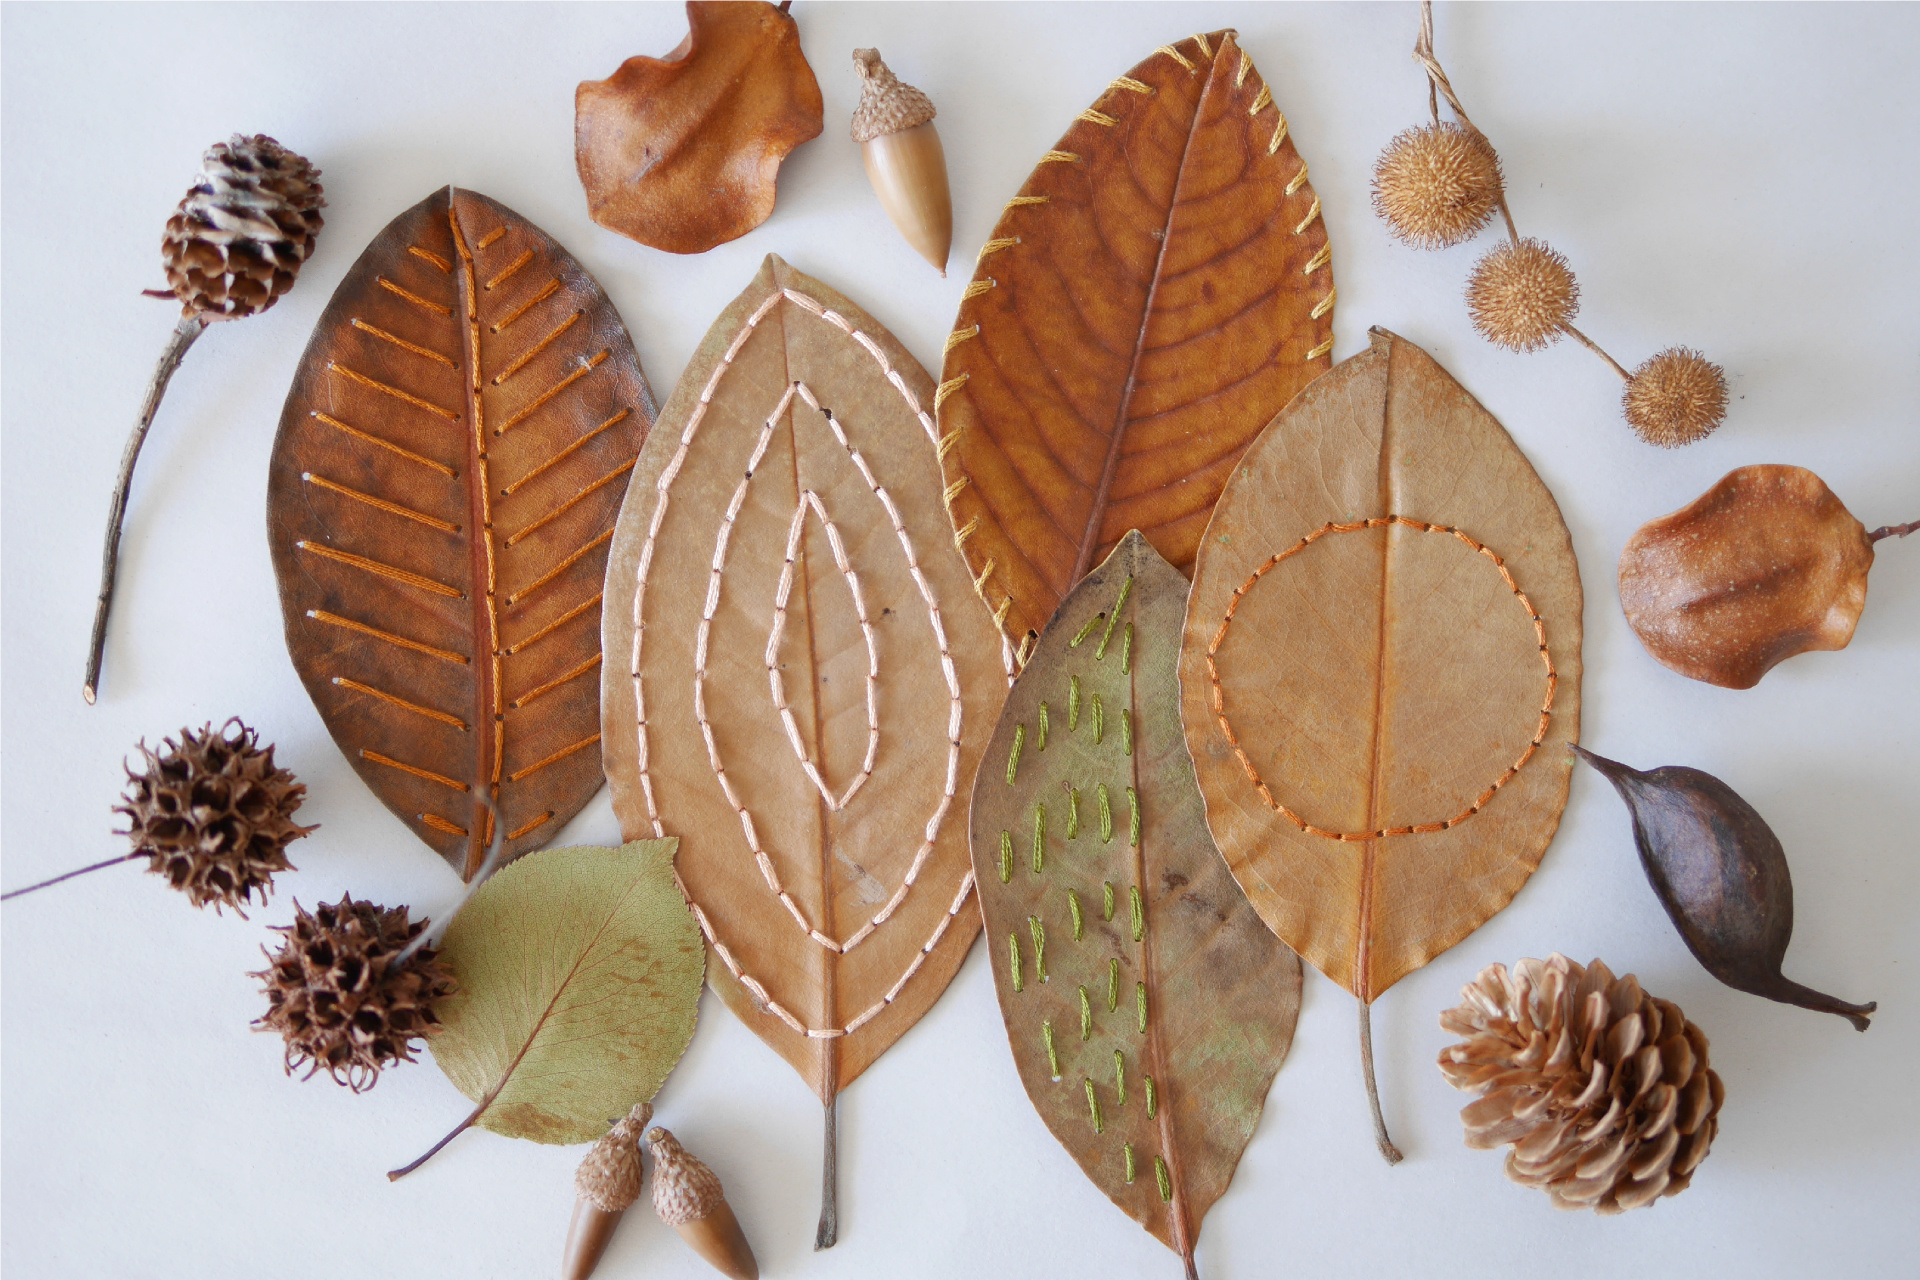
The stitched leaves in the photo are those I made with my daughter two years ago. They remain unfaded and are stored carefully in my daughter’s room. I am sure that I will look back at the stitches made by my five-year-old daughter with her tiny hands and remember this time. Children make a wide variety of treasures every day (even if they only look like meaningless scraps of paper!), however this is one of my favorite projects – one that can be preserved carefully together with the memories of that time.
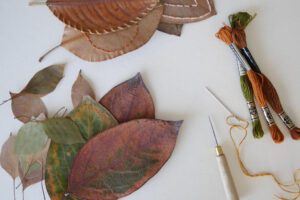
Materials
– Fallen leaves *Pressing them in advance will make them easier to handle.
– Needles
– Embroidery thread
– Awl or thick needle
Instructions for making
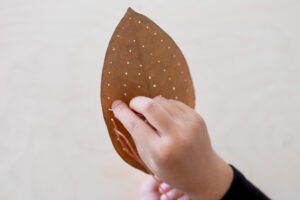
Step 1. Punch Holes in Fallen Leaves
Use an awl to create guide holes in the pressed fallen leaf. Make holes at even intervals of around 1 cm. Making holes in a large arc will make for a fun final appearance. Make the holes as you like, keeping an image of the finished product in mind.
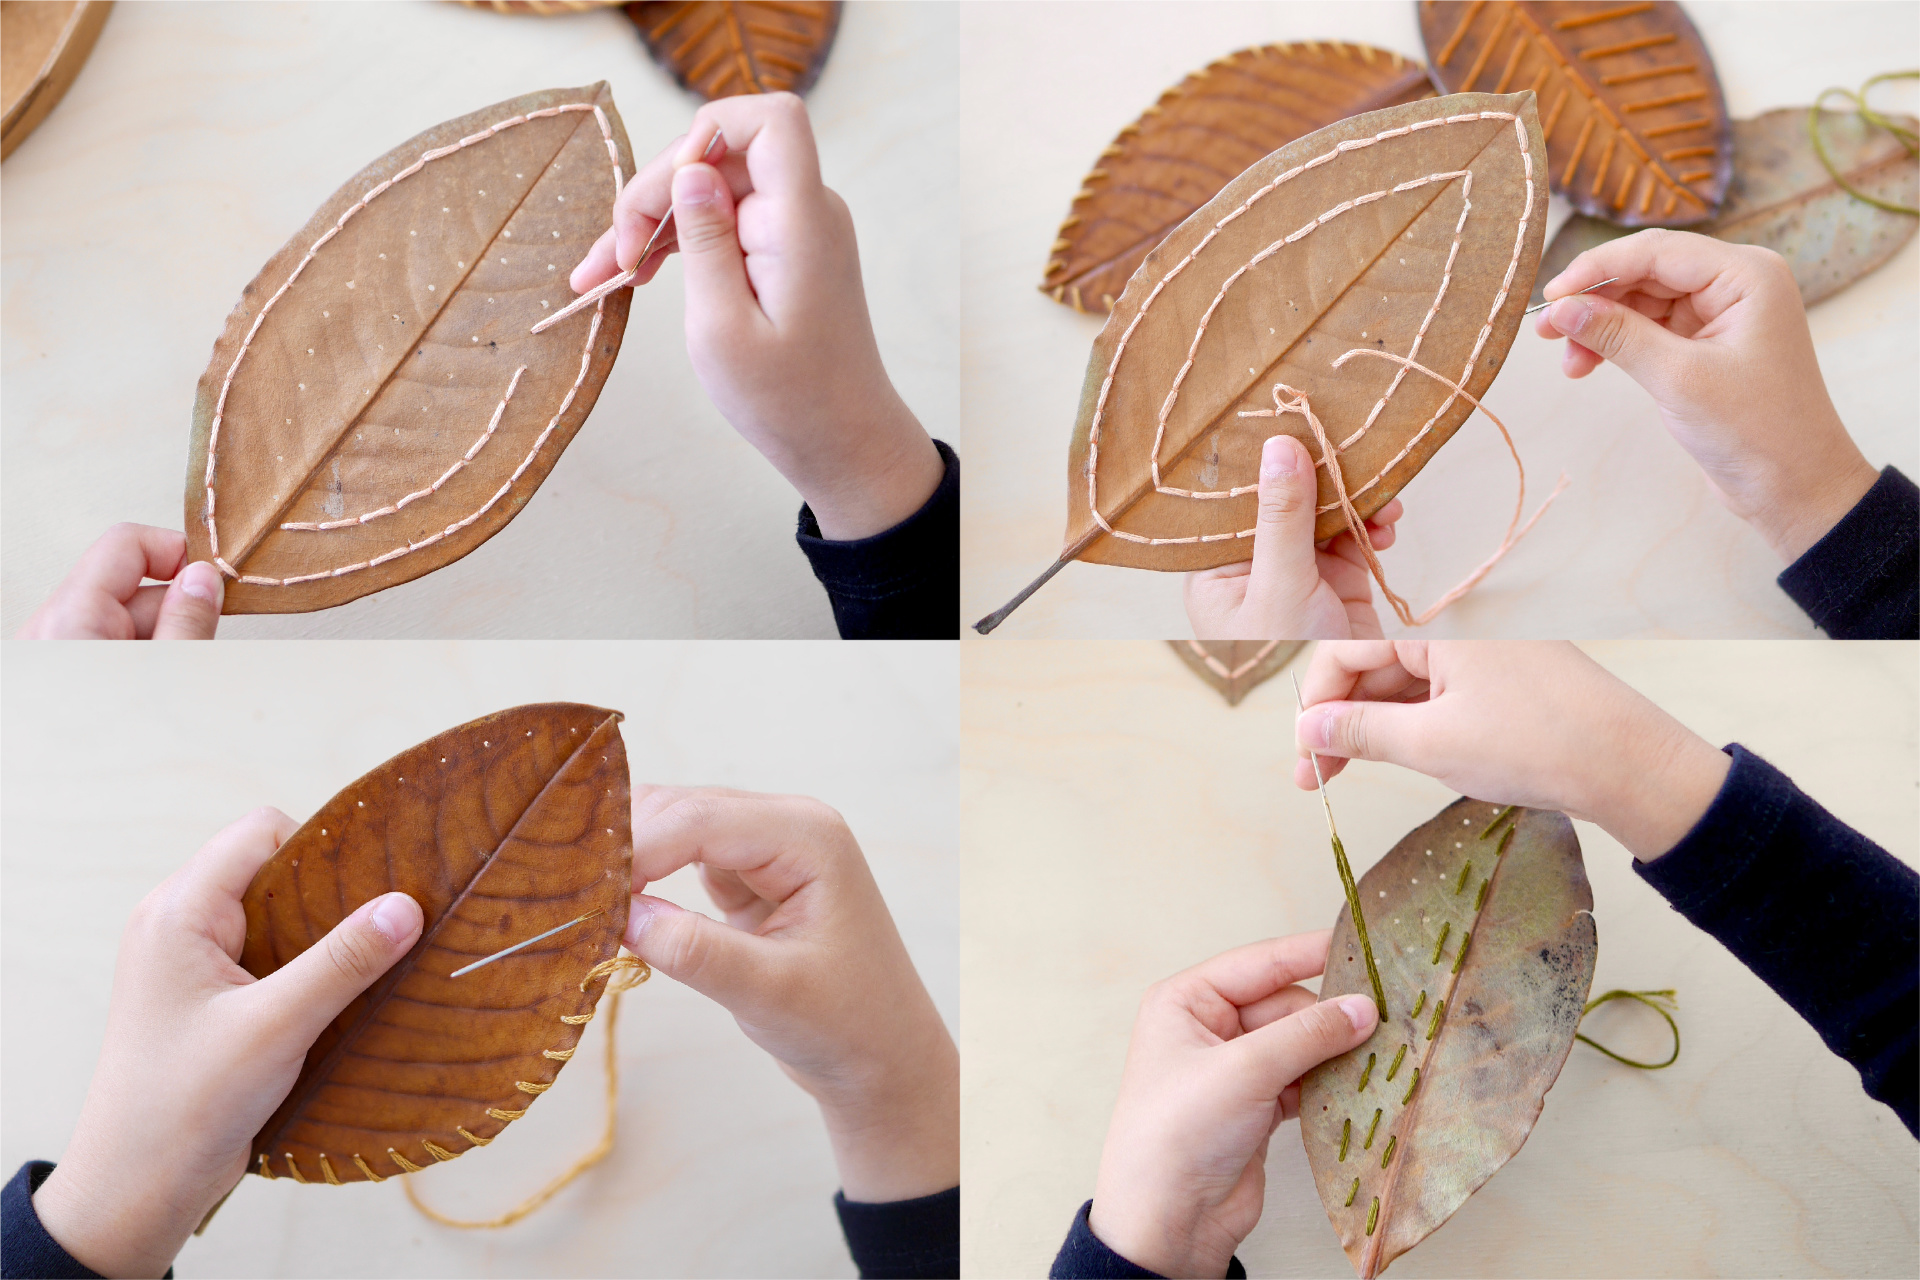
Step 2. Stitching on a Leaf
Sew with the embroidery thread along the guide holes. You can sew using any method you like. The most basic stitch is a dolphin stitch that goes from front to back, and back to front, one stitch at a time. Once you are familiar with it, you can try back stitches, blanket stitches, or other types of stitches. When the embroidering is done, finish by tying the end of the thread into a knot stopper on the back side.
Stitched on Fallen Leaves
子どもにとってのはじめての裁縫にぴったりな方法です。ドルフィンステッチ、バックステッチ、ブランケットステッチ…刺繍で葉っぱを彩ります。乾燥した葉は壊れやすいので、やさしく扱うことも一緒に教えるといいですね。出来上がったら、しおりにしたり、世界でひとつのアートとして額装して飾ったり。
写真のステッチは2年前に娘と作ったものです。これはいまでも褪せることなく娘の部屋に大切に保管されています。きっとこの先も、5歳だった娘が小さな手で刺した刺繍を見返してはこの時のことを思い出すでしょう。子どもは毎日いろいろな宝物(たとえそれが意味のないような紙屑に見えたとしても!)を作り出しますが、その時の思い出と共にこうしてずっと大切にしている私のお気に入りのプロジェクトです。
用意するもの
– 落ち葉 *事前にプレスしておくと扱いやすいです
– 針
– 刺繍糸
– 錐もしくは太めの針
つくりかた
Step 1. 落ち葉に穴を開けます
錐もしくは太めの針プレスした落ち葉に錐でガイド用の穴をあけます。1cmほどの間隔で均等に。大きな円を書くようにあけるとマークの様で楽しくなります。仕上がりをイメージしてお好きなようにあけてください。
Step 2. 穴に沿って縫います
ガイドの穴に沿って刺繍糸で縫っていきます。縫い方はお好きな方法で。ドルフィンステッチは表から裏へ、裏から表へ、ひと針ずつ縫い進める基本の縫い方です。慣れてきたら、バックスティッチやブランケットステッチなどにも挑戦してみてください。刺し終わったら裏で玉止めして完成です。