Upcycle: Cardboard Frame
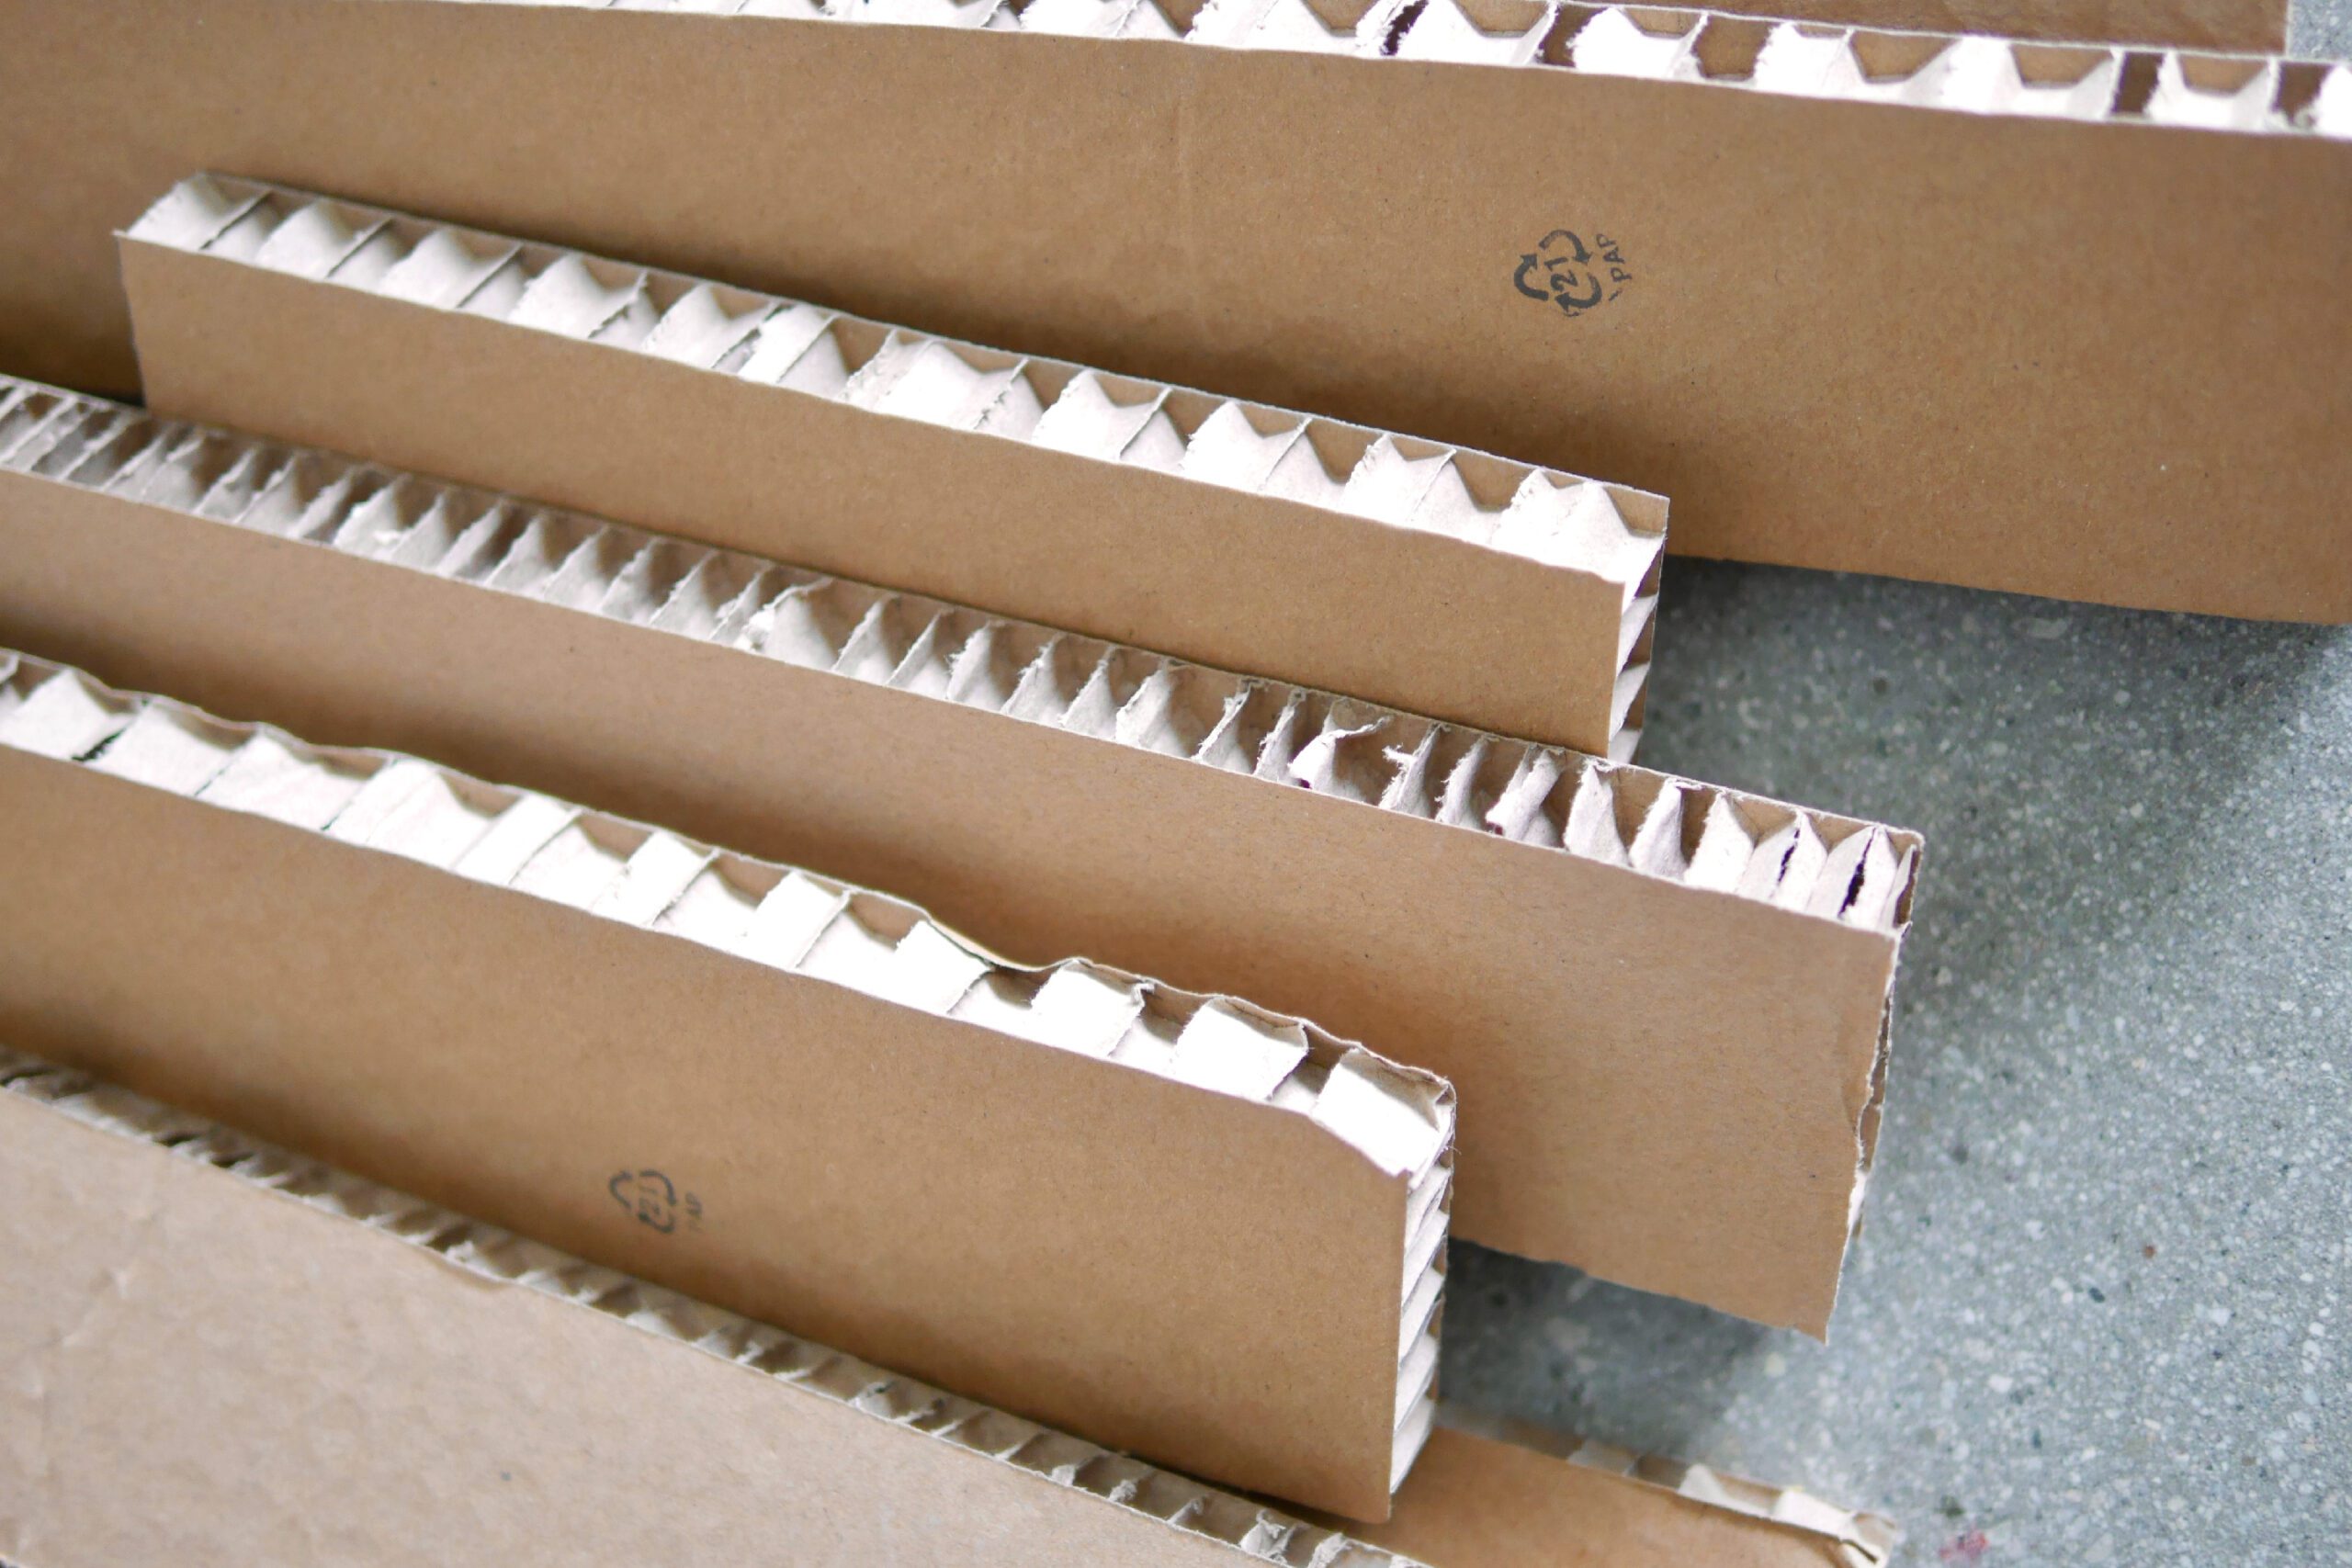
When I bought the shelves, thick, elongated cardboard boxes were used as packing material. It was 2 cm thick and about 6 cm wide. The cross section has a unique wavy texture. It was different from the usual corrugated cardboard we are used to seeing, and had a strong presence all by itself. I kept it, thinking that I could use it for some kind of craftwork.
I decided to make an art frame out of this material. There is nothing special about it, just surround the artwork with this cardboard. The result was a frame that looks like a box. The thick frame was perfect for protecting the three-dimensional artwork. Not only that, but it is also suitable for stacking and long-term storage.
I was very happy to find a new role for a material that would have otherwise been thrown away, and I loved this idea. Here are the steps.
Materials
– 額装するアート作品、写真など
– 梱包材として使用する厚手のボール紙
– チップボード *厚さ約1mm
–
定規 – カッターナイフ
– 白色接着剤
– 梱包用クラフト紙テープ *オプション
Instructions for making
Step 1. Cut the Chipboard
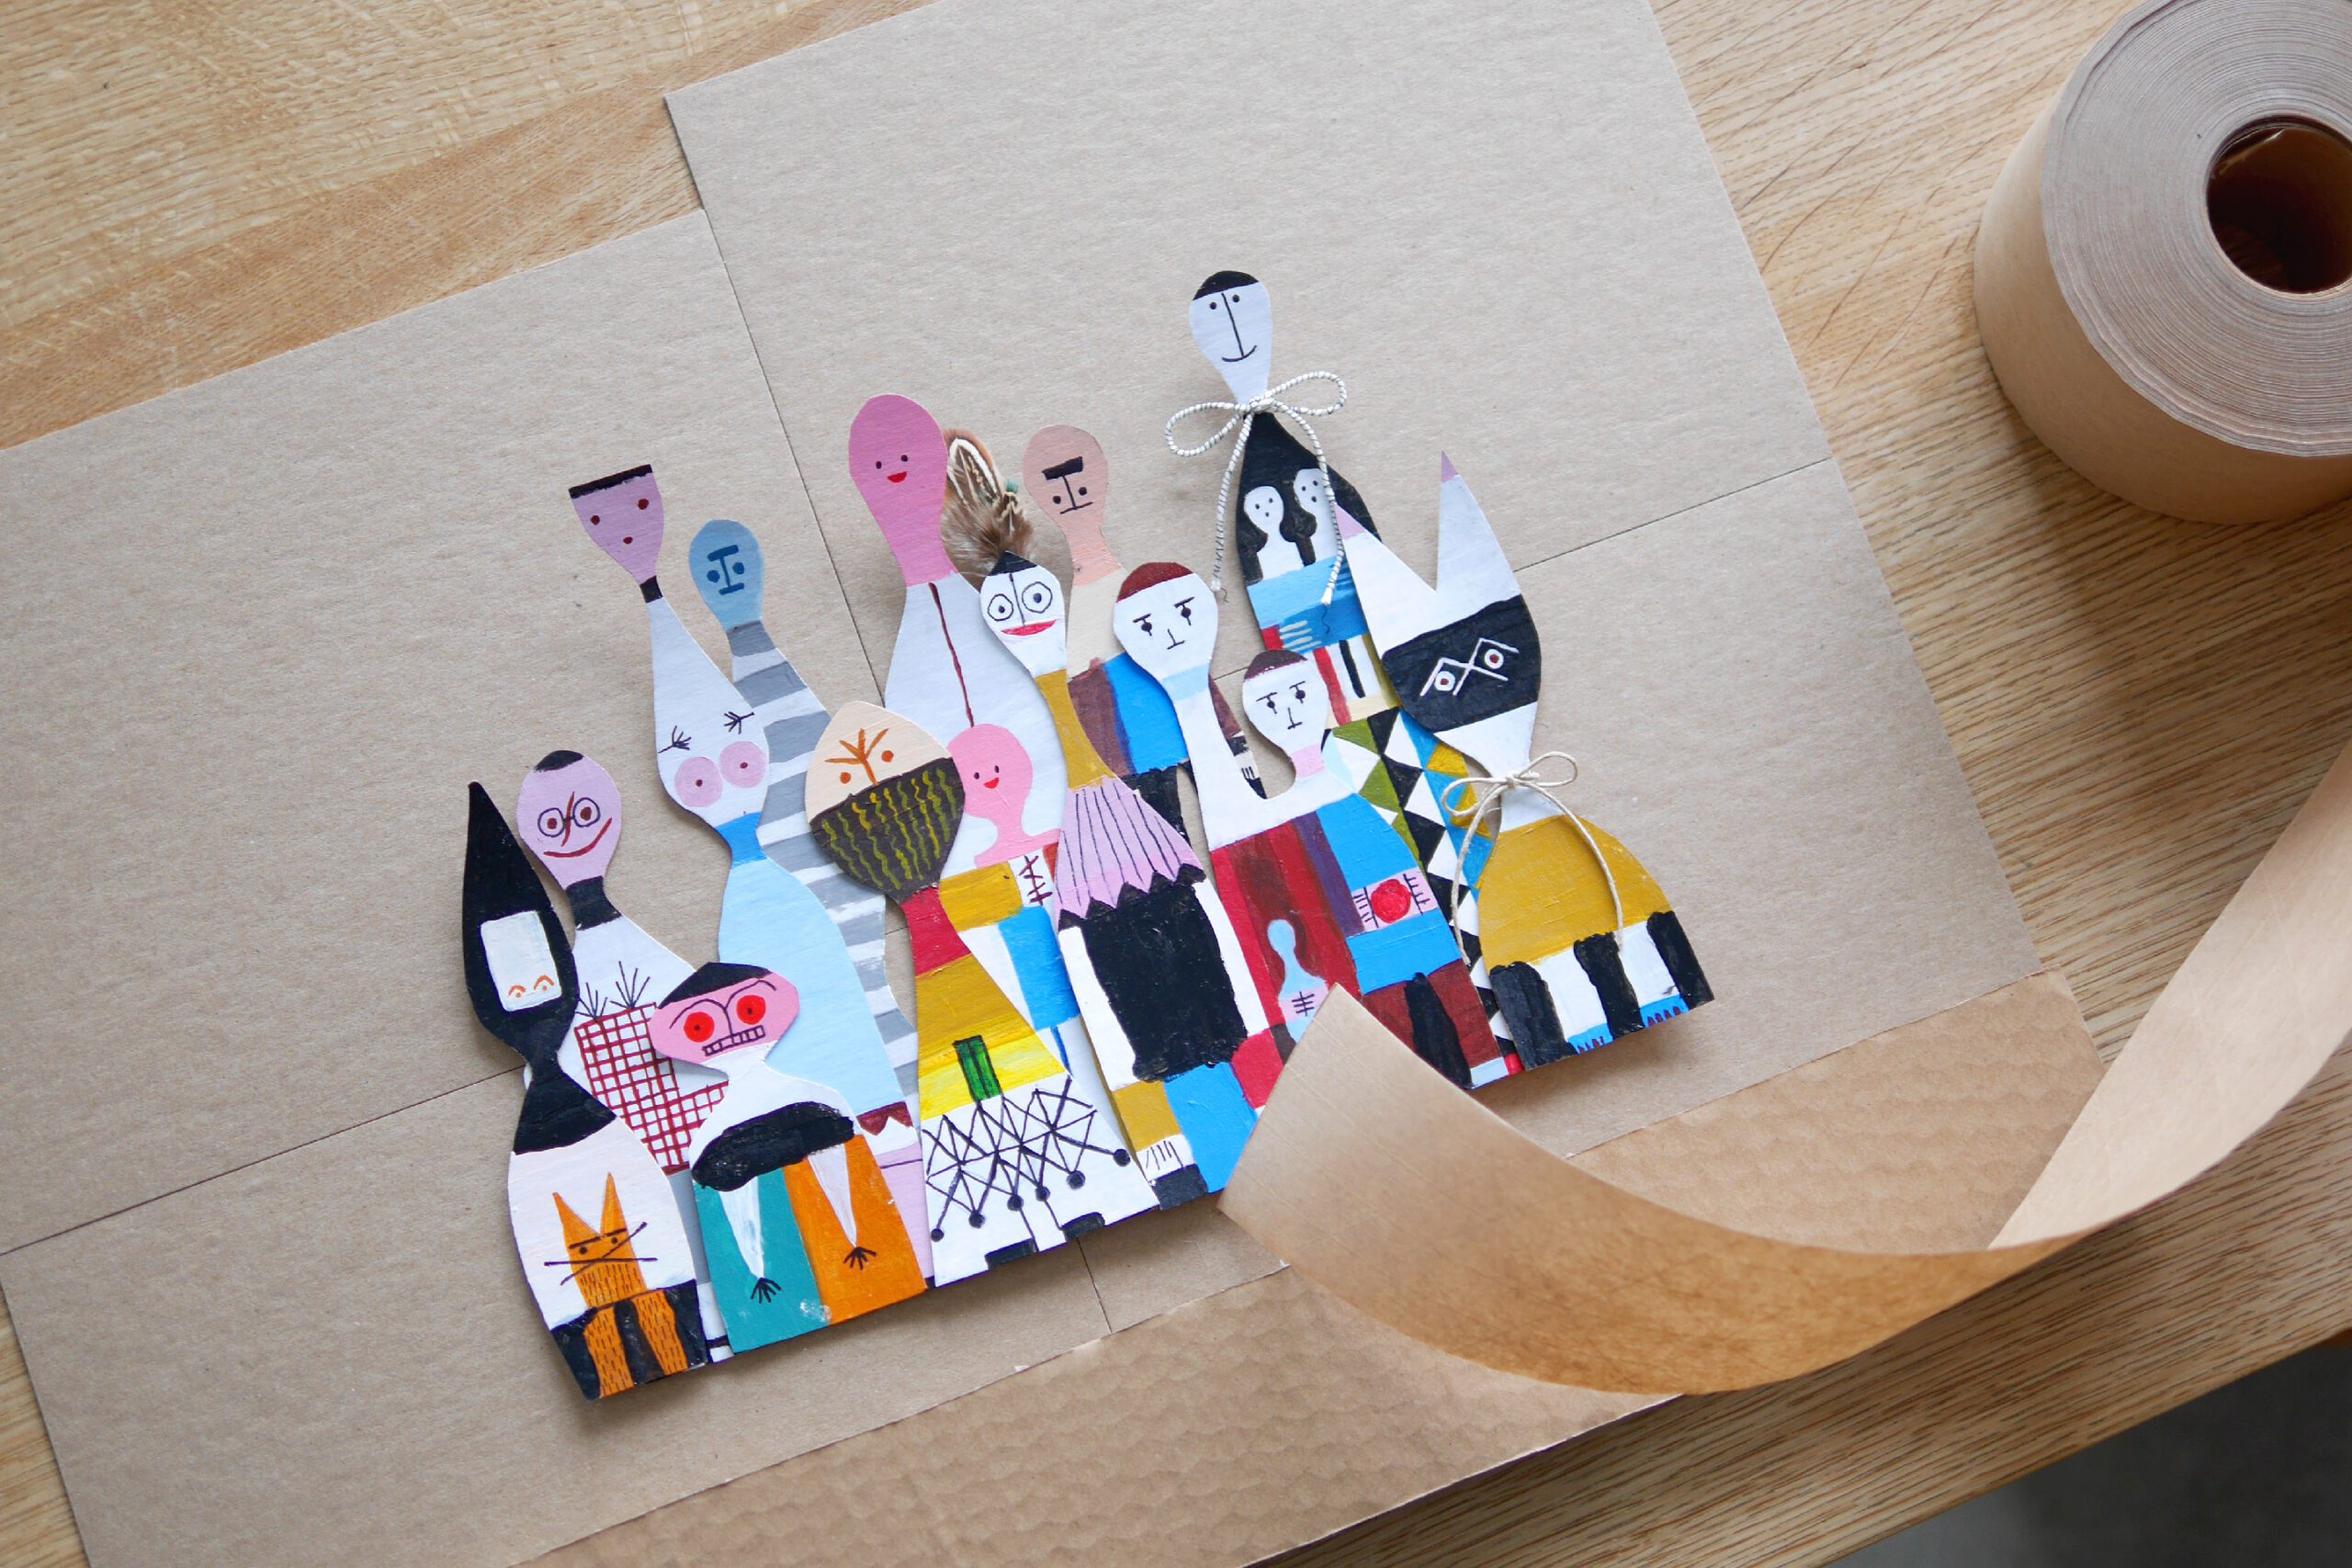
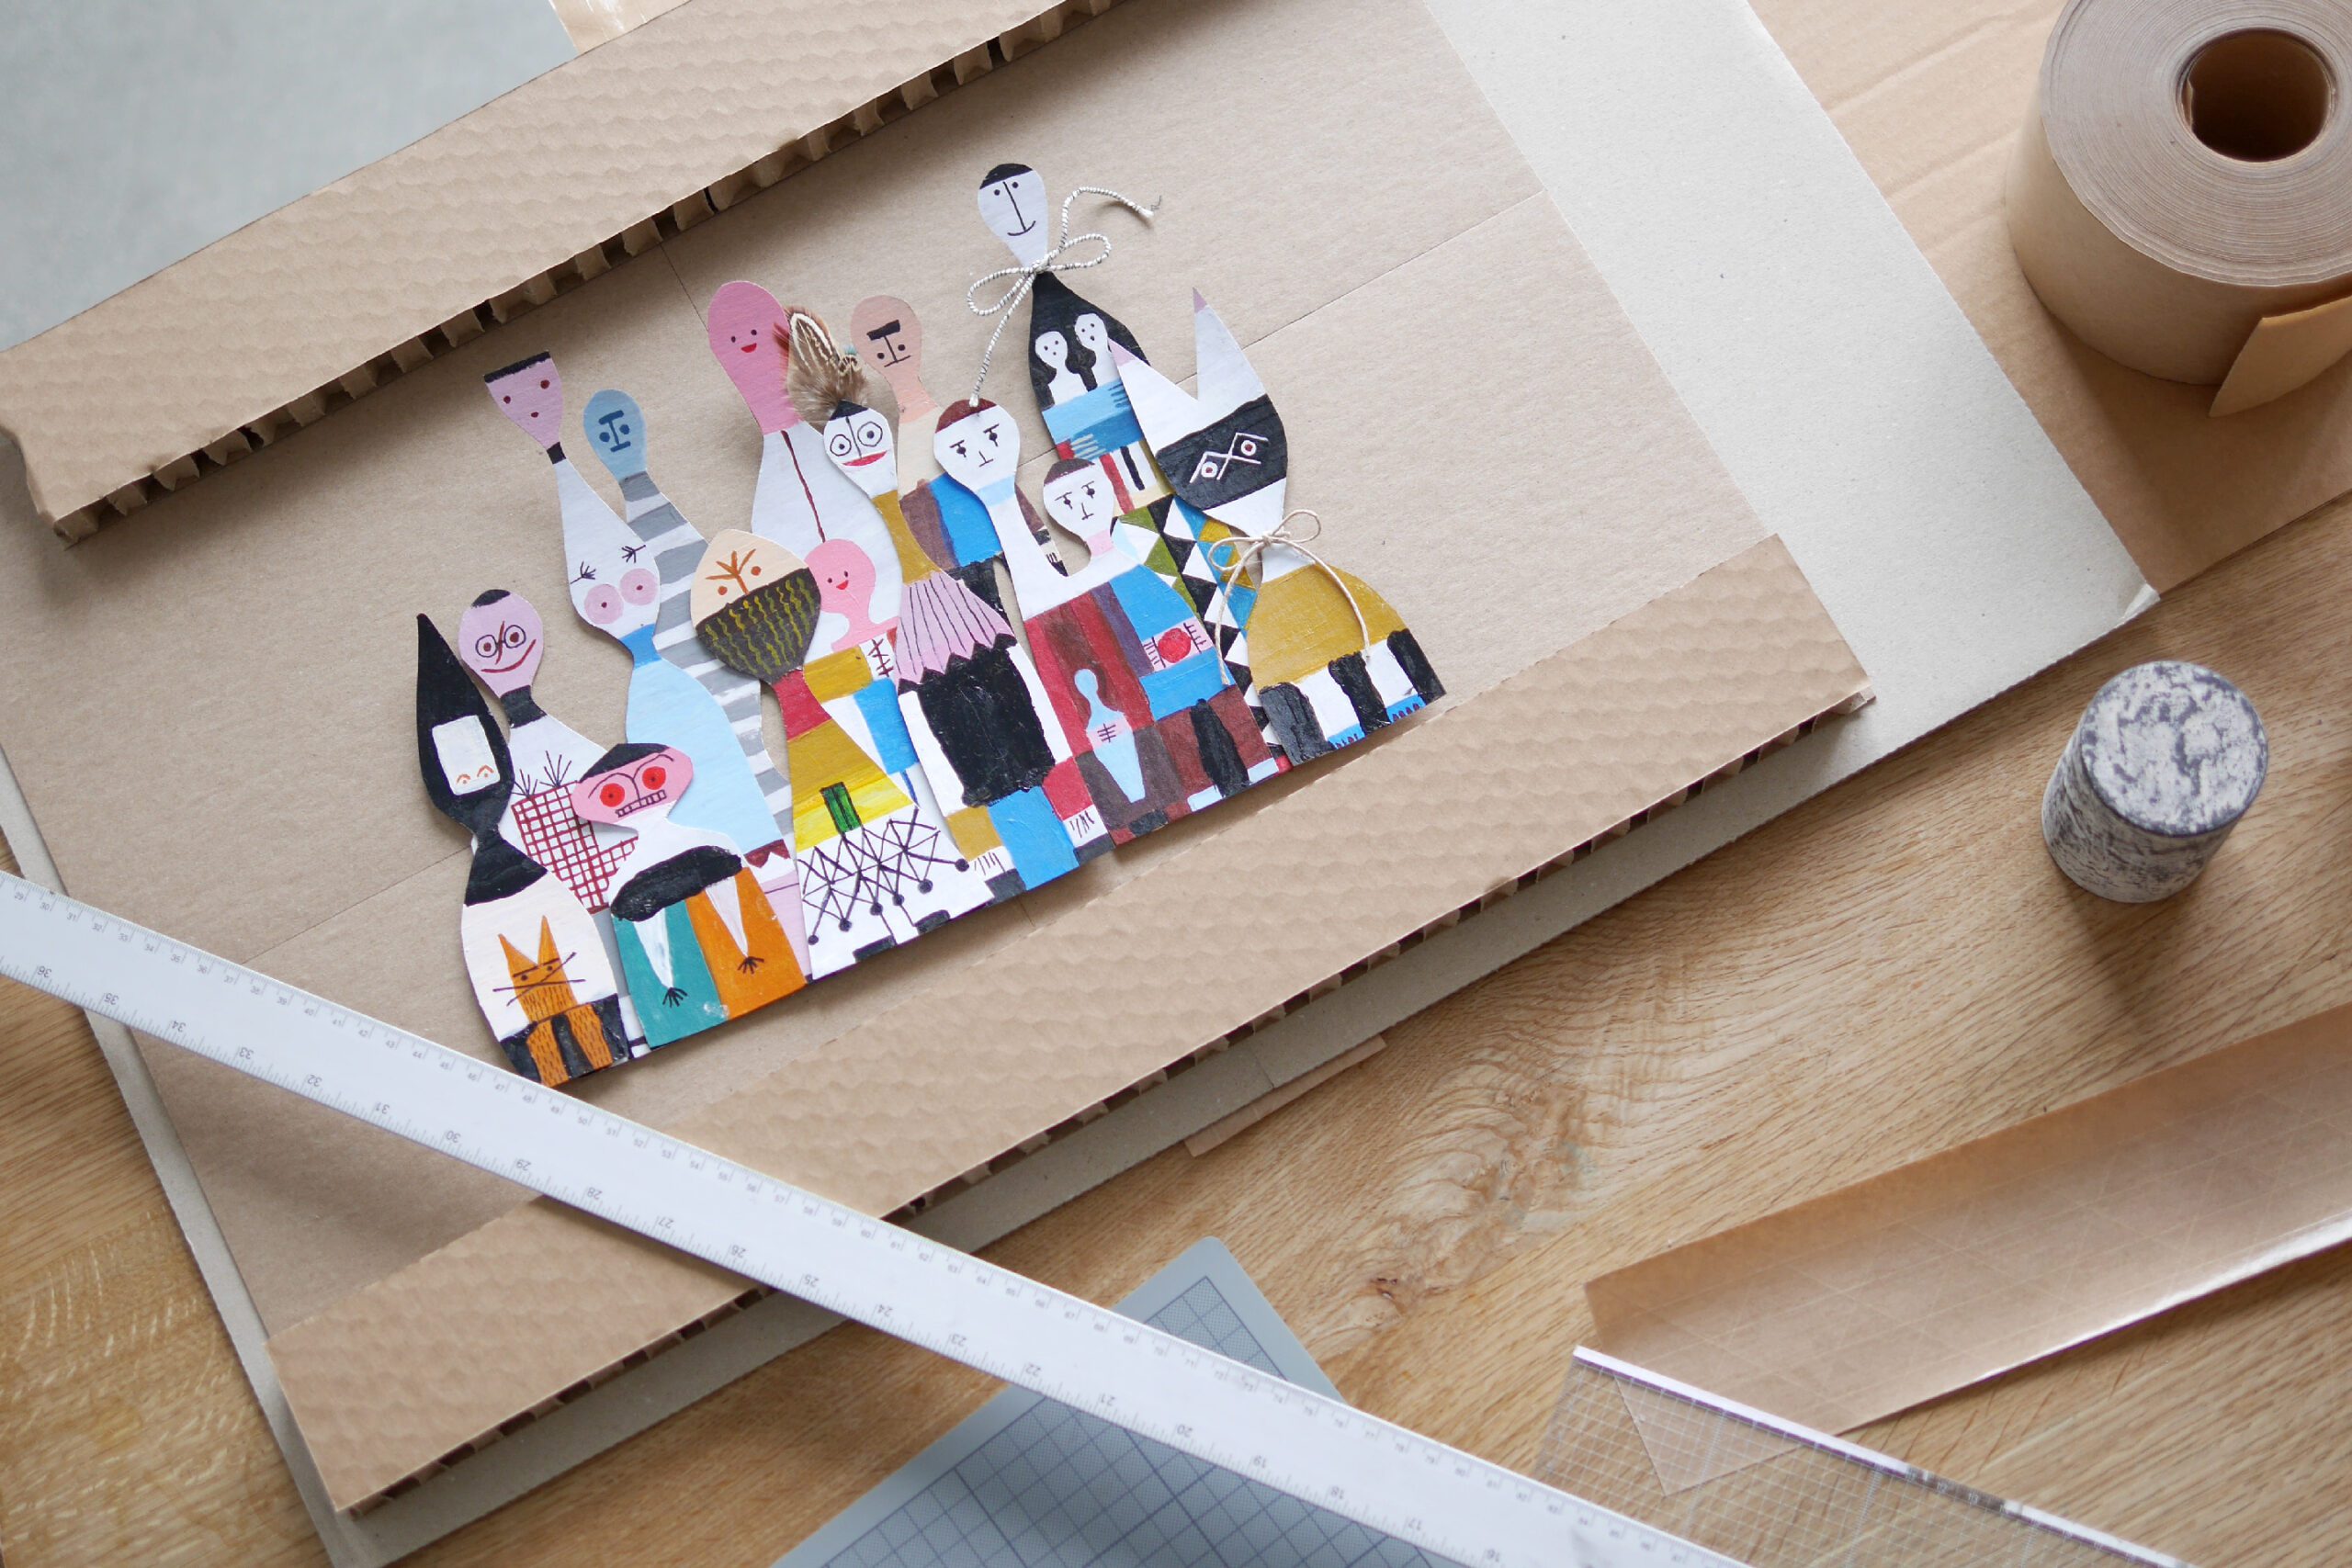
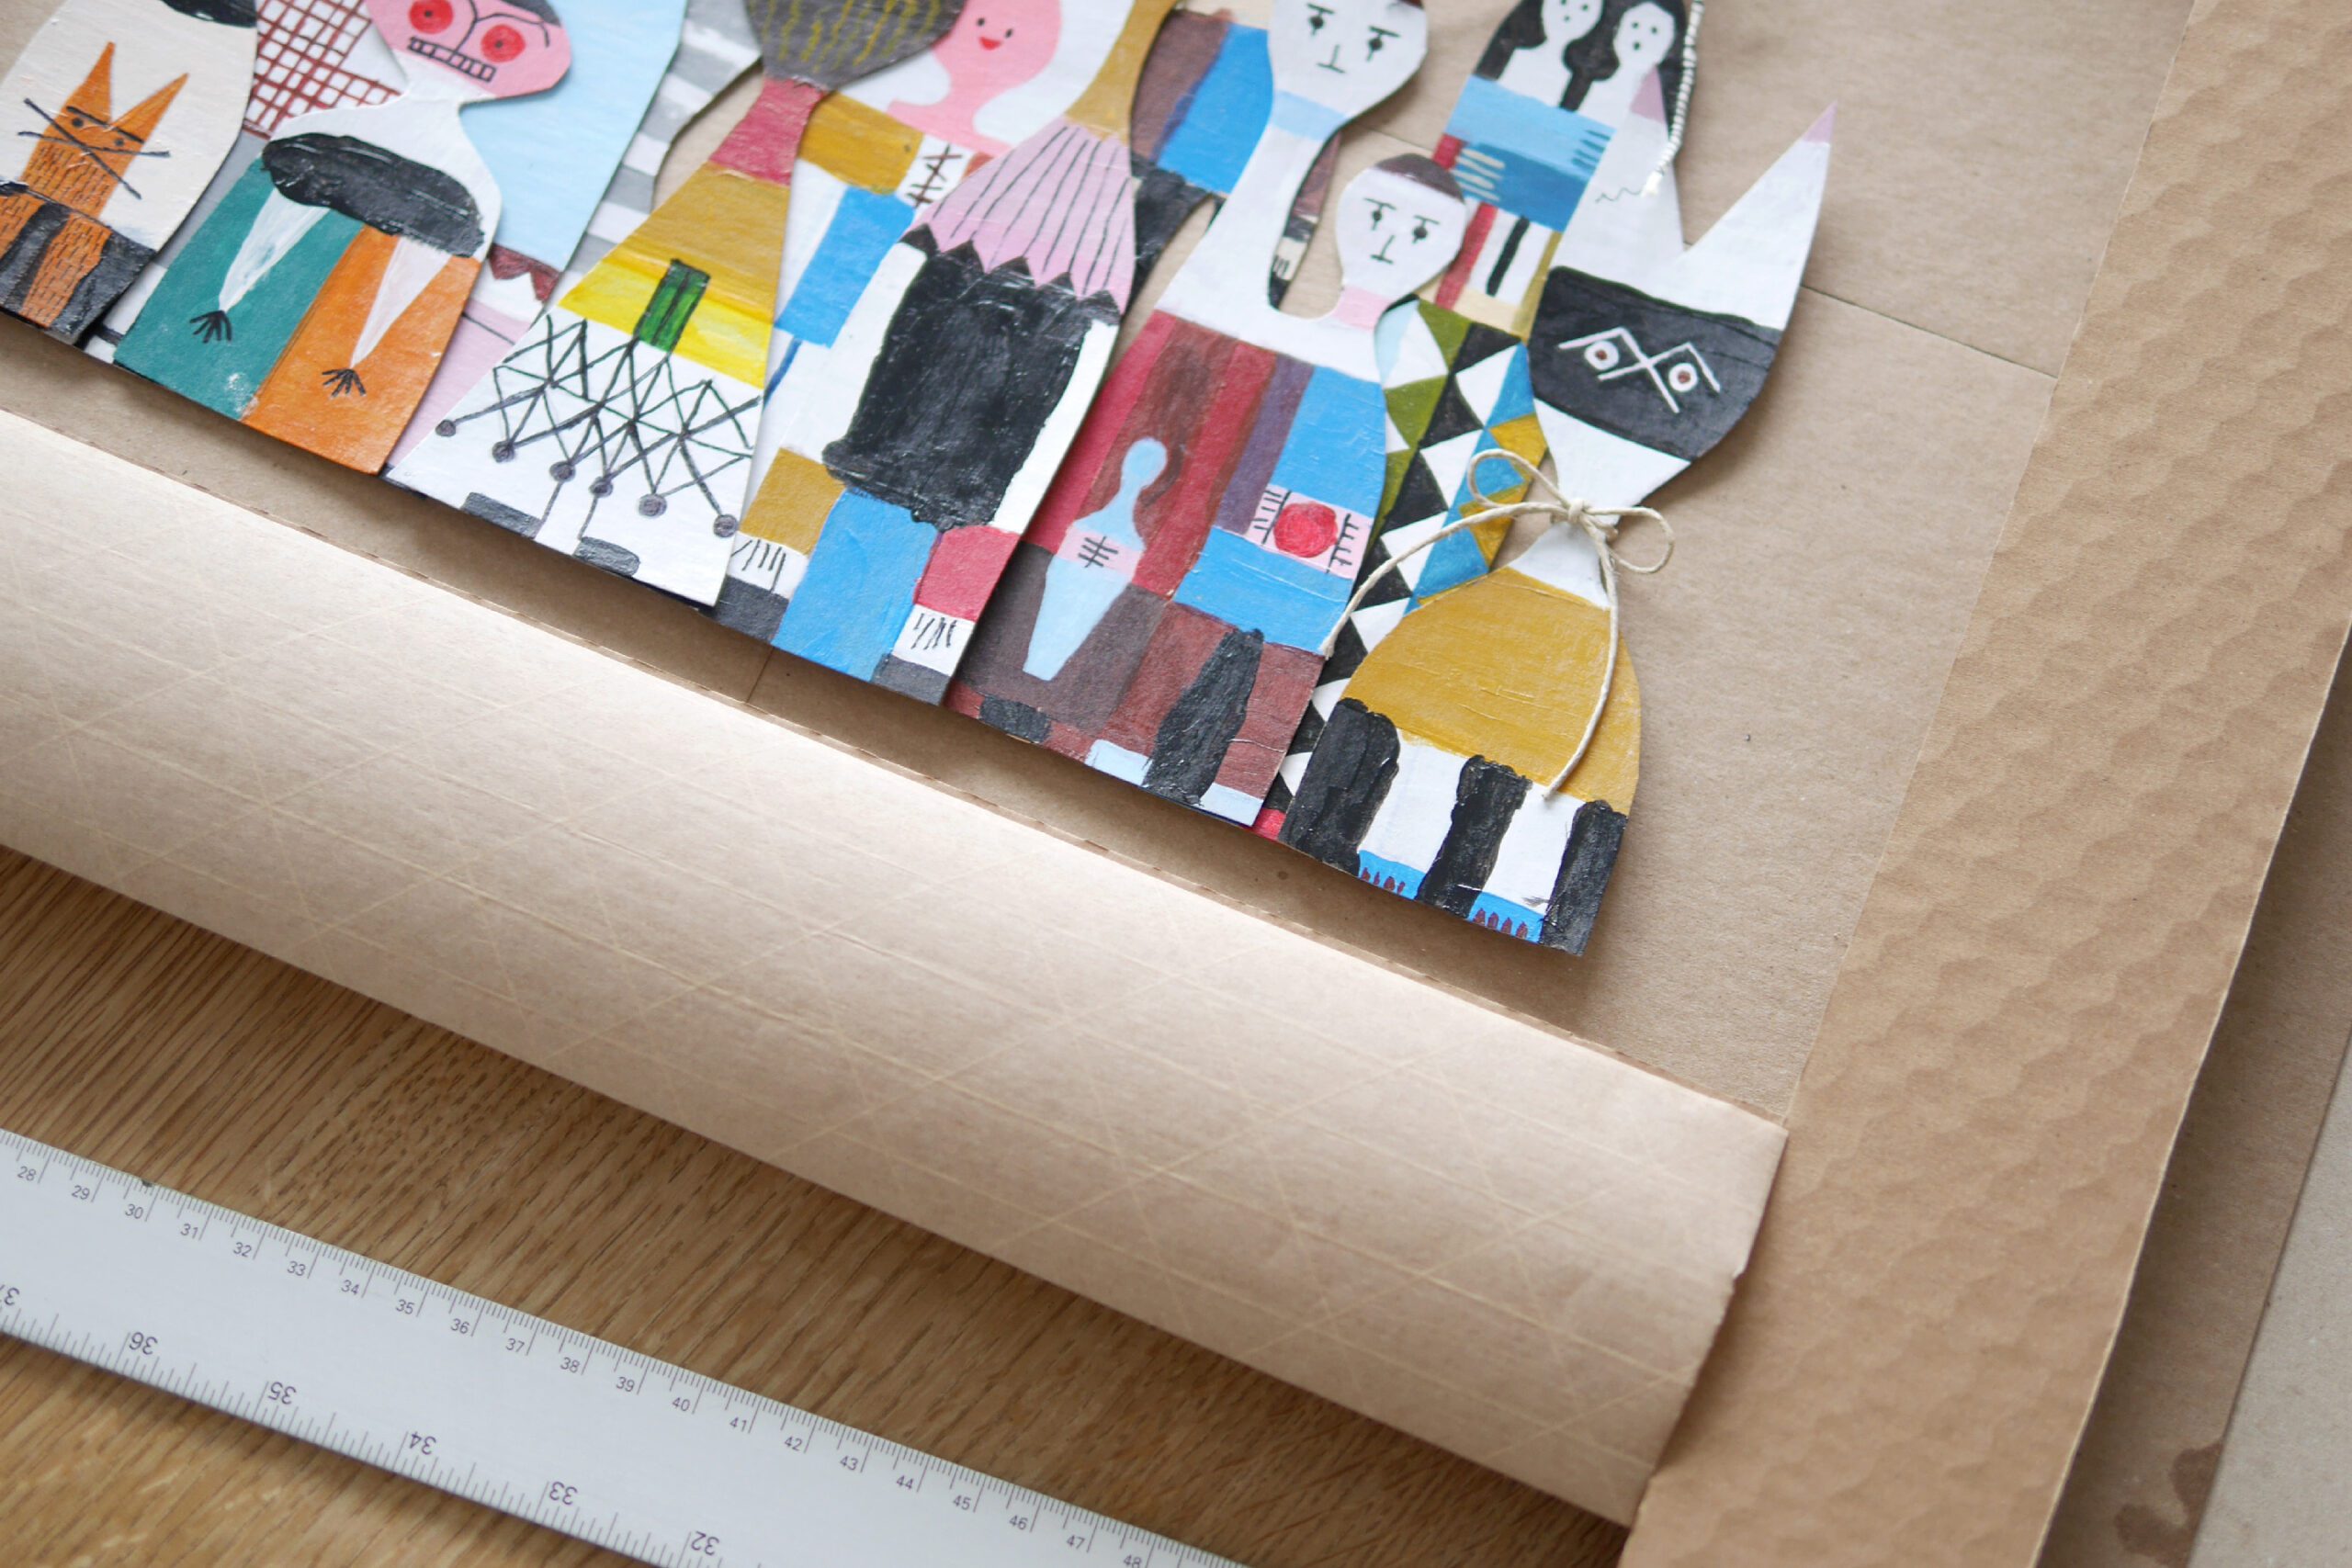
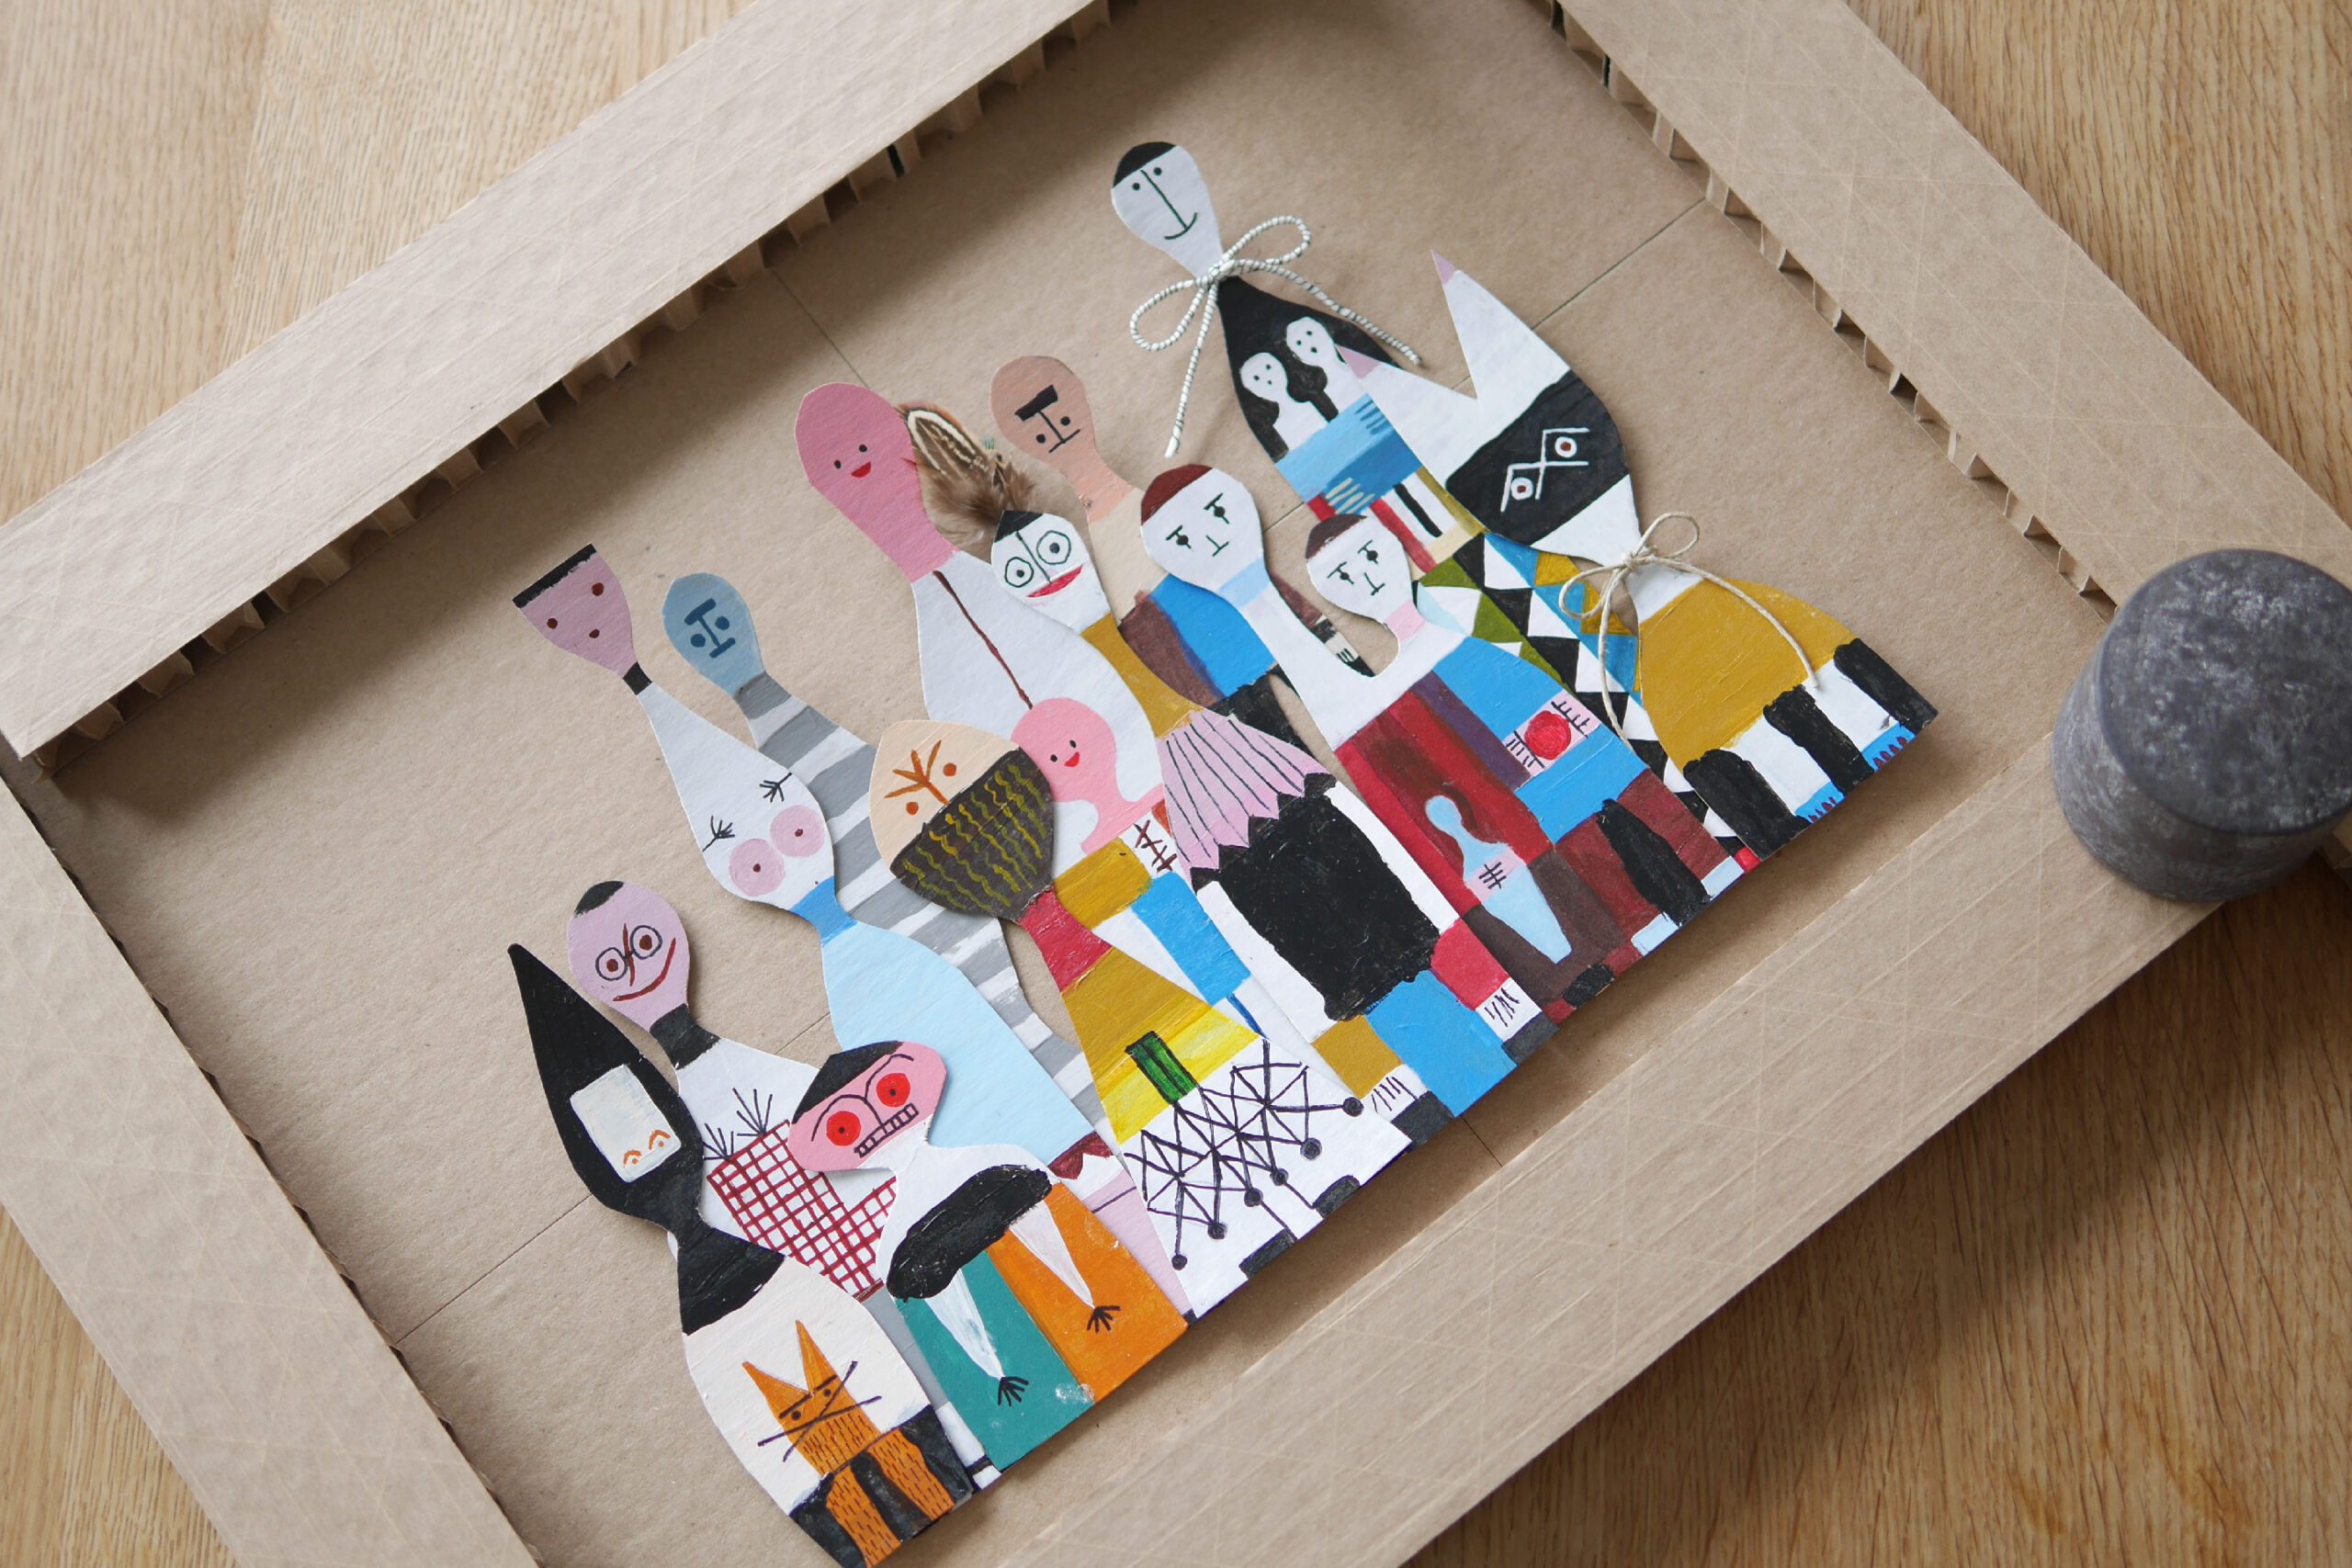
額装したいアート作品をチップボードの上に置きます。チップボードを、周囲に段ボールの縁取りのための余白を残して切り取ります。今回は、娘と一緒に作った紙に描いた木製の人形を額装することにしました。作品自体は約 13 x 10 インチです。チップボードを 4 枚つなぎ合わせて、21 x 16 インチのベースを作りました。
Step 2. Make a Frame
フレーム用チップボードの四方にボール紙を置きます。余分な長さをカッターナイフで切り取ります。厚みがあるので、一気に切ろうとせず、刃を数回当てて慎重に切ります。すべての長さを切ったら、白い接着剤でチップボードにしっかりと接着します。接着剤が浮いてしまわないように、しばらくフレームの上に重しを置きました。
Step 3. Finish with Paper Tape
これはオプションです。フレームの表面を平らにするために、梱包用のクラフト紙テープを上から貼ってみました。
Step 4. Completed
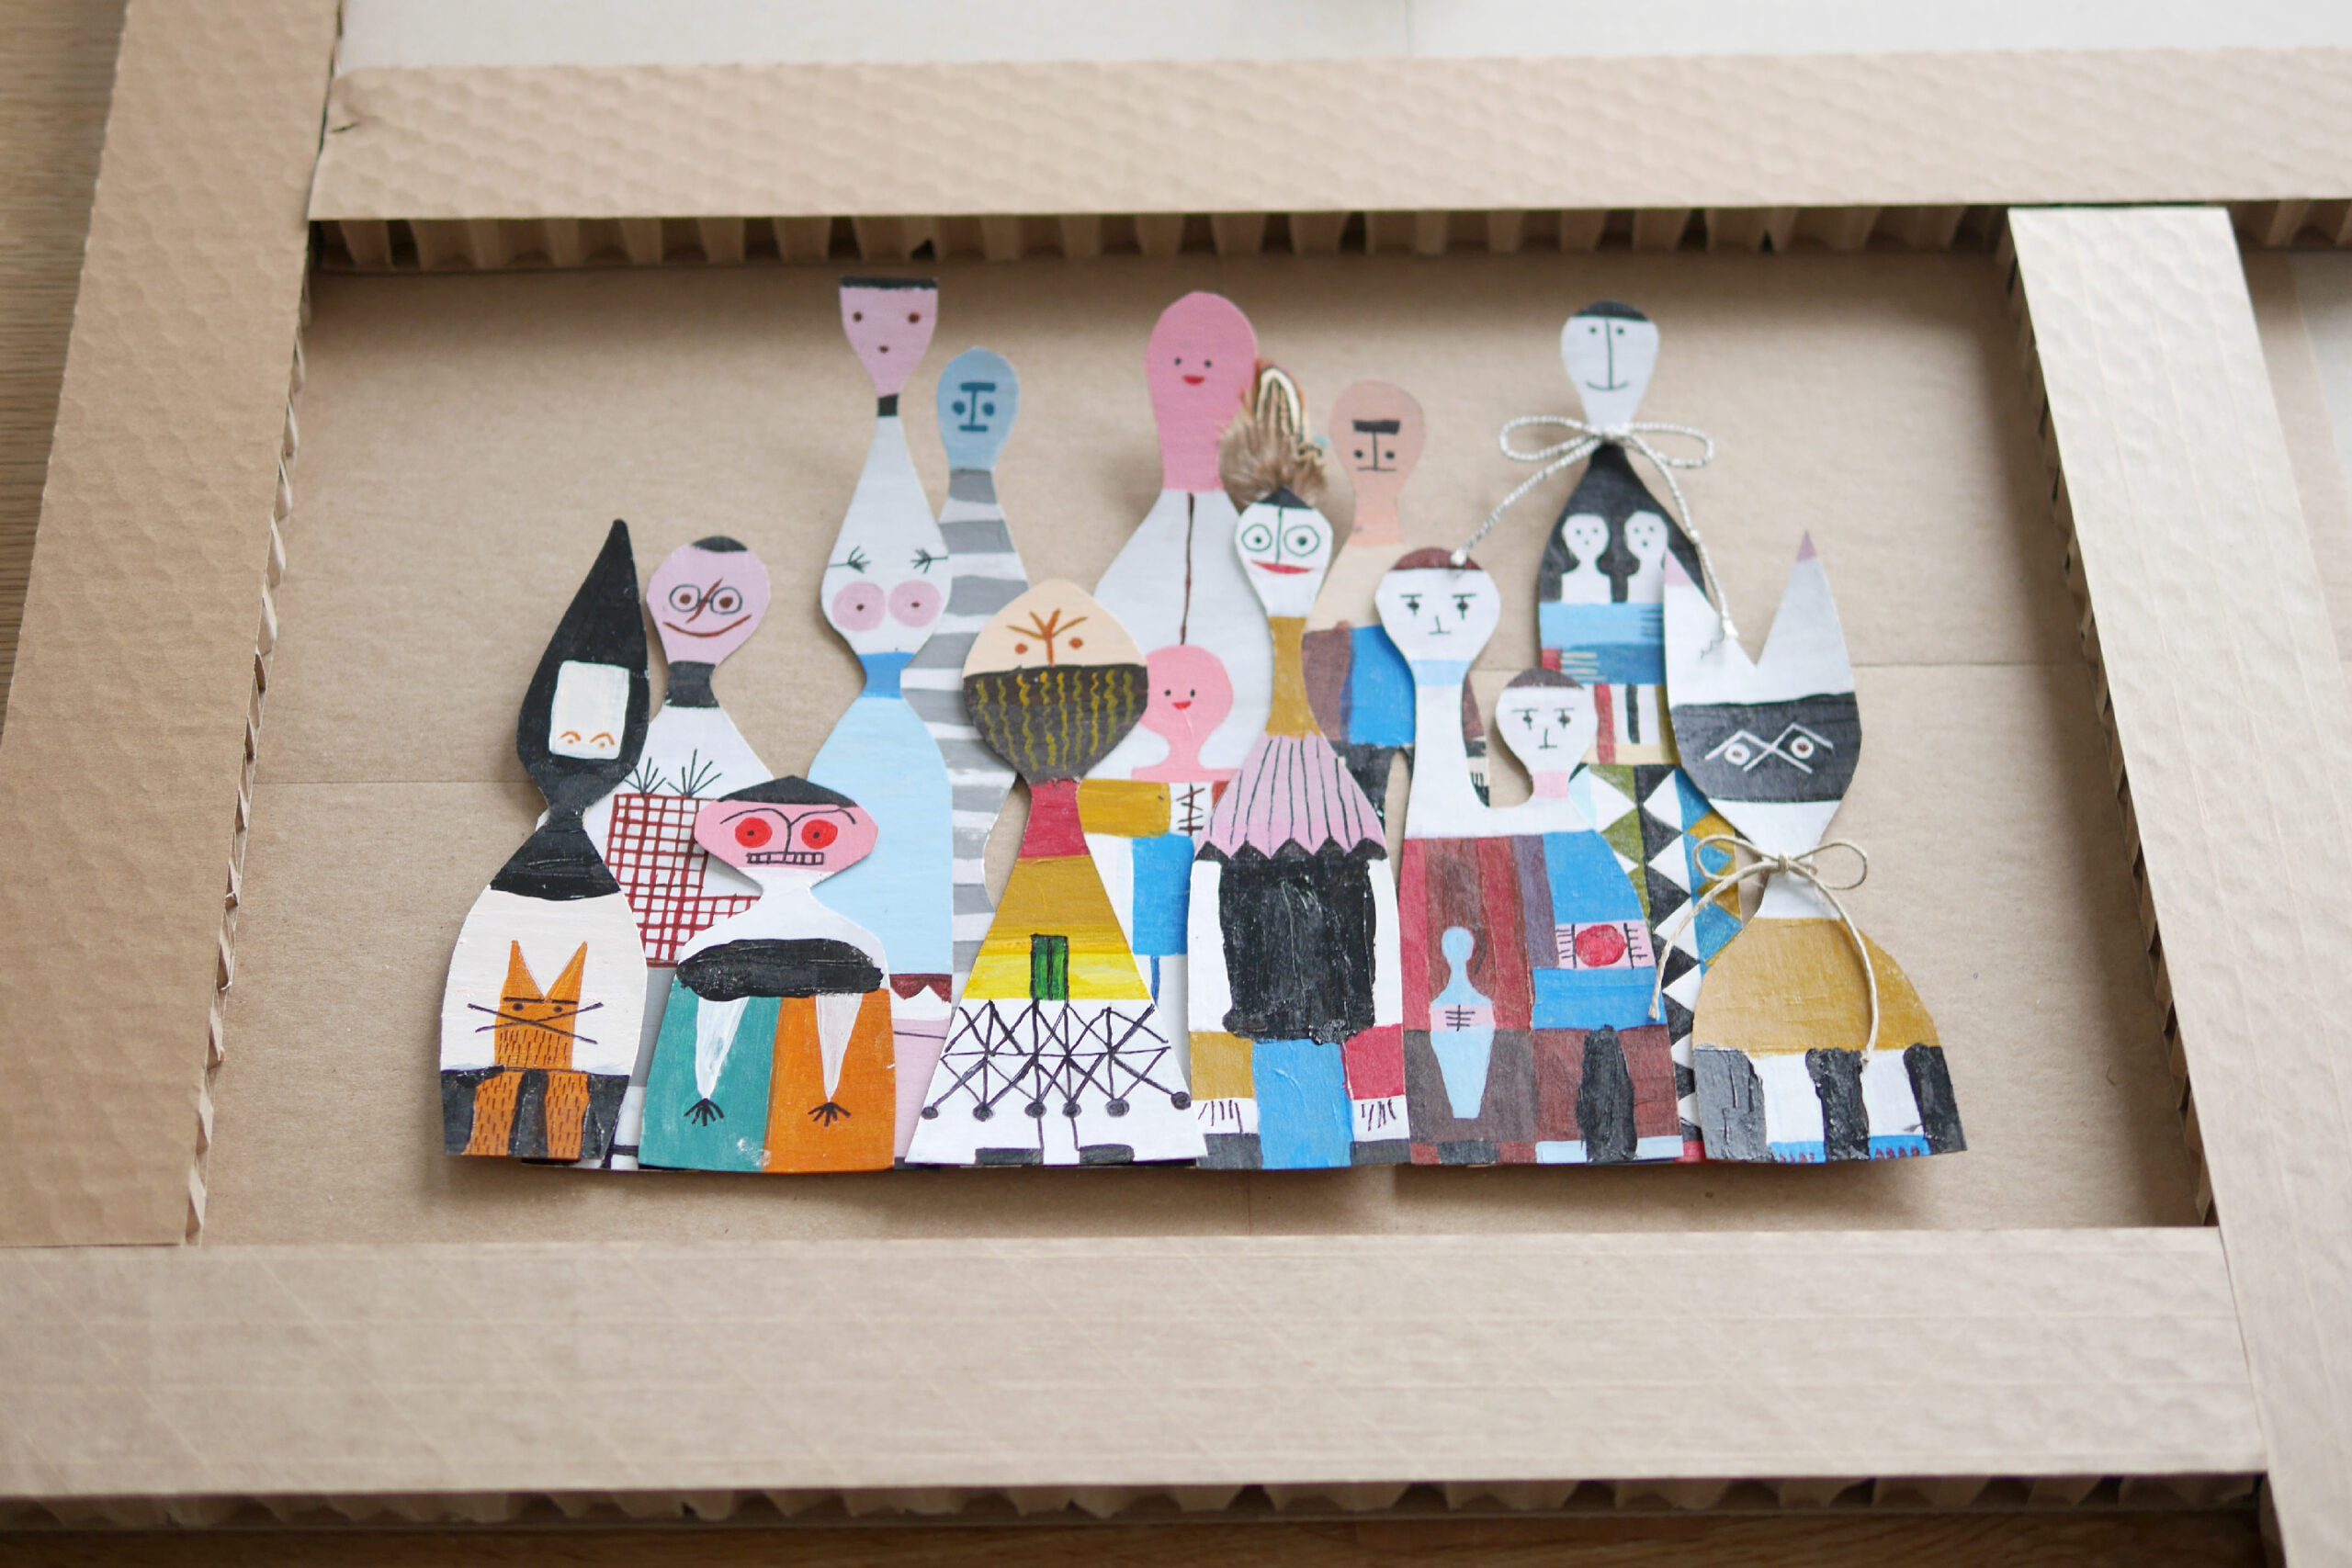
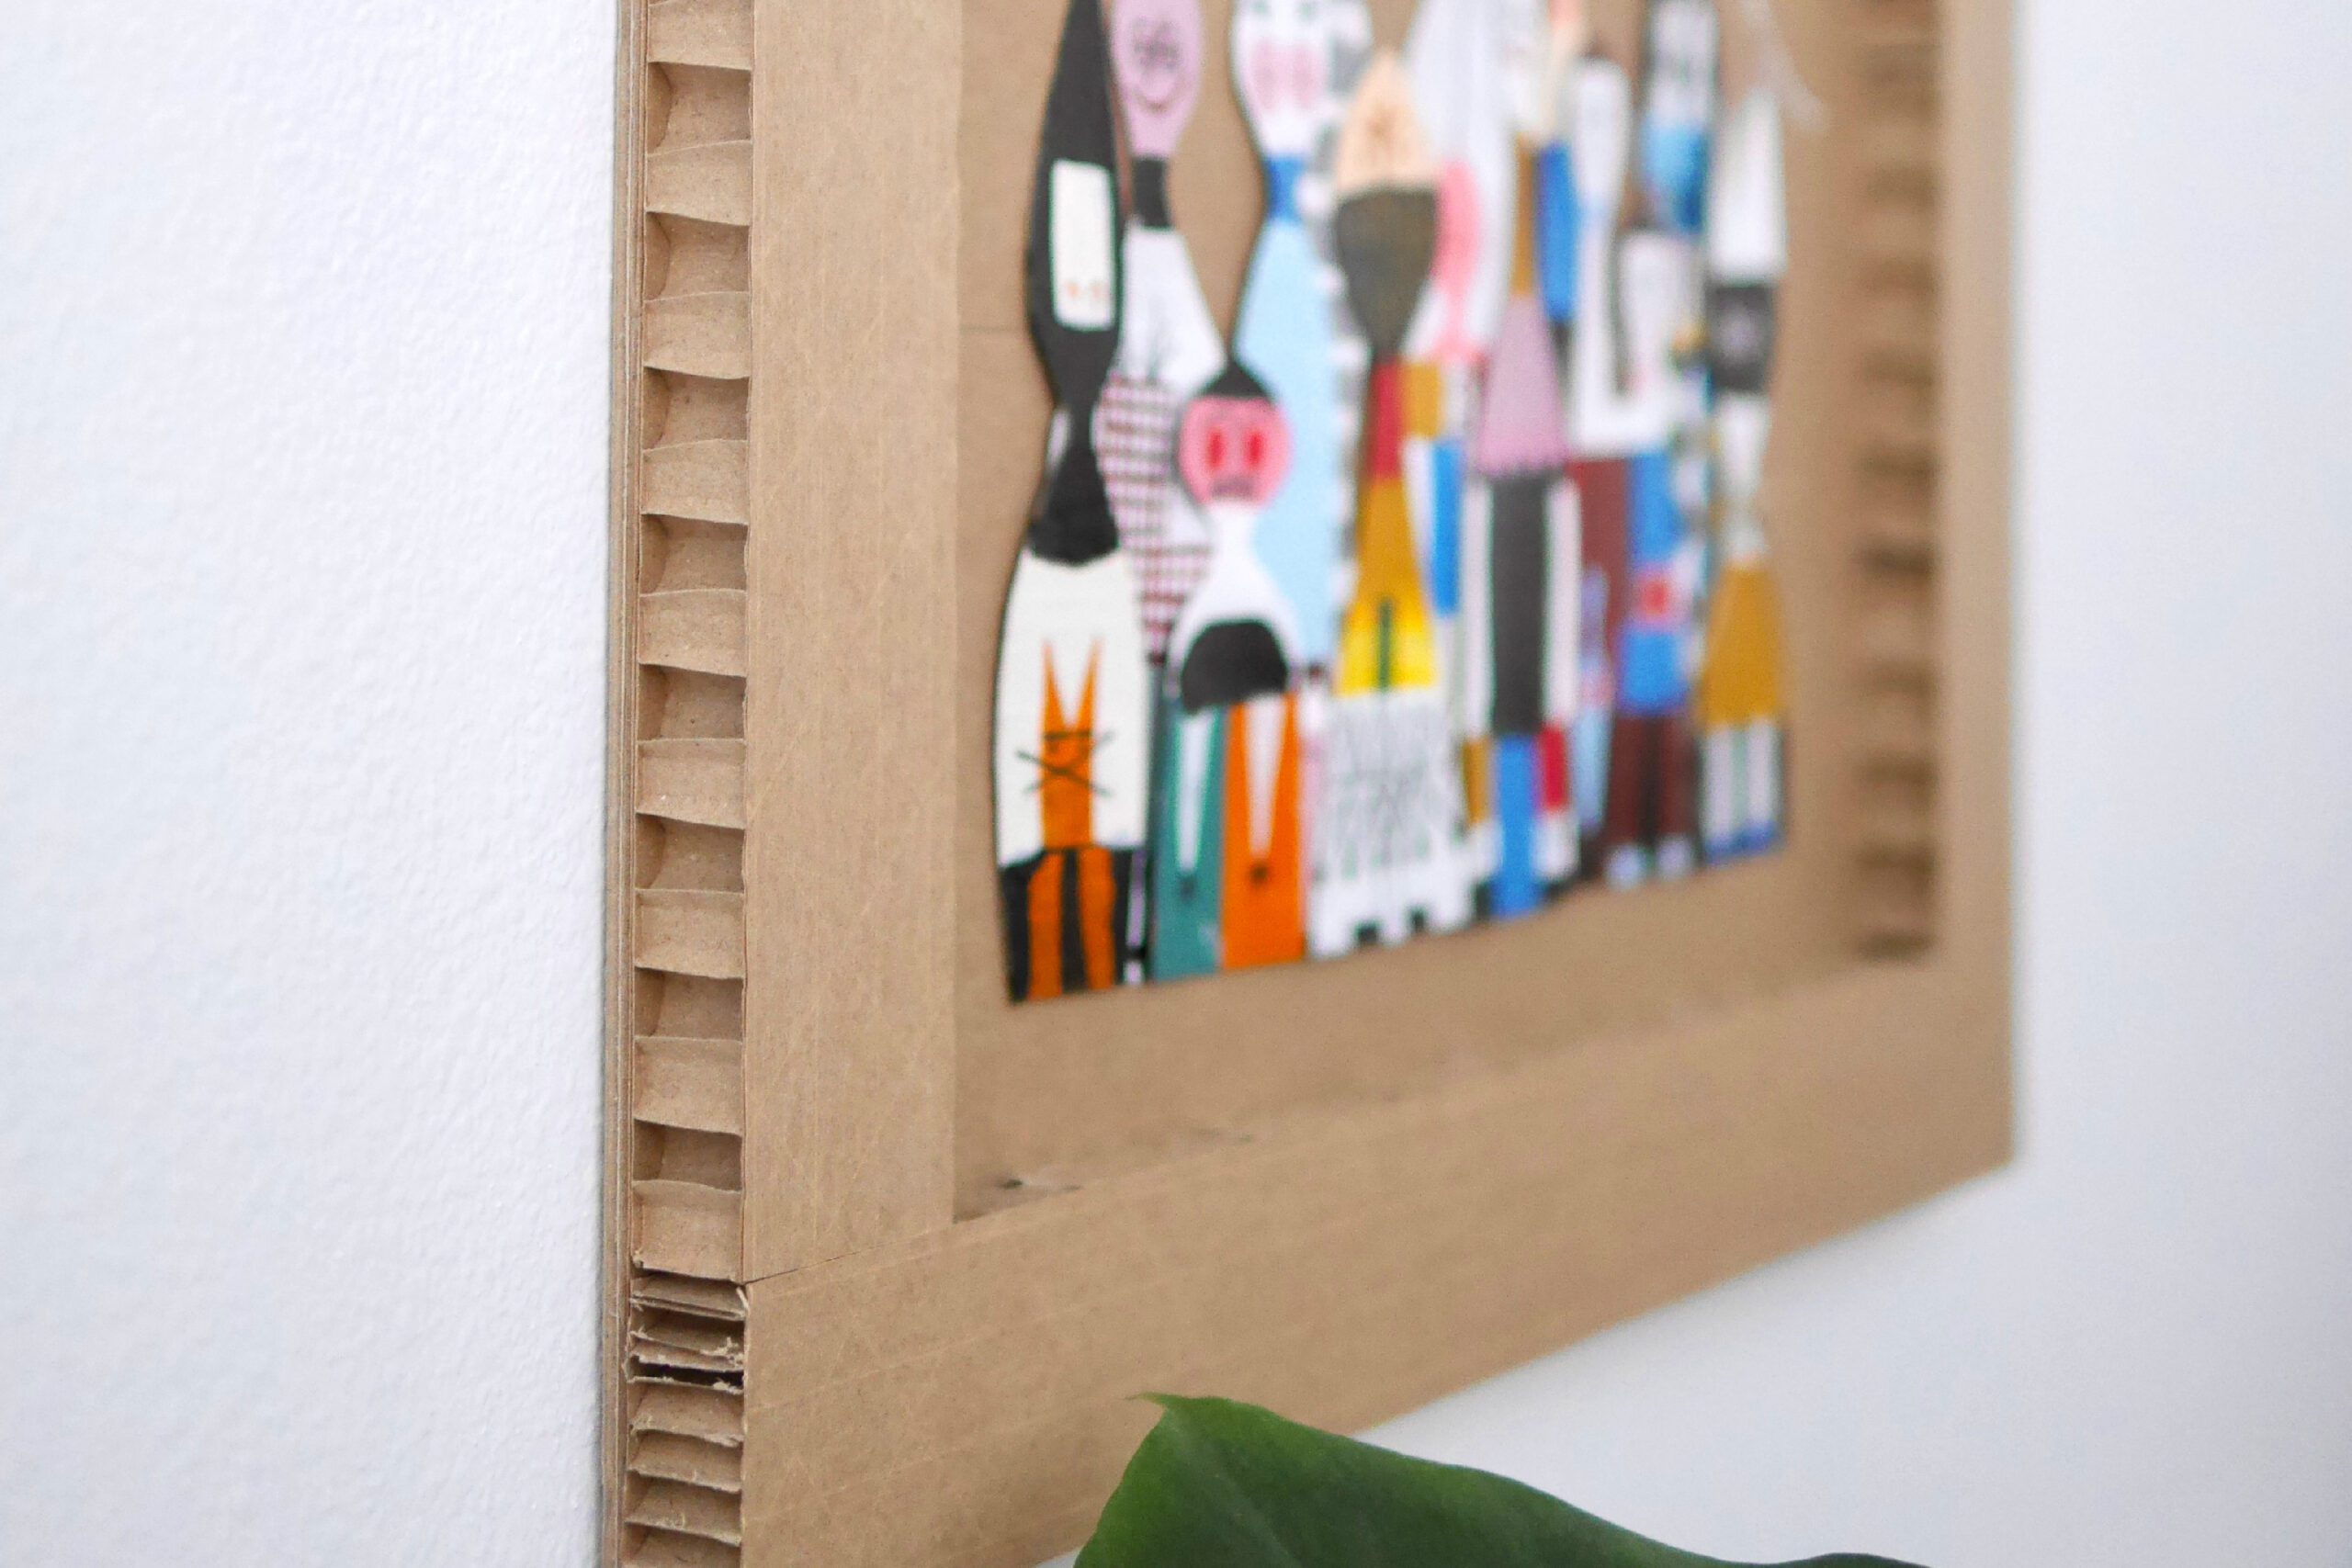
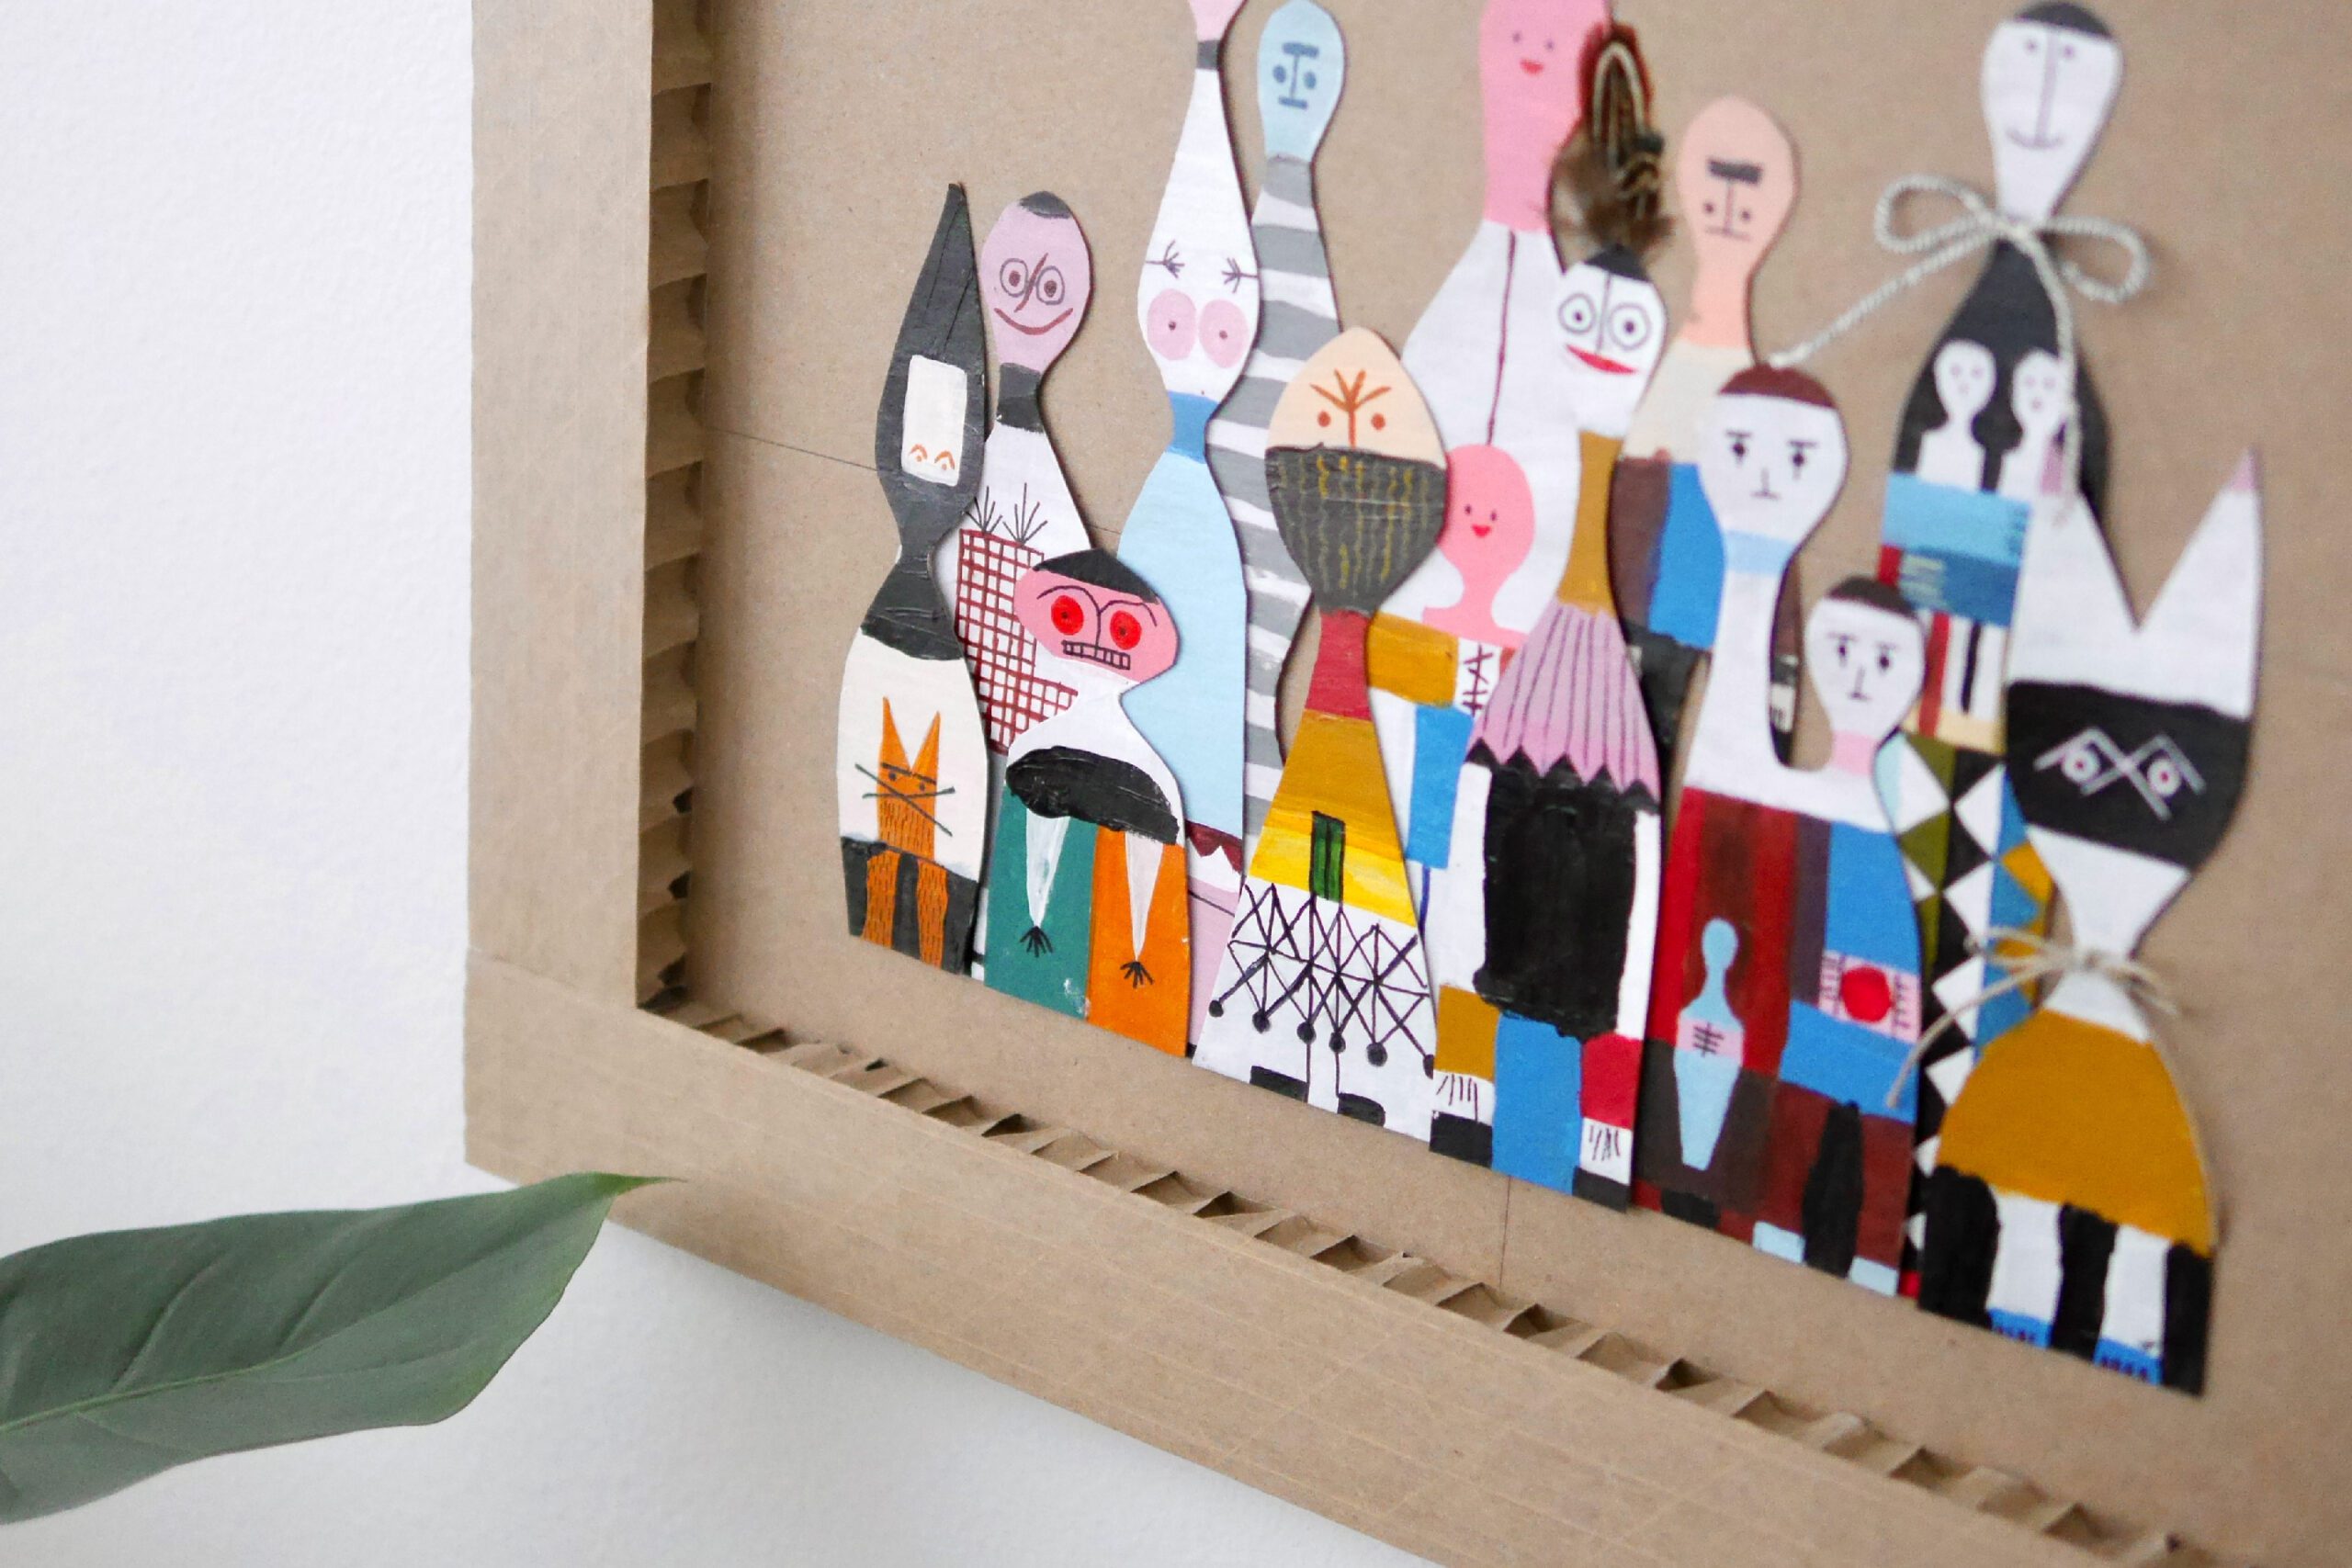
紙のフラットな表面と波打つ断面の質感が美しいアートフレームを創り出します。

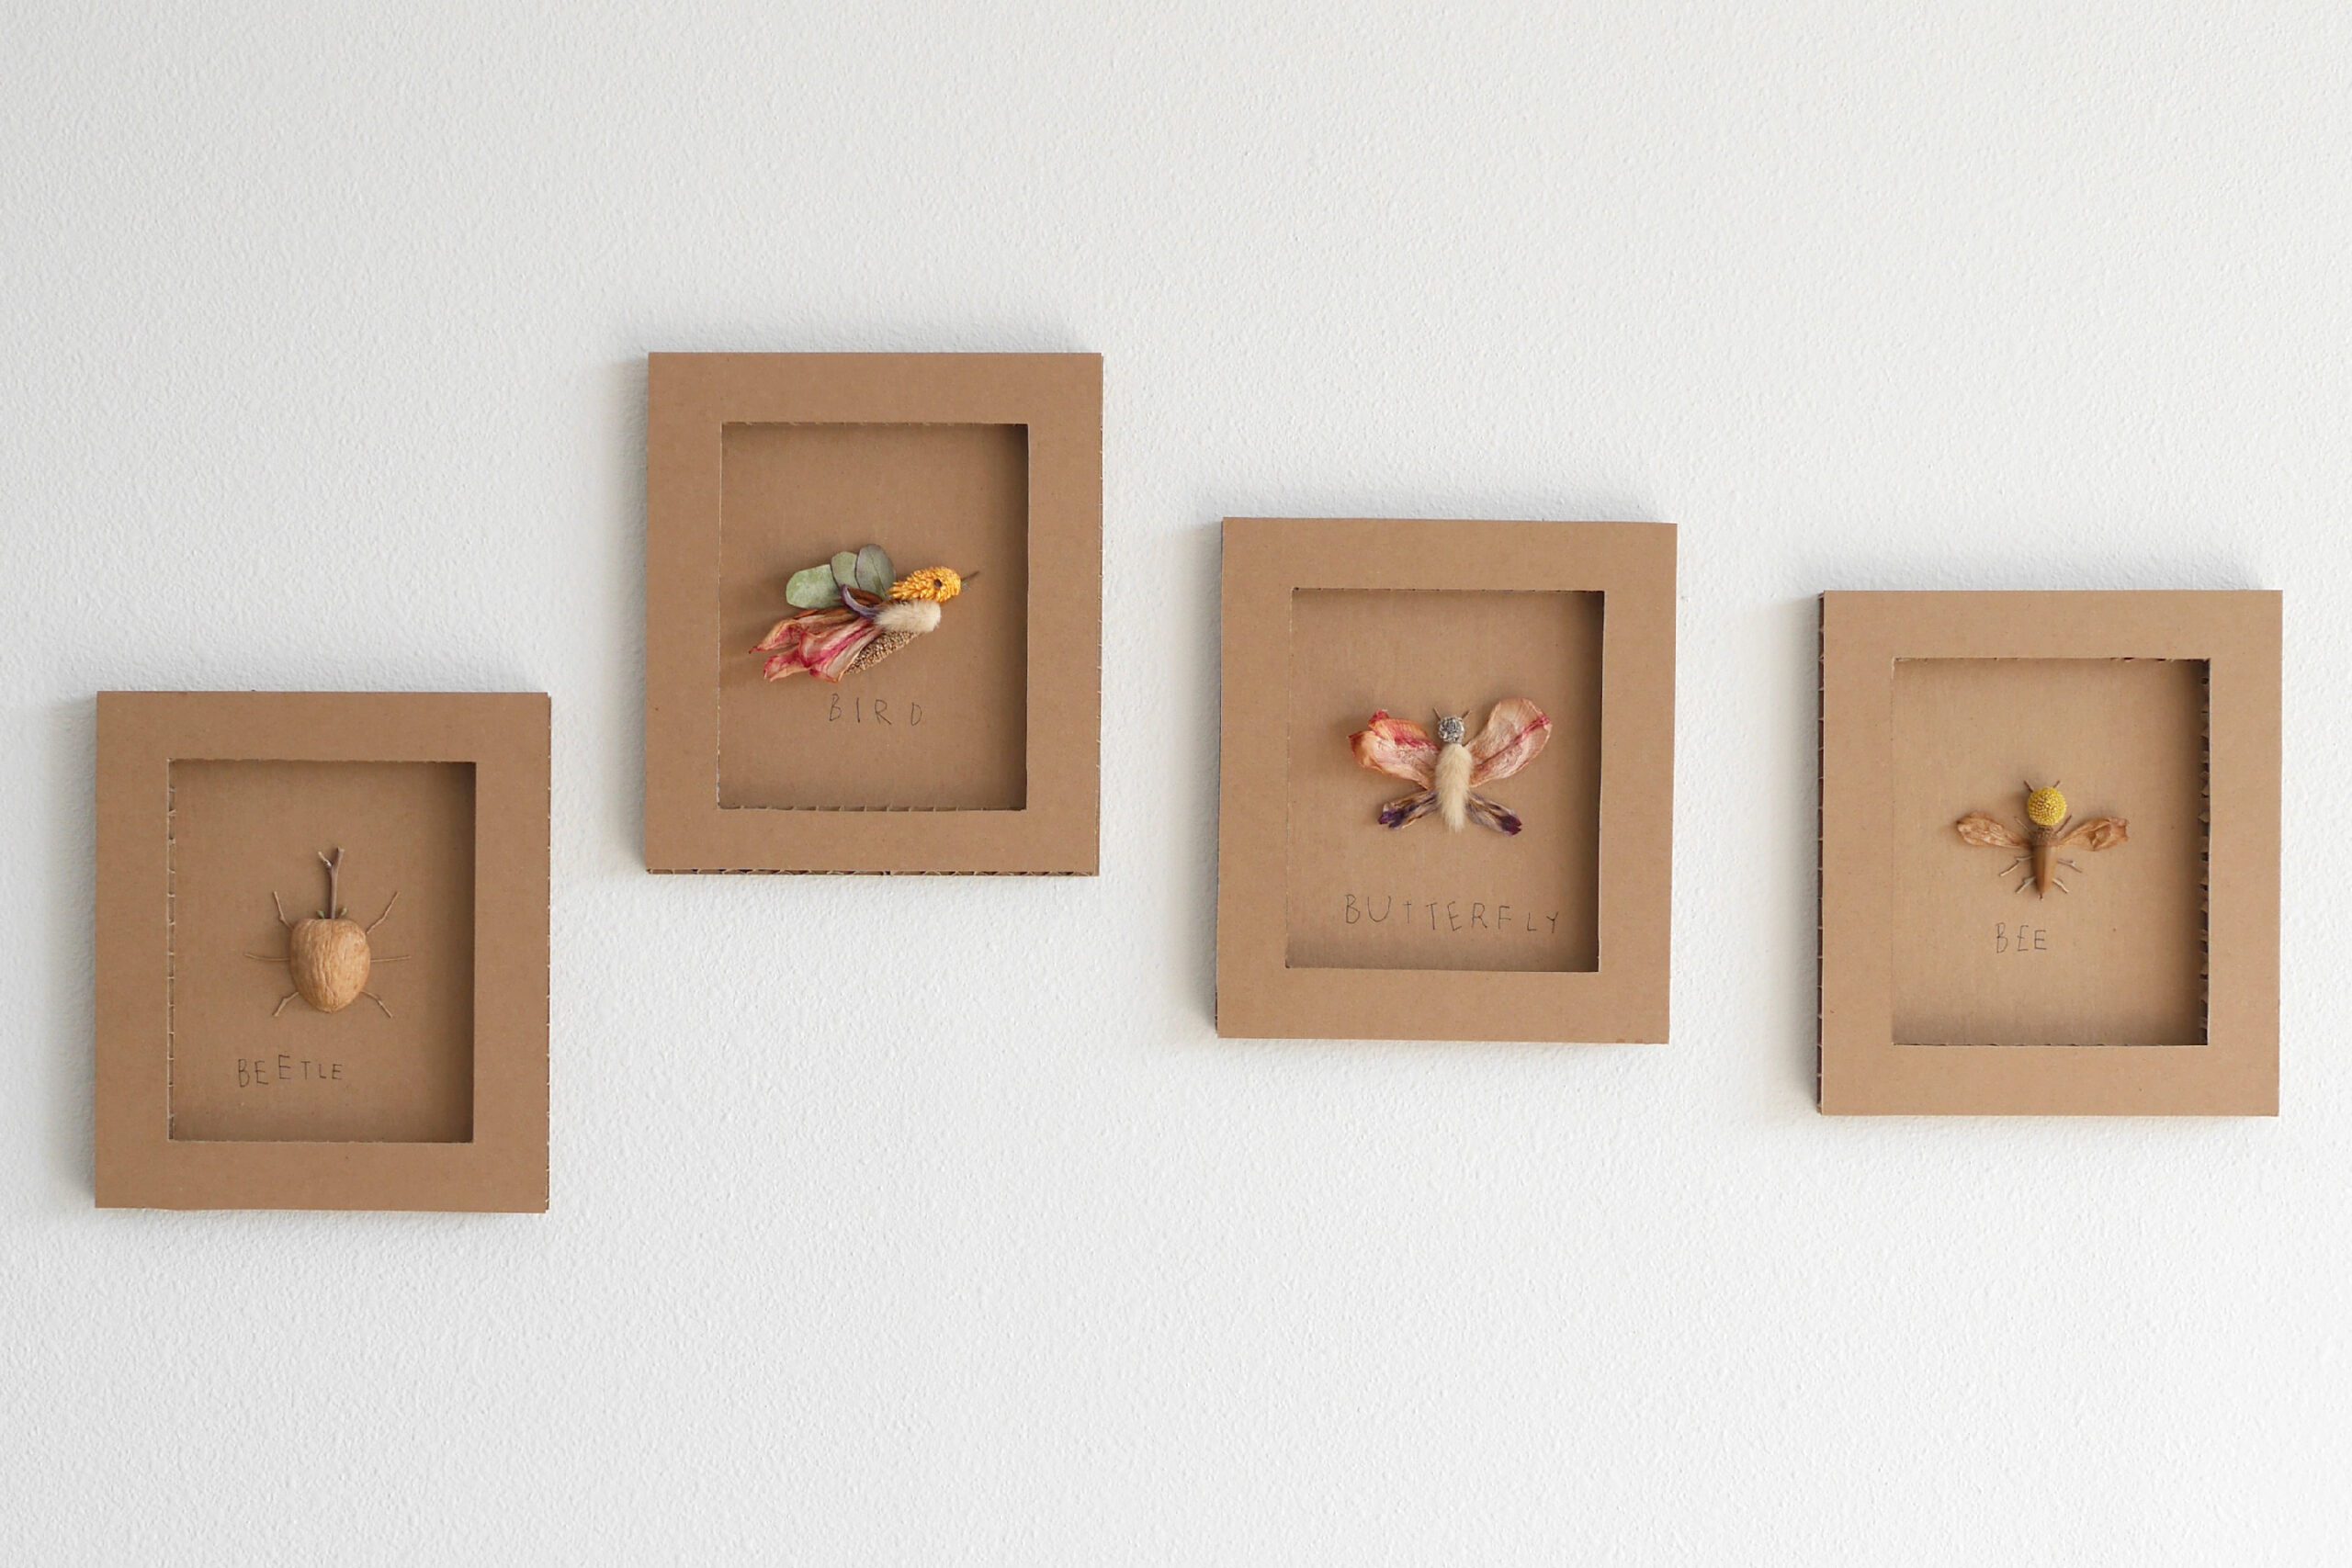
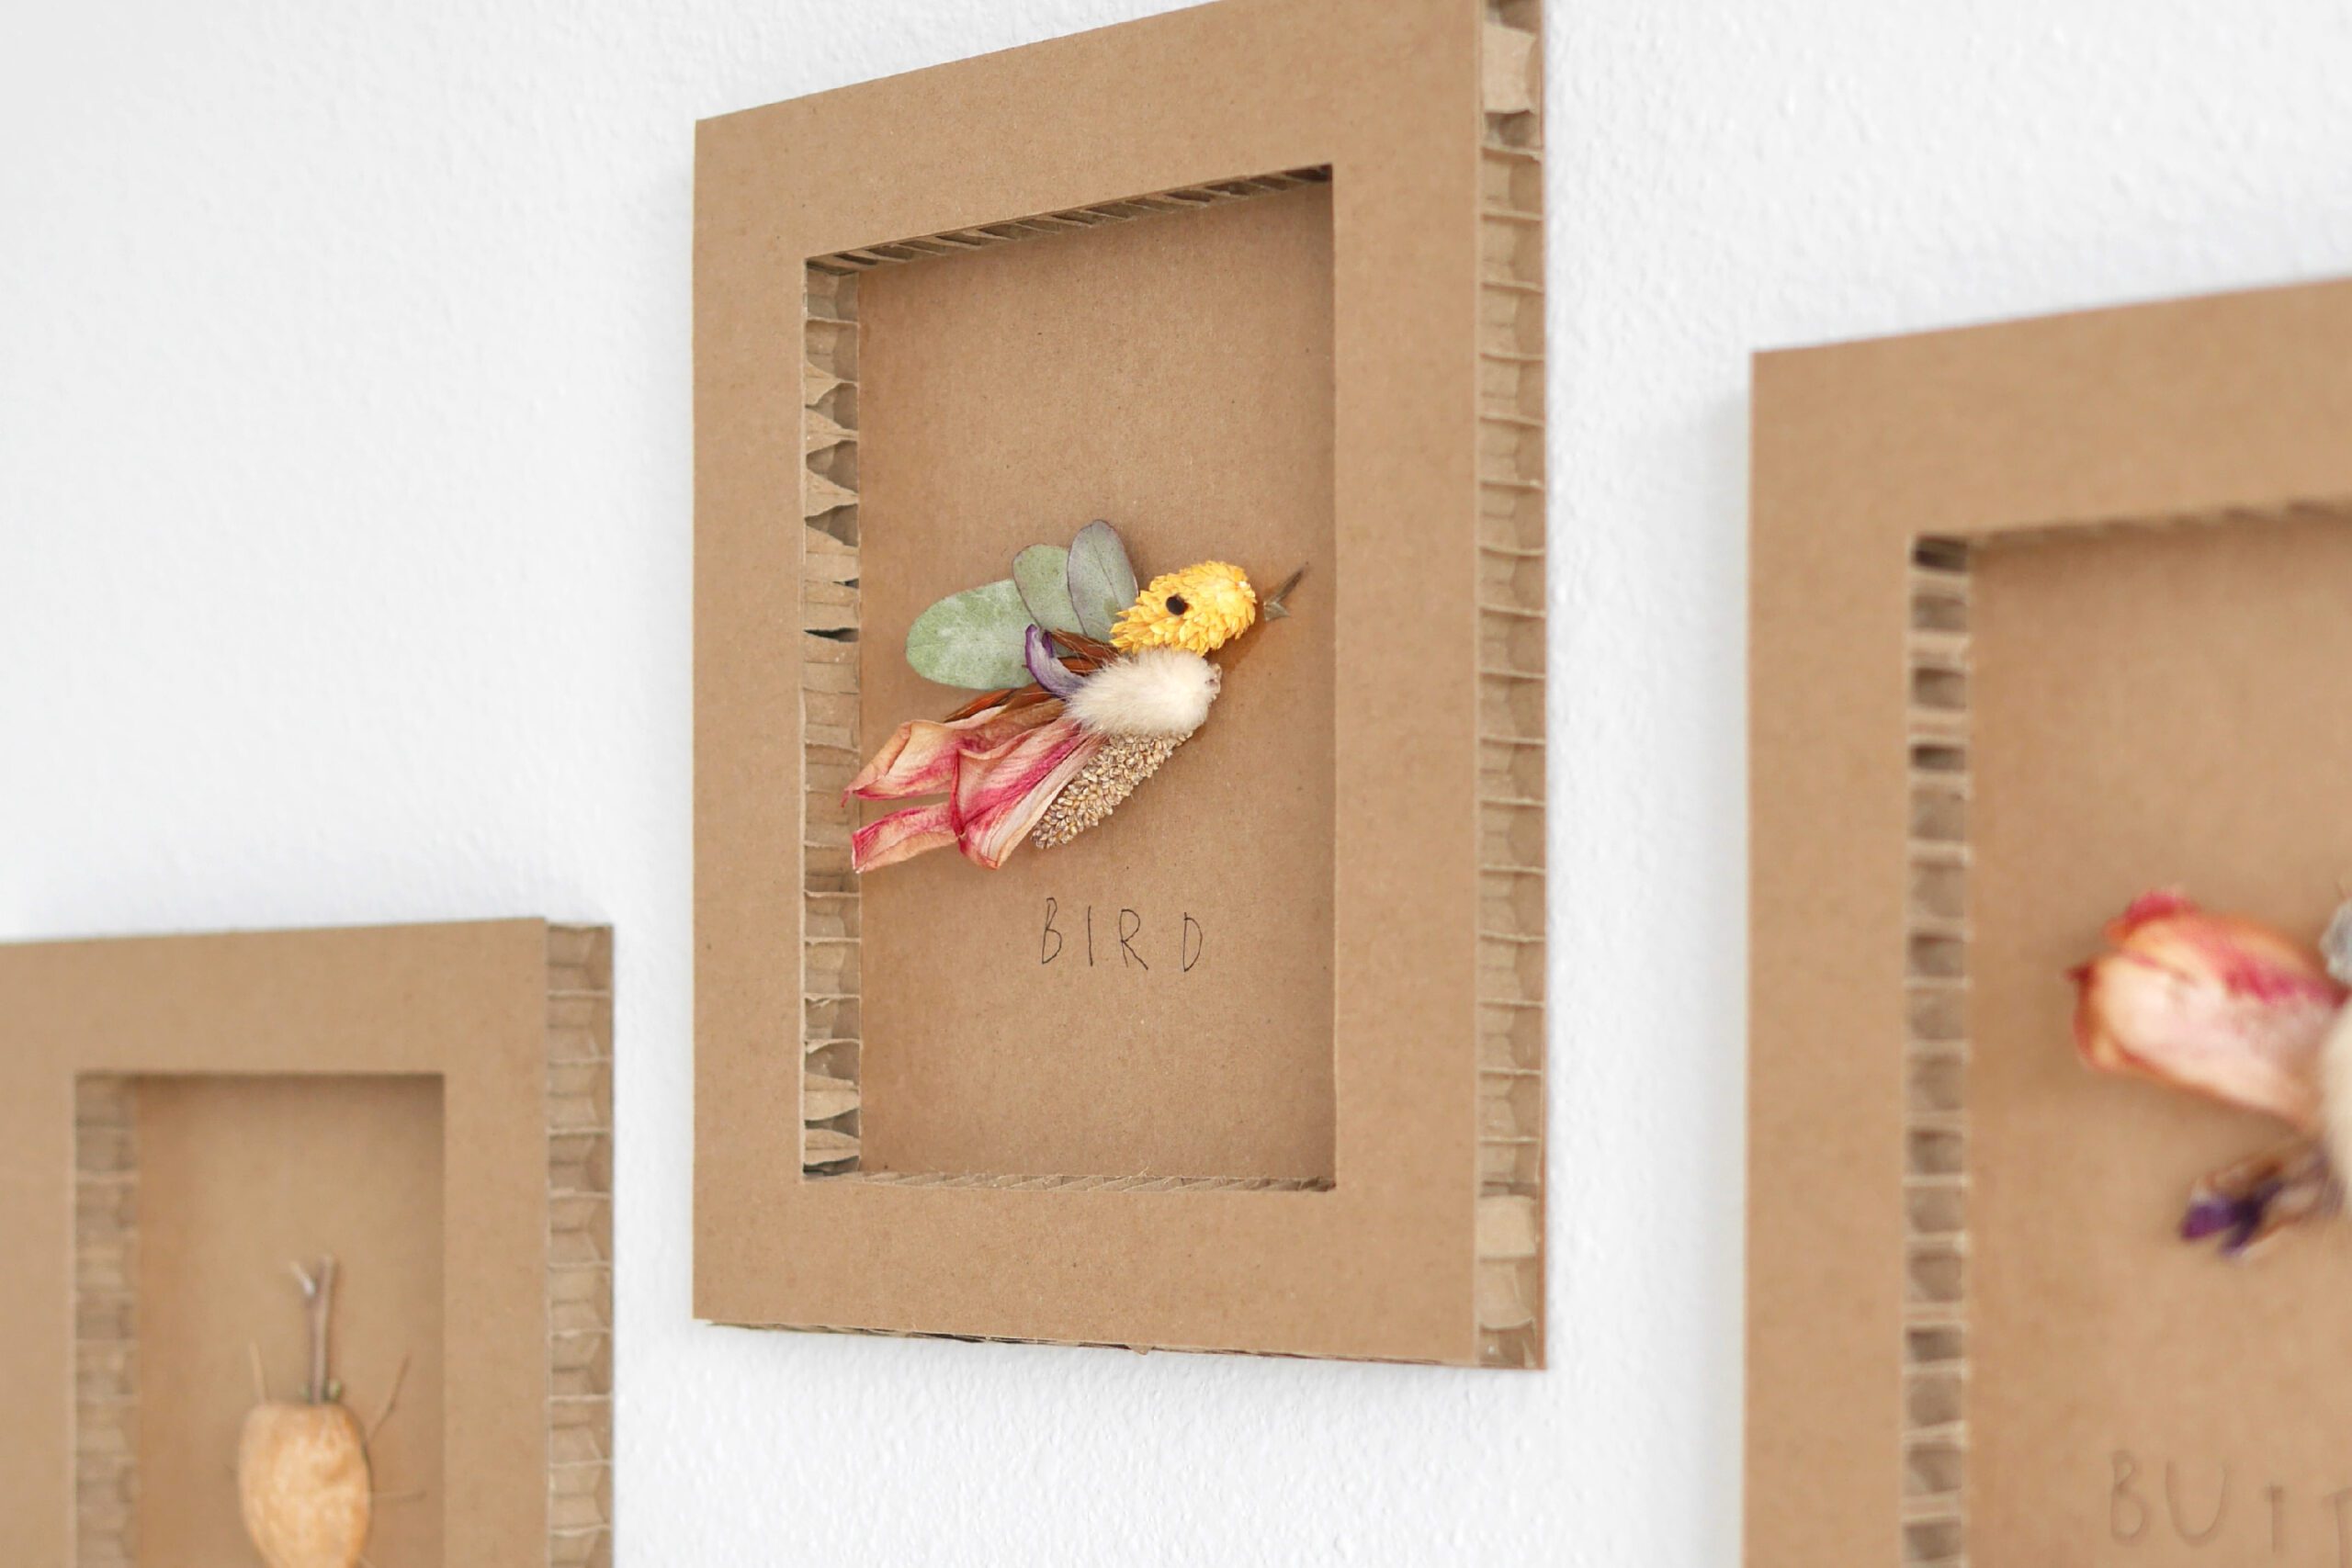
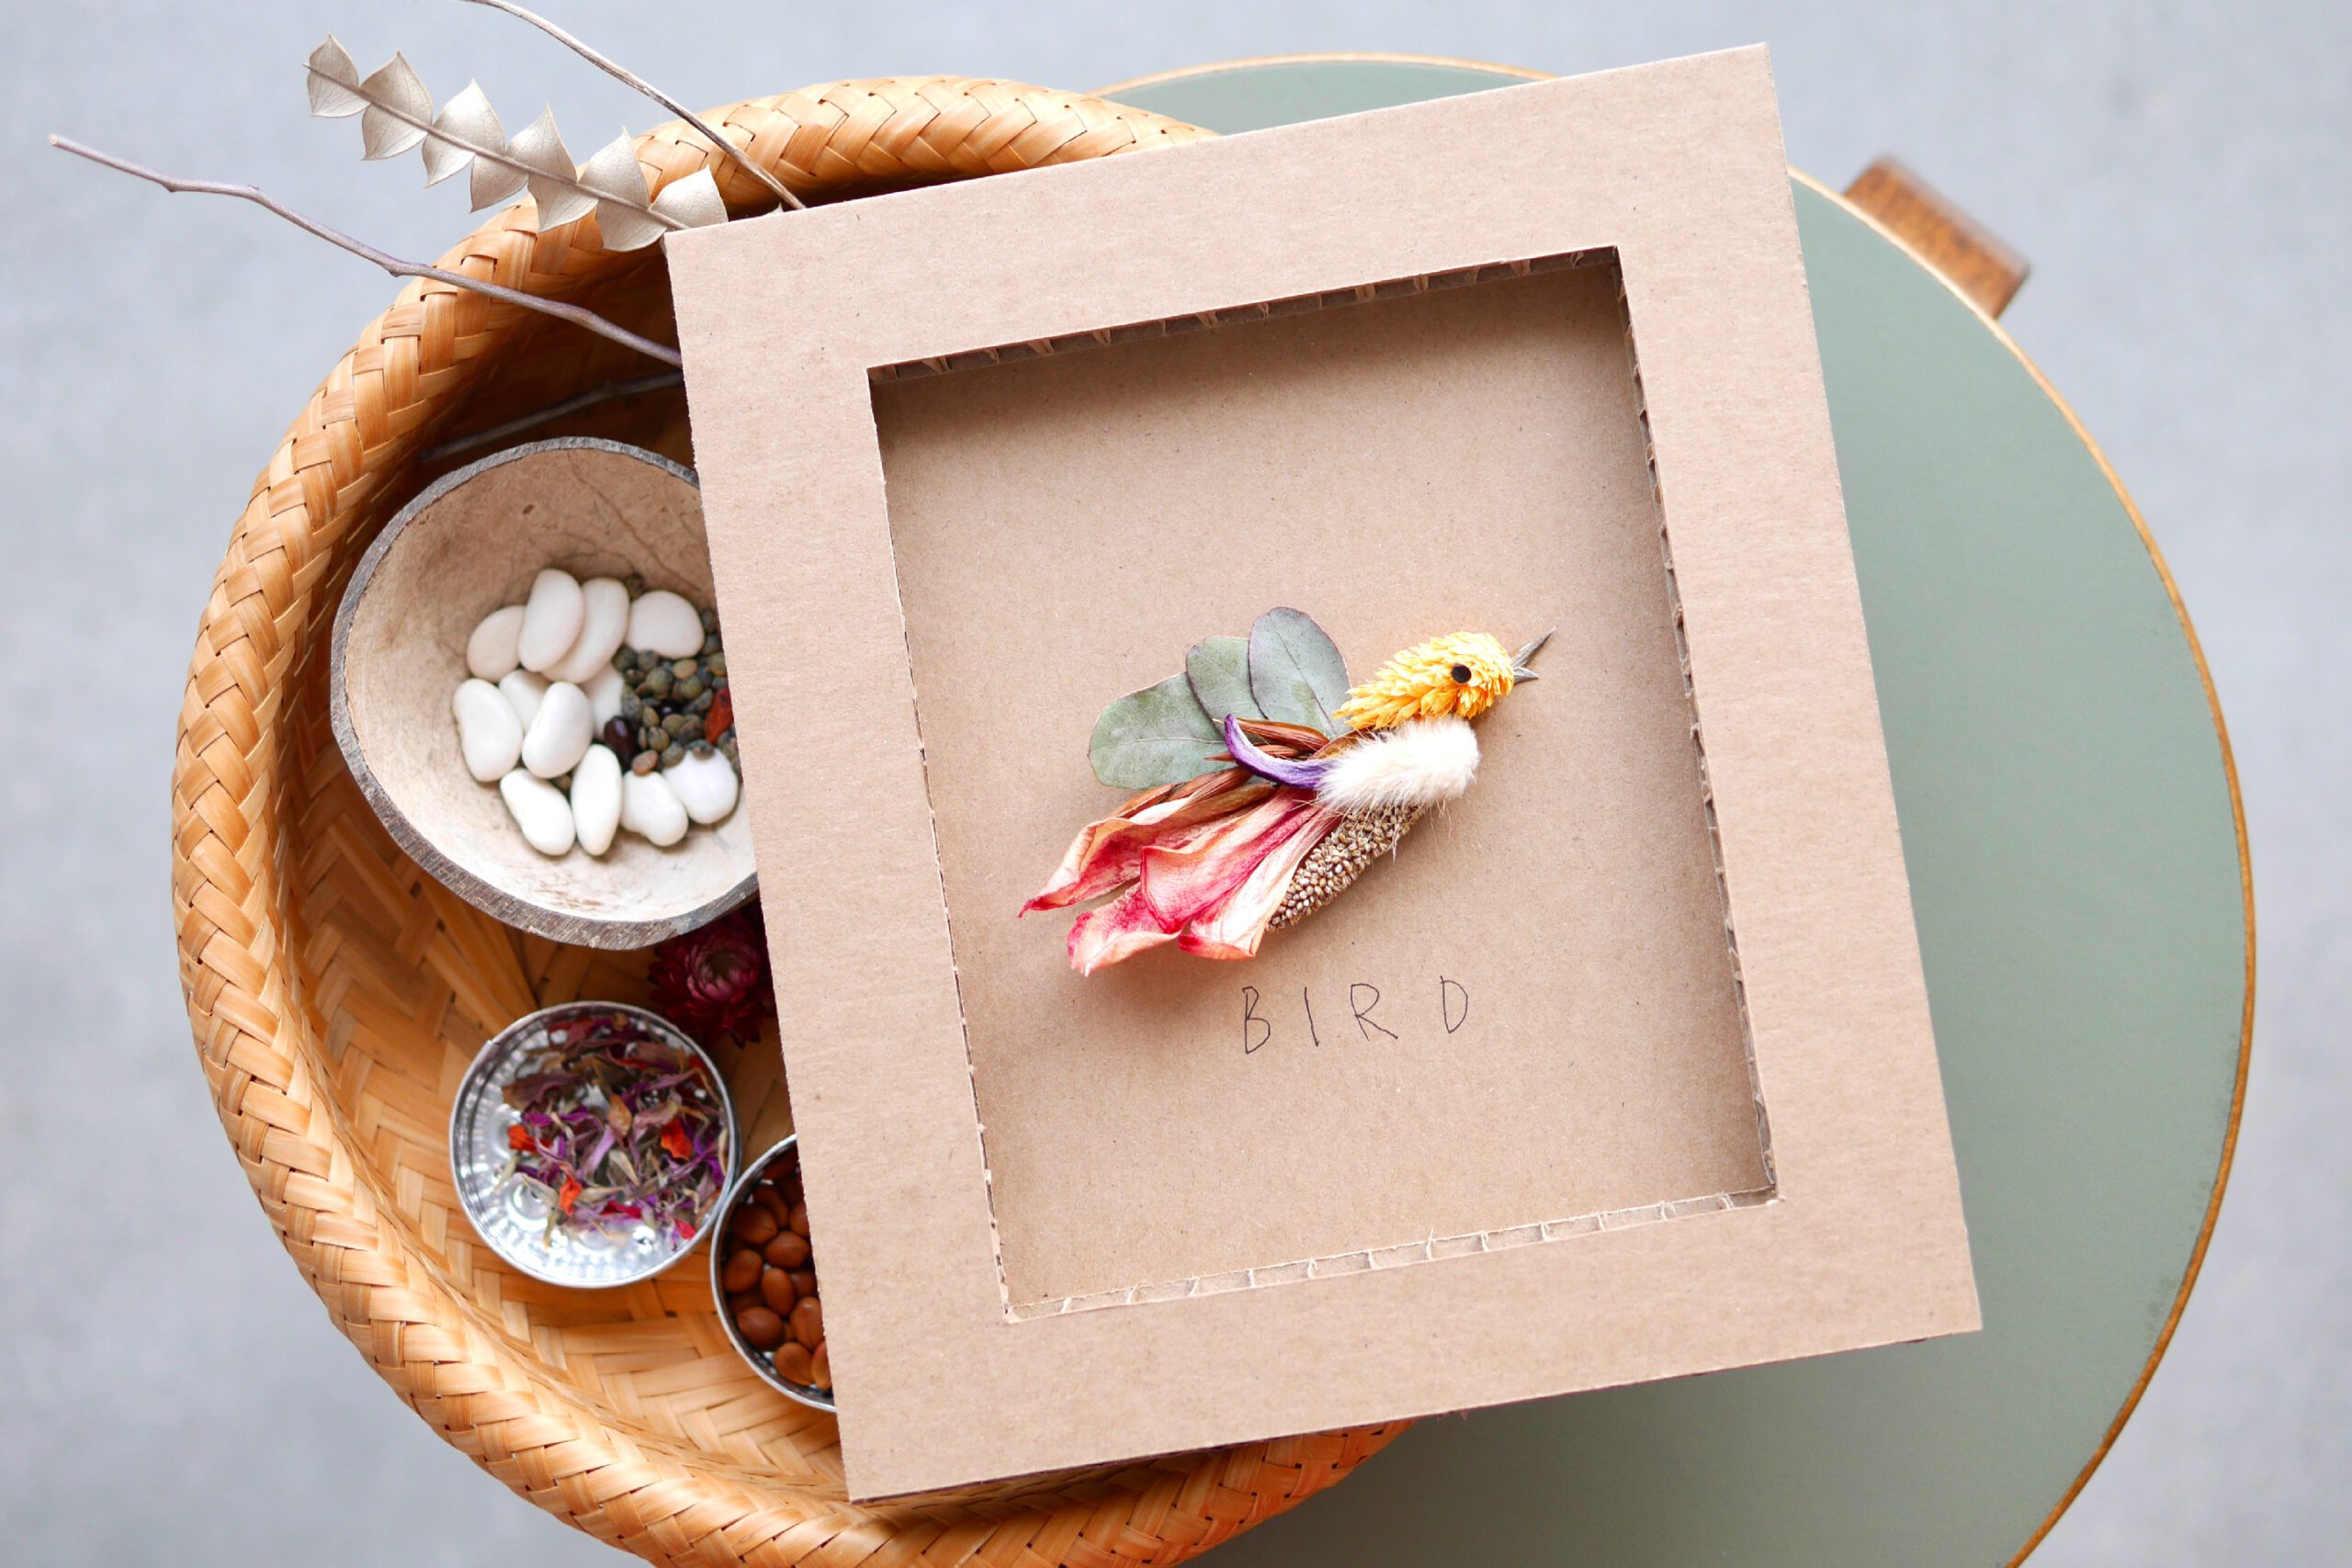
For Protection of Delicate Works
これは、私たちが過去に手がけたプロジェクト「 The Sound ‘B’ Creatures 」に使用したフレームです。段ボールのざらざらとした質感が、有機的でナチュラルな作品とよくマッチしています。厚いフレームが立体的な作品を守り、このような壊れやすい作品でも積み重ねて長期保管することができます。
Upcycle: Cardboard Frame
棚を買ったら分厚くて細長い段ボールが梱包材として使われていました。厚みは2cm、幅は6cmほど。断面は波打つ様な独特なテクスチャー。見慣れたいつもの段ボールとは違う、それだけで存在感のあるしっかりとしたつくりです。これはなにか工作に使えそうだと取っておきました。
私はこの素材をそのままを生かして、アートフレームをつくることにしました。特別なことはなく、作品の周りをこの段ボールでぐるりと囲むだけです。出来上がったのはまるで箱のようなフレーム。分厚いフレームが立体的な作品を保護するのにも最適でした。それだけでなく、積み重ねての長期保管にも適しています。こうして捨てられてしまうはずの素材に新たな役割を見出せることは、私にとってとても嬉しいことで、アイデアも仕上がりもとても気に入りました。ここに手順をご紹介します。
用意するもの
– 額装したいアート作品、写真など
– 梱包材としてれていた厚手のボード
– チップボード *1mmほどの厚さ
– 定規
– カッター
– ペースト、白グルー
– 梱包用の紙テープ *オプション
つくりかた
Step 1. チップボードを切る
額装したいアート作品をチップボードに配置します。チップボードの周囲を段ボールで囲む余白を残して好きな大きさに切ります。 今回は私は、娘と一緒に作った紙の上の木製人形を額装すること作品自体は13×10インチほどです。チップボードを4枚繋ぎ合わせて21×16インチのベースにしました。
Step 2. 枠をつくる
チップボードの四方にフレーム用のボードを配置します。 かなり長いさはカッターで切り落とします。 厚いので一気に切らずに、何度もか刃を当てて意識して切りました。を切り終えたら、チップボードにホワイトグルーでしっかりと続きます。ペーストが浮いて来ない様に、フレームの上に重しをしばらく置きました。
Step 3. 紙テープを貼る
こちらはオプションです。 私は、フレームの表面をよりフラットにするために、梱包用の紙テープを上から貼ることにしました。
Step 3. 完成です
フラットな表面と、断面の波打つような紙のテクスチャーが美しいアートフレームが完成しました。
立体作品の保護に
こちらは私たちの過去のプロジェクト、The Sound ‘B’ Creaturesに実施したフレームです。 段ボールのラフな素材感がオーガニックで自然な作品に違和感なく馴染んでいます。してくれるので、このような使いやすいアート作品でも積み重ねての長期保管ができます。