Waldorf String Art
At my daughter’s school, instead of memorizing multiplication tables as they are, students learn the mathematical order by using a multiplication circle. Place the numbers 0 to 9 evenly around the circumference of the circle, and when they are connected by lines according to the rules of multiplication, a beautiful shape appears. Children understand the order of numbers both physically and visually through the beautiful geometric forms created by the regularity of the numbers. I was impressed by the children learning multiplication from this visualization of the beauty of numbers.
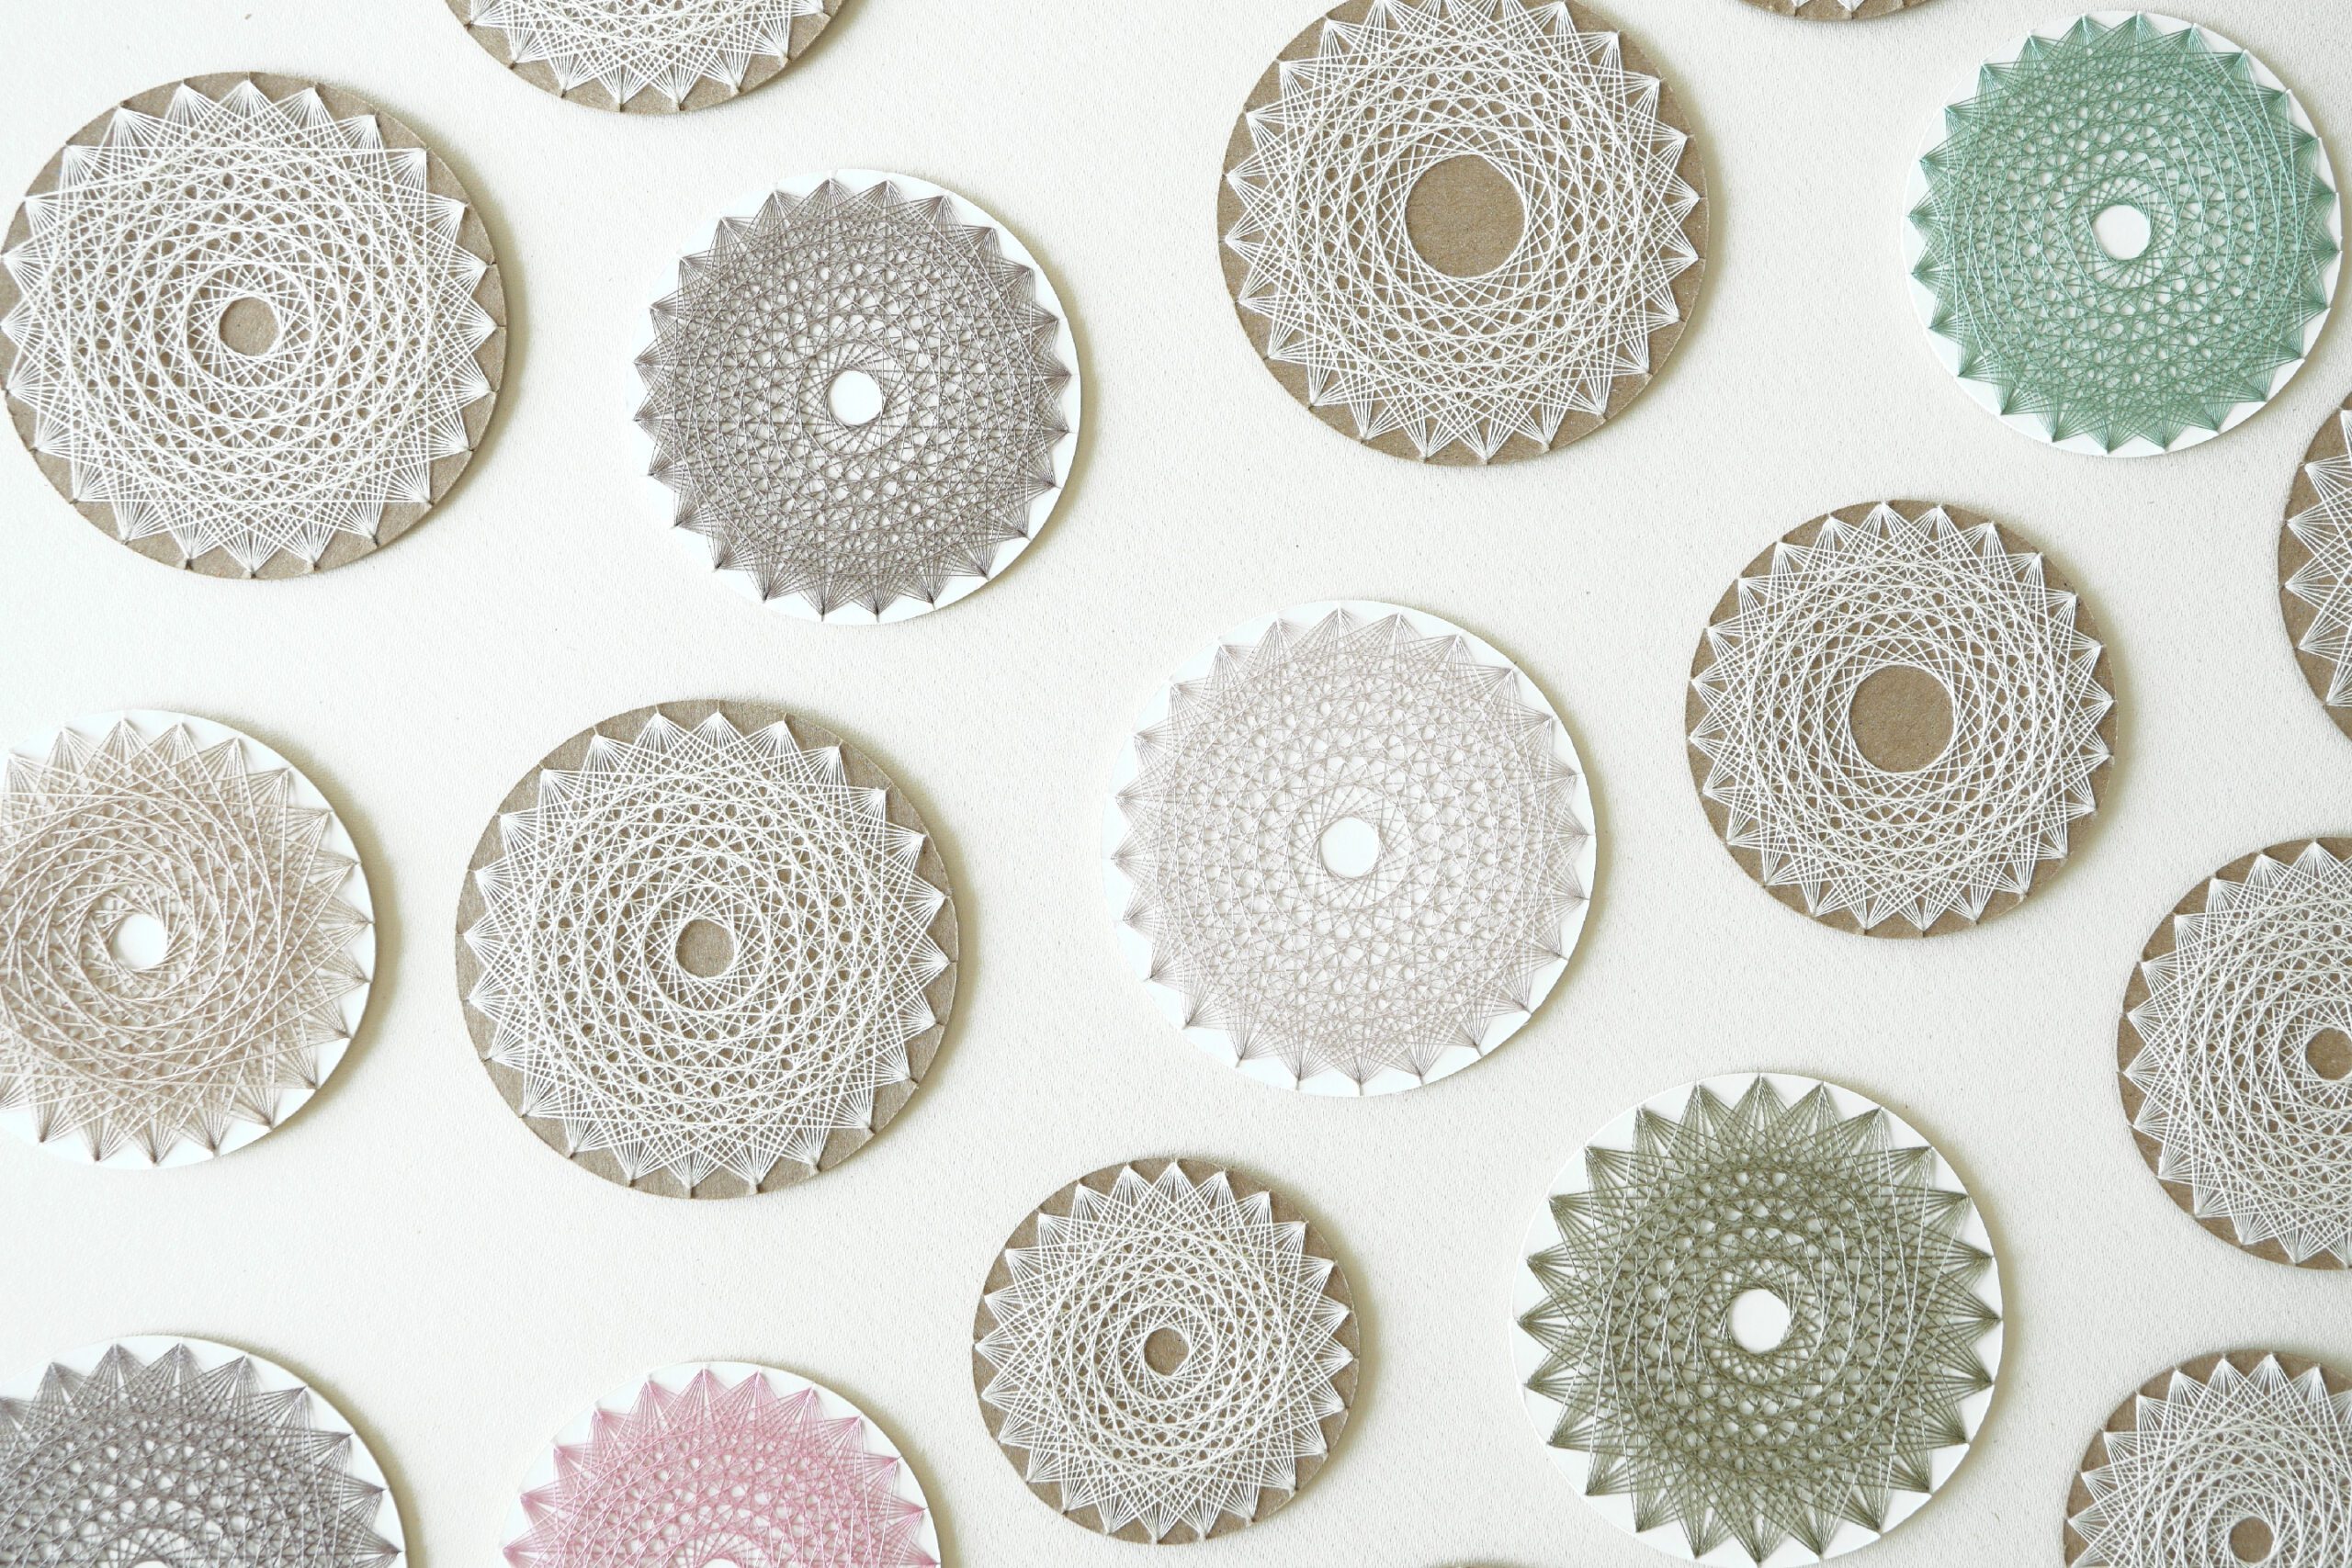
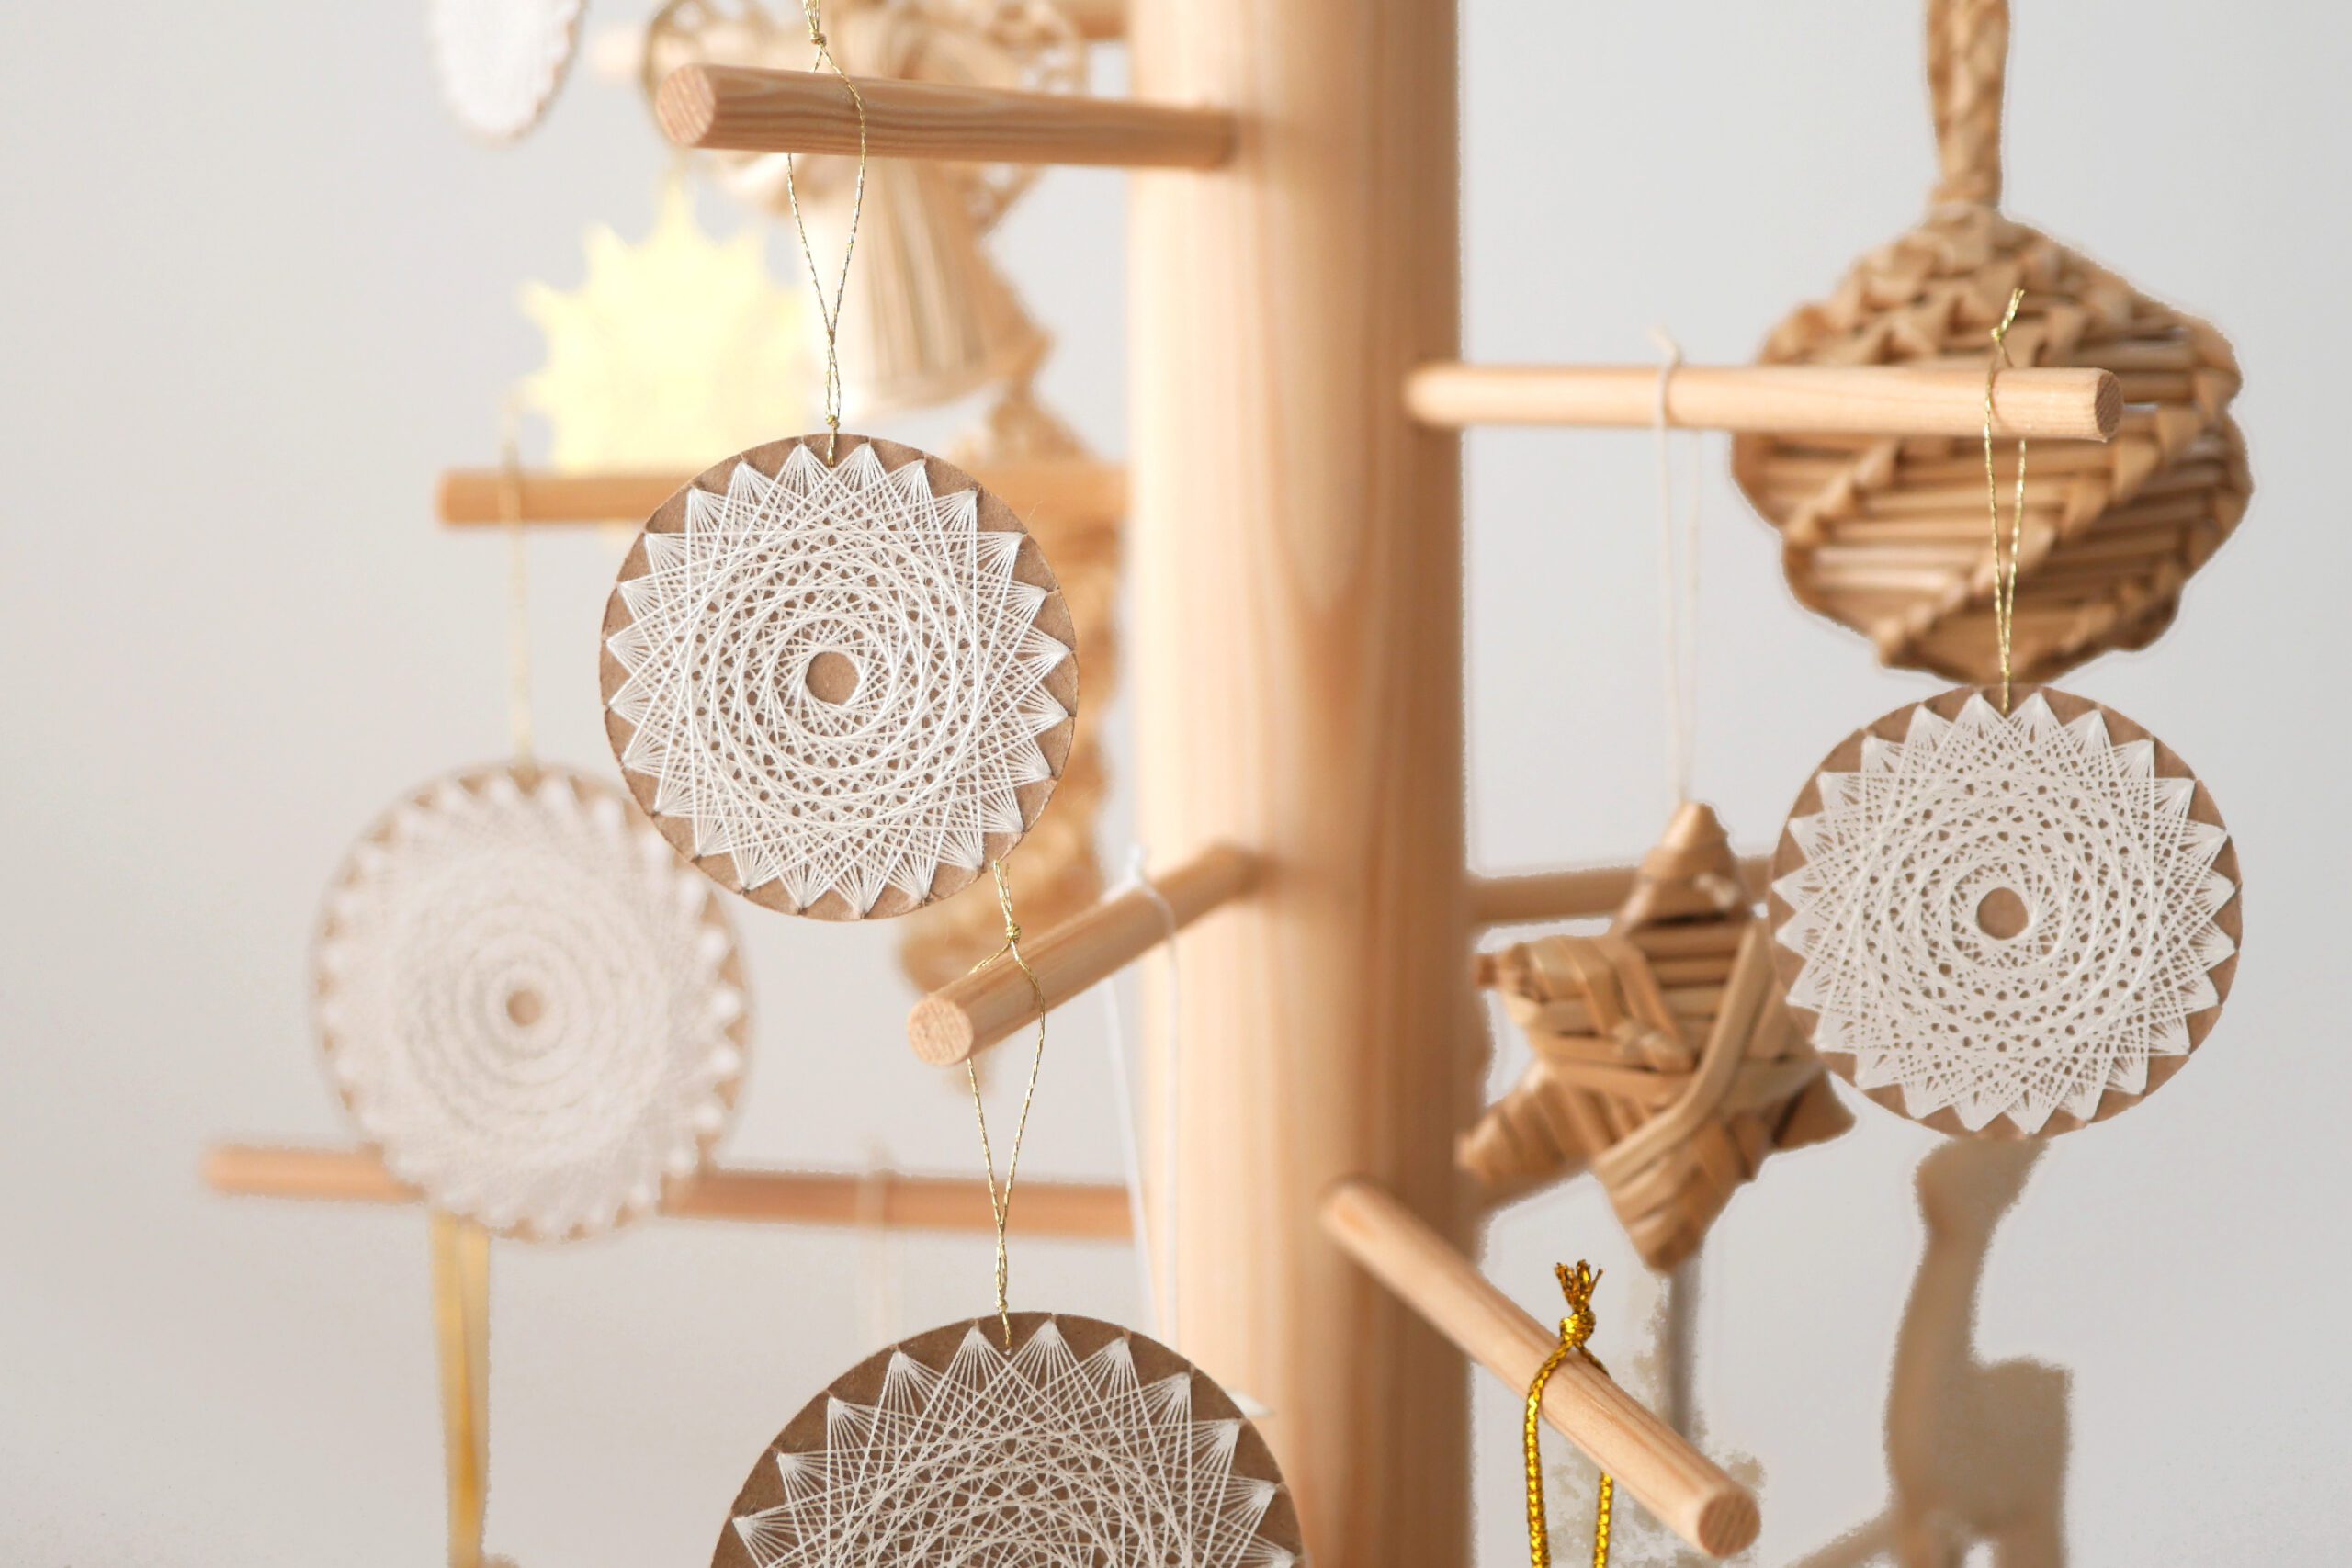
The idea of the circle of multiplication is incorporated into handwork in the string art.
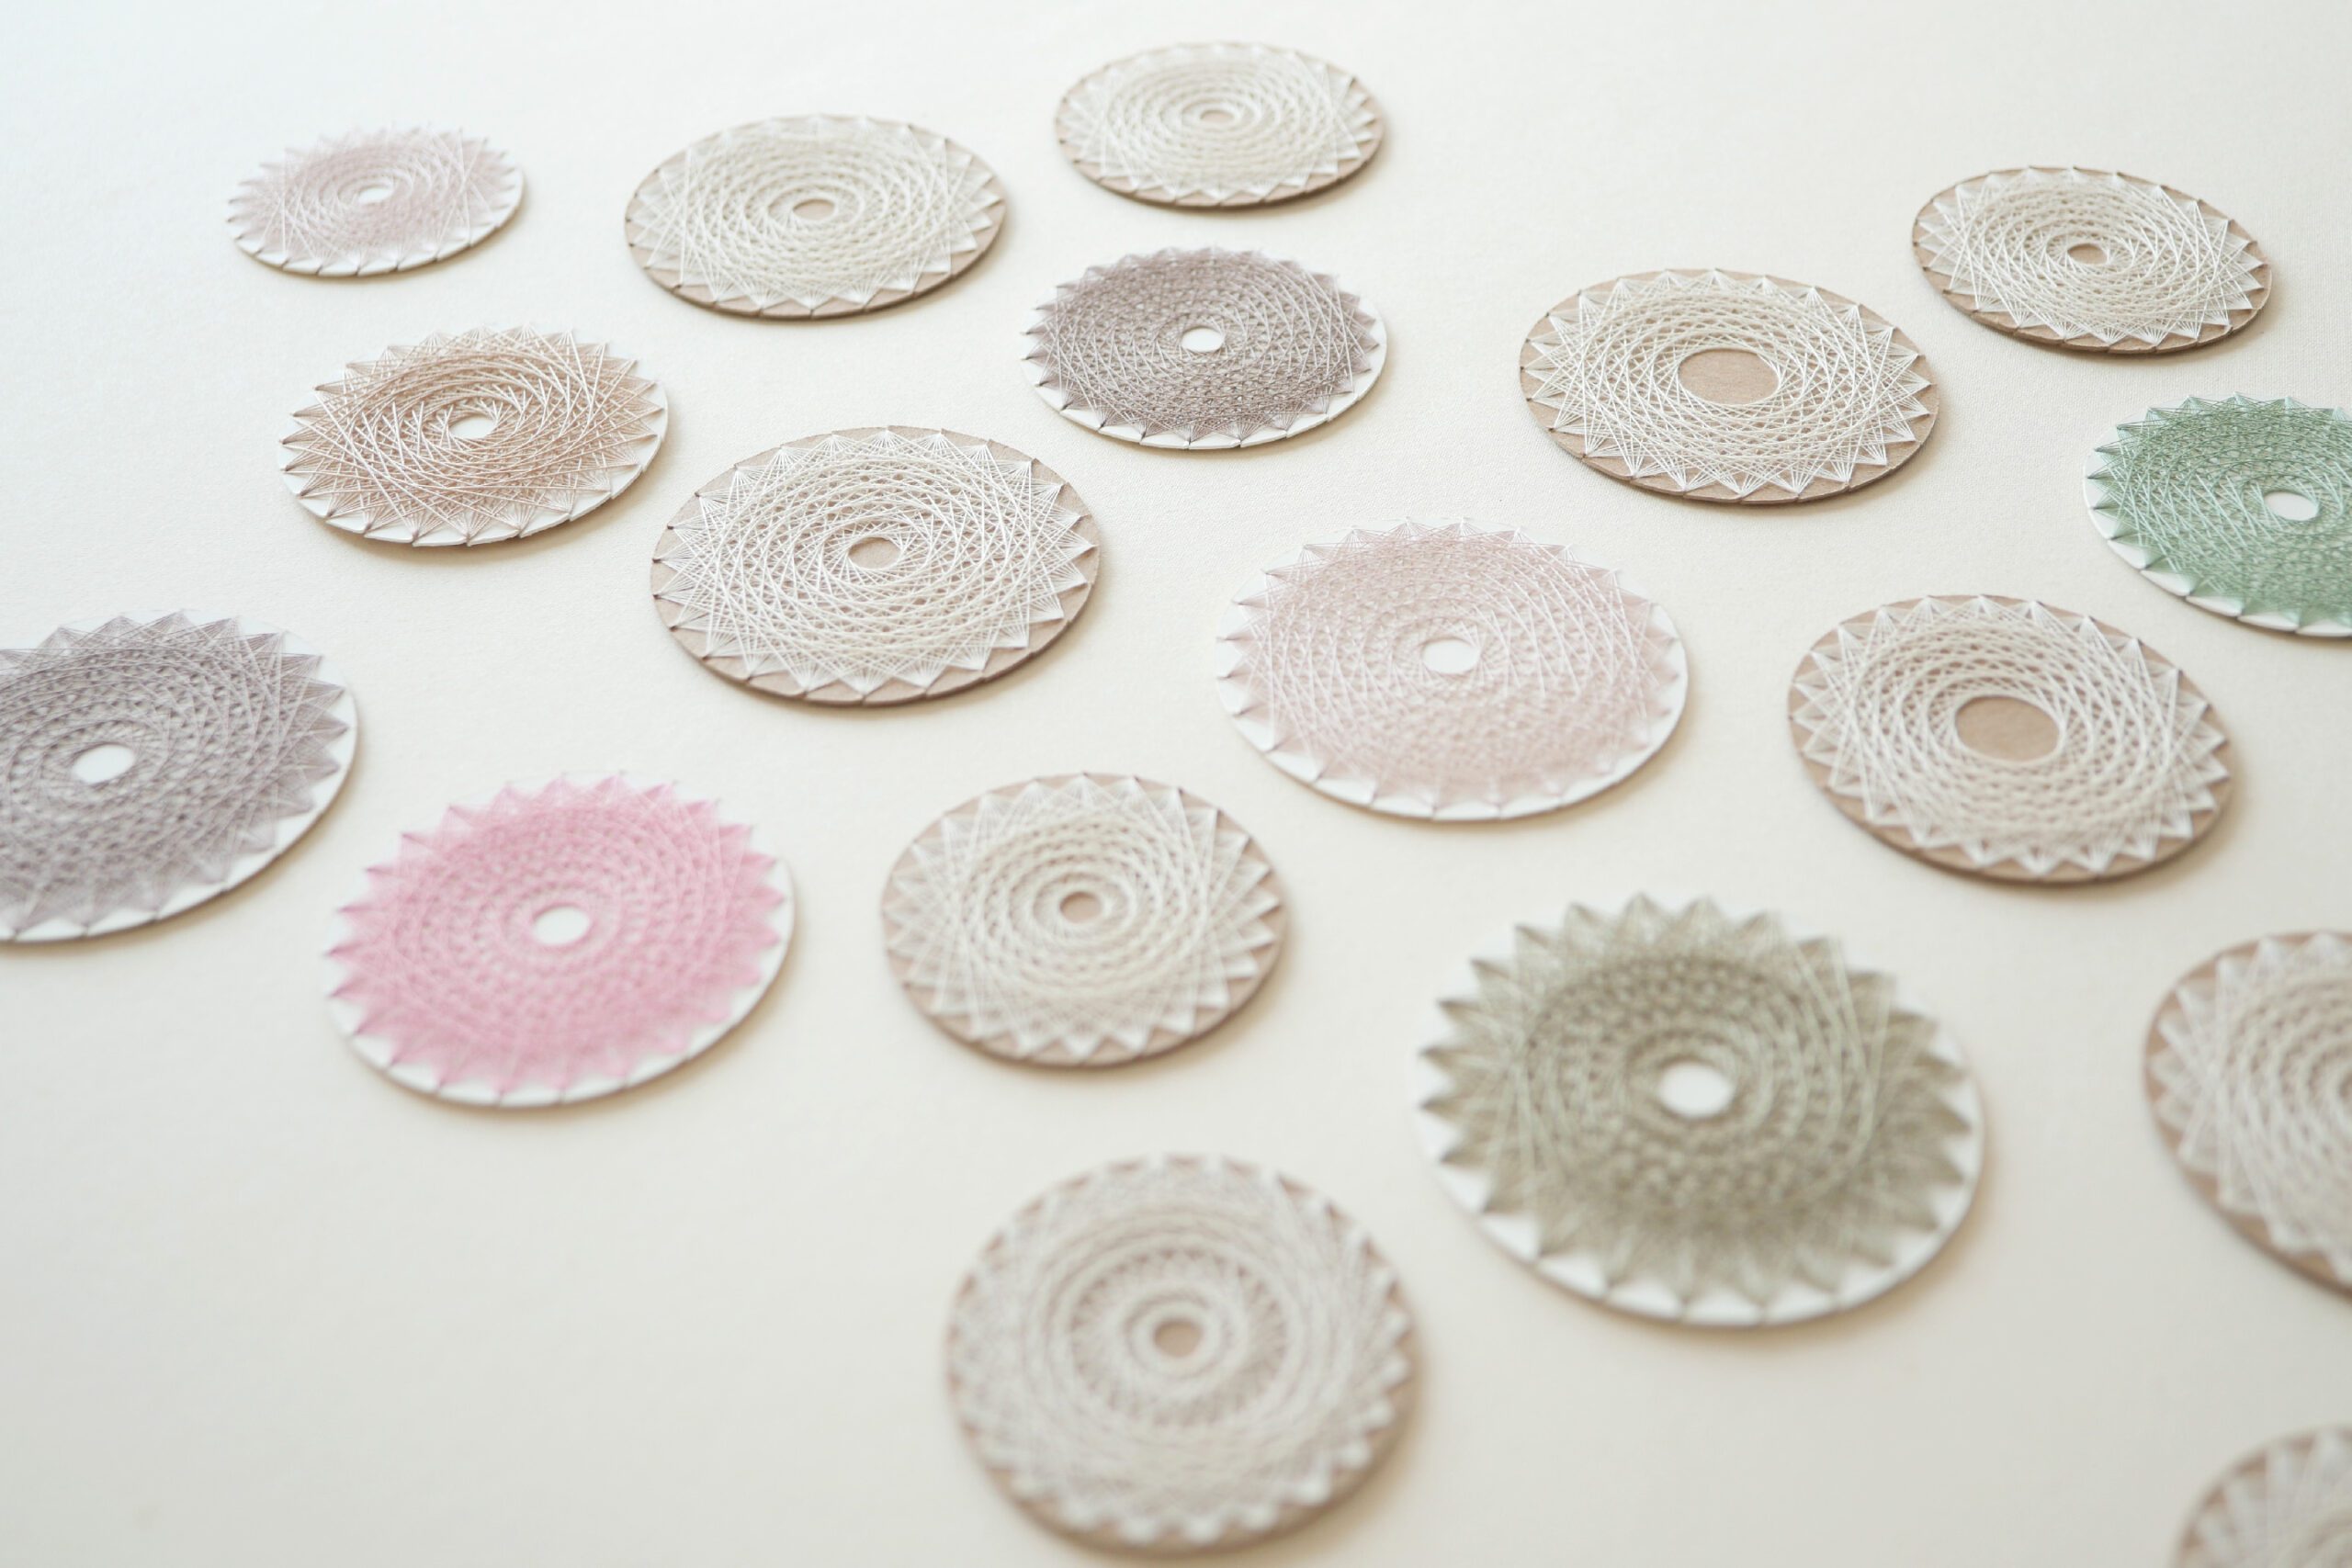
Make even cuts in the circular paper and then thread it over there with a certain regularity, a beautiful pattern will appear. Various patterns can be created by changing the position and order of thread application.
Layers of threads are piled up, and the pattern looks like a mandala. The process of making is like meditation.
Now, our challenge is what to use these for. For the coming season, how about a Christmas ornament? Other than that, they could be made into cards or hung in mobiles. I’m trying to think of other good ideas.
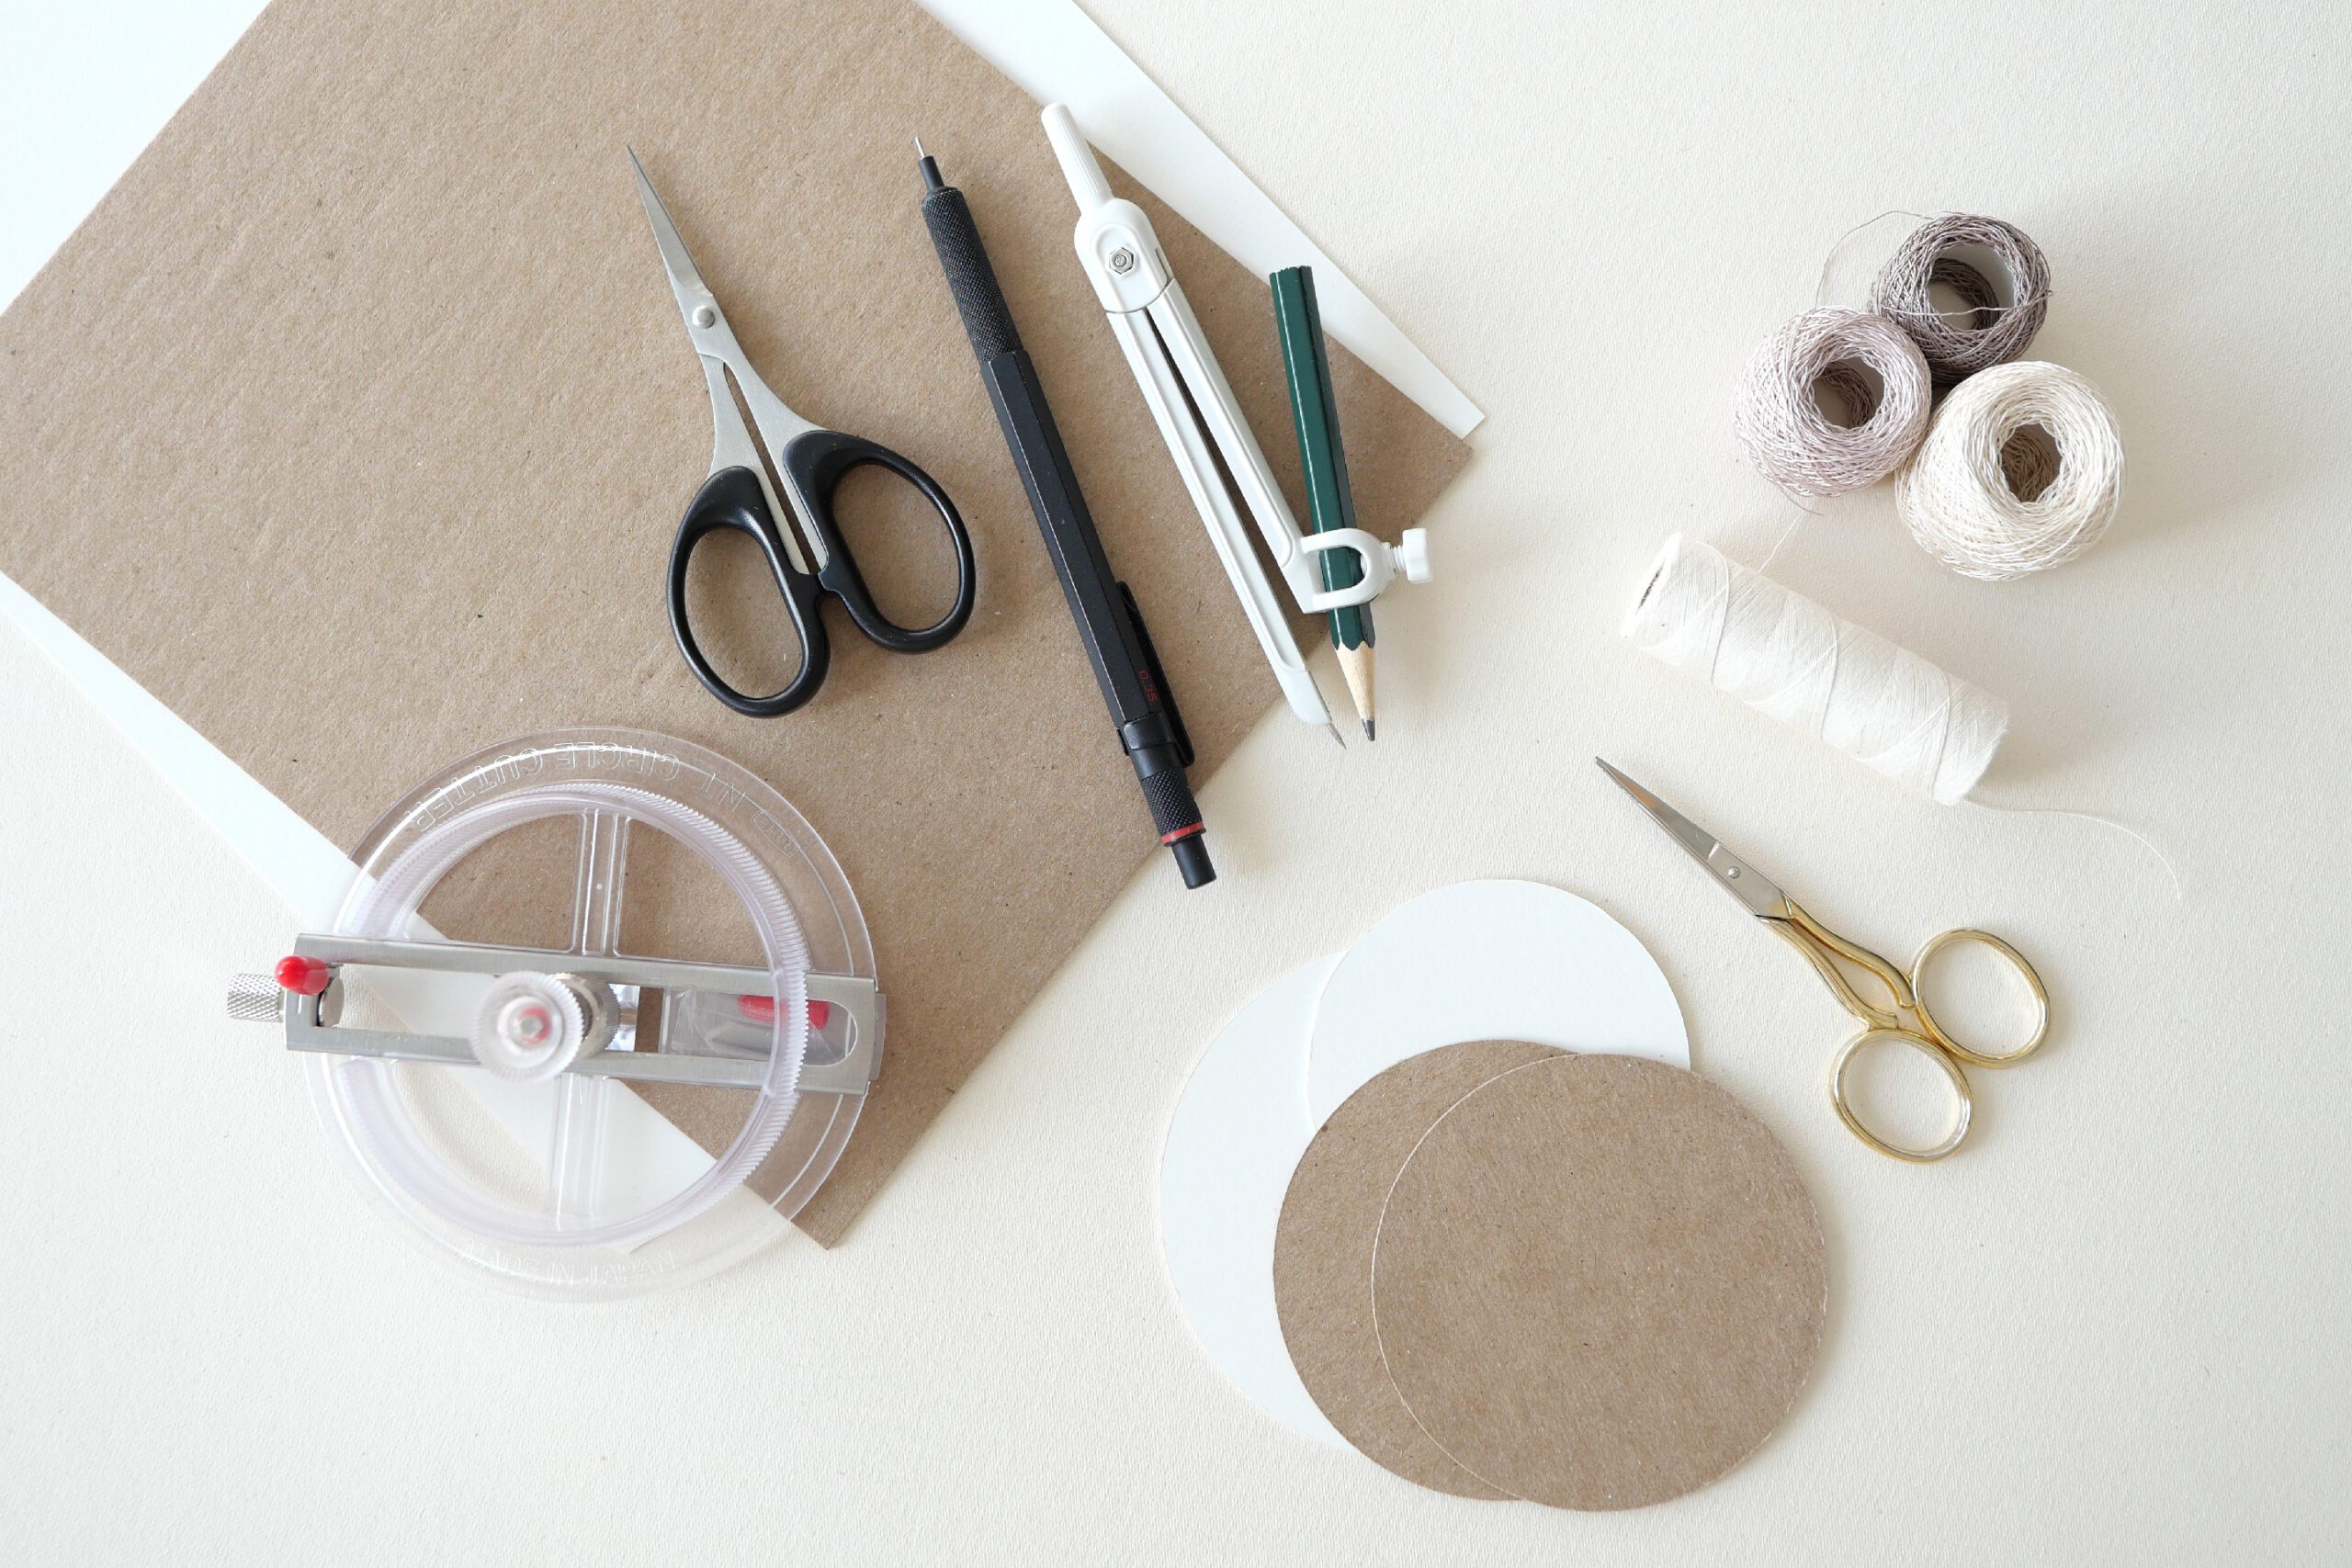
Materials
– Thick card board to serve as mount paper
– Thread
– Circle cutter or compass
– Scissors
– Pencil
– Cutting template for mount paper*
Here is the cutting template. Please feel free to download and use it.
download the cutting template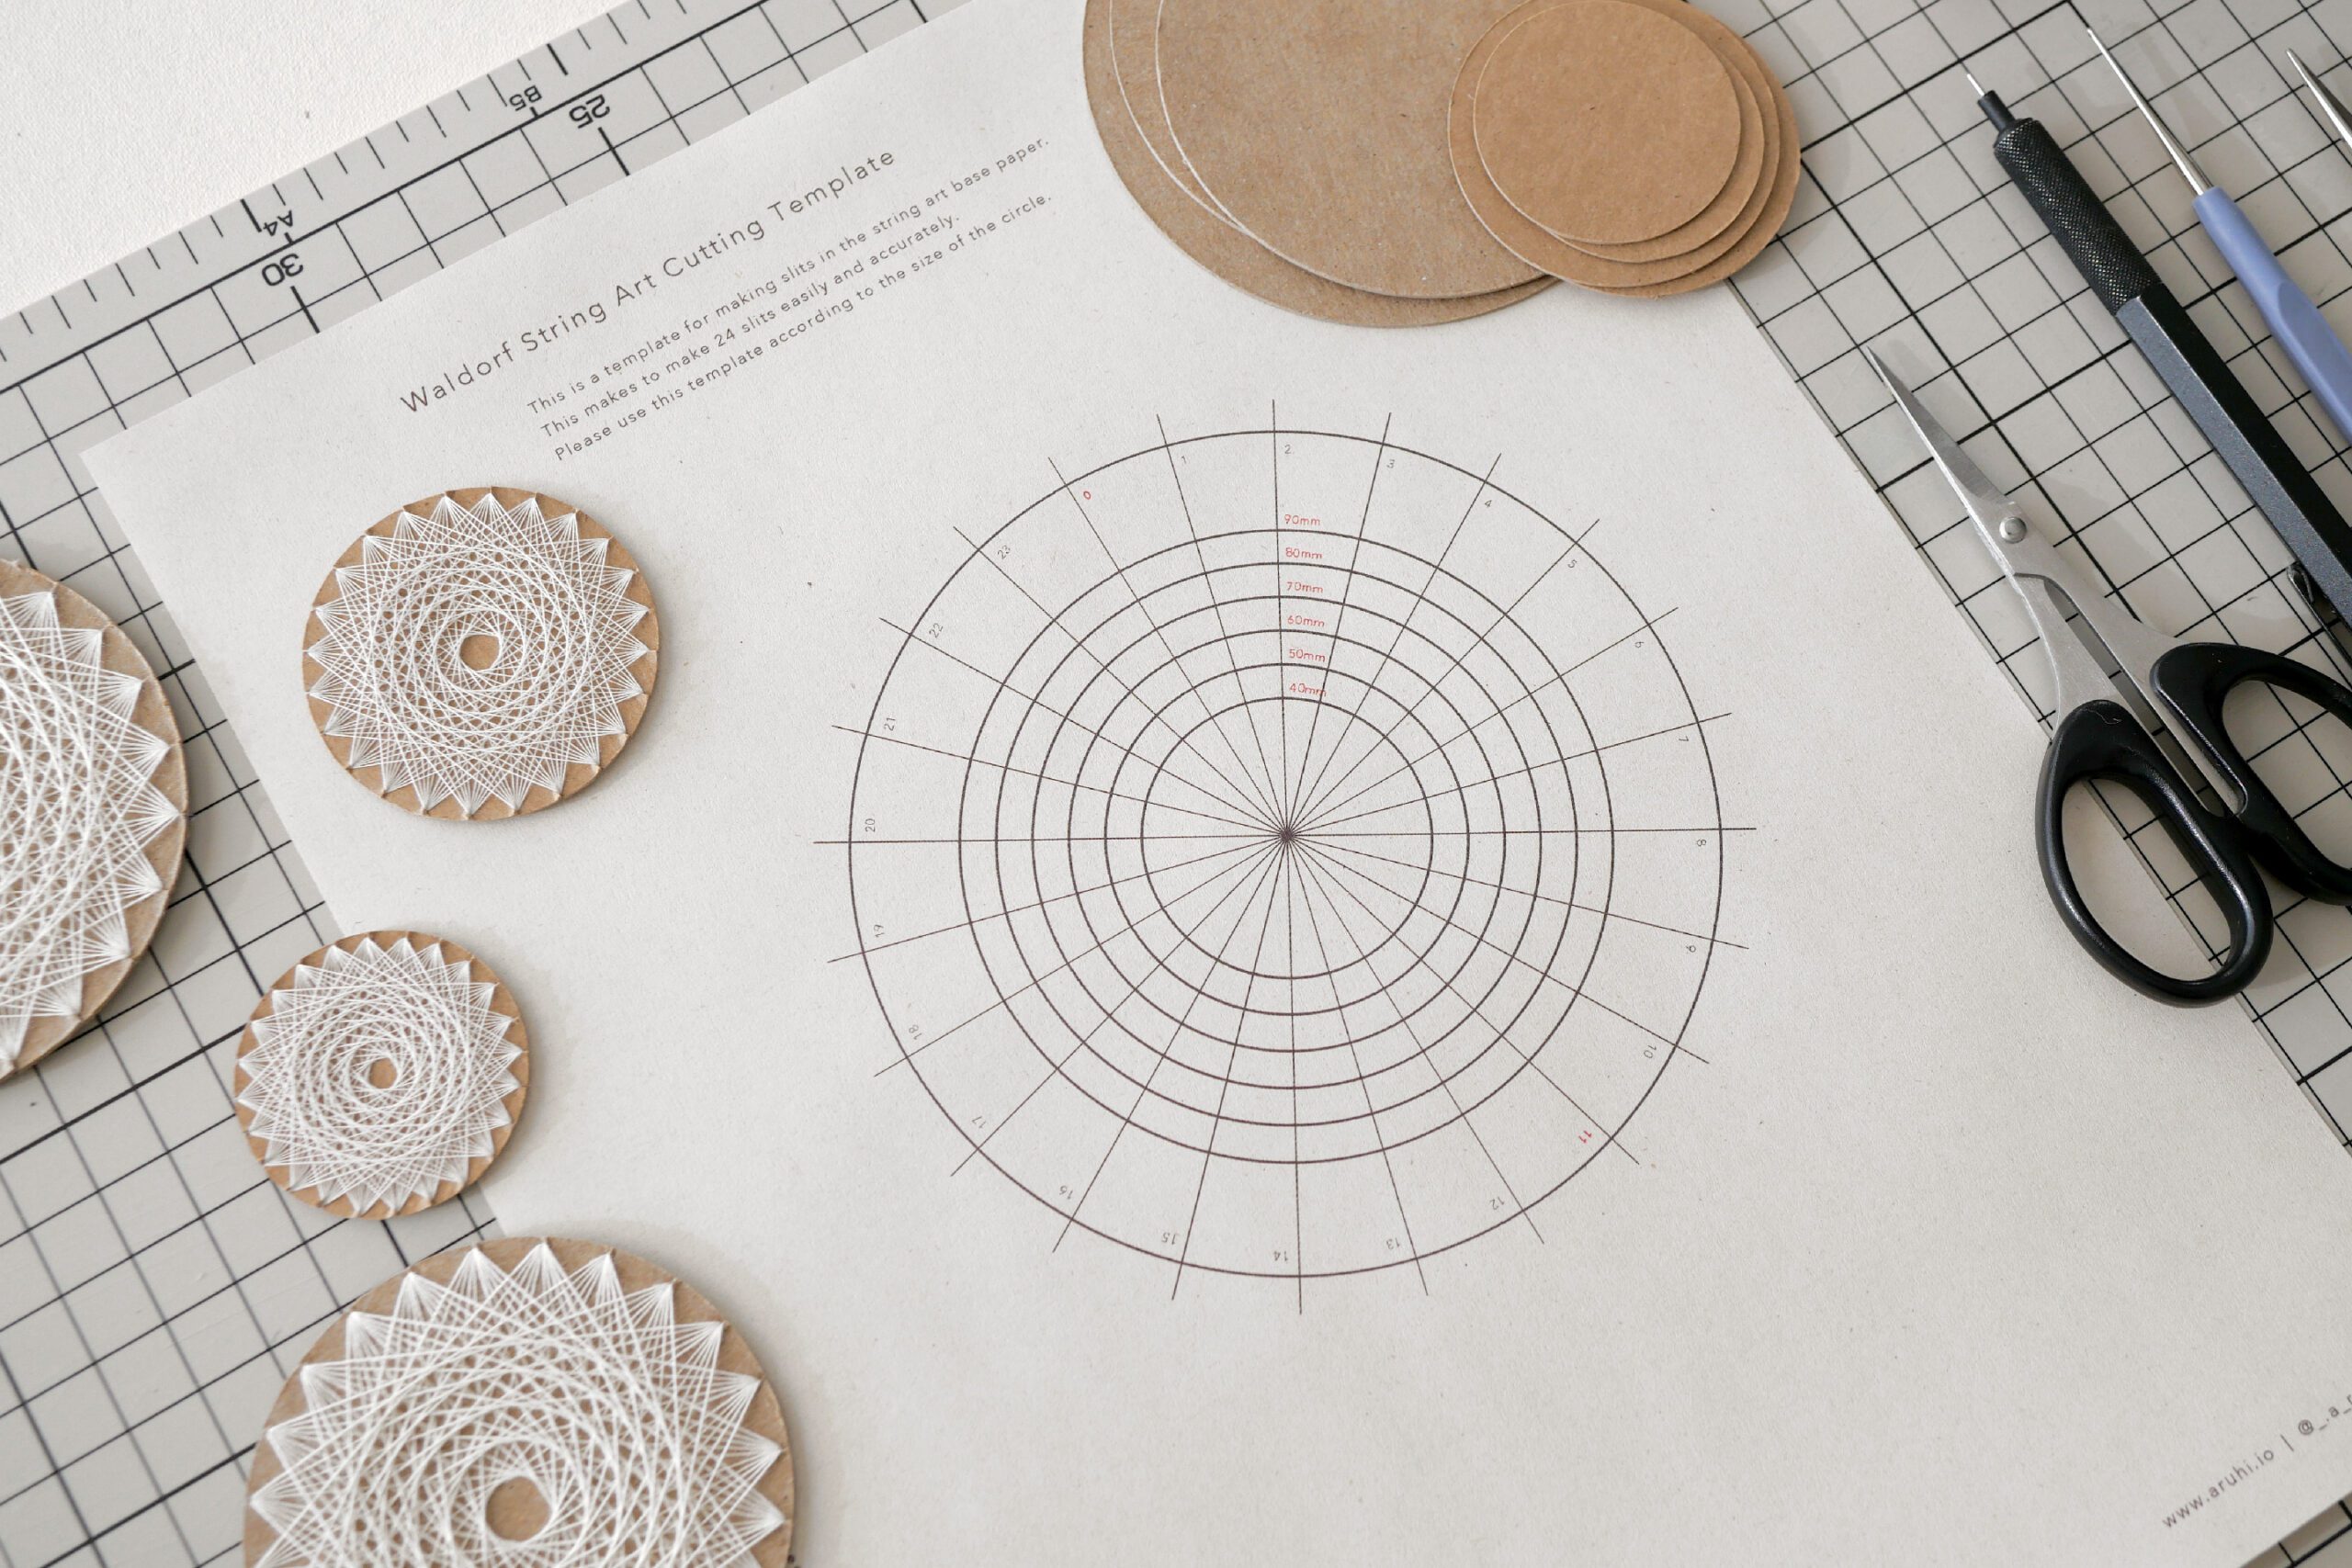
What is Multiplication Circle?
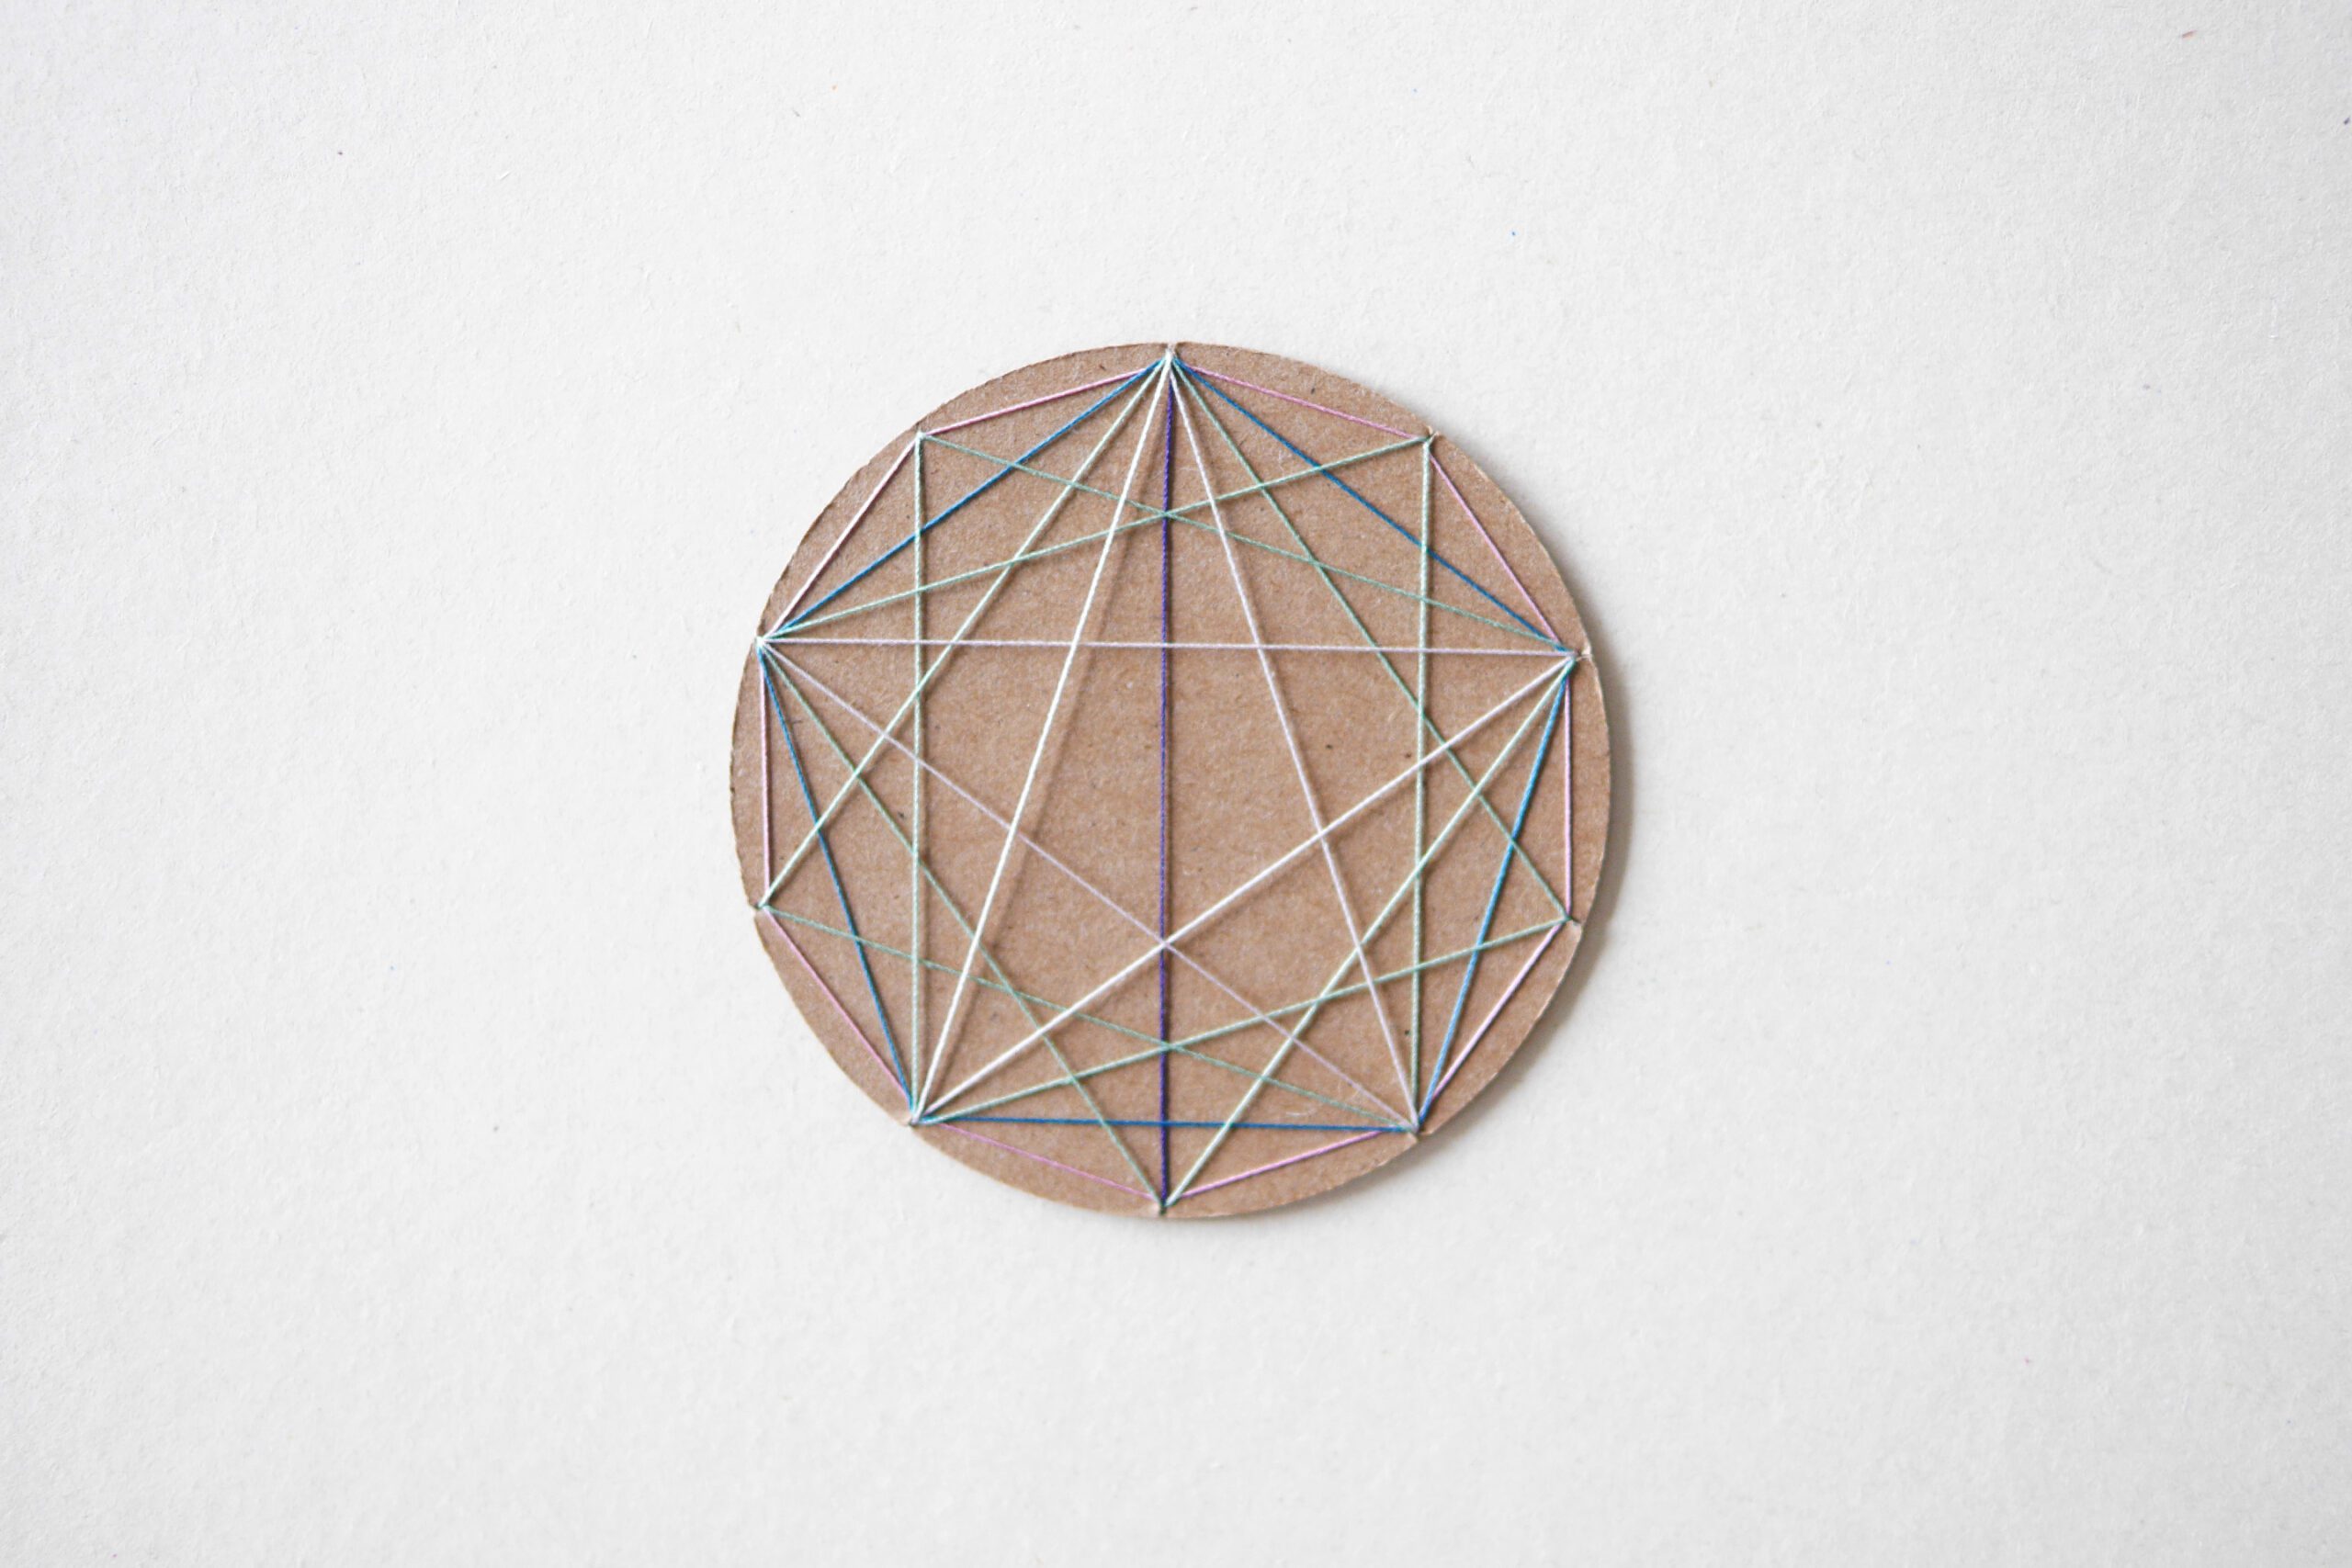
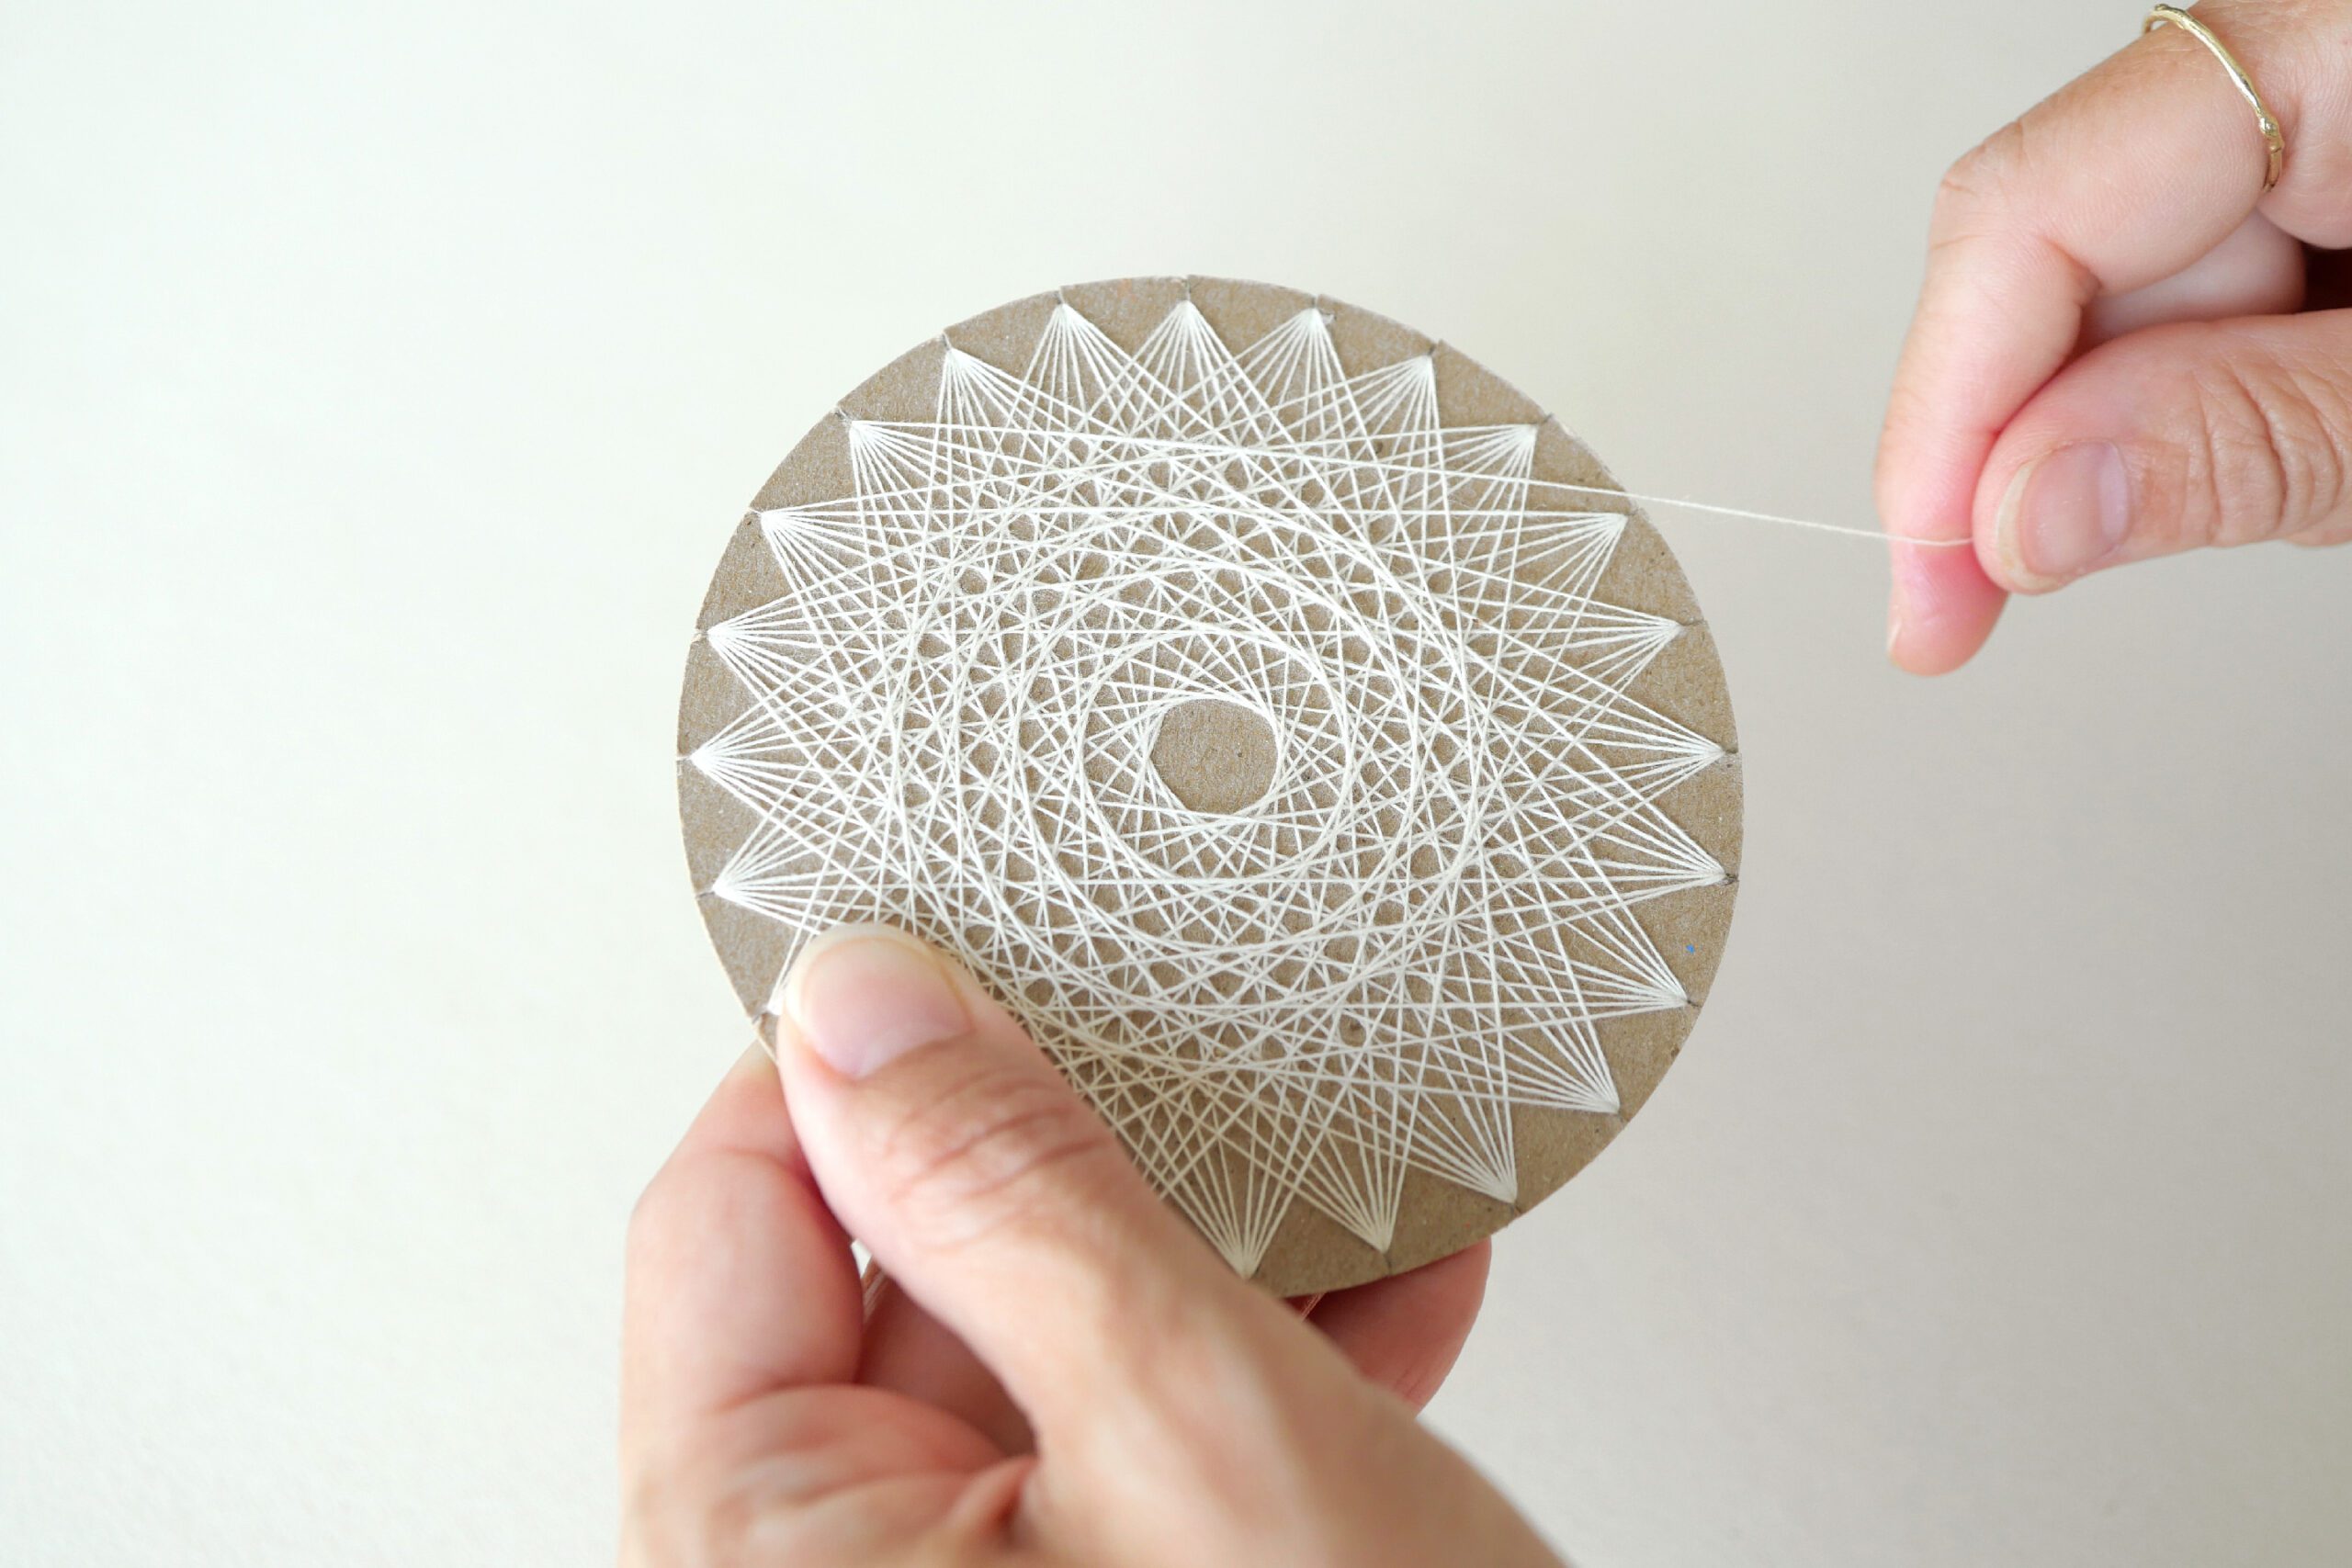
Here is the multiplication circle that my daughter learned at school. This picture shows it in the form of thread art. The 1 time table is threaded one by one, and the 2 times table is threaded by skipping one space. In this way, the threads are hung along each tier to create these beautiful shapes.
You can also see that 1 and 9, 2 and 8, 3 and 7, and 4 and 6 are symmetrical. Not only each table, but also the whole multiplication are symmetrical and have one big order centered on the 5 times table.
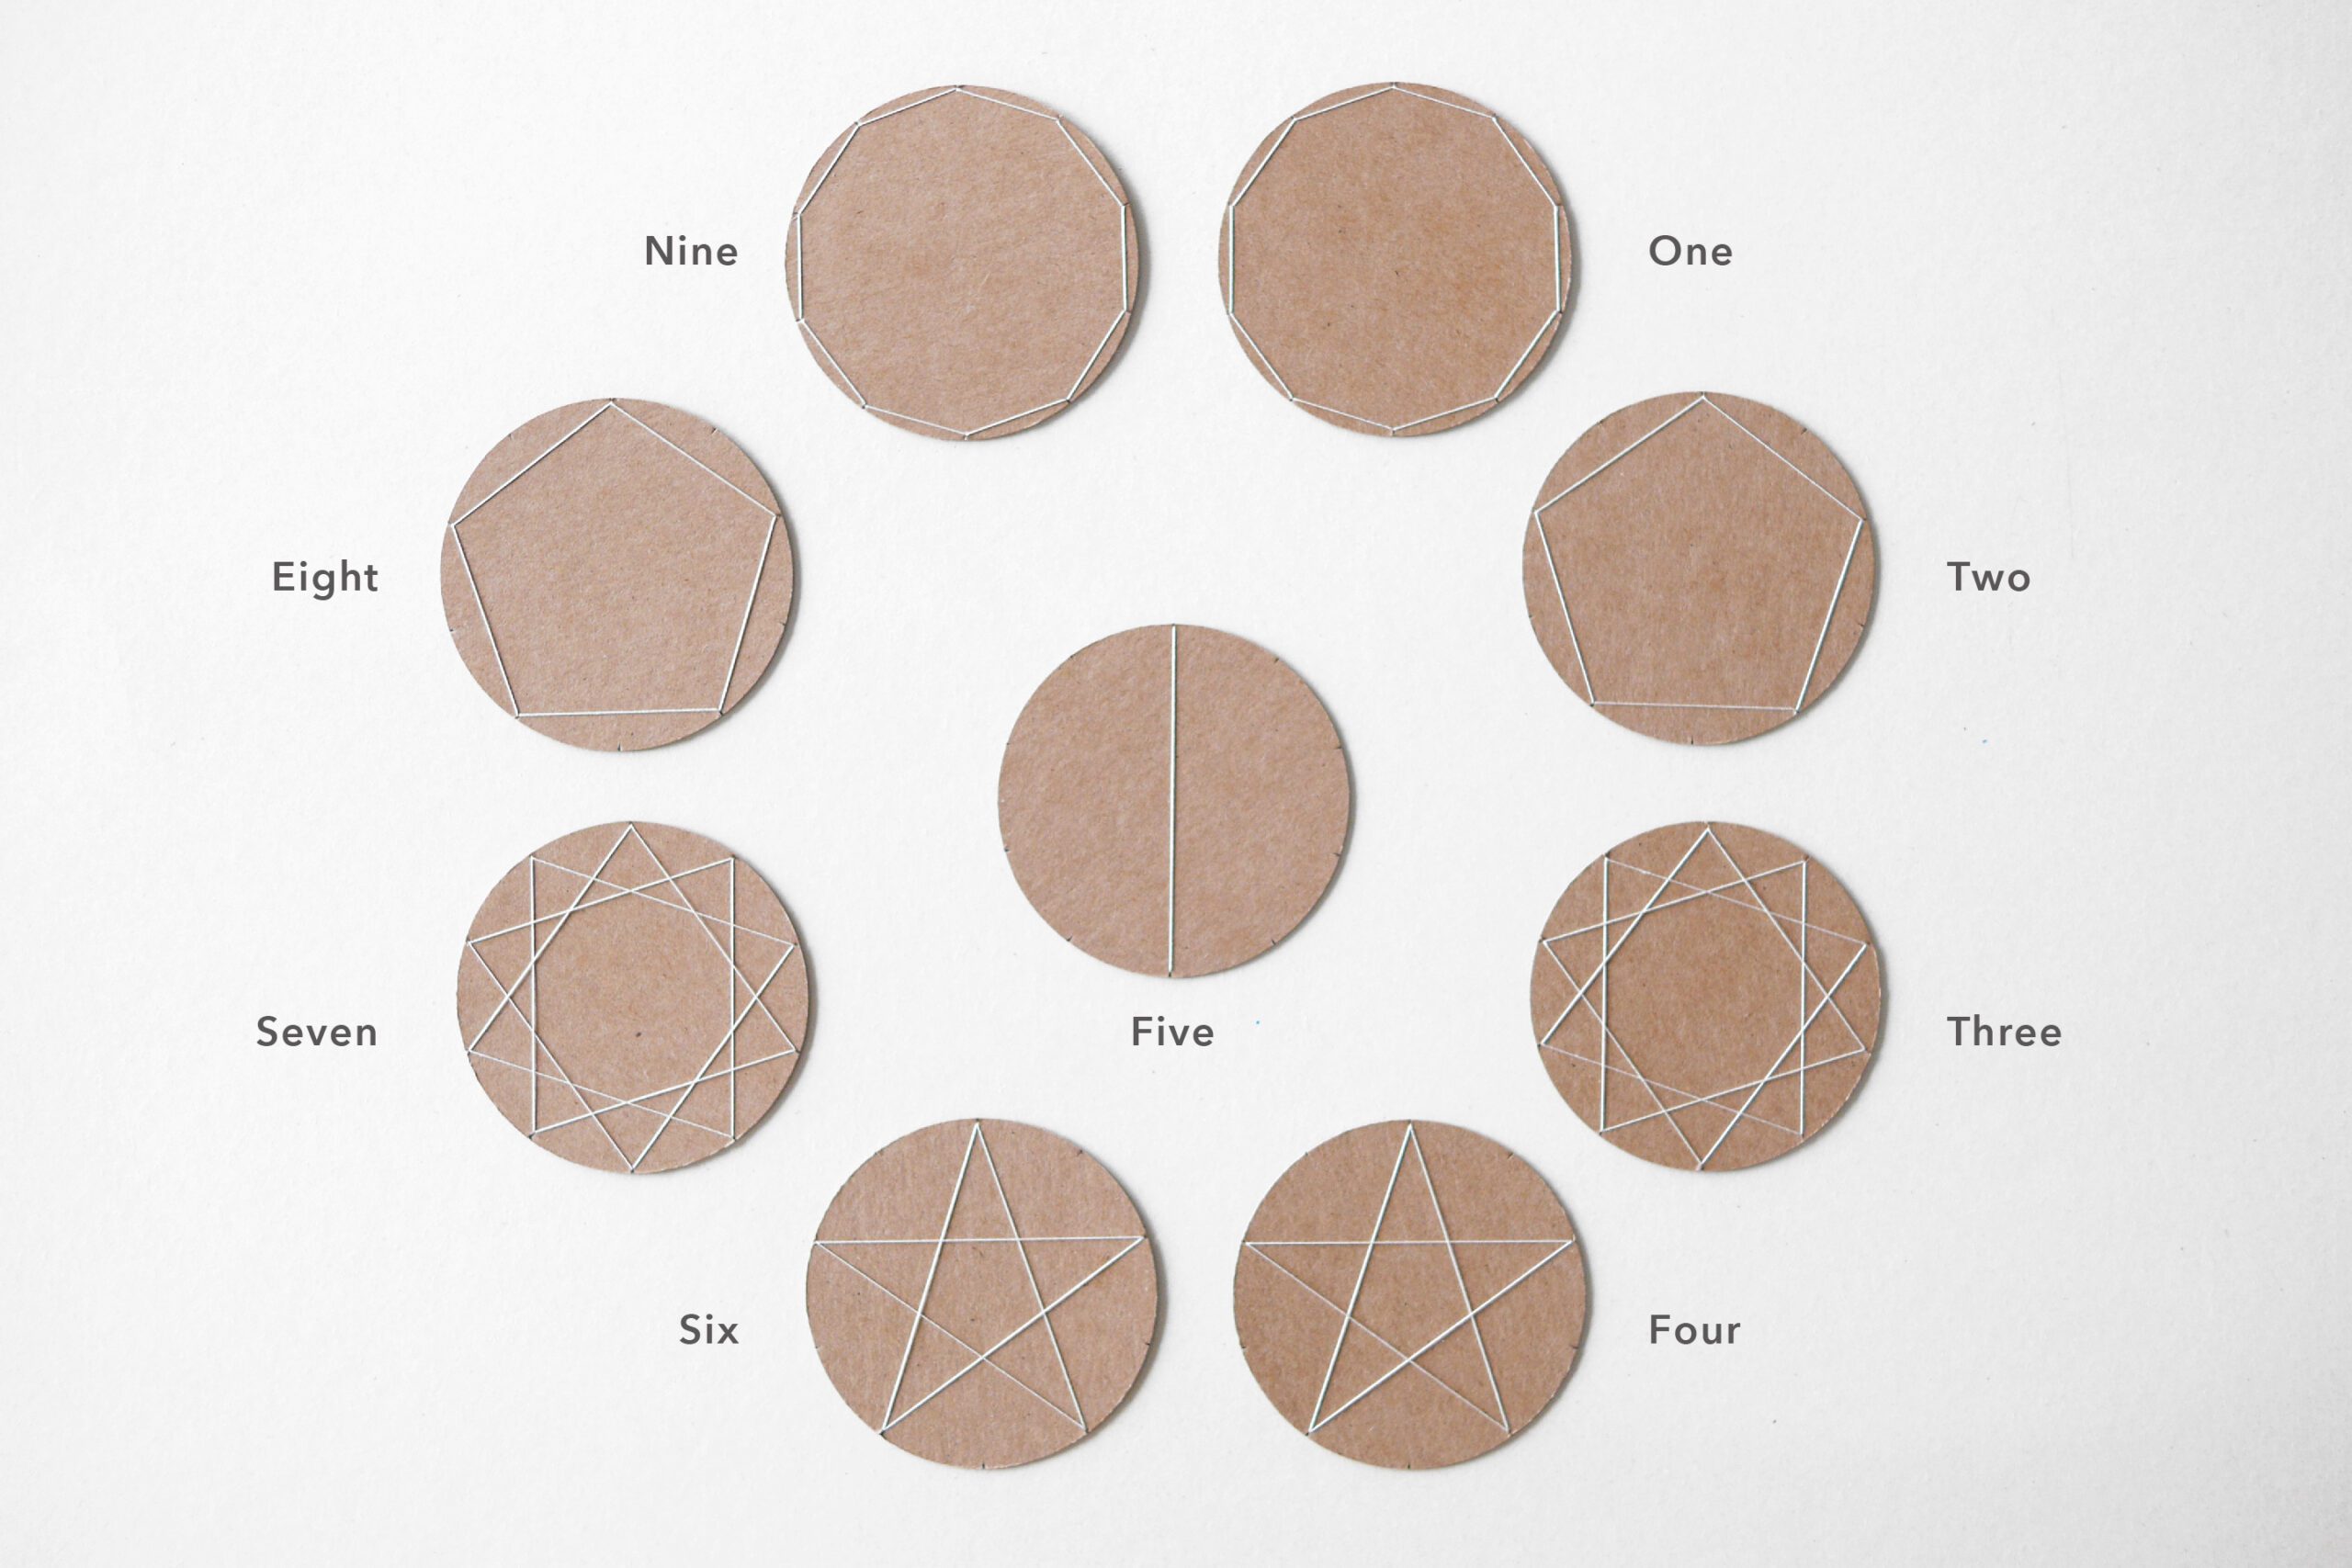
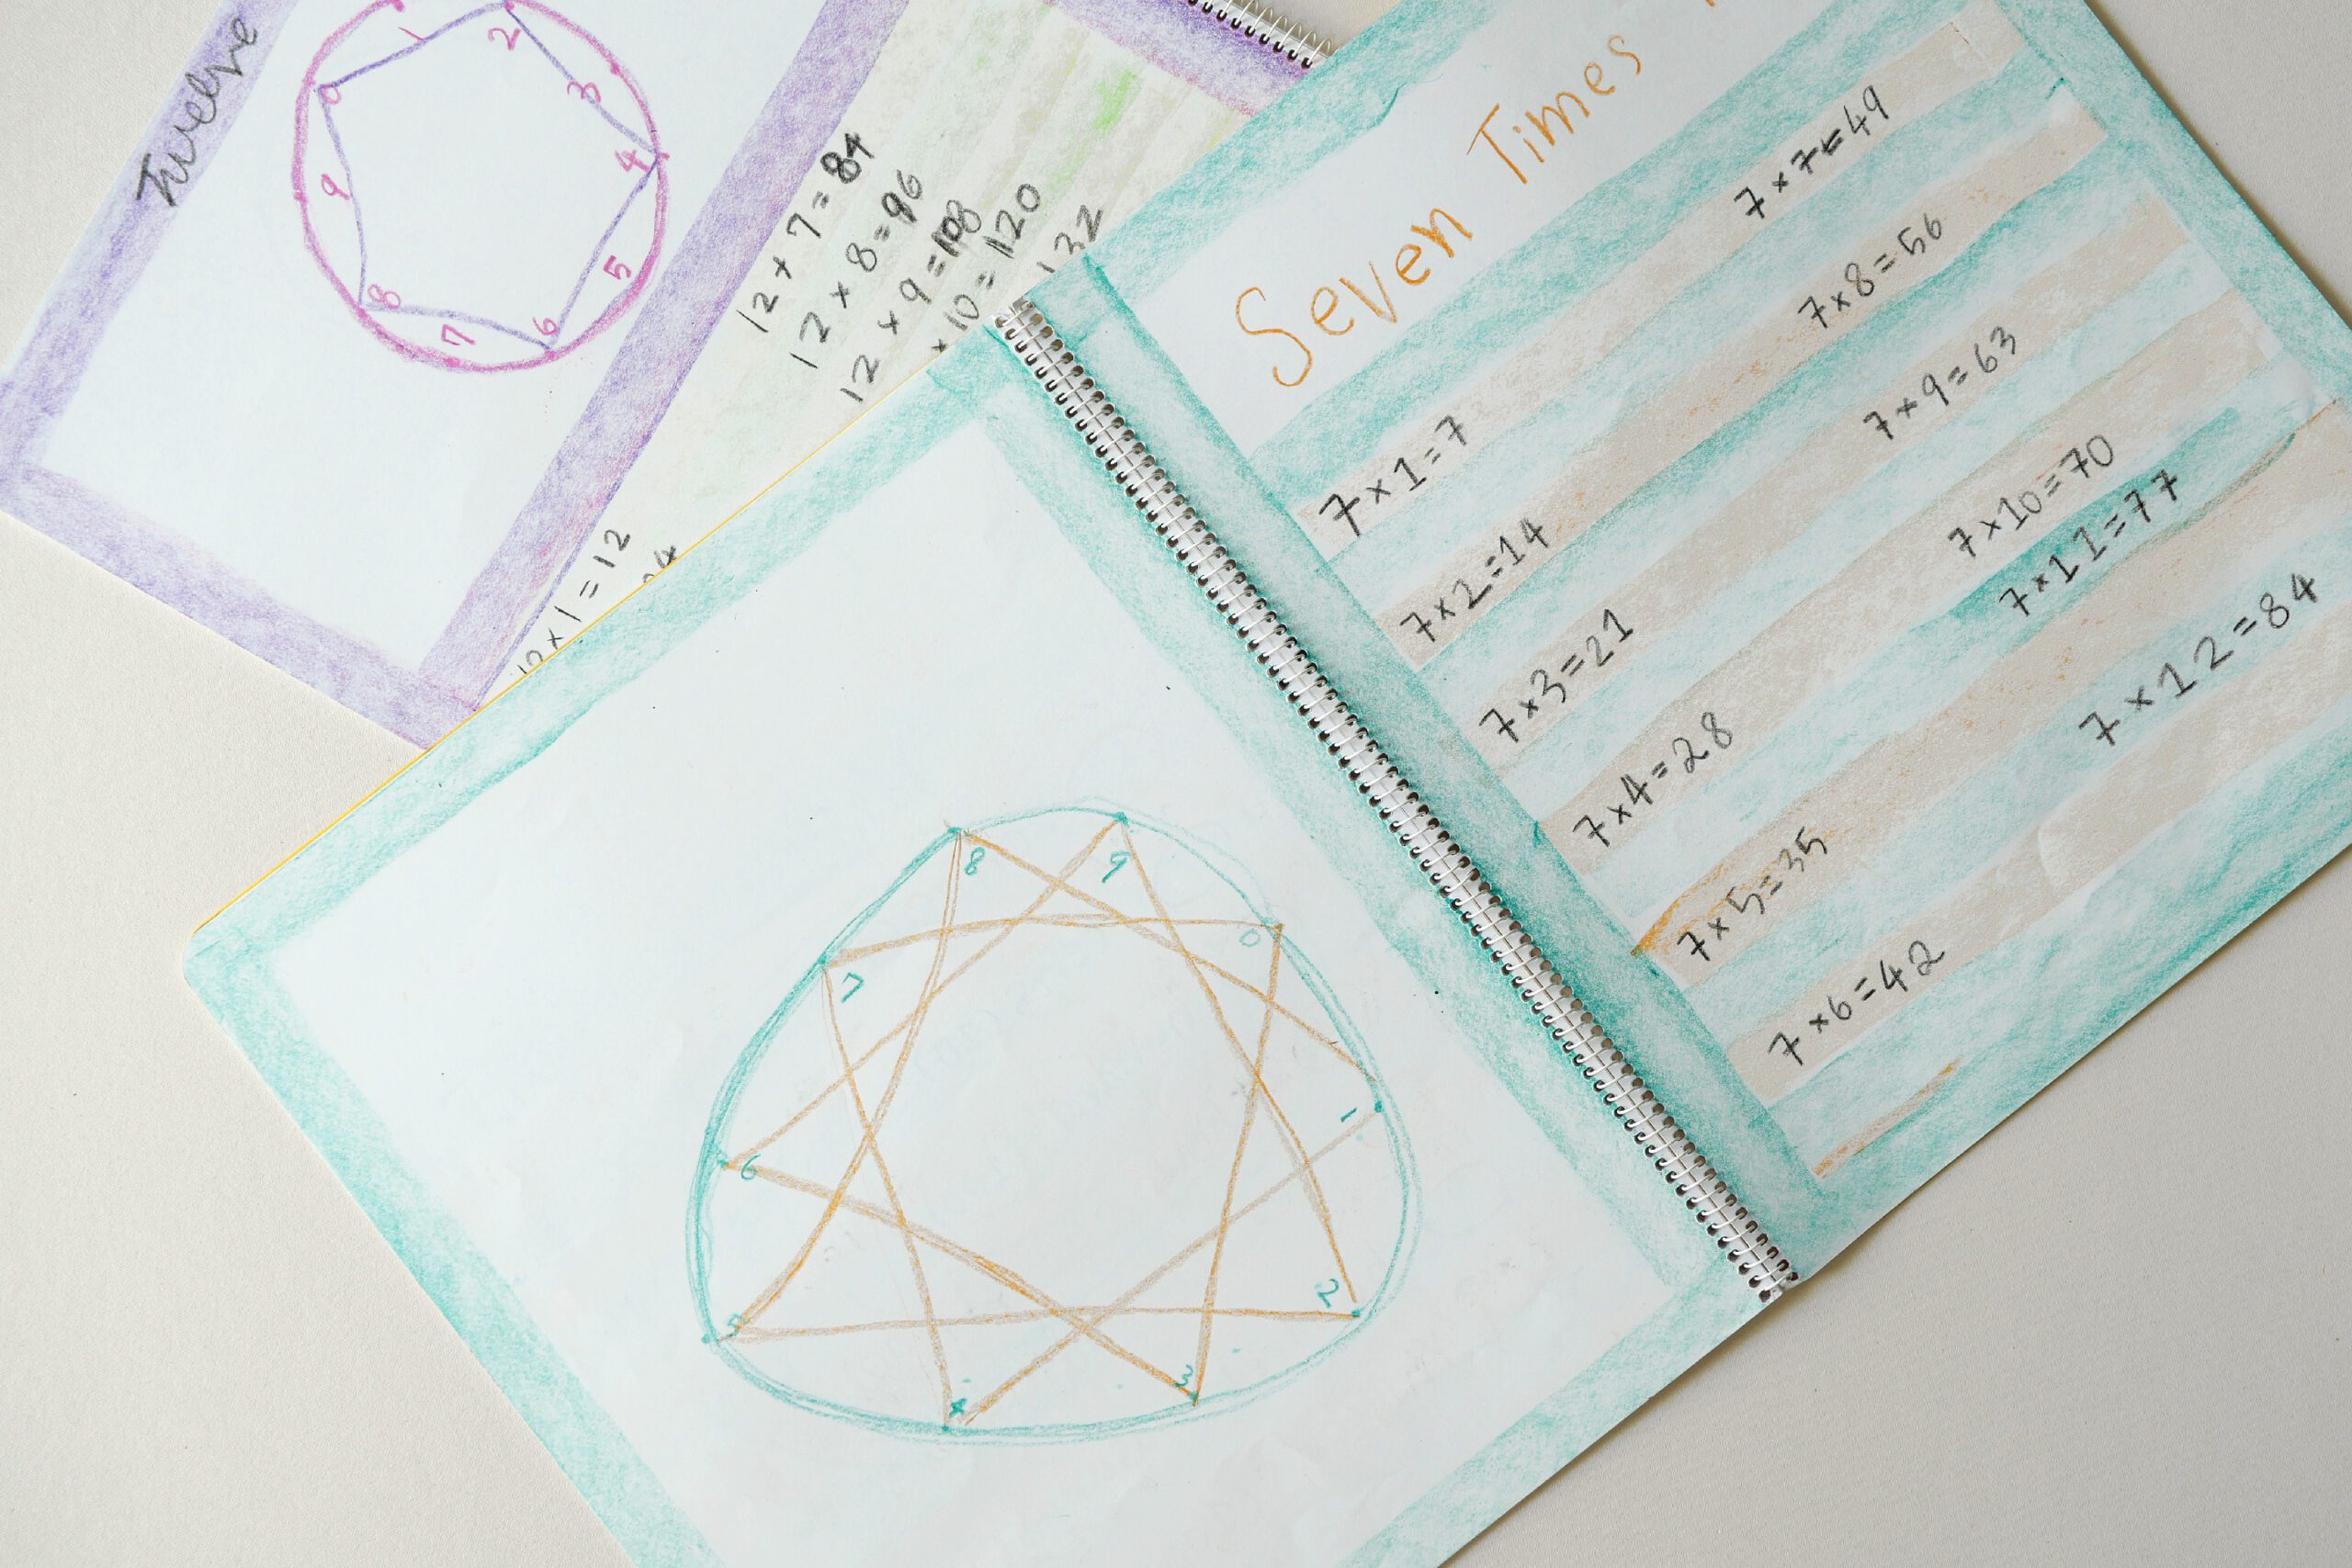
Here is my daughter’s lesson book. It is a multiplication table she wrote at school. She said she liked the shape of the 3 and 7 times table.
Instructions for making
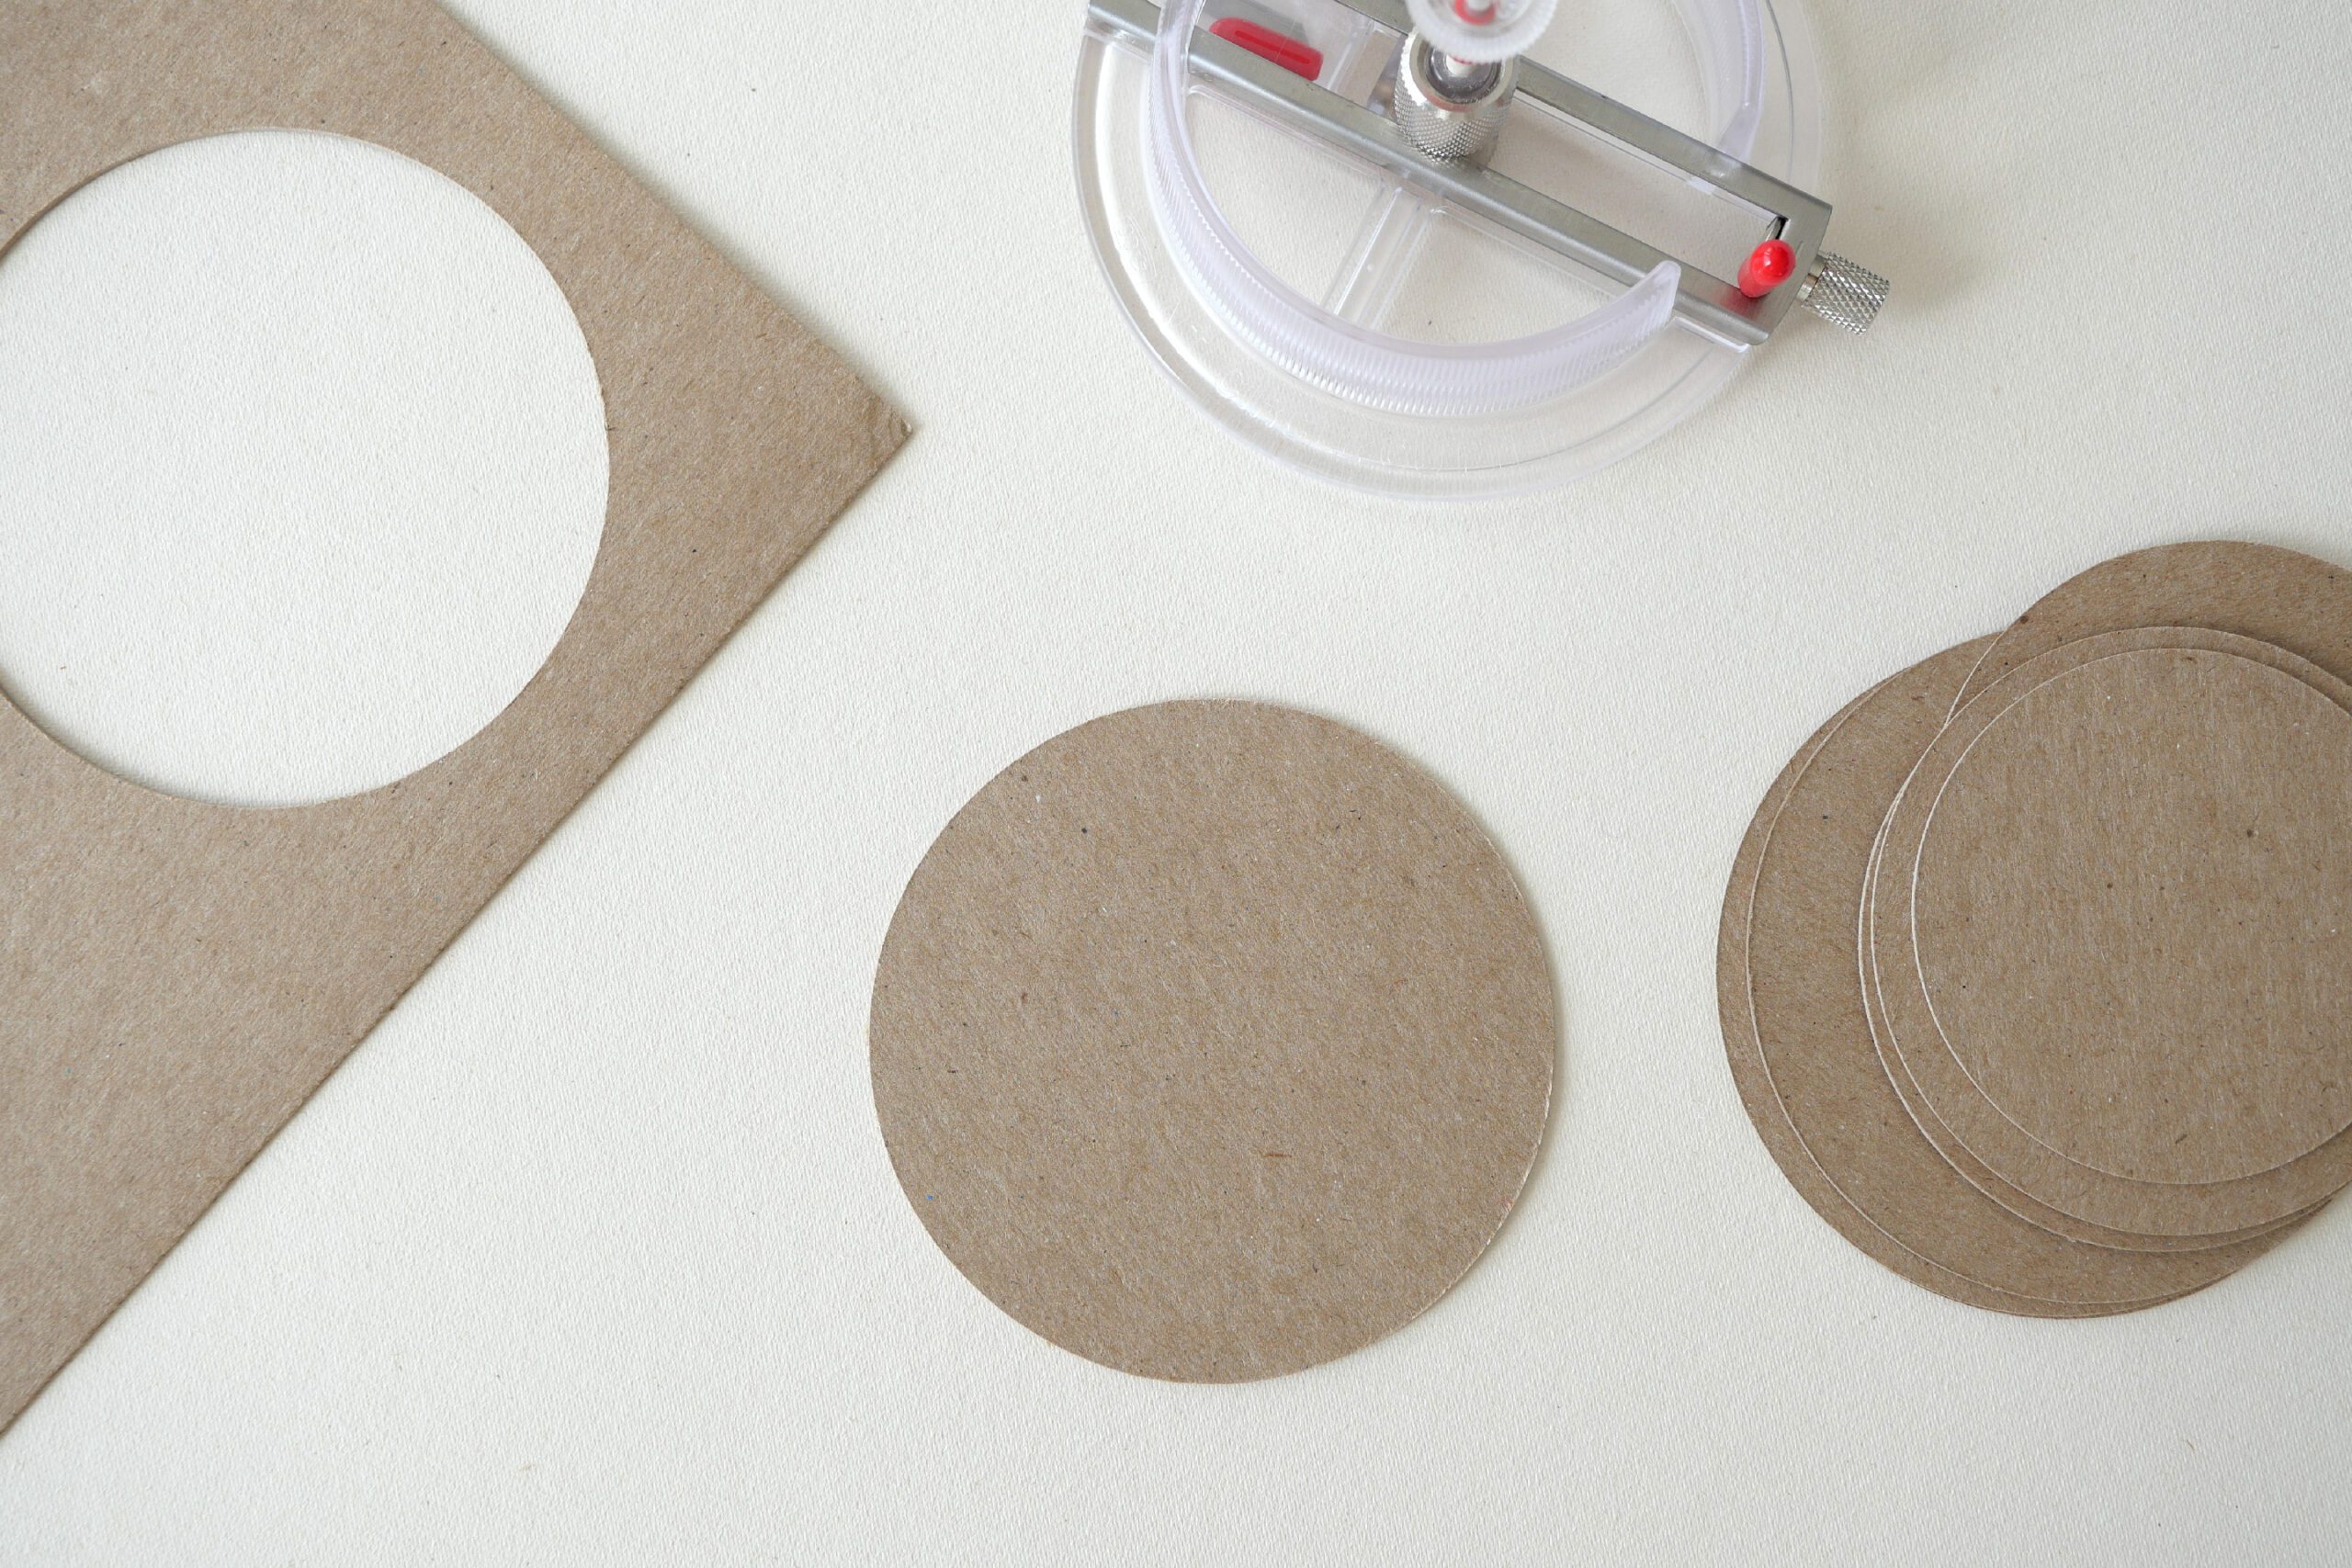
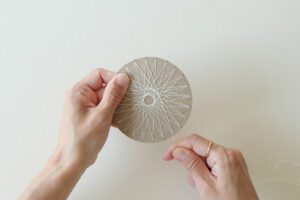
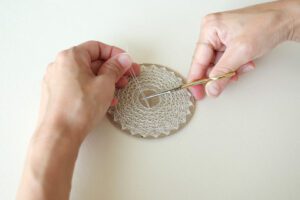
Step 1. Cut in a Circle
Draw a circle on the card board with a compass and cut it with scissors.If you have a circle cutter, it will be very easy to cut out. The size can be any size you like. The circle in this photo was cut to a size of 9 cm.
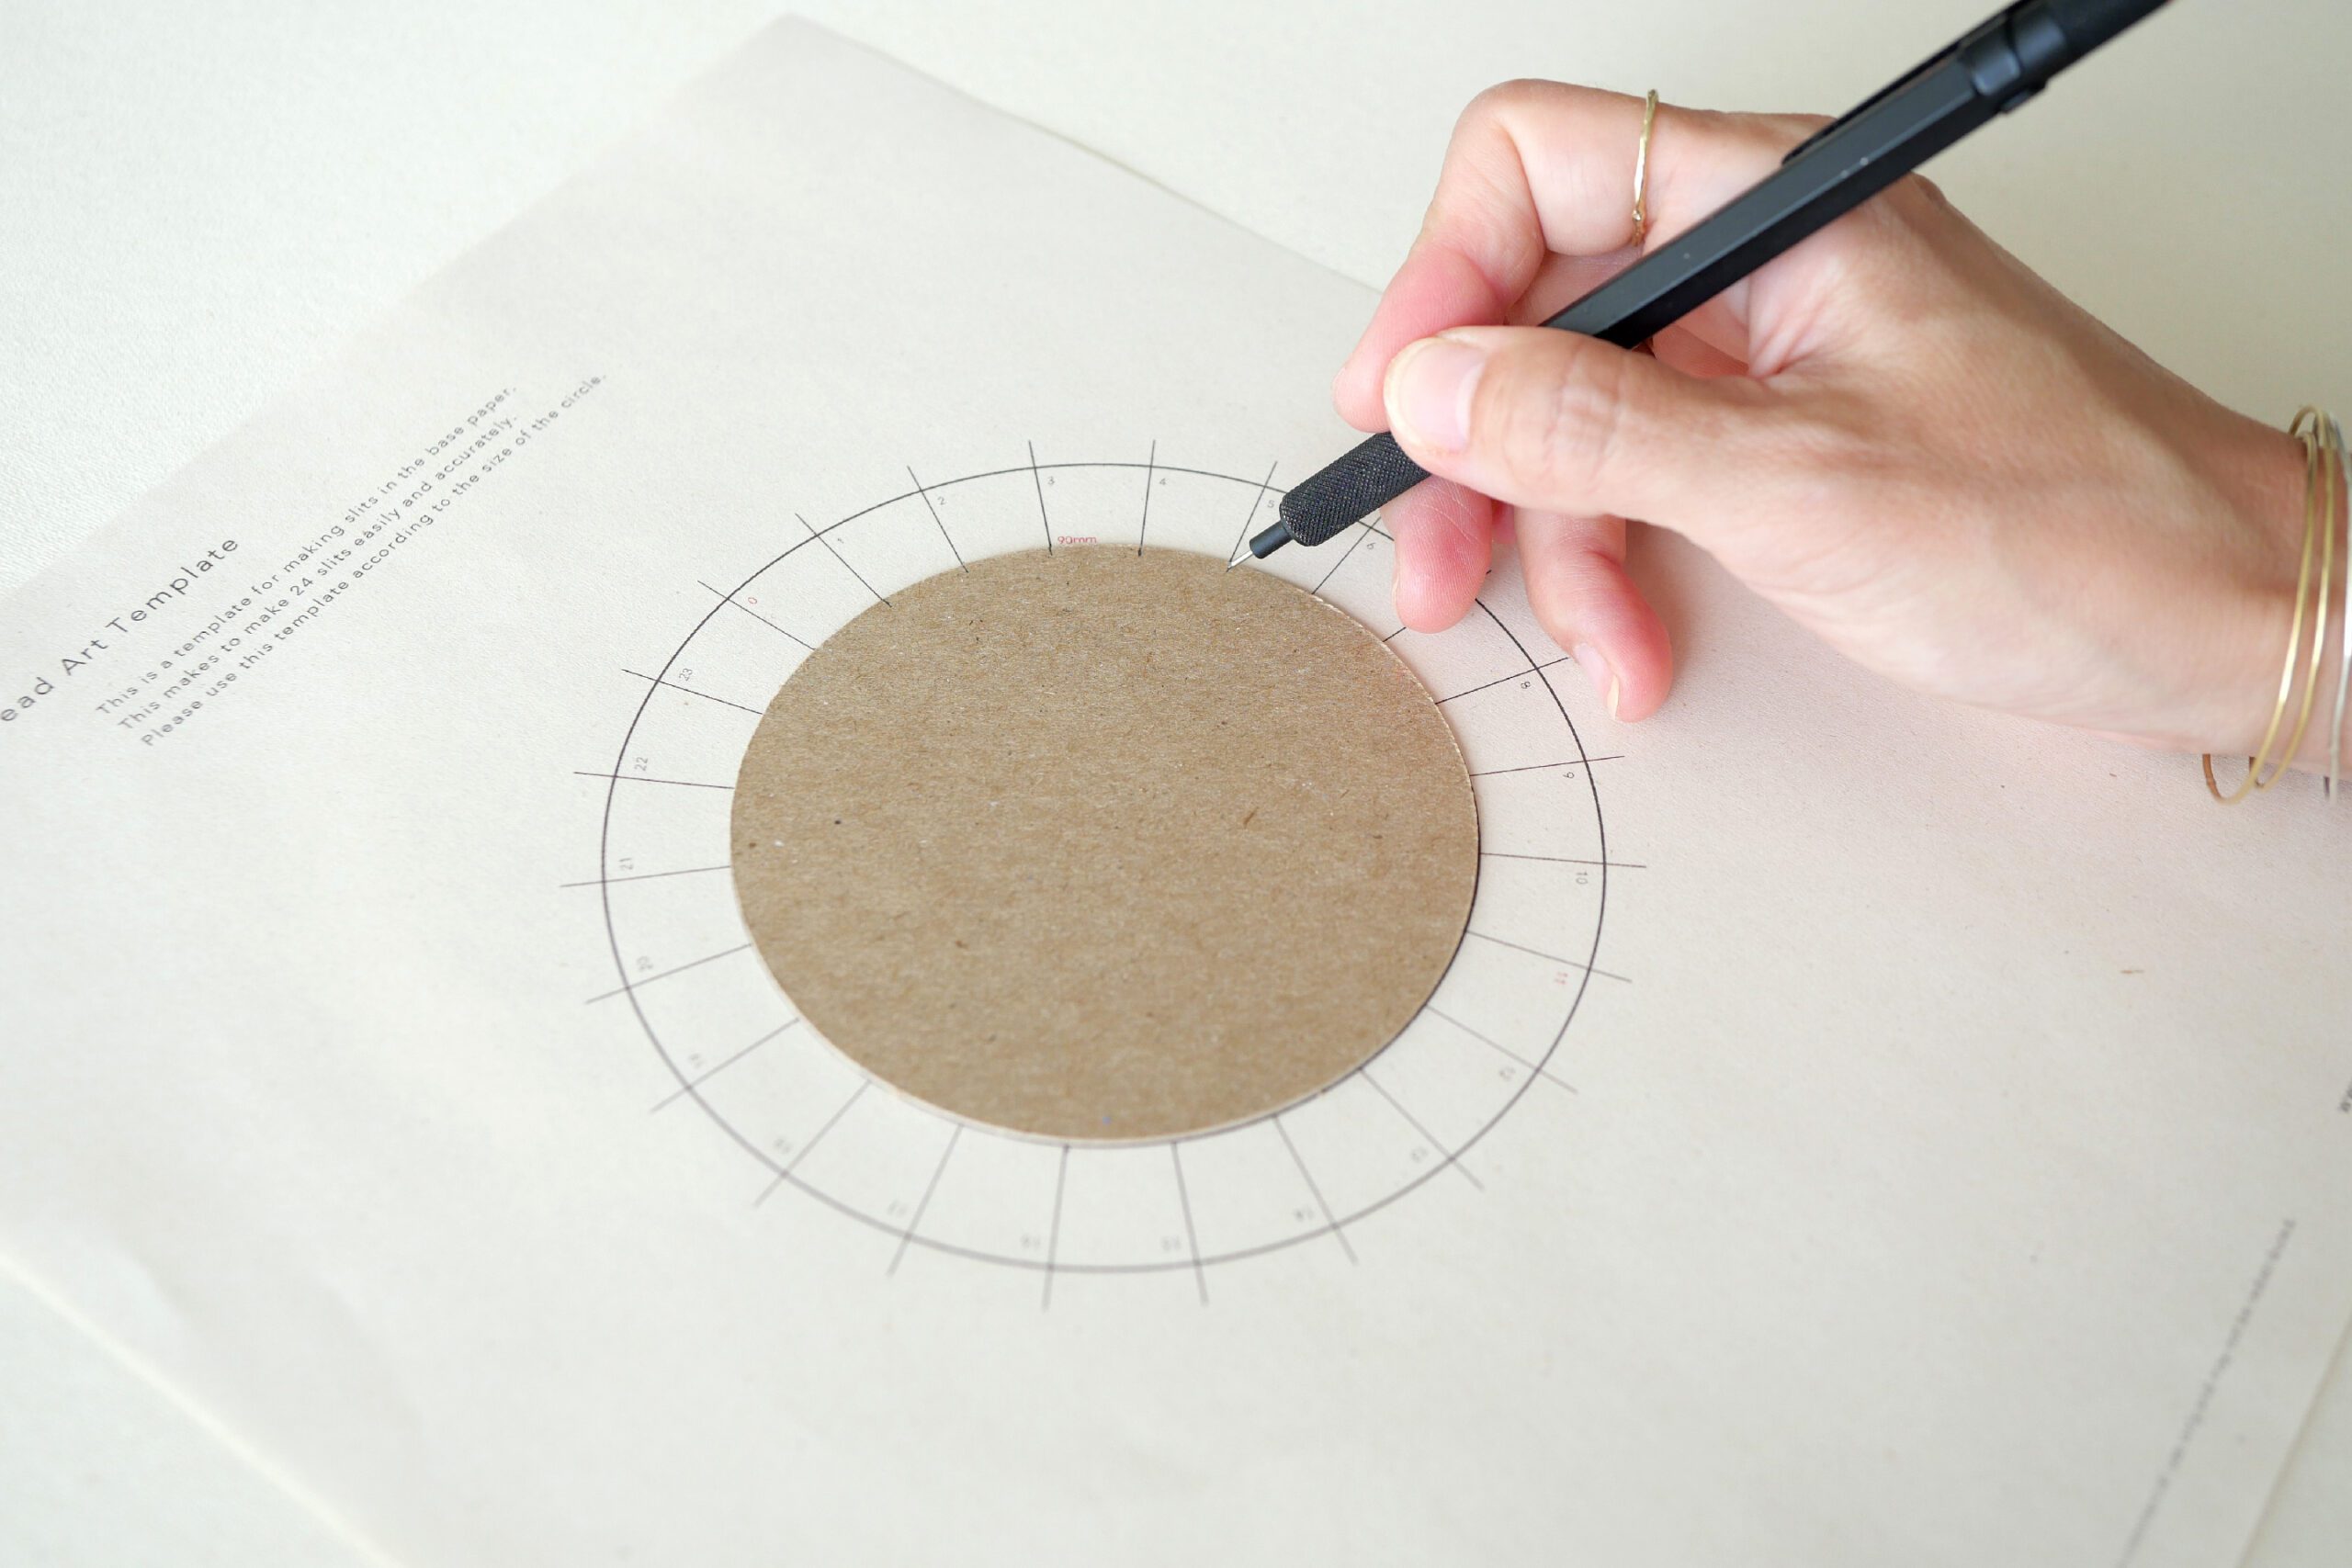
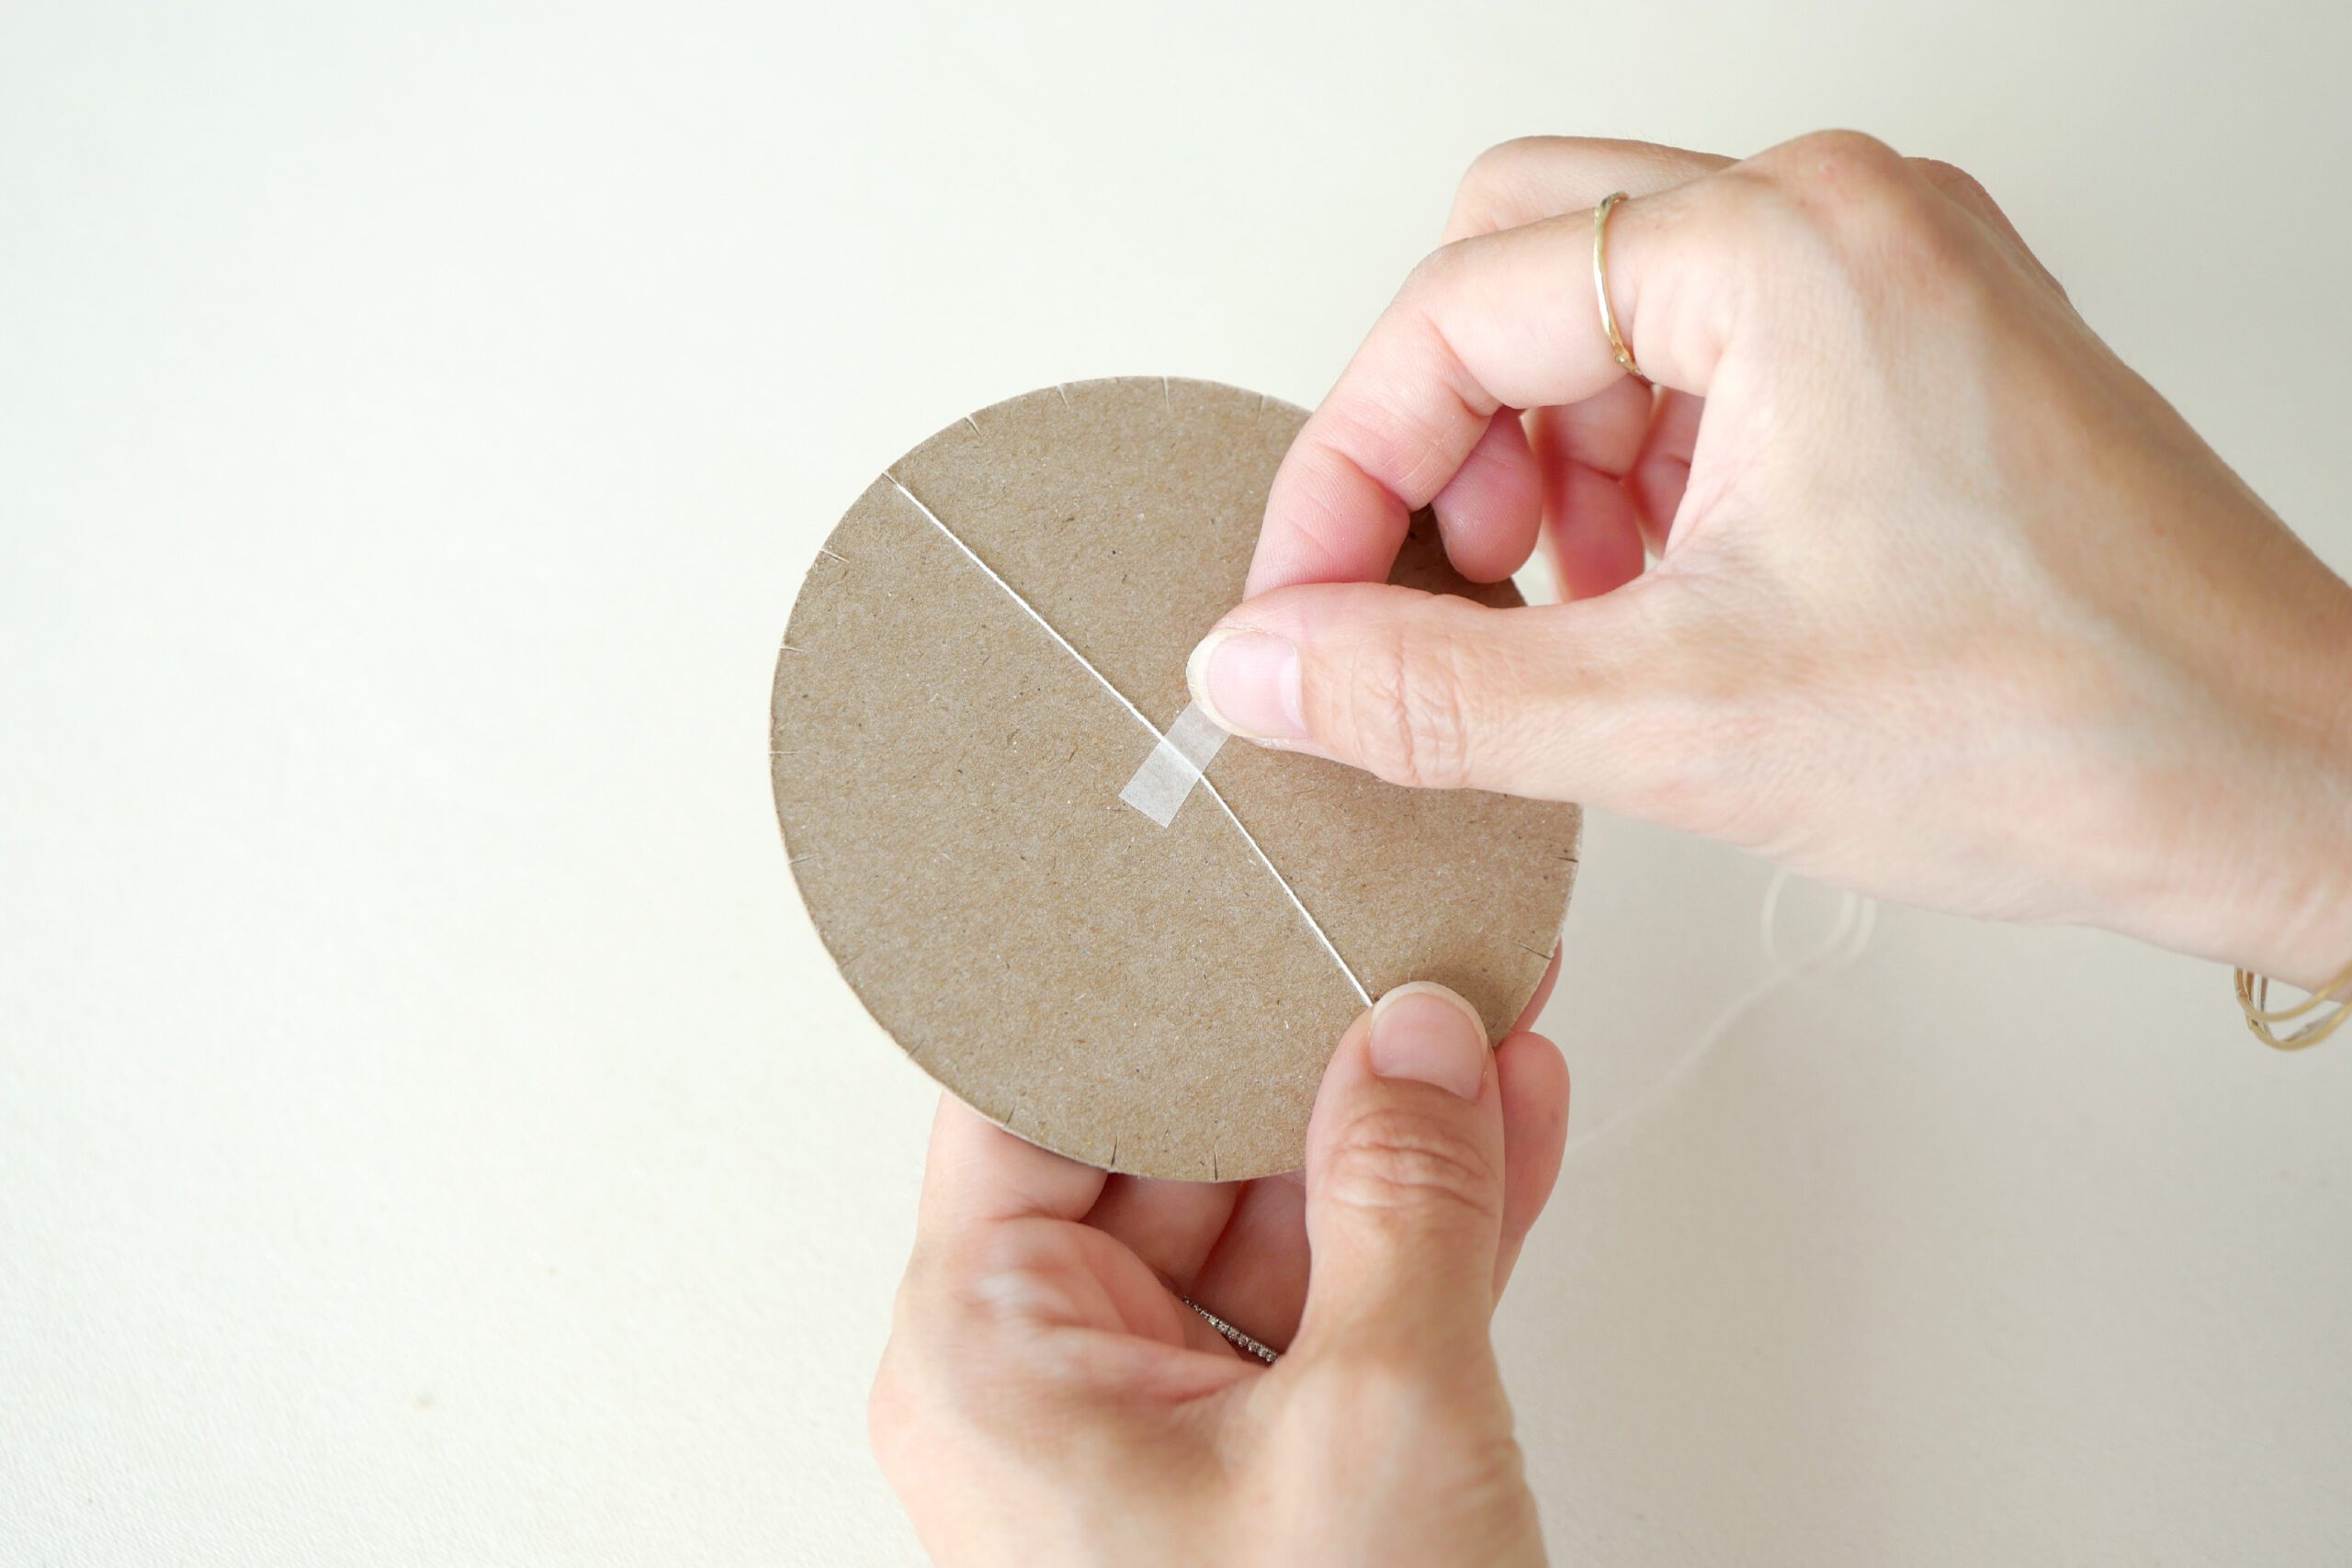
Step 2. Cut a Slit
Download the cutting template for mount paper. Align the circular card board you made with the center of the guide and scribe the position of the cut on the edge of the mount paper. Using scissors, make a 1-2 mm slit along the scribbled markings. Here is a slit of 0 to 23 is now in place.

Step 3. Thread the First Row
First, thread the 0 position. To prevent the thread from coming off, tape the end of the thread at the back. Next, thread at position 11. Continue to thread at position 1, then at position 12. Then 2-13, 3-14, 4-15, and so on, spacing the thread at intervals of 11. The first step is over when you return to 0.
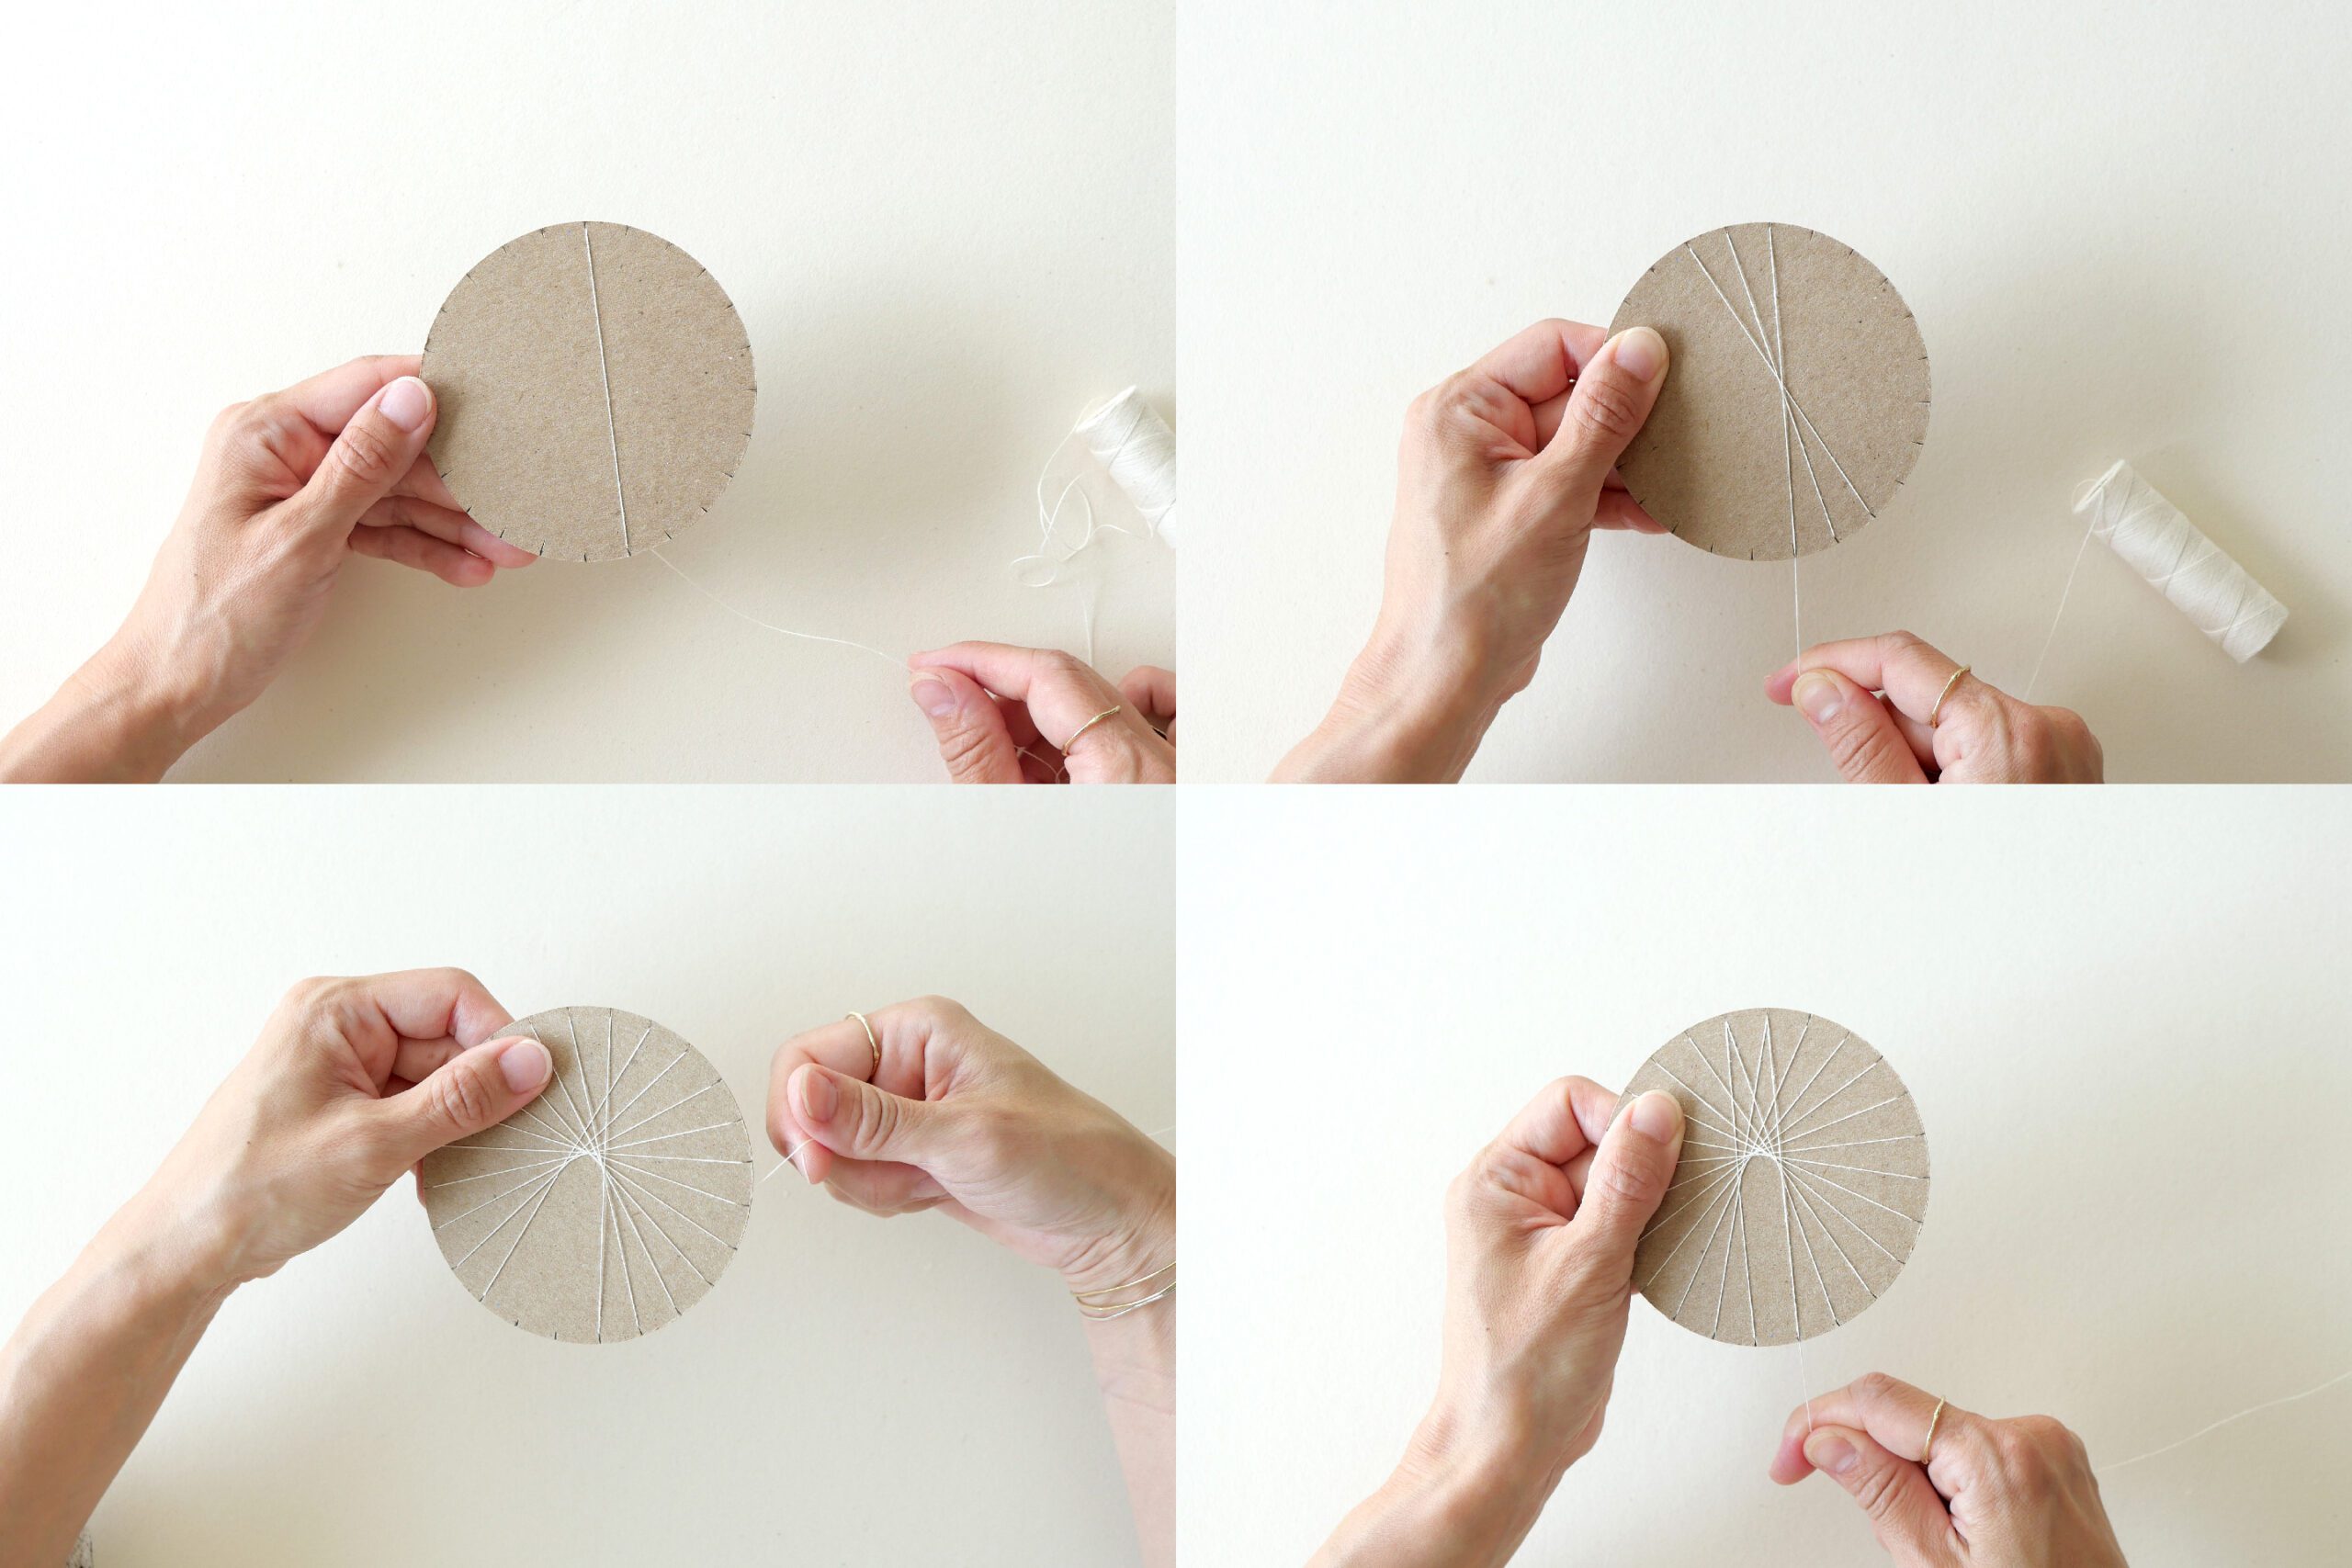
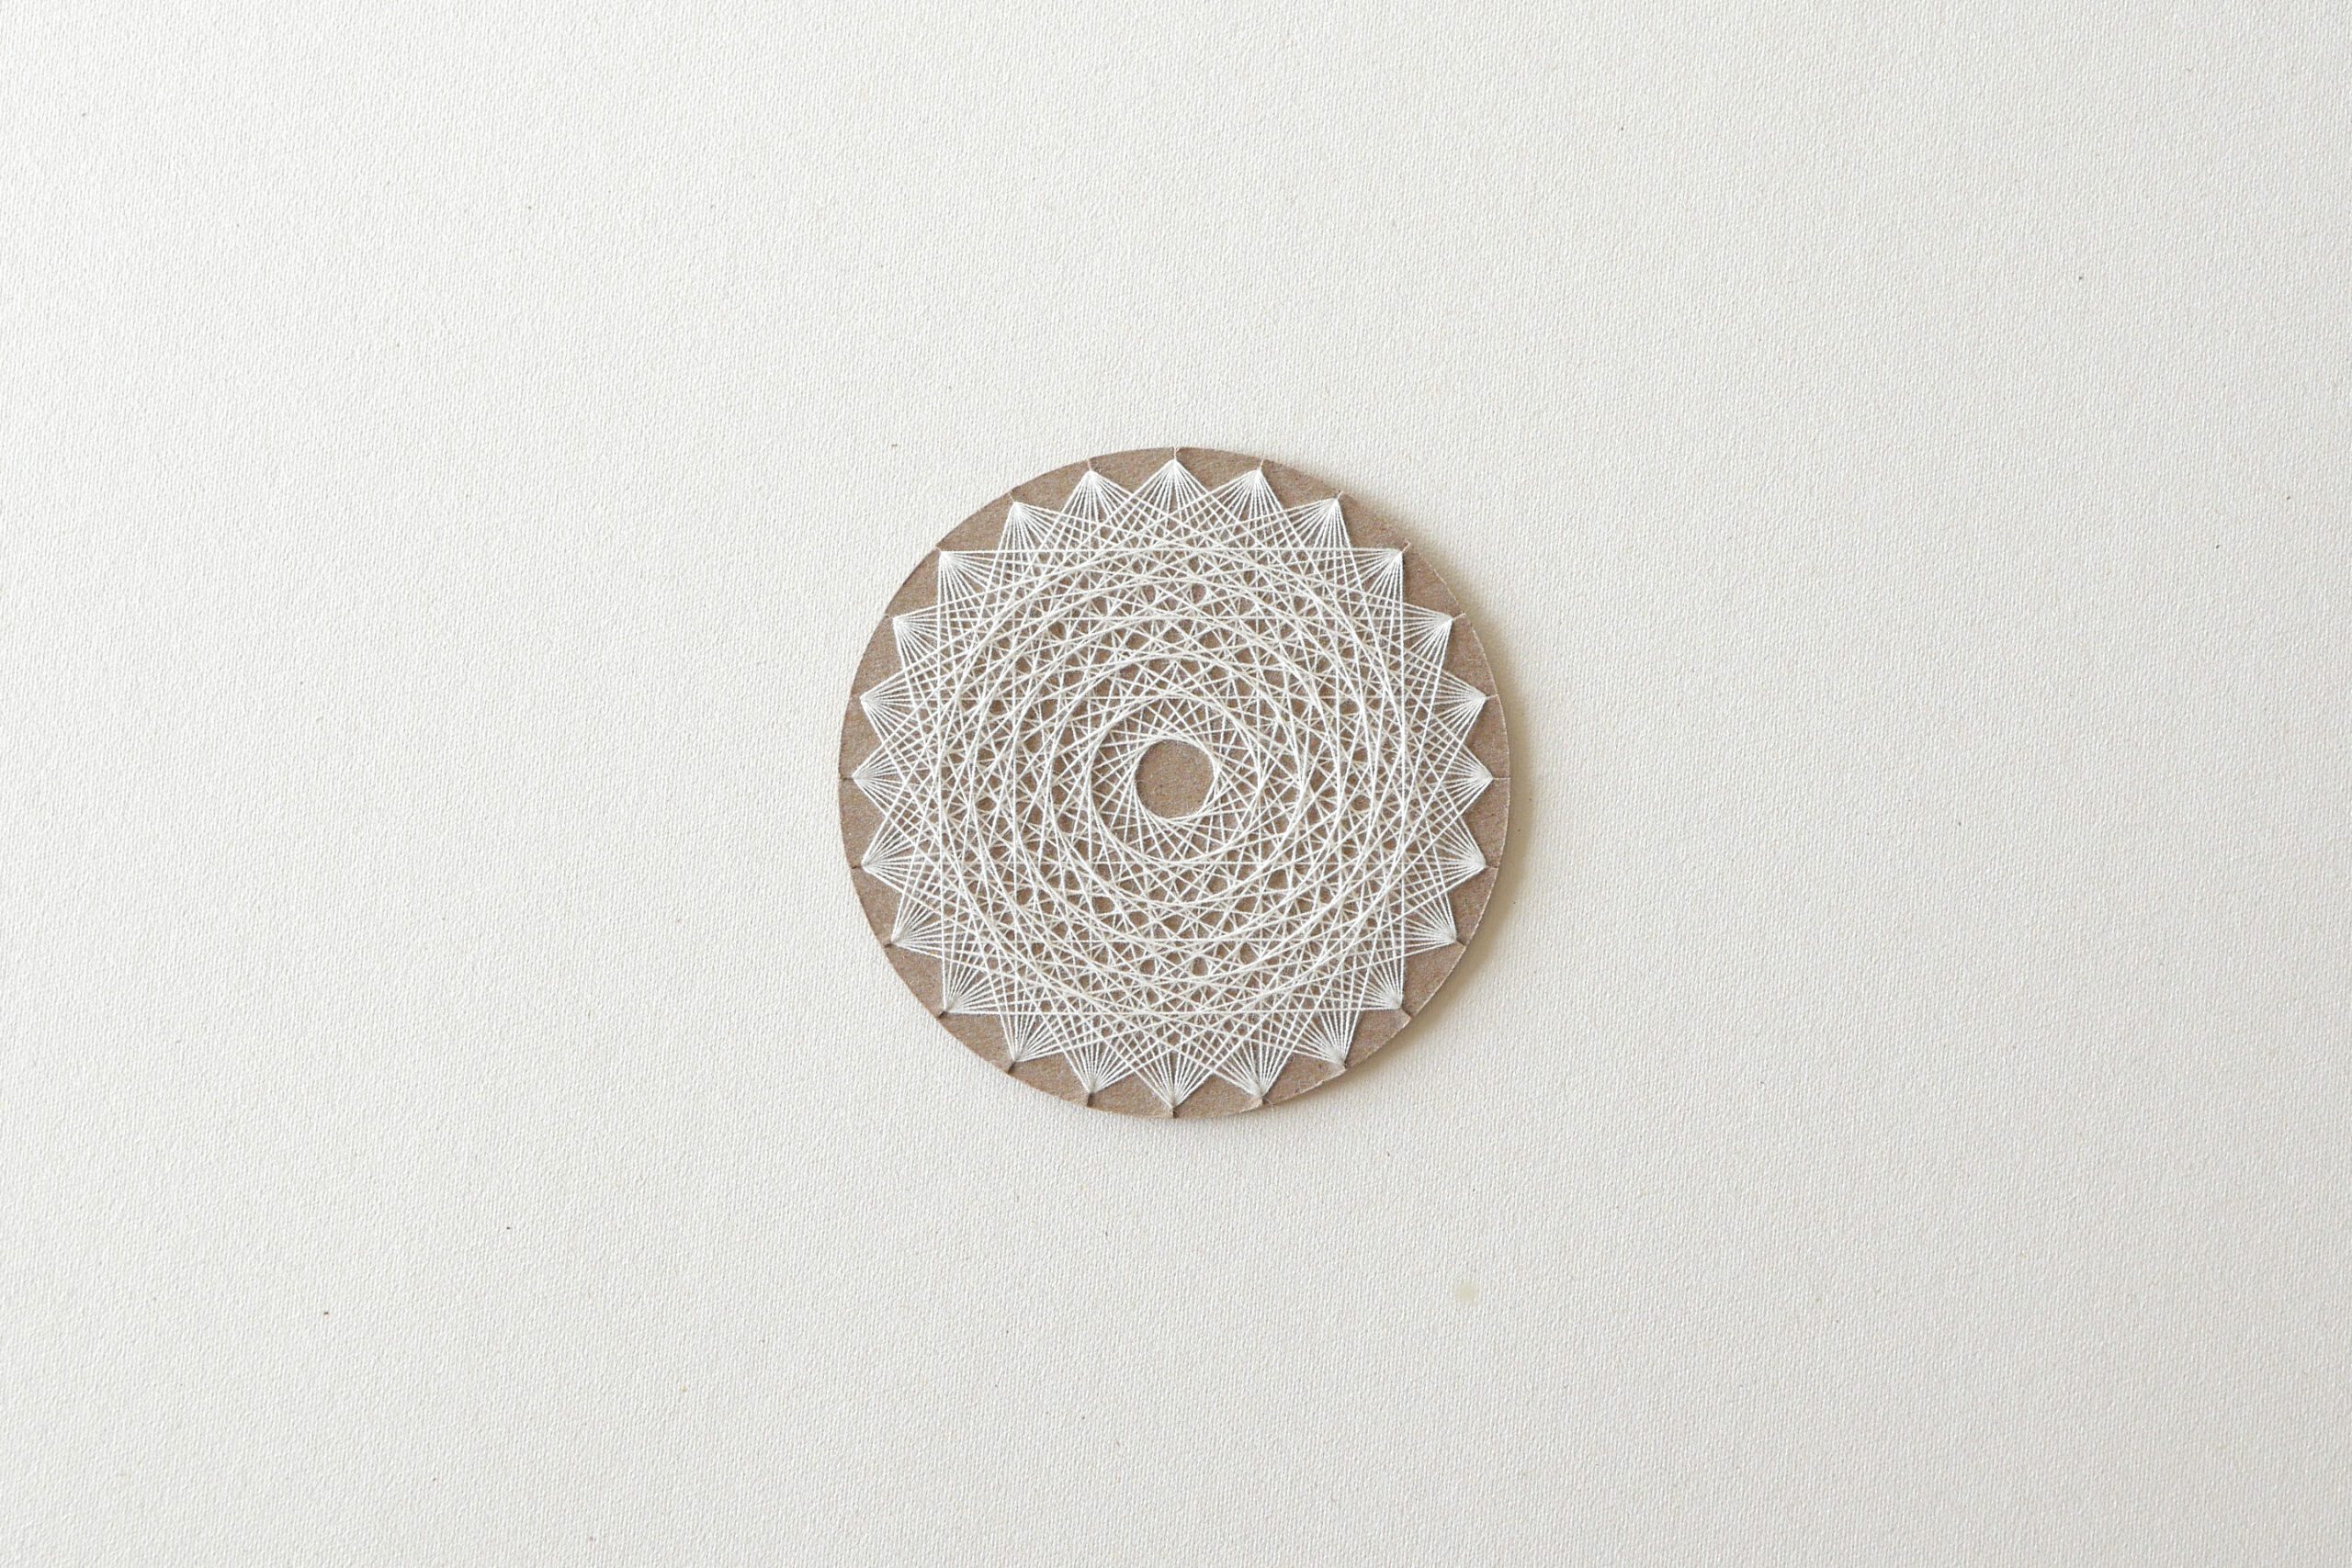
Step 4. Thread the Second Row
Then, for the second row, thread the yarn in intervals of 10: 0-10, 1-11, 2-12, and so on. After the second row is completed, now you will do the third step: 0-9, 1-10, 2-11, and so on, spacing the 9’s apart. In this way, the thread is applied in layers.
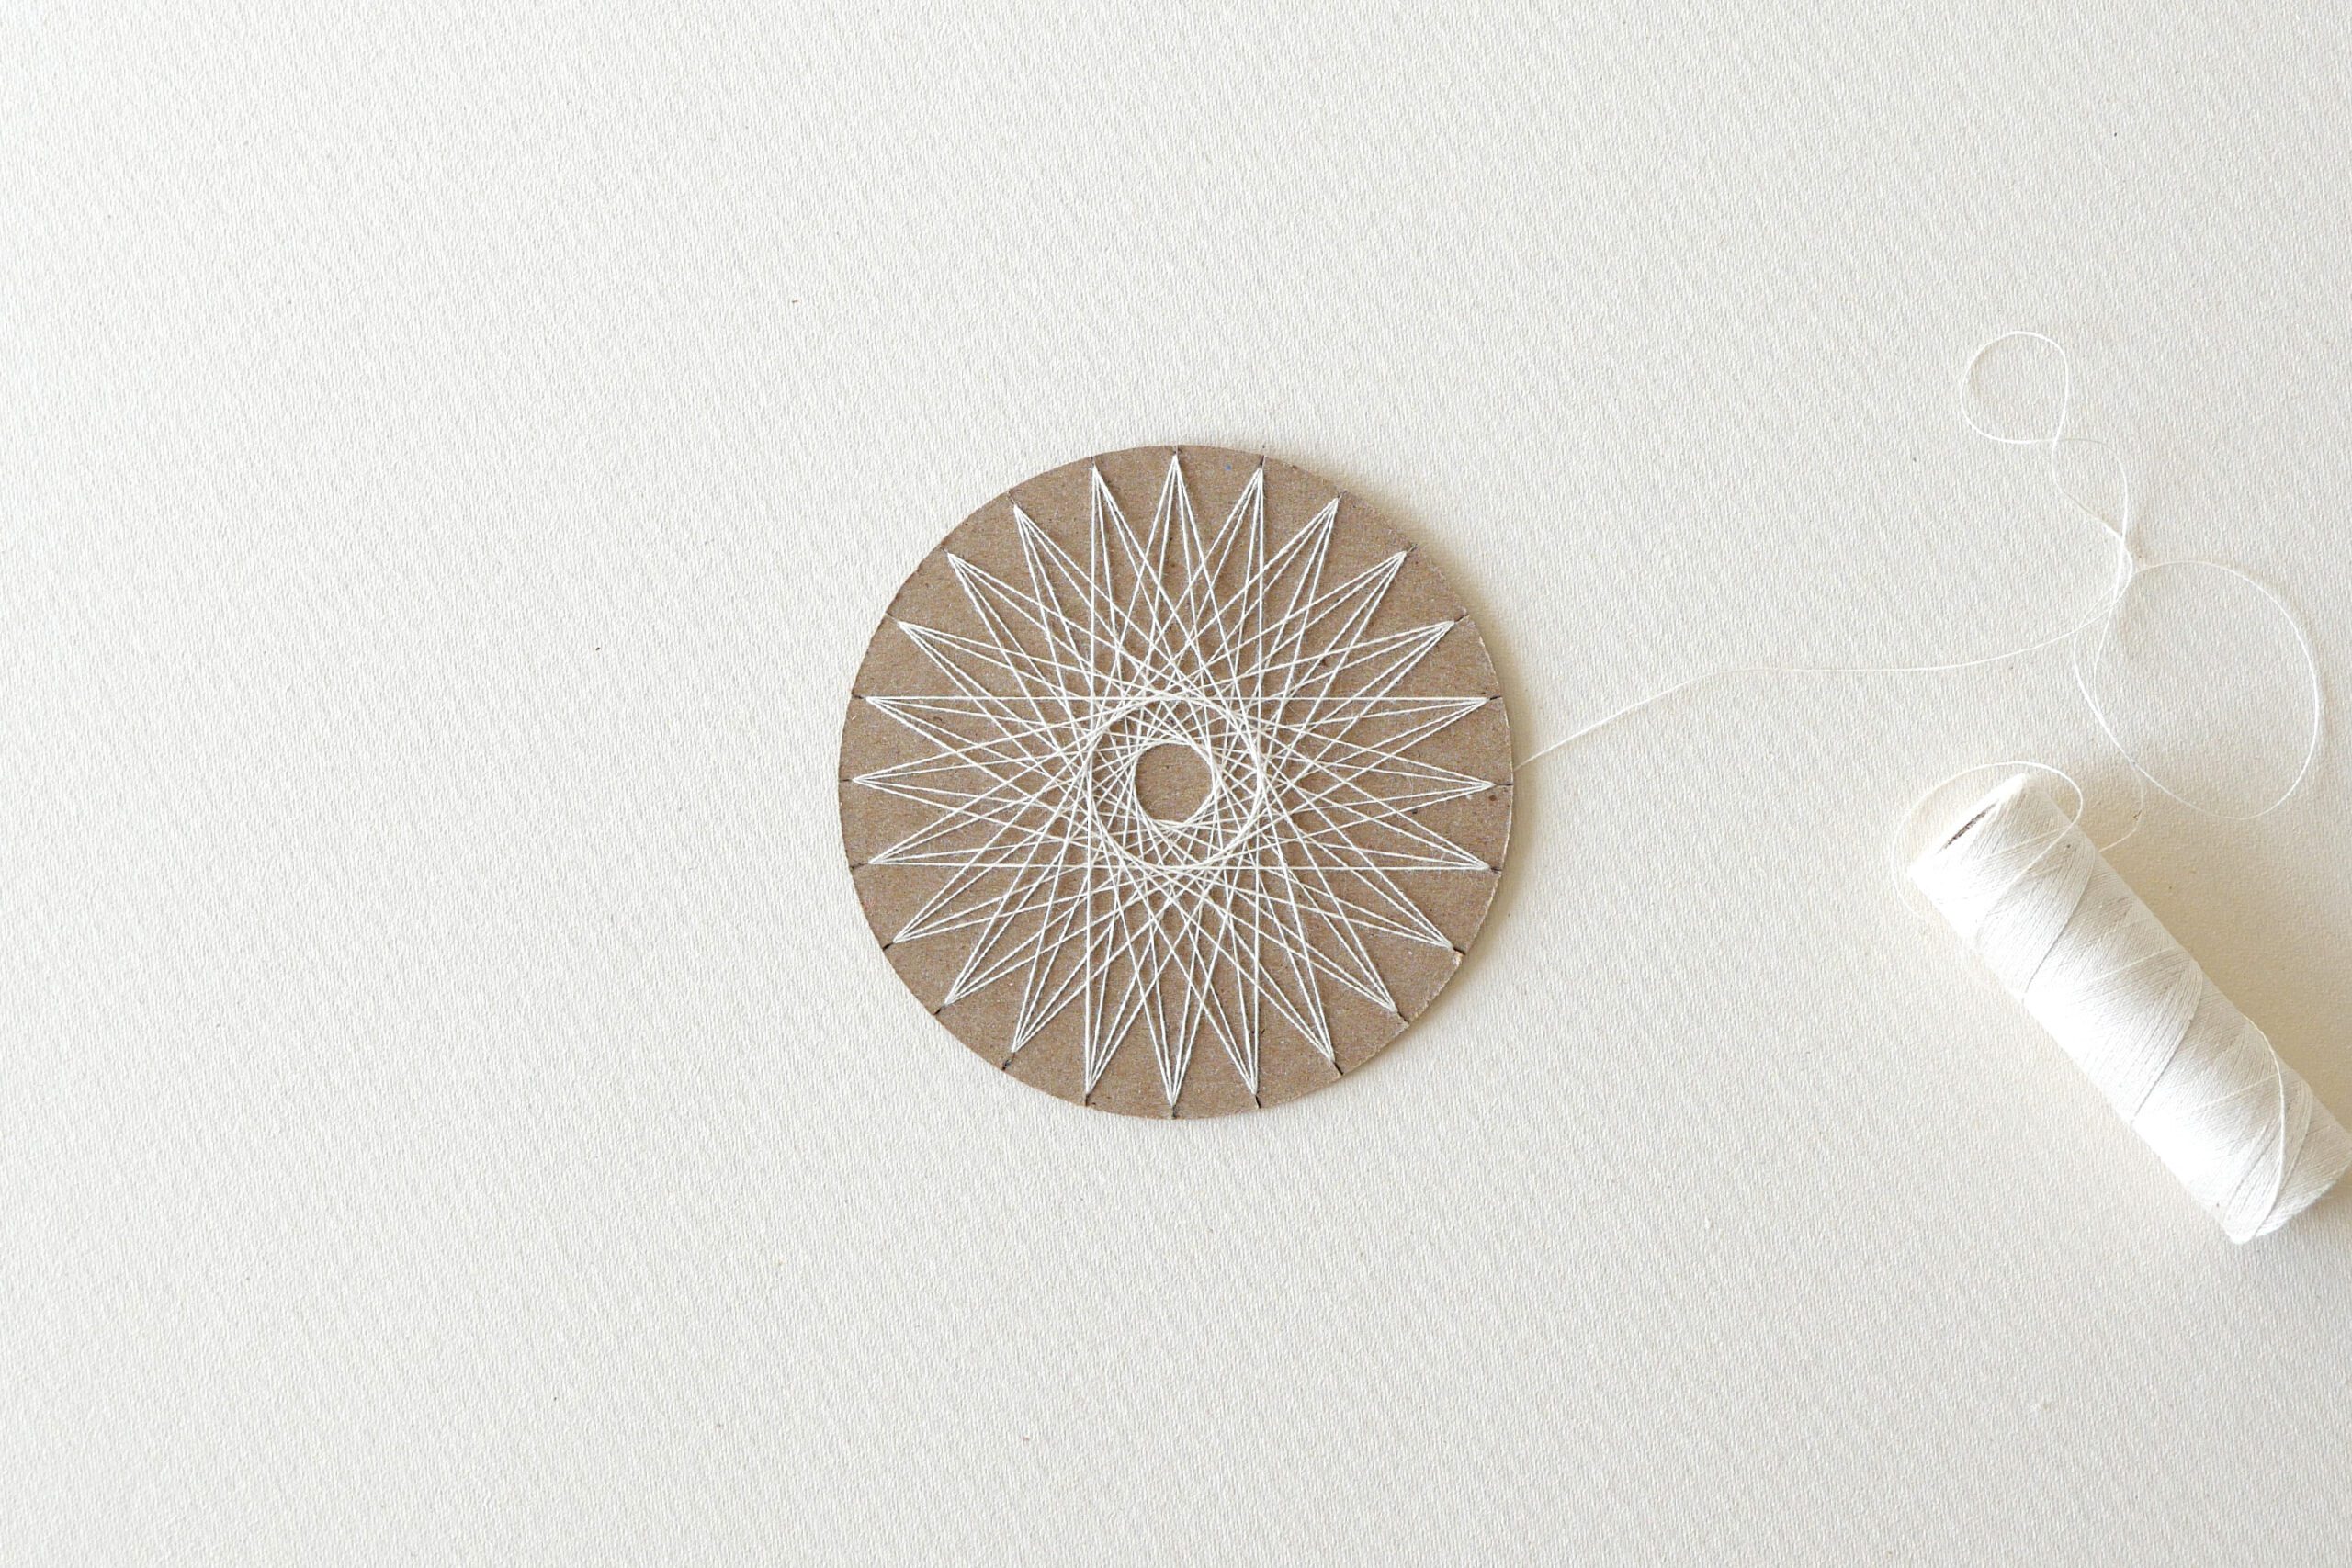
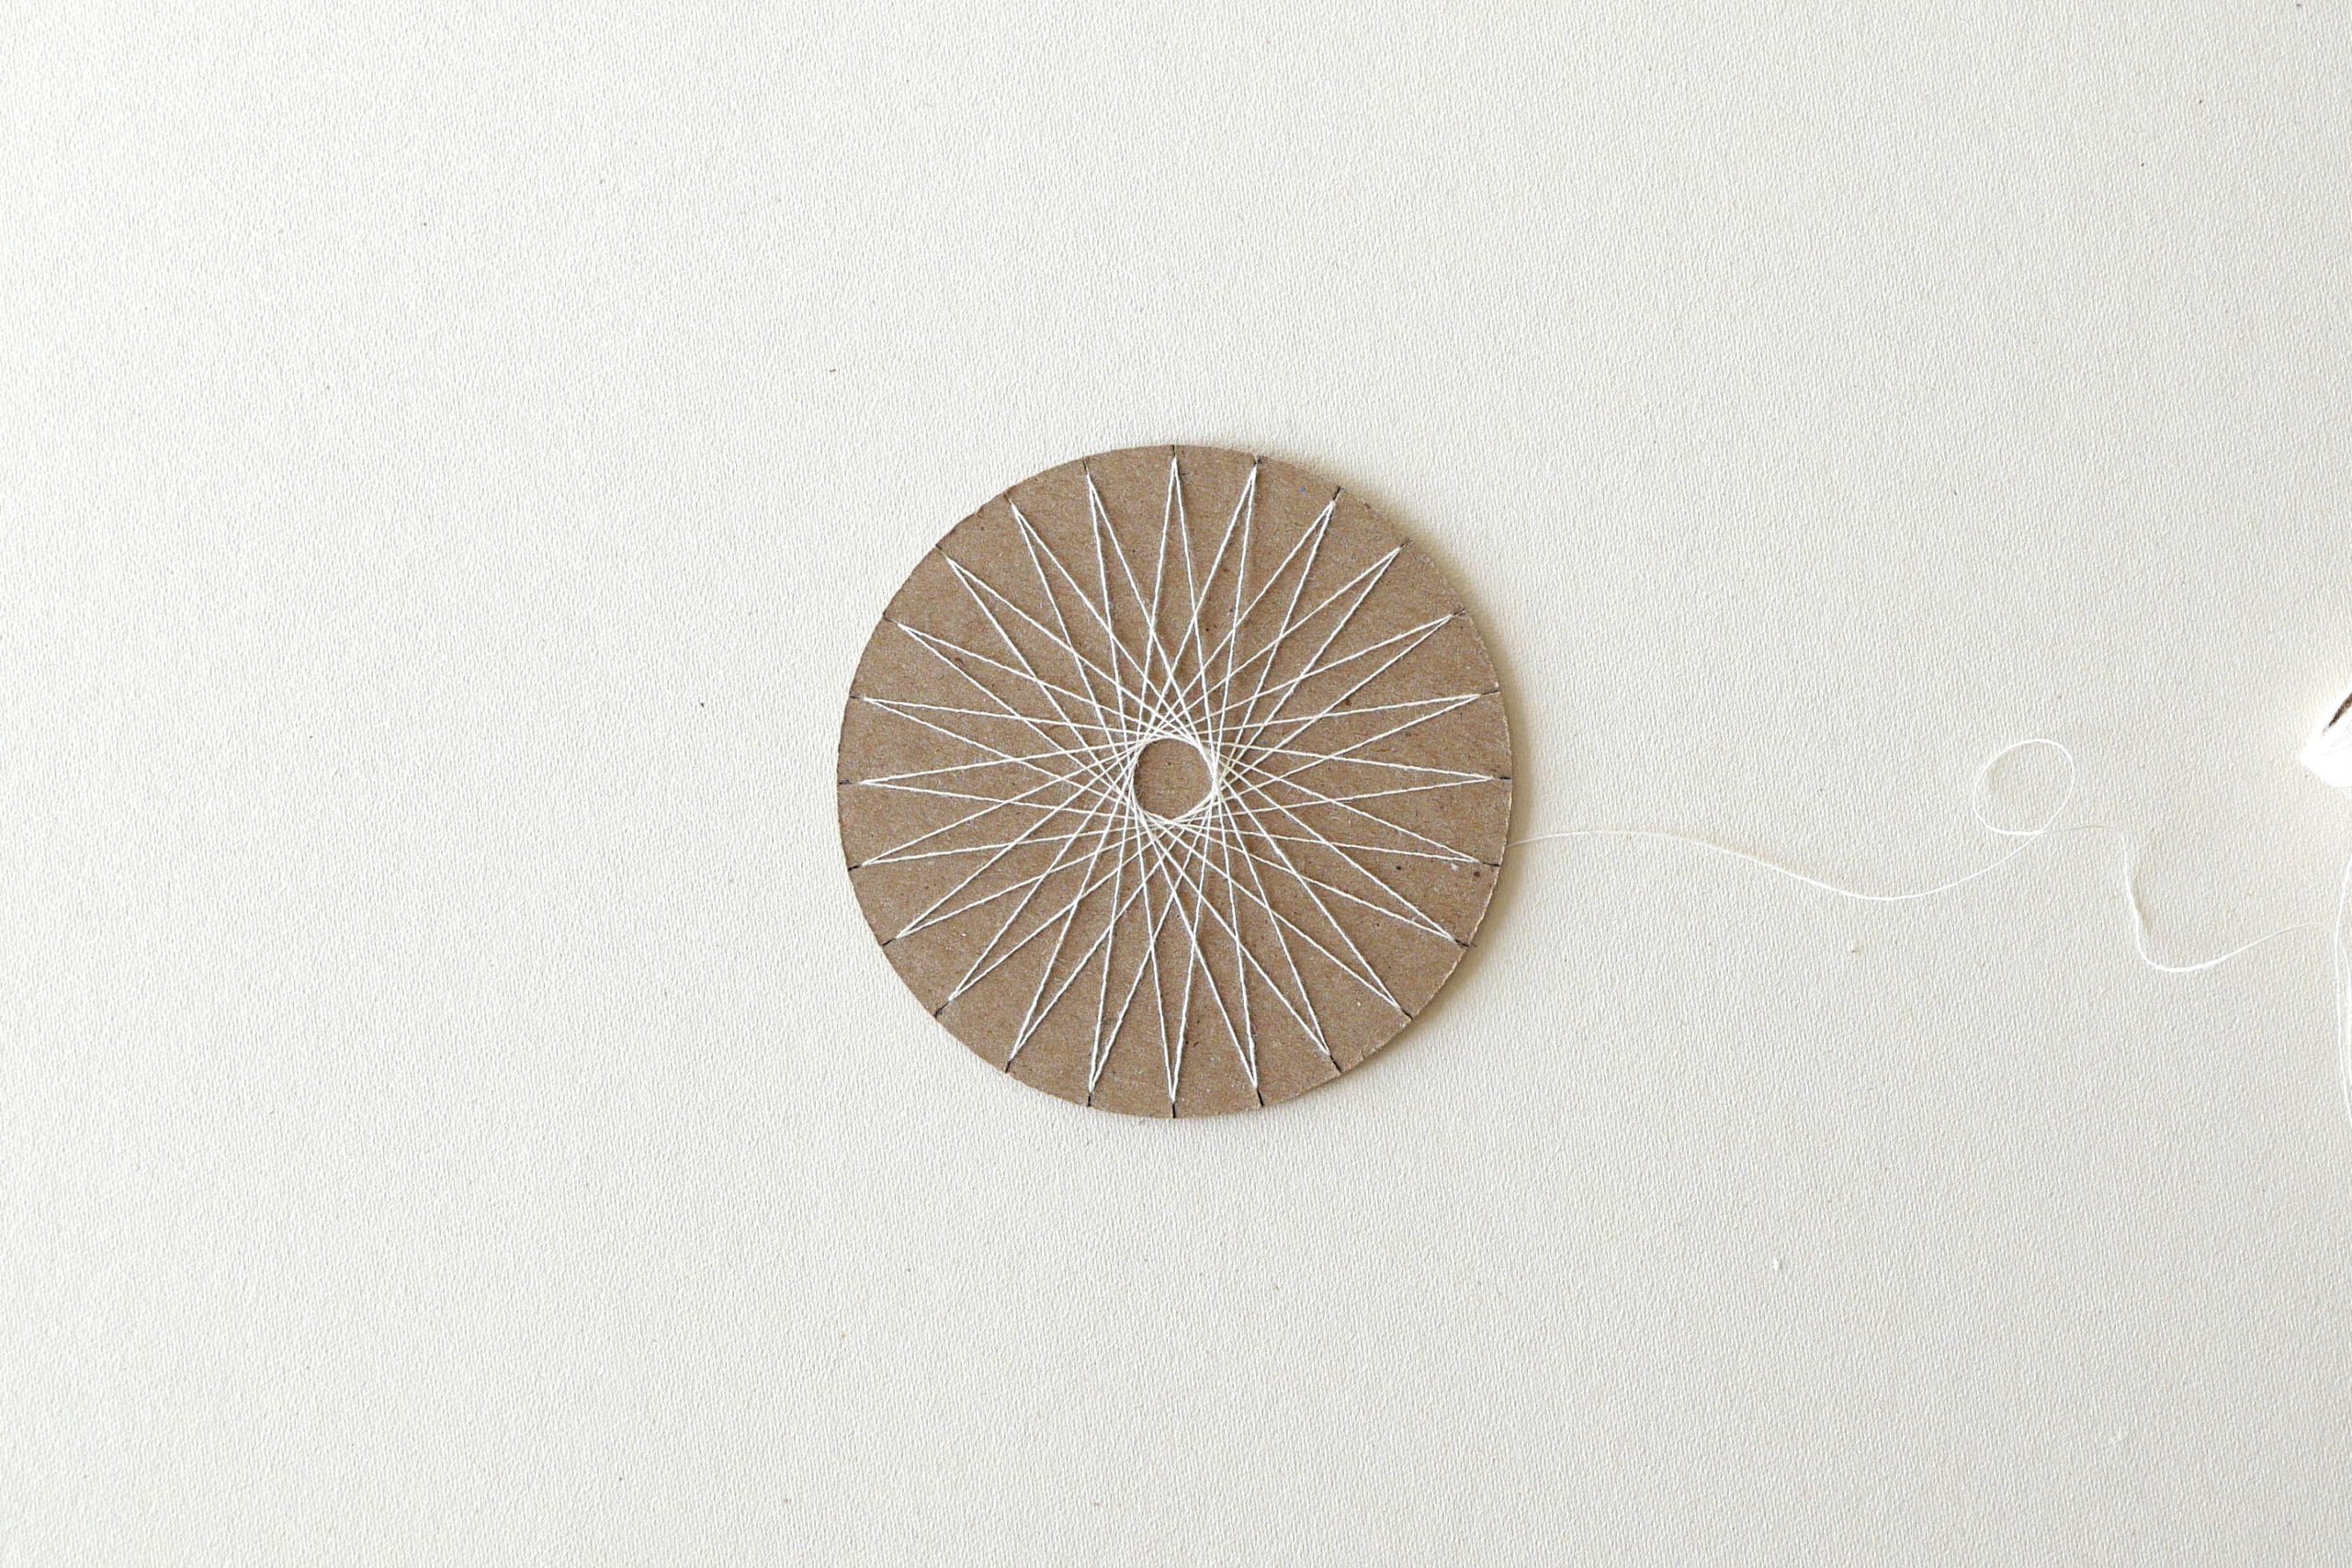
Step 5. Way of End Up
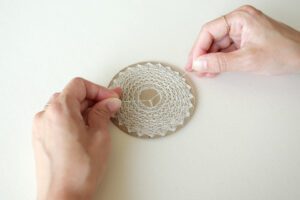
How many layers you end up with is up to you. Here I ended up with 6 layers. Finally, tie the thread at the back and you are done.
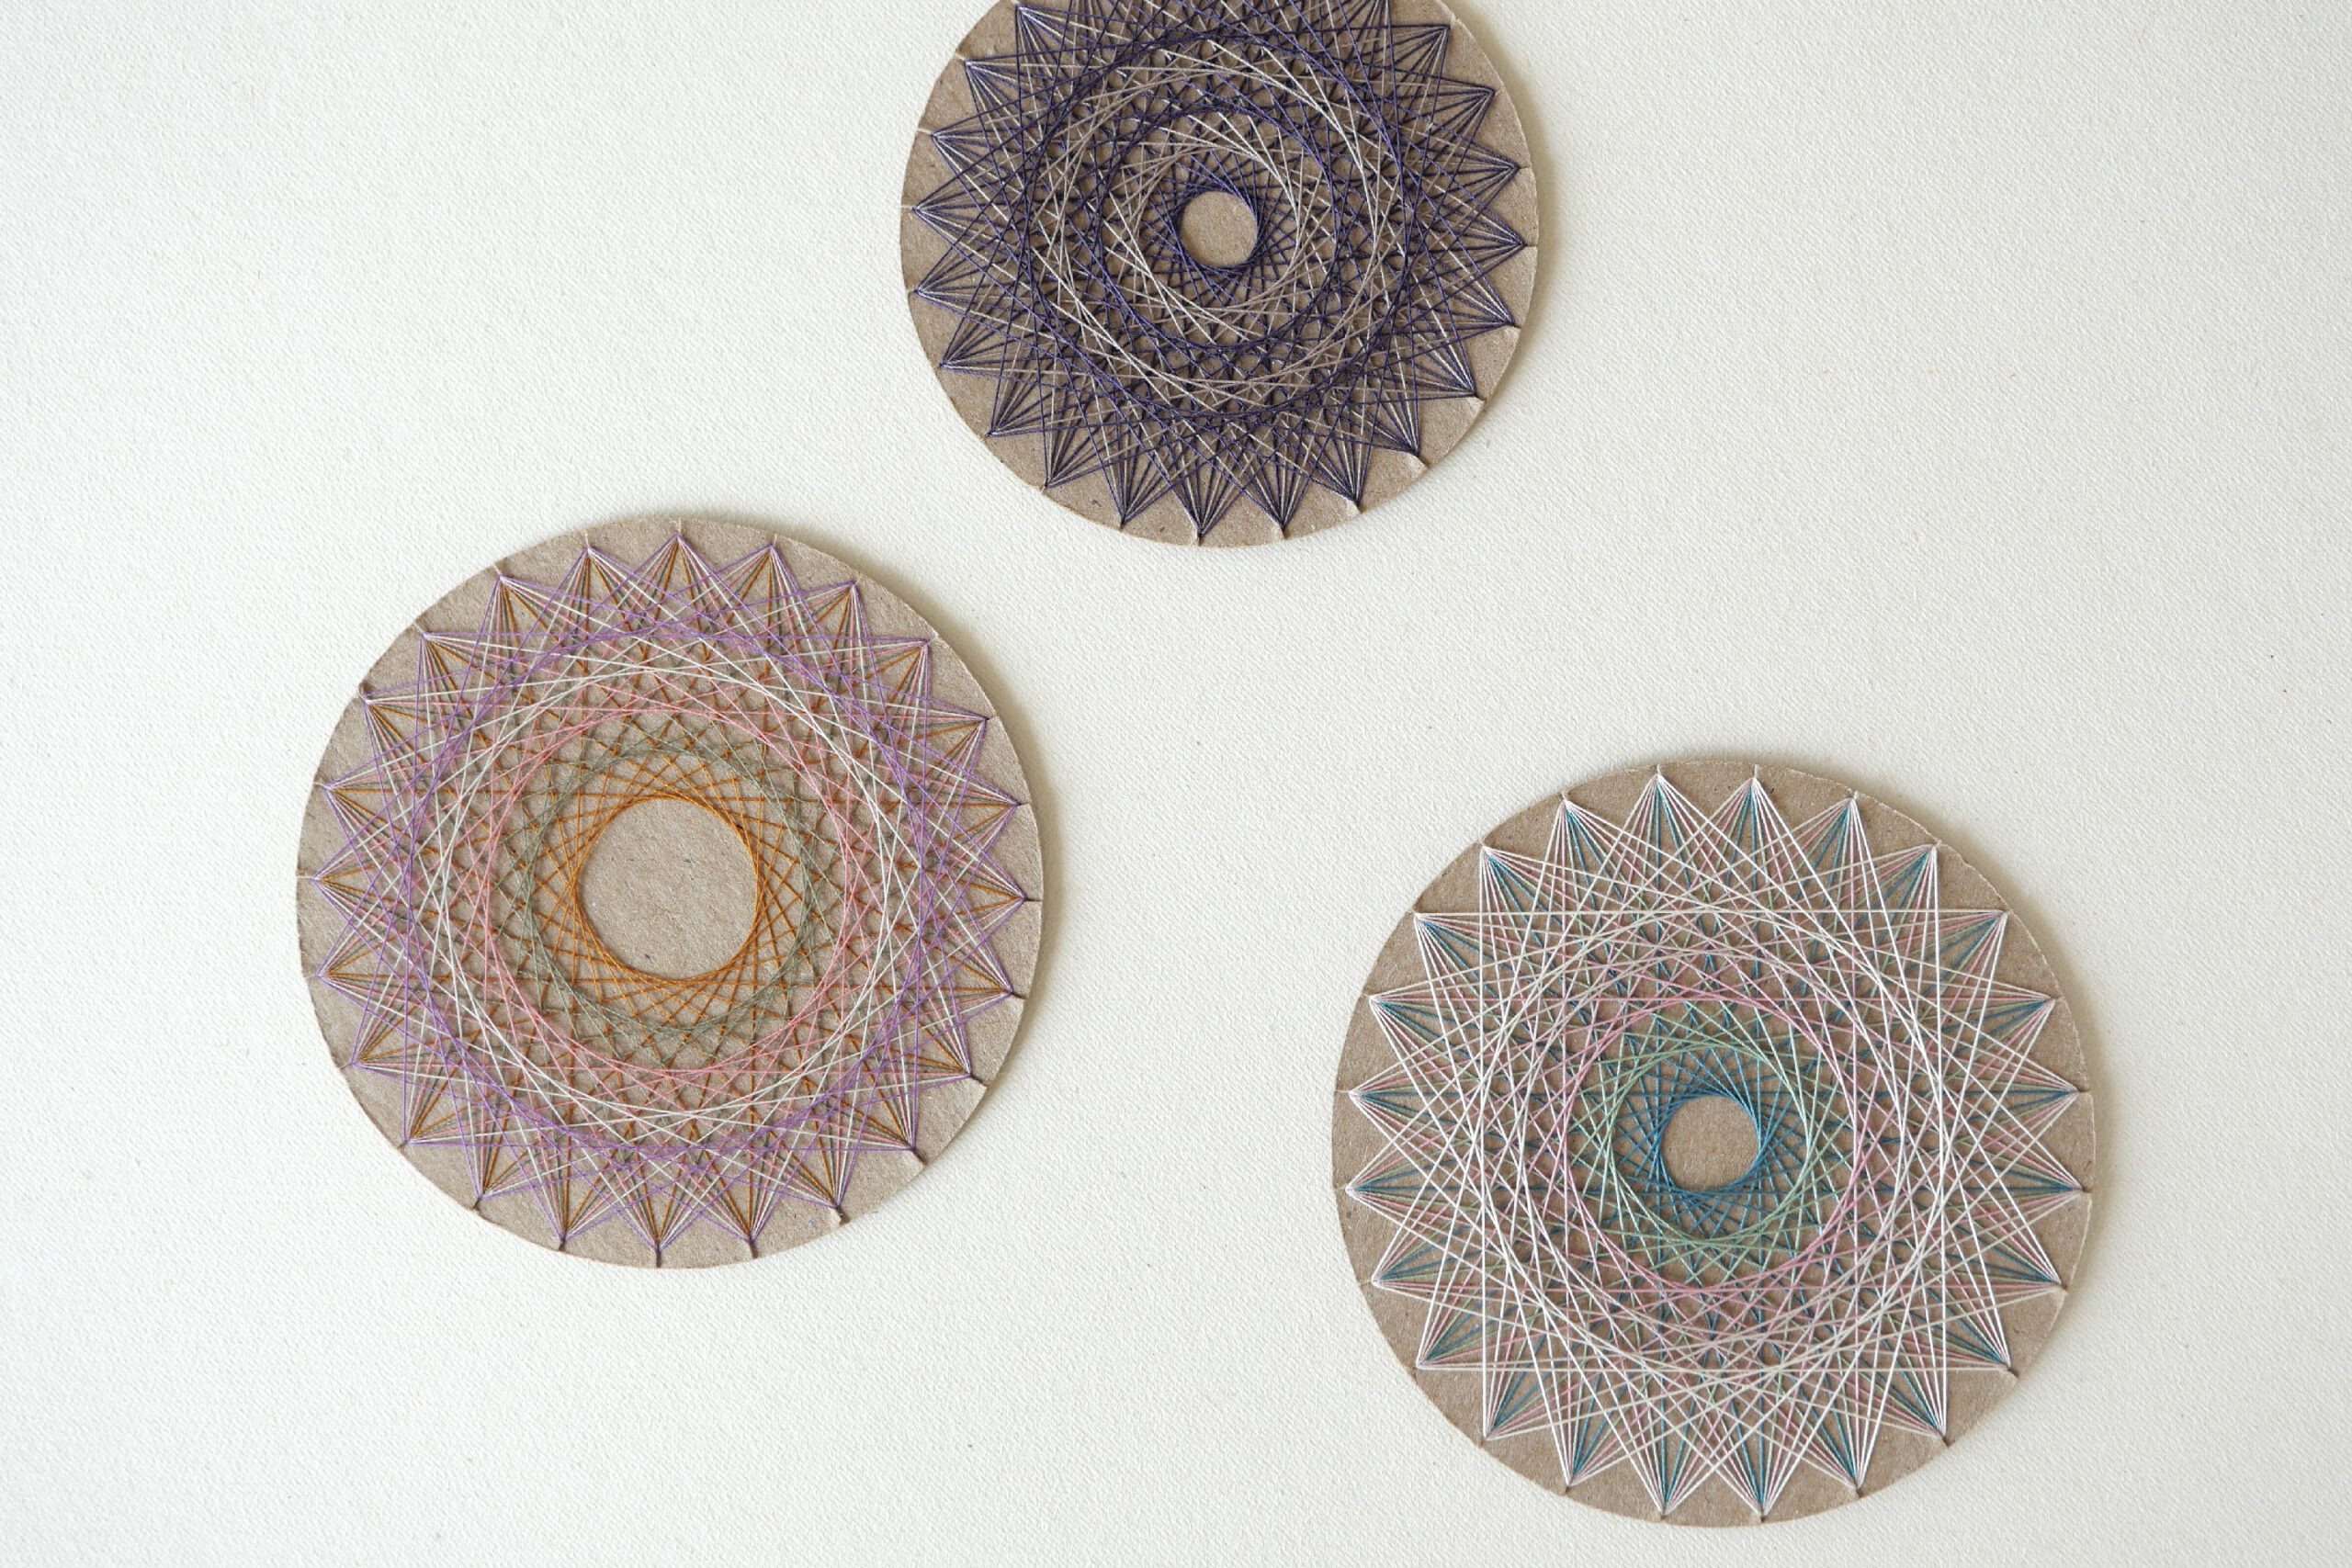
Create with Various Colors
Changing the color of each row makes it more interesting. Especially when doing with children, the different colors will help them to easily identify which row they are on and the position of the thread.
Waldorf String Art
娘の通う学校では、掛け算を学ぶにあたり乗算表をそのまま暗記するのではなく、掛け算の輪(乗算円)を用いて数学的な秩序を理解します。輪の円周に0から9までの数字を均等に配し、掛け算の法則にそって線で繋ぐと美しい形が現れます。子どもたちは、数字の規則性から出来る美しい幾何形態を通して、数字の秩序を体感と視覚で理解するのです。私は子どもたちが数の美しさが可視化されたこの図案から、掛け算を学ぶということに感銘を受けました。
掛け算の輪の考え方を手仕事に落とし込んだのが、糸かけアートです。スリットを入れた円形の台紙に、ある規則性を持って糸をかけていくとそこには美しい模様が現れます。模様は糸のかける場所や順番を変えることによっていくつもの模様を生み出します。糸の層がレイヤーとなって蓄積され、その模様は曼荼羅のよう。集中して作業をする工程はメディテーションのような感覚です。
さぁ、この出来上がったモチーフを何に使うかが私たちの課題です。これからの時期なら、クリスマスのオーナメントとしてはいかがでしょう。それ以外にはカードとして仕立てたり、いつくか吊るしてモビールでもいいかもしれません。何か他にもいいアイデアがないか、考えを巡らせています。
用意するもの
– 台紙となる厚手のカードボード
– 糸
– サークルカッター もしくは コンパス
– ハサミ
– 鉛筆
– 台紙用の切り込みテンプレート*
こちらが台紙用の切り込みテンプレートです。ご自由にダウンロードしてお使いください。
download the cutting template掛け算の輪とは
娘の通う学校で習った掛け算の輪。それを糸かけで現したのがこの写真です。一の段は、一つずつ糸をかけていき、ニの段は、一つ飛ばしで糸をかけていく。このようにそれぞれの段の法則に沿って糸をかけていくとこのような美しい図形になるのです。
また、1と9、2と8、3と7、4と6がそれぞれ対称になっていることがわかります。各段だけではなく、5の段を境に九九全体が対称となり、大きな一つの秩序を持っているのです。
こちらが娘のノート。学校で書いた掛け算の表です。娘は、3と7の段の形が好きなんだそう。
つくりかた
Step 1. 円形に切る
カードボードにコンパスで円を描き、ハサミで切ります。もしサークルカッターがあればとても簡単に切り抜くことができるでしょう。大きさは自由で構いません。この写真の円は9cmの大きさに切りました。
Step 2. スリットを切る
台紙用の切り込みテンプレートをダウンロードします。先ほどの円形のカードボードを、テンプレートの中心に合わせて、台紙の端にスリットの位置を書き写します。書き写した印に沿ってハサミで、1-2mmほどの切れ目を入れます。0から23の切れ目が入りました。
Step 3. 1段目の 糸をかける
はじめに0の位置に糸をかけます。糸が外れないように、裏で糸の端をテープで固定します。次に11の位置に糸をかけます。そのまま次は1の位置、その次は12の位置、と糸をかけていきます。2-13、3-14、4-15、、、と11の間隔を開けながら糸をかけていきます。そのまま糸をかけ続けていくと、一周してまた0の位置に戻ってきます。0に戻れば1段目は終わりです。
Step 4. 2段目の糸をかける
続いて2段目は、0-10、1-11、2-12、と10の間隔を開けながら糸をかけていきます。同じように2段目が一周したら、今度は3段目。0-9、1-10、2-11、と9の間隔を開けながら糸をかけていきます。このように、段数を重ねて、糸をかけていきます。
Step 5. 終わり方
何段で終わるかは、あなた次第です。ここでは6段まで層を重ねて終わりました。最後に裏で糸を結んだら完成です。
様々な色のバリエーション
段ごとに色を変えるとまた違った面白さがでます。特にお子さんと一緒に行うときは、色を変えることでどの段にいるか糸の位置がわかりやすいので助けになるでしょう。