Orizome, Japanese Fold Dyeing
December is just around the corner, and the holiday season has finally begun. We would like to introduce “Orizome -Fold Dyeing”, which is perfect for this season.
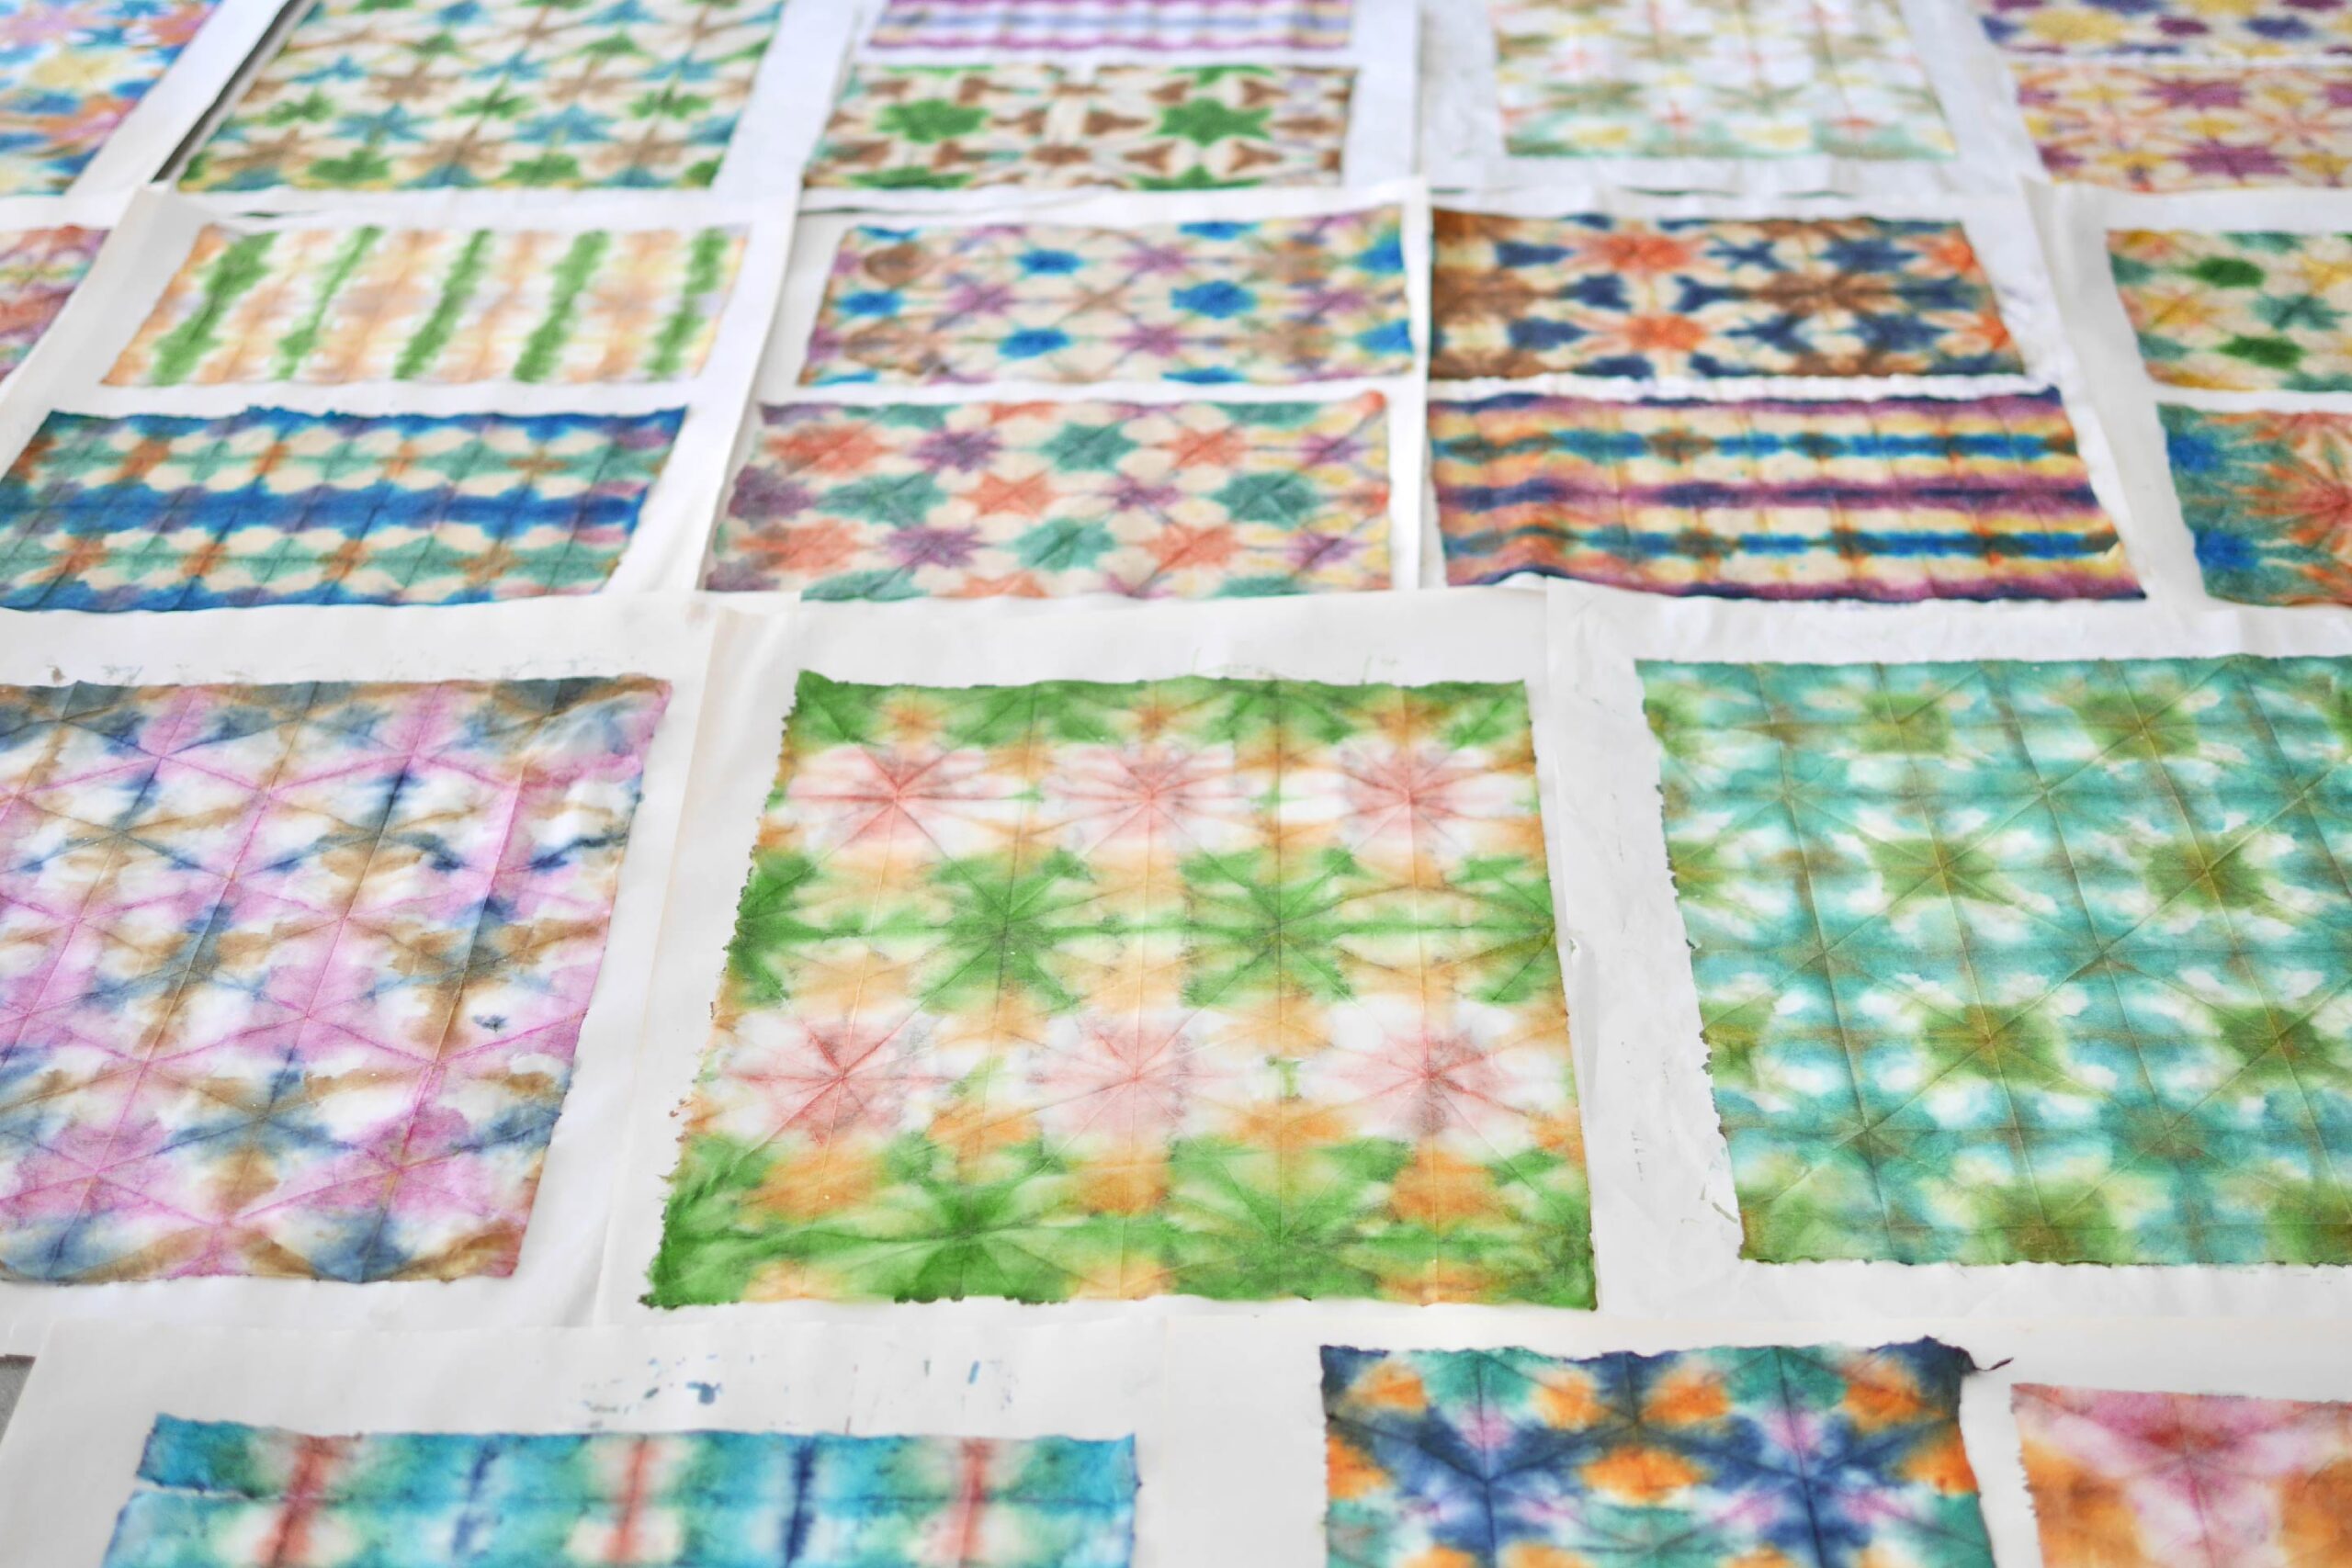
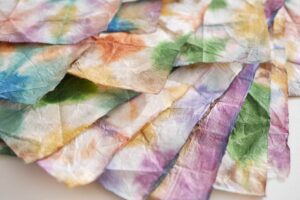
Orizome is a Japanese dyeing technique. This simple and fun dyeing play begins by folding paper into geometric shapes. Such as triangles or squares and dipped into ink to be dyed like tie-dye style or wet-in-wet(wet paint or water is added on top of wet paint on the paper). By dipping every inch of the paper into the dye, a beautiful pattern along the folds is created. The unexpected colors and shapes that unfold when the paper is opened are a surprise.
We love this project and it has been a staple of ours for the past few years to dye for the holiday season. It’s also fun to see that when we are done, even our hands are dyed and look like zombies.
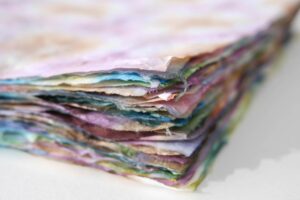
This dyed paper is very versatile and can be used to wrap gifts, make envelopes, and many other uses. I always keep a stock of this paper on my shelf for when I want to add a little something extra to a gift. I will give you more ideas on how to use these Orizome paper in the next post. Whenever I introduce this technique, I am always asked about the materials used so I will note the materials in detail.
I hope you will try this technique at the end of the year.


Materials
– Japanese paper, Mulberry paper, Calligraphy paper
– Ink *Watercolor, acrylic, food color, etc.
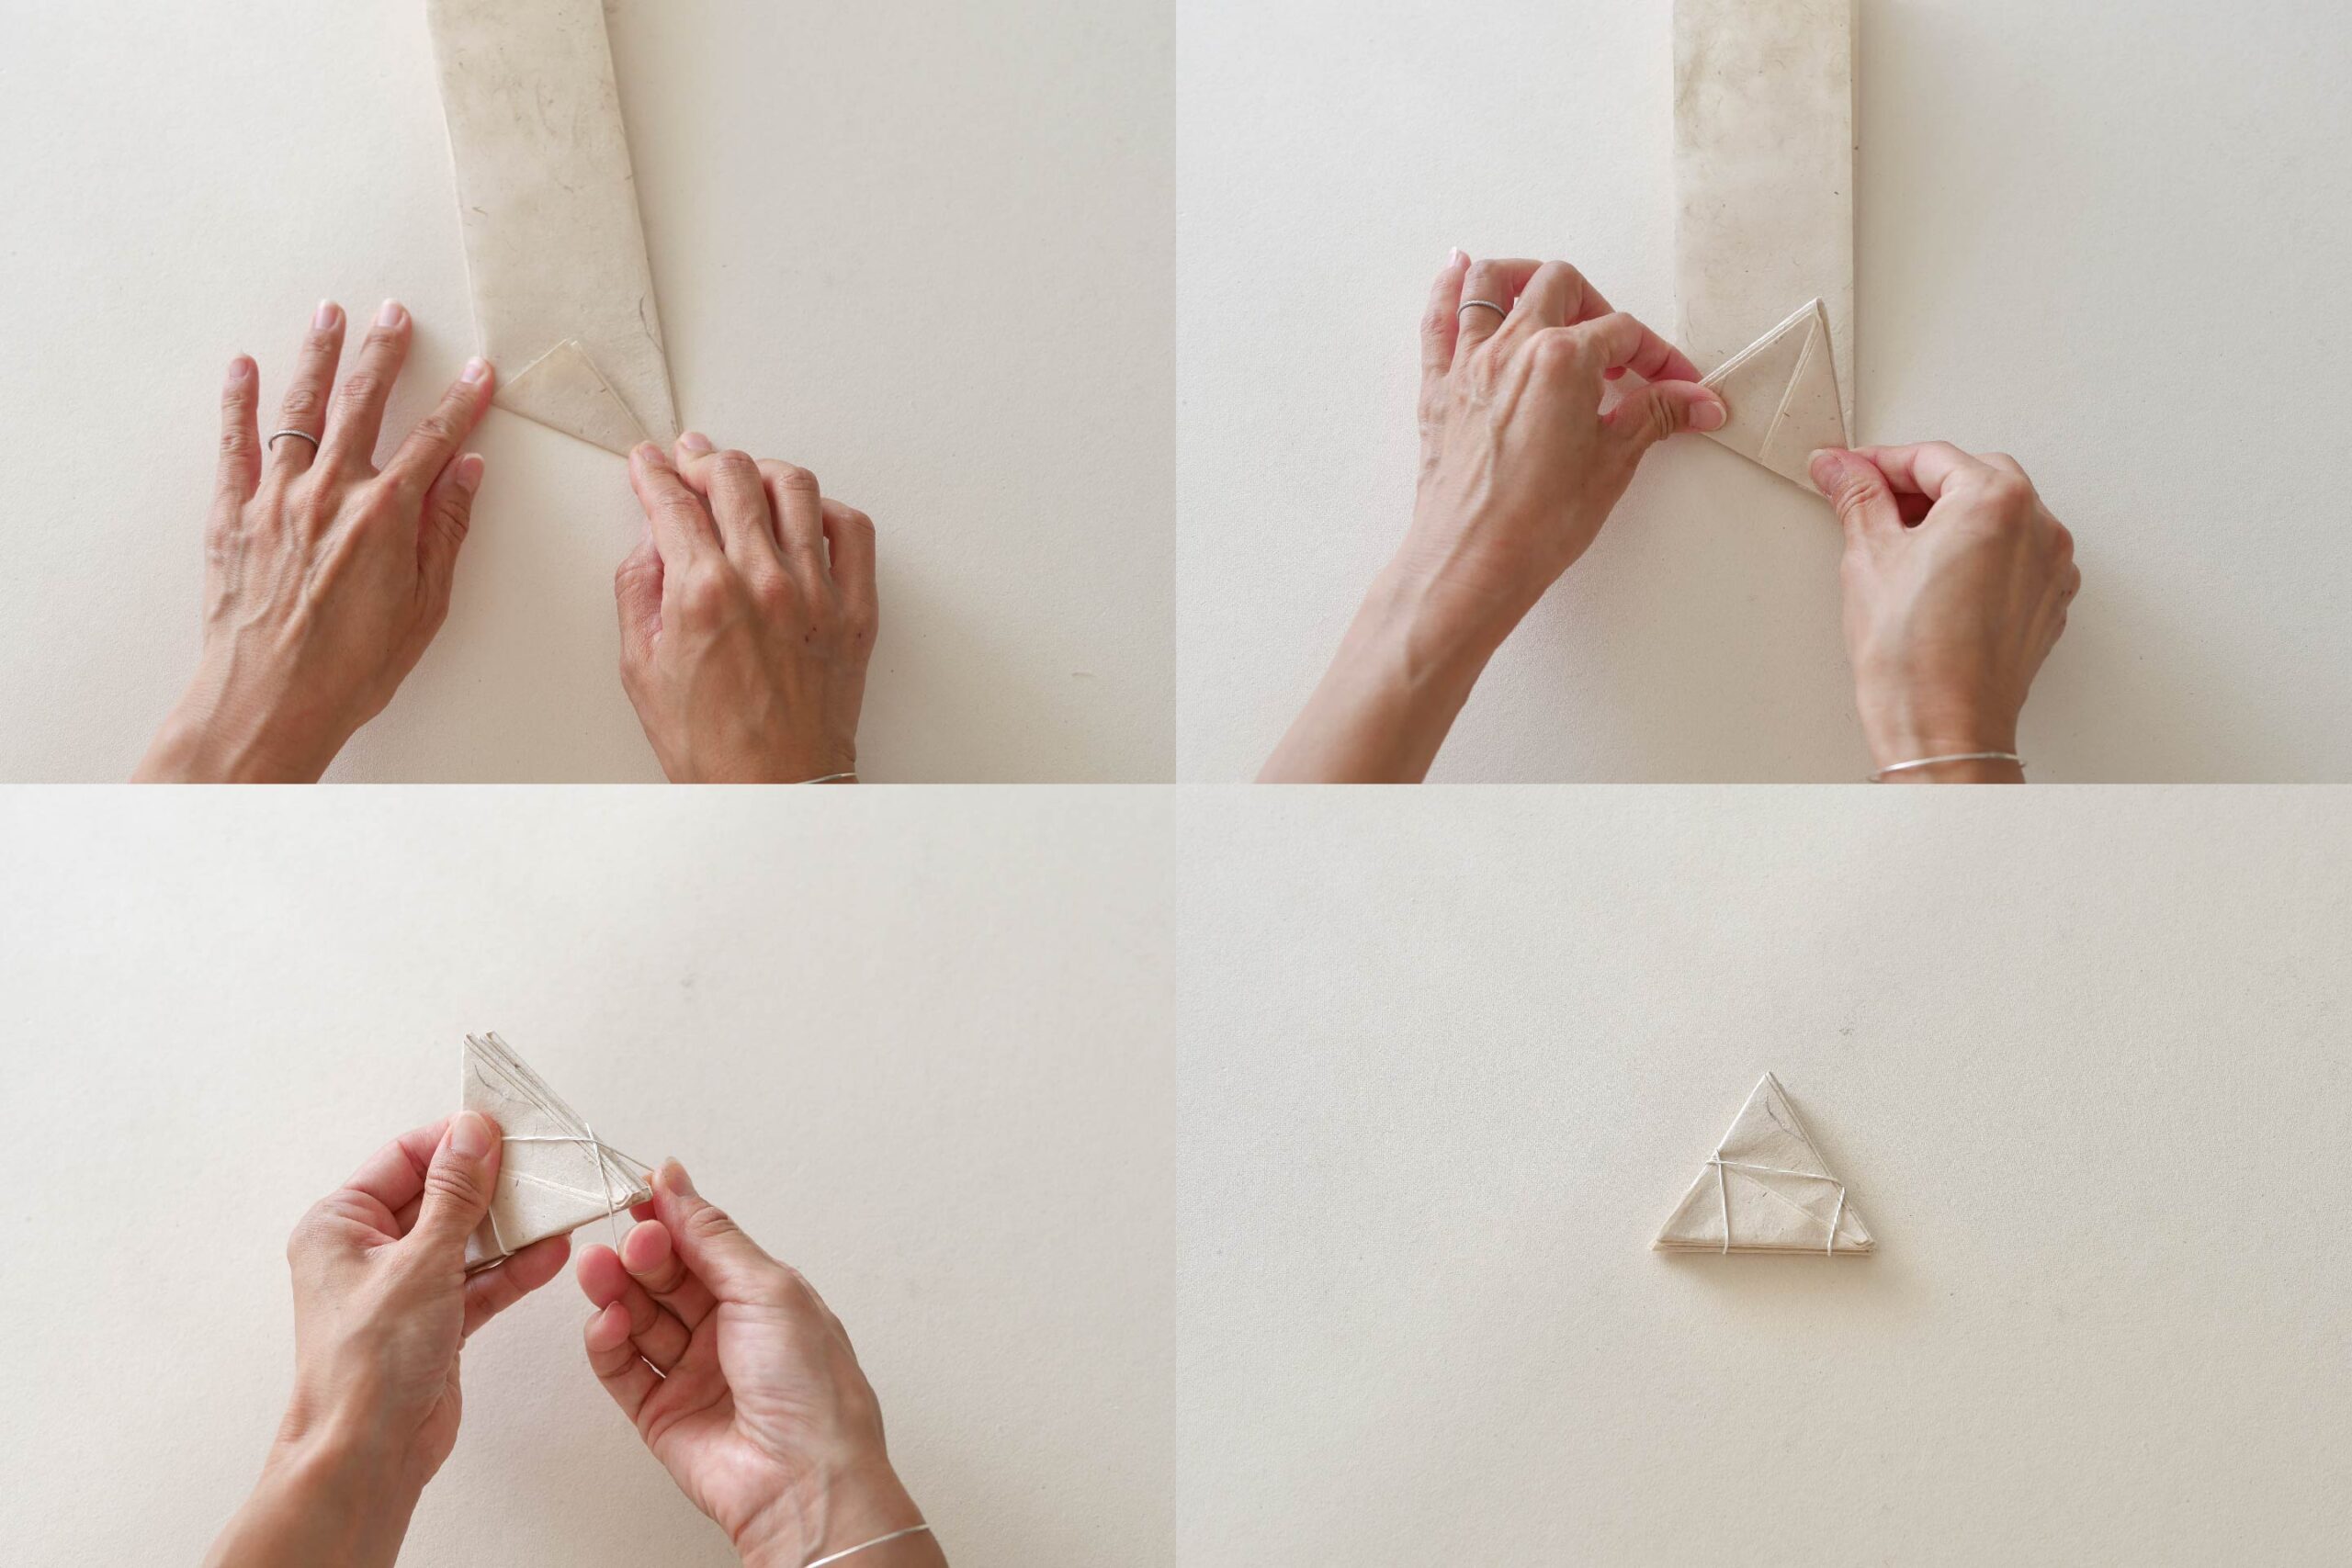
– Rubber bands or string *if necessary
Here is a helpful folding guide. Please download and use it.
download the folding guideInstructions for making
Step 1. Fold the Paper
Fold the paper into a bellows. Please refer to the Folding Guide. Triangle, square… Depending on how you fold, the pattern when opened will change. Please try different folding methods. If the paper spreads out, you can use string or rubber bands to hold it in place.
Step 2. Soak the Paper in Water
Soak the paper so that the water is fully absorbed. This will make it easier for the ink to soak through. After soaking in water, drain off the water by holding it down gently with both hands.

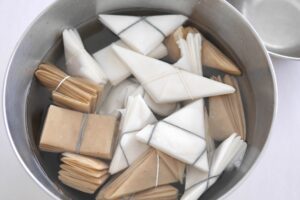
Step 3. Dye the Paper
Dye freely in any color you like. If you dye every corner and every edge, the overlapping colors will spread out like a pattern. If you dye only the edges, the lines become a distinctive design. If you dye only the corners, you will get a different pattern.
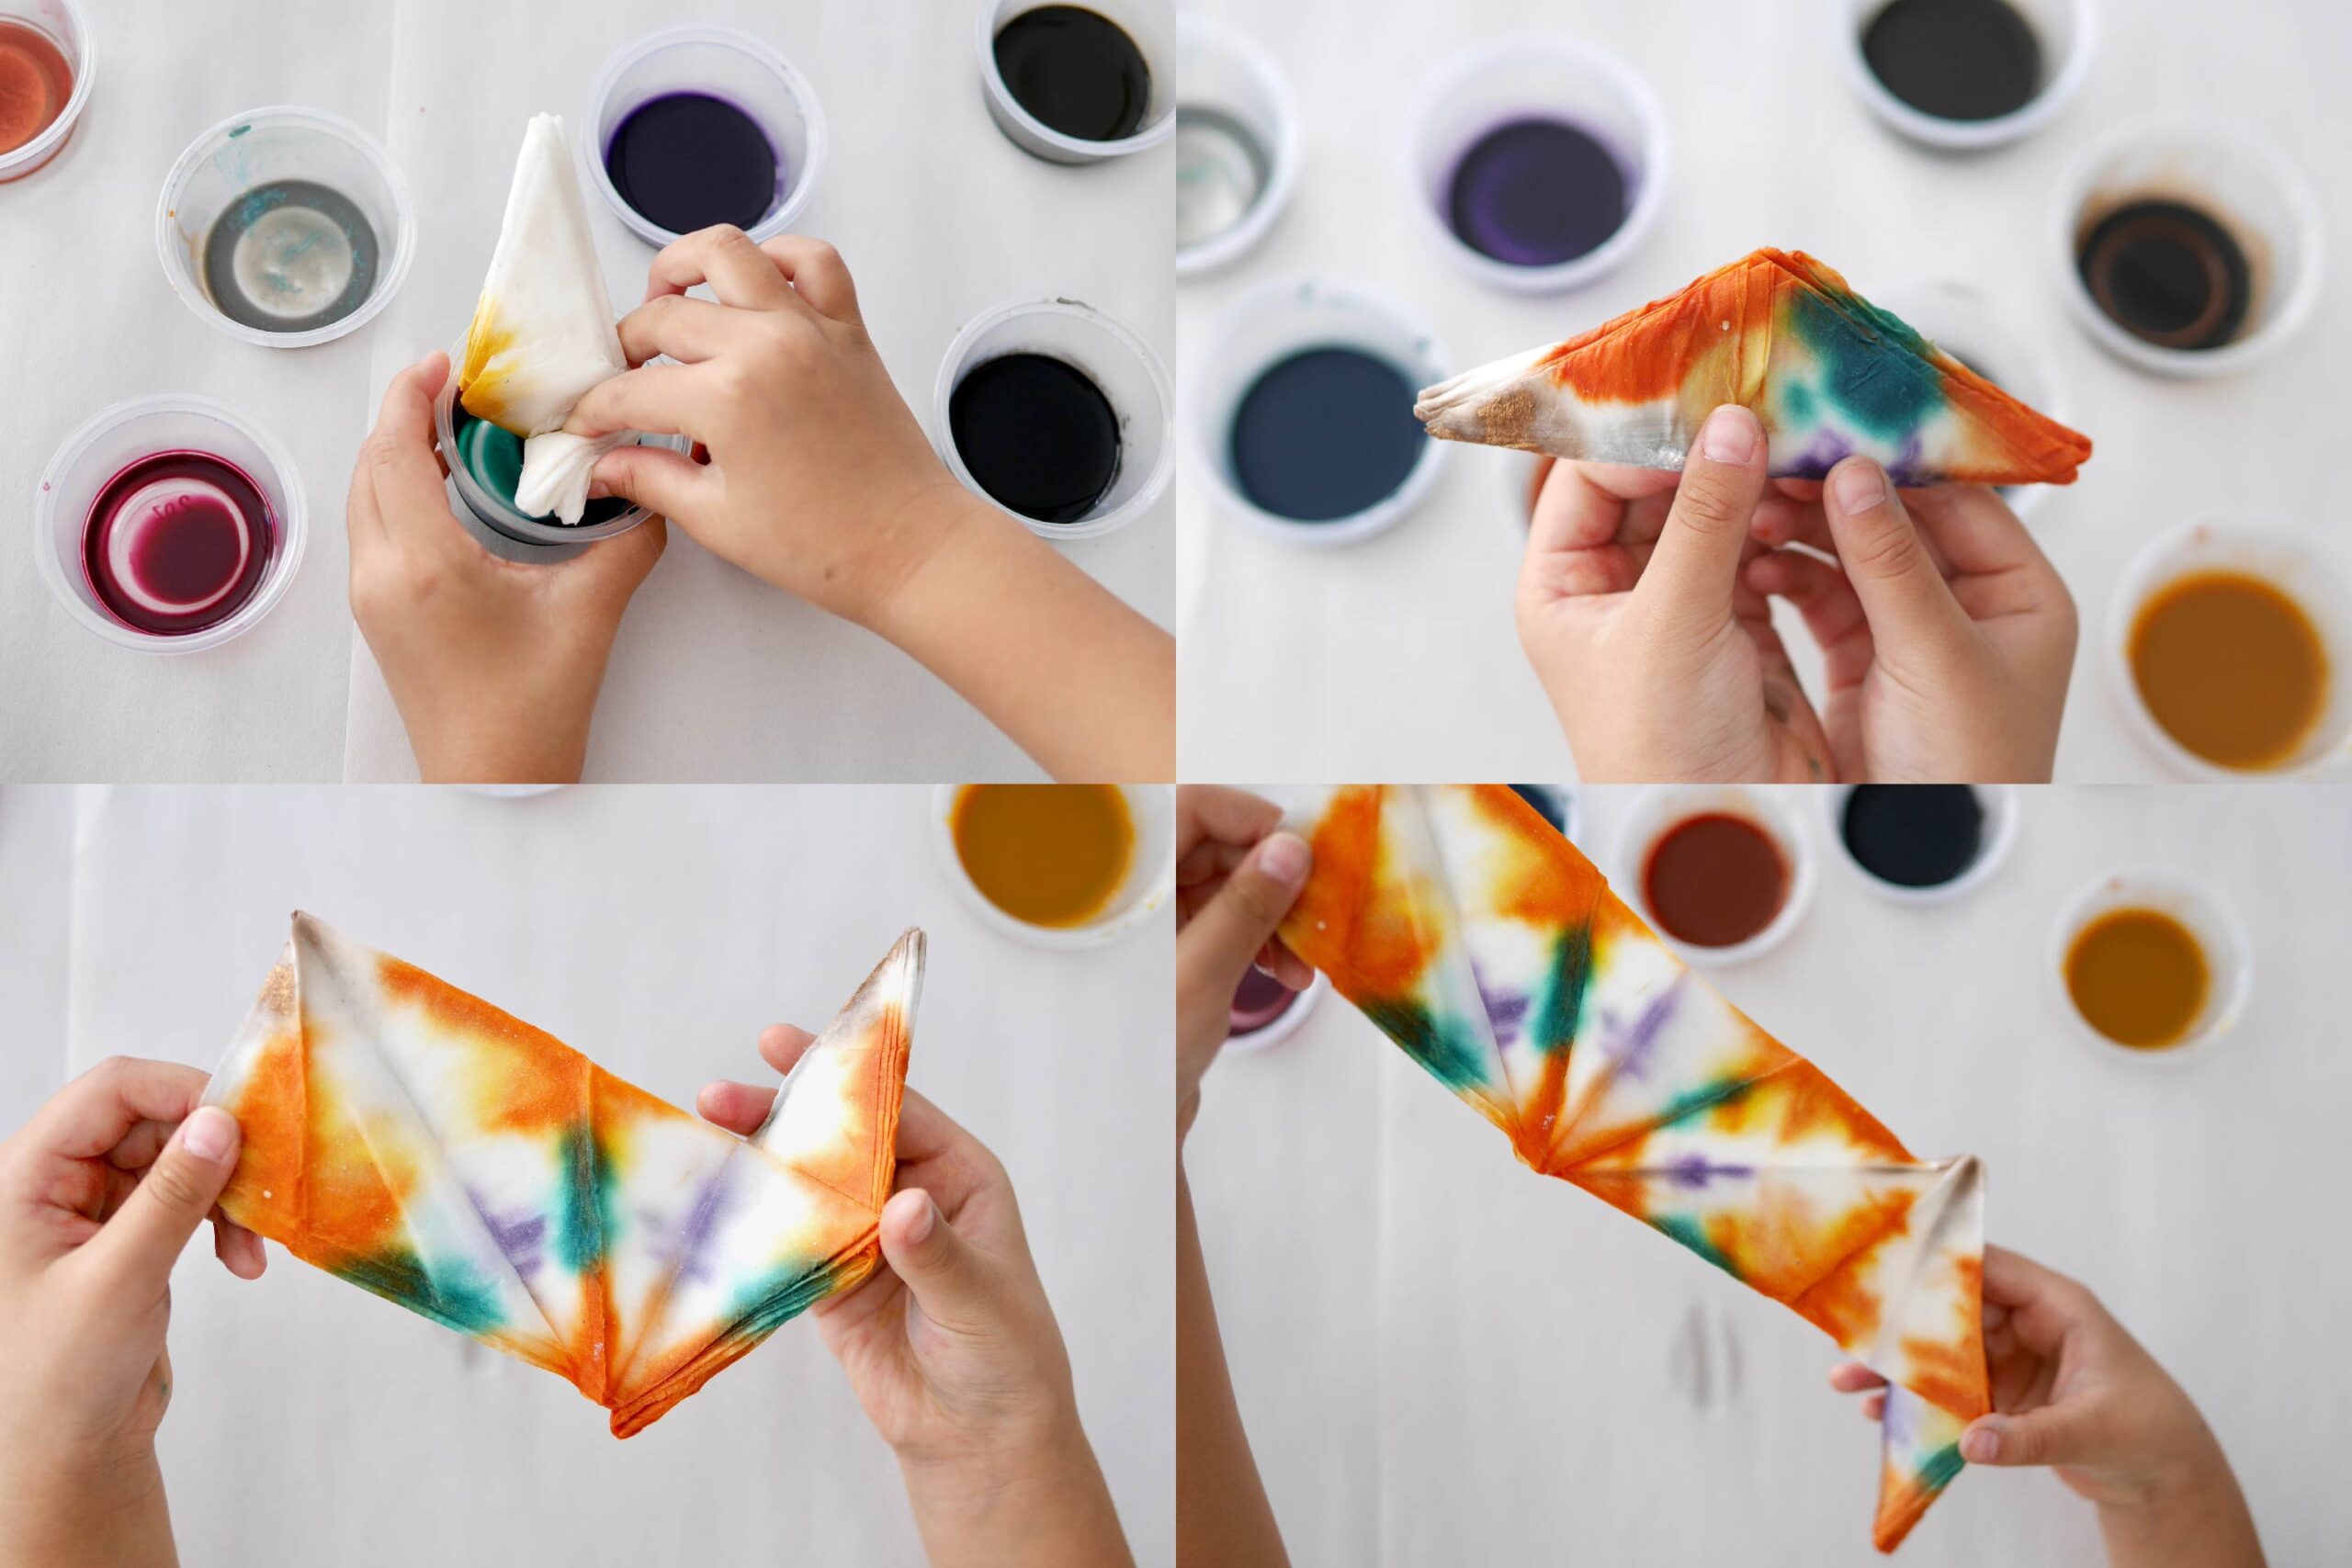
Step 4. Spread and Dry the Paper
Spread the paper. If the paper is too wet, it will tear easily when spread out, so before spreading out the paper, use kitchen paper to cover the excess moisture. Then spread it out gently and slowly.
Let it dry and it is ready to use. As it dries, the color will settle. The density of the ink can be changed according to your preference.
About Materials
About Paper
The choice of paper is a difficult one. If it is too thin, it tears easily, and if it is too thick, it is not suitable for folding and dyeing work. I usually use Mulberry paper, calligraphy paper, or shoji paper. I recently tried this paper, which was my favorite because of its raw base color. When I tried it, I was concerned that it might be a little thicker and difficult to dye, but it actually soaked up water well, which was a pleasant discovery and perfect for this project.
About Ink
Any ink can be used. You can use watercolor or acrylic paint dissolved in water, or an easy-to-use liquid watercolor ink. I prefer to use ACRYLIC INK by liquitex. I especially like the Transparent and Muted series. I like the transparency and the calm, natural colors.
Of course, these materials are just ideas and can be done with other materials. My friend dyed with food ink and kitchen paper that she had at home and it turned out wonderfully. I think it is very nice to be creative with what you have around you.